FHB Logo Facebook LinkedIn Email Pinterest Twitter X Instagram Tiktok YouTube Plus Icon Close Icon Navigation Search Icon Navigation Search Icon Arrow Down Icon Video Guide Icon Article Guide Icon Modal Close Icon Guide Search Icon Skip to content
Subscribe
Log In
  • How-To
  • Design
  • Tools & Materials
  • Restoration
  • Videos
  • Blogs
  • Forum
  • Magazine
  • Members
  • FHB House
  • Podcast
Log In
How-To

Building Wraparound Box-Frame Stairs on a Deck

This framing method is an attractive alternative to cutting stringers.

By Mike Guertin

Sponsored by Trex®

In this video, builder Mike Guertin teaches his preferred method for framing wraparound stairs: box-frame construction. He also details the processes of notching footings and installing joists with hangers, and he stresses the importance of using Trex® Protect Joist, Beam, and Rim Tape to prevent metal-wood contact. Finally, Mike shares the benefits of double-blocking corners so water and debris can pass through, reducing the risk of mold.

Here’s the Transcript:

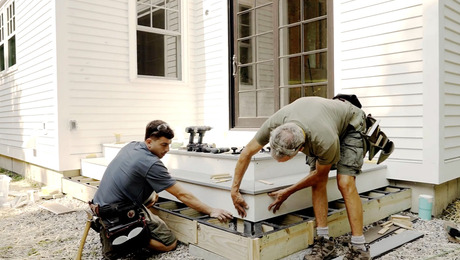
The conventional way of doing stairs is to cut stringers. But when you’re doing wraparound stairs, there are some problems with stringers. Number one, we need a continuous footing of concrete all the way around in order for those stringers to rest on. And number two, we have to cut all of those stringers absolutely perfect. In fact, the footing has to be absolutely perfect too.

Otherwise, if one stringer is a little high or a little low, you’ll see the waves of those high or low stringers in the finished deck boards. On top of that, because we’re using the Trex® decking as our tread material, they require that the stringers be spaced no more than 12 in. on center. So we’d end up needing probably about 16 or 17 stringers to go all the way around. Plus, we’d have to frame out the diagonal stringer that goes out at the corner.

Photo of Mark Guertin measuring for wraparound box-frame stairs on a deck.

Stringer Alternative

The alternative is to build box-frame deck stairs. It’s going to be much easier to do the corner and much easier to frame out. Basically, it’s a mini deck—long and thin, just with joists in between. With the box stairs, we need to notch out the footings that are high by like ¼ to ⅜ of an inch.

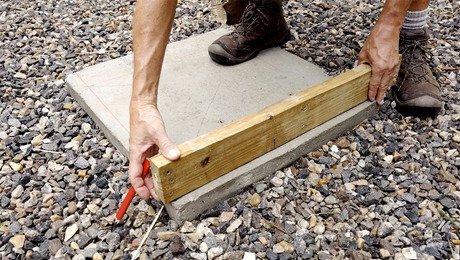
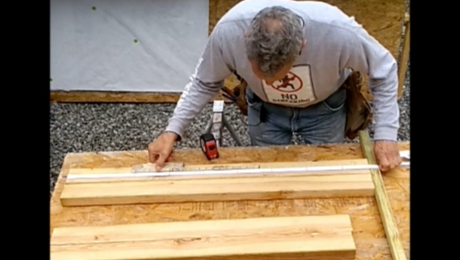
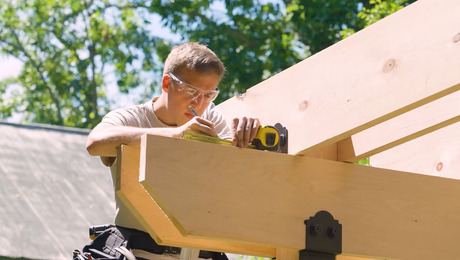
We need to get those notched only at the locations where the header boards for the boxes span over the top of the footings. The easiest way to do that is once we have the deck frame done, we can use the deck frame as our reference, and then measure down from the top to figure out how much of a notch we need to make.

I already know from my calculations how high the top of that box needs to be in relation to the top of the deck surface in order to get evenly spaced height steps. When I check this, I see that I need to trim off ⅜ of an inch from the bottom there. Over here, it’s the same; it’s a strong ⅜. I can check over at this footing to see if I need to do any adjustments.

When I check this, I only need like ¹⁄₁₆ of an inch. Over here, I need like ⅛ of an inch. I can use my pencil and drag it across the top of the footing, and that will give me the ⅛-in. space. I have a piece of scrap wood that is just a little over ¼ of an inch thick, and along with the pencil line, that will get me up to ⅜ of an inch. I can use that to make a scribe mark. Then I do the same over here because this also has to go down ⅜ of an inch.

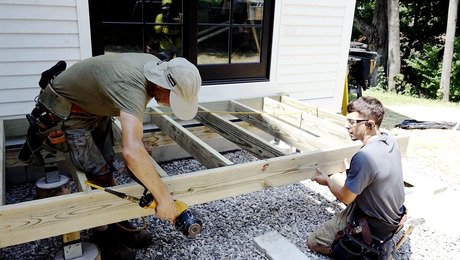
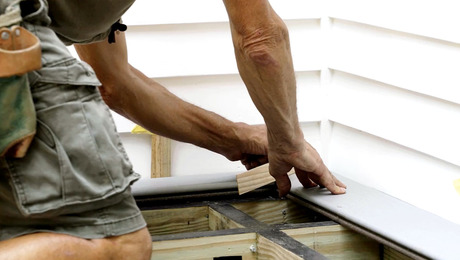
Once we cut that scribe line, we’ll coat it with copper naphthenate, drop these in place, and then we’re ready to put the little mini joists in for our bottom box. Because we’re installing all of these short joists between the stair box header boards, we’re going to need joist hangers, especially in the middle here where it’s unsupported by the footings.

Because we’ll be putting in joist hangers, we want to isolate the metal of the joist hanger from the joist and the header board. So we’re going to wrap joist tape—it’s actually flashing tape—around the end of each joist. We’ll also put a small piece of tape right across the face of the joist header board itself, so when the hanger touches it, it won’t be in contact.

Why Stacked Box Stairs?

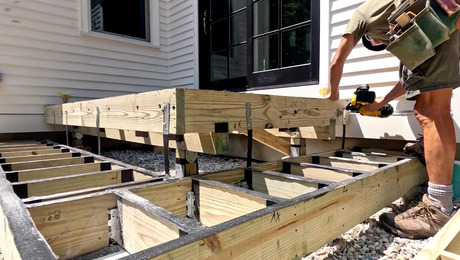
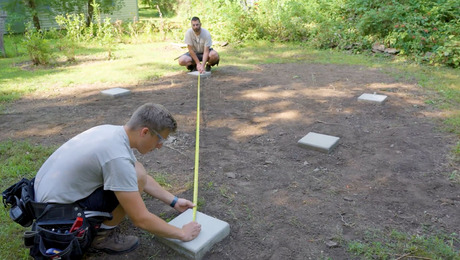
There are a couple of additional advantages to doing the stacked box stairs. One is that, as you can see here, we only need footing spaced about 4 feet apart because the rim joist of the box can span the distance between the footings.

We have fewer footings, less concrete, and it’s going to be flatter and more even, unlike the problem we might have with short or tall stringers creating waves in the treads. These stacked boxes are going to be nice and level across the top, just like the surface of the deck.

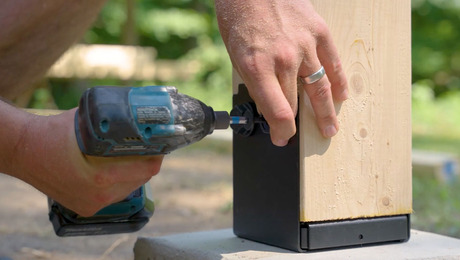
We’re just about ready to put the top-step box on top of the first-step box. But before we do that, while everything’s clear, I want to put some anchors in to anchor the bottom box down to the footings. This anchor is going to help prevent the box from lifting up, but more importantly, it will keep it from shifting out of position.

Photo of Mike Guertin showing locations for corner support for wraparound stairs on a deck.

So we’ve got the bottom box anchored down to the footings. Now we want to strap the bottom box to the deck frame on the backside. I’m just using some metal strap. I’ve already applied the isolation membrane, so where it contacts the pressure-treated lumber, it’s protected. Then I’ll just nail it on with some metal-connector nails.

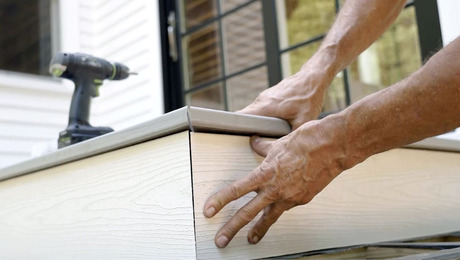
The IRT board and the rainscreen project out away from the foundation, so what we ended up doing was notching the framing. We’ll scribe the riser board to go in that hole, so it won’t be visible. Now I’m going to nail the corner together, then I’m going to toenail down the upper box to the lower box. I’ll reach around inside and put the final fasteners between the metal strap and the top box. That should tie everything together.

Corner Support

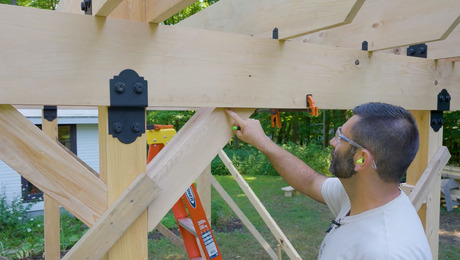
So we’ve got the boxes secured and the tape on top. The last thing we’ve got to do is deal with the corners where the mitered deck boards that form our treads are going to fall because they need support diagonally from the outside corner to the inside corner. One way to do that is to put a single board in, like I have here.

But the Trex® instructions call for all of our miters to be gapped ⅛ of an inch, which is a good thing. It gives the boards a little room to move as they expand and contract due to temperature. If we put the diagonal solid block right in the middle, debris could collect in that gap because it can’t flow through.

So, instead, I’m going to double-block it, slide the corner block back about half an inch, and put a second block in. That way, we’ve got a gap there. When the miter comes together and we leave the gap between the boards, they’re still supported about an inch back from the end at the miter. That will allow the water to flow through, and any leaves or debris that collect in there will flow through as well, preventing moss or mold growth.

RELATED STORIES

  • Building Box-Style Stairs
  • Build a Grade-Level Deck: Stairs and Blocking
  • Framing the Stairs for an Elevated Deck

Sign up for eletters today and get the latest how-to from Fine Homebuilding, plus special offers.

Signing you up...

This site is protected by reCAPTCHA and the Google Privacy Policy and Terms of Service apply.
See all newsletters
See all newsletters
×

Get home building tips, offers, and expert advice in your inbox

Signing you up...

This site is protected by reCAPTCHA and the Google Privacy Policy and Terms of Service apply.
See all newsletters
See all newsletters

Videos in the Series

  • Designing a Small Deck with a Big Role

    Learn how to design a freestanding, three-step landing deck that's prepped for paving.

  • Post and Beam Layout on a Small Freestanding Deck

    Learn how to build a long-lasting, resilient deck frame starting with post-base connections, posts, and beams.

  • Framing and Flashing a Small Deck

    Mike Guertin details the best way to build a durable deck frame.

  • Building Wraparound Box-Frame Stairs on a Deck

    This framing method is an attractive alternative to cutting stringers.

  • Installing Deck and Border Boards

    In this video, learn how to install decking boards by using spacer blocks to allow for proper water drainage.

  • Installing Risers and Treads on Wraparound Deck Stairs

    Follow Mike Guertin's recommendations for a deck that will stay free of mold and debris.

New Feature

Fine Homebuilding Forums

Ask questions, offer advice, and share your work

About This Video Series

Sponsored by Trex® In this video series, Mike Guertin takes you through the step-by-step process of creating a small but visually appealing and functional deck. In each video, he reveals some of his expert tips on enhancing the durability of any deck — no matter the size. The homeowners wanted to make the deck area more than a standard entryway to their home; they hoped for it to become a focal point of their backyard.… More about this Video Series

View Comments

  1. Maria_Luisa_Castellanos | Oct 31, 2024 10:27pm | #1

    What is the black tape for? I am an architect in Miami (www.UnitedArchitectsInc.com), but have never seen that black tape.

    1. brucewol | Nov 22, 2024 02:26pm | #3

      Deck Joist Tape - common term that you can google to find suppliers

  2. brucewol | Nov 22, 2024 02:21pm | #2

    I would think it easier to lower the footing, maybe about an inch. Then shim up using a 2x4 redwood, cedar, pressure treated board. trim the 2x4 board as needed. Avoids cutting a notch. And that way you've got something that is rot resistant touching the footing. I always use something similar with a deck post between the footing and the post. easily slides inside the post brackets and works well to stop end grain rot .

Log in or create an account to post a comment.

Sign up Log in

Become a member and get full access to FineHomebuilding.com

Up Next

Video Shorts

Featured Story

Fix Air Leaks in Old Houses

Simple air-sealing measures and spray-applied sealant lower energy bills and increase comfort without the need to tear the house apart.

Featured Video

Micro-Adjust Deck-Baluster Spacing for an Eye-Deceiving Layout

No math, no measuring—just a simple jig made from an elastic band is all you need to lay out a good-looking deck railing.

Related Stories

  • English Arts & Crafts Sensibility at Rumford Hall
  • Fastening an Exterior Door With Brick Mold
  • Step Up Your Stair-Gauge Game
  • Hazard-Free Hot Tubs

Discussion Forum

Recent Posts and Replies

  • |
  • |
  • |
  • |
  • |
  • |
View More Create Post

Highlights

Fine Homebuilding All Access
Fine Homebuilding Podcast
Tool Tech
Plus, get an extra 20% off with code GIFT20

"I have learned so much thanks to the searchable articles on the FHB website. I can confidently say that I expect to be a life-long subscriber." - M.K.

Get home building tips, offers, and expert advice in your inbox

Signing you up...

This site is protected by reCAPTCHA and the Google Privacy Policy and Terms of Service apply.
See all newsletters
See all newsletters

Video

View All Videos
  • How to Space and Install Pergola Rafters
  • How to Lay Out Post Bases for a Pergola
  • Angle Bracing for a Pergola
  • Raising and Bracing Pergola Posts
View All

Decks

View All Decks Articles
  • Fix for Fast-Drying Paint
  • No-Downside Decking
  • Spacer for Deck Boards
View All Decks Articles

Fine Homebuilding Magazine

  • Issue 330 - April/May
    • Deck Details for Durability
    • FAQs on HPWHs
    • 10 Tips for a Long-Lasting Paint Job
  • Issue 329 - Feb/Mar 2025
    • Smart Foundation for a Small Addition
    • A Kominka Comes West
    • Making Small Kitchens Work
  • Issue 328 - Dec/Jan 2024
    • How a Pro Replaces Columns
    • Passive House 3.0
    • Tool Test: Compact Line Lasers
  • Issue 327 - November 2024
    • Repairing Damaged Walls and Ceilings
    • Plumbing Protection
    • Talking Shop
  • Issue 326 - October 2024
    • Paint Behind Strike Plates
    • Conceal Cut Ends
    • Ladder Slip Solution

Fine Home Building

Newsletter Sign-up

  • Fine Homebuilding

    Home building tips, offers, and expert advice in your inbox.

  • Green Building Advisor

    Building science and energy efficiency advice, plus special offers, in your inbox.

  • Old House Journal

    Repair, renovation, and restoration tips, plus special offers, in your inbox.

Signing you up...

This site is protected by reCAPTCHA and the Google Privacy Policy and Terms of Service apply.
See all newsletters

Follow

  • Fine Homebuilding

    Dig into cutting-edge approaches and decades of proven solutions with total access to our experts and tradespeople.

    Start Free Trial Now
    • Facebook
    • Instagram
    • X
    • LinkedIn
  • GBA Prime

    Get instant access to the latest developments in green building, research, and reports from the field.

    Start Free Trial Now
    • Facebook
    • YouTube
  • Old House Journal

    Learn how to restore, repair, update, and decorate your home.

    Subscribe Now
    • Facebook
    • Instagram
    • X

Membership & Magazine

  • Online Archive
  • Start Free Trial
  • Magazine Subscription
  • Magazine Renewal
  • Gift a Subscription
  • Customer Support
  • Privacy Preferences
  • About
  • Contact
  • Advertise
  • Careers
  • Terms of Use
  • Site Map
  • Do not sell or share my information
  • Privacy Policy
  • Accessibility
  • California Privacy Rights

© 2025 Active Interest Media. All rights reserved.

Fine Homebuilding receives a commission for items purchased through links on this site, including Amazon Associates and other affiliate advertising programs.

X
X
This is a dialog window which overlays the main content of the page. The modal window is a 'site map' of the most critical areas of the site. Pressing the Escape (ESC) button will close the modal and bring you back to where you were on the page.

Main Menu

  • How-To
  • Design
  • Tools & Materials
  • Video
  • Blogs
  • Forum
  • Project Guides
  • Reader Projects
  • Magazine
  • Members
  • FHB House

Podcasts

  • FHB Podcast
  • ProTalk

Webinars

  • Upcoming and On-Demand

Podcasts

  • FHB Podcast
  • ProTalk

Webinars

  • Upcoming and On-Demand

Popular Topics

  • Kitchens
  • Business
  • Bedrooms
  • Roofs
  • Architecture and Design
  • Green Building
  • Decks
  • Framing
  • Safety
  • Remodeling
  • Bathrooms
  • Windows
  • Tilework
  • Ceilings
  • HVAC

Magazine

  • Current Issue
  • Past Issues
  • Magazine Index
  • Subscribe
  • Online Archive
  • Author Guidelines

All Access

  • Member Home
  • Start Free Trial
  • Gift Membership

Online Learning

  • Courses
  • Project Guides
  • Reader Projects
  • Podcast

More

  • FHB Ambassadors
  • FHB House
  • Customer Support

Account

  • Log In
  • Join

Newsletter

Get home building tips, offers, and expert advice in your inbox

Signing you up...

This site is protected by reCAPTCHA and the Google Privacy Policy and Terms of Service apply.
See all newsletters
See all newsletters

Follow

  • X
  • YouTube
  • instagram
  • facebook
  • pinterest
  • Tiktok

Join All Access

Become a member and get instant access to thousands of videos, how-tos, tool reviews, and design features.

Start Your Free Trial

Subscribe

FHB Magazine

Start your subscription today and save up to 70%

Subscribe

We hope you’ve enjoyed your free articles. To keep reading, become a member today.

Get complete site access to expert advice, how-to videos, Code Check, and more, plus the print magazine.

Start your FREE trial

Already a member? Log in