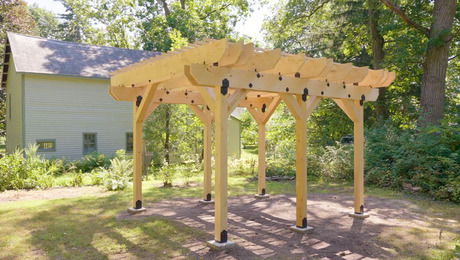
Raising and Bracing Pergola Posts
It's important to prepare pergola posts properly before raising them.
Sponsored by Simpson Strong‑Tie
The posts of this pergola will be made from hemlock that Jeremy Kassel picked up at a local sawmill. It’s a cost-effective and durable alternative to cedar. After measuring and cutting each post, Kassel uses a cordless palm router to dull the corner edges to prevent splinters. He then treats the end grain with Anchor Seal emulsified wax to protect the lumber from moisture. Now, it’s time for Kassel to raise the pergola posts.

Here’s the Transcript:
We chose hemlock, and we got it from a local sawmill. It’s durable, it’s hard, and it’s a little bit in a more agreeable price point than cedar, but it’s a step above using pressure treated. I don’t like the way that this came from the mill with a crack in it, so this will either get cut off or we could also bury this up in our beam and rafter framing.
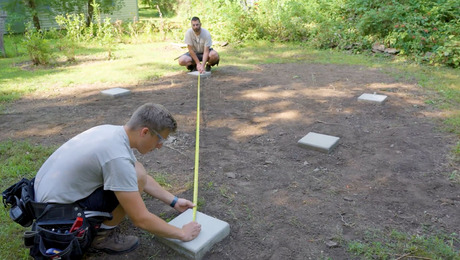
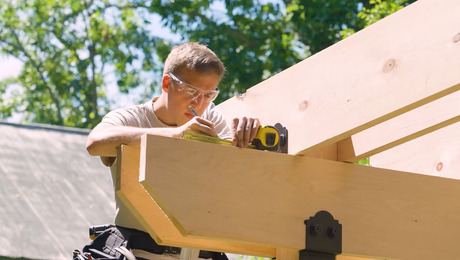
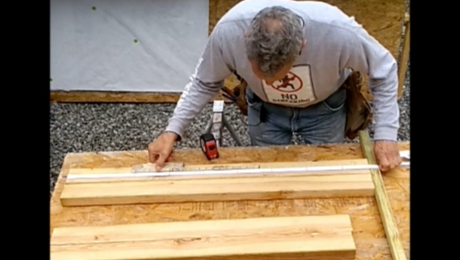
I’m going to make a mark here at 7 ft. 6 in. This is working off of the control point on our footing, which is the highest out of the ground. So none of our posts or our head height are going to be shorter than 7 ft. 6 in.

But I need to add 11¼ in. to represent the width of our beam and another 11¼-in. to represent the width of our rafters. This means that the overall length of this beam is one 112½. This is where we’re going to make our cut. It means that we’ll be able to get rid of some of this cracking in material here that I didn’t like on the end of our 6×6.
So for layout, I need to make marks all the way around the post. Now we can go ahead and get ready to cut our material. I’m going to use my 7¼-in. rear-handle circular saw. This saw will not be able to cut through all of the material in one pass, so we’re going to have to make multiple passes to cut all the way through this material. Now there’s a little bit of material right in the center of this post that our circular saw was not able to cut, so we do need to cut that out in there.
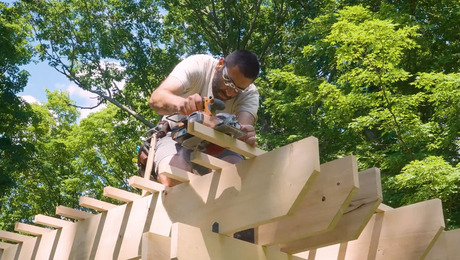
Preparing the Beams
Another detail that I’m going to add to this is I’d like to ease this sharp edge on our post. So what I have here is a cordless palm router with just a small ⅛-in. roundover bit, and I’m going to run it up and down these edges just to take that hard edge off.
Anybody that may brush up against this or run their hand on it is less likely to get splinters, and visually it just softens it up a little bit. The last step we’re going to take before we install this post is to seal and protect the end grain with this wax.
This product is called Anchor Seal. It is an emulsified wax, so when it is inside the can, it’s more liquid-y and pasty. But when it dries, it dries just like a wax.
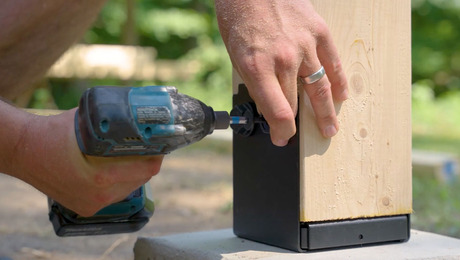
Even though the Simpson Strong-Tie Hardware has standoffs built into the hardware, this is a belt-and-suspenders approach. We really want to protect the end grain of this lumber so that it doesn’t wick up any moisture.
This wood was locally sourced from a mill, and I do want to protect the investment here. Let’s pick up this first post and nest it right in the bracket where it’s going to get stood. You can just set it right in.
Let’s record the measurement that we need for the next one. We need to add 1 and 9/16, so we need to take that first number that we established and add 1 and 9/16 in. to it because it’s that much lower into the ground.
So I’m going to record my 112½. Then I’m going to add my 1 and 9/16 in. That’s 114 and 1/16. So we’re going to add 3⅝ to our next number. Great, we can do the next one. Starting with that 112½ and adding 3¼.
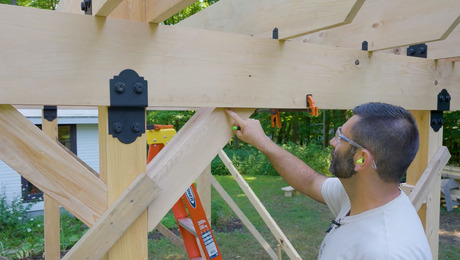
Raising the Beams
All of our posts are cut and ready to be installed. We’re ready to tip our first one up, get it plumbed, and get it braced off. Now that we have our first post plumbed and braced, we’re ready to fasten it to our adjustable post base.
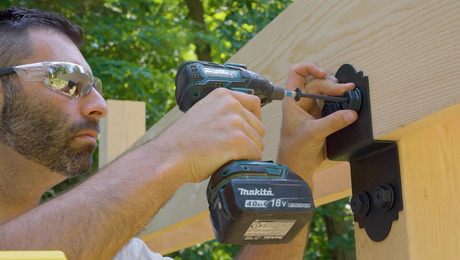
We’re using the Simpson Strong-Tie Hex Head Washer and Structural Wood Screw. These components are part of the Outdoor Accents Line and are made to look like a through-bolt or a carriage bolt.
I think we’re ready to set that next post. We’re just going to work our way around and get them all stood up and braced. We’re not going to fasten this quite yet because we still need to manipulate it plumb. It needs to go in that direction so when we get the other middle post in, we can pull it back and then brace it off to the bottom of that other post. Now we’re going to move on to this next one.
For bracing those posts, I prefer to use 2×4. I had a bunch lying around, so that’s what I used. So I am putting a 6½-foot level across these posts just to verify that all the bath we did with the different elevations of our footings and cutting the post to our desired length has now paid off in the tops of these being level to each other. And they are perfect. It looks great, I’m really happy with it.
RELATED STORIES