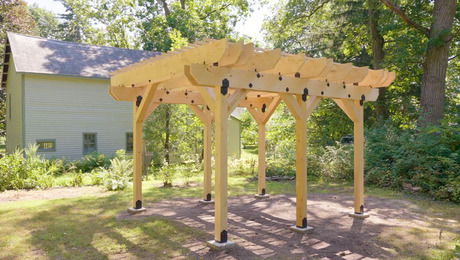
Building and Installing Pergola Beams
Learn how to transform hemlock boards into durable beams for a long-lasting pergola.
Sponsored by Simpson Strong-Tie
In this phase of the build, Jeremy Kassel transforms locally sourced 2×12 hemlock boards into beams for our pergola. After that, it’s time to prep and install the beams. From sighting and crowning the lumber to securing everything in place, Kassel shares his recommendations on creating a sturdy pergola that’s built to last.

Here’s the Transcript:
The next stage of this pergola project is to take these 2×12 hemlock boards and turn them into beam material. We’ll then install them towards the tops of our posts. We opted for locally sourced hemlock to avoid using other wood species like pressure-treated wood or cedar, which was out of our price range.
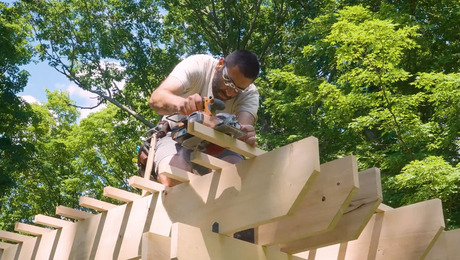
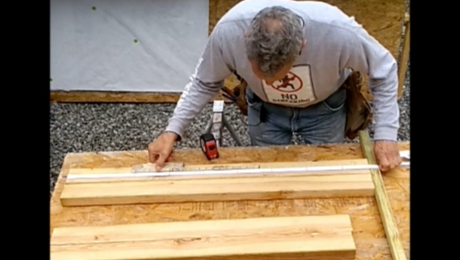
For this project, I’m sighting down the board to crown my lumber. All lumber has a slight curvature, and we want to ensure that all boards are oriented the same way. Once I identify the top of the crown, I mark it because I don’t want to mark the face of the board, since it will be finished.

I’m checking each end of this board to determine which side to start cutting from. Down here, I see that the board is cupped and has a big knot at the end, so I’ll go to the other end. This side is very flat, so we’ll start by cutting this side square and cut the other end as our waste. Now I’ve got a square edge to pull from.
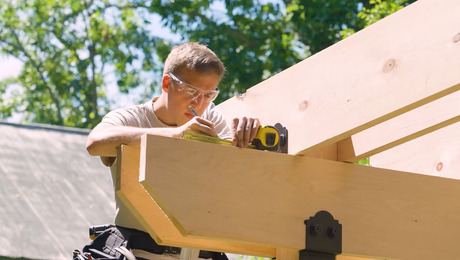
The plans call for beams that are 16 ft. long, and I’ve verified this on the posts we installed earlier. Now we’re ready to cut the decorative angles on these boards. We’ll cut the angle at the bottom of the board, and we know this is the bottom because we’ve marked the crown on the top.
I’ll make a mark at 5½ in., which will be the width of our rafter tail. I’ll turn my speed square over, scribe my line, and cut this off. I’ll do the same decorative cut on the other end, then I’ll have three more boards to cut, and we’ll be ready to install.
This locally sourced hemlock is durable, and I’m going to crown it. It’s a nice middle-of-the-road option that will last a long time. The crown is on this side. Some characteristics you might see in this lumber include chainsaw marks at the end and fiber tears from where the log fell off the stump. Sometimes you’ll see variations in thickness or width, but we had this lumber ordered to a specific thickness and width.
Let’s flip this over, stack it, and grab the next one. I’ll crown this one too. One of the nice things about working with sawmill lumber is that if they send you longer lengths than you need, you can be more selective about what to cut off. I cut off about 16 in. from this end of the board to get into flatter material.
I’m installing 2×4 cleats on our posts. These will serve as a ledge for when we lift the beams into place, giving them something to rest on.
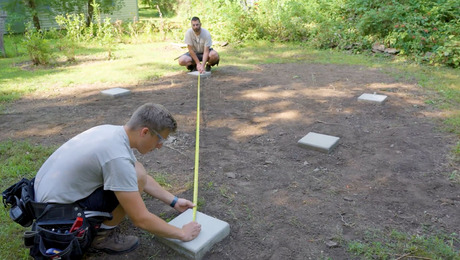
The next step is to mark the post locations on the beams so we know where to register them during installation. Here I’m making a mark at the bottom of the 2×12 beam where it will align with the outside edge of our 6×6 posts. I’ll make the same mark on the ends of all our beams. I’m double-checking my measurements to verify that the overall length from mark to mark matches the overall width between the posts, and it’s spot on. We’ll get all the marks even with each other and transfer them to the other end.

Now we’re ready to install. Slide it to me, and I’ll put a screw in to hold it. I’m making sure to put the screw low on the material because our hardware will cover it later. Now that the beam is tacked in place, we can remove the cleats, install the rest of the beams, and then install our hardware.
Please slide it a bit more. Yes, I like the face of this board, so it’ll be on the visible side. If there are imperfections, we’ll hide them on the inside of the beam. All right, slide it a quarter inch. Yep, that’s perfect. We can put screws in now. Give me a little bump. That’s perfect. I’ll check it with the torpedo level; mine needs to come up slightly. I’ll add a shim to level the tops. All right, that looks good.
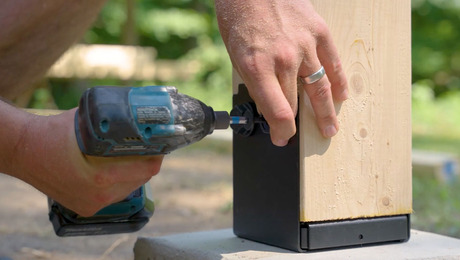
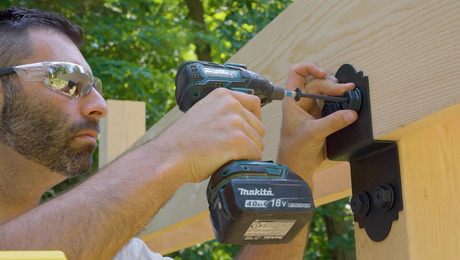
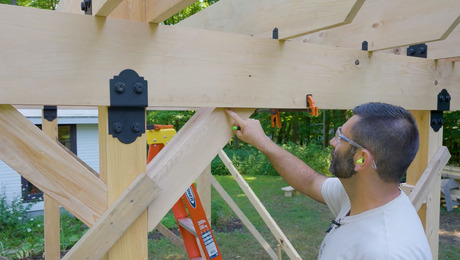
This piece of hardware is called a deck joist tie, and it’s part of the Outdoor Accents line from Simpson Strong-Tie. I like that it’s powder-coated with decorative elements, but it’s also structural. We’re eyeballing the position on the post, making sure the reveal on either side looks uniform.
It installs easily with hex-head washers and structural wood screws. What I like about these structural screws is that they set nicely. For this hardware, we’re using 3½-in. structural wood screws because we’re only fastening into the post. Up top, we’re using 5½-in. wood screws because they go through the beam and the post.
RELATED STORIES