FHB Logo Facebook LinkedIn Email Pinterest Twitter X Instagram Tiktok YouTube Plus Icon Close Icon Navigation Search Icon Navigation Search Icon Arrow Down Icon Video Guide Icon Article Guide Icon Modal Close Icon Guide Search Icon Skip to content
Subscribe
Log In
  • How-To
  • Design
  • Tools & Materials
  • Restoration
  • Videos
  • Blogs
  • Forum
  • Magazine
  • Members
  • FHB House
  • Podcast
Log In

Fix Air Leaks in Old Houses

Simple air-sealing measures and spray-applied sealant lower energy bills and increase comfort without the need to tear the house apart.

By Mason Lord Issue 326 - October 2024
Photo courtesy of AeroBarrier.

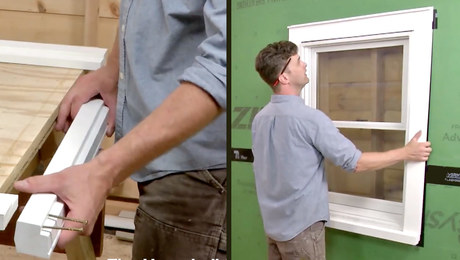
Air-sealing an old house with board insulation — without ripping the structure down to the studs — is a difficult task because of all the leaks to the exterior. Beginning with easy improvements such as reglazing and weather-stripping windows, sealing ducts, and air-sealing attic and basement access points can greatly reduce air leakage in an old home.

With simple improvements out of the way, one option for sealing an old house is to use the AeroBarrier system of spray-applied sealant. After the remodelers close up mechanical systems, cover surfaces, and prep doors and windows, the sealant is sprayed through the house to close up air leaks. The final building has greatly reduced air leakage, with updated HVAC systems for better energy efficiency.

When Air Leaks Abound

During the 33 years our company has been around, we’ve wanted to buy an office space for an investment and as a way to improve our business’s efficiency. When a suitable local property showed up on my Instagram feed, I was on the phone with the broker an hour later. We closed the deal in the fall of 2023.

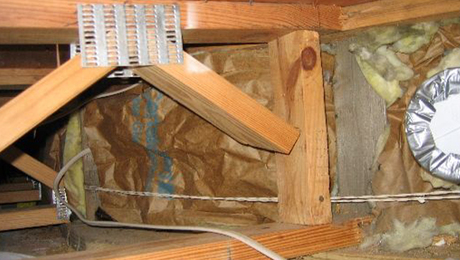
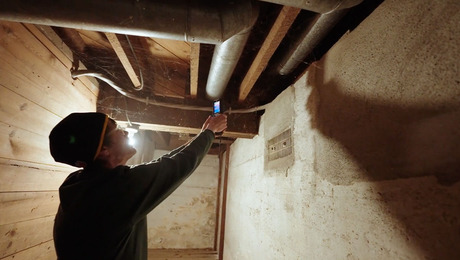
Shortly after signing the papers, we had a blower-door test to determine the building’s airtightness and look for obvious air leaks with an infrared (IR) camera. The building tested at nearly 19 ACH50—a very high number of air changes per hour. The house didn’t have obvious holes in the envelope, but we found significant leaks around doors and windows, the band joist, and the attic hatch, as well as holes around ducts leading from the basement.

The first thing we did was tighten up these areas by adding insulation and weatherstripping. We also reglazed and painted the windows and added weatherstripping to the sashes. But even after taking these measures, the building was still testing at more than 16 ACH50, so it was obvious more help was needed.

Start With Easy Improvements

Improving the airtightness of an old house starts by sealing up easily accessible leaks, both large and small. Pressurizing the house with a blower door and then looking around with an IR camera makes leaks easy to see. Focus first on the basement and top-floor air barriers, as these contribute the most to air leakage because of the stack effect. These measures alone reduced air leakage in our building by about 3 ACH50.

Establish Air Control

Old houses, especially Capes, saltboxes, garrison colonials, and other houses with overhanging floor systems or story-and-a-half designs, may have walls and joist cavities that connect unconditioned attics and crawlspaces to living space. These must be closed off.

Seal Ducts and Fix Disconnects

Disconnected or missing duct-system parts allow unconditioned and conditioned air to mix in HVAC systems and building enclosures, especially when ducts are outside the conditioned space. Replace missing parts, reattach disconnected ducts, and seal seams and transitions.

Close Holes

Holes in the building shell add significantly to air leakage. Look for abandoned waste and vent pipes, dryer and ventilation-fan outlets, broken window glass, and holes in the exterior from rotten or missing parts of the building enclosure.

Tighten the Band Joist

Caulk small gaps between the foundation top, the mudsill, and the first-floor floor framing, and then insulate around the band joist. We covered the band joist with foil-faced polyiso insulation, which can be left exposed. Seal gaps around the insulation with canned spray foam.

Add Sweeps, and Weatherstrip Doors

Add weatherstripping to front and back doors. In this house, we also added weatherstripping and a sweep to the board-and-batten basement door. Houses with only a basement bulkhead door need an exterior door between the basement and the bulkhead for any hope of air control.

Reglaze and Weatherstrip Windows

Even if windows aren’t being replaced, adding weatherstripping to the top, bottom, and sides of the sashes and replacing the glazing putty will improve the airtightness of the existing windows. We did this work and painted the sashes off-site.

Air-Seal the Attic Access

Attic access panels and pull-down stairs are notorious air leakers. Adding a draw catch that pulls the access panel tight to a weatherstripped stop minimizes air leaks around the panel.

Fix Leaks You Can’t See

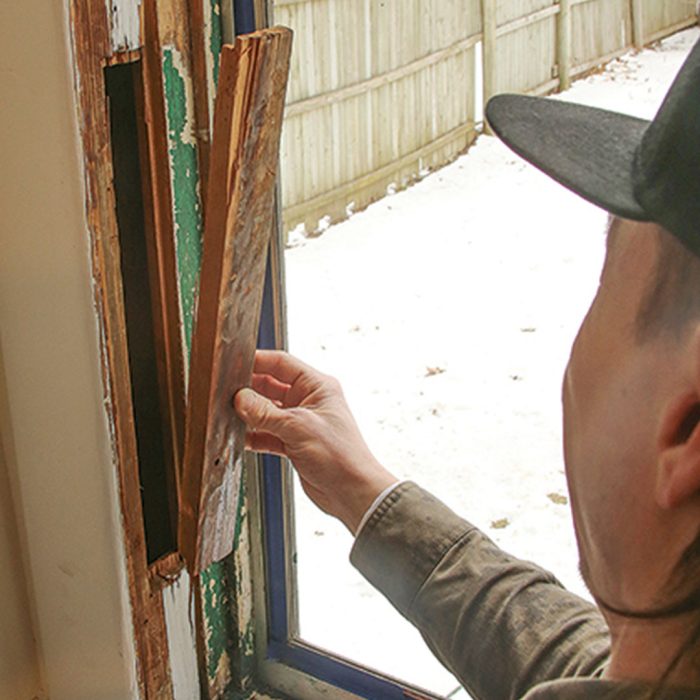
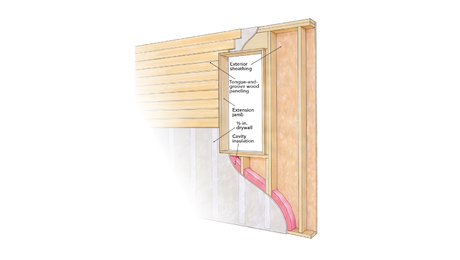
On an old house with board sheathing like this one, gaps between the individual boards are a big source of leakage and impossible to fix without stripping the siding or the interior plaster and trim.

This would be a huge expense made even more significant by the need to safely handle materials containing lead paint and asbestos. Stripping the house of original elements also goes against our company DNA, which aims to preserve old buildings and original details.

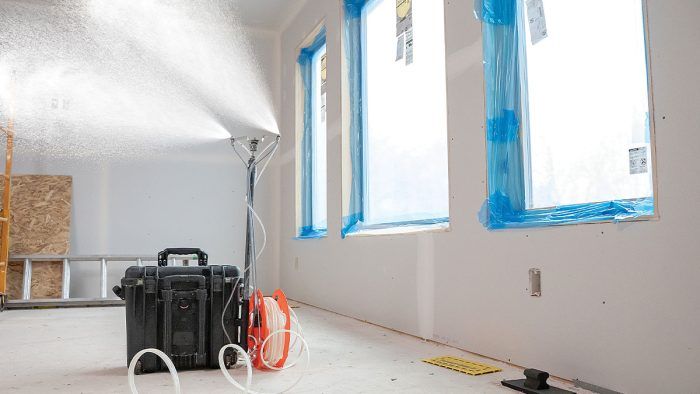
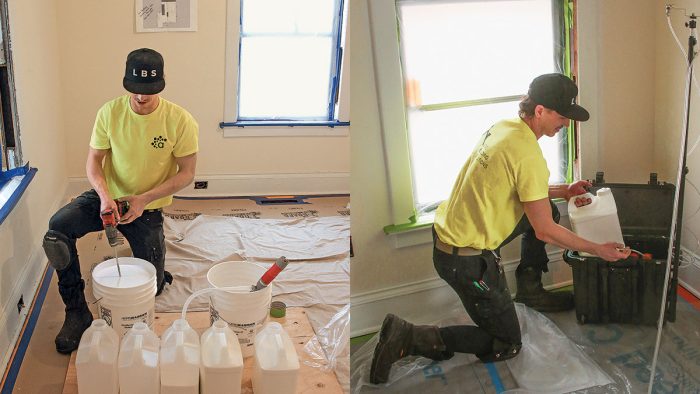
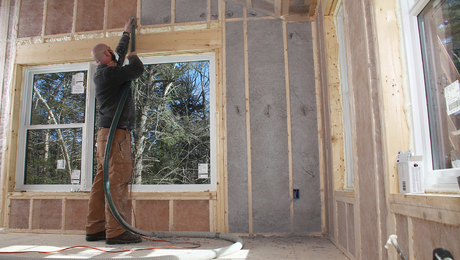
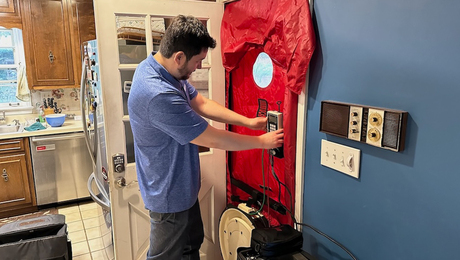
So instead of stripping the exterior or interior, we used AeroBarrier, installed by my son Alex of Lord Building Solutions. AeroBarrier is a spray-applied sealant that is forced into small gaps using a blower door pressurized to 100 pascals. The blower door’s fan forces the sealant into leaks in the building enclosure, improving its airtightness.

AeroBarrier is more common in new builds than in retrofits because of the hassle and expense of protecting the surfaces and belongings in an occupied house, which can make retrofits prohibitively expensive. On average, AeroBarrier costs between $2 and $3 per sq. ft. to install in existing buildings. Multifamily new builds are often less, while retrofits to existing buildings like ours are on the highest end.

With existing buildings that are occupied, it’s possible to remove furniture and belongings and temporarily store them, but that expense adds up. Using AeroBarrier when the building is unoccupied like the one we recently bought is easier because the house is mostly free of stuff.
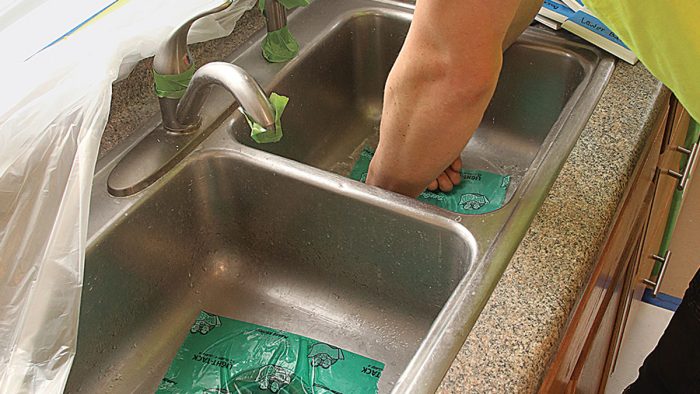
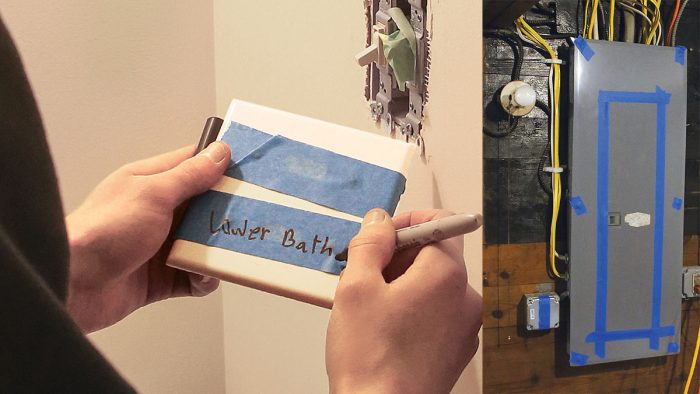
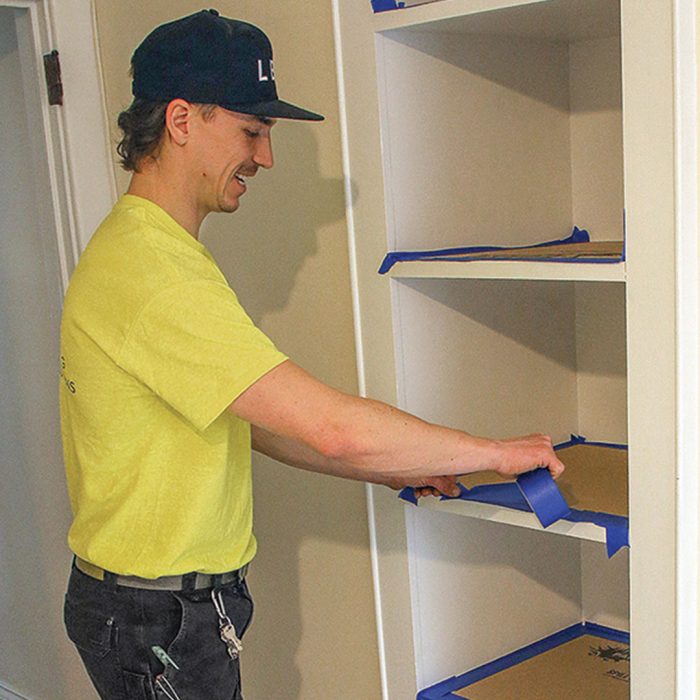
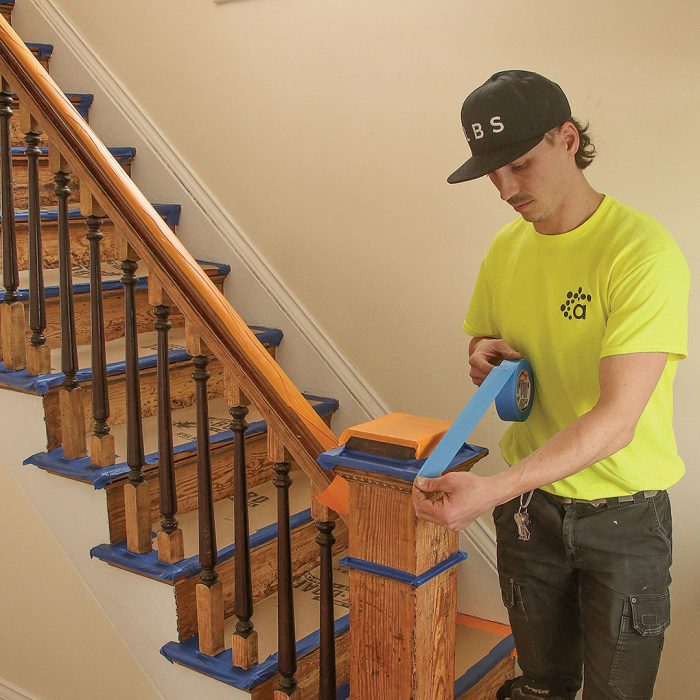
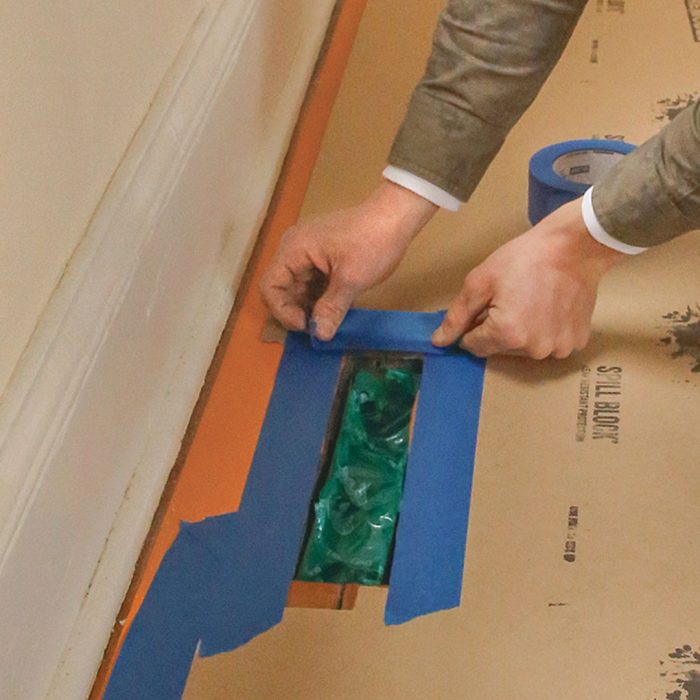
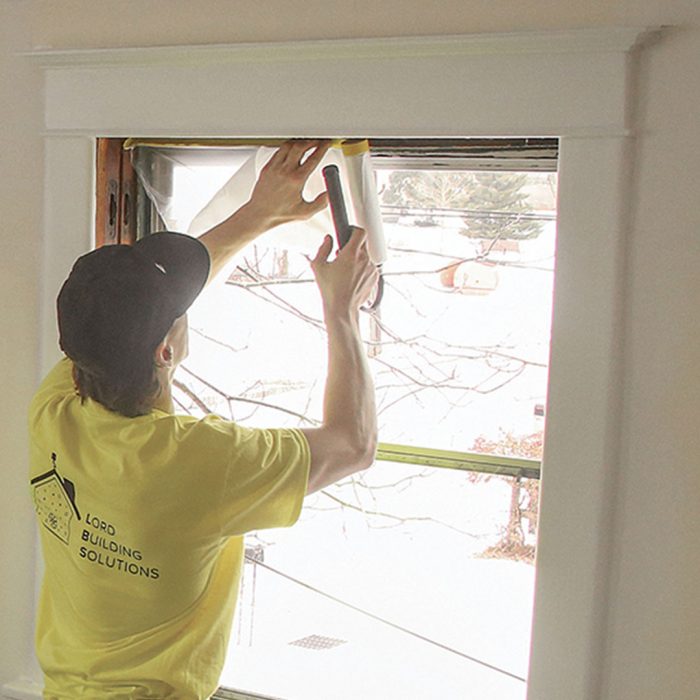
Seal Old Houses Without Demolition

Protect Surfaces

The biggest challenge with AeroBarrier in existing homes is protecting finished surfaces from sealant overspray. Windows and doors, built-ins, finished floors, and appliances must all be protected, as some of the aerosolized sealant settles during the sealing process.
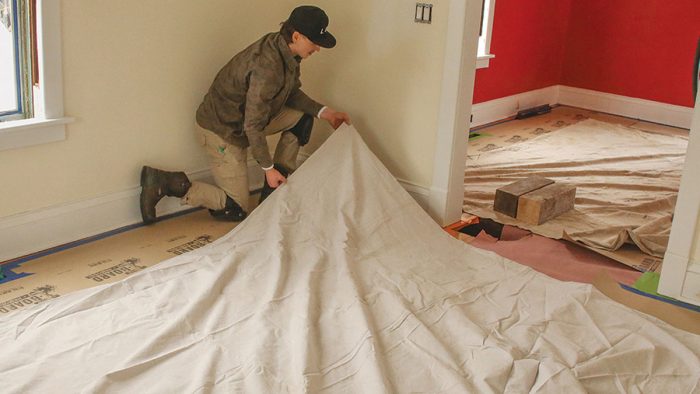
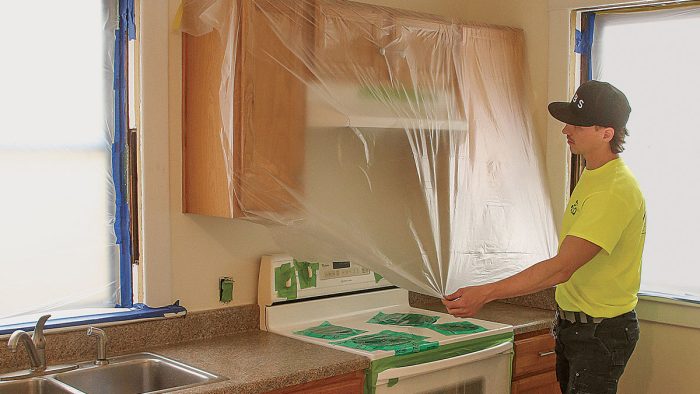
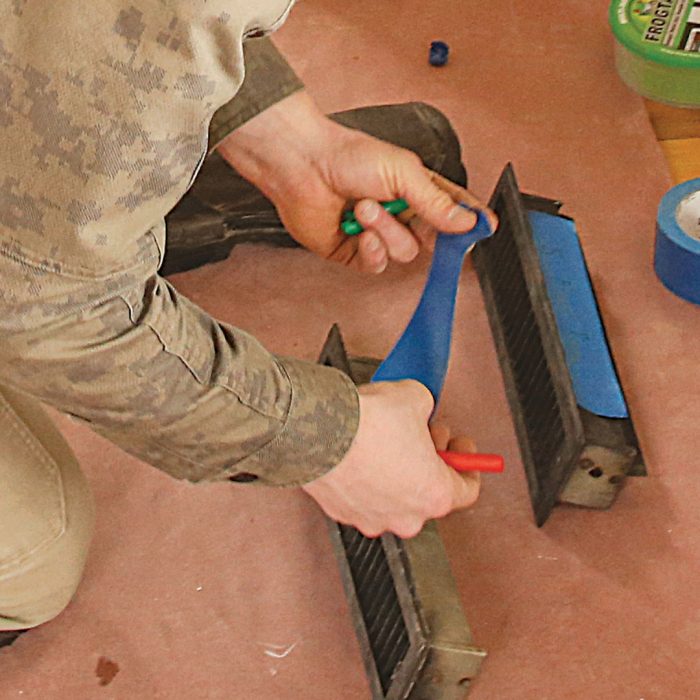
Photo of man in a brown jacket and black hat covering floors with tarp.
Cover Floors: Sealant must be able reach any gaps between the baseboard and the finished flooring. A strip of tape with a small gap between it and the base shoe allows sealant into this space while protecting the floor from overspray. Most of the floor is covered with canvas drop cloths.
Photo of a man in a neon yellow shirt covering appliance surfaces with plastics and tape.
Seal Up Appliances: Appliance doors and surfaces are protected with duct masking, tape, and poly sheeting. Make sure the masking materials don’t hinder airflow for refrigerators, beverage coolers, and icemakers. Range hoods are also covered and their ventilation openings sealed.

Photo of a man in a neon yellow shirt putting masking tape on shelves and cabinets.
Protect Cabinets and Built-Ins: Built-ins, cabinets, and countertops must also be protected from sealant overspray. Horizontal surfaces get a layer of protective cardboard with the edges taped so the masking isn’t lifted or blown around during sealing.

Photo of a man in a neon yellow shirt putting masking tape on stairs.
Keep Overspray Off Stairs: The original staircase is one of our favorite original elements in this house. We protect horizontal surfaces on the balustrade with tape. Treads are covered with protective cardboard and taped in place.

Close Off Mechanical Systems

Sealing with AeroBarrier in new builds is easier than sealing existing buildings because plumbing, HVAC, and electrical systems are in the rough-in stage, so fixtures, registers, and electrical devices have not been installed yet. All of these things must be removed or protected in an existing building.
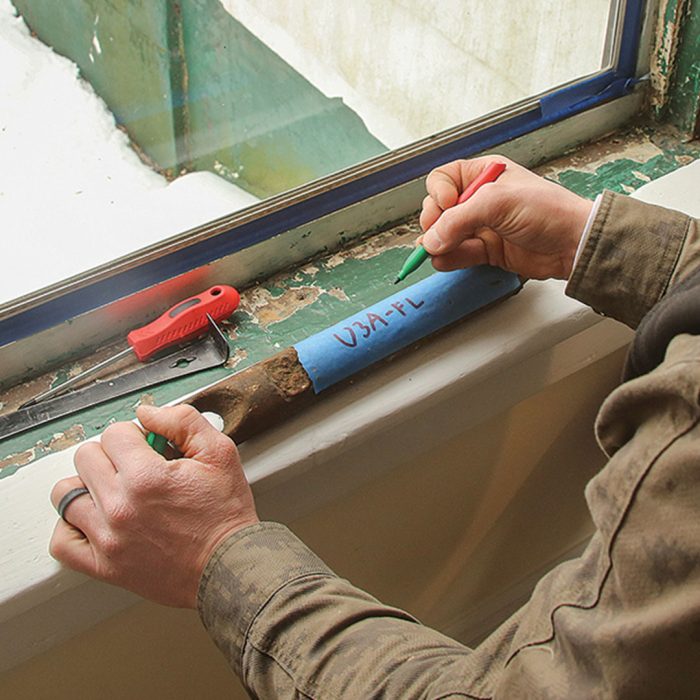
Photo of hands removing and labeling registers.
Remove and Label Registers: Floor, wall, and ceiling registers must be sealed or removed, depending on the project. Leaving them in place is easier, but we remove them instead of masking them so that the space between finished surfaces and the register boot can be sealed.

Photo of hands applying self-adhering plastic film to register.
Mask Boot Interiors: Self-adhering plastic film, commonly used to seal registers for duct-leakage testing, closes off the duct interior—a critical step to keep sealant out of the HVAC system. Balled-up paper can be used too.

Photo of hands leaving masking-tape gap around the register.
Leave a Gap Around the Boot: Protective cardboard is cut and taped around the register boot, leaving the gap between the boot and finished hardwood exposed so that it can be filled with sealant.
Photo of hands adding self-adhering film to plumbing fixtures.
Protect Plumbing Fixtures: In an existing home, bath and plumbing fixtures must be protected. Self-adhering plastic film prevents the sealant from getting inside waste lines and vents.
Photo of a hand labeling electrical panels and covering them in masking tape.
Protect Electrical Equipment: Wall plates are removed so that the sealant can get into gaps between electrical boxes and walls. The plates are labeled and the screws taped to each plate for easier reassembly. Service panels and subpanels are taped to prevent sealant from getting inside.

Prep Windows

The original single-pane windows with their period hardware are one of the house’s best features and are prohibitively expensive to replace. We removed the sashes and took them off-site for reglazing and to paint and add weatherstripping. We kept the existing storm windows for reduced noise and increased comfort, and left them in place for weathertightness during the air-sealing process.

Photo of hands filling sash pockets with self-adhering film.
Empty Your Pockets: We open the sash pockets so gaps in their interiors can be filled with the sealant, along with any gaps between the walls and the window frames or the frames and the casing.

Photo of sash weights being labeled with sharpie and masking tape.
Weight Management: Sash weights are removed and labeled so they can be returned to their correct window. Sash and balance systems can also be left in place, but they must be masked for protection.

Photo of a man in a neon yellow shirt putting tape over storm sash.
Storm Protection: We tape over the storm sash so the sealant won’t get on the glass or glue the sash to the frame. We cover the window stool with tape and cardboard to protect it from settling sealant.

Lessons Learned

As anyone who’s spent time working on old houses knows, you’re often in uncharted territory when you make upgrades to a house like this. One thing I would do differently in the future is to better coordinate with the HVAC contractor about roughing in ductwork and air-sealing around new ducts.

Let me set the scenario: By the time Alex began sealing with AeroBarrier, the house was nearly ready for occupancy. The conventional air-sealing was done. The windows were out for restoration. The attic was air-sealed and insulated, and the basement had been sealed too.

Alex started sealing with the spray-applied sealant, but things were going slowly. After snooping around with the blower door running and the sealant turned off, he found a pair of 2-in. by 8-in. holes around the duct­work running to the second floor from the basement.

These two holes allowed interior air to move throughout the second-floor floor system and the attic; the official building-science name for this is thermal bypass. With the house operating normally, these thermal bypasses would have had a huge impact on heating and cooling comfort and efficiency.

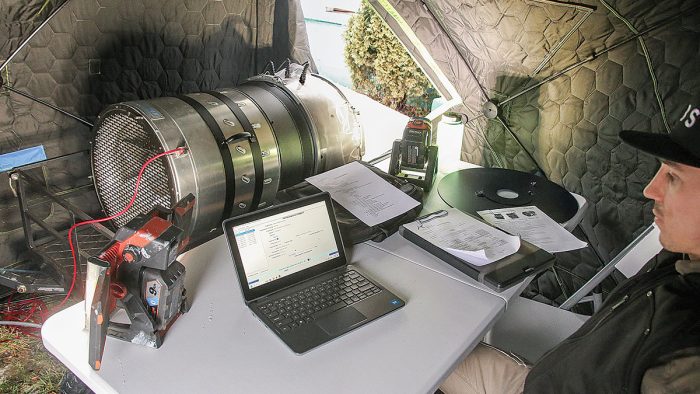
Once the two holes were plugged, sealing was able to progress, but that wasn’t the only snafu. After Alex had been sealing for about three hours of the four-hour process, the graph that tracks the effects of the sealant suddenly showed what looked like a big new hole. The hole turned out to be the furnace starting up, because the shutoff switch was broken.

This created a pressure difference that was picked up on the AeroBarrier monitoring system. Combustion equipment is always turned off and ductwork is sealed off prior to sealing because the pressure of the blower door and sealed ductwork can disrupt system and combustion airflow, potentially damaging equipment. Alex was able to kill the furnace at the breaker, and there was no damage to the equipment.
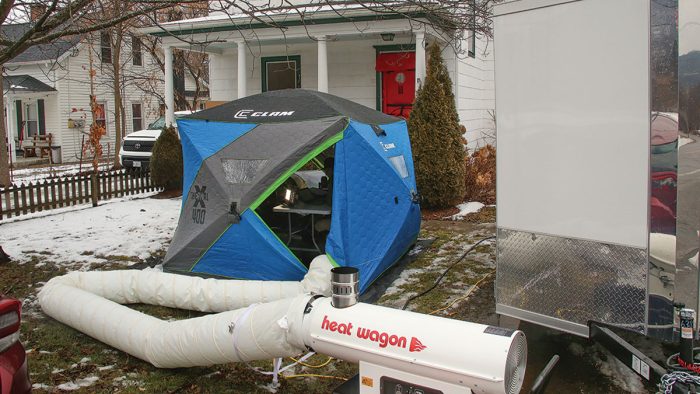
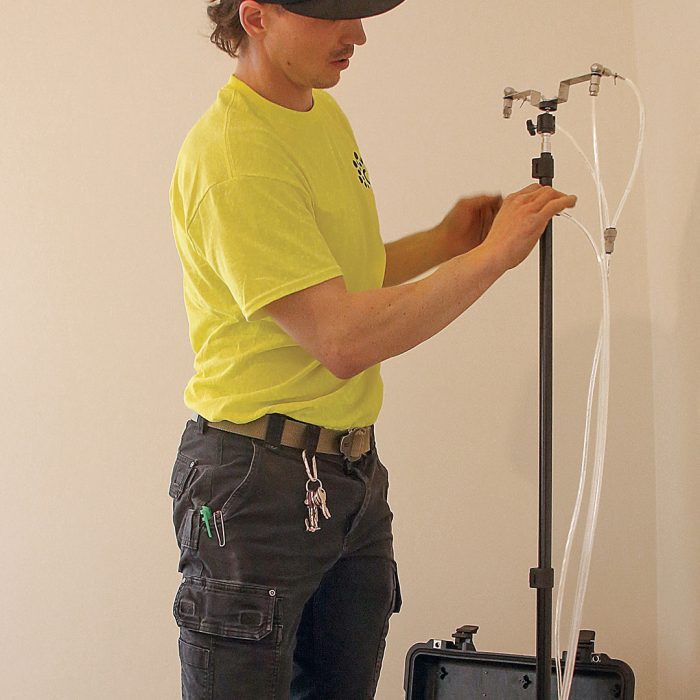
Let the Sealing Begin

Once the prep work is complete, the air-sealing equipment is set up with spray heads on every level, with the number dependent on the size of the building. AeroBarrier goes faster with warm conditions and low humidity, so portable heaters and dehumidifiers speed the process in less-than-ideal conditions.

Photo of man in a neon yellow shirt hanging spray head nozzles.
Place the Spray Heads: Each spray head has a pair of nozzles on a telescopic stand with a pump and control circuitry to manage sealant dispensing. Most residential projects require between one and four sprayers per level depending on the size of the space and how it’s divided.

Photo of man in a neon yellow shirt connecting air supply tubes to the manifold.
Connect the Air Supply: An air supply provided by a gas-powered compressor mounted in the trailer aerosolizes the sealant. Each spray head has an air-supply tube that runs to a manifold on the first floor.
Photo of a man in a neon yellow shirt mixing and loading sealant.
Mix and Load Sealant: The liquid sealant, which looks and smells like white glue, is mixed thoroughly and pumped with a battery-powered pump to the sealant containers that will be placed below the spray head.
Photo of a blue and grey tent attached to a vehicle called "Heat Wagon."
Turn Up the Heat: Cold weather slows the sealing process by increasing the time it takes the sealant to dry. As the blower door forces sealant into gaps, it quickly displaces the conditioned air inside the building. In cold weather, warm makeup air is provided by a kerosene space heater ducted to the tent holding the fan. Its sealed burner won’t introduce vapor from combustion into the makeup air, which would also slow drying.

Photo of a man monitoring the sealing process on a computer in a tent outside the house.
Seal and Monitor: With protective measures and the spray heads in place, AeroBarrier sealing is largely a set-and-forget process, with the monitoring system managing the amount of sealant moving through the heads. Still, it’s good to keep an eye on things to make sure sealing progresses normally.

The Payoff

Before moving in, we spent about four months cleaning, painting, making envelope improvements, and updating the HVAC system by adding a central heat pump and expanding the ductwork. In all, we spent $385,000 purchasing the building and $111,000 on driveway and house upgrades. About $64,000 of that was spent on energy improvements, including HVAC-system upgrades, tightening the existing double-hung windows, and air-sealing with AeroBarrier.

After all the improvements, the building tested at 5.65 ACH50, a huge reduction from the original 19 ACH50. Now that we’ve been through the AeroBarrier process on our own old building, I wouldn’t hesitate to recommend it to clients who want to improve the efficiency of an old house but don’t have the budget or inclination to tear it apart.

Buying this house for our office is one of the smartest business decisions we’ve made. It allows us to meet with clients and partners in a comfortable space that better reflects our business philosophy.

As new owners, we don’t have records to show how our energy improvements have affected the utility bills, but I can say that last year we spent less on heating oil and electricity for this house than we ever did at our smaller rented office. The space is also quieter and more comfortable. And importantly, it shows clients how much we care about old buildings.
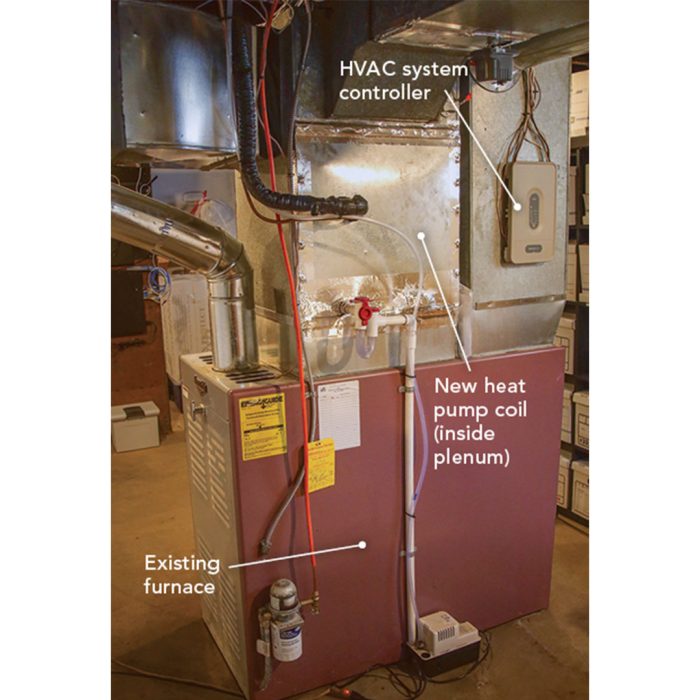
You Can’t Overlook HVAC

An evaluation of the HVAC system is a key part of any weatherization or enclosure upgrade. It’s likely that the system, which is often oversized in an old house to begin with, will be further oversized after envelope improvements and may have to be replaced or reconfigured. There are also potential combustion safety issues because of changes in the supply of combustion air.

This house had an existing oil-fired forced-air furnace made by Thermo Pride, a brand I’ve heard described by real-estate agents and heating techs alike as “the Cadillac of oil furnaces.” Even though its maximum efficiency is around 80%, we left it in place because it’s durable, is easy to fix, and has plenty of Btus for occasional subzero temperatures. We had its burner and air handler serviced and the masonry chimney inspected as part of the HVAC work done by a trusted subcontractor.

Photo of a furnace labeled with the HVAC System Controller, Existing Furnace, and New Heat Pump Coil (inside plenum).
Furnace for Cold Temps: The existing oil-fired furnace provides heating when outdoor temperatures drop below about 40°F. The rest of the time, a new high-efficiency heat pump provides the heating and cooling. A Honeywell system controller and smart thermostat automatically select which system to run.

Photo of a variable-speed Trane heat pump.
Heat-Pump Problem-Solver: With air distribution provided by the furnace blower, the variable-speed Trane heat pump heats and cools most of the year. It’s better matched to the reduced heating and cooling loads of the improved house and generally runs at low speed, which minimizes drafts and noise.

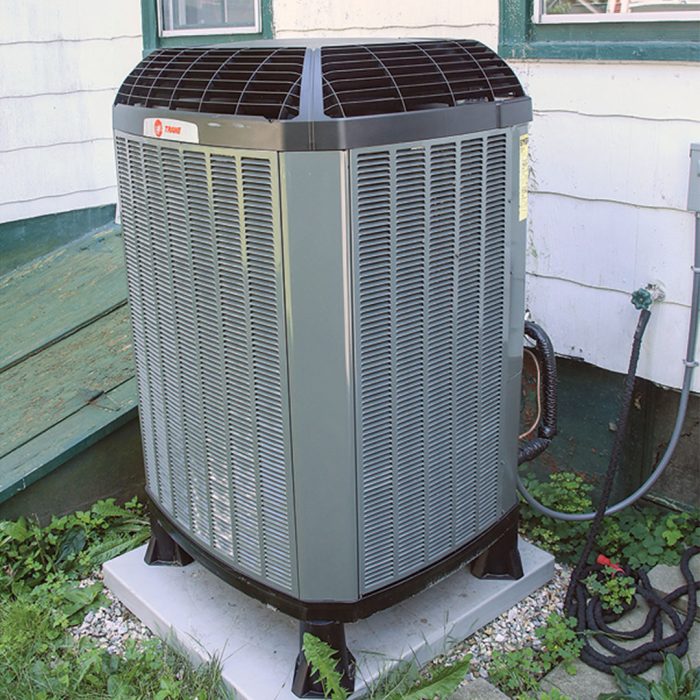
We also added a central heat pump that uses the furnace ductwork and blower to provide air-conditioning in the summer and heating down to about 40°F. In milder temperatures, the heat pump is less expensive to operate than the oil furnace, and its constant low-speed operation is quieter and provides more even heating and cooling than the on/off blasts from the furnace.

We had our HVAC contractor extend the ductwork to the attic for second-floor distribution, which we sealed and buried in loose-fill cellulose insulation.

Home-performance absolutists might question keeping the oil furnace and putting new attic ducts outside the conditioned space. This project had a tight budget, and an entirely new HVAC system was not in the cards. We also left the atmospherically vented propane-­fired water heater in place, expecting to replace it with a heat-pump model when it fails.

— Mason Lord; founding partner of Hudson Valley Preservation in Kent, Conn. Photos by Patrick McCombe, except where noted.

From Fine Homebuilding #326

RELATED STORIES

  • How to Find Air Leaks in Your House
  • Straightforward Air-Sealing Strategies
  • See Air Leaks in Hard-to-Reach Places

Fine Homebuilding Recommended Products

Fine Homebuilding receives a commission for items purchased through links on this site, including Amazon Associates and other affiliate advertising programs.

Handy Heat Gun

This heat gun is great for drying joint compound, primer and paint when patching drywall and plaster walls. Plus it can soften adhesive, get a very cold small engine to start, and shrink heat-shrink tubing.
Buy at Amazon

Reliable Crimp Connectors

These reliable, high-quality connectors from Wirefy work on 10-22-gauge wire have heat-shrink insulation to keep out water and road salt.
Buy at Amazon

8067 All-Weather Flashing Tape

Available in 2- to 12-in. widths, this is a good general-purpose flashing tape that sticks well to most things. It features a two-piece release paper, water-shedding layers, and good UV resistance.
Buy at Amazon

Sign up for eletters today and get the latest how-to from Fine Homebuilding, plus special offers.

Signing you up...

This site is protected by reCAPTCHA and the Google Privacy Policy and Terms of Service apply.
See all newsletters
See all newsletters
×

Get home building tips, offers, and expert advice in your inbox

Signing you up...

This site is protected by reCAPTCHA and the Google Privacy Policy and Terms of Service apply.
See all newsletters
See all newsletters

New Feature

Fine Homebuilding Forums

Ask questions, offer advice, and share your work

View Comments

  1. user-1110977028 | Apr 12, 2025 02:35pm | #1

    What prevented you from getting below 5.65 ACH50 ?

Log in or create an account to post a comment.

Sign up Log in

Become a member and get full access to FineHomebuilding.com

Up Next

Video Shorts

Featured Story

FHB Podcast Segment: Gutter Covers 101

Gutter covers may be riskier than you think.

Featured Video

How to Install Exterior Window Trim

Learn how to measure, cut, and build window casing made of cellular PVC, solid wood, poly-ash boards, or any common molding material. Plus, get tips for a clean and solid installation.

Related Stories

  • Podcast Episode 680: Knob-and-Tube Wiring, Vapor Movement, and Gutter Covers
  • Podcast Episode 679: Steamy Storm Doors, New Fireplaces, and Basement Insulation
  • 10 Budget-Savvy Renovation Tips
  • Podcast Episode 678: Live from the Builders' Show-Part 2

Discussion Forum

Recent Posts and Replies

  • |
  • |
  • |
  • |
  • |
  • |
View More Create Post

Highlights

Fine Homebuilding All Access
Fine Homebuilding Podcast
Tool Tech
Plus, get an extra 20% off with code GIFT20

"I have learned so much thanks to the searchable articles on the FHB website. I can confidently say that I expect to be a life-long subscriber." - M.K.

Get home building tips, offers, and expert advice in your inbox

Signing you up...

This site is protected by reCAPTCHA and the Google Privacy Policy and Terms of Service apply.
See all newsletters
See all newsletters

Video

View All Videos
  • FHB Podcast Segment: A Cost-Effective Approach to Insulating and Air-Sealing Floor Trusses
  • FHB Podcast Segment: Old Home Insulation Troubles - How to Find the Right Contractor
  • FHB Podcast Segment: Building a Paintable Surface Over a Traditional Stone Wall
  • A Preservation-Focused Approach to Air-Sealing and Energy Efficiency
View All

Insulation & Air Sealing

View All Insulation & Air Sealing Articles
  • FHB Podcast Segment: A Cost-Effective Approach to Insulating and Air-Sealing Floor Trusses
  • Strategies for Making an Old House Airtight
  • Air Barrier Under Wood Paneling
View All Insulation & Air Sealing Articles

Fine Homebuilding Magazine

  • Issue 330 - April/May
    • Deck Details for Durability
    • FAQs on HPWHs
    • 10 Tips for a Long-Lasting Paint Job
  • Issue 329 - Feb/Mar 2025
    • Smart Foundation for a Small Addition
    • A Kominka Comes West
    • Making Small Kitchens Work
  • Issue 328 - Dec/Jan 2024
    • How a Pro Replaces Columns
    • Passive House 3.0
    • Tool Test: Compact Line Lasers
  • Issue 327 - November 2024
    • Repairing Damaged Walls and Ceilings
    • Plumbing Protection
    • Talking Shop
  • Issue 326 - October 2024
    • Paint Behind Strike Plates
    • Conceal Cut Ends
    • Ladder Slip Solution

Fine Home Building

Newsletter Sign-up

  • Fine Homebuilding

    Home building tips, offers, and expert advice in your inbox.

  • Green Building Advisor

    Building science and energy efficiency advice, plus special offers, in your inbox.

  • Old House Journal

    Repair, renovation, and restoration tips, plus special offers, in your inbox.

Signing you up...

This site is protected by reCAPTCHA and the Google Privacy Policy and Terms of Service apply.
See all newsletters

Follow

  • Fine Homebuilding

    Dig into cutting-edge approaches and decades of proven solutions with total access to our experts and tradespeople.

    Start Free Trial Now
    • Facebook
    • Instagram
    • X
    • LinkedIn
  • GBA Prime

    Get instant access to the latest developments in green building, research, and reports from the field.

    Start Free Trial Now
    • Facebook
    • YouTube
  • Old House Journal

    Learn how to restore, repair, update, and decorate your home.

    Subscribe Now
    • Facebook
    • Instagram
    • X

Membership & Magazine

  • Online Archive
  • Start Free Trial
  • Magazine Subscription
  • Magazine Renewal
  • Gift a Subscription
  • Customer Support
  • Privacy Preferences
  • About
  • Contact
  • Advertise
  • Careers
  • Terms of Use
  • Site Map
  • Do not sell or share my information
  • Privacy Policy
  • Accessibility
  • California Privacy Rights

© 2025 Active Interest Media. All rights reserved.

Fine Homebuilding receives a commission for items purchased through links on this site, including Amazon Associates and other affiliate advertising programs.

X
X
This is a dialog window which overlays the main content of the page. The modal window is a 'site map' of the most critical areas of the site. Pressing the Escape (ESC) button will close the modal and bring you back to where you were on the page.

Main Menu

  • How-To
  • Design
  • Tools & Materials
  • Video
  • Blogs
  • Forum
  • Project Guides
  • Reader Projects
  • Magazine
  • Members
  • FHB House

Podcasts

  • FHB Podcast
  • ProTalk

Webinars

  • Upcoming and On-Demand

Podcasts

  • FHB Podcast
  • ProTalk

Webinars

  • Upcoming and On-Demand

Popular Topics

  • Kitchens
  • Business
  • Bedrooms
  • Roofs
  • Architecture and Design
  • Green Building
  • Decks
  • Framing
  • Safety
  • Remodeling
  • Bathrooms
  • Windows
  • Tilework
  • Ceilings
  • HVAC

Magazine

  • Current Issue
  • Past Issues
  • Magazine Index
  • Subscribe
  • Online Archive
  • Author Guidelines

All Access

  • Member Home
  • Start Free Trial
  • Gift Membership

Online Learning

  • Courses
  • Project Guides
  • Reader Projects
  • Podcast

More

  • FHB Ambassadors
  • FHB House
  • Customer Support

Account

  • Log In
  • Join

Newsletter

Get home building tips, offers, and expert advice in your inbox

Signing you up...

This site is protected by reCAPTCHA and the Google Privacy Policy and Terms of Service apply.
See all newsletters
See all newsletters

Follow

  • X
  • YouTube
  • instagram
  • facebook
  • pinterest
  • Tiktok

Join All Access

Become a member and get instant access to thousands of videos, how-tos, tool reviews, and design features.

Start Your Free Trial

Subscribe

FHB Magazine

Start your subscription today and save up to 70%

Subscribe

We hope you’ve enjoyed your free articles. To keep reading, become a member today.

Get complete site access to expert advice, how-to videos, Code Check, and more, plus the print magazine.

Start your FREE trial

Already a member? Log in