Secrets of Thermal Imaging
Diagnose comfort problems and building deficiencies without tearing the house apart.
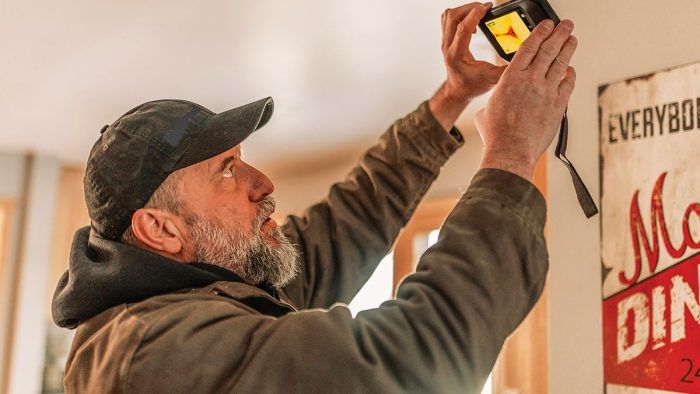
Thermal imaging cameras, also known as infrared (IR) cameras, come in a range of prices with varying features. Builder and energy auditor Randy Williams describes the common settings on most thermal imaging devices and how a thermal imaging home inspection can be used to diagnose issues such as air and water leaks, as well as to locate pipes and framing or to spot missing or ineffective insulation.
A Helpful Tool
My thermal imaging cameras are my most-used tools. I use them to find missing and poorly installed insulation in walls and ceilings, to detect air leakage during blower-door tests, to look for leaking pipes and roofs, and even just to explore the temperatures of everything around me. I purchased my first thermal imaging camera in 2009. It was an Extech i3 made by Flir. The $1200 camera had a resolution of 60×60, 3600 pixels, and no digital overlay.
If you don’t understand any of those terms, that’s OK—you will have a basic understanding of thermal imaging by the end of this article. But know up front that you can now purchase a camera with twice the resolution of my 2009 camera for $600 or less.
Where to Begin
Let’s start with a common misconception. A thermal imaging camera cannot see through walls like they show on bad TV. Thermal imaging cameras are a type of infrared (IR) camera that measures heat emitted by objects. In other words, thermal imaging “sees” differences in temperature within the camera’s field of view. You can see by these different surface temperatures where there is thermal bridging in a wall assembly. You might see wet or even slightly damp areas. Though they are only one type, thermal imaging cameras are often called IR cameras by those in the building industry, and I use the terms interchangeably.
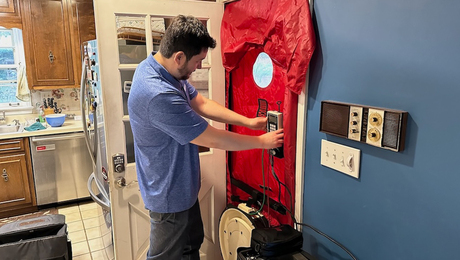
In order to use an IR camera for building diagnostics, you need a temperature difference (Delta T) between inside and outside the structure of at least 10° or everything in the IR image will appear the same color with little information to be learned from it. Bigger temperature differences are easier to discern and create a more dramatic thermal image. If the indoor and outdoor temperatures are less than 10° different, you may need the air movement of a blower door to exaggerate temperature differences enough to see them.
Additional Details to Consider
A camera’s resolution and its pixel count determine how clear an IR image is. The bigger the numbers, the sharper the image. The images from my Extech i3 were pretty blurry. My Hikmicro Pocket2 has a resolution of 256×192 with 49,152 pixels, which is a huge improvement. A high-end camera might have a resolution of 640×960 and more than 300,000 total pixels.
There are several manufacturers selling thermal imaging cameras that work well for the construction trades. Flir (now Teledyne Flir) is the best known. Hikmicro is another popular brand. Seek and Fluke also make cameras suitable for the job site. All of the manufacturers I know offer software that you can use to manipulate images for better clarity and to create reports. IR cameras are informative, fun-to-use tools—and considering their steady reduction in cost and increase in performance, I think every conscientious builder should have one.
3 Camera Categories
Smartphone AttachmentBest for DIYers and occasional use, the smallest and least costly IR camera option is a thermal imaging attachment for a smartphone. These tiny devices plug into the charging port of the phone, so you need an Android- or iPhone-compatible plug-in to match your phone. Prices start around $200 and climb to $400, with more expensive versions offering better resolution. |
|
Point and ShootA dedicated thermal imaging camera runs between $500 to $1000. These types of cameras have better image quality and more standard features than the smartphone attachments. These sturdy cameras are meant for the typical work of energy auditors, building professionals, and maintenance personnel who need IR imaging for building diagnostics, repair, and maintenance. |
|
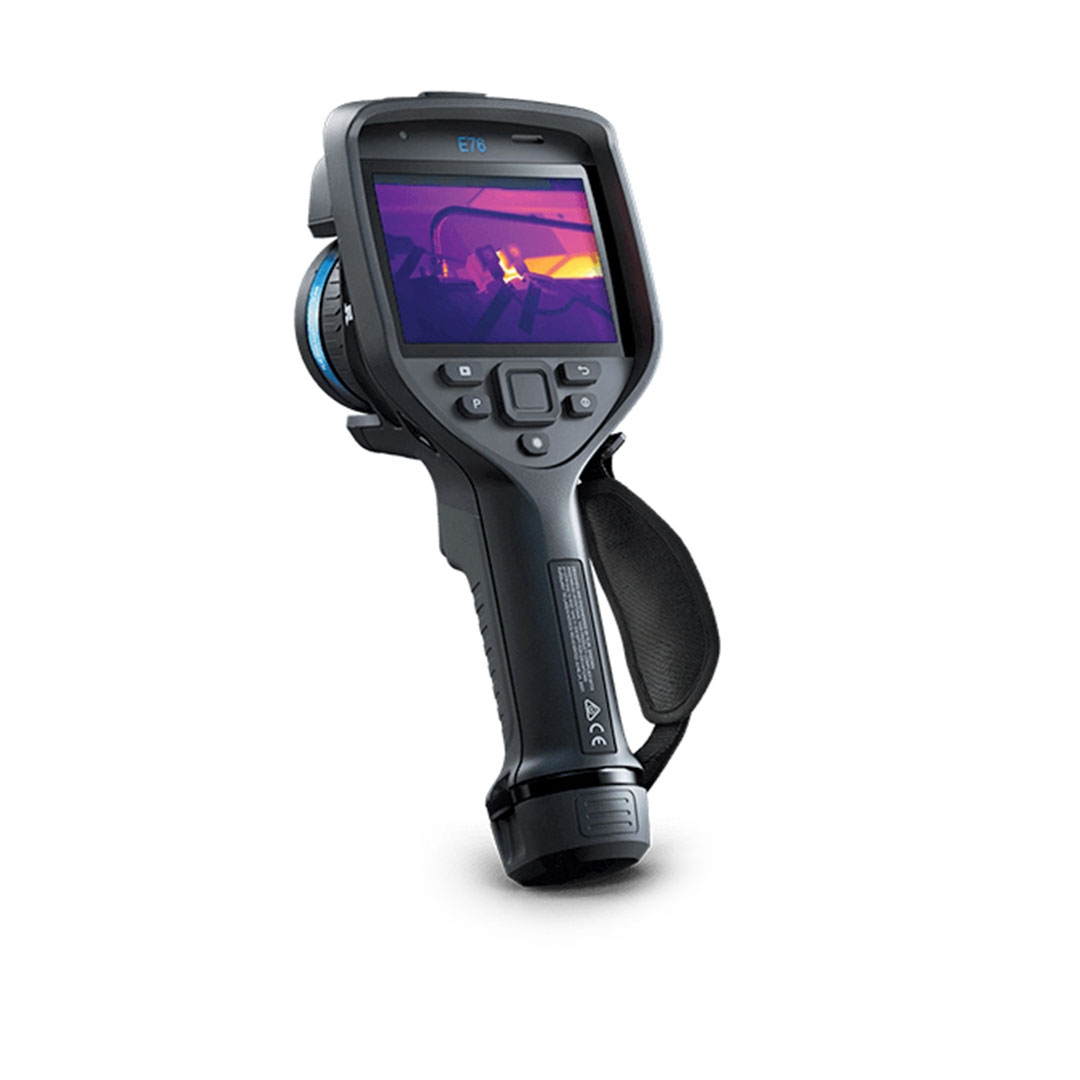
Pistol GripEntry-level pistol grip cameras cost about the same as point-and-shoot models ($500 to $1000) and have similar resolution and features, but in an arrangement that you can aim and operate easily with one hand. More expensive ($1000 or more) versions have better image quality and can more accurately measure smaller differences in temperature for industrial maintenance and advanced building diagnostics. |
|
| Photos courtesy of the manufacturers. |


Interpret the Image
Information about a thermal image is shown on the camera’s LCD display. What’s displayed and how the information is presented varies by manufacturer, but typically includes high, low, and center-of-screen temperature measurements, emissivity and camera settings, and a color-coded temperature scale.

Understand What You’re Seeing
Effectively using IR photography requires correctly interpreting the image. Mistakes can happen because of shiny materials, solar gain, and misdiagnosing whether a material or assembly is cold or wet. Here are the main camera settings to adjust and considerations to make when collecting thermal images.
Emissivity
Emissivity is a measure of how efficiently an object radiates heat. Shiny materials reflect heat and have low emissivity whereas dark-colored materials absorb heat and have a high rate of emissivity. Objects with different emissivity values may appear differently in thermal images, even if they are at the same temperature. Matching the emissivity of the material being photographed to the camera’s emissivity settings will make the temperatures in the image more accurate. Emissivity settings can be adjusted in the camera settings, and there are charts online with emissivity values of common building materials.
Be aware that a thermal image taken of shiny metal, mirrors, or glass will reflect the infrared radiation away from the camera, creating bright spots and inaccurate temperature readings in the image. If you need to accurately know the temperature of shiny surface, placing a black piece of tape on the object being measured will help.

Level and Span
Level and span settings allow you to adjust the temperature range seen in the thermal image. Keeping the level setting—the temperature that represents the midpoint of the range—the same and narrowing the difference between the highest and lowest temperatures—the span—can help to clarify what you are seeing in an image. Adjustments can be made in the camera settings before the photo is taken, or after in the camera manufacturer’s photo-editing and reporting software, as was the case with this image. By narrowing the temperature span (as indicated by the colored bar on the right side of the images), we can more easily see hot and cold spots in this home.
Palette
Palette settings adjust the image color before the camera has taken the picture or after in the reporting software. Manufacturers call color settings by different names; the options seen here are found on Teledyne Flir cameras. Changing palette settings may make thermal images easier to understand for clients, who can easily equate red with warm and blue with cold.
Display
Picture-in-picture mode
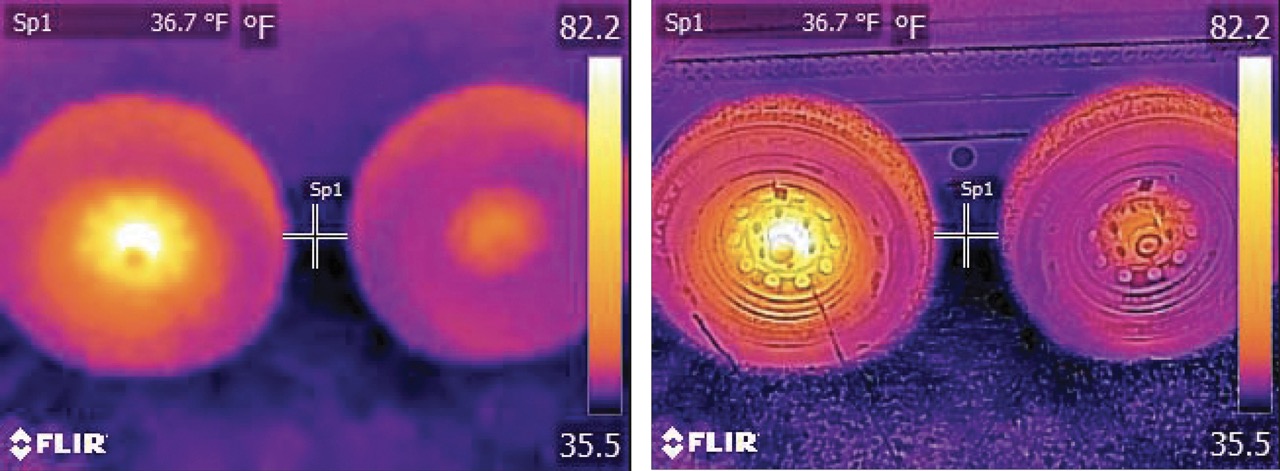
Picture-in-picture display can provide context for building problems by showing IR images within a larger photographed image. In this example from Hikmicro, the thermal image is centered with the digital image surrounding.
An overlay feature, which may go by a different name depending on the manufacturer, also makes thermal images easier to understand by showing greater detail than the thermal image alone. It’s hard to tell if the top image is a hot donut or a truck tire, but it becomes much clearer with the digital overlay shown below it.
Gathering Thermal Images
Anticipate What You Should See
When you use your camera to look for or diagnose building problems, have an expectation as to what you think the thermal image should look like before taking the picture. As an example, if the temperatures are cold outside and warm inside, an air leak should look like the image on the right. Cold air from a blower door test is being sucked into the heated home. Blower-door testing an air-conditioned home in warm weather should look like the photo on the left. In this case, warm air is being sucked into the house. If you see something you didn’t expect, investigate as to why. You may be seeing wetness, or air being pulled from a neighboring dwelling unit that’s hotter or colder than the one you’re examining.

Make a Matched Set
Even with digital overlay or picture-in-picture options to clarify IR images, it’s always helpful to make a matched set of IR and regular photographs for the most complete reports and contract documents. More-expensive IR cameras can take conventional high-resolution photographs and IR images at the same time, but it’s not difficult to make similar documentation with an inexpensive IR camera and your smartphone or a conventional digital camera.

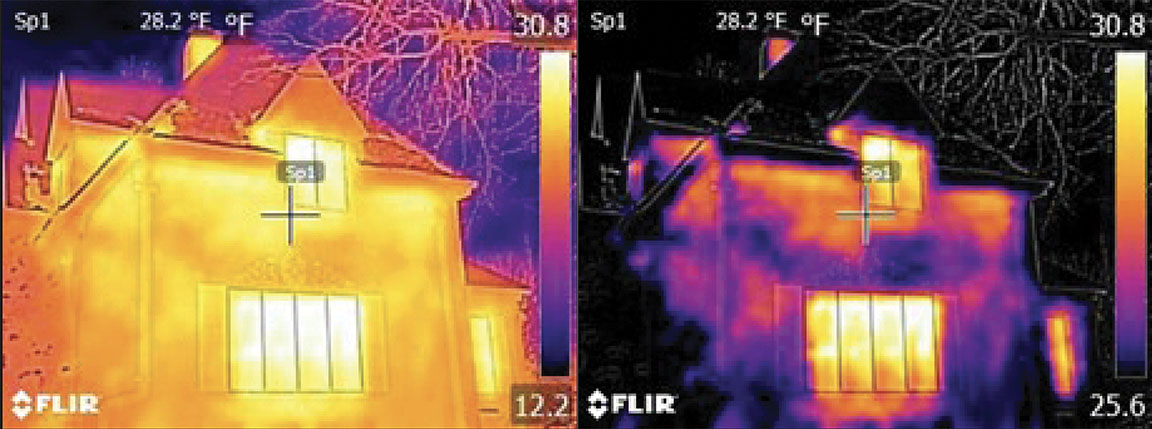
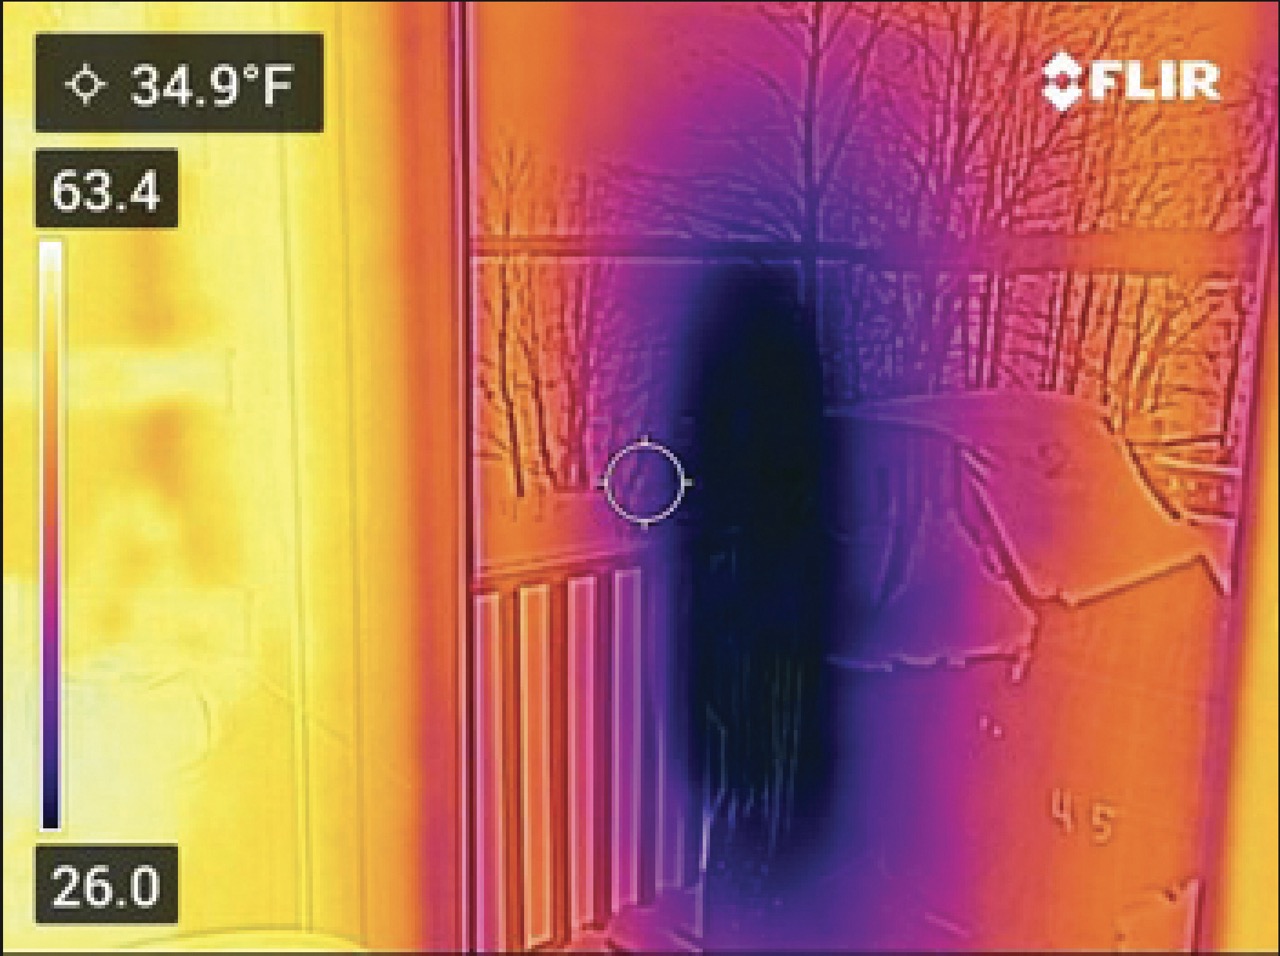
Consider Solar Gain
It is important to understand how the sun shining on surfaces can affect an image. This exterior photo was taken with outdoor temperatures at –10°F. The left side of the home is shaded with the right side in full sun. You can see how the siding is being warmed by the sun. You can also see how the shadows from the trees lower the siding temperature in spots. If this home is poorly insulated, we may see t0emperature variations on exterior walls inside the house because of what’s happening on the outside.

Diagnose Problems
Once you’re proficient with an IR camera’s controls and understand the images it produces, you can use it to see air and water leaks, locate pipes and framing, and spot missing or ineffective insulation.
Spot Thermal Deficiencies
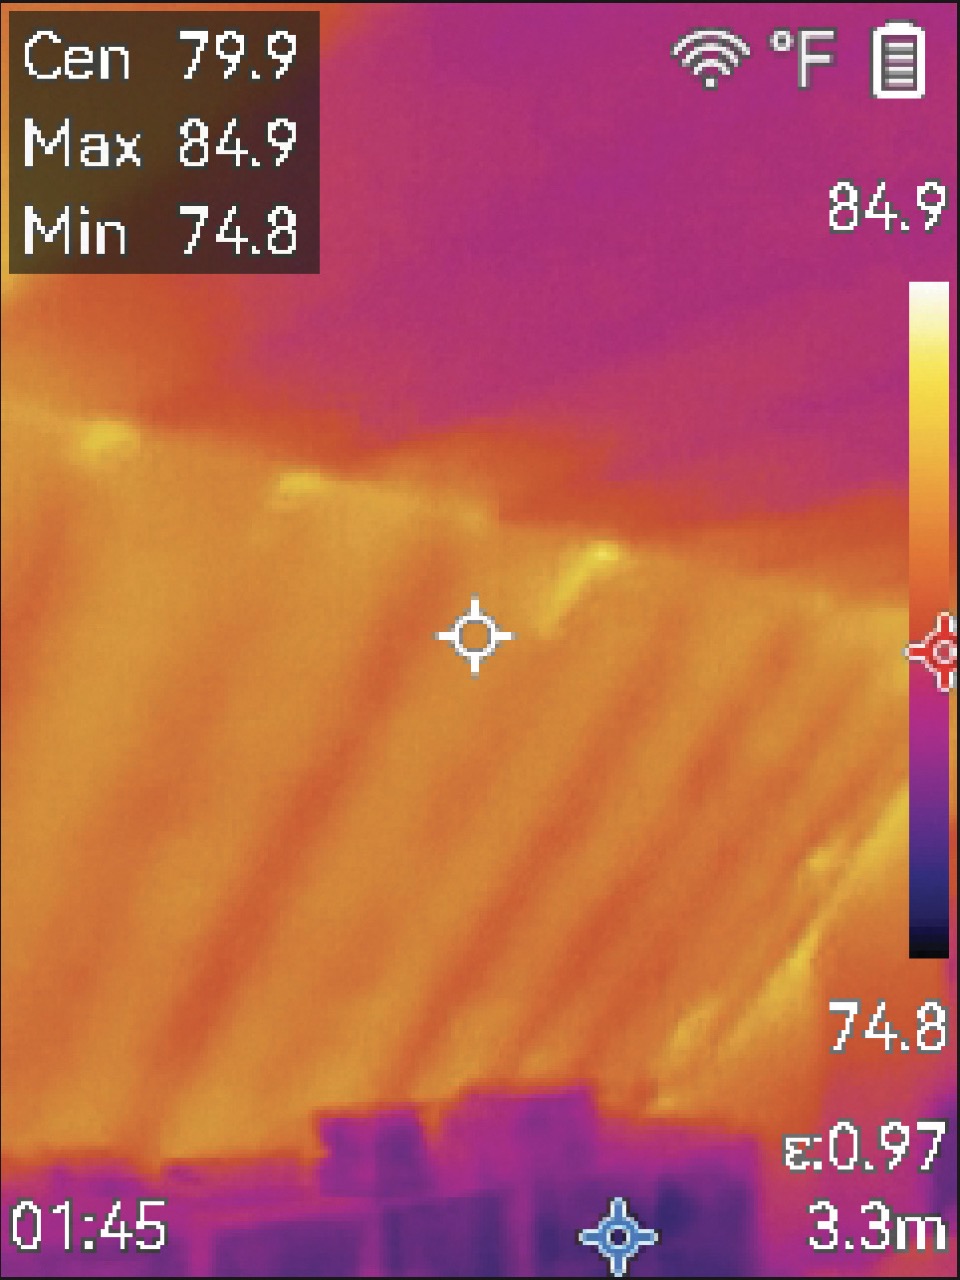
Thermal Stratification
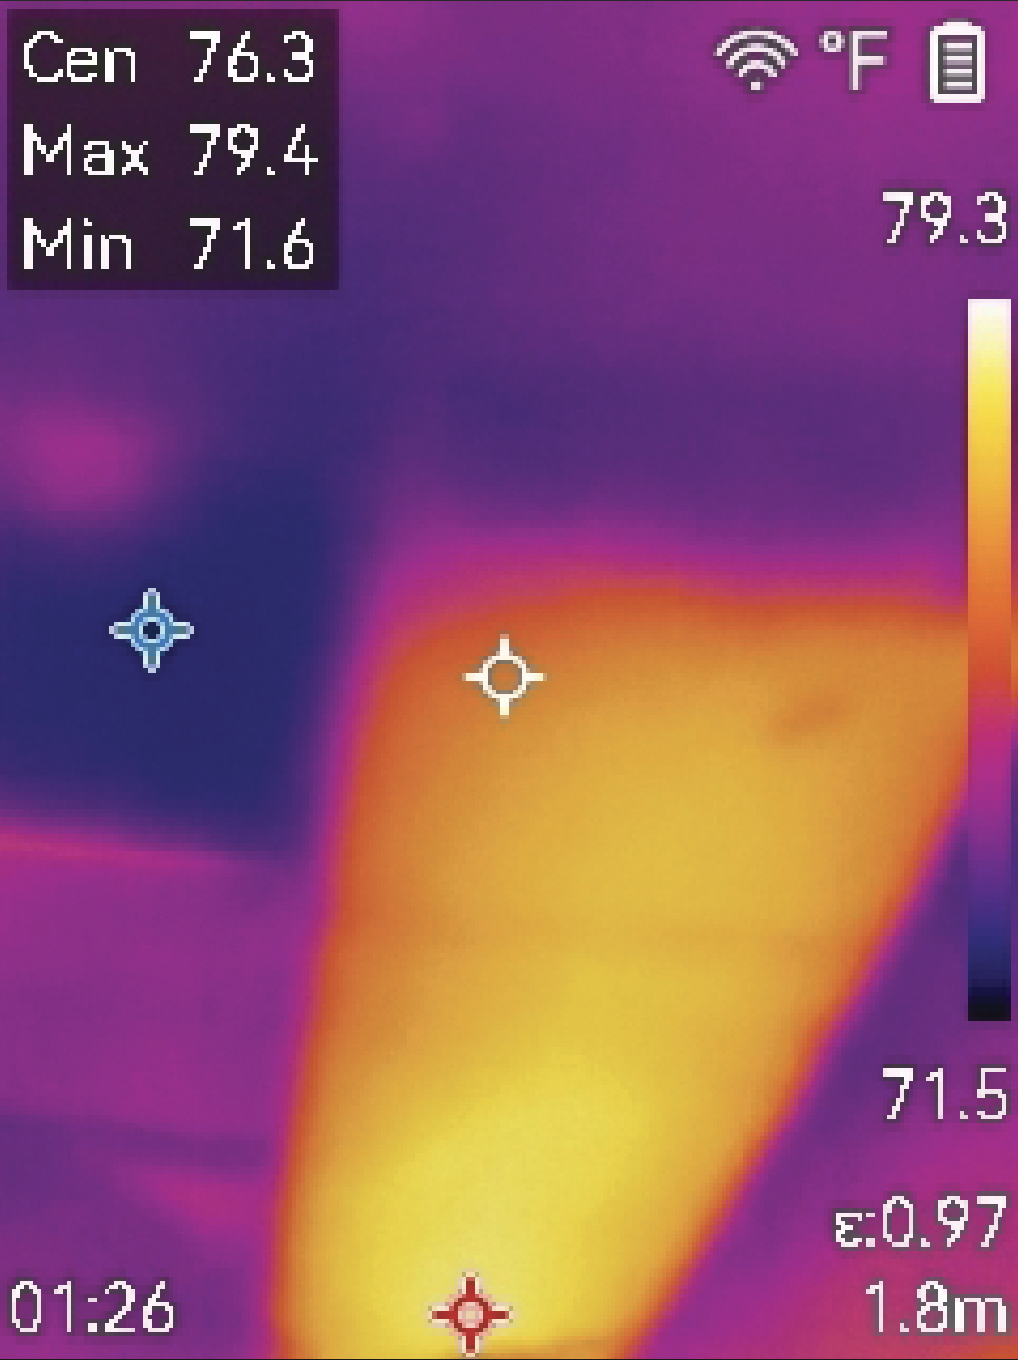
Thermal stratification is a phenomenon I see on occasion. This appears as a distinct line showing where warm air has risen in a structure and cold air has settled. What appears as stratification could also indicate a change in the R-value of the assembly, where more conductive materials, like concrete or steel, show up as hotter or colder than the surrounding area. But sometimes, what looks like stratification can actually be missing insulation.

Missing batt or wind-washed loose-fill insulation will appear significantly colder or hotter than the surrounding area. In IR images, missing insulation has sharper edges than air and water leaks and often takes the shape of a framing cavity.
Track Down Moisture
Water Leaks
Infrared images don’t detect moisture, but instead they pick up on the colder temperature that results from evaporation. Wet surfaces will appear colder than the surrounding area. Small flashing and enclosure leaks are easier to spot when surface temperatures are higher, from artificial heat sources or from solar gain.

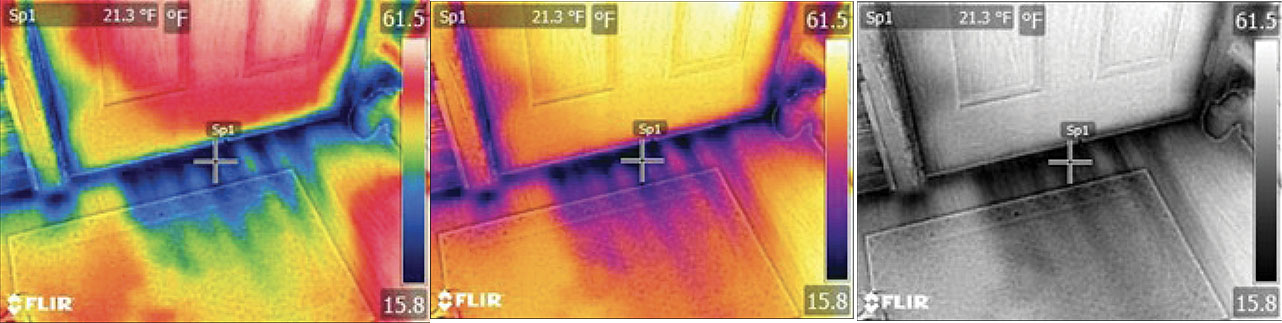
Cold vs. Wet
Sometimes it can be hard to differentiate between a cold surface—perhaps because of missing insulation, air leaks, or thermal bridging—and a wet surface. These photos show two different thermal conditions. The two square areas on the right are drying drywall patches. The rest of the purple areas are from cold air moving into the wall cavities from the vented, unconditioned attic above. This photo was taken during a blower-door test. When I suspect something is wet, I use a moisture meter to confirm.

Identify Air Leaks
| Bypasses
This image shows a significant air leak during blower-door testing. You can see how the incoming exterior air moves through the ceiling. IR cameras are a big help in blower-door-directed air-sealing, but you can learn a lot without a blower door if there’s a big difference between indoor and outdoor temperatures. |
Around Penetrations
If you’ve ever wondered why it’s hard to keep your hotel room comfortable, this image is a good demonstration. It shows the air leaks around a packaged terminal air conditioner (PTAC), the kind of system favored by affordable hotel chains because they’re inexpensive and offer individual control. |
| In Assemblies
Efficiency experts and home-performance experts and enthusiasts often talk about the energy hit associated with conventional recessed light fixtures like this one. The air leaks add to both heating and cooling loads and are often a source of drafts that lead to comfort complaints. |
Failed Glazing
Dual- and triple-pane glass used for windows and doors is often filled with argon gas. If the gas escapes through a failed seal, the center of the glass will show up as a cold or hot spot. But make sure the image isn’t showing a reflection on the glass from inside the room. |


Locate High Electrical Loads
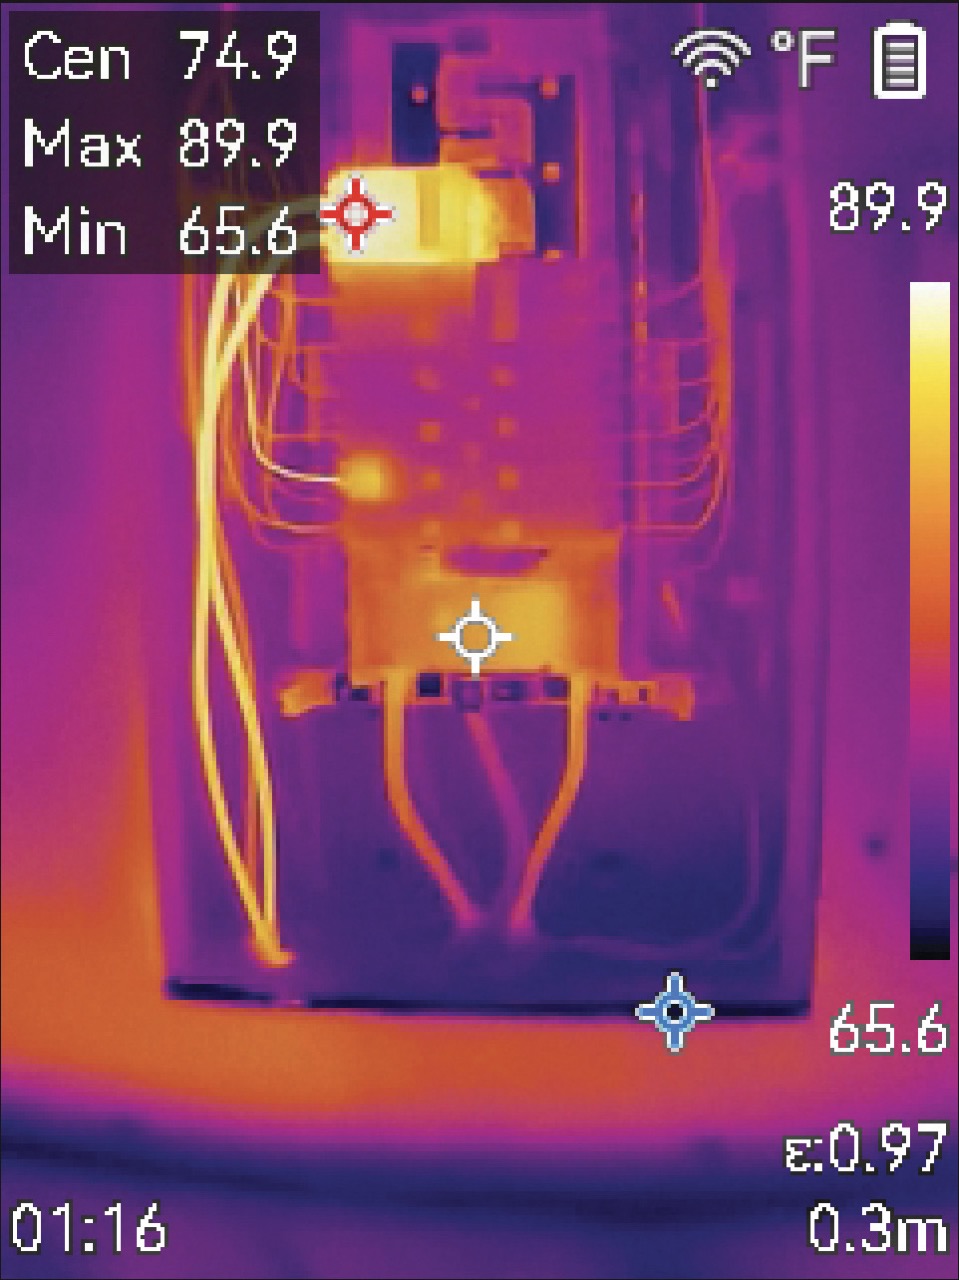
Electrical Usage
Part of my job is working with homeowners who have high electricity consumption complaints. Warm breakers or wires inside an electrical panel are tell-tale sign of circuits that use a lot of electricity. I’ll use thermal imaging to quickly identify breakers or wires that have been drawing larger amounts of current.
Find Hidden Elements
Framing
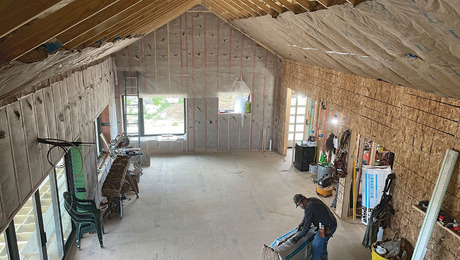
With typical insulation levels and 10° or more of Delta T you can see the framing behind exterior walls, ceilings, and floor finishes. Framing separating conditioned living spaces can be harder to see; exterior framing with unusually thick insulation layers may slow thermal bridging enough to make wood-frame components very difficult to spot.
Working on radiant floors and (less commonly) radiant ceilings risks damaging hydronic or electric elements and expensive and difficult repair, but IR images will make radiant pipes and wires glow with intensity for easy locating for remodeling or looking for leaks and hot and cold spots.

— Randy Williams is a builder and energy auditor in Grand Rapids, Minn. Photos by the author, except where noted.
RELATED STORIES
- Diagnostic Tools for Energy-Minded Remodelers
- Detect Leaks With This Compact Thermal Imager
- A Tale of Two Energy Audits
- Infrared Cameras for Building Science and Home Performance
This post contains affiliate links, which means Fine Homebuilding may receive a small commission, at no cost to you, if you make a purchase through a link. As an Amazon Associate we earn from qualifying purchases.
Fine Homebuilding Recommended Products
Fine Homebuilding receives a commission for items purchased through links on this site, including Amazon Associates and other affiliate advertising programs.
Festool Cordless Track Saw (TSC 55 KeB-F)

Large-Capacity Lightweight Miter Saw

Milwaukee M18 Fuel 18v Cordless Circular Saw (2730-22)


View Comments
Showing real picture along IR for all pictures would be good.