Deck Details for Durability
Freestanding with boxed stairs, this small deck is full of ideas for a long-lasting entry that will look great for years to come.
In this article, Mike Guertin designs a small, freestanding deck with a focus on longevity and functionality. The project features wraparound stairs framed with boxes instead of stringers. Guertin opts for a freestanding structure without a ledger to avoid the complications of attaching to the house, such as insulation issues and the need for complex inspections.
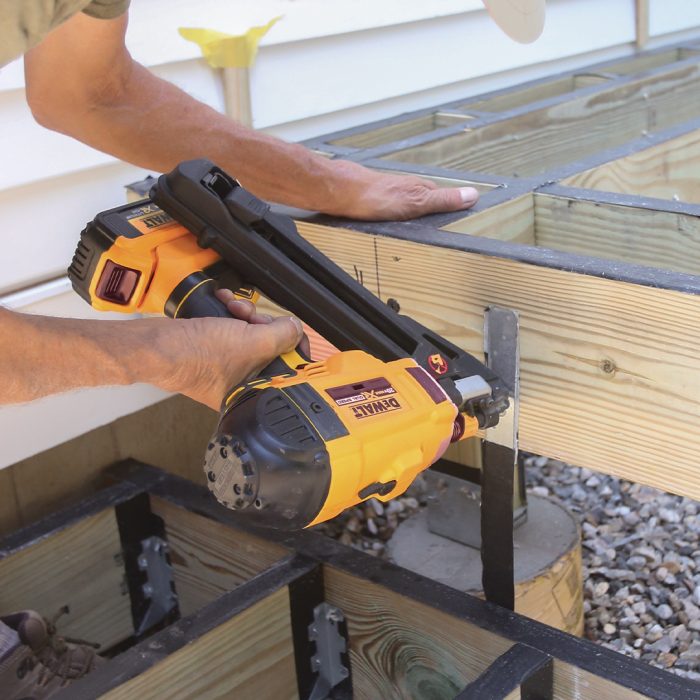
The deck’s framing includes thoughtful details, such as proper planning for decking dimensions, drainage, and additional support for a picture-framed border. For durability, the framing is treated with copper naphthenate and sealed with flashing tape to prevent water damage and galvanic corrosion.
Small Structure, Big Project
The part I like best about building a deck is that it’s like building a house but on a smaller scale—it involves design, foundation, framing, finishes, landscaping, and more. So I get to use all my skills, even on a small deck like this one. And I get the satisfaction of a completed project in a few days.
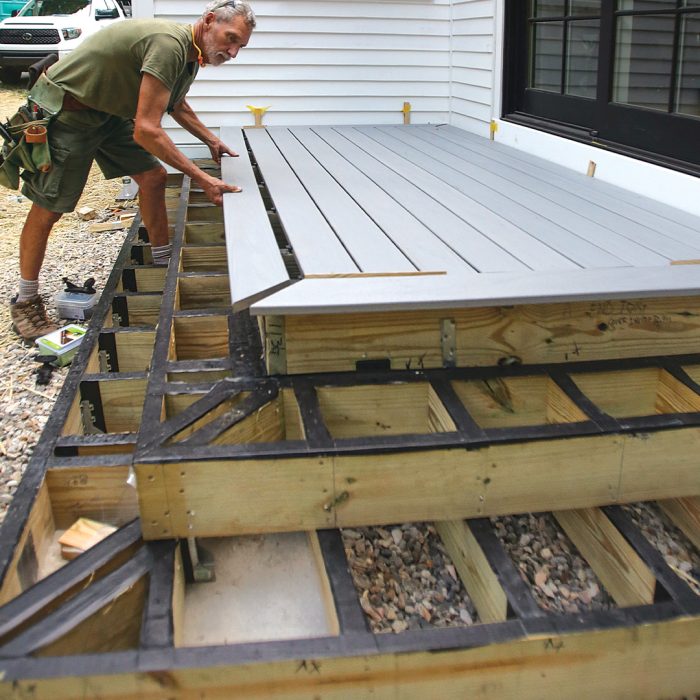
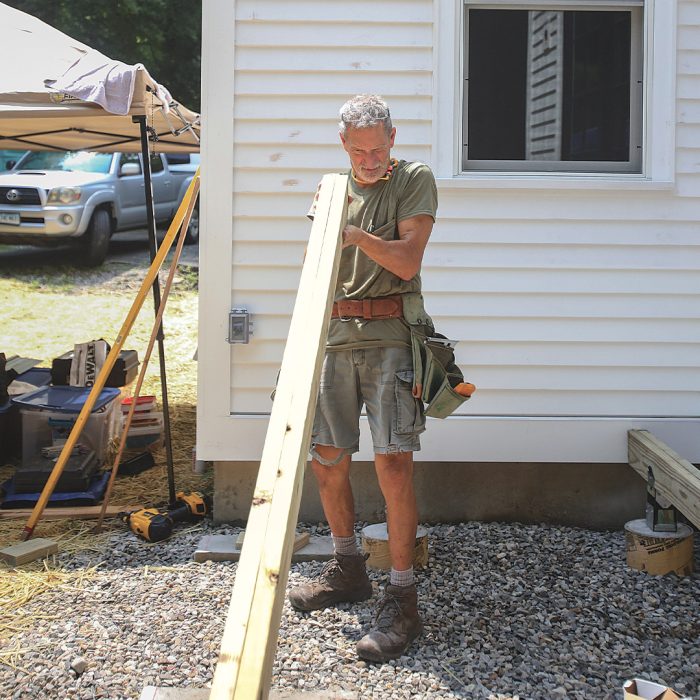
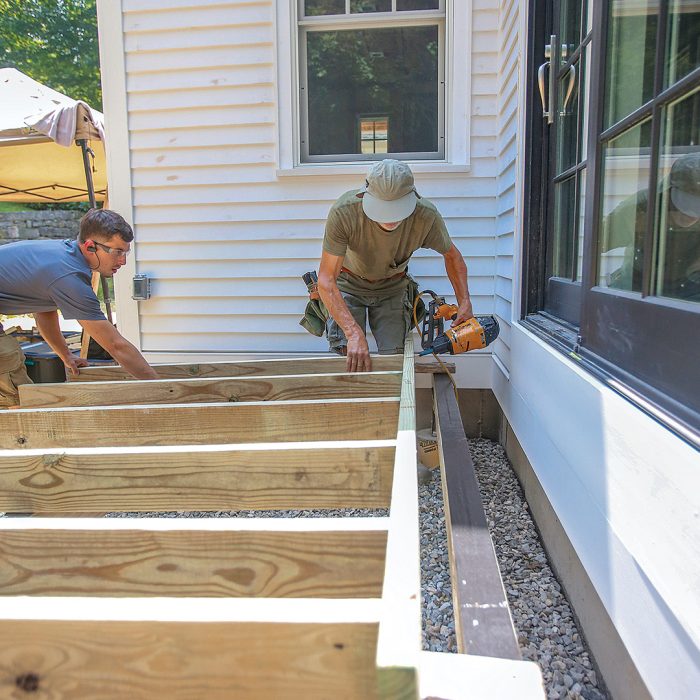
This deck is an entry landing nested into a corner intersection of two backyard-facing walls. Including the stairs, the deck’s footprint is 11 ft. by 7 ft. Though the footprint is small in comparison to that of most decks I build, this deck involved the same design process and durable building details found on a larger deck.
A good deck design is informed by the house, site conditions, elevation above grade, finish decking and trim choices, landscaping plan, and owners’ preferences. The landscaping plan on this project was important to the deck design. The backyard plan called for a paver patio about 30 in. below the inside floor level. Since the deck would be a focal point and serve as the connection between the patio and the house, the design and finish details had to complement both.
The stairs from the deck to the patio take on significant importance visually and functionally, so it seemed natural to use wraparound stairs, or “stadium stairs.” These stairs eliminate the need for a guardrail that would be a visual barrier between the patio and the house.
Design Tip: Sizing the Deck to the Decking
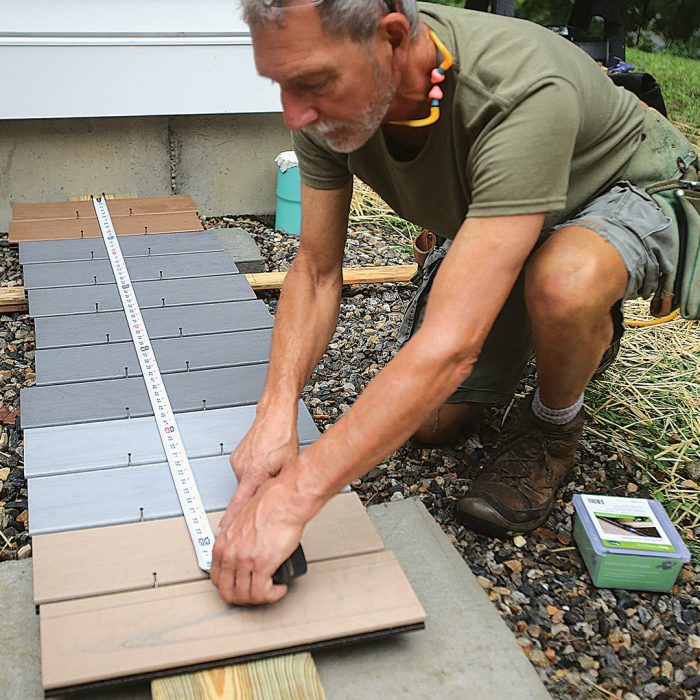
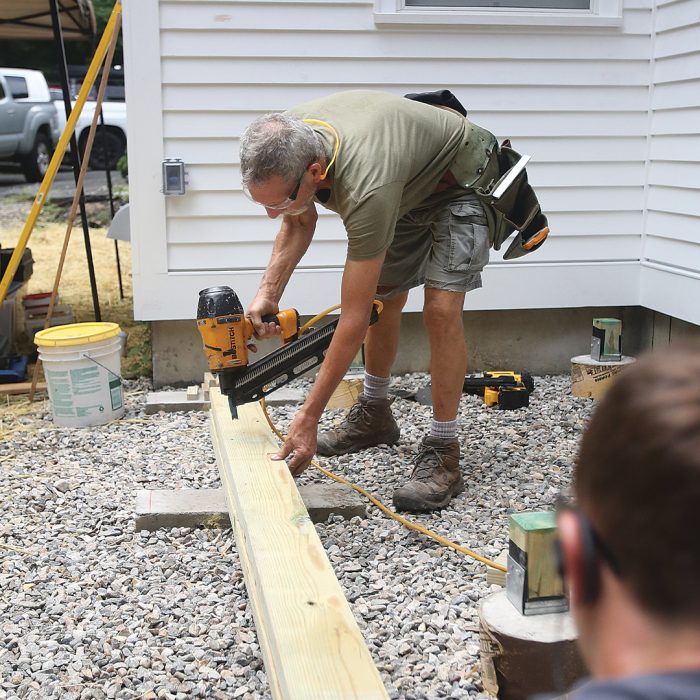
When possible, I like to size a deck to use full-width deck boards at the house and the edge of the deck. To make sure that measurement was precise on this deck, I racked up decking samples spaced with the fasteners I would be using to determine the deck’s depth. To get to the final dimensions for the framing, I also factored in the nosing overhang at the edge of the deck, as well as air spaces between the house and the deck frame and between the framing and the fascia. I also used this exercise to plan the stair framing by measuring two spaced deck boards, which I used for treads, plus an additional air space between tread and riser board. The air spaces are crucial for water to be able to drain and can be adjusted a little narrower or wider so that the decking overhang is equal around the deck and the stairs. |
No Ledger, and Shallow Footings
There’s another twist on this deck project—I built it freestanding, which means that it is not attached to the house with a ledger, as most decks are. On houses with conditions that make attaching a ledger challenging and may require special engineering, a freestanding deck makes a lot of sense.
These may include balloon-framed homes, homes built with ICFs or open-web floor trusses, or homes with cantilevered floors or other floors framed without structural rim boards. Freestanding decks also make sense on homes with exterior insulation, where installing a ledger deep in the wall assembly is tough and reduces the thermal efficiency of the wall. They also work well for decks at mid-wall level, where there is no rim joist for fastening a ledger.
In order to install a ledger to an existing house, you have to remove the siding and trim so that you can fasten and flash the ledger properly. And attaching a ledger triggers a visual inspection of the inside of the rim joist by the code official.
The inspector must verify the condition and suitability of the rim joist, check that the ledger fasteners penetrate the rim, and see that lateral load hardware is installed properly. The inspection isn’t a problem when the inside is accessible, as in an unfinished basement or crawlspace. When there is a finished ceiling, however, it may be necessary to cut holes for the inspection, which means patching the holes and repainting the ceiling.
A freestanding deck does require extra footings and an additional beam, but it avoids the hassles of adding a ledger and the risks of water leaking into the framing if the flashing is damaged or fails. The footing requirements for a freestanding deck in the International Residential Code (IRC) have some similarities and differences to the requirements for a ledger-attached deck.
The footings on both types of decks must be sized to support the live or snow load (whichever is greater) and the dead load of the materials used to construct the deck, and the footings have to be installed properly to transfer those loads to the earth below. The difference between the two types of decks is how deep the footings have to go.
When a deck is attached to a house, the deck footings must be protected from frost heaving in cold climates. This means the bottom of the footings must be below the local frost depth. Freestanding decks aren’t supported by the house, so footings only have to be 12 in. below undisturbed or properly compacted soil, even if a deck is adjacent to the house like this one. The earth at the bottom of an excavated hole must be flat, and loose soil from digging activities must be removed or compacted.
The size of a specific footing is based on the soil-bearing capacity and the surface area of the deck (the tributary area) that bears on the footing. Code tables can be used to accurately size a footing. This deck has four footings supporting the deck beams and four footings supporting the stairs.
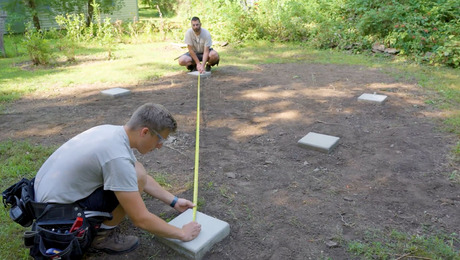
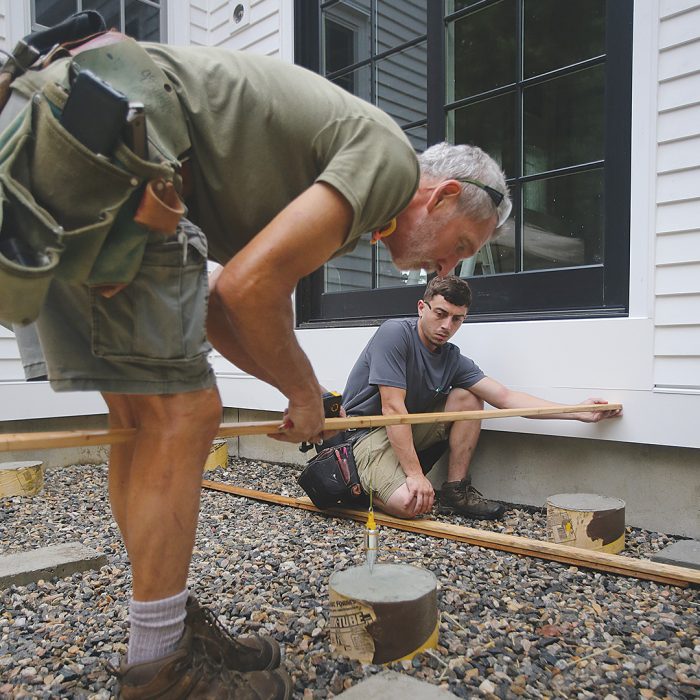
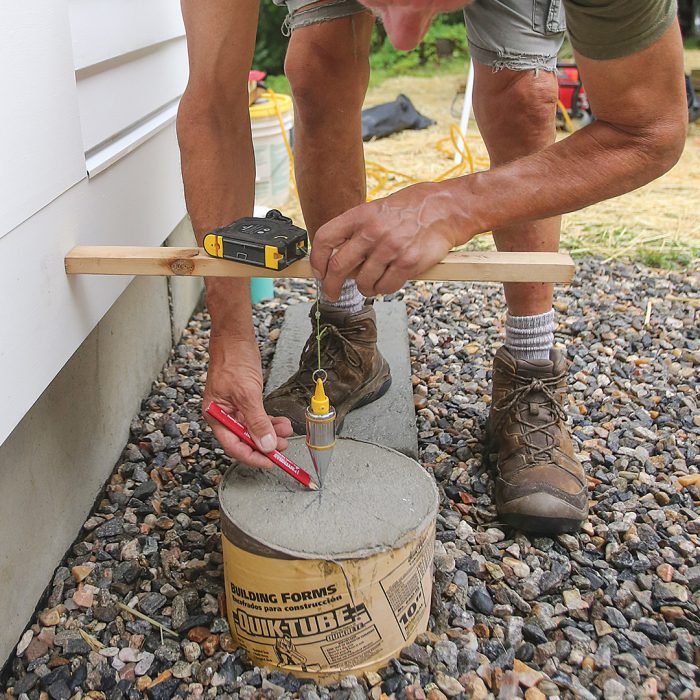
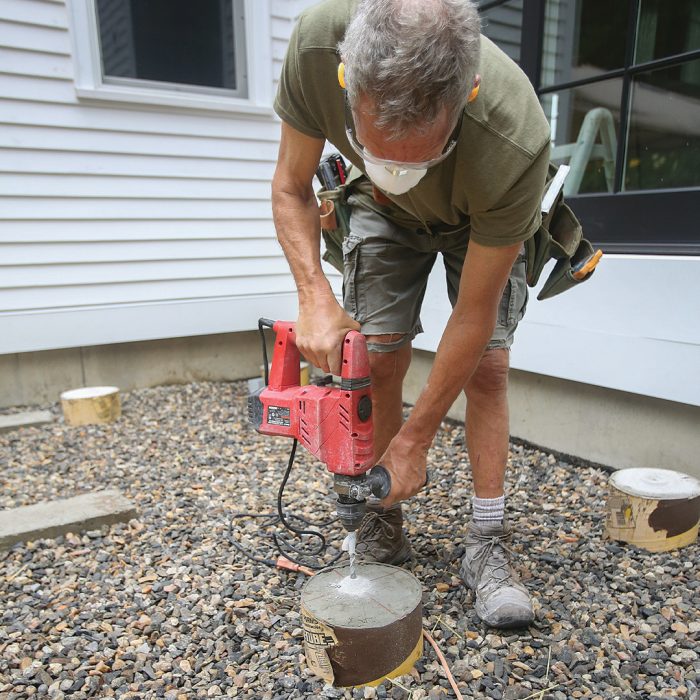
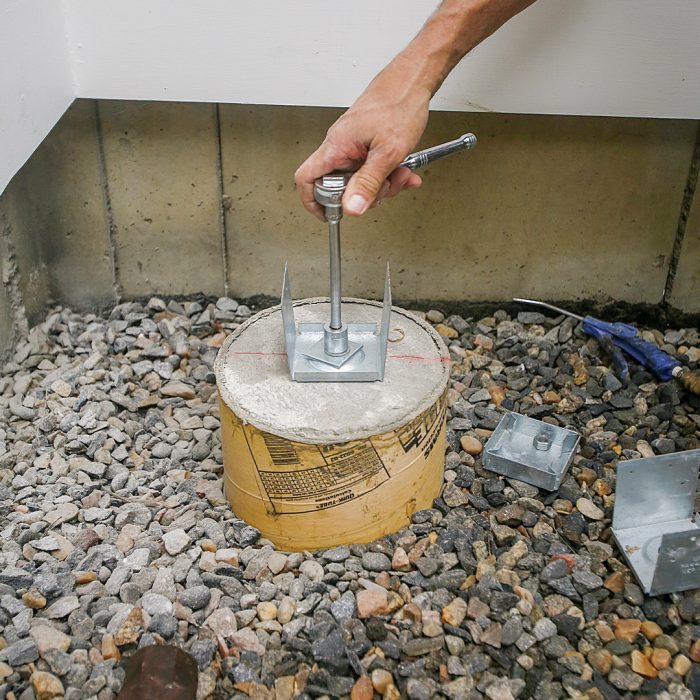
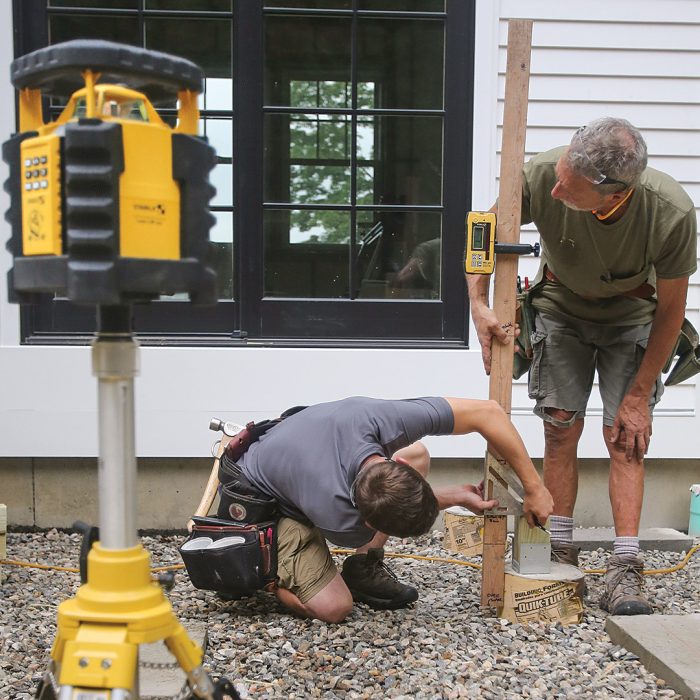
Precise Layout With Story PolesFor accurate post-base placement, I like to drill holes for anchors after the concrete footing has cured. A story pole is a handy layout tool for avoiding mistakes. Here, we used story poles to find the precise post-base locations and to locate the front edge of the wraparound stairs on both sides of the freestanding deck. Because the deck will be met with a paver patio, the stair footings could not extend beyond the stair framing and needed some trimming.
Simple Story Poles I use story poles to verify measurements taken from the plans and then hang a plumb bob from the story pole to mark for post-base anchors and the stair framing. Once I locate the stairs on each footing, we snap chalklines to mark their location across the length of all the footings.
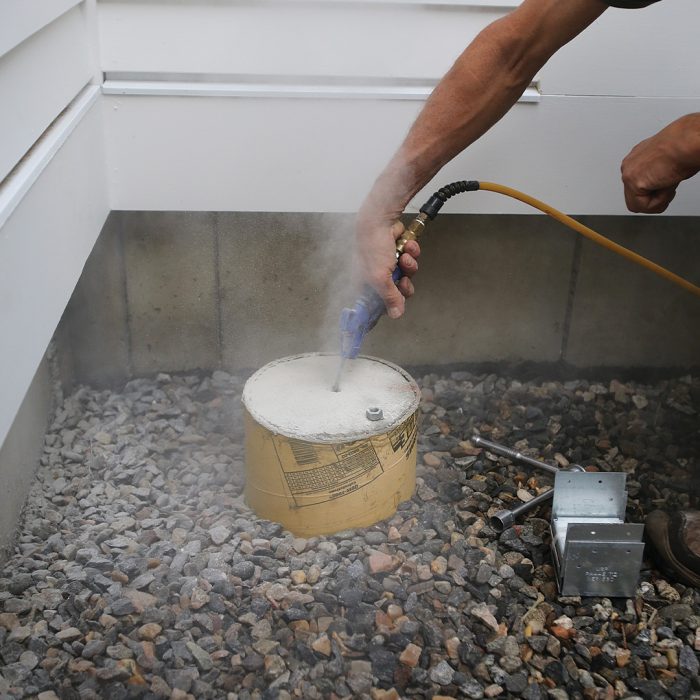
Blow It Out After drilling holes for the post-base anchors with a rotary hammer, I clear the dust from the hole with a blow gun attached to my compressor hose. Dust left in the hole can lead to the anchor slipping against the side of the hole and prevent it from seating deep enough in the hole.
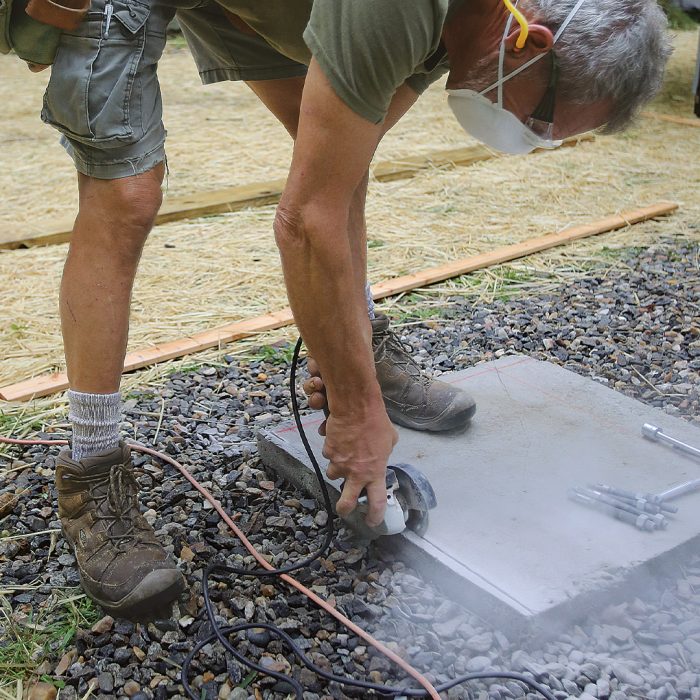
A Little Too Long After cutting a kerf with an angle grinder, I trim the stair footings back with a chisel in a rotary hammer so they will not extend beyond the stairs and interfere with the future patio-paver installation.
|

A Little Planning
I like to nail down all the details and dimensions on the plan so that we can move efficiently when we start building. It’s worth stressing a little over the details. Precise planning generates the materials list we’ll need for the lumber order and the cut lists we’ll need to break down the materials.
Part of my planning process is to design the deck-frame size with the deck boards in mind. I like to plan the finish dimensions of a deck so that I am able to use full-width boards along the house and at the outside edge, and I base measurements on stock lengths of the decking and trim boards for symmetry and to minimize waste.
The decking and trim (as well as the fasteners and the flashing tape) used here are all from Trex. (Trex sponsored a video of this project, which you can watch at FineHomebuilding.com.) To plan the deck-frame size, I borrowed sample pieces of the grooved decking from the distributor and ganged them together with the hidden fasteners to measure the precise overall dimension of the full boards for the roughly 5-ft. depth of the deck floor. (Eleven deck boards with 10 spaces between them totaled 62-1/2 in.).
With that information, I worked backward to determine the depth of the deck frame by subtracting the 3/4-in. decking overhangs (the maximum Trex allows), the 11/16-in. fascia-board thickness, and a 3/16-in. air space. The air space between the finish fascia and the framing is functional (it lets water drain and dry) and practical (it affords a little wiggle room in case the final decking installation runs shy or strong of the test measurement).
The 3/16-in. air space can be adjusted down to 1/8 in. or up to 3/8 in. so the decking overhangs match around the perimeter of the deck. This wiggle room also lets me shim the fascia straight in case the rim or end joists aren’t.
Also, long before heading to the job site, I use checklists to ensure I don’t forget any necessary tools and materials and to verify that the job site is ready for us to get started. For example, I should know if the top of the ground will be covered with weed blocking and whether it has been properly graded.
When a deck is close to the ground, we won’t have access to the earth beneath once the framing is done. So before framing we need to grade the slope away from the house to promote water drainage and then cover the surface to reduce the chance of weeds growing up between deck boards. The IRC requires that the grade slope a minimum of 6 in. in the first 10 ft. from the house.
Even though it will be dark beneath a grade-level deck, there will still be enough light through the gaps in the decking that weeds may emerge. Weed-blocking geotextile fabric can help alleviate the problem. A crushed-rock ballast placed on top of the weed blocking protects the fabric and keeps it in position.
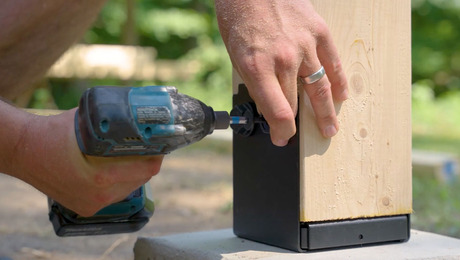
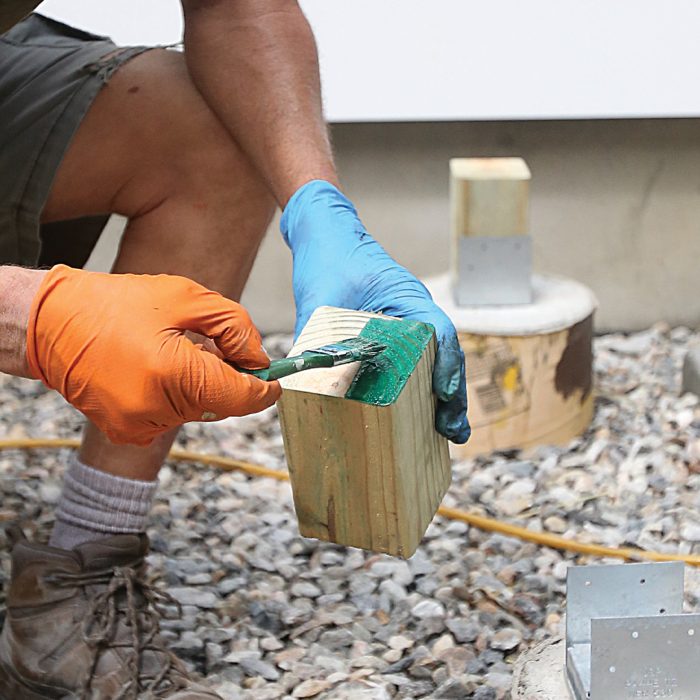
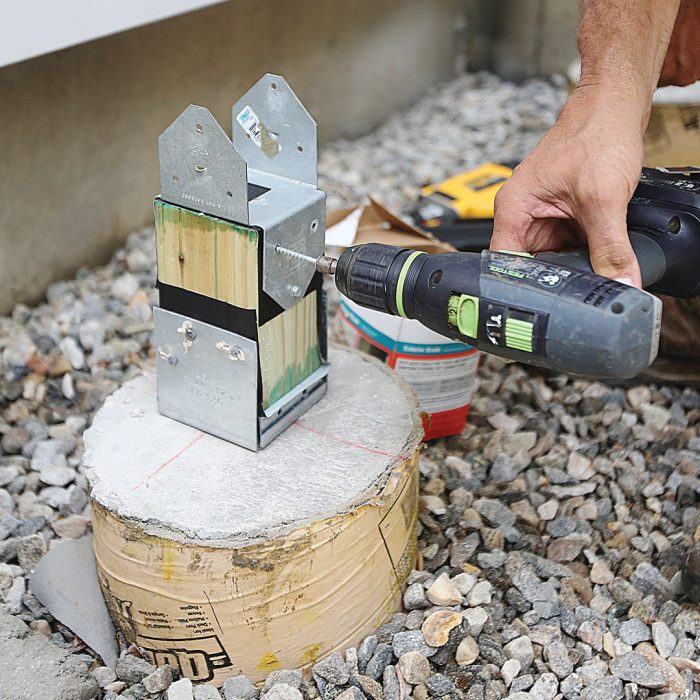
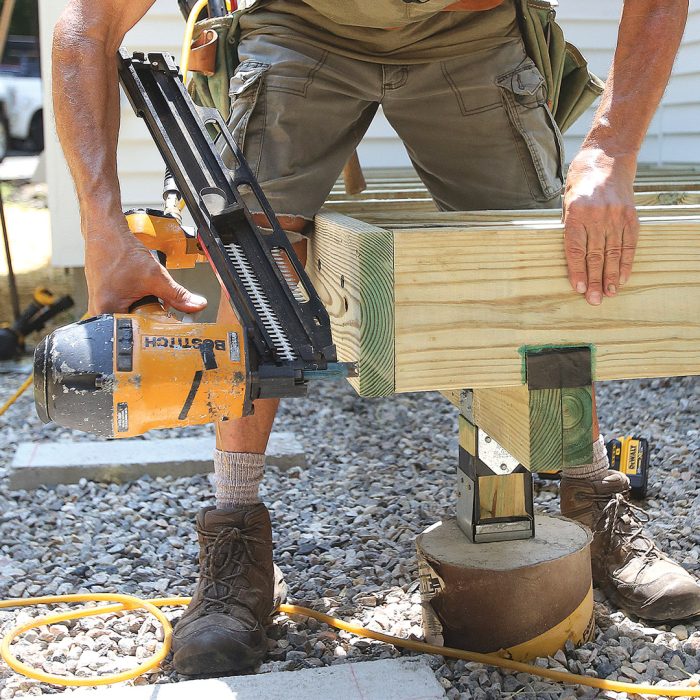
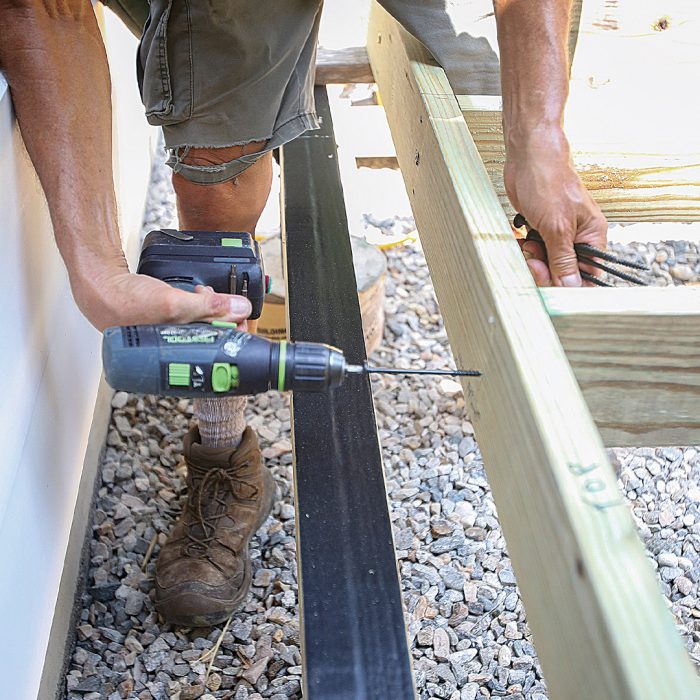
Small Posts, Big ProtectionThis low freestanding deck needed very short posts. I found their height with another story pole and made sure they would last as long as possible by treating the cut ends with copper naphthenate. To minimize galvanic corrosion, I isolated the hardware from the copper in the treated wood by applying flashing tape over the ends and on the sides wherever hardware contacted the posts. The Right Height After rough cutting all of the posts a bit longer than we need, we use a vertical story pole and a laser to mark the top of each post, which is also the elevation of the bottom of the beam. The laser receiver on the story pole registers the height, and we transfer the mark to the post with a framing square.
Coat the Cuts It’s not only best practice; the IRC requires cuts in pressure-treated lumber to be treated with copper naphthenate. I coat the cut ends of these posts until they won’t accept any more of the preservative.
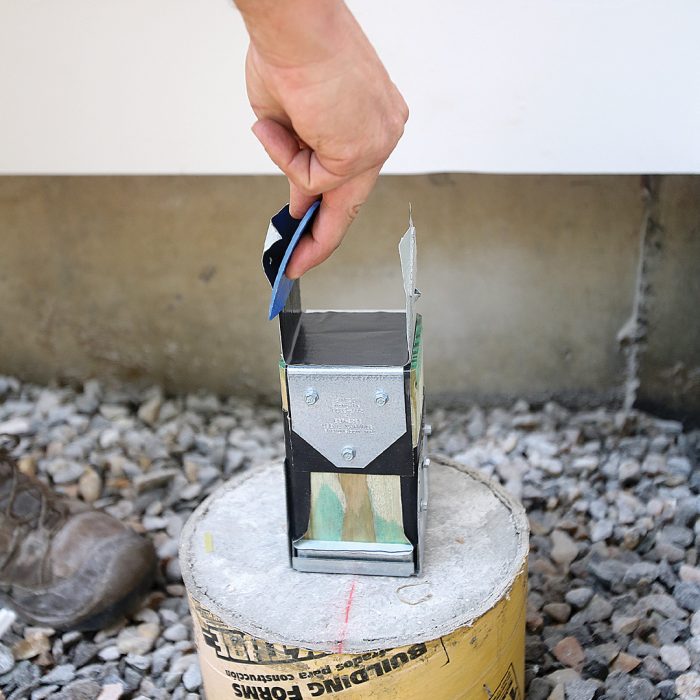
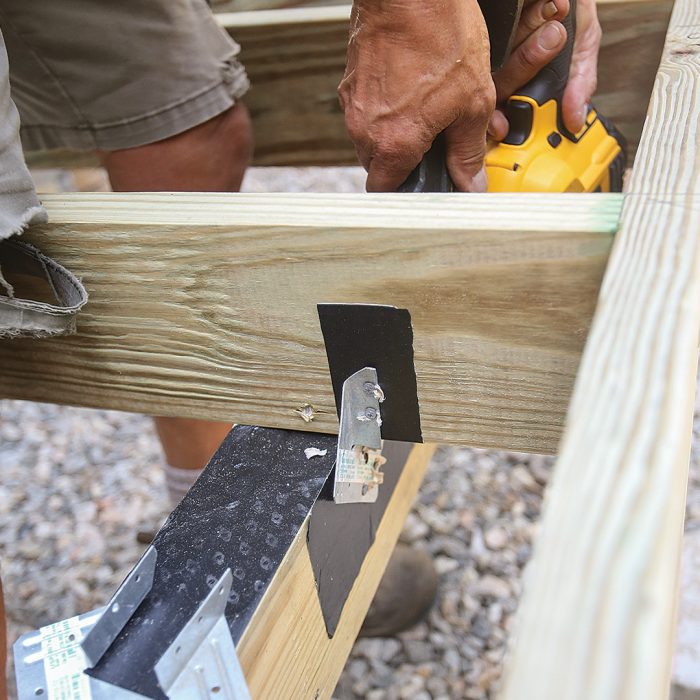
Isolation Station To protect post bases and post caps from galvanic corrosion, I wrap the post with flashing tape on the ends and on the sides where the hardware ears land.
Cap It Off In preparation for the beams, I screw the post caps onto the posts and wrap the inside of each cap with more flashing tape. I use this technique everywhere hardware meets the pressure-treated lumber.
|

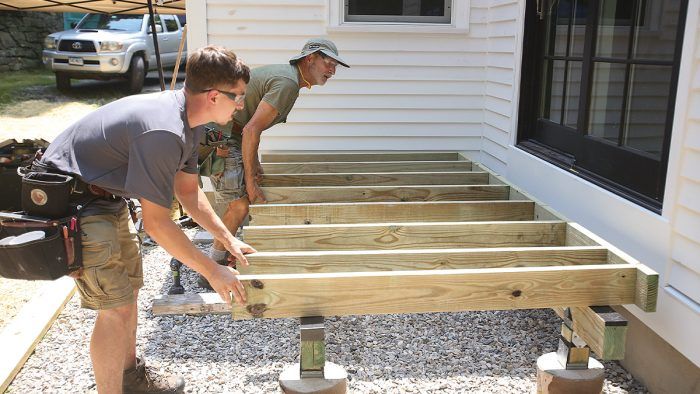
Dropped Beams, Cantilevered Joists
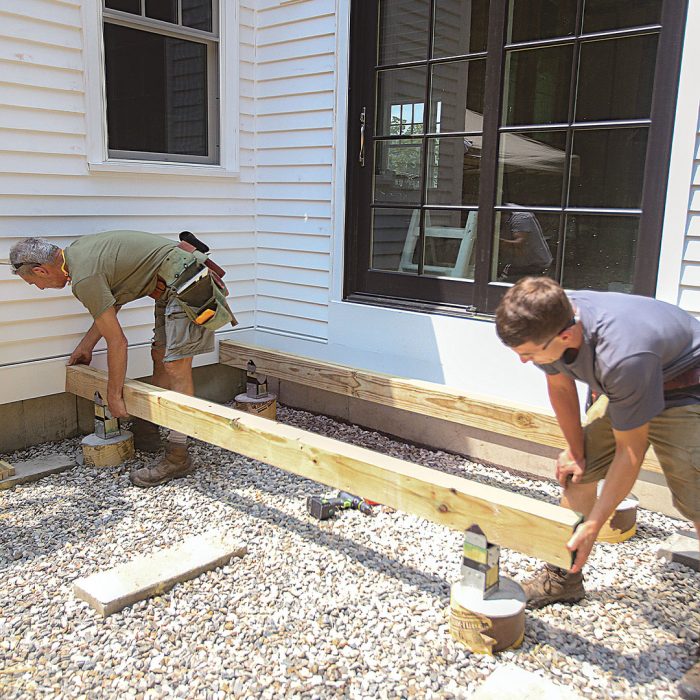
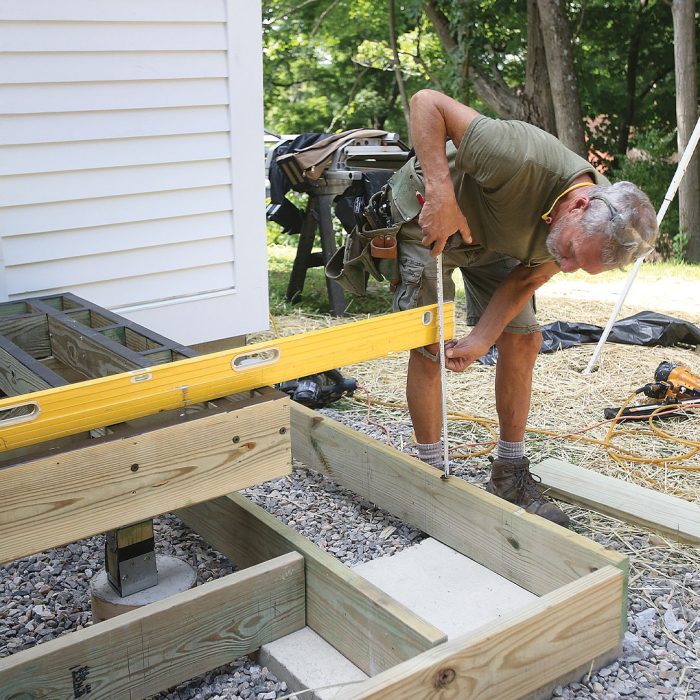
Decks can be framed with flush (rim) beams or with dropped beams where the joists cantilever over the beams. Since a freestanding deck will have a beam along the house side, a flush-beam frame would put the footings tight against the house foundation. I prefer to have the footings a foot or so away from the house, so a dropped-beam design made more sense for this deck.
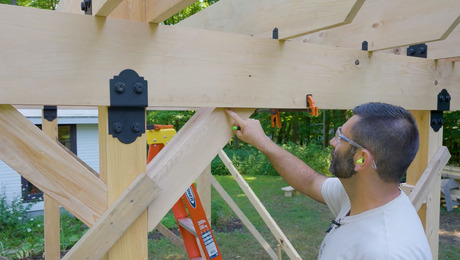
The two beams are positioned about 10 in. from the inside and outside edges of the deck. They are sized at close to the maximum span listed in the code table for double 2x8s. The distance between the two beams is spanned by 2×6 joists with cantilevers at both ends.
The joists are spaced 16 in. on-center—the maximum allowed for Trex decking run perpendicular to the joists. (When Trex decking is run diagonally, the max joist spacing is 12 in. on-center.) Always check your decking specs for proper joist spacing. I planned the outside rim joist and end joist on the sides that meet the stairs as 2x8s to give full-height backing to the stair risers for support and fastening.
With a freestanding deck, the inside rim joist is so close to the house that there would be no room to drive fasteners through the rim and into the joist ends if the frame were built in place. On a small deck, you can frame it on sawhorses and carry it into place. With a deck that is so large you can’t carry the whole floor frame to the beams, you can build the frame about a foot away from the wall and push it into place after you’re finished.
We chose that method here, setting a couple 2xs on the beams to hold the rim board as we worked. The frame was light enough for us to lift later to remove these supports. Some decks are simply too big for either of these methods, in which case the joists can be installed leaving a 2-in. space to the siding. Then the rim joist can be slipped into the space and toenailed or toe-screwed to the joists.
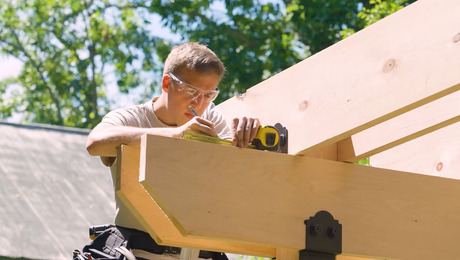
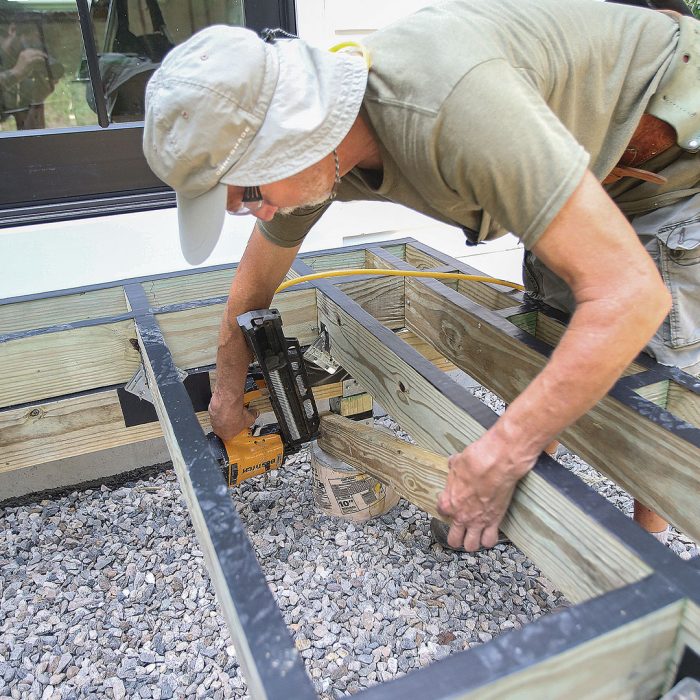
Bomb-Proof BeamsThese two-ply 2×8 beams may be about as simple as they get, but that doesn’t mean there aren’t important details to keep in mind. They’re going to support the deck floor, so we want them to be solid and to last. I followed code requirements and what I think are best practices for the beam assembly and installation.
|
Picture-Framing Border Board
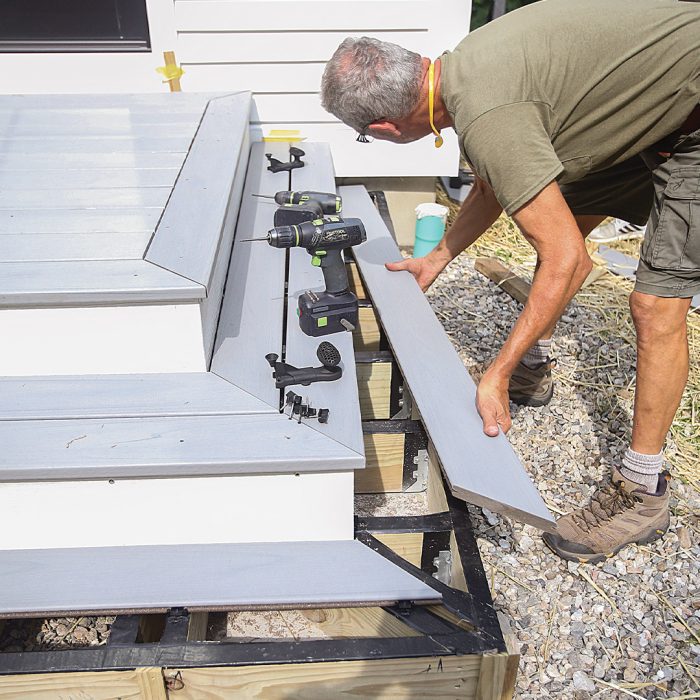
We picture-framed the deck with a border board using solid-edge deck boards for a finished look. Most of the decking is grooved for hidden fasteners; the border hides the exposed core material of the decking at the end of the field boards and the hidden fastener groove of the next-to-last board along the front. On this small landing deck, we’re using a single border board; if the deck were larger, though, we might have chosen a double border board that would match the double-deck-board treads on the stairs.
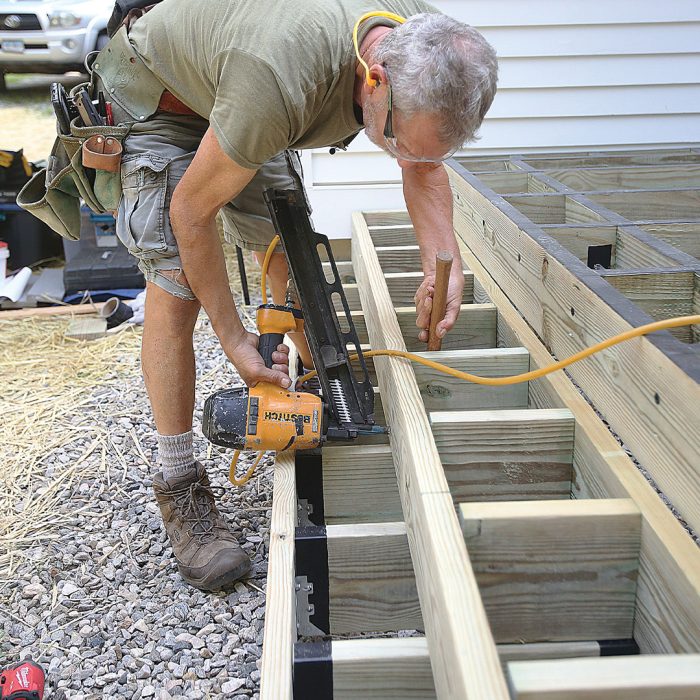
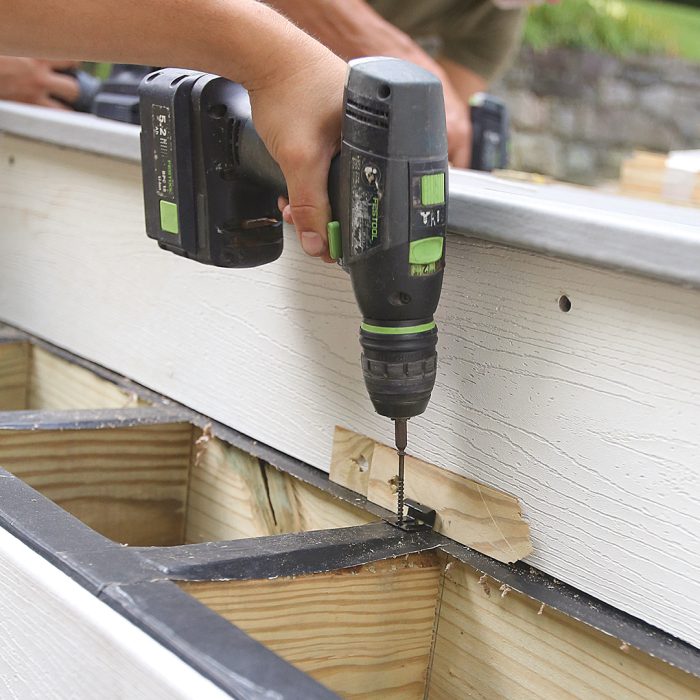
Freestanding Floor FrameFor this small deck, 2×6 joists were able to span the space between the beams and cantilever enough to give us the overall dimension we wanted. For the outside rim board and the end joist at the stairs I used 2x8s, because the riser height is greater than 5½ in. and I wanted solid backing behind the riser boards. We took extra steps to give the frame strength and durability and added blocking where required by code and necessary for the design.
|
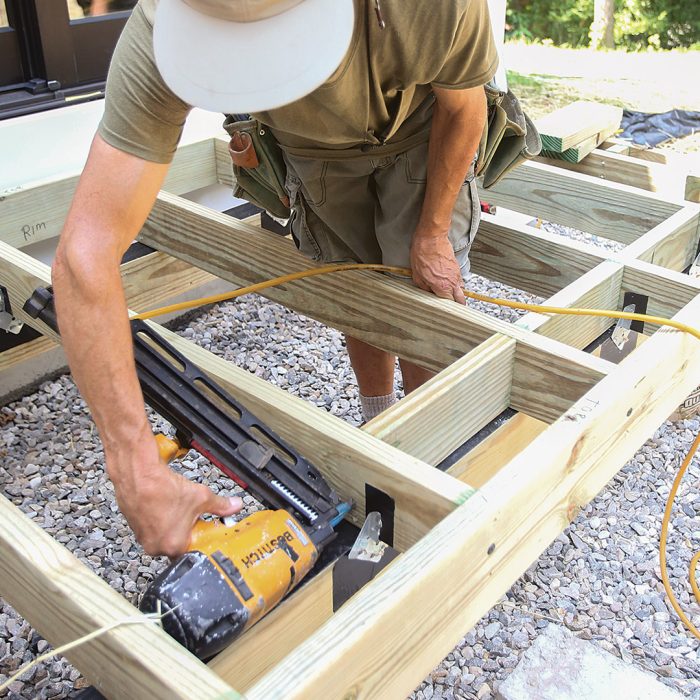

Because border boards run parallel to the joists at the ends of the deck, they need extra framing to support their inside edge. There are a few ways to provide this, but some methods, such as adding an extra joist beneath the space between the border board and the decking ends, or running a flat 2x alongside the end joists, block the gaps between the deck boards. Blocking end gaps and spaces between border boards can result in debris collecting and create a maintenance headache.
I prefer to install extra joists positioned about ½ in. to the inside of the ends of field boards and then install perpendicular blocking at 12 in. to 16 in. on-center between the outside joist and the extra joists. Framing this way provides support for the ends of the field deck boards and border boards while leaving the gap between the decking and border board open so that water flows through and debris can’t be trapped.
Freestanding Tip: Adding Diagonal Braces
If this deck had been mounted with a ledger board and lateral-load connectors, we wouldn’t have to worry about it shifting away from the house. But because the deck is not connected to the house, we needed to brace it to keep it from moving. We installed simple diagonal braces, nailed to the bottom of the posts and to the side of the joists. It’s not important that post and joist align perfectly for this brace to be effective. If the deck posts had been taller, we would have added diagonal braces between the beams and the posts to prevent side-to-side movement. |
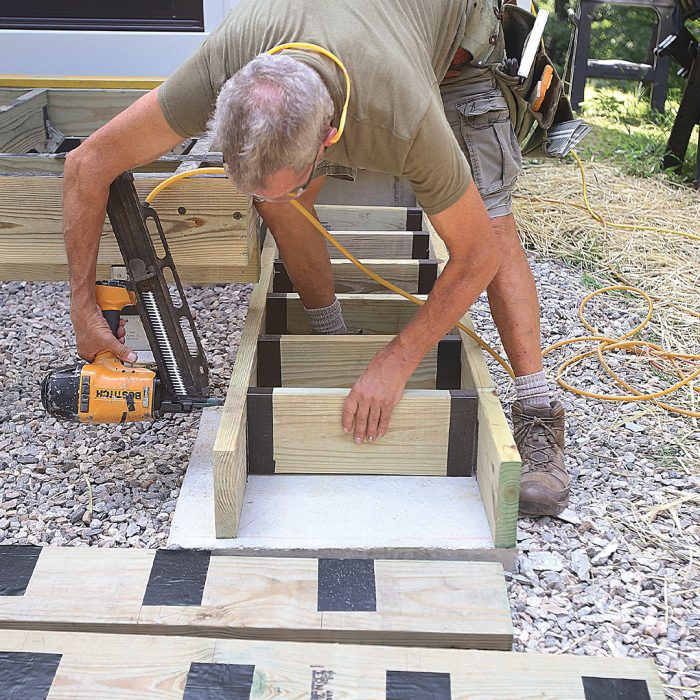
Stacked Stair Boxes
The two options for framing wraparound stairs that most deck builders consider are cut stringers and stacked boxes. Each system has its positives and negatives. Cut stringers need to rest on a solid surface—usually a continuous concrete footing placed precisely level and flat around the perimeter of the deck. The stringers must be cut exactly the same and must be installed in line so that the tread boards are flat and the riser boards straight.
Stacked boxes are simpler and less prone to unevenness. They can rest on small footings spaced several feet apart, are quick to assemble, and are easy to set straight and flat for finishes. The main downside to stacked box stairs is that they consume more lumber than stringers do.
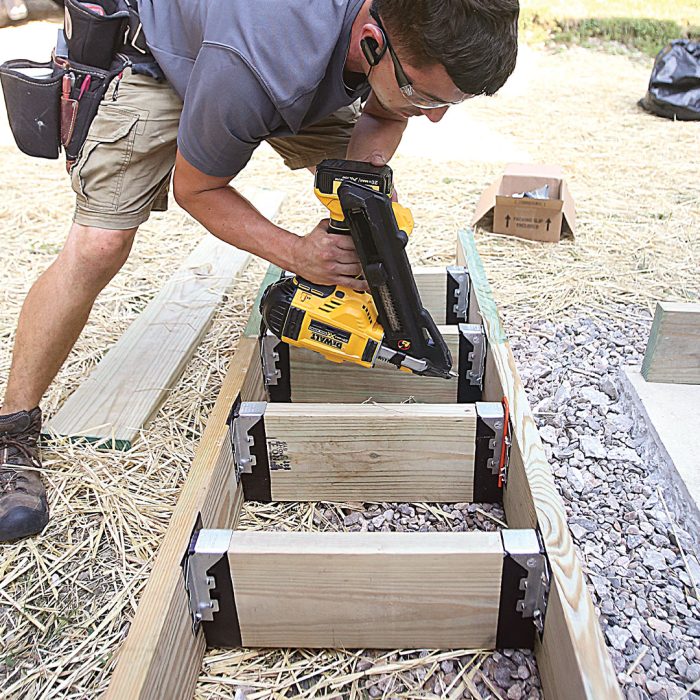
For me, the decision between the two options is based on the number of stair steps. Stairs like these, with three or fewer risers, are efficient to build with one box step or two stacked boxes. Stacking three or more boxes eats up a lot of lumber. When I encounter wraparound steps with more than three risers, I use a hybrid frame of a box for the first step set across spaced footings, with stringers resting on the rear of the box.
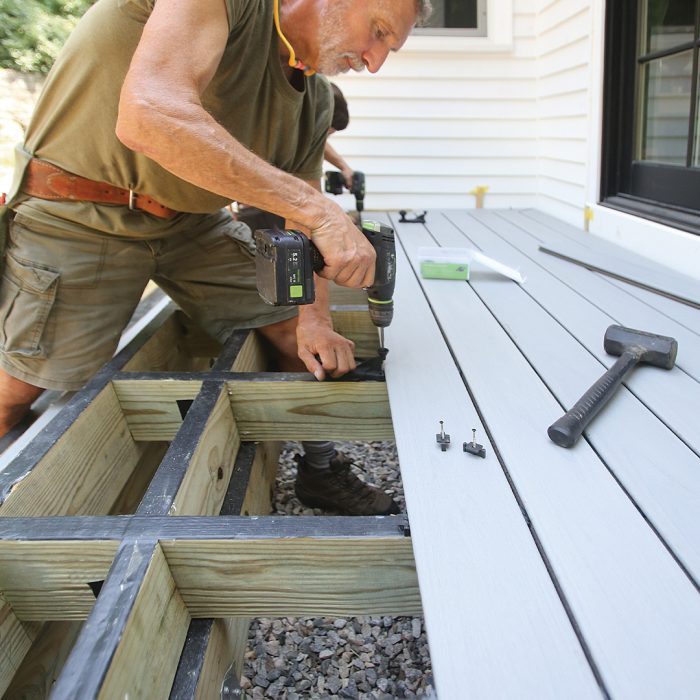
Building boxed stairs is a pretty basic framing project, but keep in mind that you may need specific blocking to support the treads. The Trex decking used here calls for tread supports spaced 12 in. on-center or closer. (Check your decking material for proper spacing when using it for treads too.)
Because header boards on the first box span between footings, the tread blocks between them need joist hangers for enduring support. We positioned the tread blocks on the second stair box directly above those on the first box, so we didn’t need hangers on those.
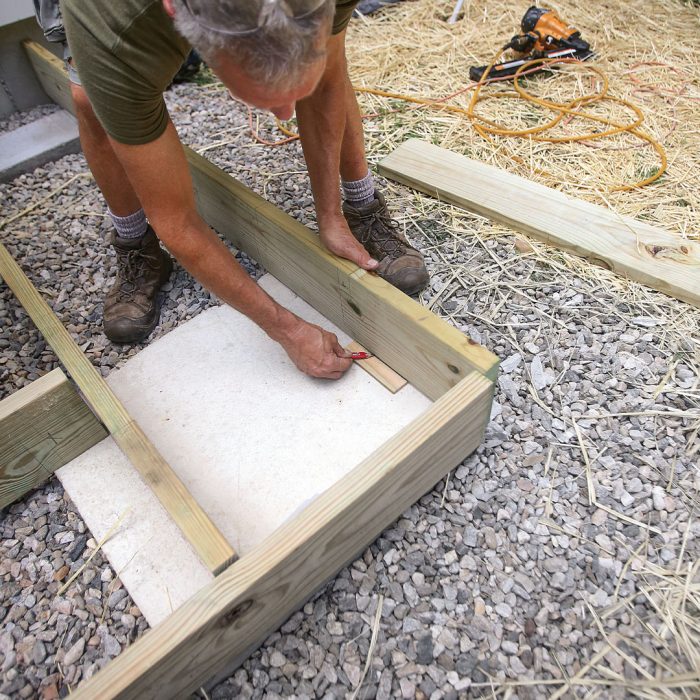
Stair Boxes Instead of StringersWhen you’re building wraparound stairs, traditional stringers are a bit fussy. Not only do the stringers have to be perfect, but they need a continuous level footing all the way around the deck. On top of that, the Trex decking used for treads here requires 12-in.-on-center stringer spacing, which means cutting a lot of stringers, even for a small deck like this. And you would have to frame the tricky diagonal stringer at the corner. The simpler alternative is to build box-frame deck stairs. Start With a Scribe Because I know how high the top of the stair box needs to be in relation to the top of the deck, I simply use a level and measure down to determine how much of a notch we need to make in the header boards. Once I know how much material I need to remove, I can scribe the cut line with a scrap of wood of the right thickness.
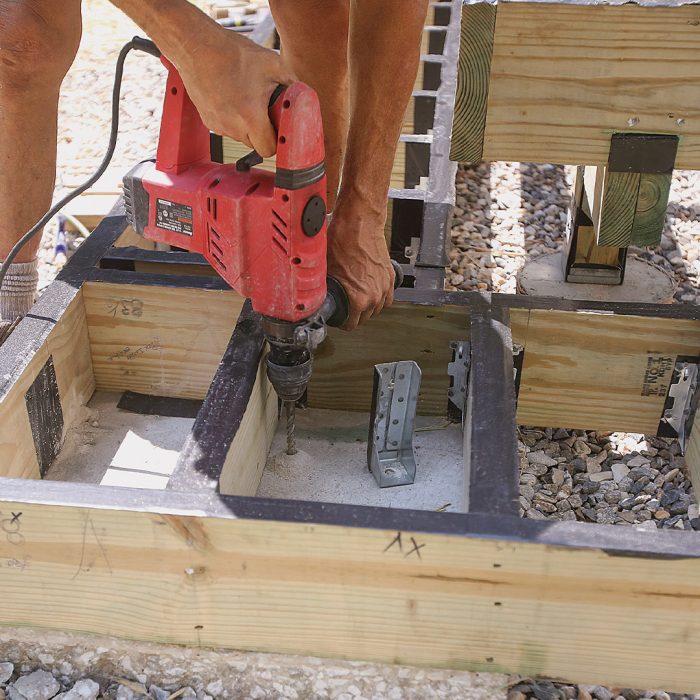
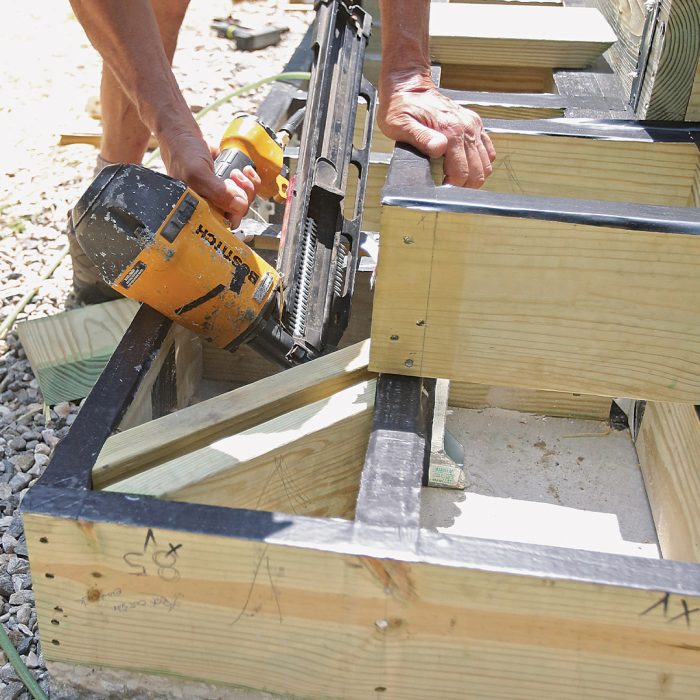
Build the Boxes The stair boxes are like a small deck with rim boards and joists. I assemble the boxes with through-nails, and my helper adds joist hangers because much of the bottom box will be spanning and not supported by the footings.
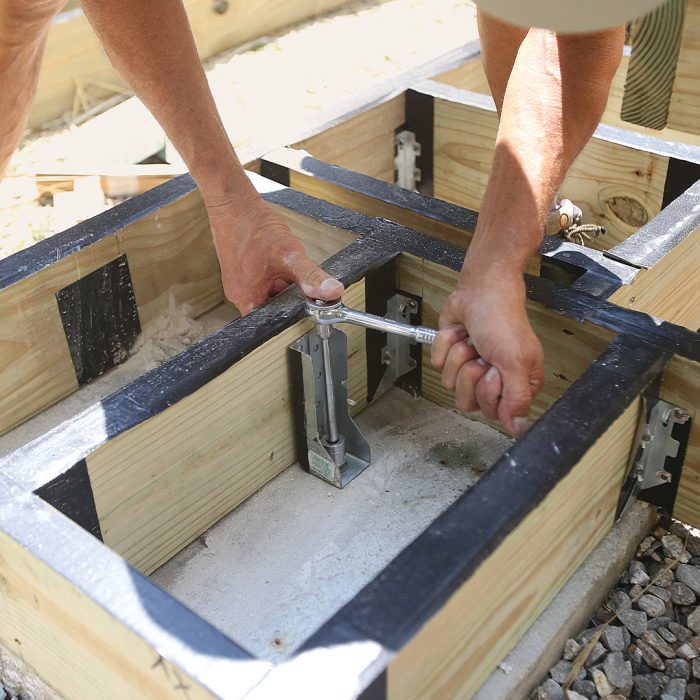
Anchored for Stability I anchor the bottom box to the footings with hold-down hardware and expansion anchors, and I connect the stairs to the deck frame with metal strapping. Along with some toenails, this strapping will also connect the two stair boxes.
Double the Blocking The mitered deck boards that form the stair treads need diagonal blocking at the corner. Two blocks spaced a bit apart and 1 in. back from the miter will support the boards and allow the water and debris to flow through.
|
Built to Last
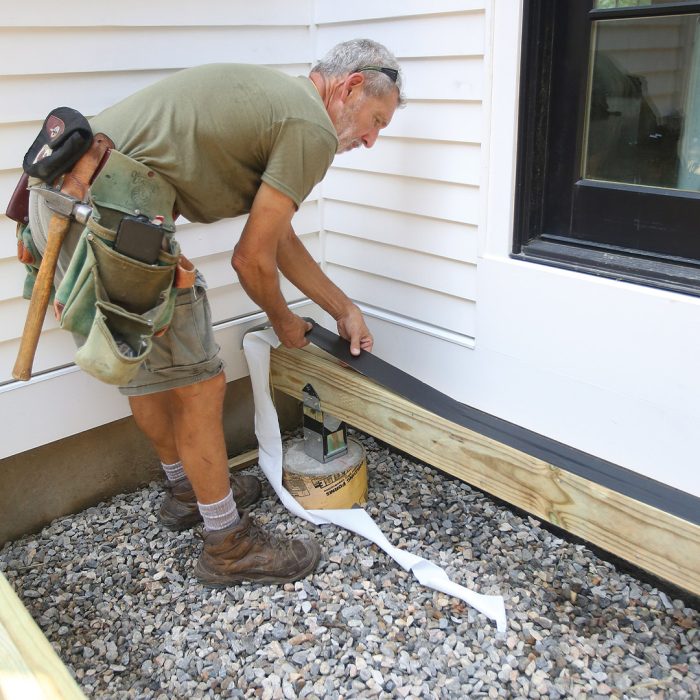
This deck is close to the ground, and with its wraparound stairs, accessing the underside is nearly impossible. For that reason, it’s even more important to take steps during the building process to ensure durability. We field-treated all cuts in the pressure-treated framing lumber with copper naphthenate—which is both a good practice and a code requirement.
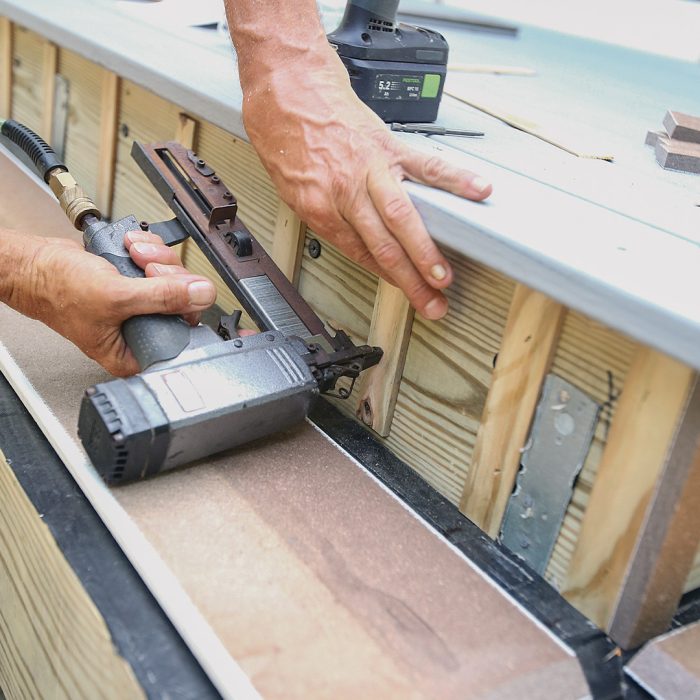
We also applied flashing tape as an isolation membrane where metal hardware comes in contact with pressure-treated lumber. The tape separates the copper in the treated lumber and the zinc and steel of the hardware, preventing galvanic corrosion. We also taped the top of the beams and joists to prevent water from seeping into cracks in the lumber and the plies of the beam. And I spaced the decking, trim, treads, and risers to allow water to drain.
Durable Decking Is in the DetailsOne of the main reasons people choose synthetic decking is for its low maintenance and durability. But nearly all building materials will start to degrade when they can’t dry, and the way that decking is installed has an impact on the framing below. Mostly, a durable decking installation means creating spaces for water to drain, and there a few ways we accomplished that here.
Inside Treads The inside tread boards are installed with hidden starter clips spaced off the facia. Regular hidden fasteners gap the inside and outside tread boards.
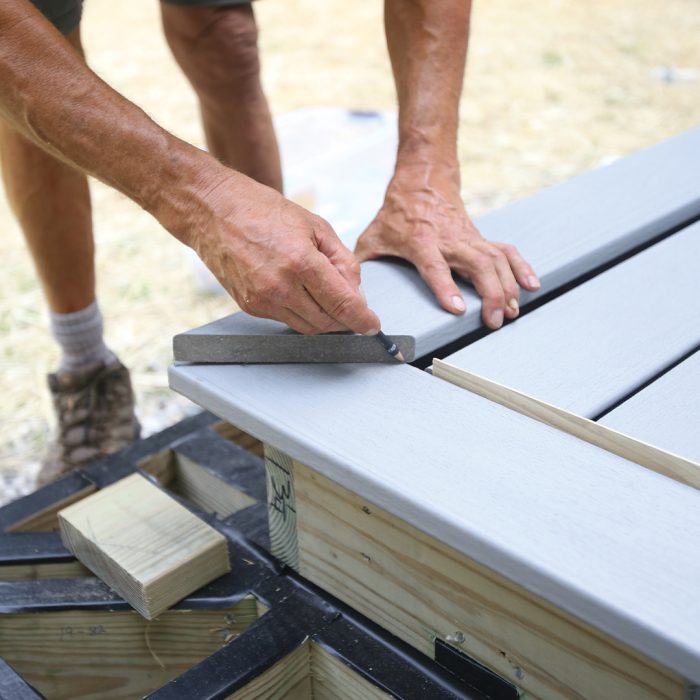
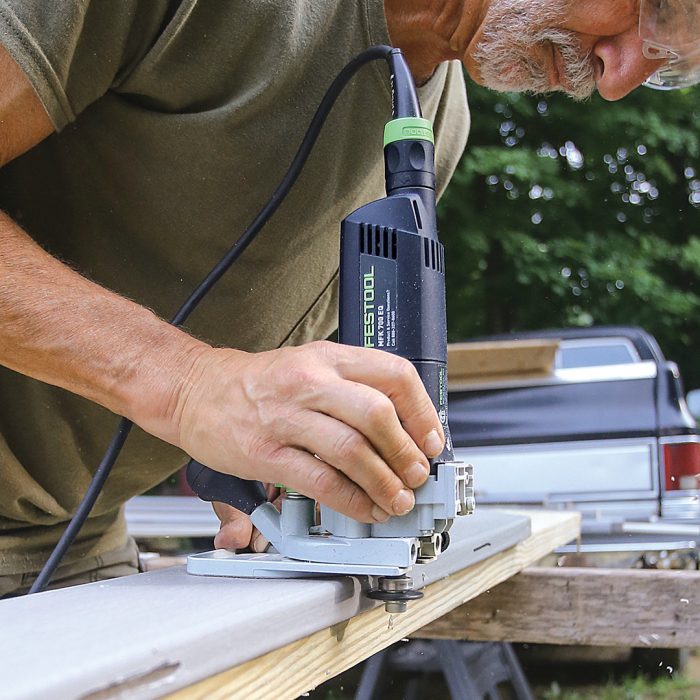
Slot the Solid-Edge Border Board The deck boards on the front of the deck and along the front edge of the stairs are solid-edge boards. To use the hidden fasteners at the back of the boards, we cut a slot at each joist location using a router and the Trex grooving bit. The bit matches the decking groove profile, so the fasteners fit and the gap between the boards matches those between the field boards. The front edge of the boards is screwed and plugged, like the fascia boards.
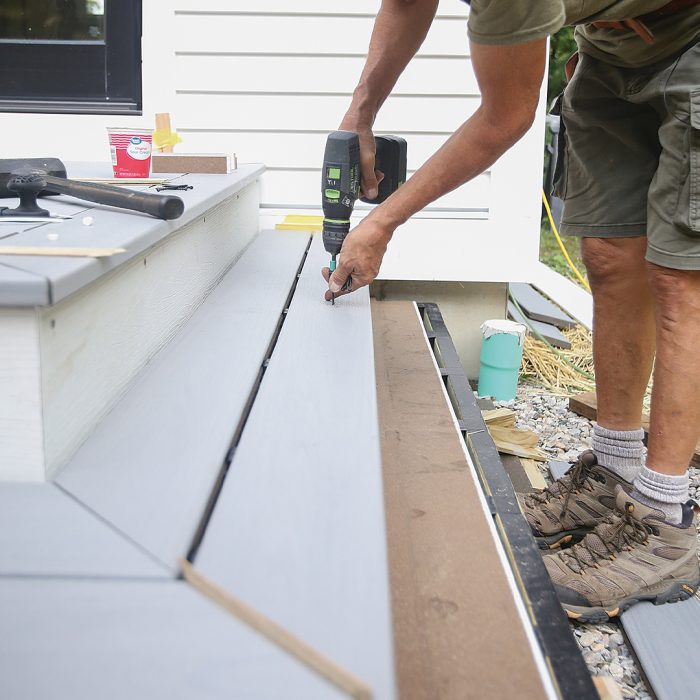
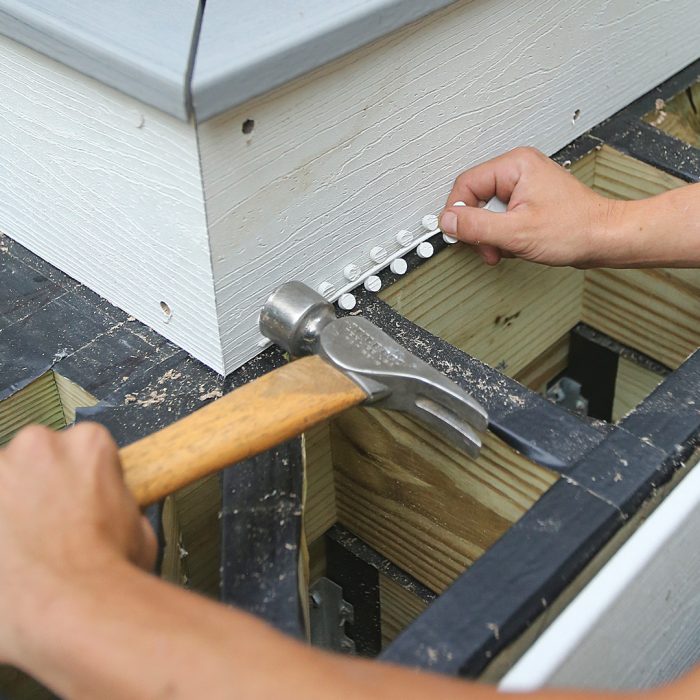
Plug When You Can The fascia boards, front stair treads, and deck-border boards all need to be screwed and plugged. In some cases, as with the bottom screws on the fascia boards, it is important to plug the screw holes before they are partially covered by the stair tread. Otherwise, this can be your last step.
|

Whether the deck is big or small, finished with synthetic decking or hardwood, these are details that will make any deck last and look good for years to come.
— Mike Guertin is Fine Homebuilding’s editorial advisor. Photos by Brian Pontolilo.
RELATED STORIES
Fine Homebuilding Recommended Products
Fine Homebuilding receives a commission for items purchased through links on this site, including Amazon Associates and other affiliate advertising programs.
Portable Wall Jack

Guardian Fall Protection Pee Vee
11" Nail Puller