10 Tips for a Long-Lasting Paint Job
A quick checklist for success with exterior coatings.

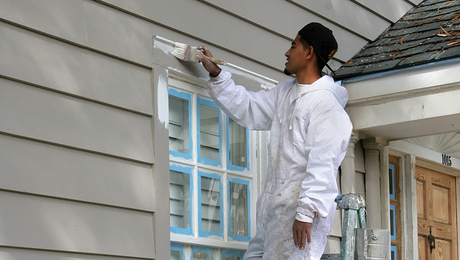
A final coat of paint or stain on the exterior is critical to the look of a finished building project and can make it a success or failure for both clients and contractors. And it’s not just about what looks good in the short term. A well-finished exterior is crucial for the long-term durability of a structure.
In a somewhat selfish effort to make my painting projects last longer, I’ve studied paint durability my whole career, learning on the job sites of trusted pro painters, touring a test lab in southeastern Pennsylvania, and asking paint manufacturers about chemistry and best practices for podcast interviews and several FHB feature articles. The following suggestions really work.
My own projects have a higher-quality finish and improved durability thanks to the many smart people who have helped me. Maybe the most important thing I’ve learned about painting is to take your time and not skip steps. Spending a few extra minutes to get a surface prepped or painted smooth makes the final result far more satisfying. If you do a good job, you’ll get to appreciate your extra effort for years.
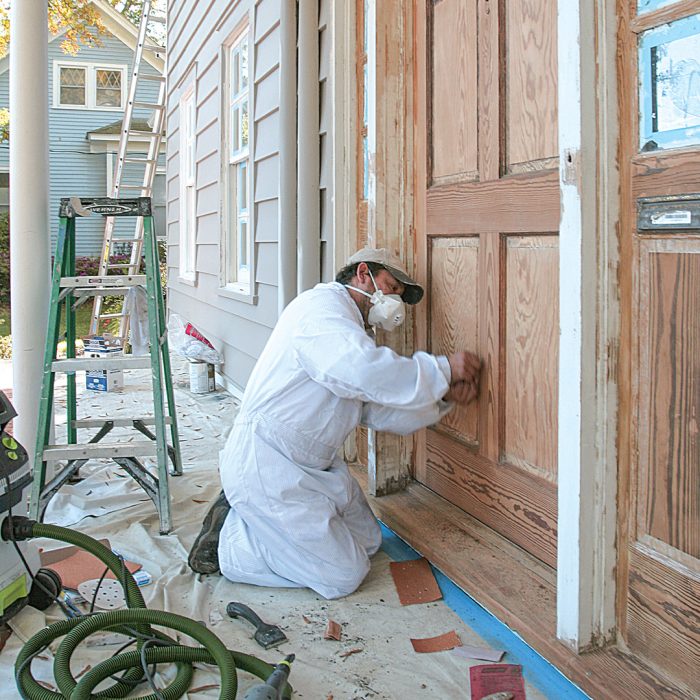
1.) Prepare Surfaces So They’re Clean, Dry, Dull, and Sound
During an interview with Rick Watson, former director of technical services at Sherwin-Williams, I learned a four-part rule that summarizes how you know if a surface is ready for paint.
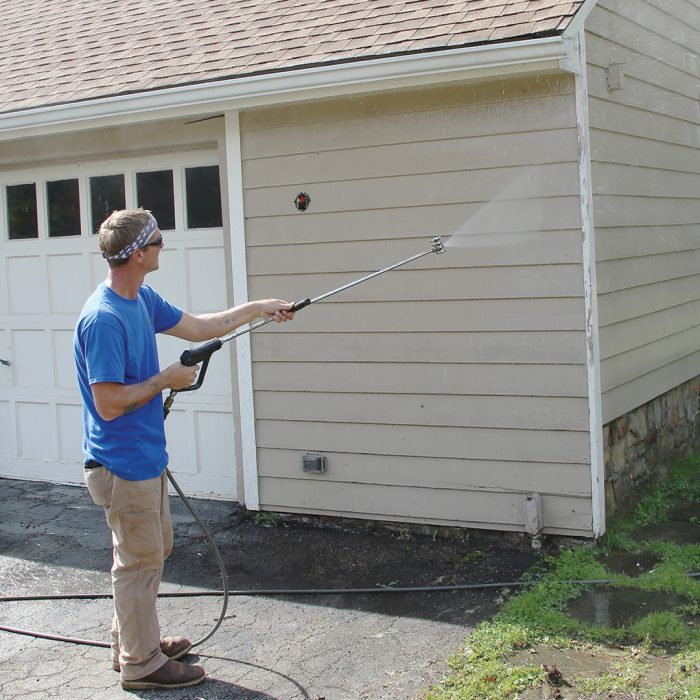
CleanSawdust, dirt, and airborne pollutants such as pollen and bits of tires from busy roadways can prevent the adhesion of paint. Many painters use an old paintbrush to dust off surfaces before priming or painting, which may be enough, but a better option is a soft wash with detergent to lift dirt off the surface (allowing it to dry thoroughly, as described below). Soft-washing is safer for building components than a high-pressure setup, which in the wrong hands can damage wood siding and trim, and force water into roof and wall assemblies. |
 |
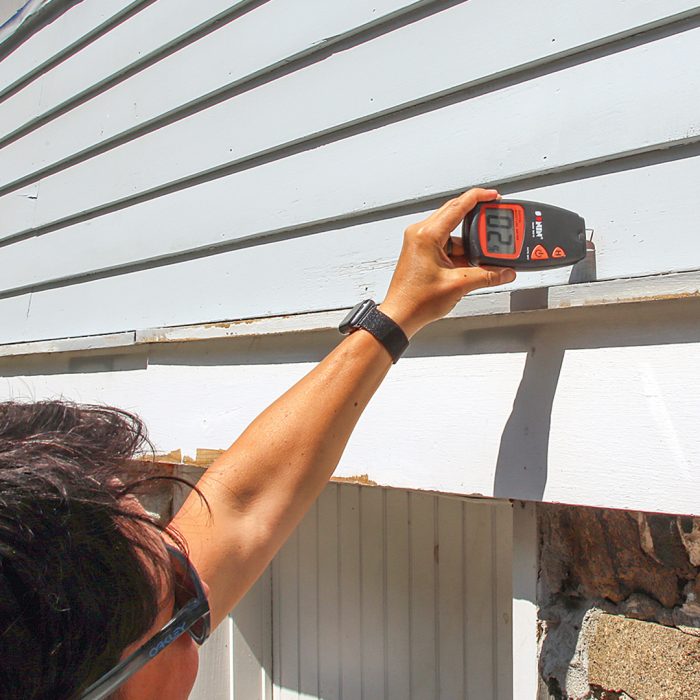 |
DryIt might sound obvious, but wait until surfaces are completely dry to the touch before priming or painting after washing. The exterior and new materials must also be within the coating manufacturer’s allowable moisture content. The only sure way to know if a material is acceptably dry is with a moisture meter. Check multiple spots, as shade from trees, neighboring structures, and surrounding hills can mean different parts of the same wall or area take longer to dry. The proper moisture content of siding or trim depends on local conditions and time of year and varies a lot nationwide. Generally speaking, exterior trim should have a moisture content of about 5% to 20%, depending on where the project is located, to prevent peeling and excessive wood movement, which can break paint film. Dry areas of the country such as the Southwest and Central California are on the lower end of the scale. The Gulf Coast and the Southeast are on the higher end. Of course, store building material off the ground and out of the rain and snow to prevent it from taking on water. |
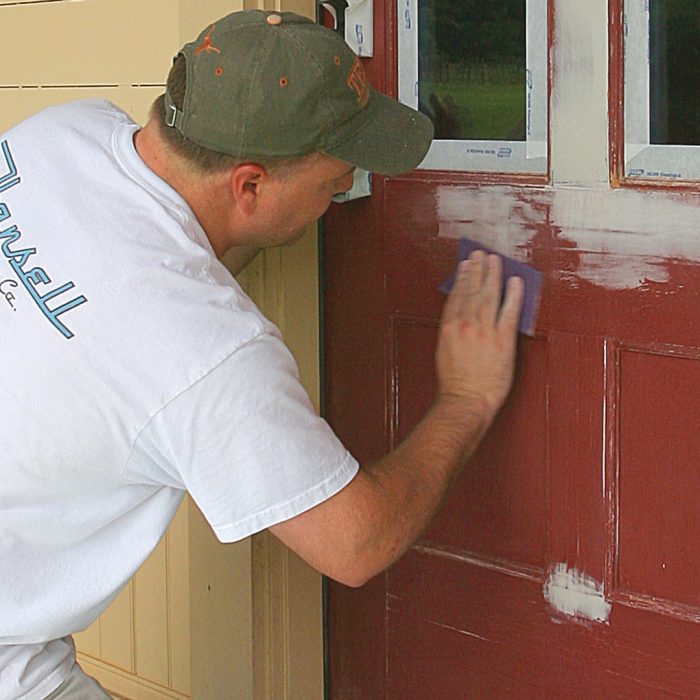
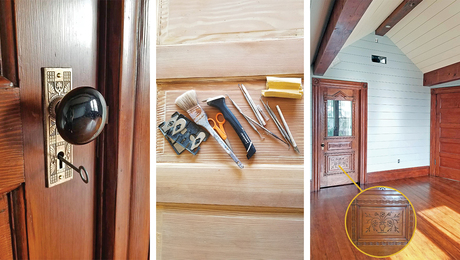
DullBonding to especially smooth or glossy surfaces is a challenge for exterior paint and primer. Surfaces should be scuffed or made “dull” for improved bond. High-gloss doors and woodwork, aluminum gutters and downspouts, window cladding, and any other supersmooth material should be roughened with 220- or 320-grit sandpaper until the surface is uniformly dull. Be sure to clean up any dust thoroughly before recoating. |
 |
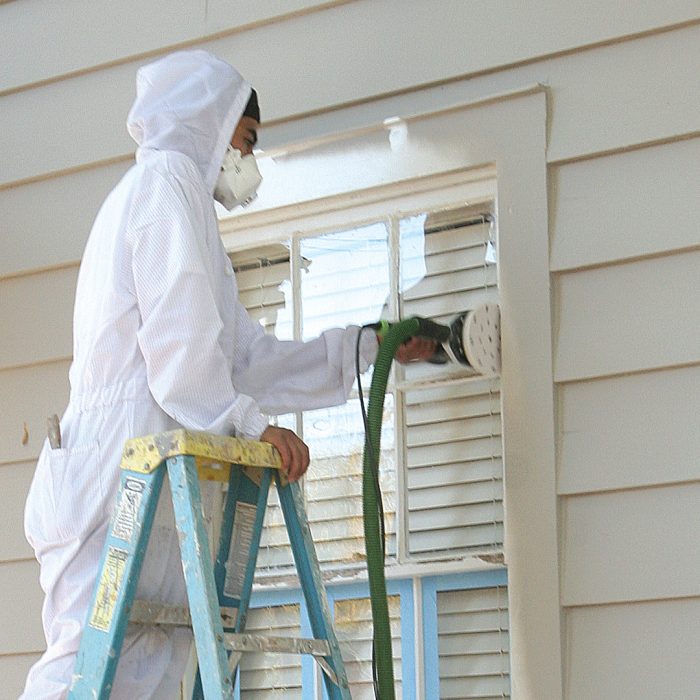 |
SoundPaints and coatings won’t stick if the underlying material is damaged. Flaking paint or primer, rotted wood, and even bare wood or primer that’s been exposed to UV for weeks or months can have a friable surface that the paint film won’t stick to reliably. Flaking and bubbled paint should be removed by scraping, sanding, media blasting, or chemical stripping. Primer that’s been exposed to the sun for weeks or months should be sanded and reprimed. Bare wood should be similarly sanded before priming to remove UV-damaged wood fibers that can prevent a good bond. |
| Quick Tip: Matching new and old exterior work may mean cleaning, prepping, and painting the whole house—not just the new part—for a good match. Keep this in mind when budgeting. |
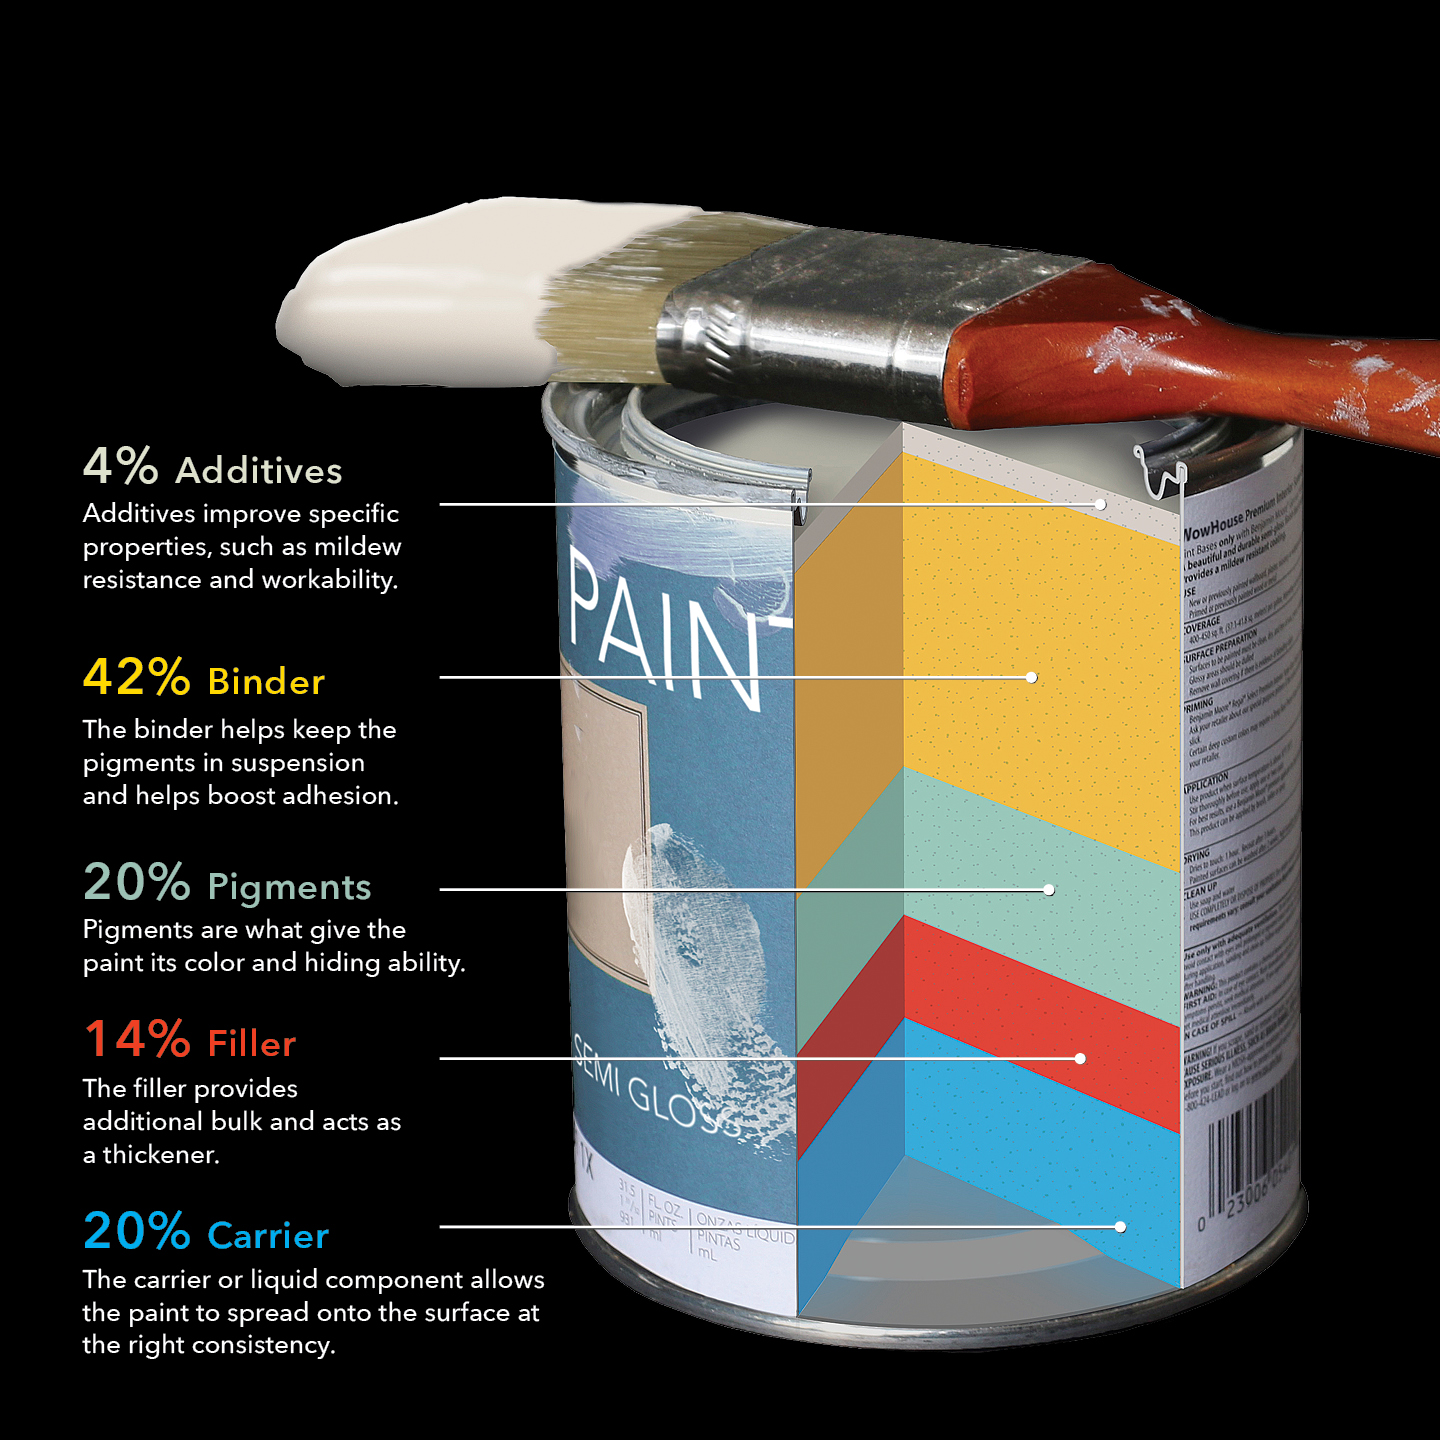
2.) Mix Paint Thoroughly
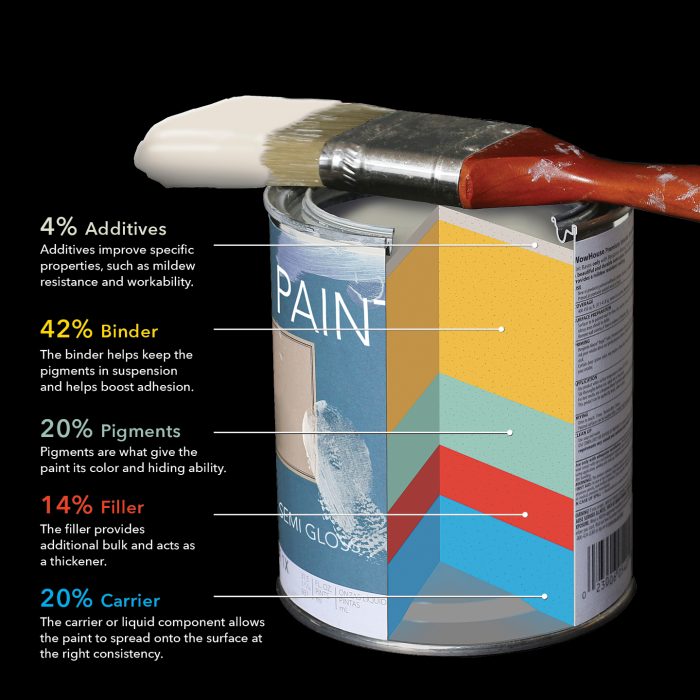
Paint is a suspension and not a solution, so the components will separate over time; therefore, it must be mixed thoroughly before use. You should also give the paint a stir when you reload the sprayer or container you’re painting from. Best practice is to mix from the bottom up to bring any settled solids into the suspension. If an old or previously opened can of paint has a funk or mold growing on the top, or any rust in it, throw it out.
One tip you might find surprising is to never apply recently shaken paint. Tiny air bubbles in the paint will create cavities in the topcoat that trap dirt and water, leading to premature failure. Let the mixed paint sit for a few hours in the unopened container. If you need to paint right away, let the can or bucket sit open for 30 to 60 minutes while you get prepped, which gives the bubbles a chance to dissipate. You can also skip the machine shaking and stir by hand.
Mix, then strain Stirring or shaking ensures all the paint components are in every dip of the brush or blast from the sprayer. Also, strain previously opened paint to ensure there are no contaminants or dried solids to mess up the work or spraying equipment.
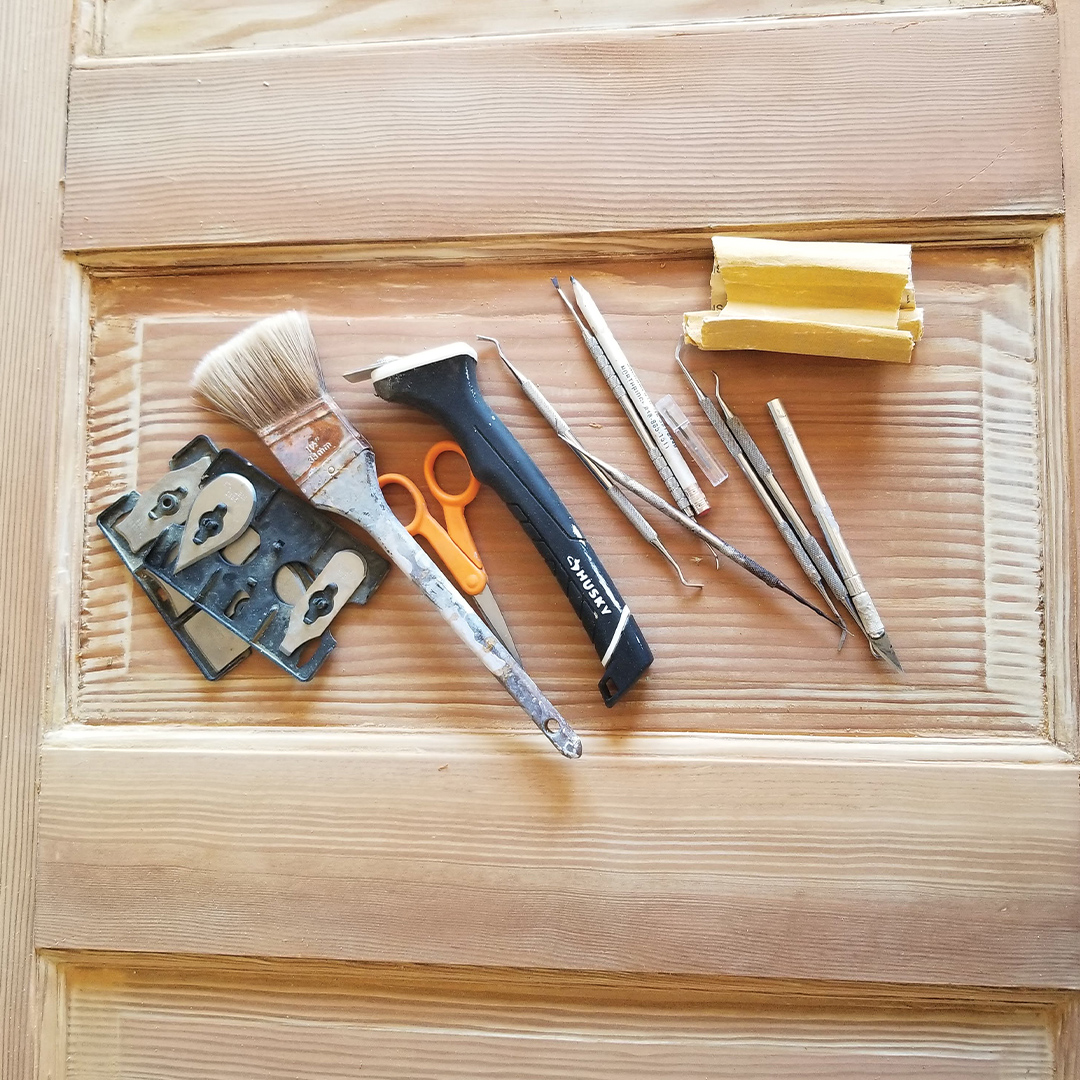
3.) Choose Good Gear
Professional painters Noah Kanter, Philip Hansell, and Mike and Luke DiBlasi have all told me that good-quality brushes and roller covers are a worthy investment, as they hold more paint and apply it more evenly. I’ve had good success with Wooster, Purdy, and Corona brushes and rollers.
A good brush properly maintained can last for dozens of projects. Brush manufacturers suggest dedicating brushes for water-based and oil products and not switching back and forth. (Traditional definitions of oil-based and water-based products have blurred in recent years with the introduction of waterborne paints and finishes. For simplicity, I’ll refer to products that require solvent cleanup as “oil-based,” though they are also commonly known as “alkyd.”)
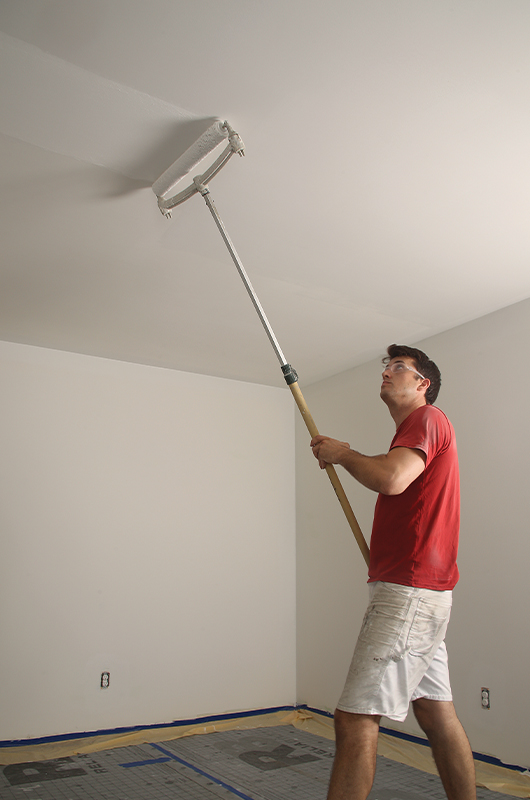
When using rollers, consider narrow and wide rollers for greater efficiency. I often use a 3-in.- or 4-in.-wide roller to coat sections of interior and exterior doors before brushing out the finish, orienting the brushstrokes to coincide with the stiles and rails. For large rooms, Kanter suggests 14-in.- or 18-in.-wide covers for faster application. In all but the smallest spaces, I use an extension pole for greater reach and less stooping when loading the roller.
When it comes to cleaning brushes, I use hot soapy water and a brush comb or wire brush to separate the bristles and scrape away dried paint. As for roller covers, I quit washing them years ago. It takes too much time and water to get the paint or primer out. Instead, between painting sessions, I wrap the roller cover in masking plastic or a bread bag, throwing it away only at the end of the project. You can keep a roller cover going for weeks or even months this way.
4.) Prime and Paint in the Right Conditions
The temperature, humidity, and heat from direct sun and reflections off windows and patio furniture can all affect the workability, durability, and bond of paints and coatings. Follow the manufacturer’s guidelines on suitable application temperature. Both surface temperature and air temperature matter, and the difference between them can vary widely. Hot surfaces can dry too quickly, leaving brush marks or bubbles, while surfaces below the recommended temperature will dry slowly or not at all, causing the paint to sag.
Avoid painting in direct sun, unless it’s near the lower extreme of the application temperature. In hot weather, work on elevations in shade. On especially hot days, start and quit early; in cold conditions, wait for temperatures to rise and then quit before they drop again. Temperatures should be at or above the safe application temperature specified in the product data—generally 50°F or 35°F depending on the paint or primer.
Also, follow recommendations for relative humidity (RH). If RH is too low, the coating won’t self-level, leaving brush marks. RH above 85% will slow or stop drying, leading to sags or streaks. Consider overnight conditions—cold temperatures can make the paint slow to dry and more susceptible to morning dew. If the coat of paint or primer hasn’t fully cured, it may wash off or form spots or streaks from wetting. Be aware that light-colored materials exposed to a clear night sky can cool rapidly, sometimes dropping to freezing temperatures even when the air is above freezing.
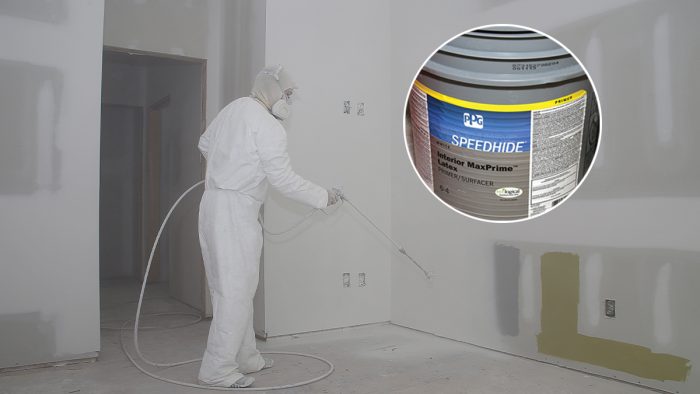
5.) Use Primer to Improve Bond and Solve Problems
Although you may occasionally hear from the uninformed that primer is just cheap paint, it’s not true. As Sherwin-Williams’s Rick Watson explained to me, paint and primer are formulated differently for their different jobs. A primer prepares the substrate and prevent stains from showing through the topcoat. A topcoat provides the color and a long-wearing surface that protects and beautifies the underlying material.
You should always prime over stains, bare wood, and building materials that haven’t been painted. For unfamiliar building products, read the manufacturer’s instructions to learn if a new product needs to be field-primed, and how. Previously painted surfaces in good repair don’t necessarily need primer, but if you’re making a big color change, it may be wise to use primer, which costs less than paint. For larger projects, priming first may save time and materials by reducing the need for three or more topcoats. Primer helps cover the existing paint, potentially eliminating the need for an additional topcoat.
You’ll likely find a dozen or more different kinds of primer at your local home center, which can make choosing somewhat overwhelming. As you can imagine, you’ll get the best results from a product designed for the task. High-bond primers promote adhesion with especially glossy or other hard-to-stick-to materials like tile and laminate. Specialty primers improve bond with concrete and masonry, smooth or rusty metals, and peeling siding.
There are also all-purpose primers designed for typical priming and stain-blocking, available in both oil- and water-based formulas. When it comes to exterior primers, water-based products are safer and preferable for covering oil-based stains like tar and permanent marker. Oil-based primers are better than water-based primers at blocking tannins that create brown stains on softwoods such as pine and cedar.
For preprimed material like trim, windows and doors, and siding, I’ve found an all-purpose primer like Benjamin Moore’s Fresh Start is a good option for both interior and exterior projects. It’s worked reliably outdoors on my southern New England house. I’ve also found that there’s no substitute for the tannin-blocking qualities of slow-dry oil primer on outdoor white pine and cedar. Unfortunately, it can take days to dry.
In the last few years, marketing for paint often has included language like “paint and primer in one” or “self-priming paint,” but these products assume you’re painting over a previously painted surface in good condition. If the topcoat has started to peel or flake, a separate primer coat will produce a finish with a more even color and uniform gloss compared to an all-in-one product. A separate primer is also better at covering stains than an all-in-one paint.
| Quick Tip: Have the paint supplier tint your primer so it better matches dark colors and its light color doesn’t bleed through. |
6.) Prime All Six Sides
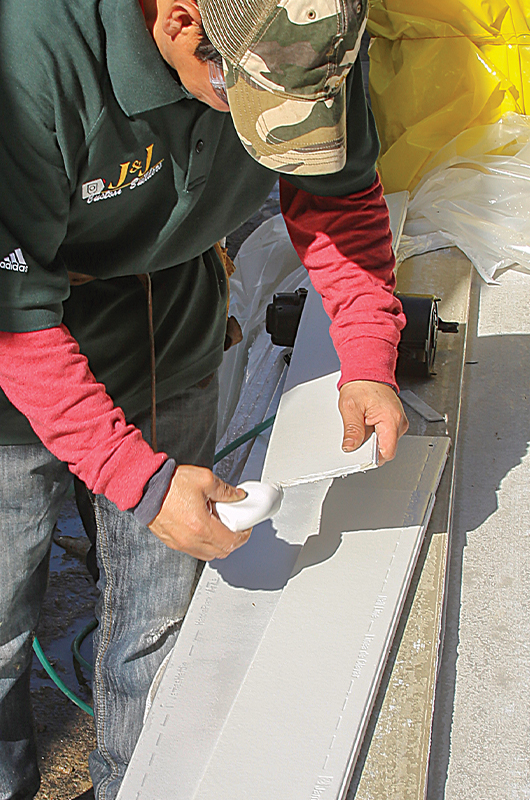
You won’t remove siding and trim to repaint it, but when you’re working with new materials that have not yet been installed, a coating of primer on all sides of the stock prevents water from being absorbed by the back side of the material and then moving out as vapor, which causes blisters and peeling in the coating.
Painters often recommend slow-drying oil primer for outdoor trim because it penetrates deeper into the wood fibers, providing more protection, but the downside is that it can take days to dry and requires mineral spirits for cleanup. In the winter in my northern climate, I prime or paint new material indoors to ensure the coating has its best chance of sticking long-term, and then install the material after it’s dried.
Because end grain is especially susceptible to taking on water, end grain and other field cuts should be primed as the trim and siding is installed. It might be tempting to use a shellac-based primer like BIN from Zinsser, since it dries quickly and can be applied in lower temperatures than other primers. But it lacks elasticity and so cracks with wood movement, making it less effective for field cuts than other primers.
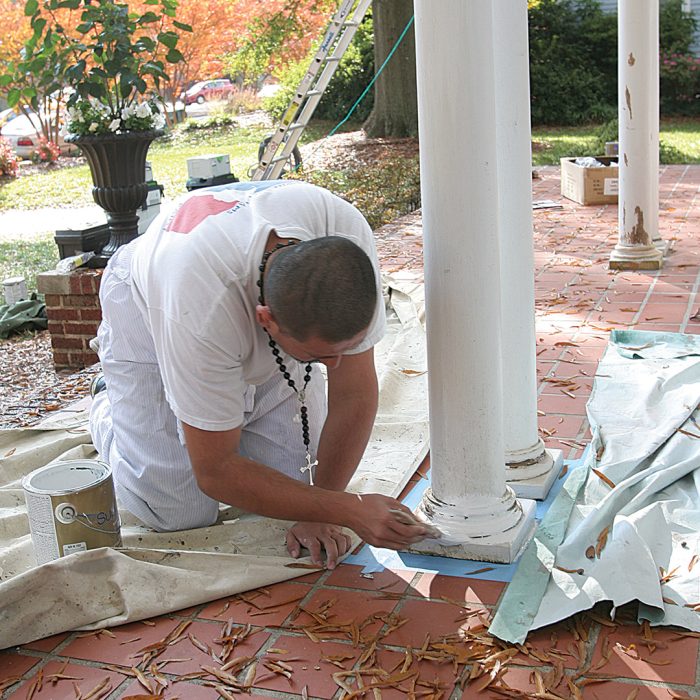
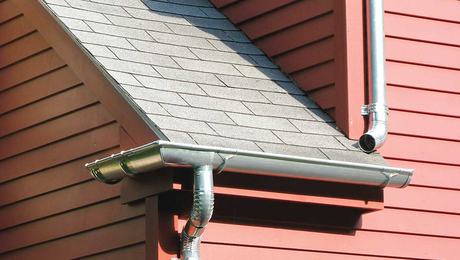
7.) Don’t Let Things Get Too Bad
Keeping after gutters, maintaining flashing, and directing rainwater away from the building prevents the materials from taking on water and the resultant peeling.
Overhangs, window pediments, and other traditional water-shedding details also help keep water away from porous materials and out of the enclosure. Similarly, correctly installing a water-resistive barrier (WRB) with proper water-shedding details on new builds also keeps materials dry.
Conscientious builders suggest drying and draining spaces behind siding and trim, which allow leaks and wind-driven rain to drain out of assemblies instead of being absorbed by painted elements. When painted wood or wood-based elements get really wet, they can blister and peel as the water moves out of the material, sometimes bringing the paint film with it. Once you have a cracked or peeling finish, you have a lot more work preparing for a repaint.
It’s less expensive to paint before anything is damaged. Keeping painted exteriors clean prevents discoloration from mold and algae. Doors, which are subject to abuse from scratching pets and collisions with people and groceries, need painting more often. To prevent the jambs from rotting, I paint my exterior doors every two or three years. Bulkhead doors, porch floors, and other sun-facing horizontal surfaces also need to be painted more often because of greater UV exposure.
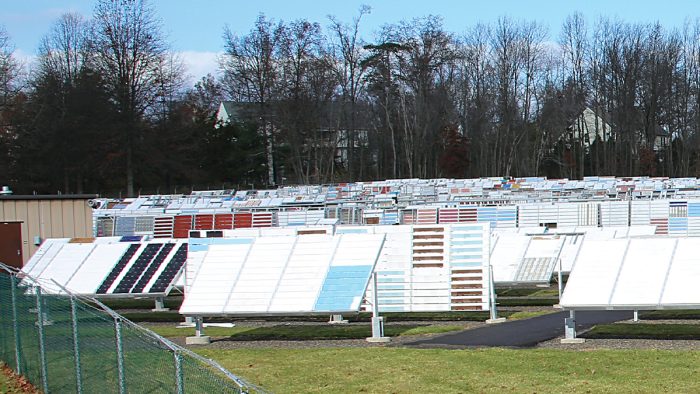
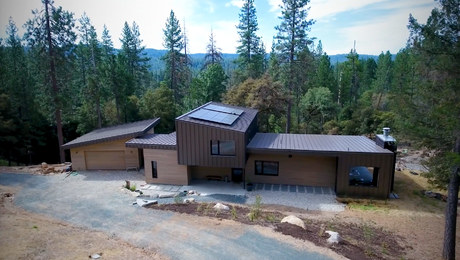
8.) Consider Color and Sheen
When the folks at the Paint Quality Institute hosted me for a tour of their “paint farm,” where they evaluate paint formulations for durability in head-to-head real-world tests, I noticed that most of the samples were white and blue. When I asked why, I learned that sample boards include white because it shows dirt and biological growth readily, and blue because intense colors show fading better than white. They use bright blue because the organic pigments used to create this and some other vibrant shades are more prone to fading than lighter colors.
In the past I assumed that what are often described as “historic colors” by manufacturers were made from inorganic pigment and therefore should be more durable, but it turns out that “historic,” when describing paint, is really about sales and marketing and not about paint formulation. Flat or matte finishes look the best longest, as inconsistent sheen from pollution and UV is often the first evidence of aging paint.
9.) Follow the Instructions!
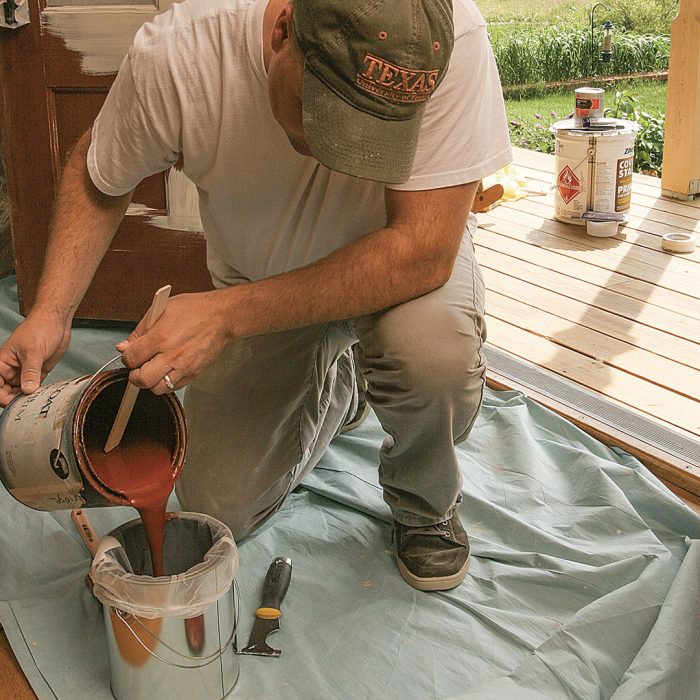
There is a ton of information printed on paint cans—and if the label gets covered by drips of paint, you can find the same information on the manufacturer’s website in the technical data sheet (TDS) for that specific product. For this reason, I’ve been taught to pour from the can so that any drips will cover the instructions, leaving the other side of the can with the product name and number visible.
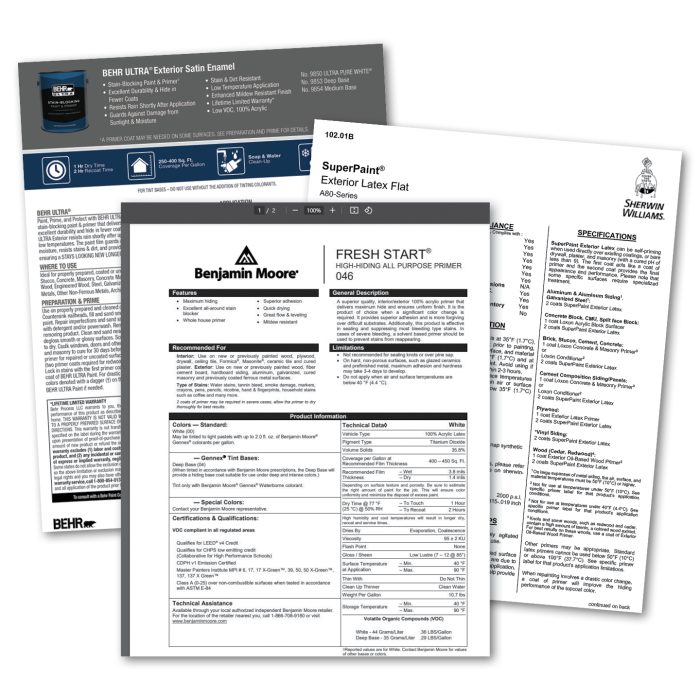 This allows you to look up the instructions and product specifics at any time. If you cover the product name, it’s far more difficult to figure out what’s inside the can. By reviewing the TDS, you’ll learn application temperature, thinning instructions, proper tips for spraying, the correct brushes and rollers to use, and expected coverage for typical substrates.
You can often trust the outside sales reps and counter help at good paint stores, but I’d be wary about trusting staff at other paint outlets. I’ve sold paint in both a pro lumberyard and in a hardware store and have heard dubious advice from colleagues. I’ve also heard questionable advice given by pro or semi-pro painters to shoppers at home centers. My advice is to check with the manufacturer when questions arise. Good paint companies have trained technical specialists who can answers questions with a phone call.
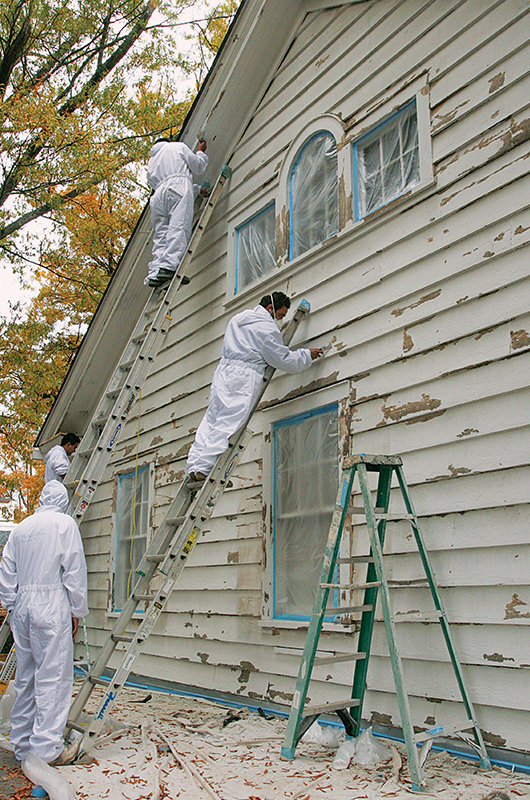
10.) Work Lead Safe…
In 1992, Congress passed the Lead-Based Paint Hazard Reduction Act in an effort to reduce widespread low-level lead poisoning that affects nearly three million children under age six every year. Many of these kids get exposed to lead from peeling paint, so it’s important to follow established protocols to collect lead-paint chips and dust during scraping and sanding.
Proper containment and removal required by the EPA’s Lead Renovation, Repair, and Painting Rule protects workers and occupants through protective measures and established protocols and prevents spreading lead-based paint into the environment. Work that will disturb lead-based paint in houses built before 1978 must also have clear and obvious signage indicating a lead hazard on the premises.
…And Dispose of Paint Properly
Paint disposal rules vary by locality, so I can’t give universal advice on how to get rid of surplus or contaminated paint except to say don’t dump it down the drain or on the ground; instead, take it to an authorized collection site. In 2013, the state of Connecticut, where I live, started participating in PaintCare, an initiative of the American Coatings Association that uses fees on the sale of paint to pay for collection by local paint dealers for processing and recycling. The program operates in 10 states, primarily in the Northeast and on the West Coast.
— Patrick McCombe; senior editor. Photos by the author.
RELATED STORIES


