FHB Logo Facebook LinkedIn Email Pinterest Twitter X Instagram Tiktok YouTube Plus Icon Close Icon Navigation Search Icon Navigation Search Icon Arrow Down Icon Video Guide Icon Article Guide Icon Modal Close Icon Guide Search Icon Skip to content
Subscribe
Log In
  • How-To
  • Design
  • Tools & Materials
  • Restoration
  • Videos
  • Blogs
  • Forum
  • Magazine
  • Members
  • FHB House
  • Podcast
Log In
Preservation

Window Glazing with Traditional Putty

Discover the benefits of using linseed oil–based products when glazing and finishing window sash.

By Justin Fink
Featured in Old House Journal

Restoration pro Justin Fink explains how to glaze a window using traditional glazing putty as well as how to finish a reproduction window sash with linseed oil paint. Because it doesn’t peel, flake, or need to be scraped like modern paints, linseed oil paint — a centuries-old finishing option — is once again growing in popularity. Linseed oil is also the base ingredient of traditional glazing putty, which means you can start painting immediately after placing the panes — no need to wait five to seven days as with modern paints. Watch Justin’s video to get all the details.

Here’s the Transcript

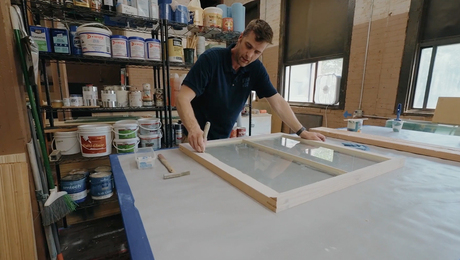
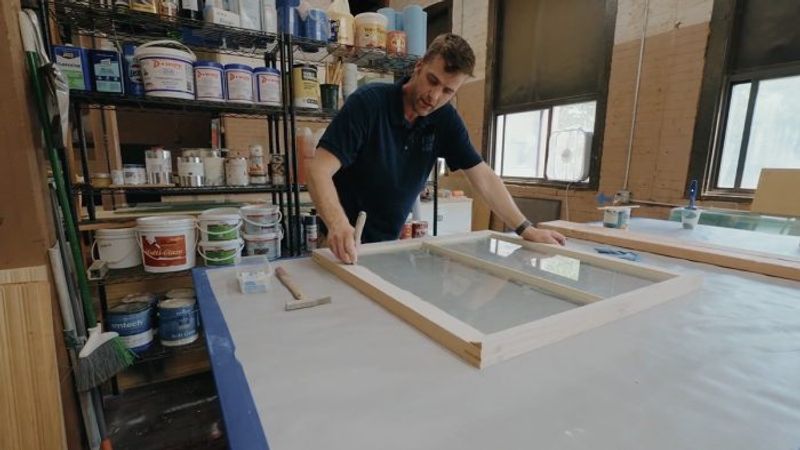
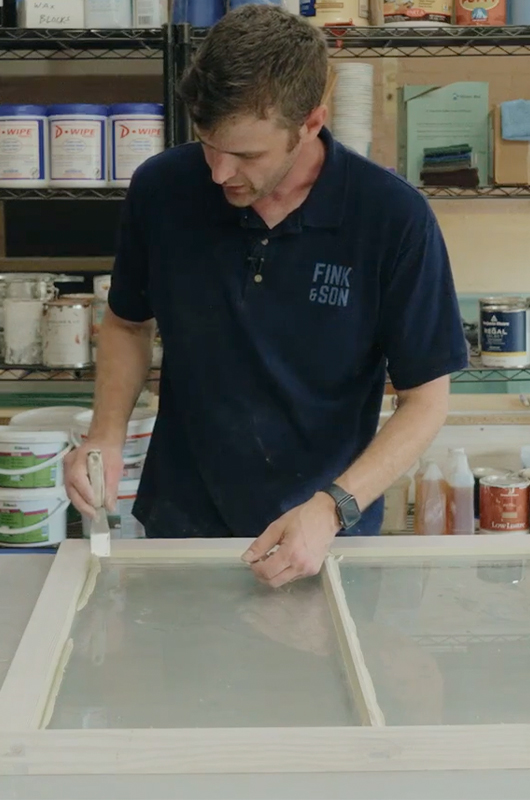
Hi, I’m Justin Fink from Fink and Son Restoration. We’re a Connecticut-based woodshop that focuses on old houses. Today we have some reproduction window sash that we’re putting into an old house, and we’re going to be finishing those sash with linseed oil paint.

It’s a traditional oil paint that’s been used for centuries, but it’s starting to make a resurgence and become popular again because it solves some of the problems that modern paint has, such as peeling, flaking, and the need to scrape it. After the first coat is dry, 24 hours or so, we’re going to put the glass in place, glaze it, and then do the second coat.

Putty and Panes

We’re using traditional glazing putty, which is just a mixture of chalk and linseed oil. It has the same base ingredient as the paint we’re using, meaning that after we get the glass in place, we can paint it right away. If you’re using acrylic, latex, or modern oil paints, you have to wait for the glazing putty to set up for five to seven days until it’s firm to the touch before applying your finish coats of paint.

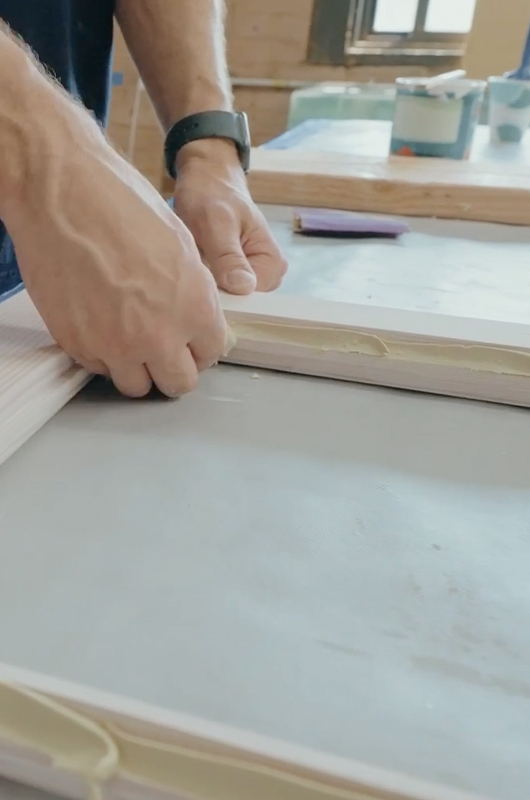
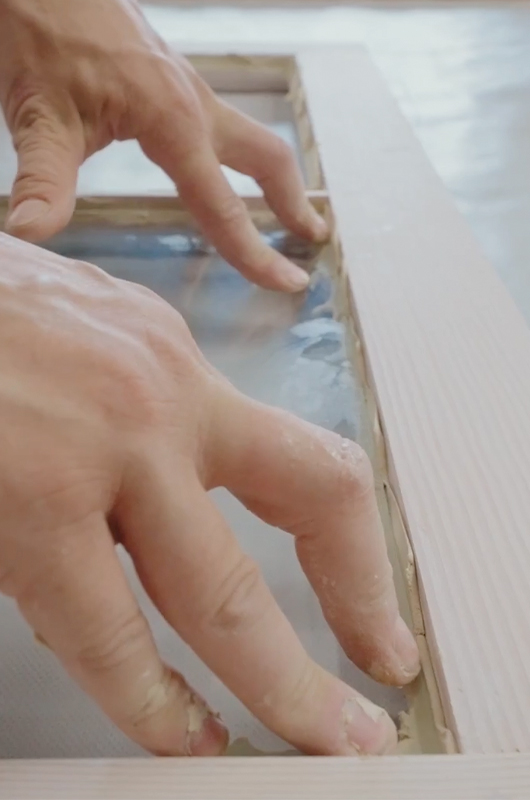
Linseed oil paint takes a little longer to dry — about 48 hours for the second or third coat — but when we’re working on windows, we can start painting a lot sooner, so it kind of evens out in the end. Right now, I’m just putting a bed of linseed oil putty on the glazing rabbet, then we’re going to put the panes of glass in here, and it’s going to sit on this, creating a seal behind the glass.

Most of the putty will squeeze back out and go back into the bucket, so we put more on here than we need and then reuse the rest. The glass gets dropped in, and then we gently push it down into the putty, keeping the pressure on the outside of the glass. Some people use a sander for this step — with a cloth over the sanding pad — to vibrate the glass into place.

Squeeze Out the Excess

Now we’re going to knock off the excess. Then we’re going to hold the glass in place with glazing points, which are just thin pieces of metal that go flat against the glass. We use a flat-sided hammer to tap in a glazing pin every 6 in. to 8 in. For this one, these panes of glass are 28 in. long, so I’m just going to put three. You want to tap them in far enough that they’ll be beyond the line of the glazing rabbet so they’re hidden once we apply the finish coat of putty.

This is the inside face of the sash, the interior side. You can see that bed coat of glazing putty — we’re just scraping off the excess here and making sure it’s packed down so that when we come back to do the finish coats of interior paint, you don’t see any gaps. After glazing the sash, we’ll come back and do this step a second time because pushing down on the glass tends to squeeze out a little more glazing putty on the interior side.

We’ll knock off most of it now so that when we lay this back down again, we can see the edge of the glazing rabbet through the glass. When we apply the putty and drag the knife through, we need to stay just inside that line so that the glazing putty isn’t visible from the inside of the house.

We get the same glazing putty, get it nice and warm and loose, take a chunk of it in one hand, and use your thumb and this edge to scrape off the putty in a rolling motion. Since I’m right-handed, I do all the right-hand sides first, then rotate. I’m using a decent amount of pressure because we’re trying to push that putty into the gap. This is what seals the glass, holds it in place, sheds water when it rains, and keeps the glass from rattling.

Maintain, Repair, Replace

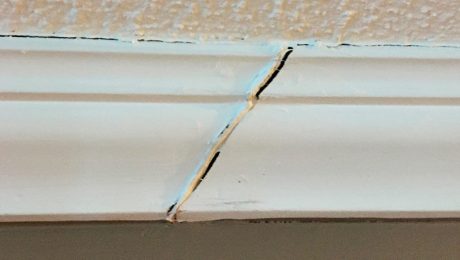
Over time, this linseed putty dries out, cracks, and falls off, which is part of the reason we use it. It’s not permanent — it’s meant to be replaceable and maintainable. We consider it a sensible trade-off. In 15 years, maybe it needs to be touched up; in 30 years, it might need to be replaced. We just replace it with the same thing again.

For glazing knives, I use a bent glazing knife like this. A straight knife is also popular — this one I have is really stiff, but some people prefer a more flexible, longer one. It’s all about preference, so if you’re going to do this, I suggest trying a few. I press it into place so that one edge touches the glass and the other catches the edge of the wood.

I don’t have it flat; I hold it at just enough of an angle to plow the excess putty out of the way. Then what’s left can be peeled off and reused. In the corners, I pull into the corner, then use the angled knife to scrape the excess off. The angled knife makes this easy — you just scrape in there, clean it up, and pull over like that. Then I do the same on the other side to get a nice, beveled corner.

Words of Wisdom from a Pro

One of the things we find with new people learning how to glaze is that you could spend four hours on one window trying to make it perfect. But the thing you have to remember when you’re working on windows — new ones or restorations — is your world is right in front of you when you’re painting and glazing and doing repair work.

Once you put it in a building, you’re not going to stand that close to it ever again. You’re never going to look at the glazing putty the same way that you look at it in the shop. The little imperfections that are noticeable up close or on camera don’t really matter in the real world, especially for something built by hand. Functionality comes first, then you can work on making it pretty, but don’t waste time chasing perfection.

Normally, if you’re using modern acrylic or oil paints, you have to set the glazing putty aside for five to seven days before painting. But with linseed oil paint, I can paint this immediately. So we’re going to move this right over to that easel and apply our second coat of paint.

RELATED STORIES

  • Resurrecting Linseed Oil Paint
  • Give Windows and Doors a Durable Finish with Linseed Oil Paint
  • Window Sash 101

Sign up for eletters today and get the latest how-to from Fine Homebuilding, plus special offers.

Signing you up...

This site is protected by reCAPTCHA and the Google Privacy Policy and Terms of Service apply.
See all newsletters
See all newsletters
×

Get home building tips, offers, and expert advice in your inbox

Signing you up...

This site is protected by reCAPTCHA and the Google Privacy Policy and Terms of Service apply.
See all newsletters
See all newsletters

New Feature

Fine Homebuilding Forums

Ask questions, offer advice, and share your work

Log in or create an account to post a comment.

Sign up Log in

Become a member and get full access to FineHomebuilding.com

More Preservation

View All
  • What to Know When Buying Kitchen Cabinetry
  • Preservation Meets Today’s Tastes & Modern Lifestyle
  • 10 Budget-Savvy Renovation Tips
  • Preservation Terms to Know
View All

Up Next

Video Shorts

Featured Story

FHB Podcast Segment: Gutter Covers 101

Gutter covers may be riskier than you think.

Featured Video

Builder’s Advocate: An Interview With Viewrail

Learn more about affordable, modern floating stairs, from design to manufacturing to installation.

Related Stories

  • Period Kitchen for an Arts & Crafts House
  • Preserving a Greek Revival Farmhouse
  • Preservation Meets Today’s Tastes & Modern Lifestyle
  • Preservation Terms to Know

Discussion Forum

Recent Posts and Replies

  • |
  • |
  • |
  • |
  • |
  • |
View More Create Post

Highlights

Fine Homebuilding All Access
Fine Homebuilding Podcast
Tool Tech
Plus, get an extra 20% off with code GIFT20

"I have learned so much thanks to the searchable articles on the FHB website. I can confidently say that I expect to be a life-long subscriber." - M.K.

Get home building tips, offers, and expert advice in your inbox

Signing you up...

This site is protected by reCAPTCHA and the Google Privacy Policy and Terms of Service apply.
See all newsletters
See all newsletters

Video

View All Videos
  • Window Glazing with Traditional Putty
  • Making and Installing Wood Wall Paneling
  • Building a Flush Interior Door With Carpenter Casey Knips
  • How to Repair Shrinking Crown Molding
View All

Finish Carpentry

View All Finish Carpentry Articles
  • That Modern Look
  • Template for Bullnose Base Corners
  • Simple Miter Measurements
View All Finish Carpentry Articles

Fine Homebuilding Magazine

  • Issue 330 - April/May
    • Deck Details for Durability
    • FAQs on HPWHs
    • 10 Tips for a Long-Lasting Paint Job
  • Issue 329 - Feb/Mar 2025
    • Smart Foundation for a Small Addition
    • A Kominka Comes West
    • Making Small Kitchens Work
  • Issue 328 - Dec/Jan 2024
    • How a Pro Replaces Columns
    • Passive House 3.0
    • Tool Test: Compact Line Lasers
  • Issue 327 - November 2024
    • Repairing Damaged Walls and Ceilings
    • Plumbing Protection
    • Talking Shop
  • Issue 326 - October 2024
    • Paint Behind Strike Plates
    • Conceal Cut Ends
    • Ladder Slip Solution

Fine Home Building

Newsletter Sign-up

  • Fine Homebuilding

    Home building tips, offers, and expert advice in your inbox.

  • Green Building Advisor

    Building science and energy efficiency advice, plus special offers, in your inbox.

  • Old House Journal

    Repair, renovation, and restoration tips, plus special offers, in your inbox.

Signing you up...

This site is protected by reCAPTCHA and the Google Privacy Policy and Terms of Service apply.
See all newsletters

Follow

  • Fine Homebuilding

    Dig into cutting-edge approaches and decades of proven solutions with total access to our experts and tradespeople.

    Start Free Trial Now
    • Facebook
    • Instagram
    • X
    • LinkedIn
  • GBA Prime

    Get instant access to the latest developments in green building, research, and reports from the field.

    Start Free Trial Now
    • Facebook
    • YouTube
  • Old House Journal

    Learn how to restore, repair, update, and decorate your home.

    Subscribe Now
    • Facebook
    • Instagram
    • X

Membership & Magazine

  • Online Archive
  • Start Free Trial
  • Magazine Subscription
  • Magazine Renewal
  • Gift a Subscription
  • Customer Support
  • Privacy Preferences
  • About
  • Contact
  • Advertise
  • Careers
  • Terms of Use
  • Site Map
  • Do not sell or share my information
  • Privacy Policy
  • Accessibility
  • California Privacy Rights

© 2025 Active Interest Media. All rights reserved.

Fine Homebuilding receives a commission for items purchased through links on this site, including Amazon Associates and other affiliate advertising programs.

X
X
This is a dialog window which overlays the main content of the page. The modal window is a 'site map' of the most critical areas of the site. Pressing the Escape (ESC) button will close the modal and bring you back to where you were on the page.

Main Menu

  • How-To
  • Design
  • Tools & Materials
  • Video
  • Blogs
  • Forum
  • Project Guides
  • Reader Projects
  • Magazine
  • Members
  • FHB House

Podcasts

  • FHB Podcast
  • ProTalk

Webinars

  • Upcoming and On-Demand

Podcasts

  • FHB Podcast
  • ProTalk

Webinars

  • Upcoming and On-Demand

Popular Topics

  • Kitchens
  • Business
  • Bedrooms
  • Roofs
  • Architecture and Design
  • Green Building
  • Decks
  • Framing
  • Safety
  • Remodeling
  • Bathrooms
  • Windows
  • Tilework
  • Ceilings
  • HVAC

Magazine

  • Current Issue
  • Past Issues
  • Magazine Index
  • Subscribe
  • Online Archive
  • Author Guidelines

All Access

  • Member Home
  • Start Free Trial
  • Gift Membership

Online Learning

  • Courses
  • Project Guides
  • Reader Projects
  • Podcast

More

  • FHB Ambassadors
  • FHB House
  • Customer Support

Account

  • Log In
  • Join

Newsletter

Get home building tips, offers, and expert advice in your inbox

Signing you up...

This site is protected by reCAPTCHA and the Google Privacy Policy and Terms of Service apply.
See all newsletters
See all newsletters

Follow

  • X
  • YouTube
  • instagram
  • facebook
  • pinterest
  • Tiktok

Join All Access

Become a member and get instant access to thousands of videos, how-tos, tool reviews, and design features.

Start Your Free Trial

Subscribe

FHB Magazine

Start your subscription today and save up to 70%

Subscribe

We hope you’ve enjoyed your free articles. To keep reading, become a member today.

Get complete site access to expert advice, how-to videos, Code Check, and more, plus the print magazine.

Start your FREE trial

Already a member? Log in