FHB Logo Facebook LinkedIn Email Pinterest Twitter X Instagram Tiktok YouTube Plus Icon Close Icon Navigation Search Icon Navigation Search Icon Arrow Down Icon Video Guide Icon Article Guide Icon Modal Close Icon Guide Search Icon Skip to content
Subscribe
Log In
  • How-To
  • Design
  • Tools & Materials
  • Restoration
  • Videos
  • Blogs
  • Forum
  • Magazine
  • Members
  • FHB House
  • Podcast
Log In
How-To

Building a Flush Interior Door With Carpenter Casey Knips

Get a closer look at the building process for this durable, flush, lightweight door.

By Casey Knips

Follow along as Casey Knips of True Fit Carpentry builds a custom flush interior door with engineered lumber, an aluminum honeycomb core, and red oak edgebanding. The door needs to be incredibly flat and lightweight, so the rim board is LSL while the front and back are MDF. From cutting lumber to applying veneer and everything in between, Casey expertly explains every step of the door-building process and offers tons of pro tips along the way.

Here’s the Transcript:

What you are looking at here in this vacuum bag is an interior flush door. I have a job coming up with some paneling that includes two hidden doors over 8 ft. I needed doors that were very flat, without any twist, and lightweight. That’s why I chose this door construction, which consists of engineered materials like LSL and MDF, combined with an aluminum honeycomb core to keep the door straight.

Let’s Build This Door

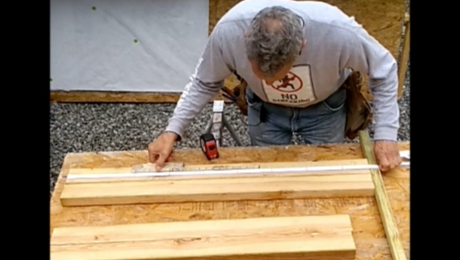
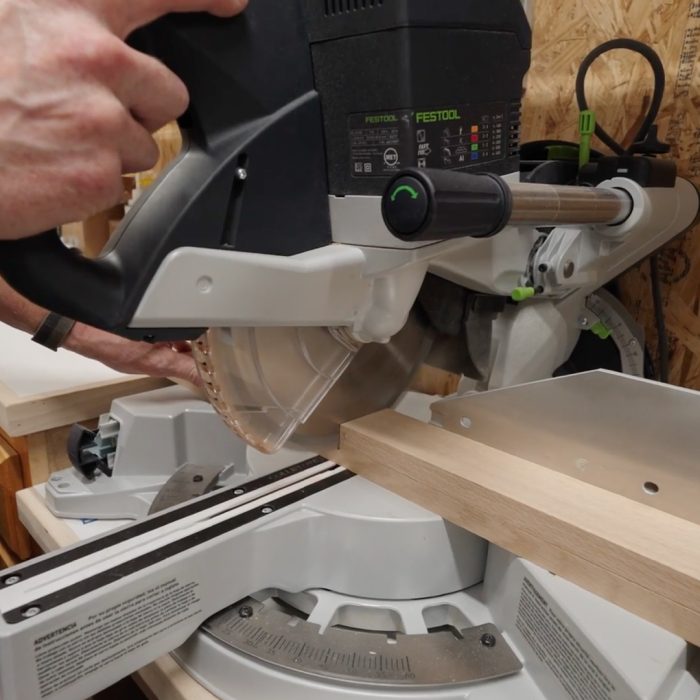
This is solid LSL rim board, which I like because it’s very straight and engineered. It’s 1-1/8 in. thick, and I need to plane it down to 1 in. to match the thickness of the aluminum core. This means I only need to take off 1/16 in. from each side. I’ll cut it into pieces to frame the door (stiles and rails). The top rail will be several inches longer to account for planer snipe, and the bottom rail will be glued up from two pieces. After letting the glue set, I’ll plane everything down to the required thickness.

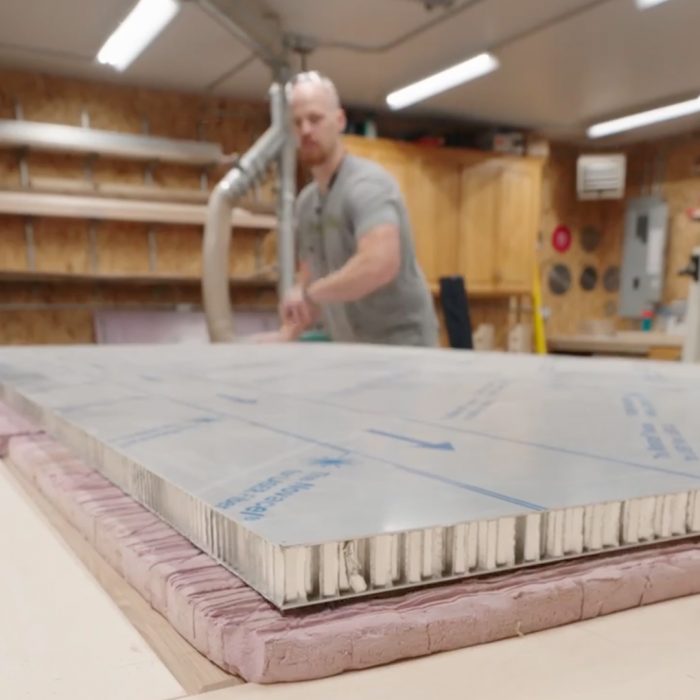
I have MDF for the front and back of the door — this 1/2-in. MDF keeps the weight down and ensures flatness. When I glue the LSL frame, aluminum core, and MDF together, I’m confident it will create a very flat door. Next, I’ll cut the aluminum honeycomb core to the finished size. I chose this core because it’s lightweight, consistent in thickness, and extremely flat. Using a special aluminum cutting blade on my track saw, I’ll trim it to the width I need.

The glued-up pieces are ready to be run through the planer to reach the required thickness. Once everything is cut to final size and width, I’ll glue up the rails and stiles. I’ll also add a few loose tenons for alignment, not strength, with minimal glue. For better adhesion, I’ll sand the MDF surface slightly for more grip.

Into the Vacuum Bag

The next step is a dry run with the vacuum bag to ensure there are no issues. This bag has a zipper that makes it easy to use for large pieces. I’ll clean the aluminum honeycomb core, which has an epoxy primer, with denatured alcohol before applying epoxy.

The goal is even coverage on all surfaces, including the aluminum and MDF. I’ll also pin the pieces slightly to prevent shifting inside the vacuum bag. A protective layer will be added to protect the bag, and then everything will be placed in the bag and pressed for at least 24 hours.

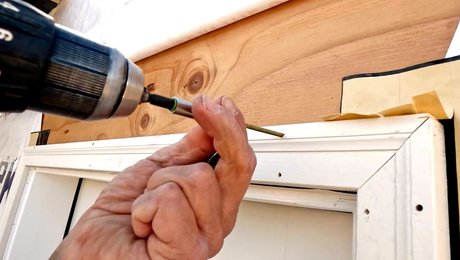
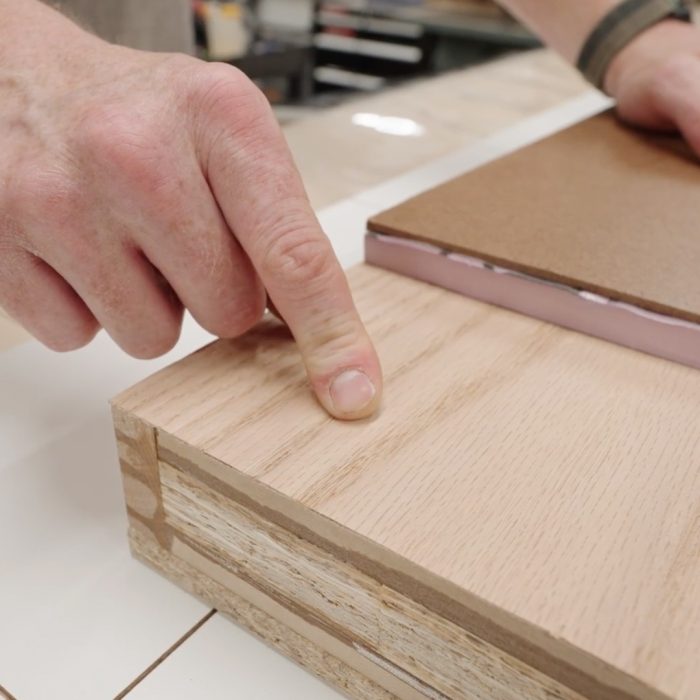
After 24 hours in the vacuum bag, the door will be removed, trimmed to the final width, and prepared for red oak edgebanding. A local company provided the oak, which I’ll cut slightly proud and glue to the edges of the door. Once the epoxy sets, I’ll use a flush-trim bit to clean up the edges, ensuring the MDF aligns perfectly with the oak for veneering. Finally, I’ll alternate parallel clamps on both sides to avoid stress imbalances.

Edges

And then this one I’m going to do a little different. I’m going to do this edge, and I’ll probably have to do two coats on this because it will soak into the MDF quite a bit. So I’ll coat both edges and then do the red oak and come back and do this again. You can see after applying this second coat, it’s pretty quick. You can just see it build up a little film finish, which is what I’m looking for.

Since the MDF is so porous, I wanted some of it to soak in. We have both sides with a layer of epoxy. We have to raise it up, but this is where that 3/4-in. oak is going to be helpful so that we don’t have to move the door up and down; we just have to move the edging.

If your edging is pretty close to flush, it doesn’t have to be exact. I’m going to put light pressure on that and move down to the next one. Same thing: if you get it up, you can feel it with your hands from underneath and apply light pressure.

Now that I like where everything is — it’s pretty close to being centered — I’m going to tighten up the clamps a little bit and then start adding clamps on top, alternating as I go. The nice thing with this call is that it gives rigid material with this honeycomb shape, providing even pressure across the entire length. I cut it to the width needed so it applies consistent pressure everywhere.

Seams

Now I’ll show the process for seaming these pieces together. My seam lines up nicely here in the middle. I’ll use some blue tape, which is slightly elastic. I put it down on one edge, pull the tape a little, and push it down. I do this about every 2 to 3 in.

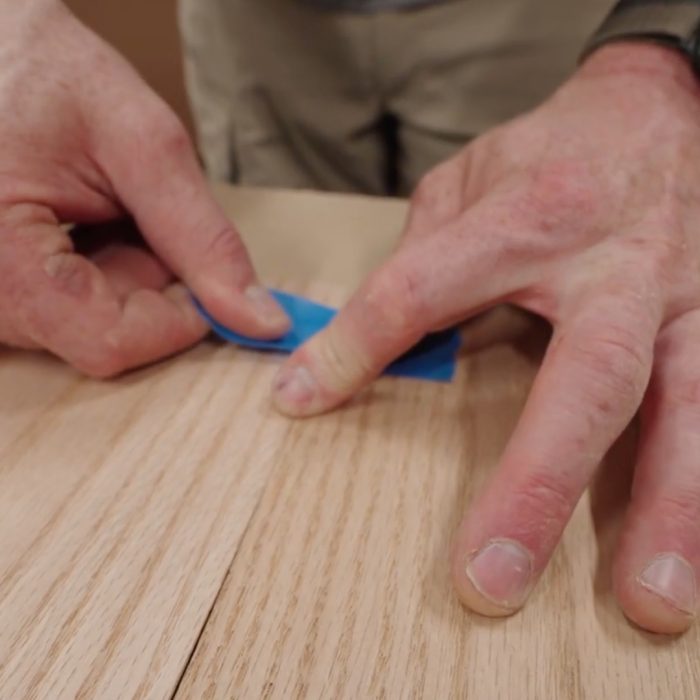
Now that I like how it looks, I’ll run a layer of tape down the entire length. Then I make sure the seam is pushed down firmly for even pressure. This is just two out of the five pieces. Now that one side is stitched together, I can flip it over and carefully let it hang over the edge.

With the amount of tape applied, it won’t move. I’ll take a glue bottle and run a very small bead all the way down this 1/16-in. material because I want this to act as one big sheet. I don’t want to piece these together in the vacuum bag. Once the glue is applied evenly, I’ll put it back, and glue will squeeze out along the piece.

I’ll use a putty knife to remove the excess glue and sandpaper (100–120 grit) to clean up the seam. Sanding also mixes dust with glue to fill small gaps, making them disappear. Since it’s stitched on the backside, I’ll add a few strips of tape along the seam for security before vacuum-bagging it.

I’ll let it sit overnight with toolboxes or something similar on top for even pressure across the veneer. After 24 hours, I’ll remove the clamps. The 3/4-in. red oak edging was left proud of the surface, so I’ll use a router and flush-trim bit to make it flush with the MDF.

Veneer

After routing, I’ll sand the edge to clean up any leftover epoxy residue. Even though there’s some residue, I’m not worried about it affecting the veneering process. I’ll double-check with the sander to ensure the edge is straight without any dips.

That side is now ready for veneer. In the vacuum bag setup, I have my platen, 1/2-in. foam (to prevent epoxy sticking), and hardboard for protection. The foam ensures uniform pressure over the veneer, even in high spots.

The top layer of veneer is coated with epoxy on both sides for even coverage and to prevent warping. It’s essential to veneer both sides of the door to avoid bowing, even if one side isn’t visible.

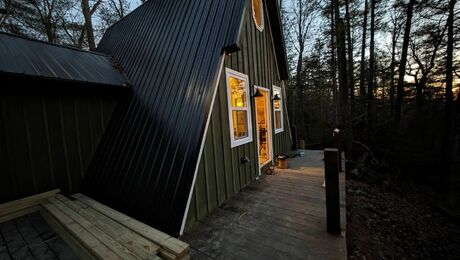
After everything is in the vacuum bag, I’ll leave it for 24 hours. Once it’s set, I’ll trim it to the final width. The oversizing allows for adjustments to account for any minor errors. The next time you see this door, it will be installed on-site.

Thanks for watching this door build. I hope you learned something. This was a unique build for me, and I’m confident in how I handled it. Thanks for tuning in!

RELATED STORIES

  • Big Doors Have Big Challenges
  • Build Your Own Interior Doors
  • Build a High-Performance Door

Sign up for eletters today and get the latest how-to from Fine Homebuilding, plus special offers.

Signing you up...

This site is protected by reCAPTCHA and the Google Privacy Policy and Terms of Service apply.
See all newsletters
See all newsletters
×

Get home building tips, offers, and expert advice in your inbox

Signing you up...

This site is protected by reCAPTCHA and the Google Privacy Policy and Terms of Service apply.
See all newsletters
See all newsletters

New Feature

Fine Homebuilding Forums

Ask questions, offer advice, and share your work

Log in or create an account to post a comment.

Sign up Log in

Become a member and get full access to FineHomebuilding.com

Up Next

Video Shorts

Featured Story

Eight Common Electrical Myths and Mistakes

Dangerous electrical work and widespread misconceptions cause fires, deaths, and $1.5 billion in property damage annually.

Featured Video

Micro-Adjust Deck-Baluster Spacing for an Eye-Deceiving Layout

No math, no measuring—just a simple jig made from an elastic band is all you need to lay out a good-looking deck railing.

Related Stories

  • Window Glazing with Traditional Putty
  • Fastening an Exterior Door With Brick Mold
  • Making and Installing Wood Wall Paneling
  • Big Doors Have Big Challenges

Discussion Forum

Recent Posts and Replies

  • |
  • |
  • |
  • |
  • |
  • |
View More Create Post

Highlights

Fine Homebuilding All Access
Fine Homebuilding Podcast
Tool Tech
Plus, get an extra 20% off with code GIFT20

"I have learned so much thanks to the searchable articles on the FHB website. I can confidently say that I expect to be a life-long subscriber." - M.K.

Get home building tips, offers, and expert advice in your inbox

Signing you up...

This site is protected by reCAPTCHA and the Google Privacy Policy and Terms of Service apply.
See all newsletters
See all newsletters

Video

View All Videos
  • Fastening an Exterior Door With Brick Mold
  • Building a Flush Interior Door With Carpenter Casey Knips
  • Podcast Episode 627: Leaky Doors, Flashing, and Kneewalls
  • Podcast 380: 40th FHB-Anniversary-Edition Interview With Gary Katz
View All

Finish Carpentry

View All Finish Carpentry Articles
  • That Modern Look
  • Template for Bullnose Base Corners
  • Simple Miter Measurements
View All Finish Carpentry Articles

Fine Homebuilding Magazine

  • Issue 330 - April/May
    • Deck Details for Durability
    • FAQs on HPWHs
    • 10 Tips for a Long-Lasting Paint Job
  • Issue 329 - Feb/Mar 2025
    • Smart Foundation for a Small Addition
    • A Kominka Comes West
    • Making Small Kitchens Work
  • Issue 328 - Dec/Jan 2024
    • How a Pro Replaces Columns
    • Passive House 3.0
    • Tool Test: Compact Line Lasers
  • Issue 327 - November 2024
    • Repairing Damaged Walls and Ceilings
    • Plumbing Protection
    • Talking Shop
  • Issue 326 - October 2024
    • Paint Behind Strike Plates
    • Conceal Cut Ends
    • Ladder Slip Solution

Fine Home Building

Newsletter Sign-up

  • Fine Homebuilding

    Home building tips, offers, and expert advice in your inbox.

  • Green Building Advisor

    Building science and energy efficiency advice, plus special offers, in your inbox.

  • Old House Journal

    Repair, renovation, and restoration tips, plus special offers, in your inbox.

Signing you up...

This site is protected by reCAPTCHA and the Google Privacy Policy and Terms of Service apply.
See all newsletters

Follow

  • Fine Homebuilding

    Dig into cutting-edge approaches and decades of proven solutions with total access to our experts and tradespeople.

    Start Free Trial Now
    • Facebook
    • Instagram
    • X
    • LinkedIn
  • GBA Prime

    Get instant access to the latest developments in green building, research, and reports from the field.

    Start Free Trial Now
    • Facebook
    • YouTube
  • Old House Journal

    Learn how to restore, repair, update, and decorate your home.

    Subscribe Now
    • Facebook
    • Instagram
    • X

Membership & Magazine

  • Online Archive
  • Start Free Trial
  • Magazine Subscription
  • Magazine Renewal
  • Gift a Subscription
  • Customer Support
  • Privacy Preferences
  • About
  • Contact
  • Advertise
  • Careers
  • Terms of Use
  • Site Map
  • Do not sell or share my information
  • Privacy Policy
  • Accessibility
  • California Privacy Rights

© 2025 Active Interest Media. All rights reserved.

Fine Homebuilding receives a commission for items purchased through links on this site, including Amazon Associates and other affiliate advertising programs.

X
X
This is a dialog window which overlays the main content of the page. The modal window is a 'site map' of the most critical areas of the site. Pressing the Escape (ESC) button will close the modal and bring you back to where you were on the page.

Main Menu

  • How-To
  • Design
  • Tools & Materials
  • Video
  • Blogs
  • Forum
  • Project Guides
  • Reader Projects
  • Magazine
  • Members
  • FHB House

Podcasts

  • FHB Podcast
  • ProTalk

Webinars

  • Upcoming and On-Demand

Podcasts

  • FHB Podcast
  • ProTalk

Webinars

  • Upcoming and On-Demand

Popular Topics

  • Kitchens
  • Business
  • Bedrooms
  • Roofs
  • Architecture and Design
  • Green Building
  • Decks
  • Framing
  • Safety
  • Remodeling
  • Bathrooms
  • Windows
  • Tilework
  • Ceilings
  • HVAC

Magazine

  • Current Issue
  • Past Issues
  • Magazine Index
  • Subscribe
  • Online Archive
  • Author Guidelines

All Access

  • Member Home
  • Start Free Trial
  • Gift Membership

Online Learning

  • Courses
  • Project Guides
  • Reader Projects
  • Podcast

More

  • FHB Ambassadors
  • FHB House
  • Customer Support

Account

  • Log In
  • Join

Newsletter

Get home building tips, offers, and expert advice in your inbox

Signing you up...

This site is protected by reCAPTCHA and the Google Privacy Policy and Terms of Service apply.
See all newsletters
See all newsletters

Follow

  • X
  • YouTube
  • instagram
  • facebook
  • pinterest
  • Tiktok

Join All Access

Become a member and get instant access to thousands of videos, how-tos, tool reviews, and design features.

Start Your Free Trial

Subscribe

FHB Magazine

Start your subscription today and save up to 70%

Subscribe

This exclusive content is for members only

Get complete site access to expert advice, how-to videos, Code Check, and more, plus the print magazine.

Start your FREE trial

Already a member? Log in