FHB Logo Facebook LinkedIn Email Pinterest Twitter X Instagram Tiktok YouTube Plus Icon Close Icon Navigation Search Icon Navigation Search Icon Arrow Down Icon Video Guide Icon Article Guide Icon Modal Close Icon Guide Search Icon Skip to content
Subscribe
Log In
  • How-To
  • Design
  • Tools & Materials
  • Restoration
  • Videos
  • Blogs
  • Forum
  • Magazine
  • Members
  • FHB House
  • Podcast
Log In

Fine Homebuilding Project Guides

Drywall

Guide Home
  • Drywall Basics
  • Tools and Materials
  • Hanging Drywall
  • Taping and Sanding
  • Special Installations
  • Drywall Repairs
  • Plaster
How-To

Install and Finish Drywall: 9 Secrets to an Effortless Install

These straightforward steps will make any drywall-hanging job easier.
By Myron R. Ferguson

Jump to all the videos in this series

Choosing when to cut, where to cut, and how to cut your sheets of drywall can make all the difference in getting the best fit and finish. Plus, using the right tools will put less strain on your body and more money in your pocket. Here are 9 tips that will help you get the job done right:

1. Cut through the good side to save time

When you’re hanging drywall, there is seldom a piece that doesn’t need to be cut to length. Most of our drywall is leaning against a wall; it’s standing on edge and easier to cut. Score along the edge of the t-square, and snap away from the cut. If you’re first cut is on the good face, stick your knife through the face right into the groove that has already been snapped. Cut through the back paper that way. If you’re cutting through the back side first, don’t do this, because you’ll tear the paper on the good face.

2. Trim drywall in place when possible

Don’t bother cutting the drywall to the exact length if there’s room to overhang past the end of the wall. Fasten it to the framing first; then take a utility knife and score along the outside corner, snap the panel away, and cut the other side.

3. Cut openings after hanging the sheet

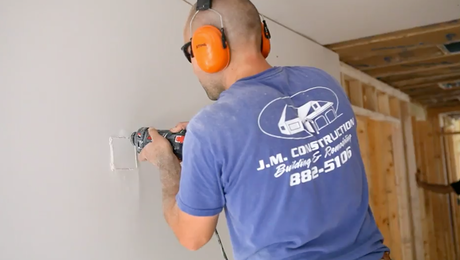
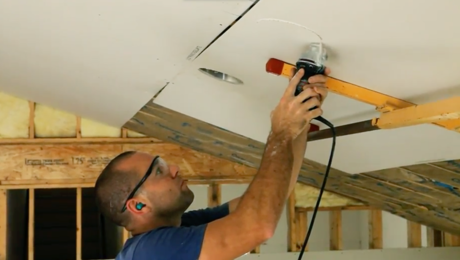
We typically cut out any penetrations through the wall after the drywall is attached. It’s more accurate to cut the drywall when it’s in place. This applies to any penetration through the wall: doors, windows, electrical boxes, and recessed lights.

4. Cut short to ensure the sheet will fit

You can cut sheets shorter by 3/8 in to 1/2 in without compromising the tape joints. It’s actually better to be a little short that too tight. Plus, you will save time by not having to make several attempts to fit a sheet of drywall.

5. Before hanging, mark for electrical boxes, light fixtures, and framing

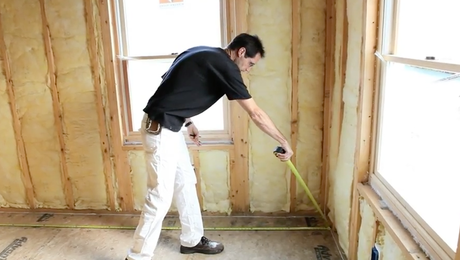
Put an “X” on the floor underneath each outlet. Also, measure the distance from two perpendicular walls to every ceiling box; mark these measurements on the top plates of the walls. Together, the marks will show help you find the center of each light fixture.

You can often mark framing locations with the panel tucked into the corner. Take your pencil and mark directly on the sheet at each stud.

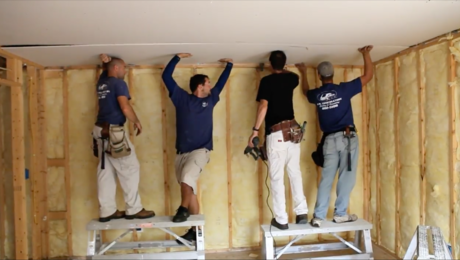
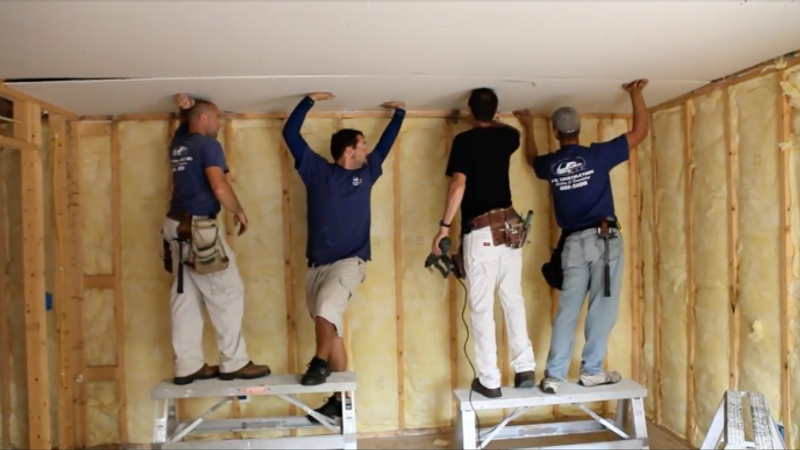
6. Use adjustable benches to work at the right height

Place your head right against the ceiling in case you need your head to support the panel. The legs of the benches are adjustable. In case of height difference each person would have their own individual bench to work off of.

7. Use the drywall as an air barrier

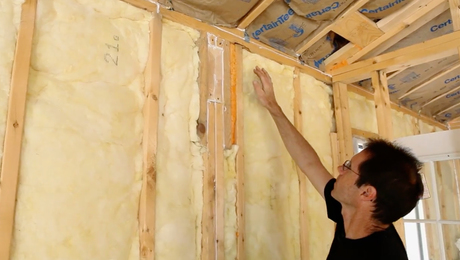
On this job we’re using the drywall as an air barrier. On any of our exterior walls or ceilings the drywall is going to be placed into some adhesive so the air doesn’t get into the wall or ceiling cavity. All the ceiling fixtures and outlets are boxed in with foam insulations. When we hang the drywall over the fixtures or outlets we’re going use a bead of adhesive caulk and seal the fixture in.

8. Remove screws that miss the mark

Using a hammer to remove screws is going to cause a little damage. Every time you have a miss you have to remove it. If you drive the screw in, it isn’t going to hit anything and it will work its way out. Every time you remove a screw by pulling it out you get a little fuzz raised up. It’ll be difficult to hide later so use the end of the screw driver to indent the frayed edge.

9. Use these five tools for an easier install:

  • Drywall lift: Get the drywall to the ceiling faster and easier
  • Auto-feed driver: Don’t waste time placing screws by hand
  • Foot jack: Keep your hands free to drive the screws
  • Mini router with a spiral bit: Cut electrical boxes and recessed lights in place for more accuracy and efficiency
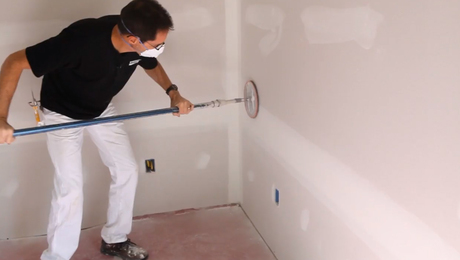
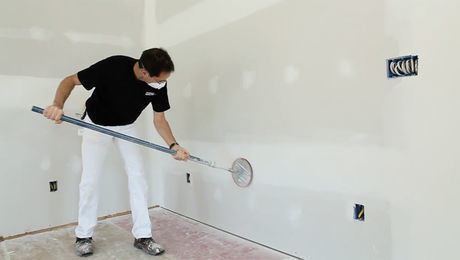
  • Auto-feed adhesive dispenser: Tape faster with less mess

Sign up for eletters today and get the latest how-to from Fine Homebuilding, plus special offers.

Signing you up...

This site is protected by reCAPTCHA and the Google Privacy Policy and Terms of Service apply.
See all newsletters
See all newsletters

Videos in the Series

  • Series Introduction: Install and Finish Drywall

    In this video series, a drywall expert shares his no-nonsense tips for making the job go smoother, and for getting a perfect finish every time.

  • Install and Finish Drywall: 7 Tips for an Accurate Takeoff

    Ordering the proper materials is really important because your main goal is to reduce the lineal footage of seams that you're going to have to tape later.

  • Install and Finish Drywall: 7 Fixes Before Delivery

    Prep your framing so that drywall sits flat and is easy to fasten securely.

  • Install and Finish Drywall: 9 Secrets to an Effortless Install

    These straightforward steps will make any drywall-hanging job easier.

  • Install and Finish Drywall: 9 Rules for Hanging a Vaulted Ceiling

    Cover cathedral ceilings faster and easier by following a few basic rules.

  • Install and Finish Drywall Series: 7 Tips for the Best Basic Finish

    Pro drywall installer Myron Ferguson shares techniques that will help you get smoother seams with almost no sanding.

  • Install and Finish Drywall Series: 6 Steps to a Level-5 Finish

    High-gloss paint and harsh lighting will show every imperfection in your walls unless you take this additional step to eliminate surface differences.

Previous: Hanging Drywall Next: Horizontal vs. Vertical Drywall: Which is Best?

Guide

Drywall

Chapter

Hanging Drywall

View Comments

  1. skullnba | Aug 22, 2019 06:21pm | #1

    When cutting the penetrations after hanging, how do you avoid running the router bit into the sides of the receptacles?

    1. user-7195315 | Aug 23, 2019 11:42am | #2

      Could you use a router bit with a bearing on the far end? That way the bearing would rub harmlessly along the inside of the electrical box and guide the cutting blade. I think they call them flush-trim bits. Not sure if I can post a link, but I'll try: https://www.homedepot.com/p/Diablo-1-4-in-Double-Bearing-Flush-Trim-Bit-DR50501/204073454?cm_mmc=Shopping%7CG%7CBase%7CD25T%7C25-7_POWER+TOOL+ACCESSORIES%7CNA%7CPLA%7c71700000034127227%7c58700003933021549%7c92700031755124913&gclid=CjwKCAjwnf7qBRAtEiwAseBO_EzbDLoiLhgpGkhvsu9iB4lz_H1O8xmX9uDXKPe7TMO0k6nQLm6MlhoCt5YQAvD_BwE&gclsrc=aw.ds

      1. skullnba | Sep 15, 2019 10:35pm | #4

        That first bearing wouldn't be able to bust through the drywall though. You'd have to go around and drill a hole at every penetration that would let you insert the bit.

  2. taper1 | Aug 23, 2019 12:35pm | #3

    You really shouldn't put board standing up against wall to cut, it's a saftey hazard they can fall towards you crushing you. A few sheets is one thing but the whole stack is another story.

Log in or create an account to post a comment.

Sign up Log in

Become a member and get full access to FineHomebuilding.com

Drywall

Drywall

Trusted, comprehensive guidance for choosing, hanging, taping, sanding, and repairing drywall—the right way

View Project Guide

View All Project Guides »

Become a member and get unlimited site access, including the Drywall Project Guide.

Start Free Trial

Drywall Basics
  • Types and Uses of Drywall
  • Planning the Job
Tools and Materials
  • Hanging Tools
  • Taping Tools and Materials
  • Sanding and Finishing Tools and Materials
Hanging Drywall
  • Prep for Hanging
  • Measuring and Cutting Drywall
  • Guidelines for Hanging and Fastening Drywall
  • Hanging Ceilings
  • Hanging Walls
  • Hanging Airtight Drywall
  • Trim Accessories/Corner Beads
Taping and Sanding
  • Taping Basics
  • Taping Seams
  • Taping Inside and Outside Corners
  • Sanding
Special Installations
  • Tricky Transitions
  • Curved Surfaces
  • Other Special Installations
  • Decorating with Drywall
Drywall Repairs
  • Patching Holes, Cracks, and More
Plaster
  • Working with Lime Plaster
  • Plaster Repair
  • Classic Plaster Techniques

Fine Home Building

Newsletter Sign-up

  • Fine Homebuilding

    Home building tips, offers, and expert advice in your inbox.

  • Green Building Advisor

    Building science and energy efficiency advice, plus special offers, in your inbox.

  • Old House Journal

    Repair, renovation, and restoration tips, plus special offers, in your inbox.

Signing you up...

This site is protected by reCAPTCHA and the Google Privacy Policy and Terms of Service apply.
See all newsletters

Follow

  • Fine Homebuilding

    Dig into cutting-edge approaches and decades of proven solutions with total access to our experts and tradespeople.

    Start Free Trial Now
    • Facebook
    • Instagram
    • X
    • LinkedIn
  • GBA Prime

    Get instant access to the latest developments in green building, research, and reports from the field.

    Start Free Trial Now
    • Facebook
    • YouTube
  • Old House Journal

    Learn how to restore, repair, update, and decorate your home.

    Subscribe Now
    • Facebook
    • Instagram
    • X

Membership & Magazine

  • Online Archive
  • Start Free Trial
  • Magazine Subscription
  • Magazine Renewal
  • Gift a Subscription
  • Customer Support
  • Privacy Preferences
  • About
  • Contact
  • Advertise
  • Careers
  • Terms of Use
  • Site Map
  • Do not sell or share my information
  • Privacy Policy
  • Accessibility
  • California Privacy Rights

© 2025 Active Interest Media. All rights reserved.

Fine Homebuilding receives a commission for items purchased through links on this site, including Amazon Associates and other affiliate advertising programs.

X
X
This is a dialog window which overlays the main content of the page. The modal window is a 'site map' of the most critical areas of the site. Pressing the Escape (ESC) button will close the modal and bring you back to where you were on the page.

Main Menu

  • How-To
  • Design
  • Tools & Materials
  • Video
  • Blogs
  • Forum
  • Project Guides
  • Reader Projects
  • Magazine
  • Members
  • FHB House

Podcasts

  • FHB Podcast
  • ProTalk

Webinars

  • Upcoming and On-Demand

Podcasts

  • FHB Podcast
  • ProTalk

Webinars

  • Upcoming and On-Demand

Popular Topics

  • Kitchens
  • Business
  • Bedrooms
  • Roofs
  • Architecture and Design
  • Green Building
  • Decks
  • Framing
  • Safety
  • Remodeling
  • Bathrooms
  • Windows
  • Tilework
  • Ceilings
  • HVAC

Magazine

  • Current Issue
  • Past Issues
  • Magazine Index
  • Subscribe
  • Online Archive
  • Author Guidelines

All Access

  • Member Home
  • Start Free Trial
  • Gift Membership

Online Learning

  • Courses
  • Project Guides
  • Reader Projects
  • Podcast

More

  • FHB Ambassadors
  • FHB House
  • Customer Support

Account

  • Log In
  • Join

Newsletter

Get home building tips, offers, and expert advice in your inbox

Signing you up...

This site is protected by reCAPTCHA and the Google Privacy Policy and Terms of Service apply.
See all newsletters
See all newsletters

Follow

  • X
  • YouTube
  • instagram
  • facebook
  • pinterest
  • Tiktok

Join All Access

Become a member and get instant access to thousands of videos, how-tos, tool reviews, and design features.

Start Your Free Trial

Subscribe

FHB Magazine

Start your subscription today and save up to 70%

Subscribe

We hope you’ve enjoyed your free articles. To keep reading, become a member today.

Get complete site access to expert advice, how-to videos, Code Check, and more, plus the print magazine.

Start your FREE trial

Already a member? Log in