
Secrets to Smoother Drywall
Dead-flat walls aren’t just about taping; they start with careful planning, smart staging, and solid installation strategies.
Synopsis: Professional drywaller Myron Ferguson explains the best ways to prepare for installation and to install drywall. He begins with planning best practices and tips for estimating and ordering material, as well as guidelines for avoiding trouble spots. He then moves on to delivery and staging, including checking for fit and optimal stacking methods. He also describes the most efficient ways to hang drywall. The article includes a section on essential extras, including screws, tape, and compound.
Homeowners aren’t likely to be bowled over by a great drywall job like they might be by cabinetry or flooring. Everybody expects flat walls.
Because drywall covers about 80% of the visible surface in most American homes, it demands a quality installation, and because there’s so much of it, there are lots of ways it can go wrong. Some of these mistakes happen before the first panel is hung.
When the right materials are used, and properly installed and finished, drywall can add real beauty to a home. A successful drywall job depends on the work you do before the delivery truck shows up, as well as the efficiency and care of the installation. It doesn’t take a lot of experience or special tools to hang drywall, but doing it well takes a load off of the taping crew, who might charge extra to hide mistakes. Largely, a good hanging job comes down to planning.
Think beyond the standard 4×8 panel
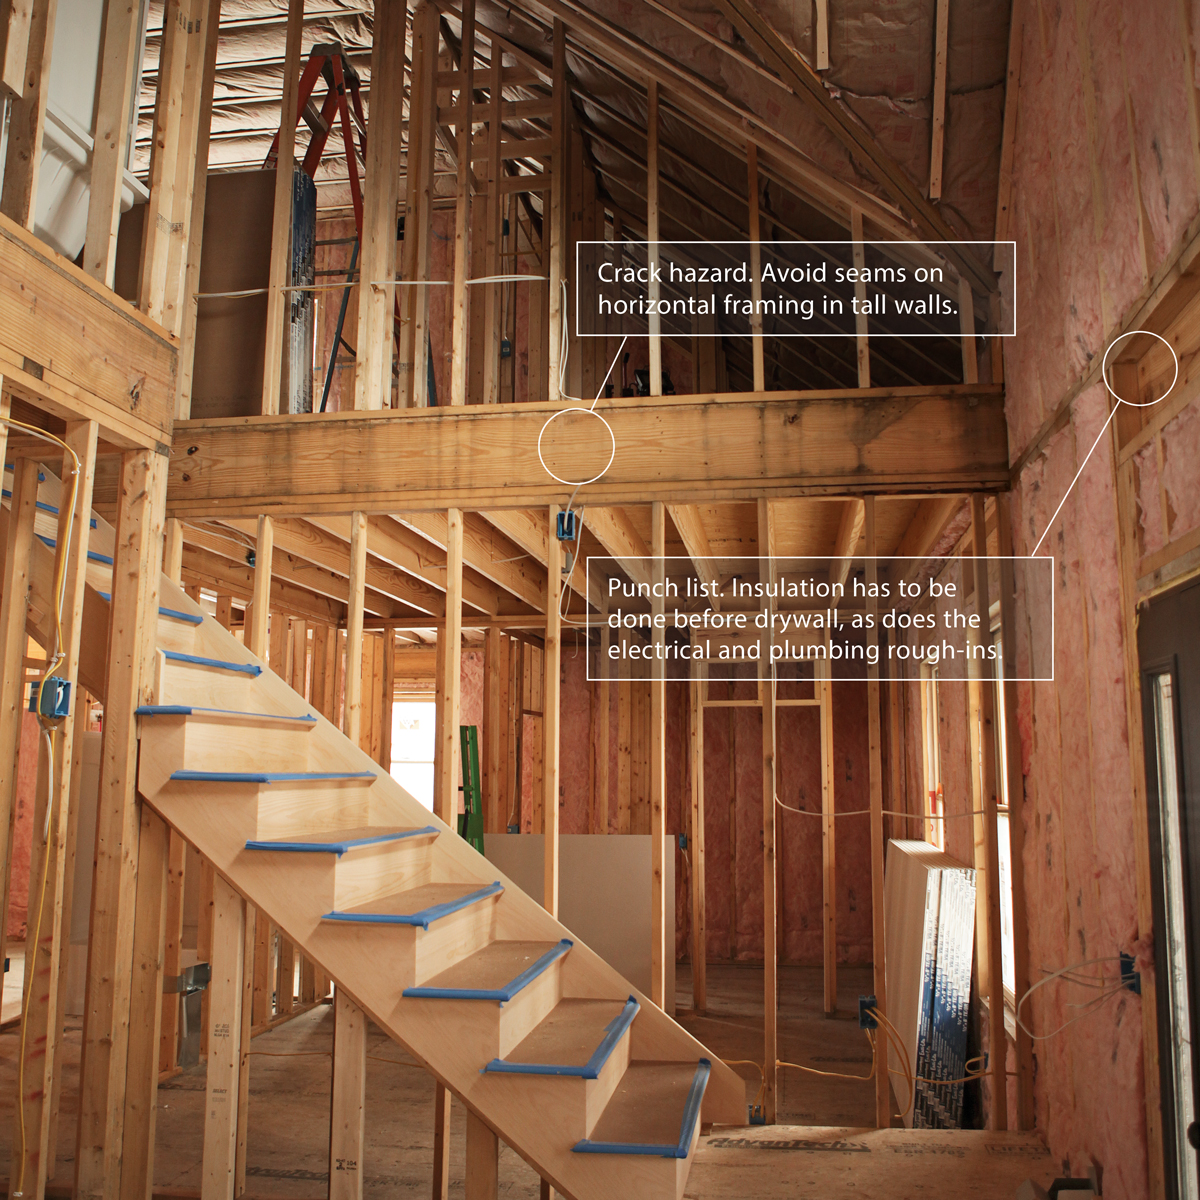
I like to measure for materials as soon as the house is framed. Seeing the structure helps me visualize things that could cause trouble—for example, horizontal framing in some of the tall walls in this house—as well as simple details, such as the actual lengths and heights of ceilings and walls and locations of doors and windows, any of which can be off from the plans.
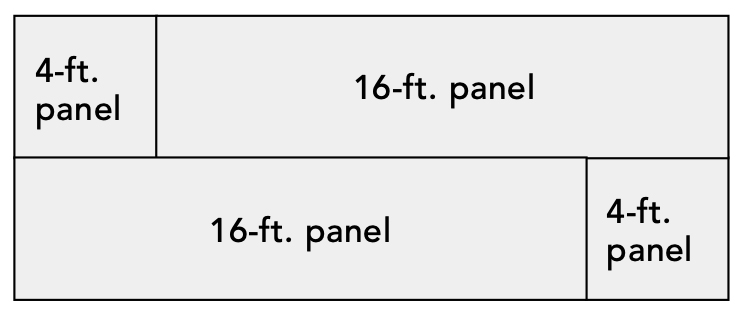
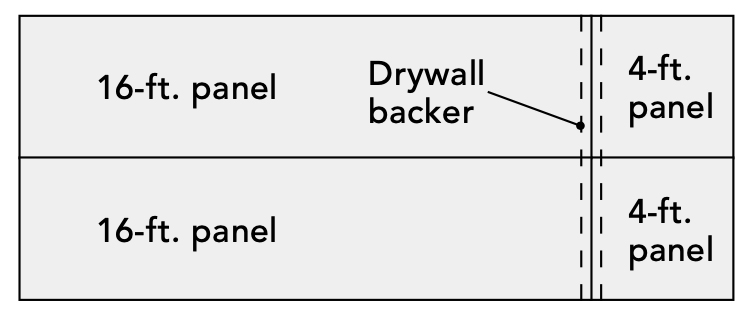
Drywall comes in a range of lengths from 8 ft. to 16 ft., and in widths of 48 in. and 54 in. to accommodate most common wall and ceiling heights. Using the full palette of available sizes can reduce both waste and unnecessary seams. One of the best ways to reduce seams is to use long panels, which can eliminate butted seams on surfaces 16 ft. or shorter, and, mixed with shorter panels, can cover a wide range of odd-size surfaces.
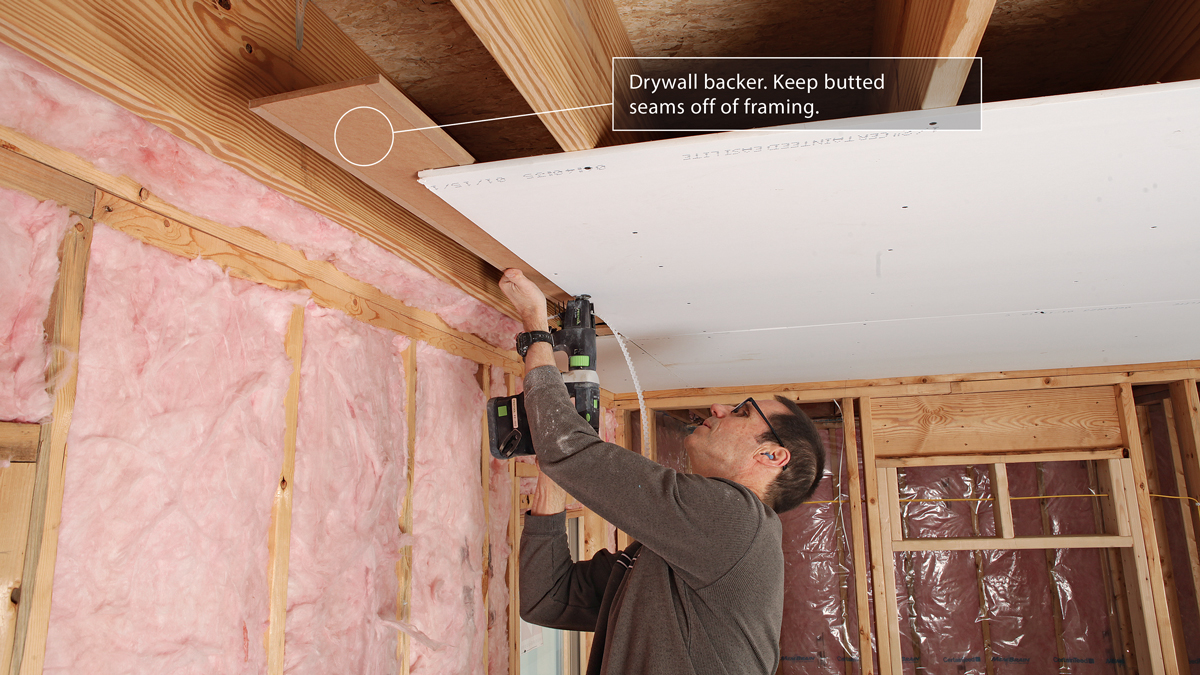
The reason for minimizing butted seams—where the end of one panel butts into the end of another—is both for efficiency and flatter surfaces. The long edges of drywall are tapered so the tape and joint compound can sit flush with the panel face, but that’s not the case with the panel ends, which have no taper, and when joined over a framing member are harder to hide. I use RockSplicer drywall backerboards, which float butted seams between framing, to create a pseudo-tapered joint that’s easier to tape.
On walls, hanging drywall horizontally reduces seams by as much as 25% compared to hanging it vertically, and puts seams at a convenient height for taping. The exception is on walls 54 in. wide or less, where hanging drywall vertically can eliminate seams entirely, and in garages, where aesthetics typically aren’t as important. Also consider window and door openings, because seams above headers and under sills are typically short and easier to hide—but keep the seams in at least 7 in. from the edges of openings, and use adhesive rather than fasteners on large headers to avoid cracks.
On ceilings, drywall is typically hung perpendicular to the framing or furring because it’s less likely to sag, more easily spans framing imperfections, results in fewer ridged seams, adds shear strength, and allows for the use of drywall backers. Only consider attaching it parallel to the ceiling framing or furring if butted seams can be eliminated entirely, but even then, ensure the panel edges have solid backing.
Some framing details can cause problems for drywall, like the horizontal framing in this house’s foyer. Drywall screws in these horizontal members are prone to popping, and seams there are likely to crack or ridge. I figure out what panels are needed to bridge these trouble spots. I’d consider running the panels vertically, but note that vertical seams on bowed-out studs are impossible to hide.
Planning should be precise
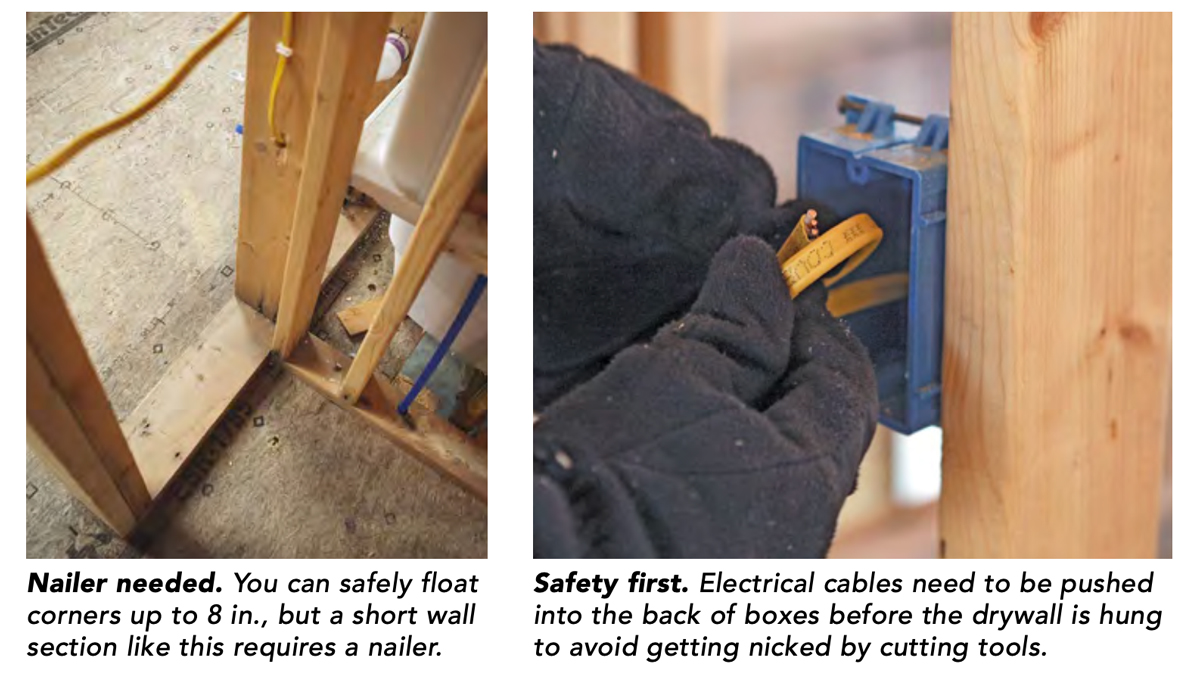
While measuring, note issues you want to bring up to the builder. I look for missing nailers in corners, crooked studs, unshimmed walls above fiberglass showers, loose electrical wires, and missing insulation.
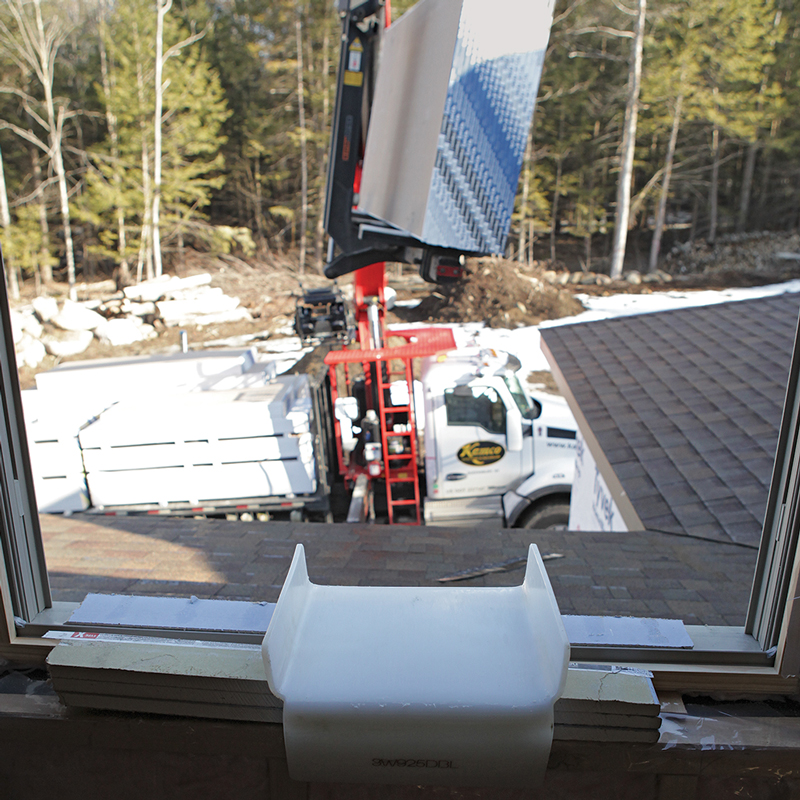
I also check access for the delivery truck, making sure the doors and windows I want to move material through are accessible and clear of obstructions, like utility lines that could get in the way of a boom lift. If necessary, ask the builder to leave out a window, a door, or even a section of plywood on an exterior wall to allow access for the delivery. Look for freshly covered ditches or septic tanks, and assess the condition of the driveway, to make sure they can bear the weight of the delivery truck.
A few days or more before you start hanging, check with the builder to make sure that other trades and the inspections required before the drywall is hung are done. Having a carpenter around to fix framing problems encountered when hanging is useful, so I usually ask if one will be on site those days.
Be organized about your delivery
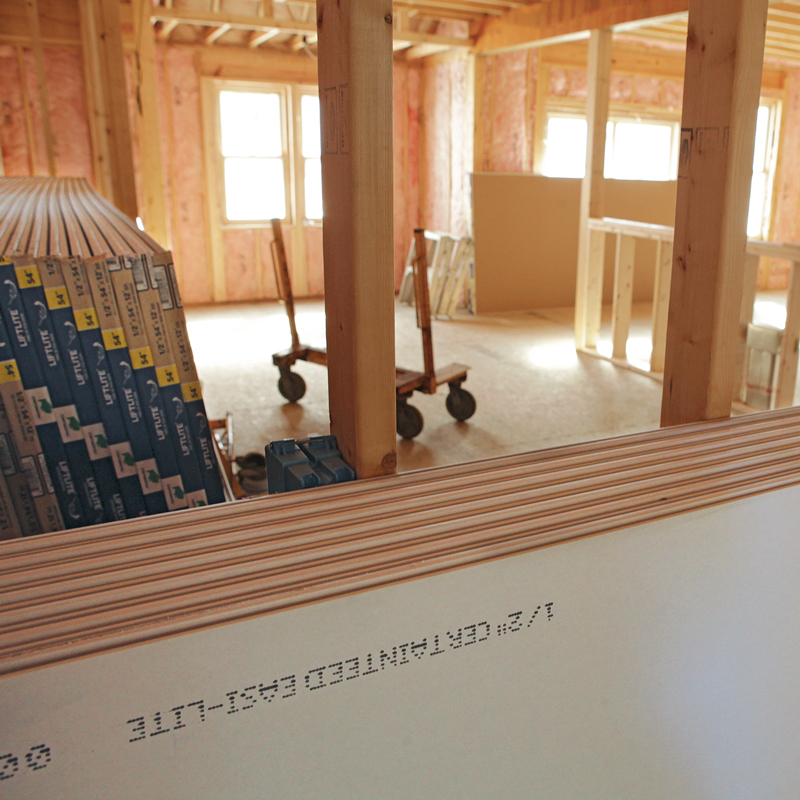
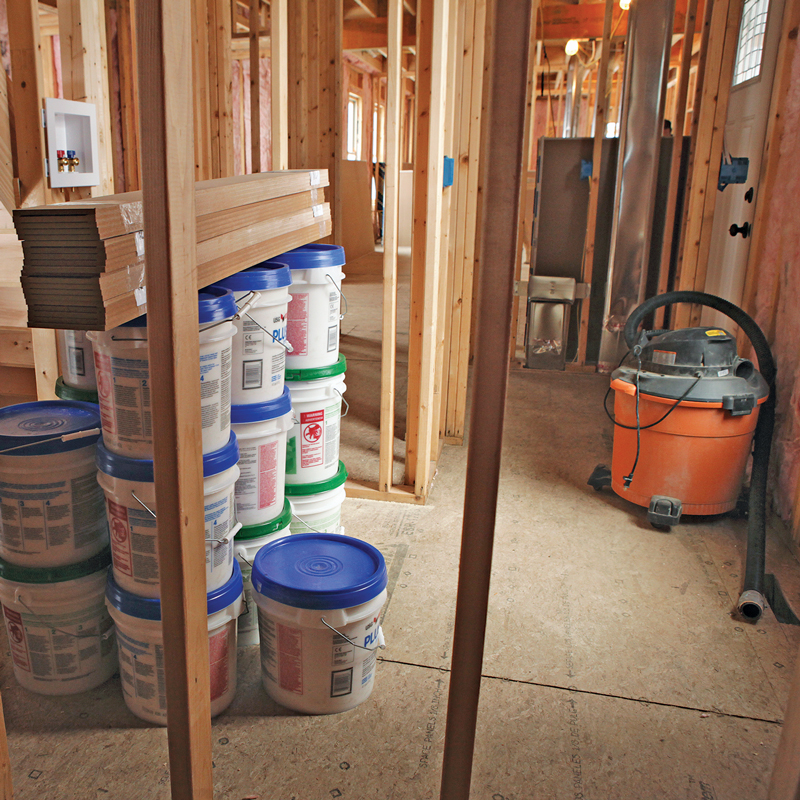
It pays to order materials far in advance so that they can be delivered at least three or four days before hanging starts. This gives the drywall time to acclimate to the space, and leaves time for special-order items to arrive. I order some, but not all, of the compound, backerboard, tape, and fasteners I’ll need when I order the drywall panels. That way I can start taping right away without having buckets and bags taking up lots of space.
The panels have to be distributed in neat groups throughout the building to spread the weight and speed up the hanging process. If it’s winter, the heat should also be on to control the temperature and humidity.
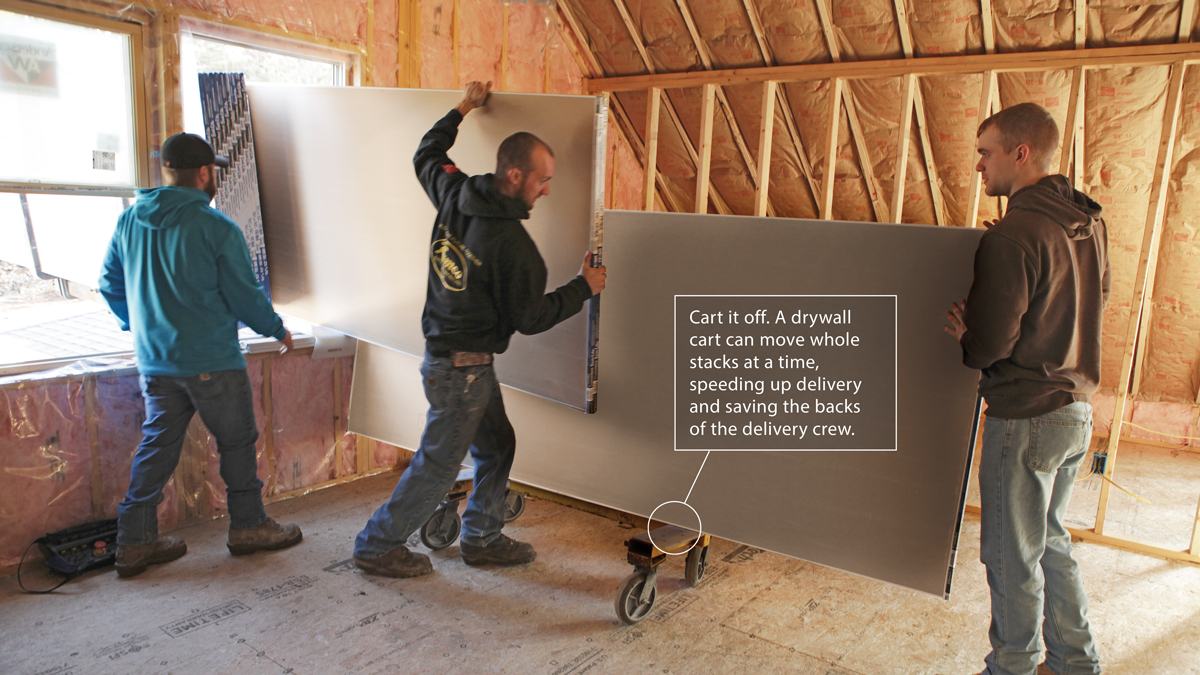
If there’s access, a boom truck can save a lot of hard work. But removing heavy panels from the boom can be awkward. The sashes on most windows can be removed to move drywall through, but make sure to protect the window frame from damage as the panels are slid off the boom. In this case, the delivery guys had a drywall window slide.
The safest way to stack drywall is flat on the floor so it can’t tip over, but it’s more commonly leaned against the walls so it doesn’t get in the way when hanging the ceilings, which are hung first. The angle of the lean is important: the bottom edge should be 4 in. to 6 in. from the wall, with each additional sheet kept tight to the last. A lean of less than 4 in. puts it at risk of tipping over and hurting someone; more than 6 in. will put excessive pressure on the walls. Try to stack the panels in the rooms where they’ll be used, keeping the ceiling drywall in its own stacks or on top.
Hang smarter
To make the best use of materials, hang long full panels first and fill small gaps later with scraps. Cutting full panels just to fill gaps will result in unnecessary butted seams in the last rooms. Don’t get sloppy—clean up the work site periodically, placing small usable pieces in areas where they may be used later.
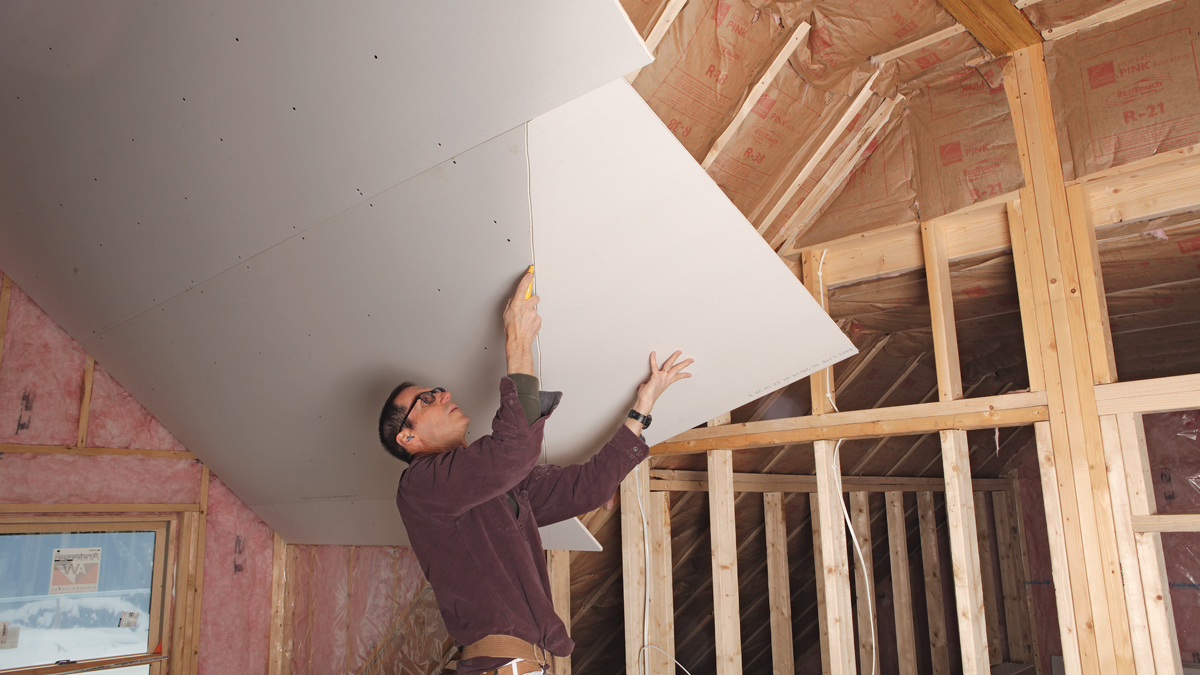
The straightness of the first row of ceiling panels will affect the following rows, so the best place to start is along the longest and straightest wall. Where panels span an entire ceiling between walls, one hanger should lift each panel end high while the other end is kept low, allowing room to maneuver the panel into position without binding on the walls. It also helps to cut these panels a tad short—1/4 in. to 1/2 in. The wall panels will cover the gaps and support the ends of the ceiling panels.
On higher ceilings—or when hanging alone—a drywall lift makes the work easier and safer. On cathedral ceilings, a lift can determine the order of hanging. With a lift, start at the top of the ceiling and work down. If lifting by hand, start at the bottom of the ceiling and work up.
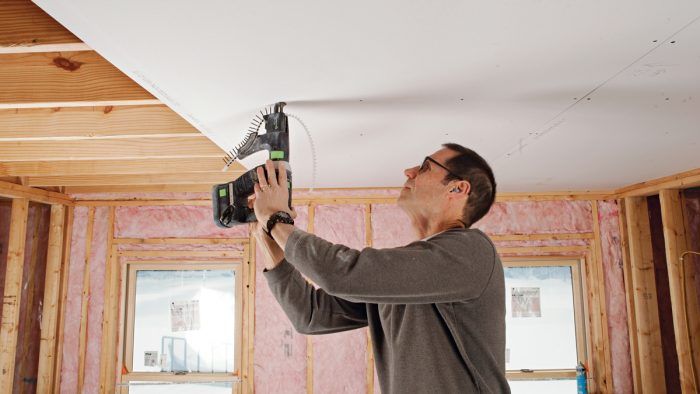
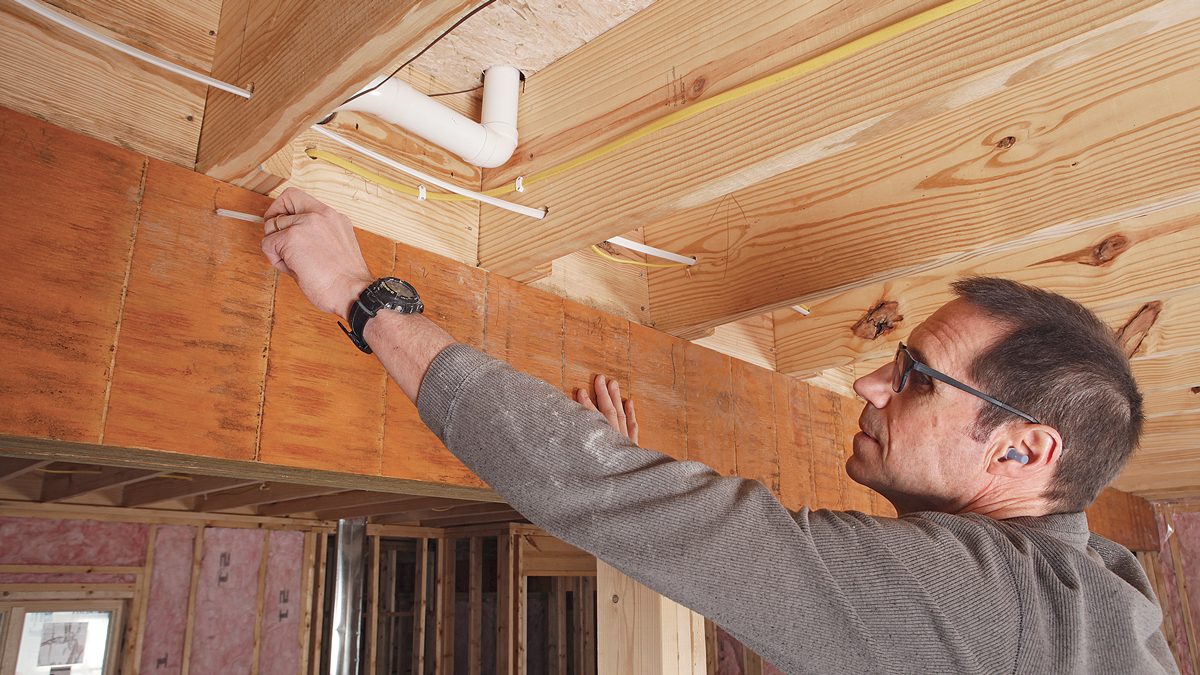
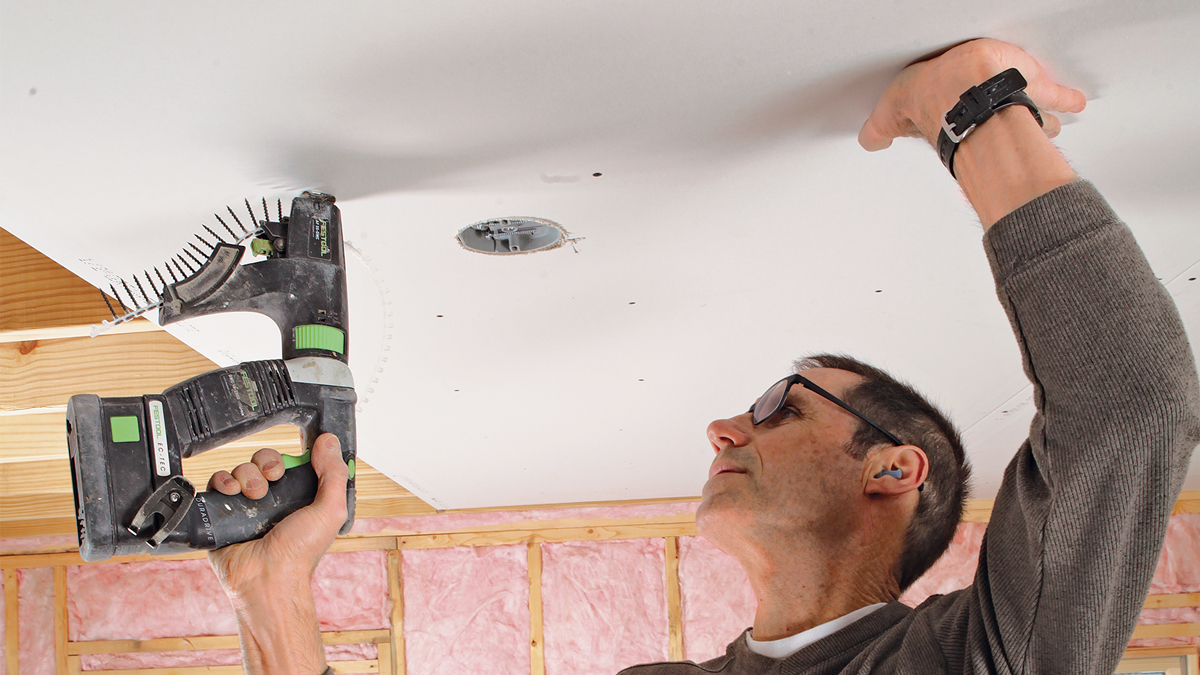
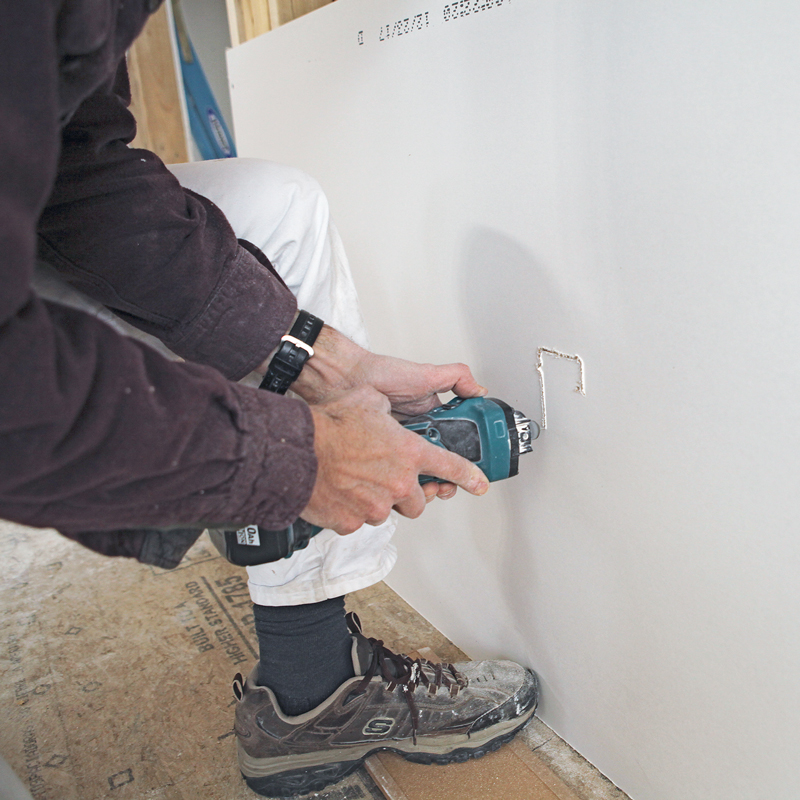
When cutouts are needed for electrical boxes or other mechanicals, tack the panel in place, keeping the screws back from planned cutouts. (Pressure on the boxes can cause blowouts when routing openings.) Then quickly make the cutouts—I use a drywall router for this—and finish fastening. Usually, one person finishes fastening while the other preps the next panel.
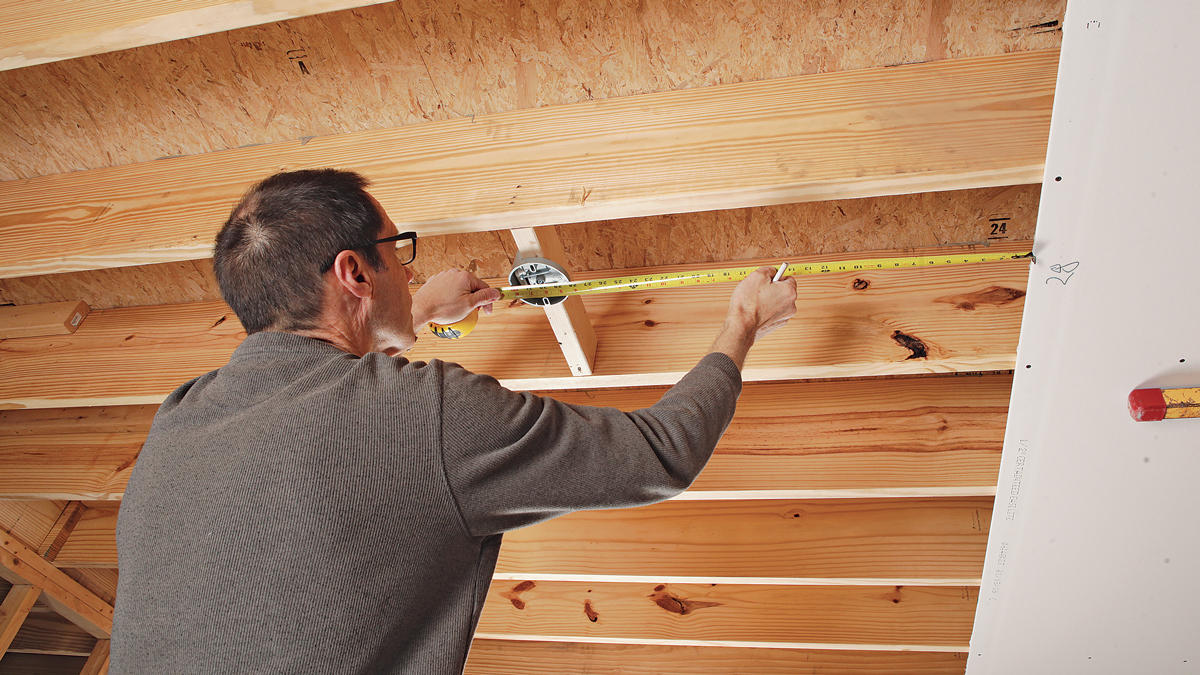
After the ceilings are done, sweep debris away from the walls so the bottom panels don’t trap anything against the framing, and mark outlet-box locations on the floor and stud locations on the ceiling so they can be easily found for fastening and cutouts.
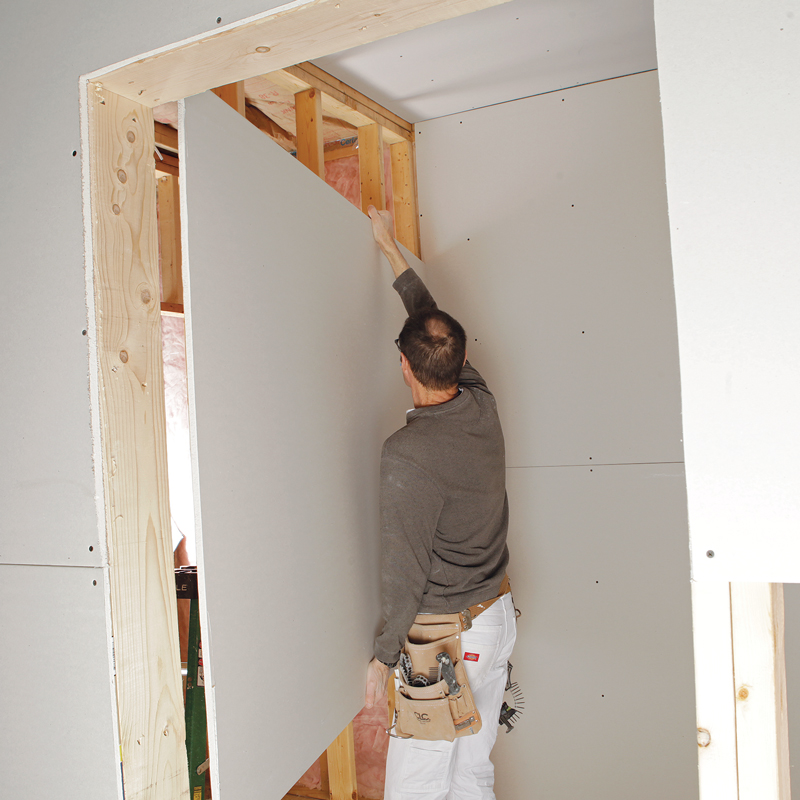
I usually start on a wall farthest from the door. The first wall is hung with a slight gap on each end so the panels don’t bind as they’re hung. The next wall butts tight to the first, and I leave a small gap at the other end. The next wall butts tight to that. The last wall hung is the one with the door. Only the top panel has to fit tight between two previously hung walls. The bottom panels only have to fit tight into the wall corners; trim will cover gaps next to the door.
Install the top wall panels first, tight to the ceiling. Use a foot lift—a small lever that raises the panel when you step on it—to get the bottom panels tight to the upper row, and leave your hands free for fastening.
This approach to planning and hanging has worked for me for years, and if you follow the same formula, you’ll keep the taping crew happy.
Planning prevents problems
Take off
A fast and fairly accurate way to estimate the amount of drywall needed for a house is to multiply the square footage of the living-area floor space by a multiplier: 3.5 for a house with 8-ft.-high ceilings, and 3.82 for 9-ft.-high ceilings. But this method doesn’t give you a count of the different lengths you’ll need; it just gives you a rough idea of the square footage of drywall needed for a job. Before ordering materials, you have to measure at the site, and there are some important things to always keep in mind:
- Panels are available in widths of 48 in. and 54 in., and in lengths of 8 ft., 9 ft., 10 ft., 12 ft., 14 ft., and 16 ft.
- It’s preferable to have the long beveled edges of the panels abutting each other, which will ease finishing.
- Keep the linear footage of seams—especially butted seams—to a minimum, also to ease finishing.
- Drywall is stronger in the long direction than the wide direction, so ceilings are typically hung perpendicular to the framing or furring.
- Walls are usually hung with the long edges horizontal to better span framing imperfections, to reduce the overall length of seams, and to make taping easier.
- The type and thickness of drywall for different areas needs to be specified on your order, along with lengths and widths.
- Access for the drywall has to be determined before you order, and can dictate the lengths of drywall used. Tight access may require shorter panels.
Better Butted Seams
 Old School Traditionally, butted seams are attached to studs, staggered, and kept as far away as possible from the middle of the wall or ceiling. Old School Traditionally, butted seams are attached to studs, staggered, and kept as far away as possible from the middle of the wall or ceiling. |
 New School Drywall backers (photo above) turn butted seams into pseudo- tapered seams, eliminating worries about staggering seams. Still, keep seams away from the middle of the wall or ceiling. New School Drywall backers (photo above) turn butted seams into pseudo- tapered seams, eliminating worries about staggering seams. Still, keep seams away from the middle of the wall or ceiling. |
Materials List
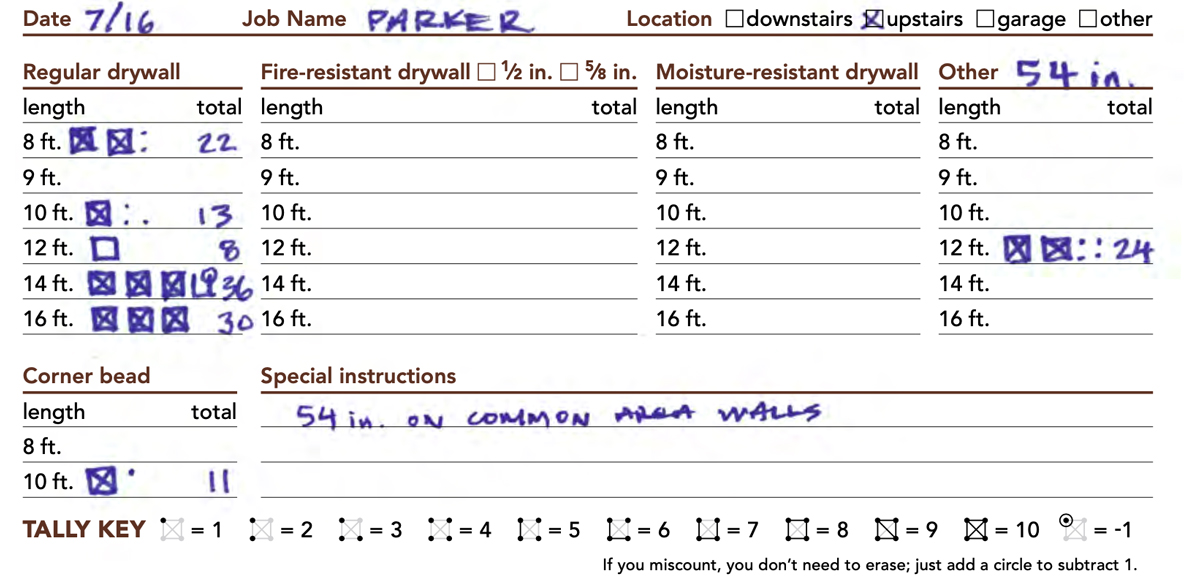
Years ago I made my own materials list for estimating drywall jobs, and I still use it today. I use a dot-and-line tally system I learned from my days in forestry to note each panel of drywall I want to use, and I dedicate one tally sheet to each floor of the house so that when the materials are ordered and delivered, they’re easily loaded onto the floor of the house where they’re going to be used.
Troubleshooting
When measuring for drywall, be on the lookout for trouble spots in the framing, as well as other issues that could hold up the job or otherwise make hanging difficult:
- Horizontal framing that breaks up tall walls, and large beams that span ceilings— seams on these members are crack-prone and should be avoided
- Missing nailers in corners
- Unshimmed walls above fiberglass showers
- Wires hanging from electrical boxes
- Bowed framing
- Missing insulation
- Access for the delivery truck, which needs solid ground and clear airspace for the boom
- Available windows with removable sashes to move material through
Delivery and Staging
The delivery has the potential to make or break a drywall- hanging job. Drywall delivered to the wrong floor of the house will have to be hauled up or down stairs—that is, if it will fit. Protect window and door openings from dings and dents using dunnage or other protective measures, and prevent structural failures by spreading the weight of the new drywall throughout the house. Don’t carry the drywall any farther than you have to—let machines do the work.
Staging tips
- Stack the drywall inside, under cover, flat on the floor, and in the center of rooms when possible.
- Spread the drywall out into smaller piles throughout the house to avoid overloading floors and walls.
- The capacity of a floor to hold the heavy load of a stack of drywall should be determined and considered before loading the drywall.
- The ceilings will be attached first, so the ceiling panels should be stacked where they’re easily accessible.
- Store materials as close as possible to where they will be used.
- Avoid stacking longer lengths on top of shorter lengths.
- Try to stack out of the way of construction traffic, and don’t stack where it will hinder access for other trades.
|
|
|
Essential extras
Framing and fastener spacing, the panel lengths, the panel orientation, and whether I’m using adhesive all affect the number of fasteners, but as a guide, I usually figure one fastener per sq. ft. of drywall.
Tape
It takes about 370 feet of joint tape to finish 1000 sq. ft. of drywall.
Compound
Using three coats, it takes 11 gal. of premixed drying-type compound, 80 lb. of powdered drying-type compound, or about 3 bags of setting- type compound to finish 1000 sq. ft. of drywall.
Working efficiently
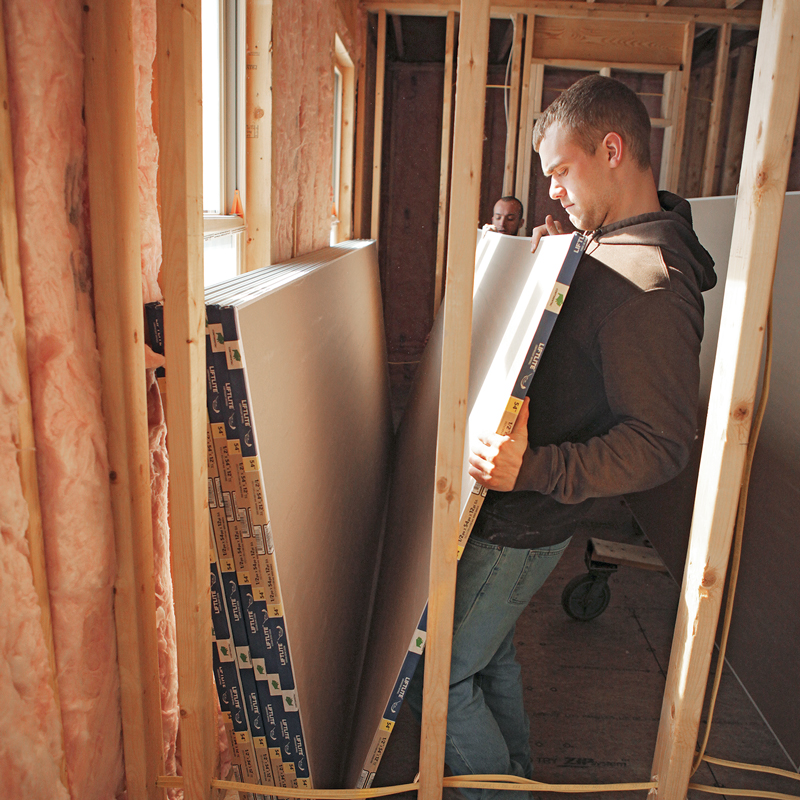
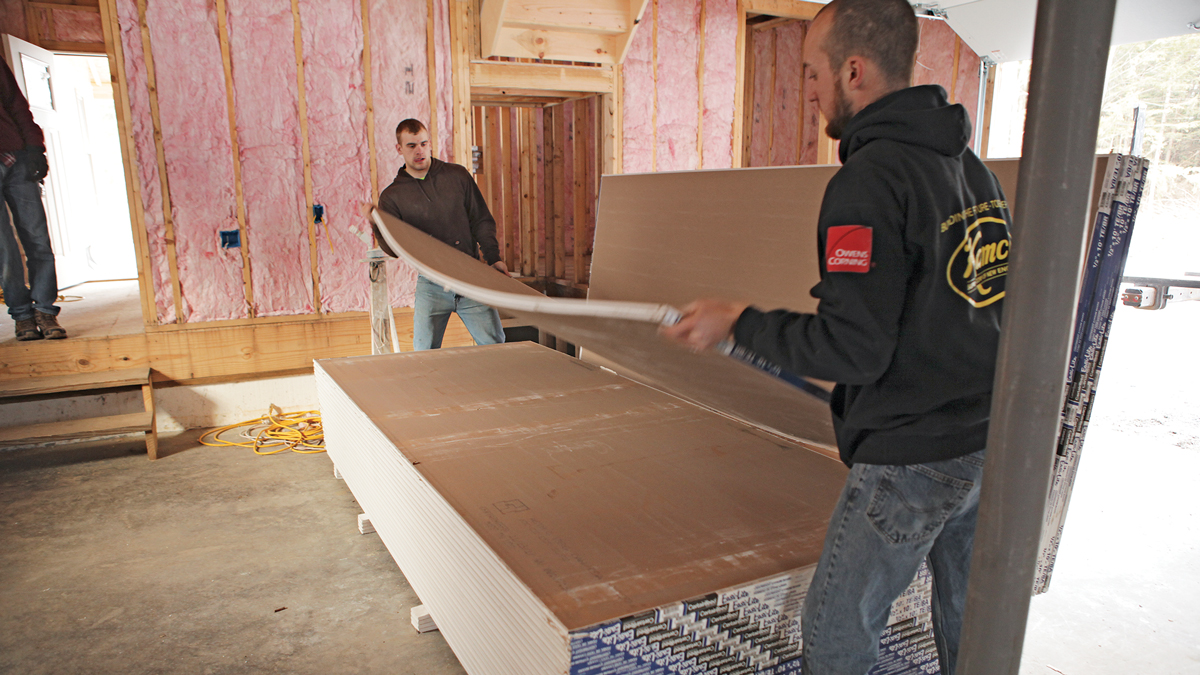
Using long drywall panels makes it easier to tape and results in a better finish, but they’re not easier to hang. Long panels require at least two people to hoist and hang, and a drywall lift can make the job safer and faster. Whatever the crew size, everybody should always be busy, either hoisting, fastening, measuring, or cutting.
Division of labor
It’s hard for one person working alone to hang anything longer than an 8-ft. panel on a ceiling or upper part of a wall. Having enough help is important, especially since it’s preferable to use long panels. I typically use a two-person hanging crew.
Without a panel lift, large panels take two people to hoist. When working on smaller sections, like closets or short walls, it’s usually faster if one person measures and cuts while another fastens. Both hangers should be busy, and if they aren’t, consider having each do their own cutting and fastening.
|
|
|
|

Myron R. Ferguson (thisisdrywall.com) is a professional drywaller and certified building-performance analyst. Photos by Matthew Millham.
Related: Click here for Drywall Delivery Dos and Don’ts.
For more information and photos, please click the View PDF button below.
From Fine Homebuilding #277

View Comments
Seems like it would’ve helpful if yu could buy some panels with a taper on all four edges. I know some folks will laugh but think of the potential benefits?
We switched from backing to drywall clips and tape on corners and 99% of our problems went away (30 years ago). Also discontinued the use of solid 4x or 6x beams as these beams are green and shrink badly. We use GLB as we do not like PSL or LSL material as we have a lot of rain in our area and keeping PSL/LSL from getting soaked with water is near impossible.