Installing Wainscots
Wall finishes in wood, beadboard; using salvage; raised-panel repairs.

Adding depth and character to any room, wainscots are a practical and beautiful covering for plaster in high-traffic areas, protecting the lower wall from nicks, spills, and wear. Styles have historically evolved from simple horizontal planks to high-style raised paneling and to the homey, machine-produced material colloquially known as beadboard.
Repairing, re-creating, or installing wainscoting may be a simple DIY project—and other times a challenge for a master carpenter. The older the house, the rarer it is that original paneling has survived unscathed. Old wainscots are often targeted with paint, which can cause its own set of problems.
Others, particularly utilitarian styles including beadboard, were often ripped out in favor of new wall finishes from Homasote to drywall. Perhaps that’s why installing wainscot is all the rage right now. Beaded board, a pattern familiar from houses built between 1880 and 1920 or so, is an especially popular choice.
A Cap Makes the RoomWhen Alex and Wendy Santantonio received a long-awaited shipment of wainscoting for the primary bathroom in their 1880s row house, both fell silent. They’d ordered ¾” thick single-bead boards a generous 5 ½” wide, but it wasn’t what they had imagined.
“The wainscoting looked ridiculously huge, both in width and size of the bead,” says Wendy. “I hated it.” A few days later, Alex admitted he felt the same way. Wendy and Alex agonized for a few days about whether they should sell their custom-milled beadboard and start over. (It couldn’t be returned.)  Loath to waste the $1,000 they’d spent (a third of it in shipping costs), they primed a section of tongue-and-groove boards and lined it up along the wall. The result looked better than expected, so they proceeded with installation, carefully cutting out openings for electrical outlets and milling custom adjustments around door and window trim. Along the way, they discovered a method for installing a section over an old brick wall (see “Cheating Brick,”).  The Santantonios finished the 48″-high wainscot with bullnose cap moulding with an overhang of about 1 ½”. They knew it needed additional trim elements to help smooth the transition to the wainscot, but which ones? After experimenting with different trim profiles, they finally hit on the right combination: a coved spacer recessed just beneath the bullnose, transitioning directly to an ogee profile. 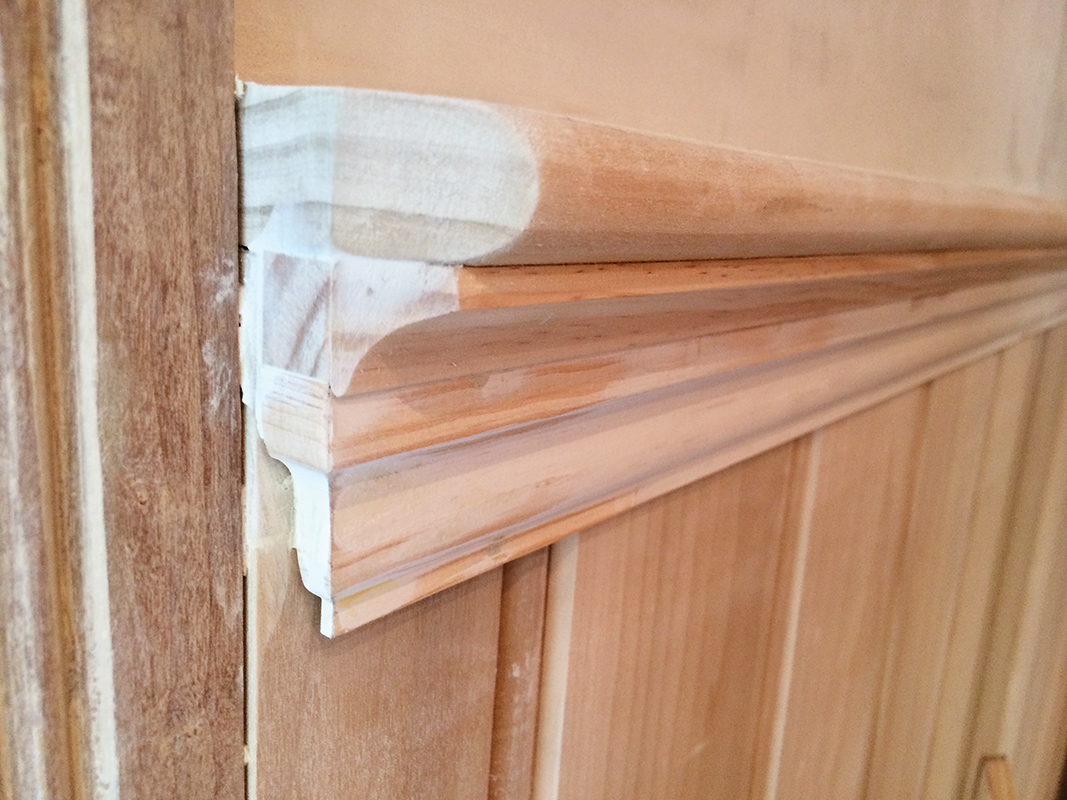 The result was a substantial bit of trim with all the elegance and heft of crown moulding. Installation of those final pieces of trim resulted in a dramatic transformation. After nail holes were filled and the treatment was painted, all elements of the wainscot came together in a well-proportioned, flawless installation. 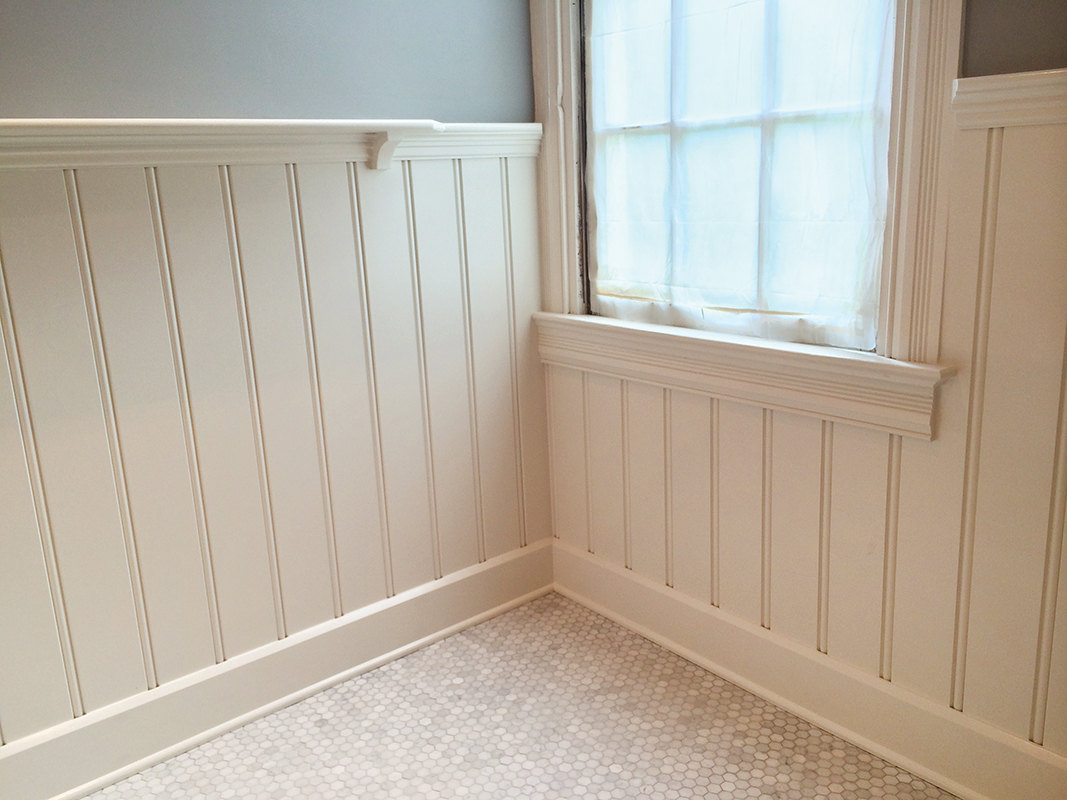 The cap also played well with the other period elements in the room, including new baseboards in a pattern found throughout the house, milled by Alex himself. No longer “ridiculously huge,” the wainscot speaks to every other detail, thanks to experimentation and persistence. |
It can be ordered as 4″ x 8″ sheet stock or as traditional tongue-and-groove boards, which generally convey a greater sense of depth and give the installer more flexibility in terms of height. That may be important, considering how tricky it is to align the elements of pattern and proportion into a pleasing, period-sympathetic appearance.
Before settling on a wainscot style and material, consider what’s most appropriate for the age and style of your home. The earliest wainscots—popular deep into the 19th century—were flat horizontal or vertical boards slapped against the plaster.
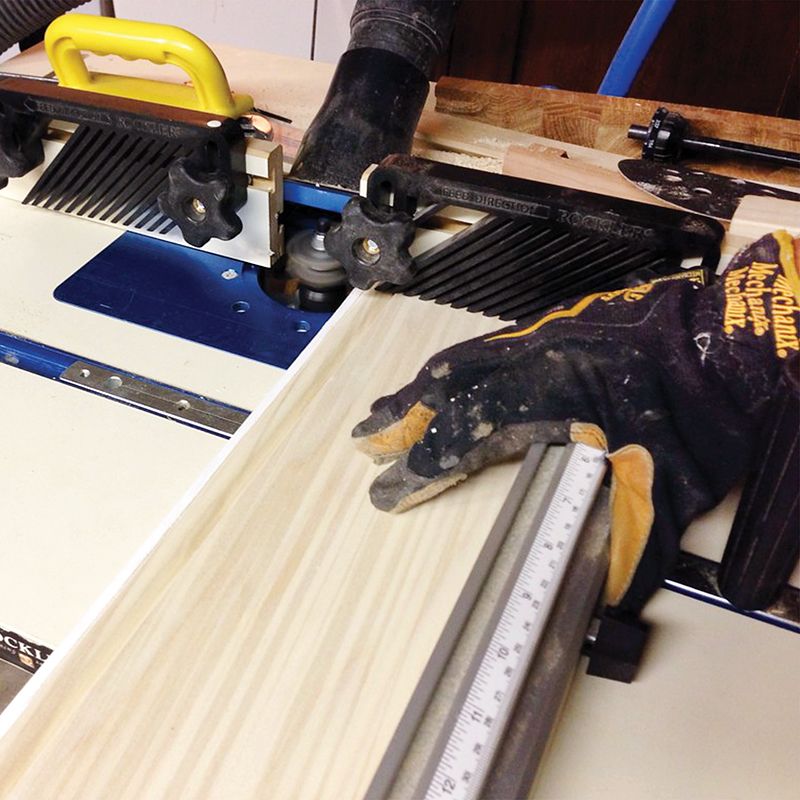
Installing BeadboardBeadboard tongue-and-groove boards are straightforward to install, provided you are working with a wall with open studs. To help support the new wainscot, install 2×4 blocking (nailers) between the studs. (For standard-width studs, this is usually 16″). Toe-screw blocks (base, center, and top if the wainscot is particularly tall) to the sides of the studs using 2″ thin-shanked trim screws. Once the blocking is in place, line up each board tongue-out against its predecessor. Tap lightly along the length of the tongue with a rubber mallet to seat the board in the previous tongue-and-groove joint. As you reach the corner, you may have to fabricate an extension piece to fit into the space—complete with a groove, if necessary. If the space is only slightly larger than the width of the beadboard stock, try cutting your own piece. Using appropriately sized stock (1×4 or 1×6), set up a table saw to mimic the angle of any beveling and cut the edge as close to the appearance of the stock beadboard as possible. To fasten, toe-nail the boards at an angle through the tongue and into the blocking using finishing nails. If painting the wainscot, avoid painting any projecting grooves. That way paint will not interfere with the wood’s natural shrink/swell cycle. |
These precursors to shiplap usually rose to the same height above the floor as the windowsill, much lower than today’s chair rails. Historically, the proportion followed the Classical orders.) The window stool or trim moulding ran continuously along the top of the wainscoting to form a cap.
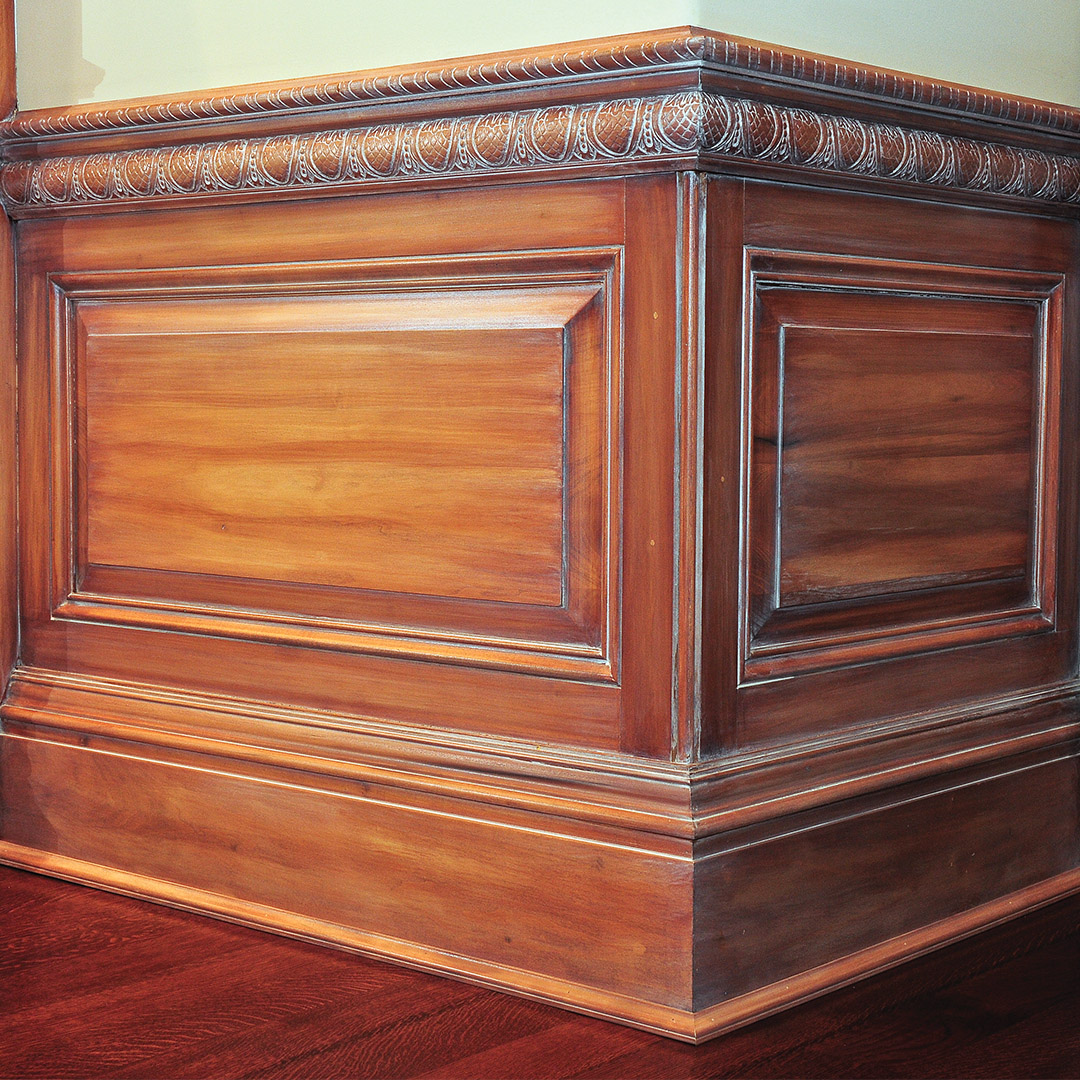
In higher-style homes and buildings, a more refined design is the raised-panel wainscot. Made with the same techniques used to construct early four-panel doors, a raised panel consists of a floating wood panel with beveled edges, held in place between vertical stiles and horizontal rails. Beveling the panel’s edges creates a three-dimensional surface with great visual depth.
All About ProportionWainscots should be installed with sensitivity to the proportions of the room. Wainscot and chair-rail heights historically followed the proportions of the Golden Mean (Golden Ratio): a little more than one-third of the height of the wall. Never install wainscoting or chair rail exactly halfway up a wall, or you’ll visually cut the room in two.  For a room with an 8′ ceiling, for example, use of the Golden Ratio indicates a wainscot about 36″ high—the closest you can get to the Mean in whole numbers. (To calculate, multiply the desired height of the wainscot by 1.66. The result should equal or nearly equal the remaining height of the rest of the wall, or 60″.) For a 9′ ceiling, the wainscot should be about 42″. |
In a variation, the flat-panel or Shaker wainscot, completely flat panels float between stiles and rails that have crisp, 90-degree edges. The height of historic raised-panel wainscoting varies from low (windowsill height) to floor-to-ceiling and overmantel installations. Plate rail-height wainscots were especially popular in the late Victorian era and beyond.
Sometime around 1880, a millwork product called beadboard took off as a low-cost alternative to fancier forms of wall covering. Early beaded boards are relatively thin (3/8″ to 5/8″ thick) pieces of tongue-and-groove lumber with a side bead and a groove called a quirk along one interlocking edge. (The bead distracts the eye from gaps that form as the wood shrinks and swells seasonally.)
Working With Salvage

|
Beadboard attaches vertically or horizontally across wall studs to the height of the wainscot. It’s finished with a cap moulding along the top and with a simple baseboard at the bottom. Going one step further, bungalow builders in the 1910s and 1920s developed another easy-to-install form of wainscot: board-and-batten paneling.
Composed of wide planks laid vertically, often over two-thirds of the height of the wall, the treatment includes narrow strips called battens that cover joints between planks. The wainscot is topped with a deep plate rail. A less-expensive variation, called a skeleton wainscot, leaves the wall surface between battens to be painted, papered, or fitted with fabric such as burlap.
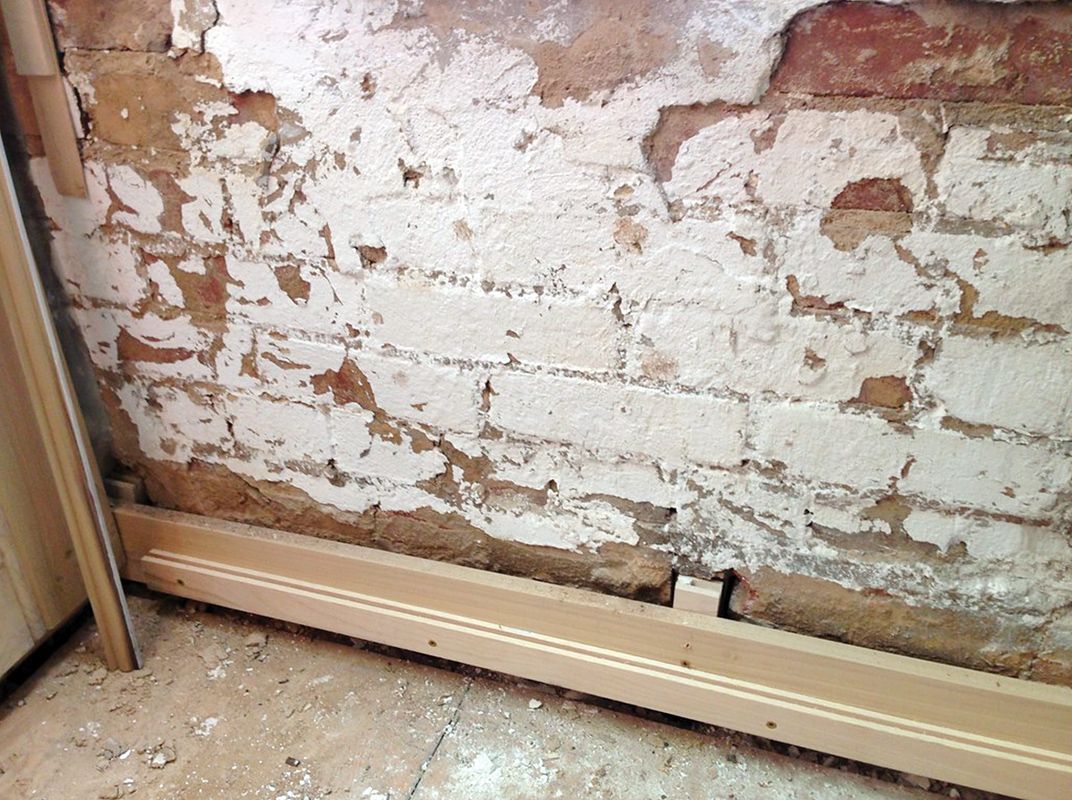
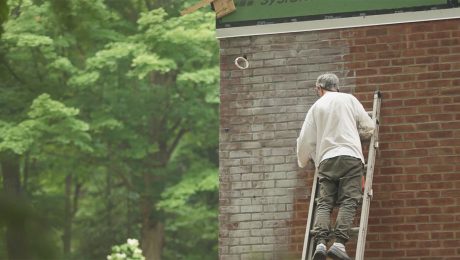
Cheating BrickIn our bathroom, under a window, one of the walls was old, water-compromised plaster over brick. Since there was nothing for fasteners to grab onto, I decided to create a floating section of wainscot, hoping it would hold together long term. First, I cut pieces of 1×2 poplar to length to act as rails for the top and bottom of the section. Then I cut grooves into both pieces of poplar to accept the mating tongues of beadboard. Finally, I cut tongues top and bottom on each piece of beadboard I planned to use.
As I was working, the entire section of damaged plaster failed spectacularly, revealing the old studs beneath. With the plaster out of the way, I was able to fix the bottom piece of poplar directly to the old studs that had been hidden by the plaster. I added nailing blocks to the brick wall with screws. I then slid all the pieces of wainscot into place, in a floating configuration without fasteners. Finally, I slid the top rail over the hand-cut tongues and screwed it into place, using the same stud locations as the bottom. — Alex Santantonio |


While almost every category of wainscot is now available as stock lumber or in kit form, not all cuts and kits are true to period style. Even a simple material like beadboard can include one- or two-bead or double-bead patterns.
For those considering more formal raised-panel wainscoting, the challenges grow. Do you want Shaker-style flat panels, or coved Georgian ones beveled to a feather edge? A skilled carpenter can re-create paneling inspired by historic wainscot or from remnants found in your home.
Wood Work: Helpful Ideas for Many Projects Involving Wood
|


That said, fitting a period-inspired wainscot into a chosen space is a lot like building a puzzle with components that are cut and assembled as you work. Naked but for a thin skin of paint, modern walls are an aberration in the long history of decorated walls.
Wainscots are not only one of the most characteristic finishes in a period house, but also the logical extension of the baseboard that anchors the room.
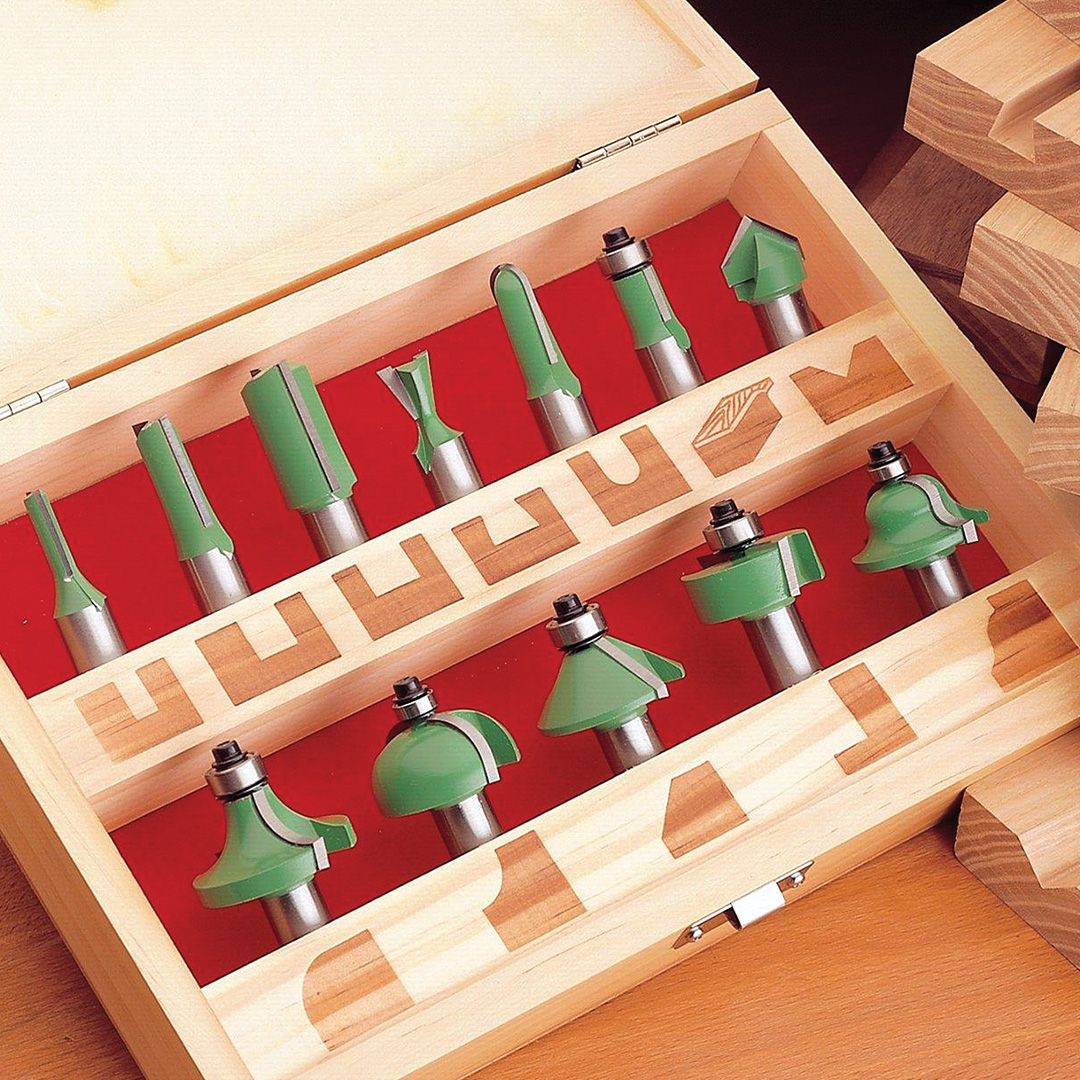
Raised Panel RepairRaised-panel wainscots are sturdy but complicated rail-and-stile constructions, built around panels that float within a “picture frame” arrangement. The panels are made by milling or hand-planing the perimeter of a board 1″ or so thick to a feather edge. Historic panels often split or warp, especially if they’re covered in multiple coats of paint. To create a replacement floating panel, choose wood of the same species, cut, and thickness as the existing panel. (Panels are usually slightly smaller than the available space within the frame to provide room for movement.) Measure the bevel angle of the sloping sides of the panel with a protractor and set the blade angle and depth on a combination saw to match. Run the panel through the saw on edge to remove excess material on each side. To re-create a missing piece of panel moulding, measure a sound piece of trim with a profile gauge. Transfer it to a piece of paper. Then break down the profile into a series of shapes: cove, fillet, flat, and bead. Either re-create the needed shapes in wood with router bits, as ask a skilled carpenter to do it for you.
|


— Mary Ellen Polson
RELATED STORIES
- A Simple Approach to Raised-Panel Wainscot
- Beadboard Wainscot Made Easy
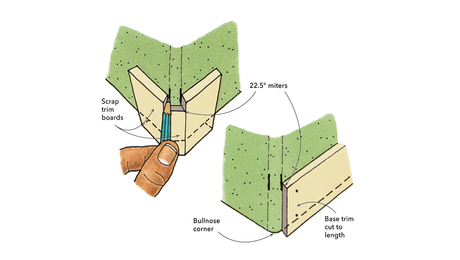
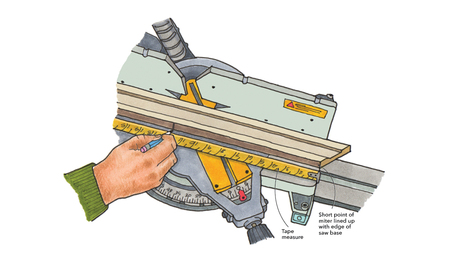
- Tips for Scribing and Installing Wainscot Cap
Fine Homebuilding Recommended Products
Fine Homebuilding receives a commission for items purchased through links on this site, including Amazon Associates and other affiliate advertising programs.
Musings of an Energy Nerd: Toward an Energy-Efficient Home

Not So Big House

The New Carbon Architecture: Building to Cool the Climate
-
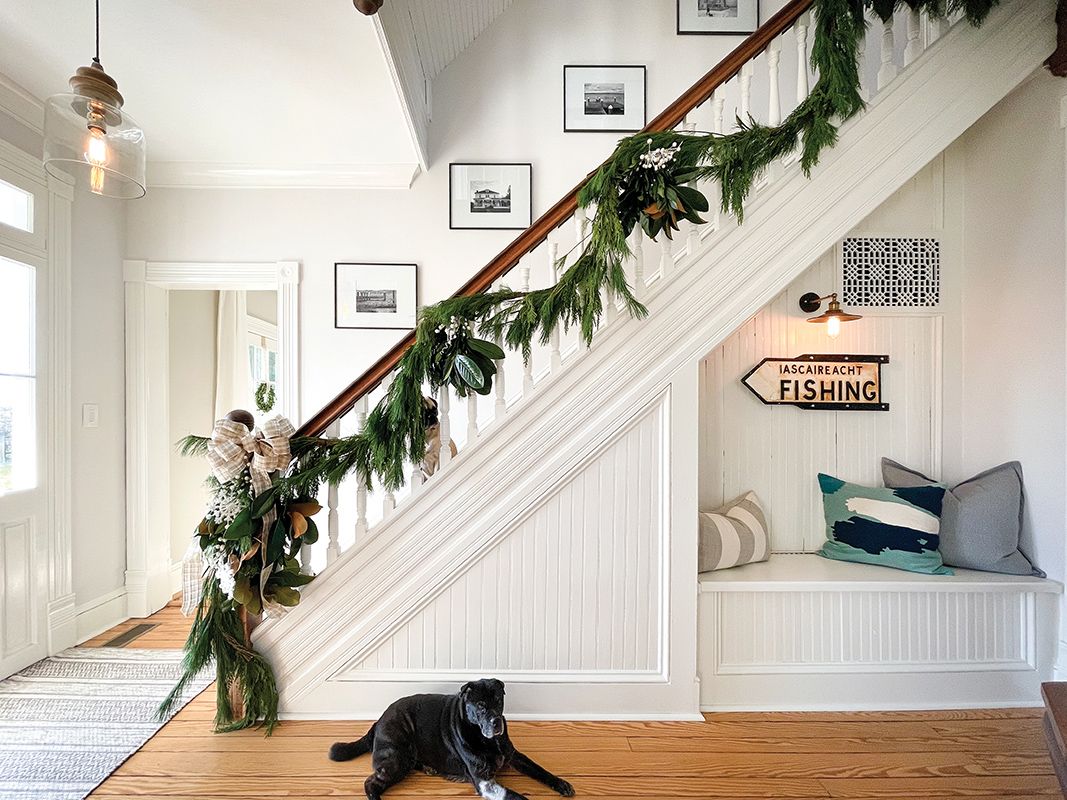
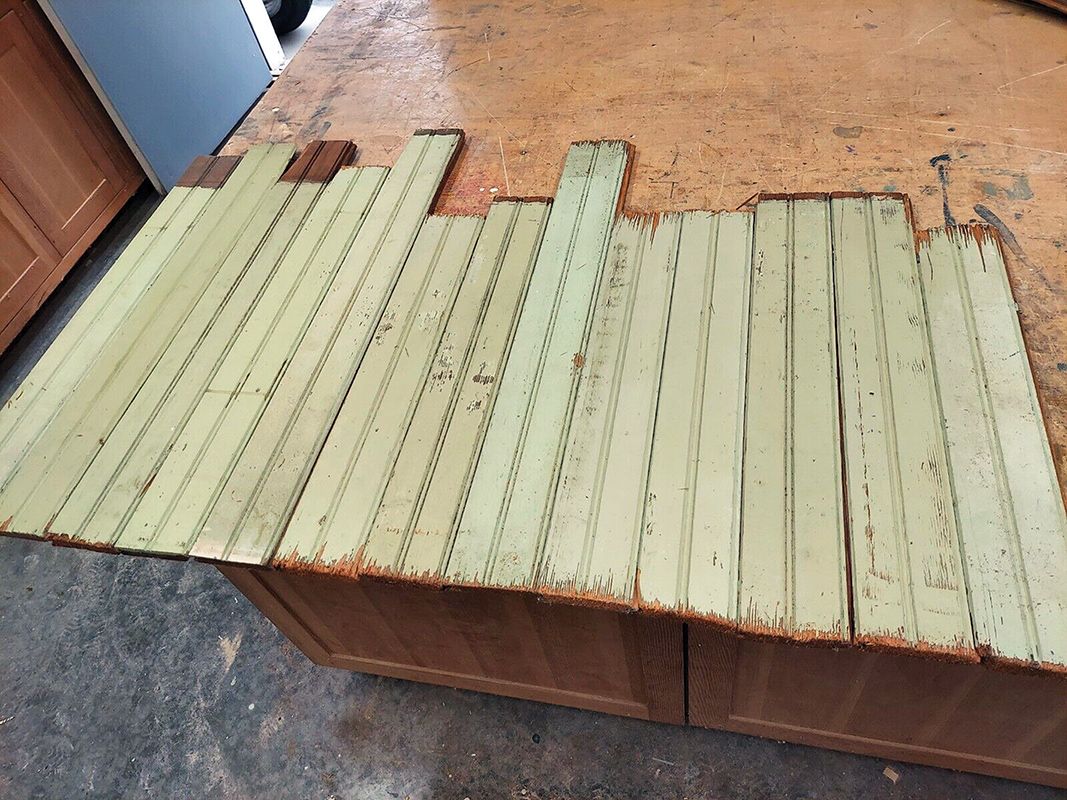
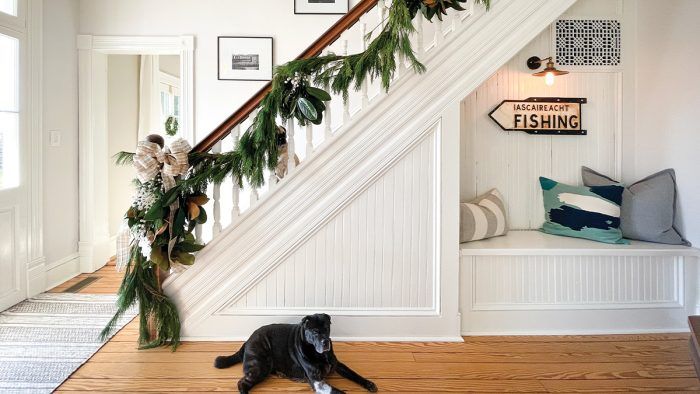
When a new HVAC system required covering an area under the stairs in their 1908 Foursquare, Alex and Wendy Santantonio used salvaged beadboard found in the attic to create a wainscoted bench and wall backing. Photo by Wendy & Alex Santantonio.
-
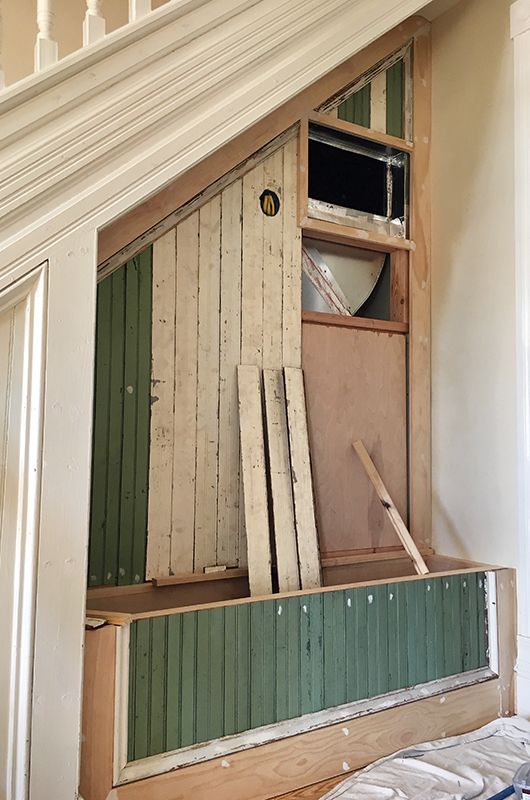
Each piece of the limited cache needed a new and precise measurement before nailing in place. Photo by Wendy & Alex Santantonio.
-
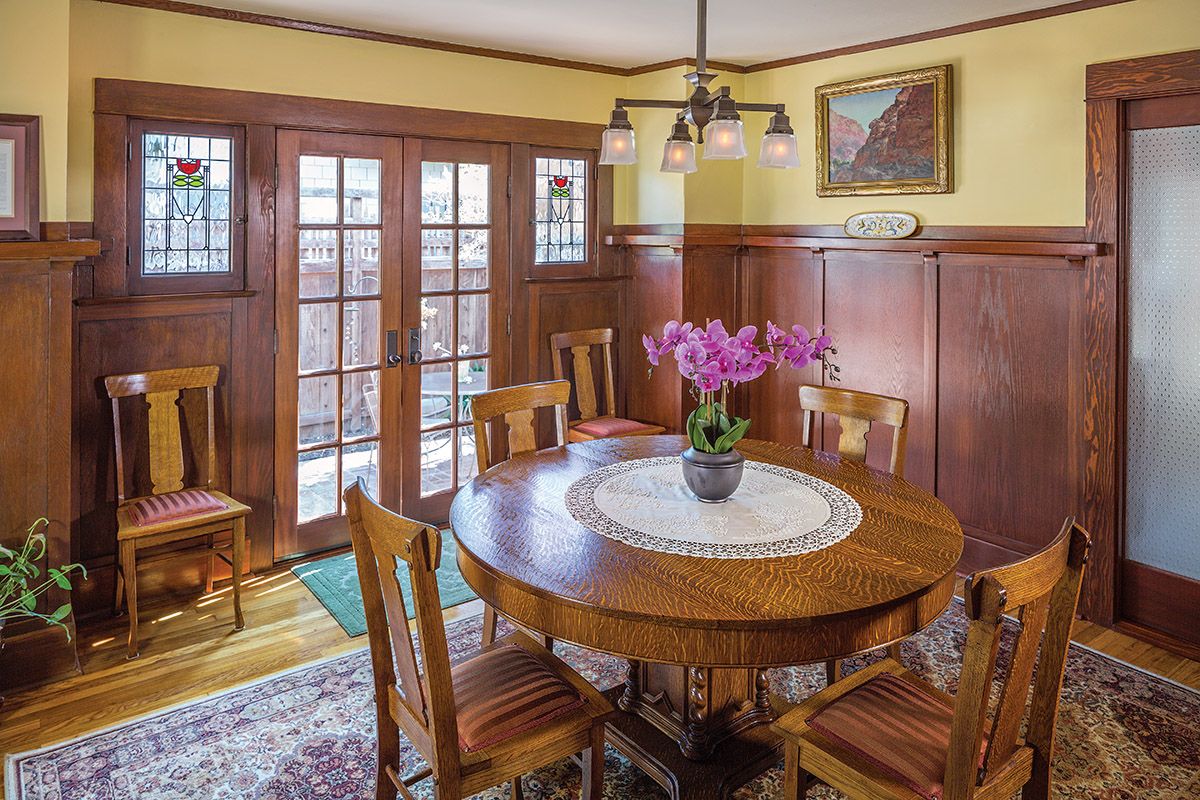
In a 1915 bungalow, an original board-and-batten wainscot of Douglas fir, once painted Pepto Bismol pink, cleaned up well. Photo by Gary Payne.
-
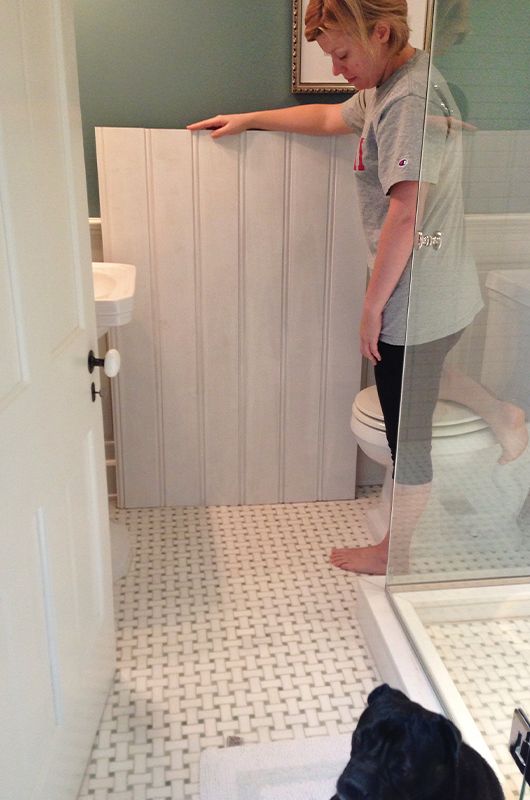
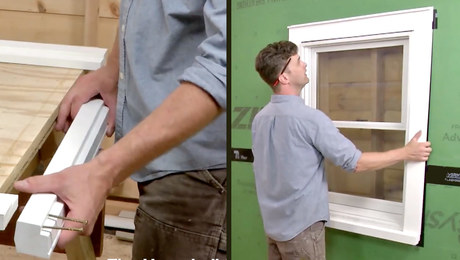
Wendy Santantonio tries out a section of wainscot against a finished bathroom floor. Photo by Wendy & Alex Santantonio.
-
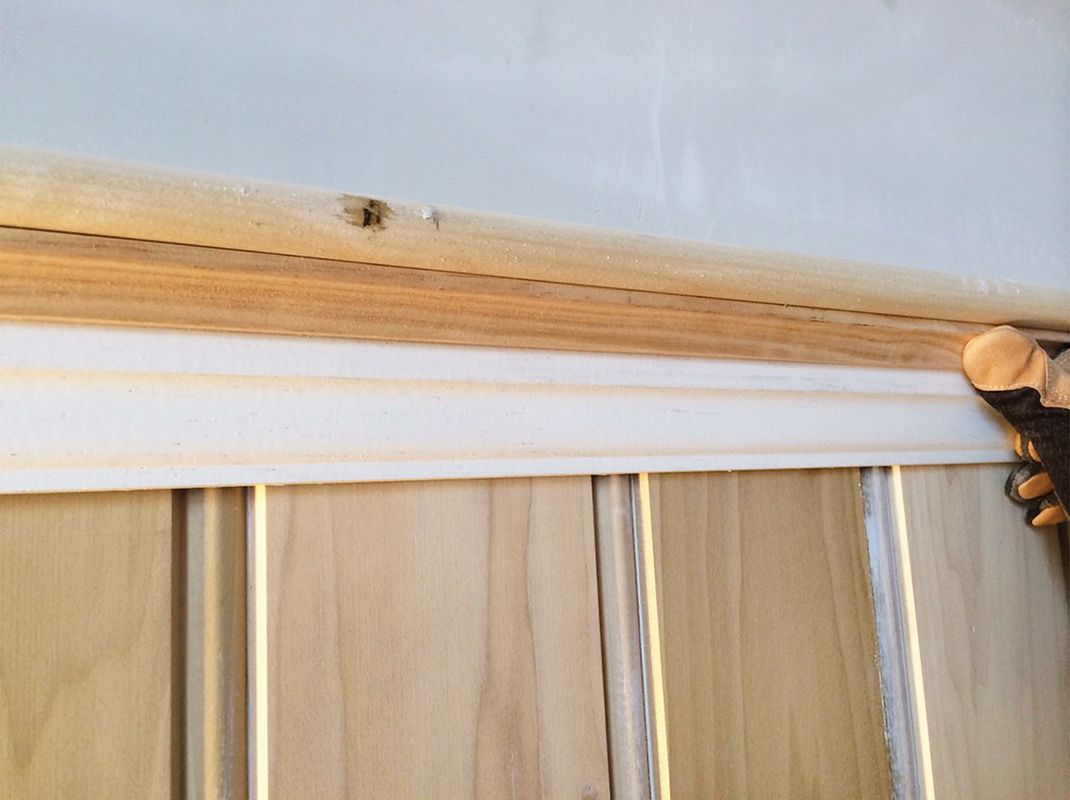
A spacer with a low-profile ogee helped give the bullnose cap some relief, but not quite enough. Photo by Wendy & Alex Santantonio.
-
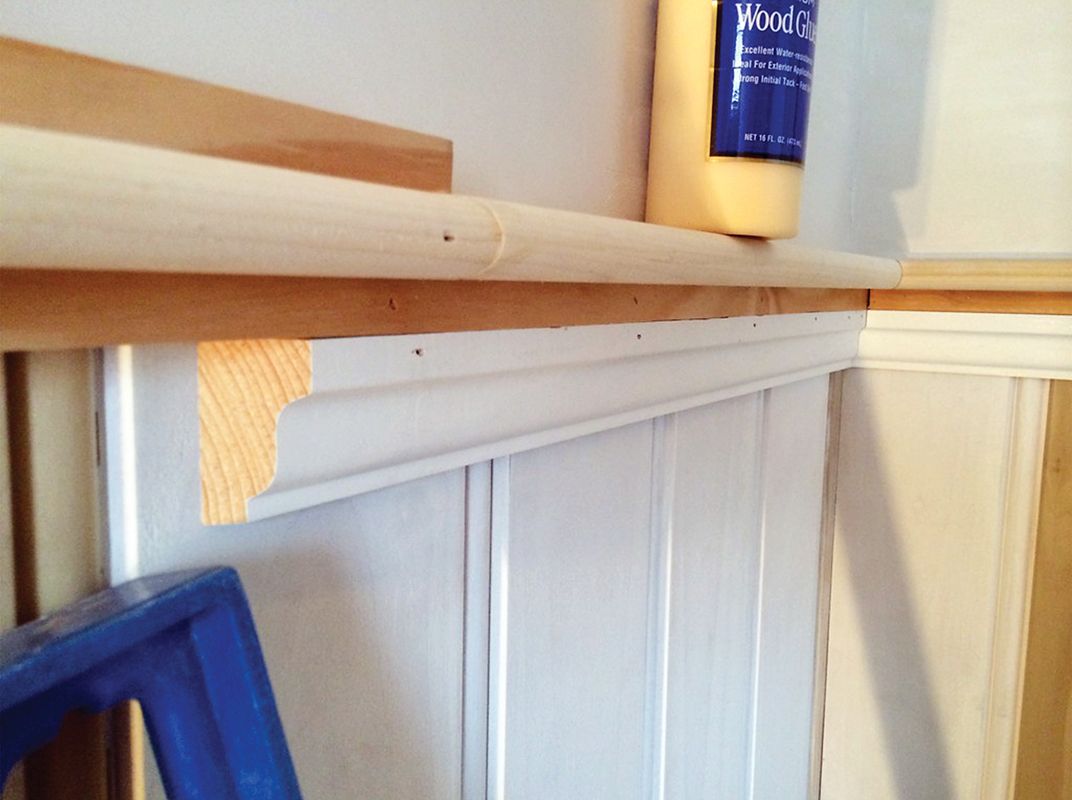
Adding a backer board between the bullnose and ogee mouldings made a huge difference. Photo by Wendy & Alex Santantonio.
-
The finished profile before painting. Photo by Wendy & Alex Santantonio.
-
The final cap profile speaks not only in relation to the wainscot but also to period casings on windows and doors. Photo by Wendy & Alex Santantonio.
-
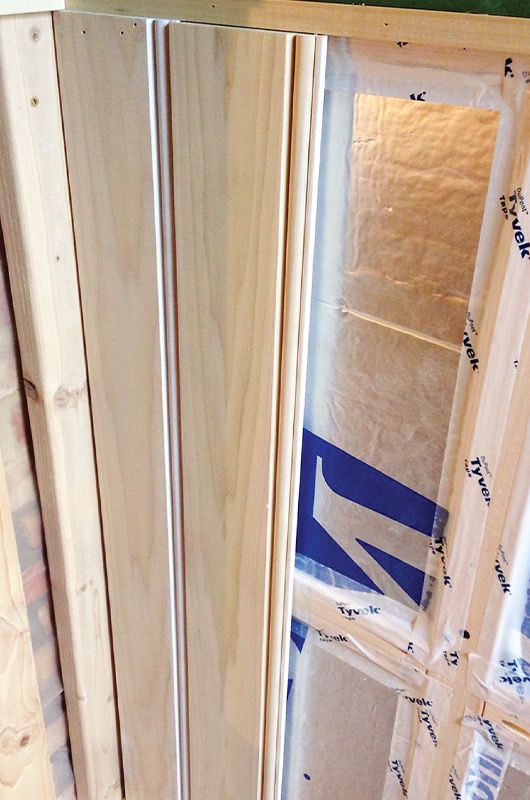
To start a new section of wainscot, snug the first piece of beadboard against the corner framing tongue out, then tap the next piece in place along the tongue. Photo by Wendy & Alex Santantonio.
-
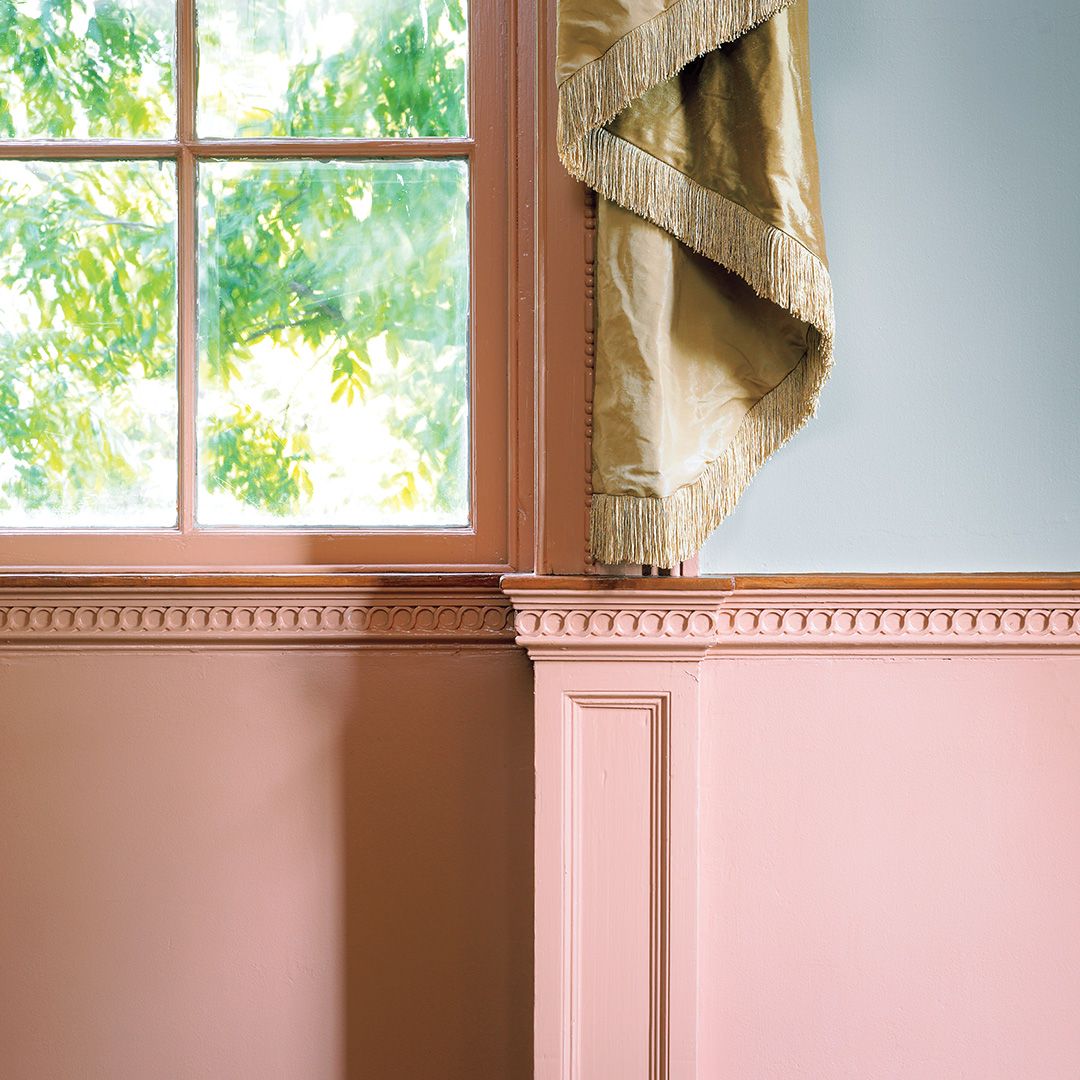
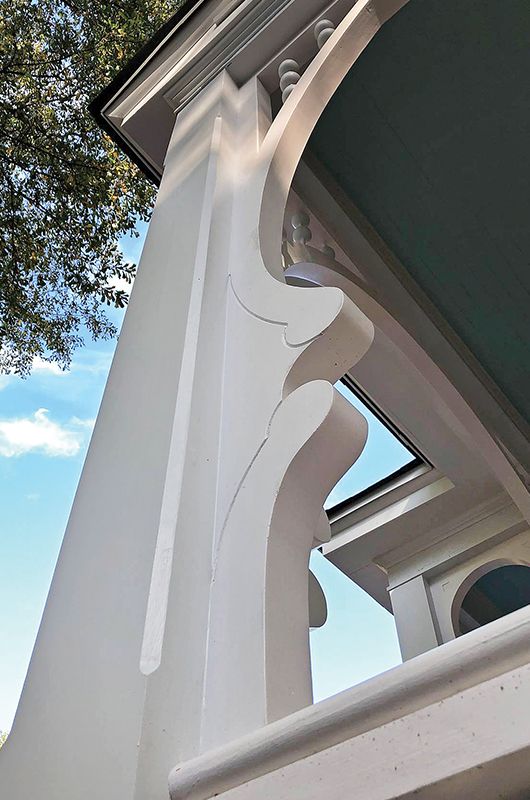
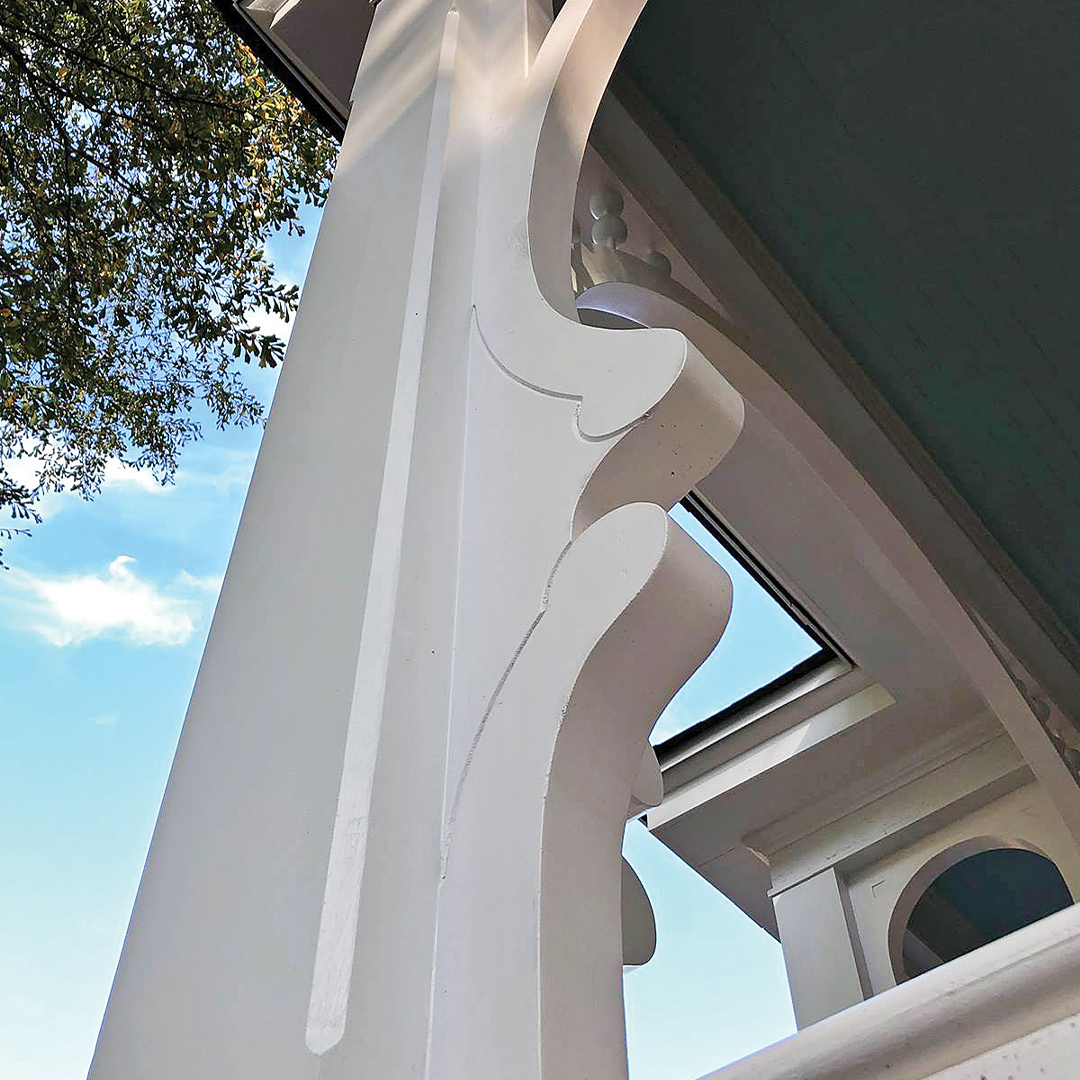
In an 1803 Federal house, the high-style wainscot is flush with the bottom of the window sill, but embellished with moulded pilaster and decorative railing. Photo by Gridley + Graves.
-
Salvaged beadboard recently available on eBay. Photo by Wendy & Alex Santantonio.
-
Alex Santantonio created a floating framework for a section of wainscot against an old brick wall, attaching a grooved rail to 1x6 stock attached to old studs. Photo by Wendy & Alex Santantonio.
-
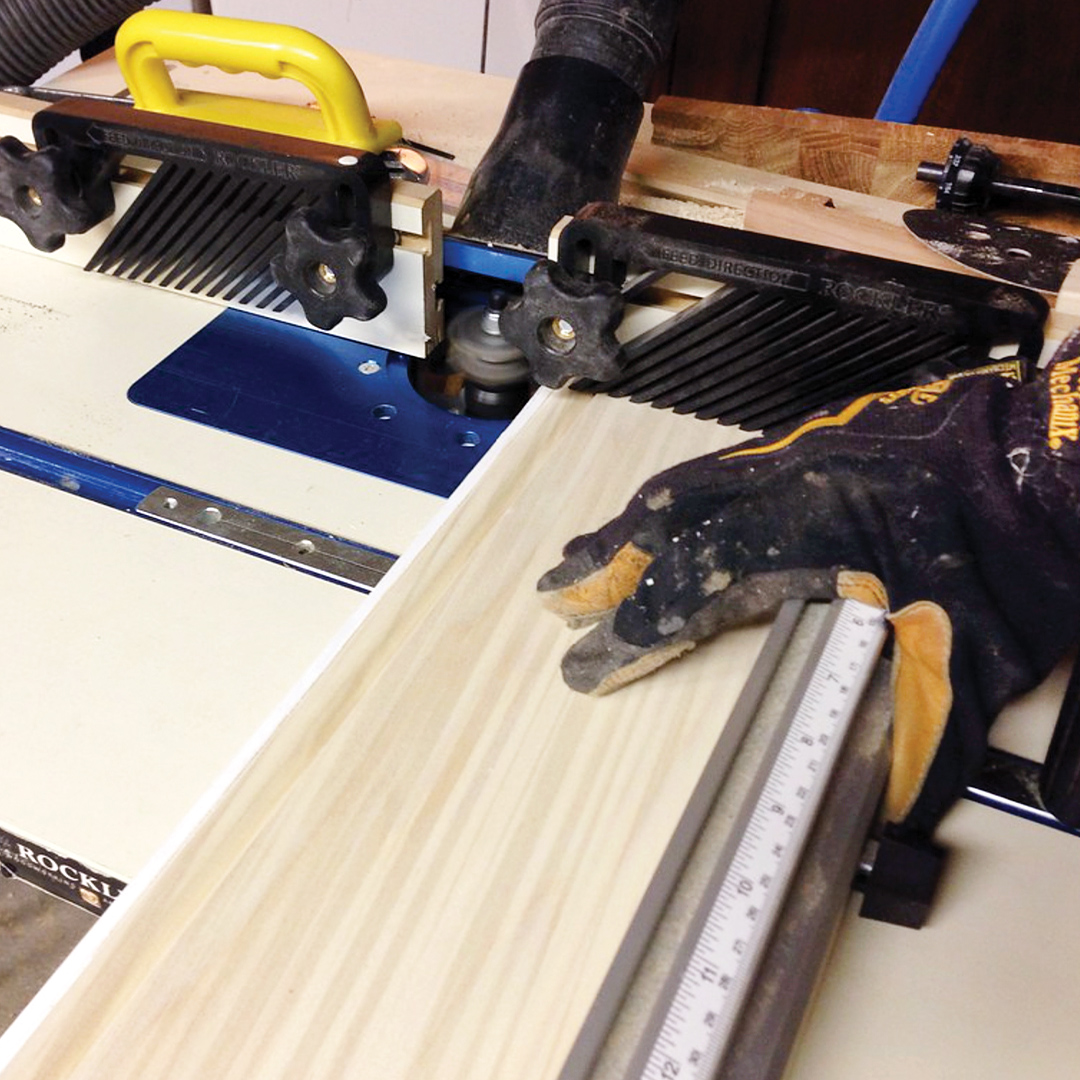
He cut grooves and tongues along the top of beadboard stock to fit into his improvised system. Photo by Wendy & Alex Santantonio.
-
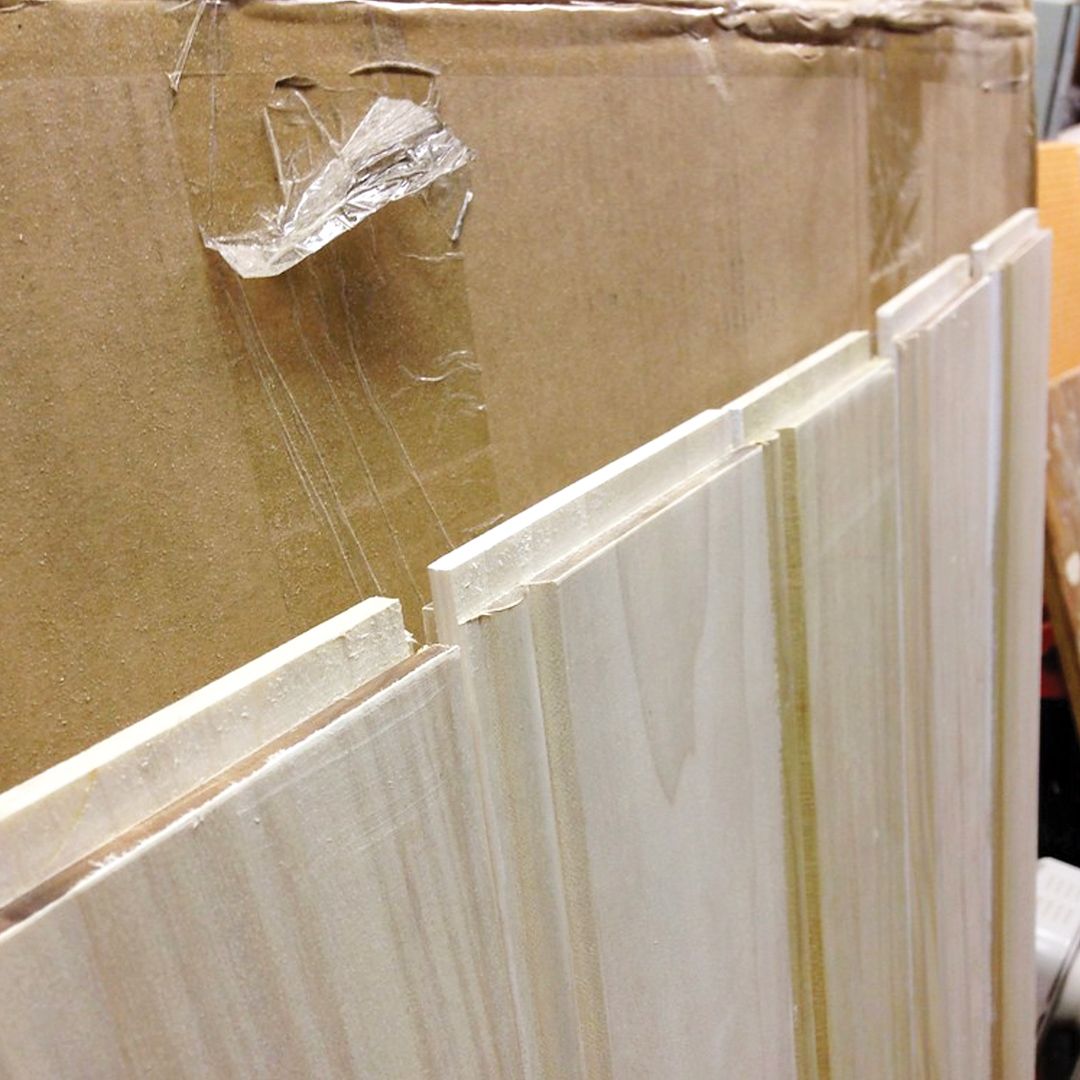
Beadboard with hand-cut top tongues is ready to slide into place. Photo by Wendy & Alex Santantonio.
-
Photo courtesy of the manufacturer.
-
Photo courtesy of the manufacturer.
-
Photo courtesy of the manufacturer.
-
Photo courtesy of the manufacturer.
-
Photo courtesy of the manufacturer.
-
Missing mouldings may be duplicated by cutting coved, flat, filleted, and beaded shapes with standard bits on a router. Illustration by Rob Leanna.
-
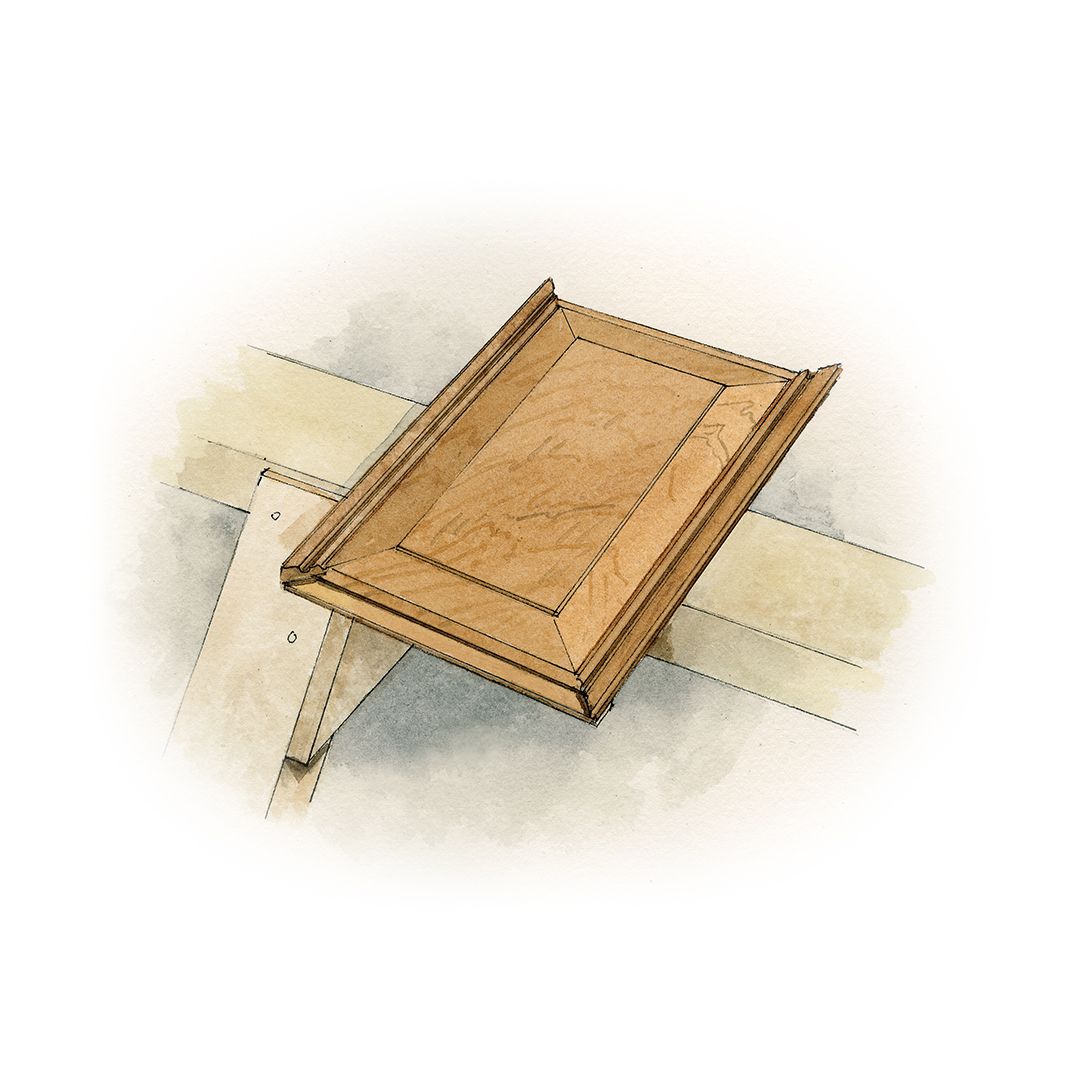
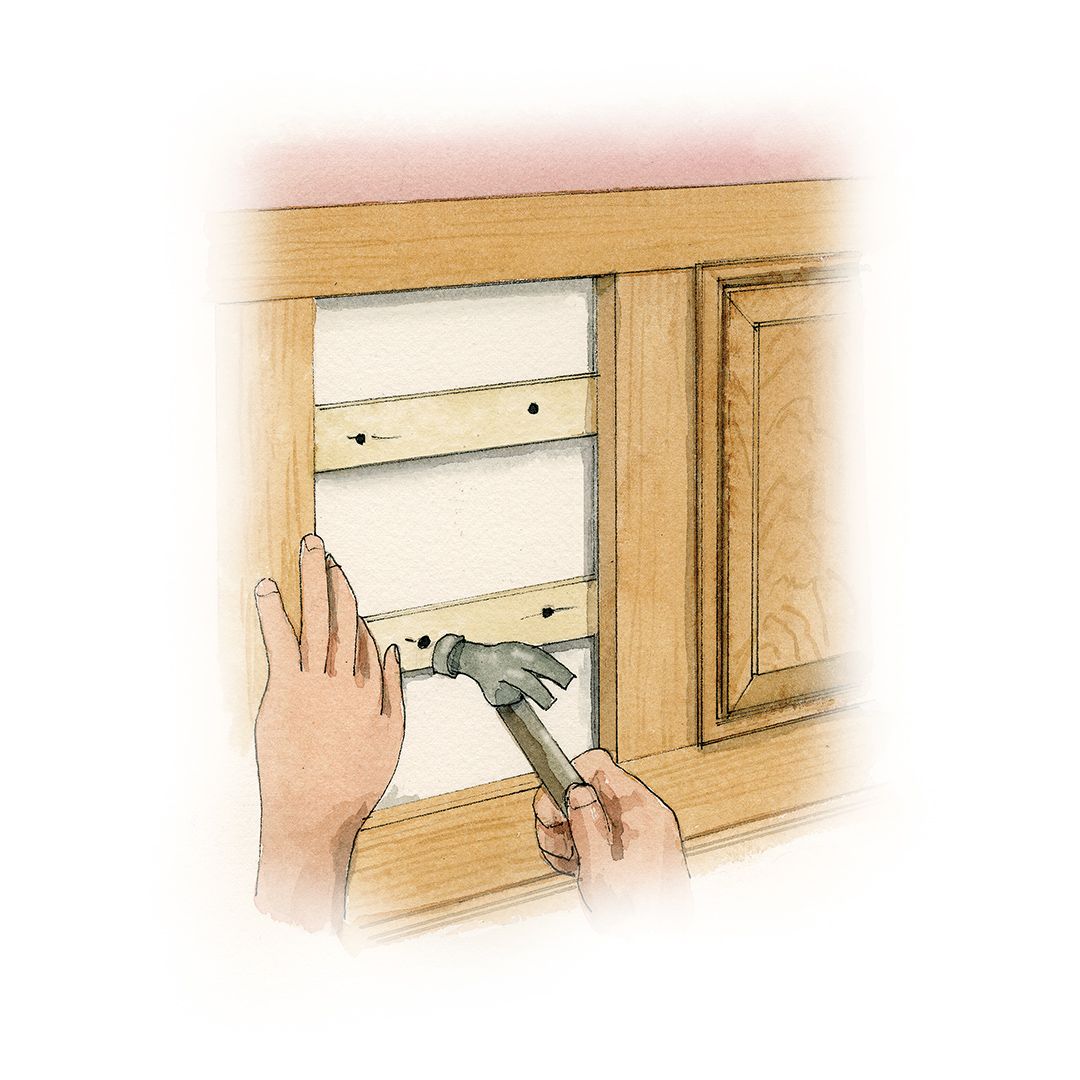
To install a new or repaired panel without removing the entire wainscot, first remove the panel. Nail a couple of slender (1/8" to 1/4" thick) grounds to the wall underneath. Illustration by Rob Leanna.
-
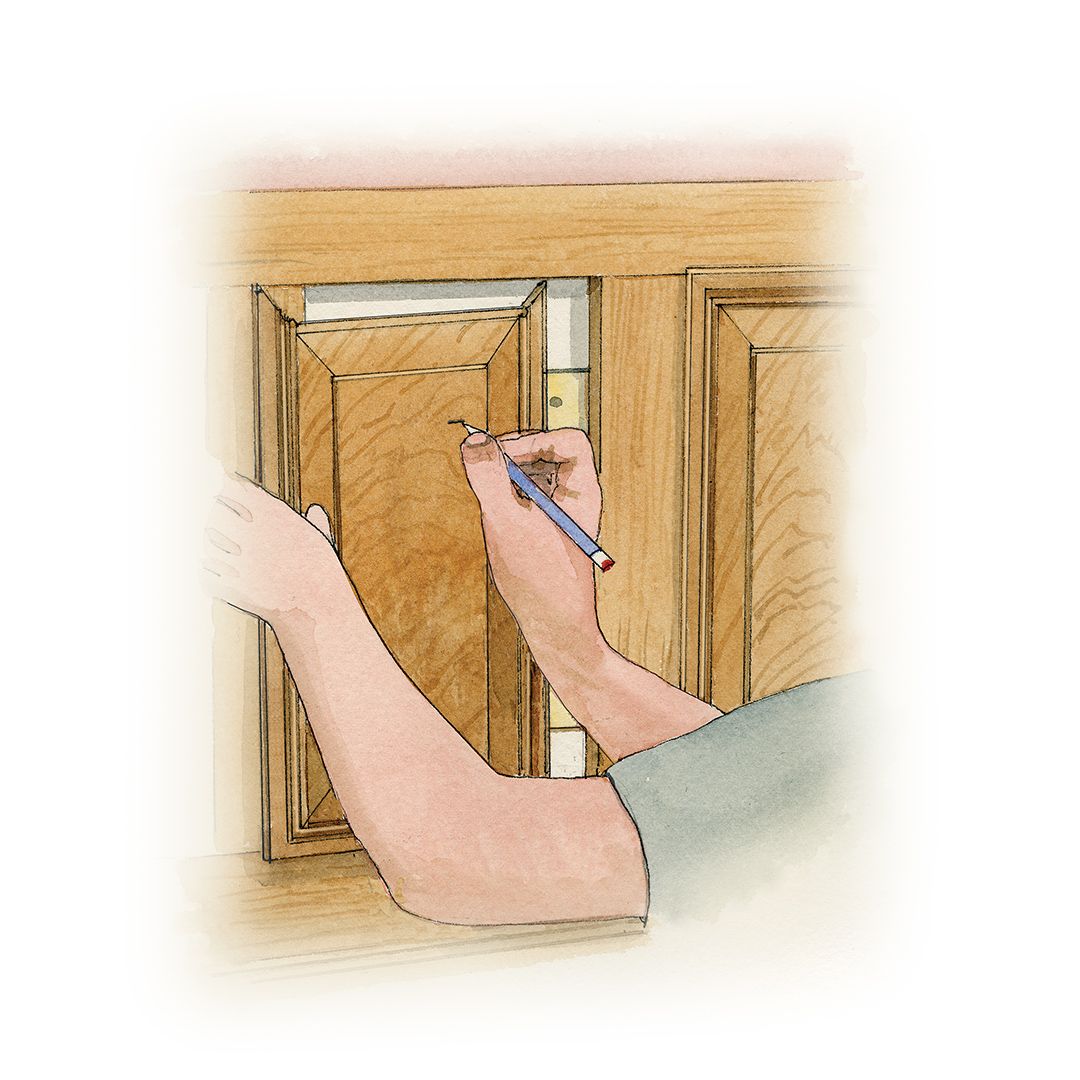
Mark the location of the grounds on the new or repaired panel front. Use them as indicators to secure the mouldings, which should be face-nailed into the grounds. The panel should be allowed to float between the mouldings. Illustration by Rob Leanna.
-
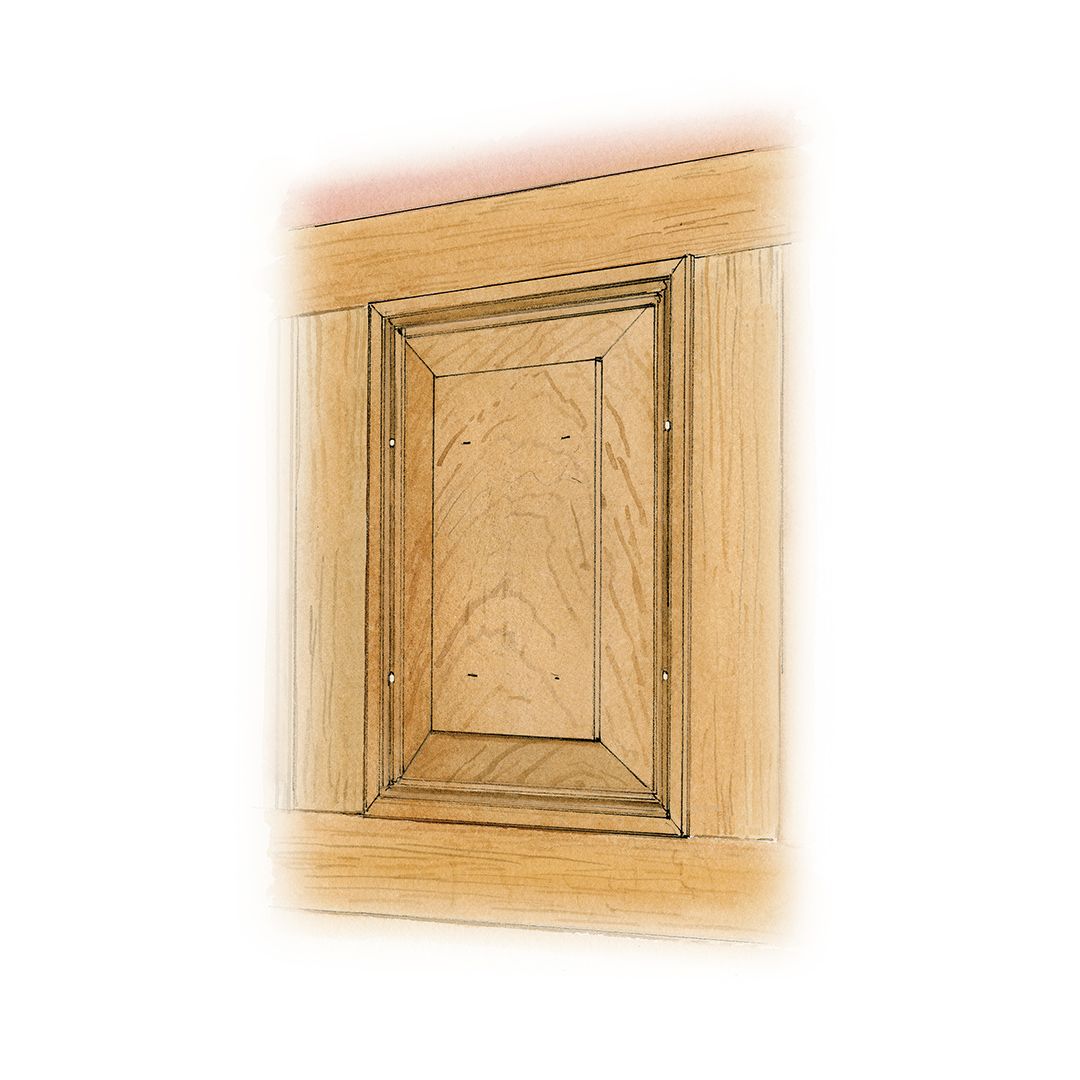
A completed panel, installed with finishing nails on the left and right where they catch the grounds underneath, allowing the panel to float. Illustration by Rob Leanna.