FHB Logo Facebook LinkedIn Email Pinterest Twitter X Instagram Tiktok YouTube Plus Icon Close Icon Navigation Search Icon Navigation Search Icon Arrow Down Icon Video Guide Icon Article Guide Icon Modal Close Icon Guide Search Icon Skip to content
Subscribe
Log In
  • How-To
  • Design
  • Tools & Materials
  • Restoration
  • Videos
  • Blogs
  • Forum
  • Magazine
  • Members
  • FHB House
  • Podcast
Log In

Fine Homebuilding Project Guides

Drywall

Guide Home
  • Drywall Basics
  • Tools and Materials
  • Hanging Drywall
  • Taping and Sanding
  • Special Installations
  • Drywall Repairs
  • Plaster
Tips & Techniques

Hang Drywall on the Ceiling the Right Way

Follow along as Myron explains how to make straight seams and accurate holes for electrical boxes when hanging ceilings.

By Myron R. Ferguson

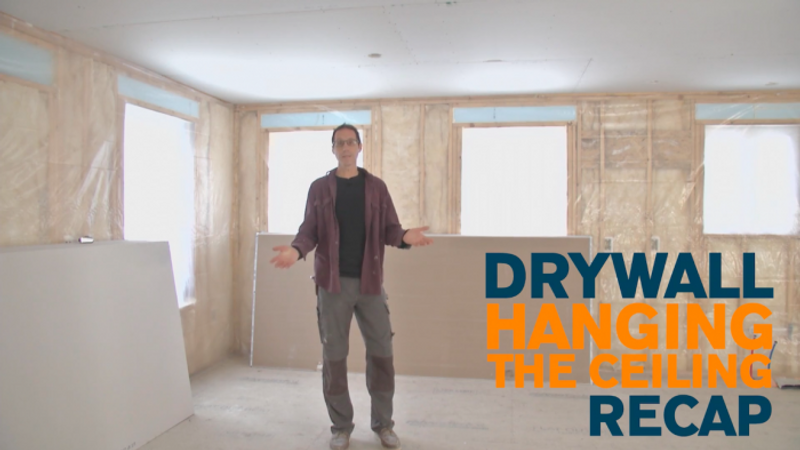
On-site at a Habitat for Humanity build, drywall expert Myron Ferguson shares his tips for correctly and efficiently hanging drywall on the ceilings. 

In this room, I hung the drywall on the ceilings before we insulated the walls—before I even brought the drywall in for the rest of the job—because I was blowing in insulation in the ceiling. When I started hanging this ceiling, I started against the longest wall and the straightest wall. But because no wall is ever perfectly straight, I actually measured out from the wall on each end, 48-1/4 in., and snapped the line. And when I hung this first run, I actually put the drywall to that line. That way, every time I moved along on this ceiling, each subsequent row of drywall stayed straight. If the first row had started out crooked, that would have been compounded by the time we got to the other end of the room. Starting straight is really important. 

The first piece is 12 ft., and we finished it up with an 11-ft. piece. For the second run, because this room is approximately 24 ft. long., I actually started with an 8-ft. sheet and filled it in with a 12-ft. sheet and then finished it off. So the first run has one butted seam and the second one has two, but I did that to avoid having my butted seams line up.

This next room has a pretty big ceiling and the customer’s expectations were very high, so we wanted to do whatever we could to make it a perfect ceiling. The biggest problem we had is hiding the seams on this ceiling. The more difficult seams to hide are butted seams. To deal with this, I have floated every butted seam—so there are two ceiling joists and the seam is in between those two joists. Above that I have what is called a back blocker, made of a piece of MDF board that is specifically designed for back-blocking. When I attach the drywall to that, it actually pulls it up slightly. So instead of having a butted seam that is a bump that I’m trying to hide, it is actually recessed, similarly to a beveled-edge seam on a ceiling. 

I rarely hang a ceiling where I’m not using a drywall lift. Often, when you hang a piece of drywall without using a lift, you’re standing on a bench and you’re balancing on that bench, and you’re hoping that you get the drywall in the exact right spot. But when you use a drywall lift, you crank it up to the ceiling and you can stand back and look at it and make little adjustments. Most of them just have a hand winch and they are mobile, so you can move them from side to side.

Once the drywall is lifted into place, especially when I’m using a lift, the only place that can really fasten it is along the perimeter. Once the lift is out of the way, I fasten the center. On this particular ceiling, I put four screws into the face. Typically, 12 in. on center is plenty, but because I put about 15 in. to 16 in. of cellulose in this attic, I put an extra screw in there just for my own protection.

When you’re fastening the drywall, make sure you don’t put a fastener too close to an electrical box because you will have to cut that out—and because it protrudes down flush with a ceiling, putting a faster too close puts too much pressure against it. Then when you route it out, it busts out. The important thing for me is accurate cuts on all these electrical boxes. Every time I cut one incorrectly, I have a five- to ten-minute repair to do because each repair takes three coats to finish. When I first got a router, I was making a lot of mistakes because I was trying to do things as fast as possible. But there is no reason to be in a hurry. The important thing is to do a quality job. Take your time—when you use the router, go in a counter-clockwise direction around the outside of the box.

Related Links: 

  • Hanging Drywall on Ceilings
  • How to Use a Drywall Router
  • Community Effort Makes Homes More Affordable

Sign up for the Fine Homebuilding Tip of the Day and get daily tips and special offers delivered to your inbox.

Signing you up...

This site is protected by reCAPTCHA and the Google Privacy Policy and Terms of Service apply.
See all newsletters
See all newsletters
Previous: Laser Plumb Bob Speeds Ceiling Drywall Installation Next: Hanging Walls

Guide

Drywall

Chapter

Hanging Drywall

Log in or create an account to post a comment.

Sign up Log in

Become a member and get full access to FineHomebuilding.com

Drywall

Drywall

Trusted, comprehensive guidance for choosing, hanging, taping, sanding, and repairing drywall—the right way

View Project Guide

View All Project Guides »

Become a member and get unlimited site access, including the Drywall Project Guide.

Start Free Trial

Drywall Basics
  • Types and Uses of Drywall
  • Planning the Job
Tools and Materials
  • Hanging Tools
  • Taping Tools and Materials
  • Sanding and Finishing Tools and Materials
Hanging Drywall
  • Prep for Hanging
  • Measuring and Cutting Drywall
  • Guidelines for Hanging and Fastening Drywall
  • Hanging Ceilings
  • Hanging Walls
  • Hanging Airtight Drywall
  • Trim Accessories/Corner Beads
Taping and Sanding
  • Taping Basics
  • Taping Seams
  • Taping Inside and Outside Corners
  • Sanding
Special Installations
  • Tricky Transitions
  • Curved Surfaces
  • Other Special Installations
  • Decorating with Drywall
Drywall Repairs
  • Patching Holes, Cracks, and More
Plaster
  • Working with Lime Plaster
  • Plaster Repair
  • Classic Plaster Techniques

Fine Home Building

Newsletter Sign-up

  • Fine Homebuilding

    Home building tips, offers, and expert advice in your inbox.

  • Green Building Advisor

    Building science and energy efficiency advice, plus special offers, in your inbox.

  • Old House Journal

    Repair, renovation, and restoration tips, plus special offers, in your inbox.

Signing you up...

This site is protected by reCAPTCHA and the Google Privacy Policy and Terms of Service apply.
See all newsletters

Follow

  • Fine Homebuilding

    Dig into cutting-edge approaches and decades of proven solutions with total access to our experts and tradespeople.

    Start Free Trial Now
    • Facebook
    • Instagram
    • X
    • LinkedIn
  • GBA Prime

    Get instant access to the latest developments in green building, research, and reports from the field.

    Start Free Trial Now
    • Facebook
    • YouTube
  • Old House Journal

    Learn how to restore, repair, update, and decorate your home.

    Subscribe Now
    • Facebook
    • Instagram
    • X

Membership & Magazine

  • Online Archive
  • Start Free Trial
  • Magazine Subscription
  • Magazine Renewal
  • Gift a Subscription
  • Customer Support
  • Privacy Preferences
  • About
  • Contact
  • Advertise
  • Careers
  • Terms of Use
  • Site Map
  • Do not sell or share my information
  • Privacy Policy
  • Accessibility
  • California Privacy Rights

© 2025 Active Interest Media. All rights reserved.

Fine Homebuilding receives a commission for items purchased through links on this site, including Amazon Associates and other affiliate advertising programs.

X
X
This is a dialog window which overlays the main content of the page. The modal window is a 'site map' of the most critical areas of the site. Pressing the Escape (ESC) button will close the modal and bring you back to where you were on the page.

Main Menu

  • How-To
  • Design
  • Tools & Materials
  • Video
  • Blogs
  • Forum
  • Project Guides
  • Reader Projects
  • Magazine
  • Members
  • FHB House

Podcasts

  • FHB Podcast
  • ProTalk

Webinars

  • Upcoming and On-Demand

Podcasts

  • FHB Podcast
  • ProTalk

Webinars

  • Upcoming and On-Demand

Popular Topics

  • Kitchens
  • Business
  • Bedrooms
  • Roofs
  • Architecture and Design
  • Green Building
  • Decks
  • Framing
  • Safety
  • Remodeling
  • Bathrooms
  • Windows
  • Tilework
  • Ceilings
  • HVAC

Magazine

  • Current Issue
  • Past Issues
  • Magazine Index
  • Subscribe
  • Online Archive
  • Author Guidelines

All Access

  • Member Home
  • Start Free Trial
  • Gift Membership

Online Learning

  • Courses
  • Project Guides
  • Reader Projects
  • Podcast

More

  • FHB Ambassadors
  • FHB House
  • Customer Support

Account

  • Log In
  • Join

Newsletter

Get home building tips, offers, and expert advice in your inbox

Signing you up...

This site is protected by reCAPTCHA and the Google Privacy Policy and Terms of Service apply.
See all newsletters
See all newsletters

Follow

  • X
  • YouTube
  • instagram
  • facebook
  • pinterest
  • Tiktok

Join All Access

Become a member and get instant access to thousands of videos, how-tos, tool reviews, and design features.

Start Your Free Trial

Subscribe

FHB Magazine

Start your subscription today and save up to 70%

Subscribe

We hope you’ve enjoyed your free articles. To keep reading, become a member today.

Get complete site access to expert advice, how-to videos, Code Check, and more, plus the print magazine.

Start your FREE trial

Already a member? Log in