FHB Logo Facebook LinkedIn Email Pinterest Twitter X Instagram Tiktok YouTube Plus Icon Close Icon Navigation Search Icon Navigation Search Icon Arrow Down Icon Video Guide Icon Article Guide Icon Modal Close Icon Guide Search Icon Skip to content
Subscribe
Log In
  • How-To
  • Design
  • Tools & Materials
  • Restoration
  • Videos
  • Blogs
  • Forum
  • Magazine
  • Members
  • FHB House
  • Podcast
Log In

Fine Homebuilding Project Guides

Drywall

Guide Home
  • Drywall Basics
  • Tools and Materials
  • Hanging Drywall
  • Taping and Sanding
  • Special Installations
  • Drywall Repairs
  • Plaster
Tools & Materials

Drywall Corner Beads

You'll need beads for all outside corners, some inside corners, and occasionally to cover the edge of a panel.

By Myron R. Ferguson
Beads for inside corners; Special tapes for inside corners provide excellent and long-lasting results. The one on top has a flexible center.

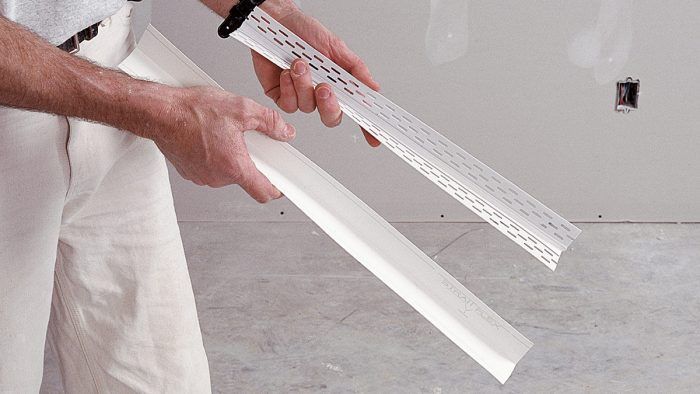
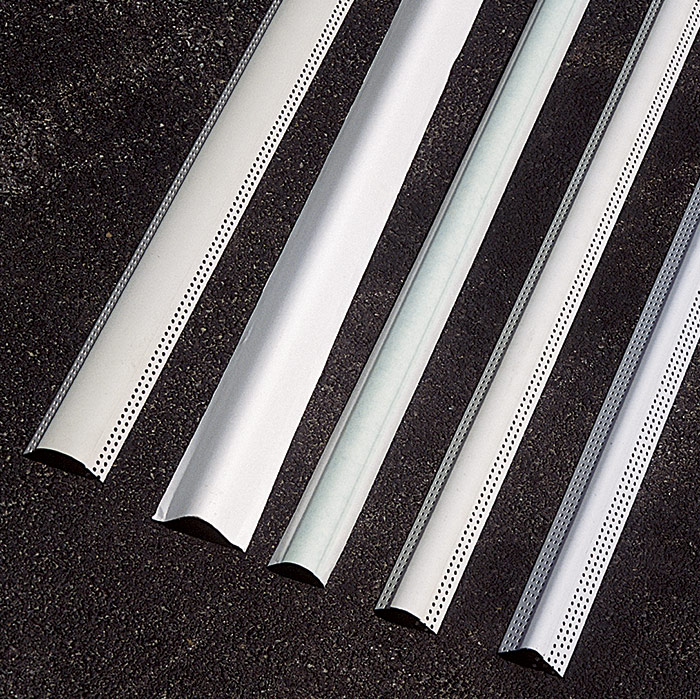
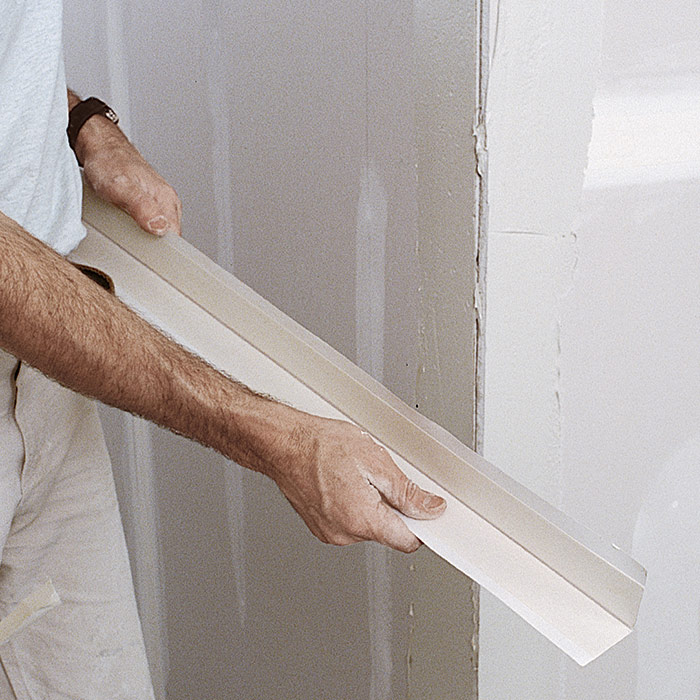
Outside corner beads

Whether on a wall or on a soffit, outside corners must be covered with corner bead. The material protects the surface and has a slightly raised beaded edge, which keeps the corner straight and acts as a screed while taping.

It wasn’t too long ago that square-edged metal corner bead was the most commonly used corner bead, and it may still be today, but the other options really are worth looking into. Today, you have your choice of metal, vinyl, plastic covered with paper, or metal covered with paper. Some types are available in 100-ft. rolls. Bullnose beads are also available in a variety of sizes and have become very popular because they offer an elegant look and are just as easy to install as regular bead.

Metal Corner Bead

Bullnose corner beads
Bullnose corner beads: Bullnose corner beads are quite popular because they provide an easy way to add an elegant look to a room. They are available in many materials and radii, ranging from 3⁄8 in. to 1-1⁄2 in.

Corner beads for odd angles
Corner beads for odd angles: Off-angle beads are available pre-shaped for 135-degree outside corners, even in bullnose styles (at left). At center is a paper-faced bead and on the right is a vinyl bead.


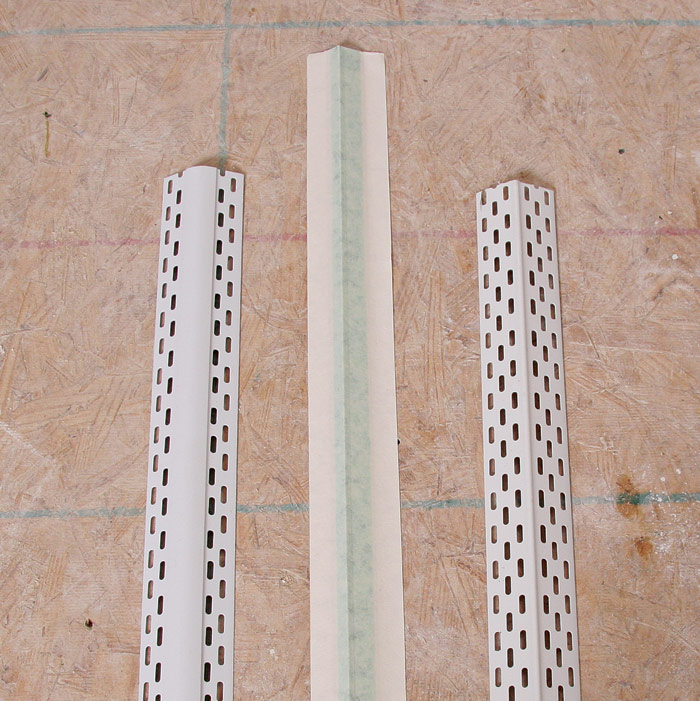
Archway bead For years, I used metal corner bead to finish the edges of archways. The only way to install it was to snip the bead at 1-in. intervals and push each piece into place along the curve of the arch. This method worked, but it cannot be compared to the simplicity and quality you get with new products designed specifically for archways. There are three basic types of flexible corner bead made for arches:

  • Flexible wire bead has a plastic beaded edge and is nailed in place.
  • Vinyl bead has a pre-snipped edge that is glued and stapled in place.
  • Composite bead has a PVC core and a paper surface and is embedded in joint compound.


WORK SMART: For off-angle inside corners, use either an adjustable bead that comes in stick form or, for longer runs, roll form. These newer styles of beads do a great job of keeping off-angle corners straight.


Beads for arches
Beads for arches: Flexible archway beads are the easiest option for handing curved corners. They are also available in bullnose form.


The PVC material comes in rolls up to 100 ft. long and is now available in stick form with a wire reinforced edge. The wire and vinyl beads come in lengths of up to 10 ft. and the composite bead comes in lengths of up to 100 ft. Vinyl bullnose corner bead, which is flexible, is available to match the outside and inside corner bullnose beads. If you are using bullnose corner bead on your 90-degree corners, then you will most likely want bullnose on the archways. The vinyl bead companies make archway beads in all the bullnose radii. There are even bullnose beads made for off-angle inside and outside corners (135-degree corners only).


Inside corner beads

On most inside corners, I use paper tape embedded in joint compound, which is then covered with compound and feathered to a smooth edge. This method works great for inside corners that are around 90 degrees.

When I first saw a 90-degree inside corner bead I really couldn’t see why anybody would use it. I am a professional and I get great results with paper tape so I wouldn’t spend the money on a bead for a 90-degree inside corner. But after using the different types of bead I can see why they would be used:

  • You don’t have to coat the very inside edge with compound. Therefore, both sides of the corner can be coated at once—as opposed to waiting for one edge to dry and then coating the other.
  • When sanding you can sand the inside edge clean and straight, because you don’t have to leave any compound in the corner.
  • All this adds up to a great-looking inside corner, especially for the less experienced taper.
  • The end result is a very strong and straight inside corner.
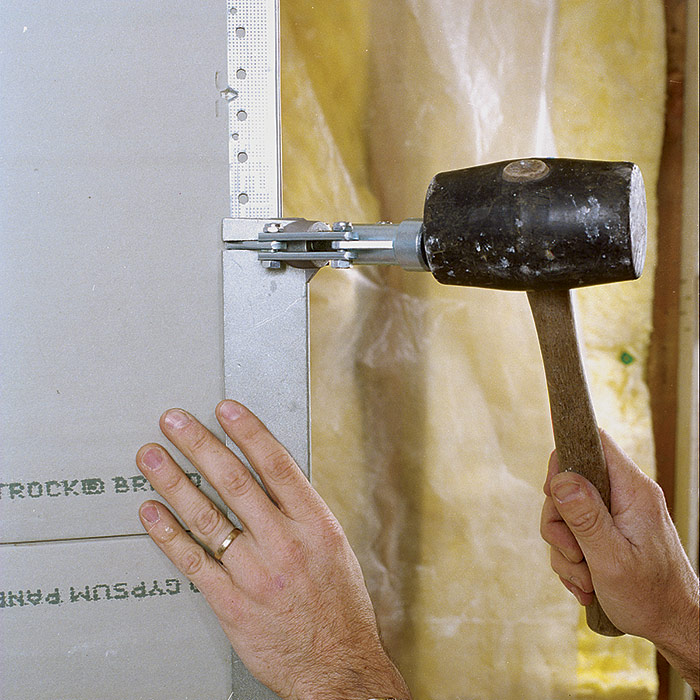
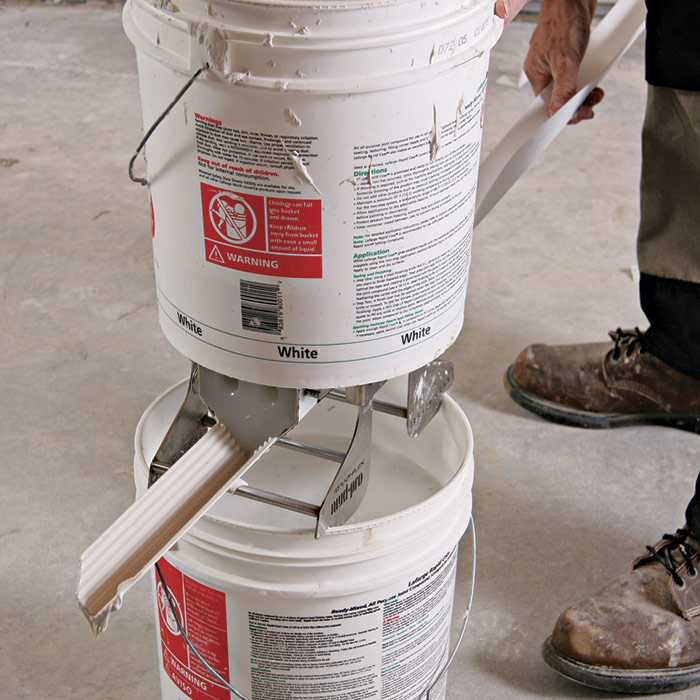
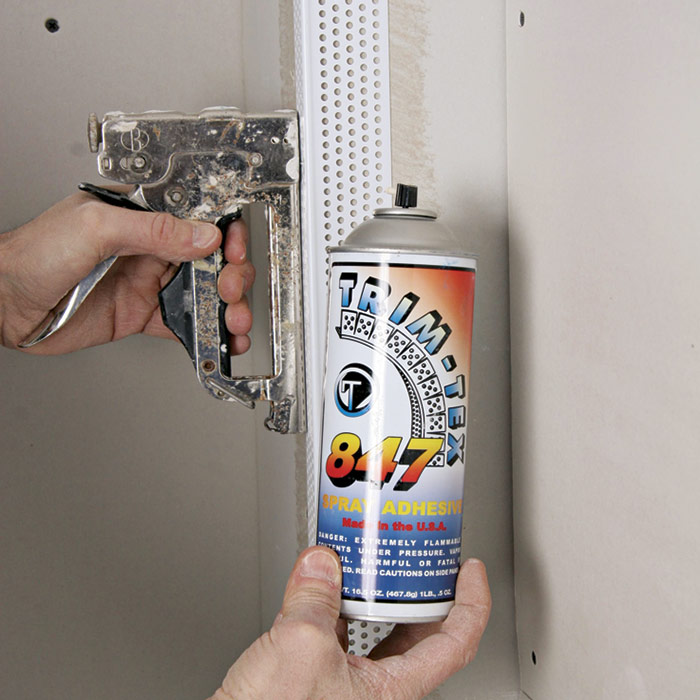
 

Securing Corner Beads

Among many contractors, nailing or crimping a standard metal corner bead in place is gradually being replaced by beads that are attached using adhesive only. With these beads, the adhesive is simply sprayed onto the drywall along the entire length of the bead. All corner beads should be installed in one piece, unless the length of the corner exceeds the standard corner-bead lengths of 6 ft. 10 in., 8 ft., 9 ft., and 10 ft.

Metal beads
Metal beads: One blow with a rubber mallet on a corner crimper every 4 to 6 in. attaches standard metal corner bead to an outside corner. This style bead can also be attached with drywall nails.

Paper-covered plastic
Paper-covered plastic: Corner beads are available in a variety of styles. Pictured here is a paper-covered plastic outside corner bead that is attached with joint compound.

Compound secures the bead
Compound secures the bead: A special tool is used to coat the back side of tape-on corner beads with joint compound. The compound works as an adhesive to hold the bead in place.

Glue it in place
Glue it in place: Some beads, like this vinyl bead, are attached with spray adhesive and staples. The staples penetrate only the drywall—not the framing.


If an inside corner is much wider than 90 degrees, a specialized product is a must for achieving the straight lines that define these corners. Fortunately, there are a number of products that can handle these off angles. Some work on both inside and outside corners; others are more specialized and designed for application on specific-angle corners. For off-angle inside corners, there is even a product that has a rubber center groove, which flexes if the structure moves slightly, greatly reducing costly callbacks. Inside corner beads are also available in bullnose styles to match bullnose outside corners. These products cost more than regular paper tape and compound, but you easily make up the extra cost in time saved and improved quality.

Trim beads

Metal, plastic, and paper-covered metal J-trims are caps used to cover the edges of drywall panels. Typically, they are applied against a shower stall, a window jamb, or a brick wall; around an opening that is left untrimmed; or on the exposed end of a panel. J-trim is available in different thicknesses to fit different sizes of drywall. It can be installed before the panel is hung or after the panel is loosely attached. It is held in place by driving a nail or screw through the face of the drywall and through the longer back flange of the J-trim. Some types need to be finished with joint compound, whereas others do not require any finishing at all (see the drawing below).

J-TRIM AND L-BEAD


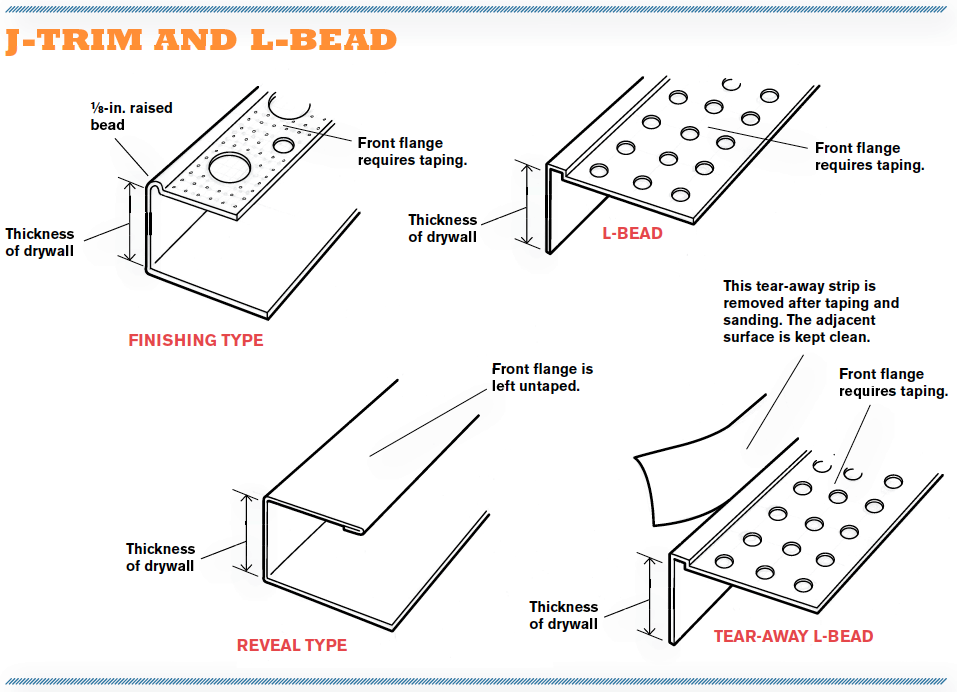
An L-bead finishes the edges of drywall that butt up against something, such as a suspended ceiling, a window, or a paneled wall. The drywall is cut so that the short edge of the L-bead can be inserted between the drywall and the abutting material. The exposed edge of the bead is then finished with joint compound. Many of these L-beads have a removable strip that protects the abutting surface from compound and some can be left on to protect the surface from paint. Trim beads are available in lengths of up to 12 ft. long and for 1/2-in.- and 5/8-in.-thick drywall. I prefer L-beads over J-beads in most applications, as L-beads are easier to install—especially on longer runs—because they are attached after the drywall.

Expansion joints

Expansion joints, which are made of metal or vinyl, are installed between drywall panels. They are not covered with joint compound, as other typical drywall joints are, but they can be filled with a flexible caulk. Expansion joints are designed to compensate for the expansion and contraction of building materials and for the normal settling of a building, so that drywall seams don’t become cracked or ridged. They are used when there is a large expanse of ceiling or wall. On ceilings, they run from wall to wall; on walls, they run from ceiling to floor. In high stairway walls, they are installed from wall to wall.

Sign up for eletters today and get the latest how-to from Fine Homebuilding, plus special offers.

Signing you up...

This site is protected by reCAPTCHA and the Google Privacy Policy and Terms of Service apply.
See all newsletters
See all newsletters
Previous: 4 Options for Drywall Joint-Compound Next: Drywall Taping Tools

Guide

Drywall

Chapter

Tools and Materials

Log in or create an account to post a comment.

Sign up Log in

Become a member and get full access to FineHomebuilding.com

Drywall

Drywall

Trusted, comprehensive guidance for choosing, hanging, taping, sanding, and repairing drywall—the right way

View Project Guide

View All Project Guides »

Become a member and get unlimited site access, including the Drywall Project Guide.

Start Free Trial

Drywall Basics
  • Types and Uses of Drywall
  • Planning the Job
Tools and Materials
  • Hanging Tools
  • Taping Tools and Materials
  • Sanding and Finishing Tools and Materials
Hanging Drywall
  • Prep for Hanging
  • Measuring and Cutting Drywall
  • Guidelines for Hanging and Fastening Drywall
  • Hanging Ceilings
  • Hanging Walls
  • Hanging Airtight Drywall
  • Trim Accessories/Corner Beads
Taping and Sanding
  • Taping Basics
  • Taping Seams
  • Taping Inside and Outside Corners
  • Sanding
Special Installations
  • Tricky Transitions
  • Curved Surfaces
  • Other Special Installations
  • Decorating with Drywall
Drywall Repairs
  • Patching Holes, Cracks, and More
Plaster
  • Working with Lime Plaster
  • Plaster Repair
  • Classic Plaster Techniques

Fine Home Building

Newsletter Sign-up

  • Fine Homebuilding

    Home building tips, offers, and expert advice in your inbox.

  • Green Building Advisor

    Building science and energy efficiency advice, plus special offers, in your inbox.

  • Old House Journal

    Repair, renovation, and restoration tips, plus special offers, in your inbox.

Signing you up...

This site is protected by reCAPTCHA and the Google Privacy Policy and Terms of Service apply.
See all newsletters

Follow

  • Fine Homebuilding

    Dig into cutting-edge approaches and decades of proven solutions with total access to our experts and tradespeople.

    Start Free Trial Now
    • Facebook
    • Instagram
    • X
    • LinkedIn
  • GBA Prime

    Get instant access to the latest developments in green building, research, and reports from the field.

    Start Free Trial Now
    • Facebook
    • YouTube
  • Old House Journal

    Learn how to restore, repair, update, and decorate your home.

    Subscribe Now
    • Facebook
    • Instagram
    • X

Membership & Magazine

  • Online Archive
  • Start Free Trial
  • Magazine Subscription
  • Magazine Renewal
  • Gift a Subscription
  • Customer Support
  • Privacy Preferences
  • About
  • Contact
  • Advertise
  • Careers
  • Terms of Use
  • Site Map
  • Do not sell or share my information
  • Privacy Policy
  • Accessibility
  • California Privacy Rights

© 2025 Active Interest Media. All rights reserved.

Fine Homebuilding receives a commission for items purchased through links on this site, including Amazon Associates and other affiliate advertising programs.

X
X
This is a dialog window which overlays the main content of the page. The modal window is a 'site map' of the most critical areas of the site. Pressing the Escape (ESC) button will close the modal and bring you back to where you were on the page.

Main Menu

  • How-To
  • Design
  • Tools & Materials
  • Video
  • Blogs
  • Forum
  • Project Guides
  • Reader Projects
  • Magazine
  • Members
  • FHB House

Podcasts

  • FHB Podcast
  • ProTalk

Webinars

  • Upcoming and On-Demand

Podcasts

  • FHB Podcast
  • ProTalk

Webinars

  • Upcoming and On-Demand

Popular Topics

  • Kitchens
  • Business
  • Bedrooms
  • Roofs
  • Architecture and Design
  • Green Building
  • Decks
  • Framing
  • Safety
  • Remodeling
  • Bathrooms
  • Windows
  • Tilework
  • Ceilings
  • HVAC

Magazine

  • Current Issue
  • Past Issues
  • Magazine Index
  • Subscribe
  • Online Archive
  • Author Guidelines

All Access

  • Member Home
  • Start Free Trial
  • Gift Membership

Online Learning

  • Courses
  • Project Guides
  • Reader Projects
  • Podcast

More

  • FHB Ambassadors
  • FHB House
  • Customer Support

Account

  • Log In
  • Join

Newsletter

Get home building tips, offers, and expert advice in your inbox

Signing you up...

This site is protected by reCAPTCHA and the Google Privacy Policy and Terms of Service apply.
See all newsletters
See all newsletters

Follow

  • X
  • YouTube
  • instagram
  • facebook
  • pinterest
  • Tiktok

Join All Access

Become a member and get instant access to thousands of videos, how-tos, tool reviews, and design features.

Start Your Free Trial

Subscribe

FHB Magazine

Start your subscription today and save up to 70%

Subscribe

We hope you’ve enjoyed your free articles. To keep reading, become a member today.

Get complete site access to expert advice, how-to videos, Code Check, and more, plus the print magazine.

Start your FREE trial

Already a member? Log in