FHB Logo Facebook LinkedIn Email Pinterest Twitter X Instagram Tiktok YouTube Plus Icon Close Icon Navigation Search Icon Navigation Search Icon Arrow Down Icon Video Guide Icon Article Guide Icon Modal Close Icon Guide Search Icon Skip to content
Subscribe
Log In
  • How-To
  • Design
  • Tools & Materials
  • Restoration
  • Videos
  • Blogs
  • Forum
  • Magazine
  • Members
  • FHB House
  • Podcast
Log In
How-To

Convert a Porch to a Mudroom

The key to this budget-friendly and comfortable entry remodel is a new airtight and insulated floor system

By Jeremy Kassel Issue 319 - November 2023

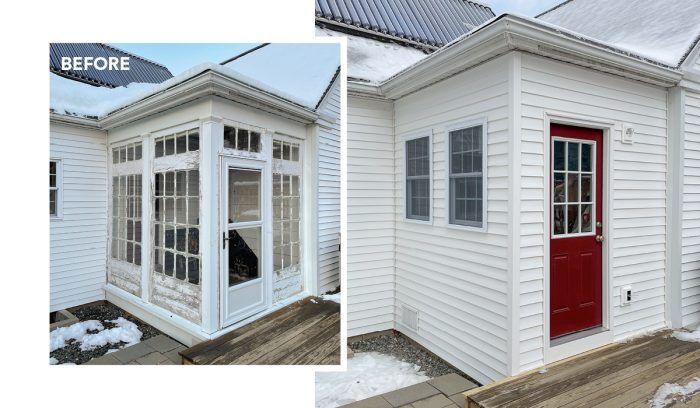
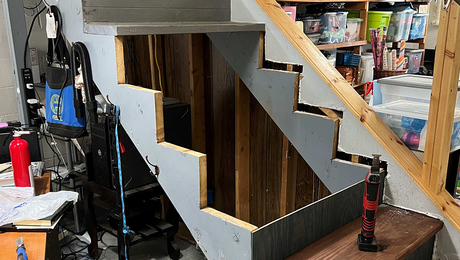
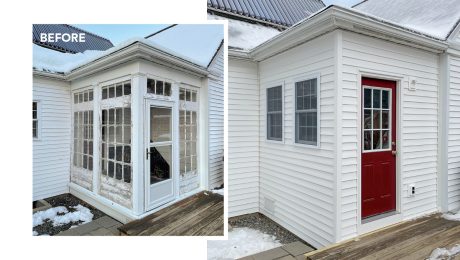
Last winter a longtime customer asked us to convert his ­existing porch into a mudroom. The enclosed porch, which was approximately 60 sq. ft., had single-pane windows, no wall or roof insulation, and a storm door in place of a proper entry door. A small staircase within the porch footprint provided access to the client’s home workshop, where he restores and refinishes furniture professionally. Given that the porch was almost always too hot or too cold, it was only used for accessing the backyard and the workshop. Our plan was to eliminate the staircase (with the client accessing his shop from outside the house in the future) and rebuild the porch into a semi-­conditioned mudroom that would include a utility area for laundry as well as space for kicking off boots, hanging jackets, and storing hats and gloves.

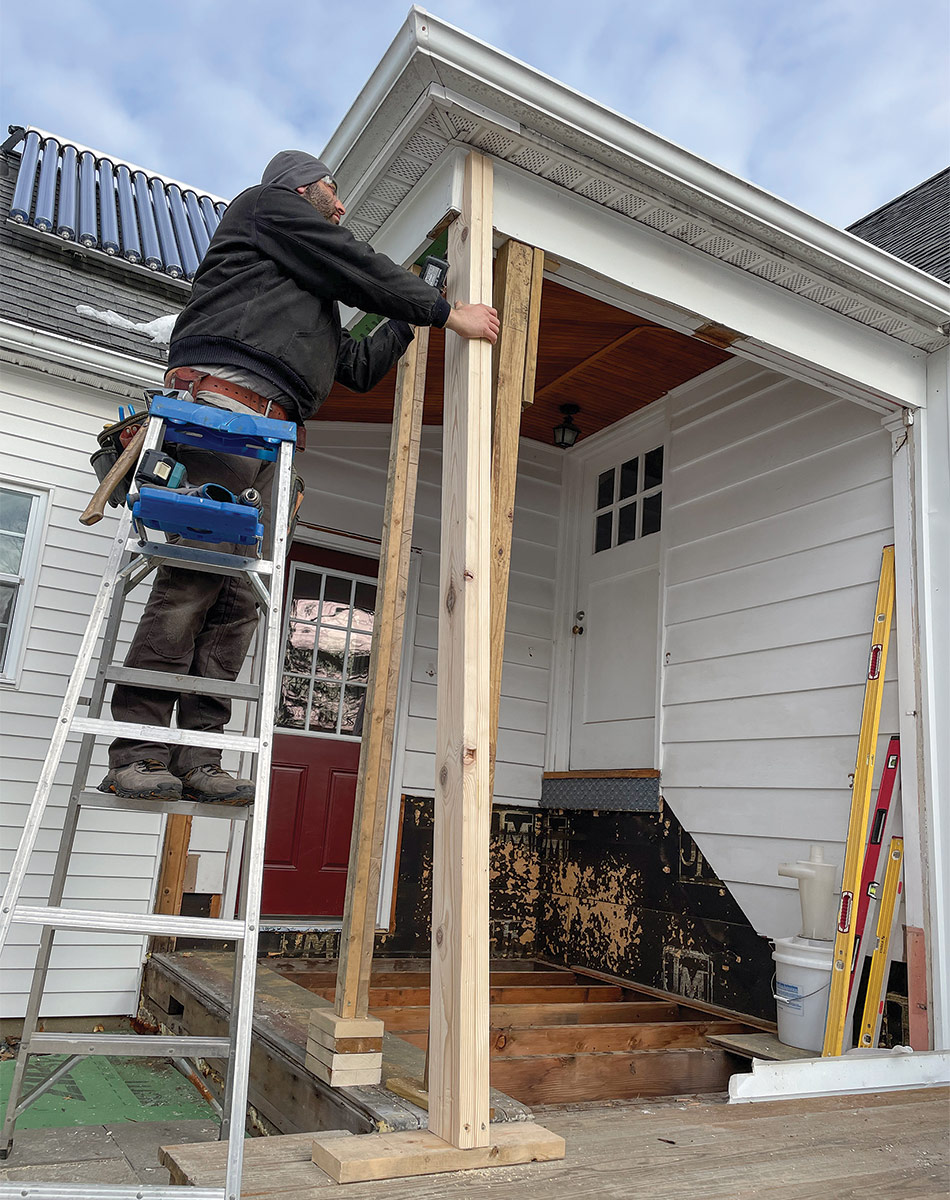
As with most porches in the area, there was a step down from the house to the porch floor. We decided to raise the floor system so the mudroom would be on the same level as the rest of the house and feel like part of the original floor plan. Exploratory demolition by the homeowner revealed some problems with the original structure. The posts supporting the roof were not solid lumber but rather four 1x trim boards nailed together to create a hollow post. There were also load-carrying beams at the roof level with voids and spaces, particularly at the outside corner of the roof valley. Addressing these structural deficiencies would be part of the scope.

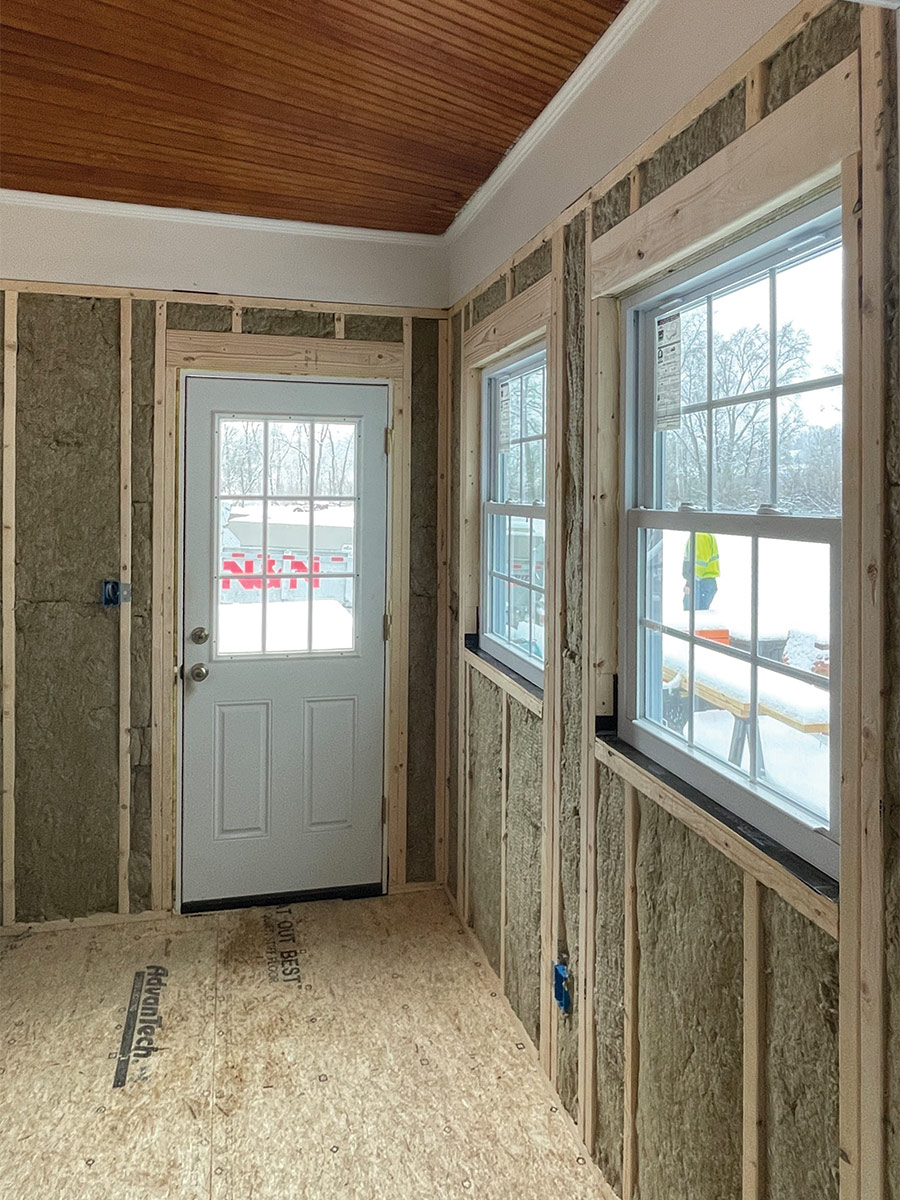
To keep costs down, we did not change the porch’s tongue-and-groove beadboard ceiling. We also left the existing clapboard siding as an interior wall finish, using salvaged pieces from other parts of the house for repairs. To control costs further, the client would finish the drywall, install a vinyl floor, and trim out the entry door and two windows himself.

Porch-to-mudroom conversions like this challenge the standard construction sequence because they’re often on a concrete slab or inaccessible crawlspace. In this case, the existing block foundation was in excellent condition, but there is no access from inside or outside the home. This meant we would need to install the electrical, insulation, and venting in the floor system before sheathing the floor and building the walls.

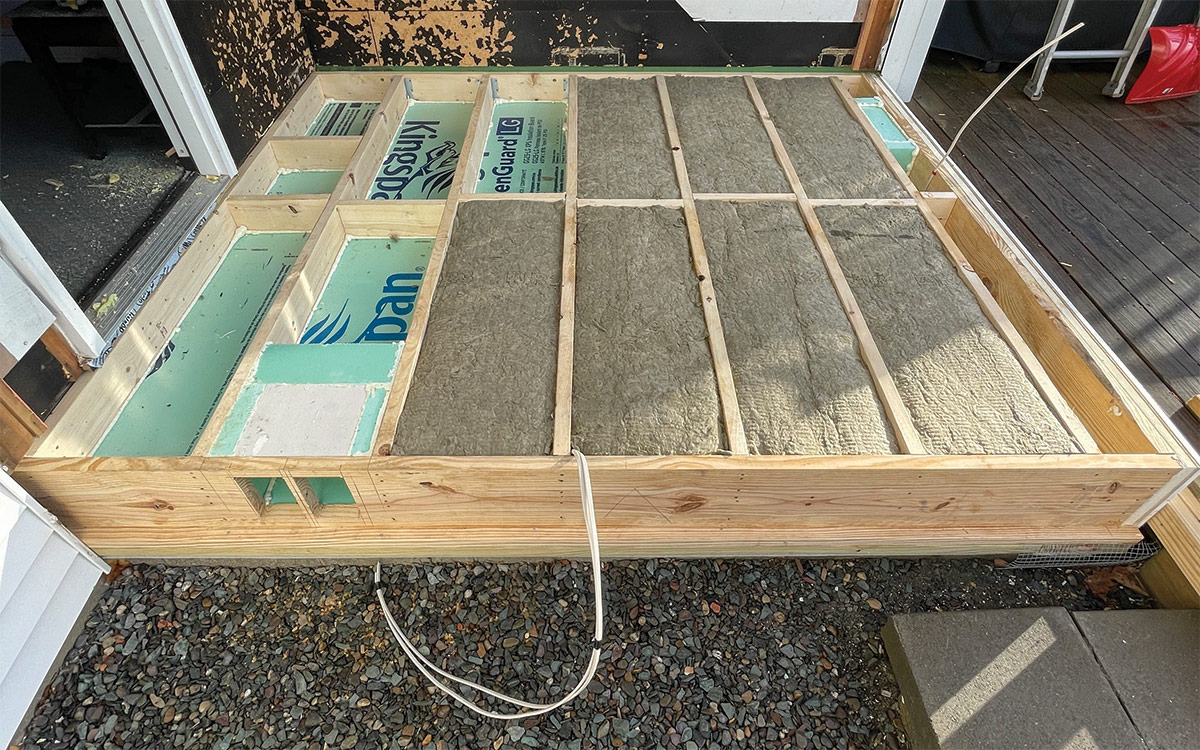
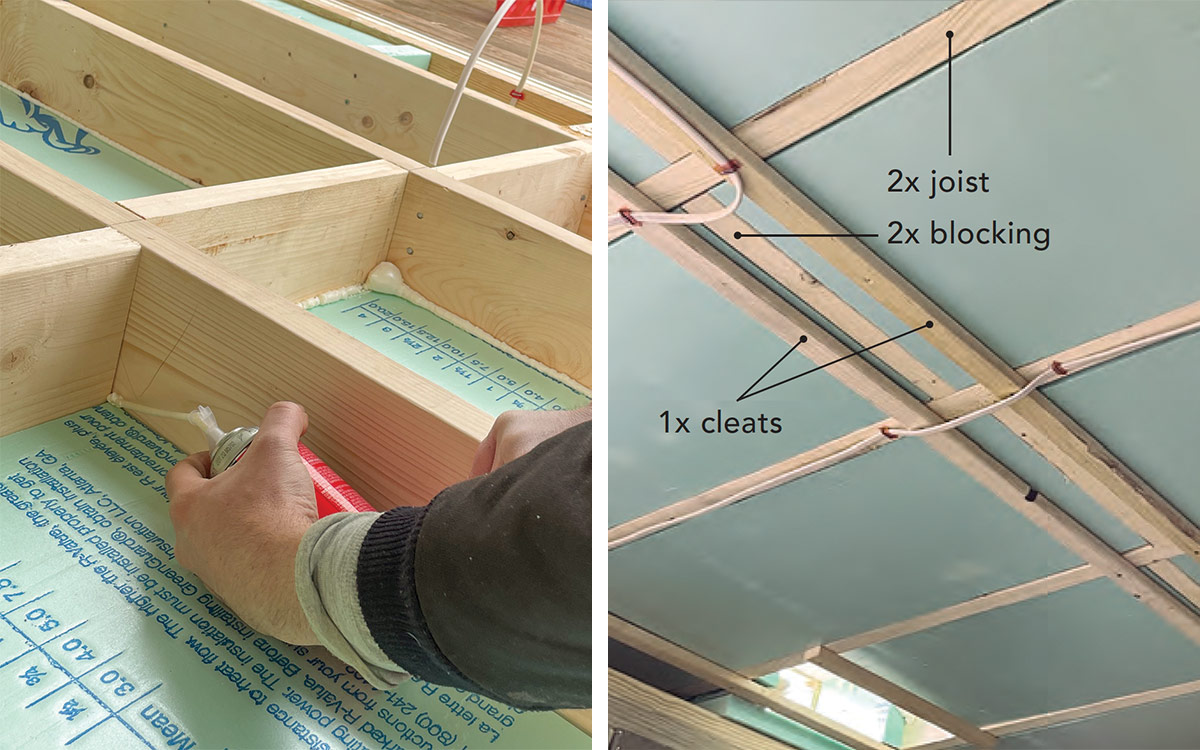
The new mudroom would have insulation but no heat source, so I wanted a robust insulation and air-sealing strategy to keep the space comfortable. The crawlspace under the porch floor was vented when we started construction, and we wanted to keep it that way. This meant we needed to insulate and air-seal the floor assembly. The 2×8 floor joists can only hold 7-1/4 in. of insulation, so we installed 2-in.-thick XPS rigid insulation ripped to fit between the joists, with mineral-­wool batts on top. I love mineral wool for its fire resistance, sound-­deadening characteristics, and R-value (R-4 per in.). The rigid foam provides an even greater R-value per inch (R-10 for 2 in.), and because it is sealed around the perimeter with canned spray foam, it creates an air barrier below the mineral wool. The floor assembly is approximately R-35.

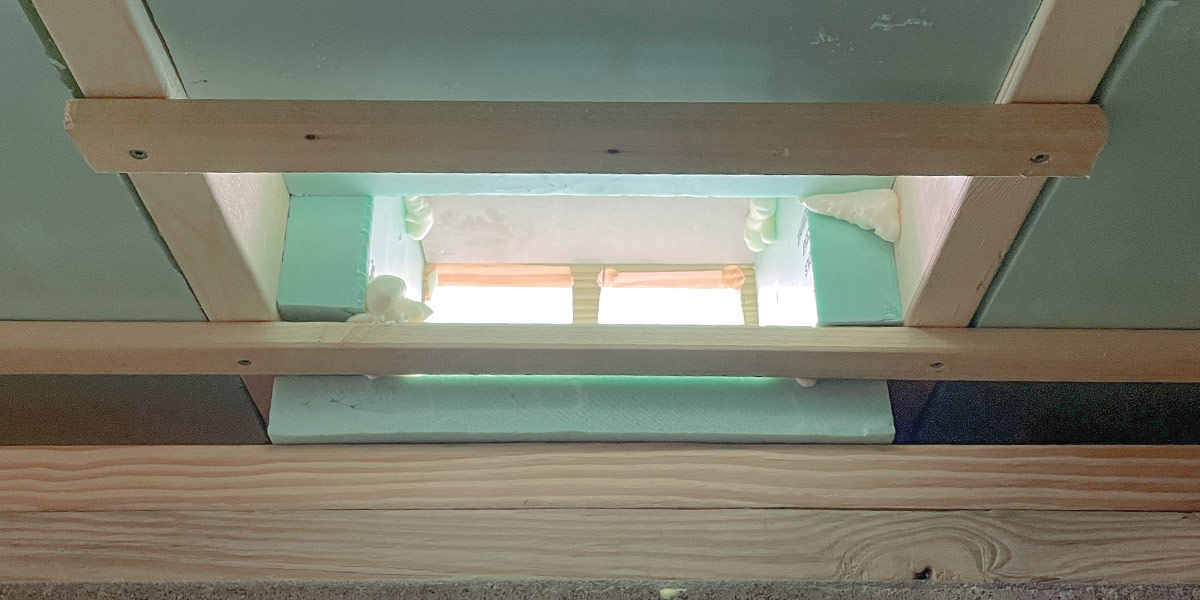
We retained the two passive vents to allow seasonal drying in the crawlspace. We constructed those using the 2-in. XPS. The vents were covered with basic, aluminum, louvered register covers.

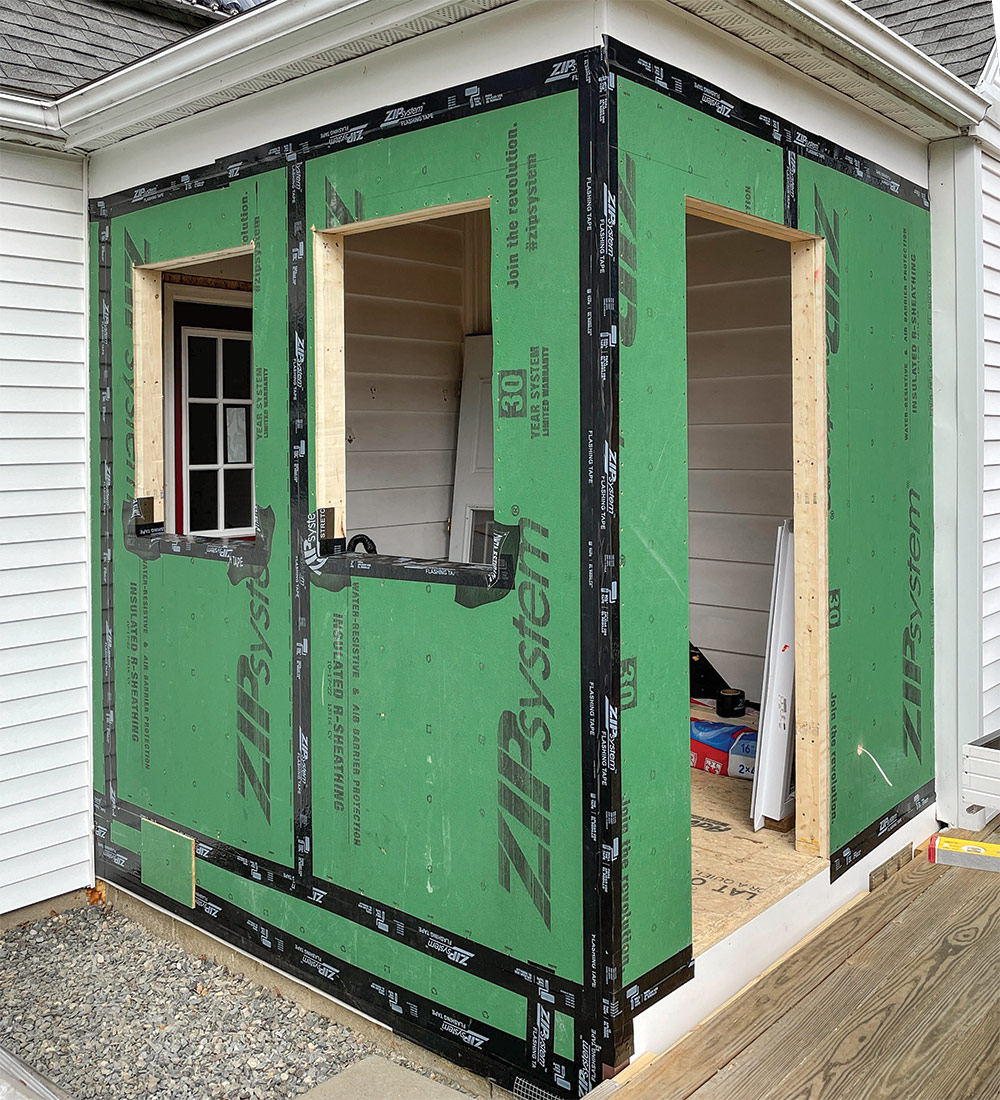
For the exterior walls we used Zip System R-sheathing (R-6.6), which has a layer of insulation built into it. With the addition of R-15 mineral-wool batts, our wall assembly is approximately R-21. Although this space isn’t fully conditioned with a heat source, because it is so well-insulated and air-sealed and has such a small footprint, it is generally comfortable and can be made more so by opening the door to the main house.

This project cost about $9000, not including the client’s labor, which easily saved a few thousand dollars. It’s always enjoyable to help a family make their house more livable, and it’s especially satisfying to do so for a reasonable sum of money.

Frame a New Floor


We considered leaving the porch’s floor joists in place and sistering taller joists or adding sleepers to raise the floor, but we found an untreated mudsill sitting on the block foundation with no sill-seal gasket. Even though there were no signs of rot, we chose to cut out the existing joists and sill plates and start fresh with a new floor system raised to match the rest of the house.
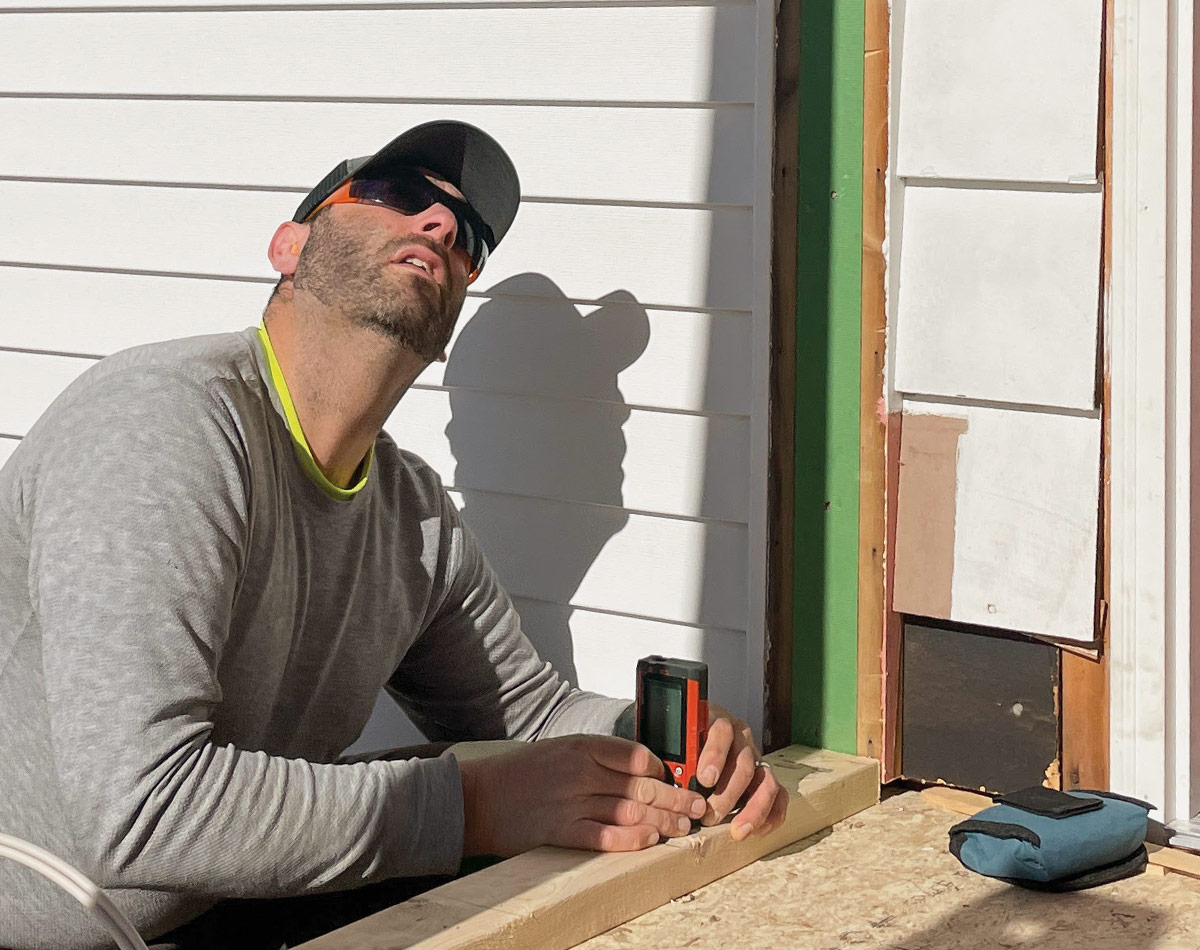
Support the roof

installing temporary support post on porch
We had to temporarily support the porch roof because the posts were on top of the existing tongue-and-groove flooring. We used a two-ply 2×6 angled post with a large bird’s mouth to hold up the beam supporting the roof. With the top of the post attached to the roof beam, we drove the post inward at the bottom to take up the roof load.

Demo the floor

doing demo of porch floor
With the roof supported, we pried up the porch flooring with wrecking and flat bars. When the flooring was gone, we cut out the floor joists with a cordless reciprocating saw equipped with a demolition blade.

Start straight and smooth
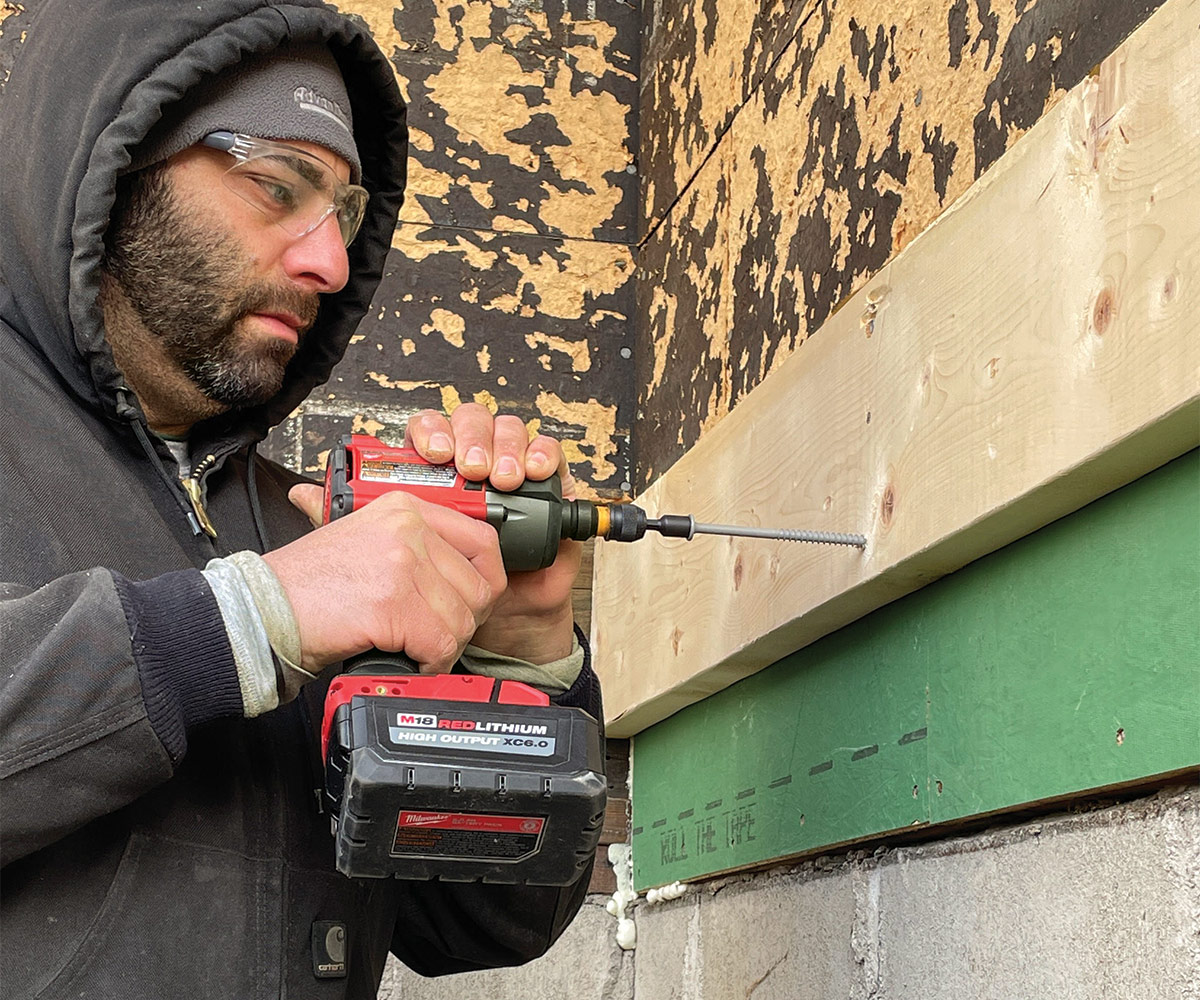
installing new mudroom floor starting with 2x8 ledgers fastened with structural screws
We started building a new floor by cutting a level line in the ’50s-era wood-fiber sheathing with a circular saw and removing the sheathing below the cut line. We then installed 7/16-in. Zip sheathing in place of the wood-fiber sheathing over the wall framing, followed by 2×8 ledgers fastened with structural screws. The Zip sheathing is flat and its coated surface is smooth, making it easier to air-seal.

New higher joists

installing 2x8 floor joists
We used concrete screws to fasten double 2×10 sill plates to the block foundation, followed by a 2×10 rim joist. We then hung the 2×8 floor joists from the ledger and the rim joist with joist hangers and fasteners spaced at 16 in. on center. We also added midspan blocking for additional rigidity.

Add electrical

framing of new mudroom floor with cables running under the floor
With no access after the floor was to be sheathed, we had to run the cables under the floor for receptacles and lights before sheathing. We draped a few feet of wire outside of the rim joist to feed a new receptacle inside, and another leg of wire from that location to the adjacent rim joist to supply power to an outdoor receptacle and a switched exterior light.

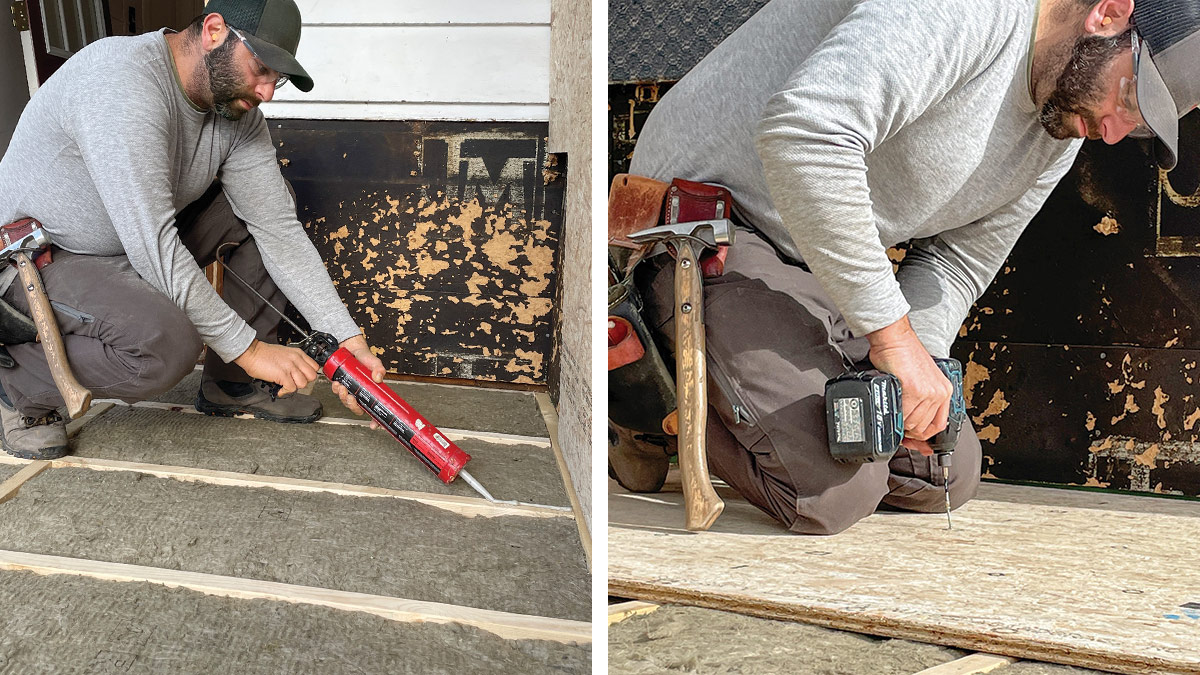
Foam for a warmer floor

2-in. layer of XPS insulation in new mudroom floor
A 2-in. layer of XPS insulation boosts the floor’s R-value and creates an air barrier on the bottom of the joists. We screwed 1x cleats to the bottom side of the joists to hold the foam, then sprayed canned foam to glue the XPS in place and fill any gaps between it and the framing.

Space to breathe

crawlspace vents in unconditioned crawlspace
To make sure the unconditioned crawlspace would be able to dry, we added a pair of crawlspace vents through the rim joists and separated them from the insulated floor with XPS. Aluminum insect screen on the interior of each vent prevents bugs from getting inside.

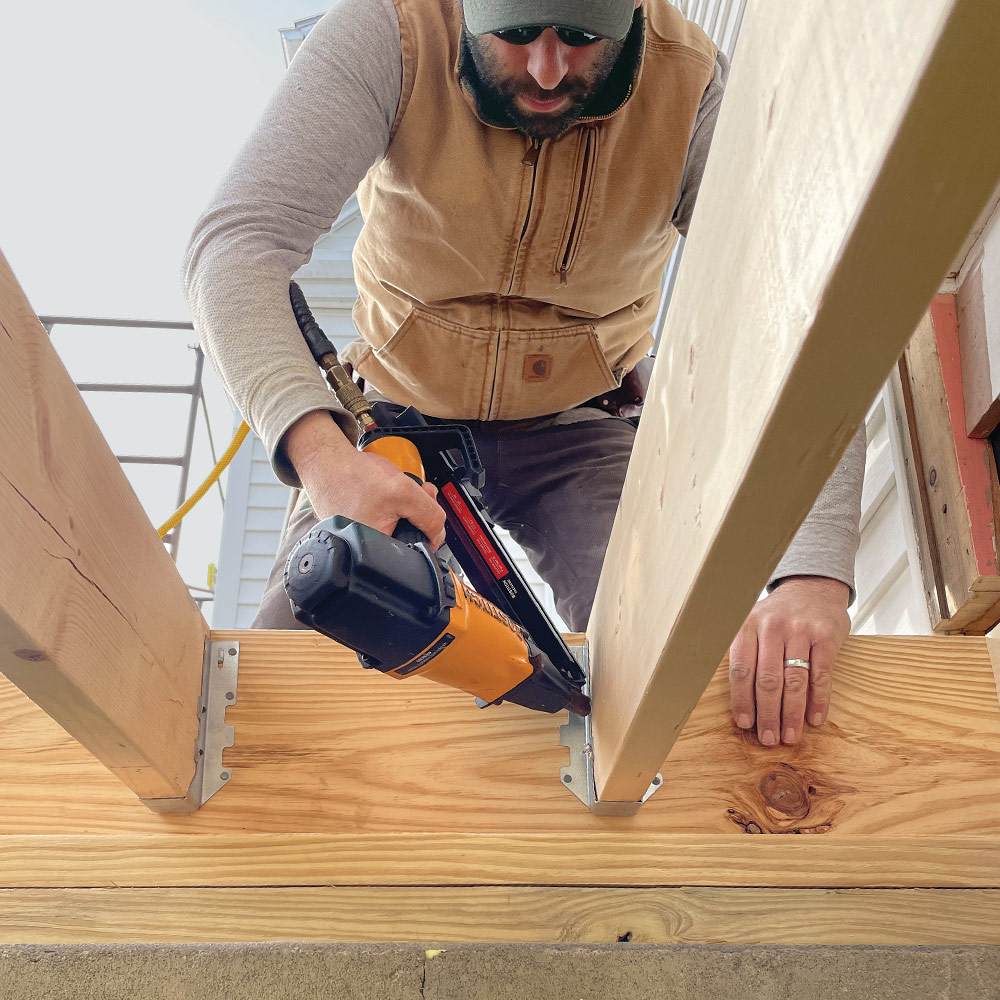
Fit and fasten the subfloor
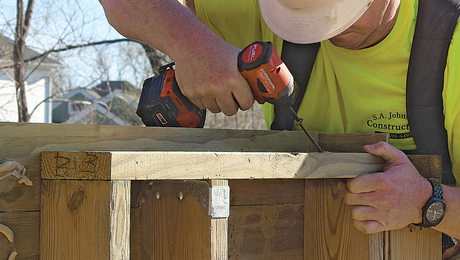
installing new subfloor for mudroom
With the in-floor electrical done, we placed 5-1/2-in. mineral-wool batts atop the foam and then installed 3/4-in. subflooring using subfloor adhesive and 2-in. screws. We also had to pull the electrical cables through holes in the subfloor near where they’d enter the wall framing.

Build New Walls


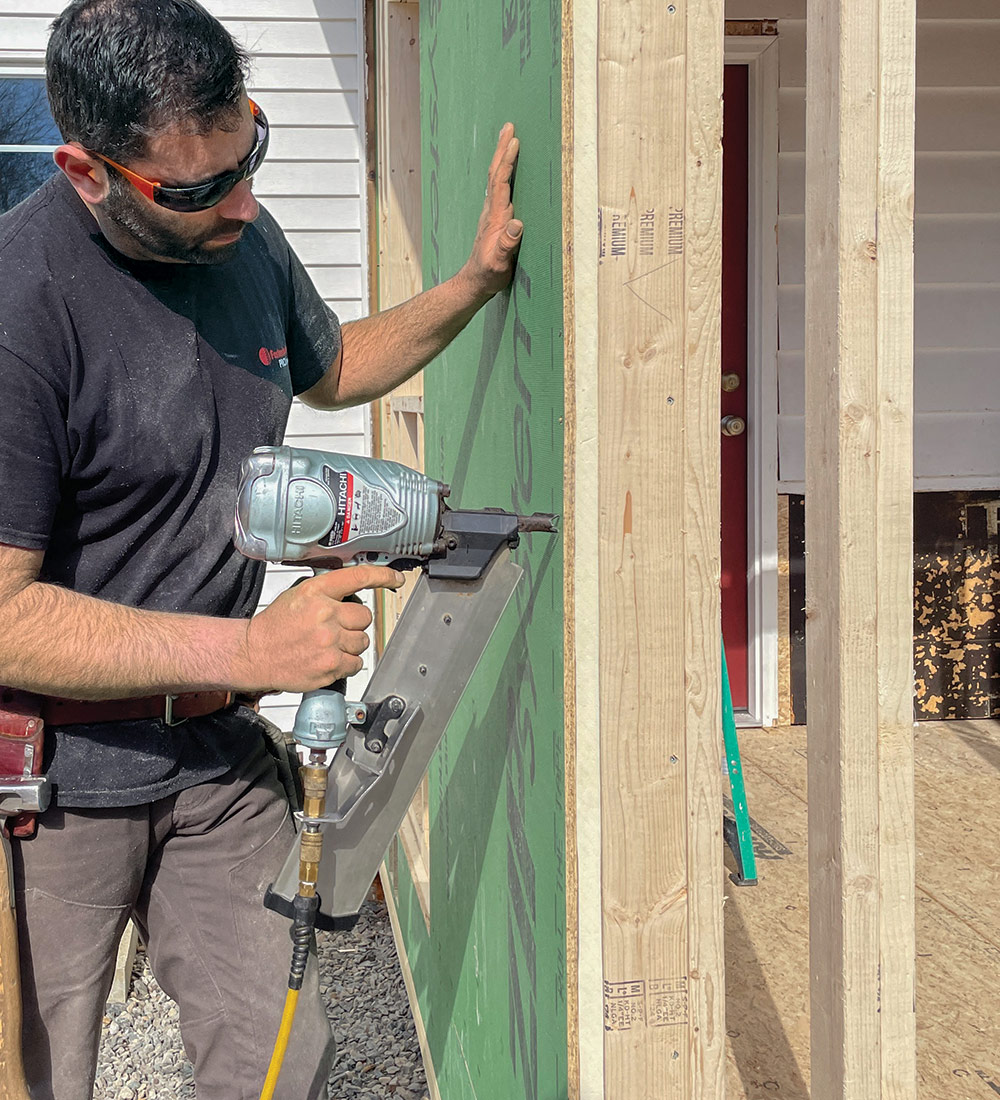
After the floor was framed and insulated and the electrical stubbed up, we could build the walls. As in most remodeling situations, we built the new walls in place to make sure they followed any framing irregularities caused by seasonal movement or settling over time. Once the walls were built, we sheathed them with Zip R-sheathing and taped the seams for weather resistance and air-sealing.

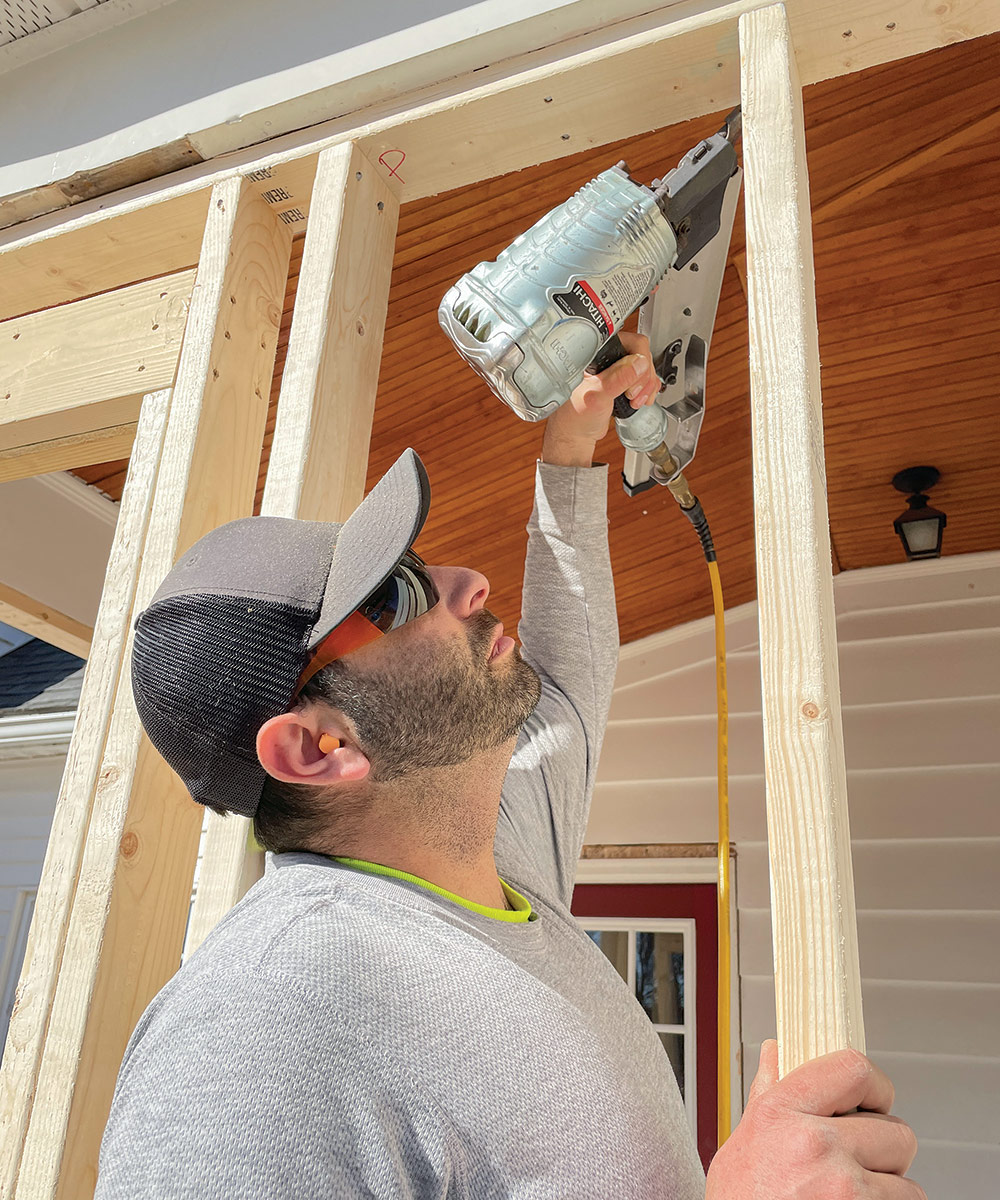
Fit studs individually

measuring studs with a laser measurer
We measured each stud with a laser measurer and cut it to fit snug. In addition to ensuring that every stud was a tight fit, this method made it easier to slide the bottom plate over the long electrical cable.

Toenail the top and bottom

installing new studs and plates
The studs and plates are held in place with 3-in. full-round-head framing nails. Building the wall in place required either toenailing or using screws at the tops and bottoms of studs to connect them to the previously installed plates.

Foam and sheathing combined

installing Zip System R-sheathing on exterior of new mudroom
Zip System R-sheathing is an easy way to add exterior insulation under siding and beef up a wall’s performance. The foam layer slows thermal bridging through the framing, and the sheathing layer on the outside makes it straightforward to install siding, windows, and doors.

new walls and insulation on mudroom

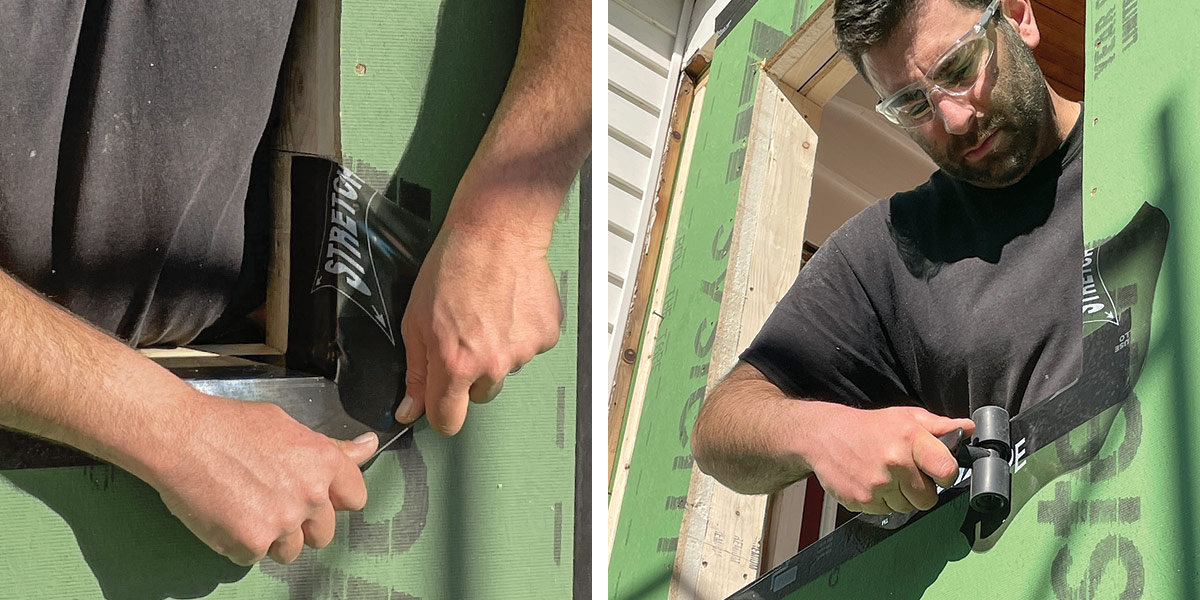
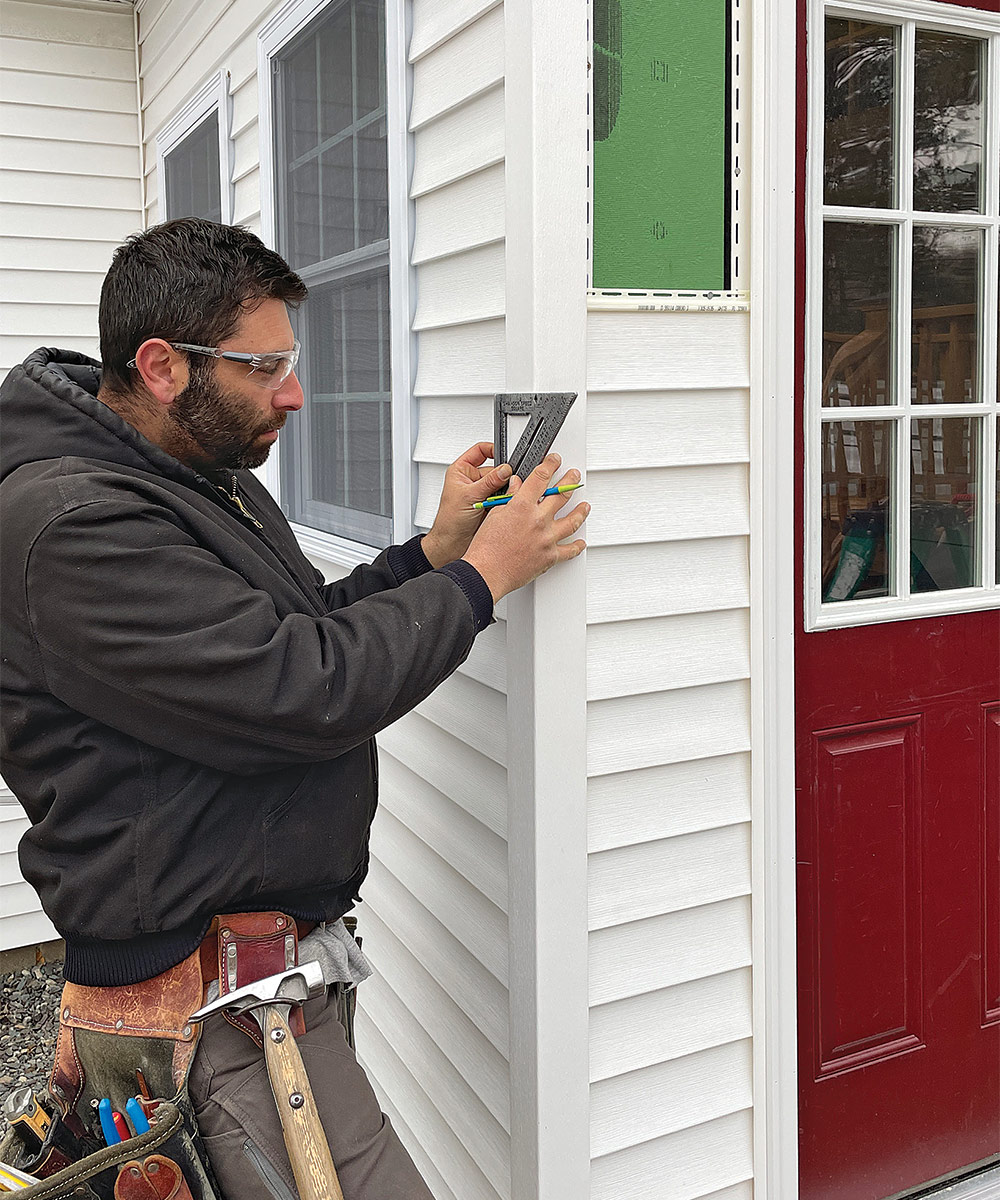
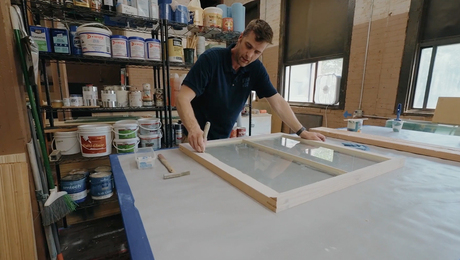
Install Windows, Doors, and Siding


The material choices were simple and inexpensive and were meant to match the aesthetic of the rest of the home. We installed basic vinyl windows, a fiberglass door, and white D-4 vinyl siding. While not fancy, these building products are affordable, quick to install, and easy to maintain and clean.

Install windows with care
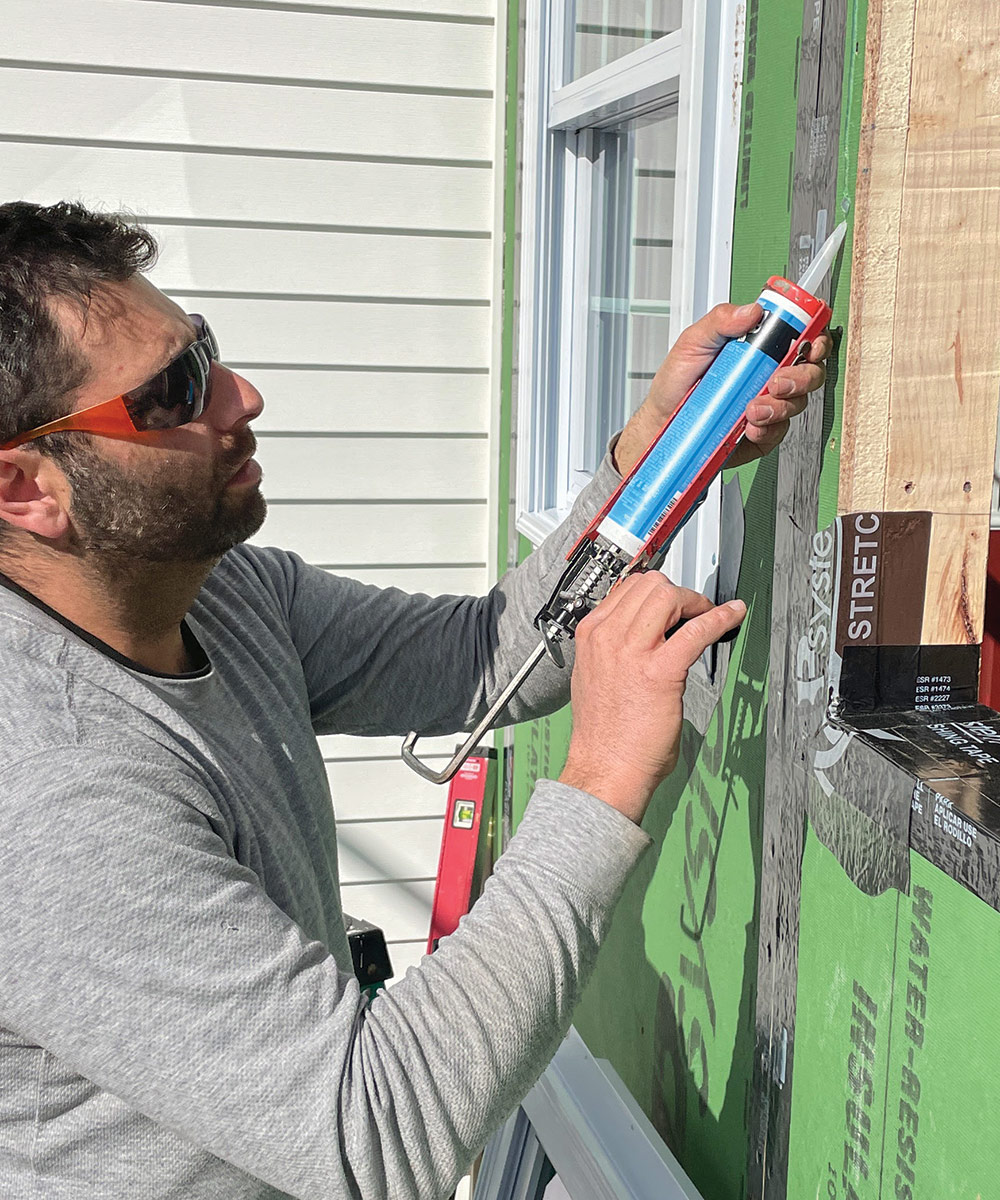
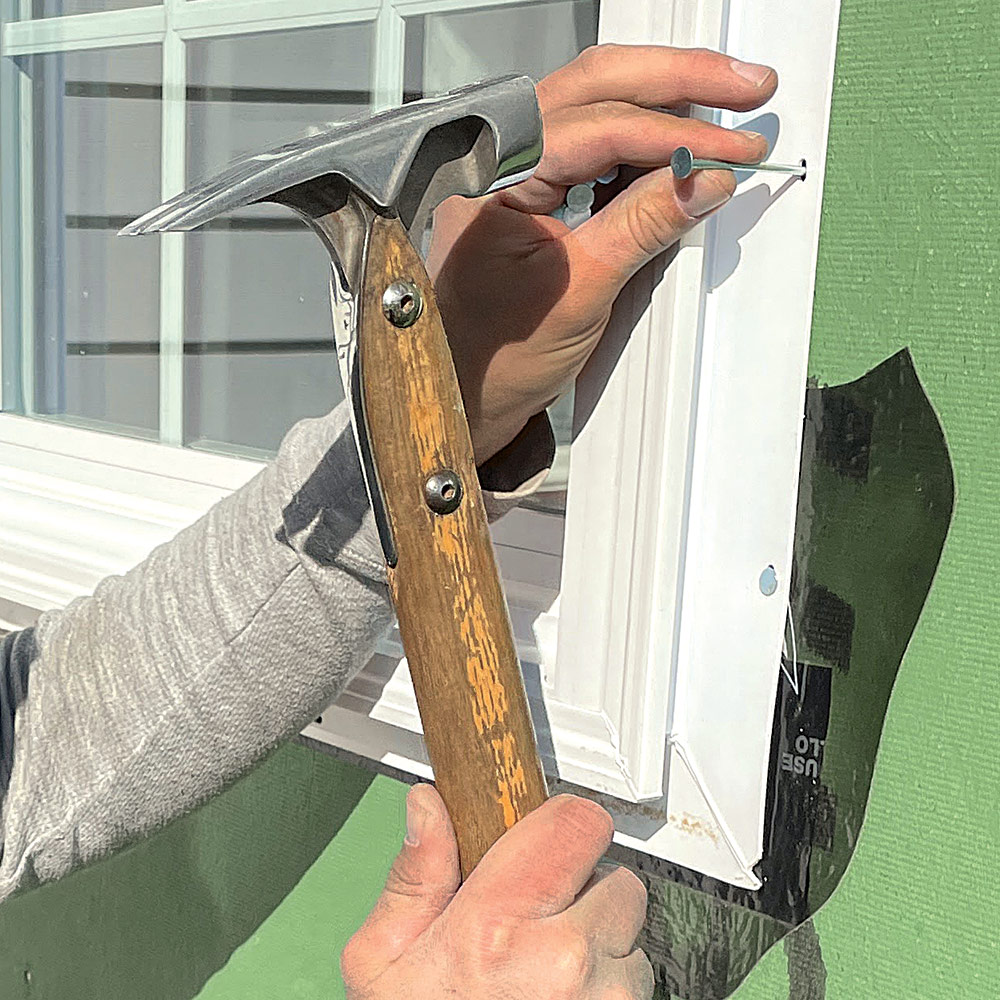
creating a waterproof sill pan with flexible flashing tape
A piece of bevel siding under lengths of seam and flexible flashing tape created a waterproof sill pan.
placing a bead of silicone sealant behind a window flange
We also placed a bead of silicone sealant behind the window flange as a second line of defense against wind-driven rain and water running down the exterior.

Fasten the windows

using 3-in. galvanized roofing nails to install the windows
To make it through the Zip R-sheathing’s insulation layer and get into the framing, we used 3-in. galvanized roofing nails to install the windows. After they were fully nailed, we covered the nailing flange with flashing tape, leaving the bottom open for drainage.

Install accessories first
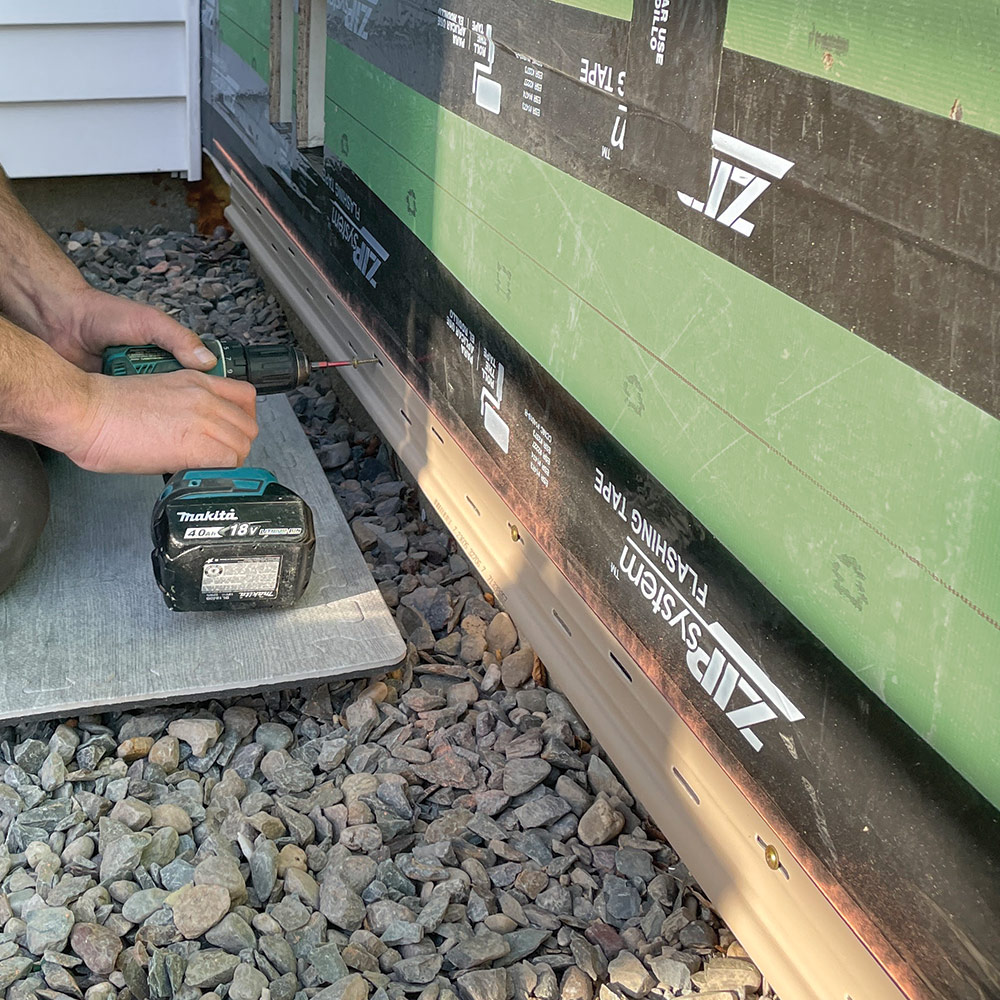
beginning a vinyl-siding installation with the starter strip
We began the vinyl-siding installation with the starter strip that holds the bottom of the first course of siding. We used a long level or laser to get the strip perfectly level before fastening it with 1-1/4-in. washer-head screws. We then installed corner trim and J-channels before installing the siding.

Line up corners

lining up siding on different elevations
It drives me crazy to see courses of siding on different elevations that don’t align, so we took great care to line up the starter strips so that the panels would line up at inside and outside corners. Inexpensive materials are elevated with high-quality carpentry.

inside of new mudroom before drywall and flooring

Jeremy Kassel (@kasselconstruction) is a builder in Glenmont, N.Y. Photos by Jeremy Kassel and Levi Kovach.


RELATED STORIES

  • How to Insulate a Floor Over a Crawlspace
  • Video Series: Build a Built-in Mudroom
  • Details of Using Stone Wool Insulation

Fine Homebuilding Recommended Products

Fine Homebuilding receives a commission for items purchased through links on this site, including Amazon Associates and other affiliate advertising programs.

Homebody: A Guide to Creating Spaces You Never Want to Leave

Joanna Gaines may have started as a celebrity designer on HGTV, but she’s proven to be the real deal. This book help you understand how and why good design works so that you can recreate it on your own.
Buy at Amazon

The New Carbon Architecture: Building to Cool the Climate

With this book, architect Bruce King changes the conversation around what it means to build a green home. Take everything you thought you knew about the topic, and just set it aside and let Bruce explain why embodied carbon trumps the rest of what is undoubtedly important.
Buy at Amazon

A House Needs to Breathe...Or Does It?: An Introduction to Building Science

Allison Bailes is great at explaining complex building science topics in simple terms that anyone can understand. If your goal is a new house or remodel that embodies the best practices that building scientists have to offer, buy this book right away.
Buy at Amazon

Sign up for eletters today and get the latest how-to from Fine Homebuilding, plus special offers.

Signing you up...

This site is protected by reCAPTCHA and the Google Privacy Policy and Terms of Service apply.
See all newsletters
See all newsletters
×

Get home building tips, offers, and expert advice in your inbox

Signing you up...

This site is protected by reCAPTCHA and the Google Privacy Policy and Terms of Service apply.
See all newsletters
See all newsletters
View PDF

New Feature

Fine Homebuilding Forums

Ask questions, offer advice, and share your work

View Comments

  1. user-196571 | Nov 13, 2023 01:05pm | #1

    A classic example where the After product looks FAR worse than the Before. They should have just insulated around the windows and floor and installed a new door. The functionality of the floor space didn't change. It went from cute to ugly really fast, and at a much higher expense.

Log in or create an account to post a comment.

Sign up Log in

Become a member and get full access to FineHomebuilding.com

Up Next

Video Shorts

Featured Story

Eight Common Electrical Myths and Mistakes

Dangerous electrical work and widespread misconceptions cause fires, deaths, and $1.5 billion in property damage annually.

Featured Video

A Modern California Home Wrapped in Rockwool Insulation for Energy Efficiency and Fire Resistance

The designer and builder of the 2018 Fine Homebuilding House detail why they chose mineral-wool batts and high-density boards for all of their insulation needs.

Related Stories

  • Restoring Polychromed Light Fixtures
  • Rescuing Old Hardware
  • Laundry and Pantry in One
  • Period Kitchen for an Arts & Crafts House

Discussion Forum

Recent Posts and Replies

  • |
  • |
  • |
  • |
  • |
  • |
View More Create Post

Highlights

Fine Homebuilding All Access
Fine Homebuilding Podcast
Tool Tech
Plus, get an extra 20% off with code GIFT20

"I have learned so much thanks to the searchable articles on the FHB website. I can confidently say that I expect to be a life-long subscriber." - M.K.

Get home building tips, offers, and expert advice in your inbox

Signing you up...

This site is protected by reCAPTCHA and the Google Privacy Policy and Terms of Service apply.
See all newsletters
See all newsletters

Video

View All Videos
  • FHB Podcast Segment: Can a Pretty Good House Have a Fireplace?
  • Window Glazing with Traditional Putty
  • FHB Podcast Segment: A Permanent Wood Foundation in the Adirondacks
  • FHB Podcast Segment: Drywall-Free Half Wall Finish
View All

Entryways and Foyers

View All Entryways and Foyers Articles
  • Convert a Porch to a Mudroom
  • Exterior Fiberglass Doors Offer Durability and Customization
  • Dropped First-Floor Framing
View All Entryways and Foyers Articles

Fine Homebuilding Magazine

  • Issue 330 - April/May
    • Deck Details for Durability
    • FAQs on HPWHs
    • 10 Tips for a Long-Lasting Paint Job
  • Issue 329 - Feb/Mar 2025
    • Smart Foundation for a Small Addition
    • A Kominka Comes West
    • Making Small Kitchens Work
  • Issue 328 - Dec/Jan 2024
    • How a Pro Replaces Columns
    • Passive House 3.0
    • Tool Test: Compact Line Lasers
  • Issue 327 - November 2024
    • Repairing Damaged Walls and Ceilings
    • Plumbing Protection
    • Talking Shop
  • Issue 326 - October 2024
    • Paint Behind Strike Plates
    • Conceal Cut Ends
    • Ladder Slip Solution

Fine Home Building

Newsletter Sign-up

  • Fine Homebuilding

    Home building tips, offers, and expert advice in your inbox.

  • Green Building Advisor

    Building science and energy efficiency advice, plus special offers, in your inbox.

  • Old House Journal

    Repair, renovation, and restoration tips, plus special offers, in your inbox.

Signing you up...

This site is protected by reCAPTCHA and the Google Privacy Policy and Terms of Service apply.
See all newsletters

Follow

  • Fine Homebuilding

    Dig into cutting-edge approaches and decades of proven solutions with total access to our experts and tradespeople.

    Start Free Trial Now
    • Facebook
    • Instagram
    • X
    • LinkedIn
  • GBA Prime

    Get instant access to the latest developments in green building, research, and reports from the field.

    Start Free Trial Now
    • Facebook
    • YouTube
  • Old House Journal

    Learn how to restore, repair, update, and decorate your home.

    Subscribe Now
    • Facebook
    • Instagram
    • X

Membership & Magazine

  • Online Archive
  • Start Free Trial
  • Magazine Subscription
  • Magazine Renewal
  • Gift a Subscription
  • Customer Support
  • Privacy Preferences
  • About
  • Contact
  • Advertise
  • Careers
  • Terms of Use
  • Site Map
  • Do not sell or share my information
  • Privacy Policy
  • Accessibility
  • California Privacy Rights

© 2025 Active Interest Media. All rights reserved.

Fine Homebuilding receives a commission for items purchased through links on this site, including Amazon Associates and other affiliate advertising programs.

X
X
This is a dialog window which overlays the main content of the page. The modal window is a 'site map' of the most critical areas of the site. Pressing the Escape (ESC) button will close the modal and bring you back to where you were on the page.

Main Menu

  • How-To
  • Design
  • Tools & Materials
  • Video
  • Blogs
  • Forum
  • Project Guides
  • Reader Projects
  • Magazine
  • Members
  • FHB House

Podcasts

  • FHB Podcast
  • ProTalk

Webinars

  • Upcoming and On-Demand

Podcasts

  • FHB Podcast
  • ProTalk

Webinars

  • Upcoming and On-Demand

Popular Topics

  • Kitchens
  • Business
  • Bedrooms
  • Roofs
  • Architecture and Design
  • Green Building
  • Decks
  • Framing
  • Safety
  • Remodeling
  • Bathrooms
  • Windows
  • Tilework
  • Ceilings
  • HVAC

Magazine

  • Current Issue
  • Past Issues
  • Magazine Index
  • Subscribe
  • Online Archive
  • Author Guidelines

All Access

  • Member Home
  • Start Free Trial
  • Gift Membership

Online Learning

  • Courses
  • Project Guides
  • Reader Projects
  • Podcast

More

  • FHB Ambassadors
  • FHB House
  • Customer Support

Account

  • Log In
  • Join

Newsletter

Get home building tips, offers, and expert advice in your inbox

Signing you up...

This site is protected by reCAPTCHA and the Google Privacy Policy and Terms of Service apply.
See all newsletters
See all newsletters

Follow

  • X
  • YouTube
  • instagram
  • facebook
  • pinterest
  • Tiktok

Join All Access

Become a member and get instant access to thousands of videos, how-tos, tool reviews, and design features.

Start Your Free Trial

Subscribe

FHB Magazine

Start your subscription today and save up to 70%

Subscribe

We hope you’ve enjoyed your free articles. To keep reading, become a member today.

Get complete site access to expert advice, how-to videos, Code Check, and more, plus the print magazine.

Start your FREE trial

Already a member? Log in