FHB Logo Facebook LinkedIn Email Pinterest Twitter X Instagram Tiktok YouTube Plus Icon Close Icon Navigation Search Icon Navigation Search Icon Arrow Down Icon Video Guide Icon Article Guide Icon Modal Close Icon Guide Search Icon Skip to content
Subscribe
Log In
  • How-To
  • Design
  • Tools & Materials
  • Restoration
  • Videos
  • Blogs
  • Forum
  • Magazine
  • Members
  • FHB House
  • Podcast
Log In
How-To

Make Mudsills Square and Level

Careful measuring, precise layout adjustments, and repeated double-checks pay off with a faster, frustration-free build.

By John Spier Issue 318 - October 2023

Synopsis: In this article, builder John Spier shares his process for installing a mudsill. He begins by checking to see if it is level, square, and in plane. If it isn’t, he makes the necessary correction. From there he locates the placement of the mudsills and snaps layout lines. He then installs the mudsill, which in his area is made of two 2×6 plates.


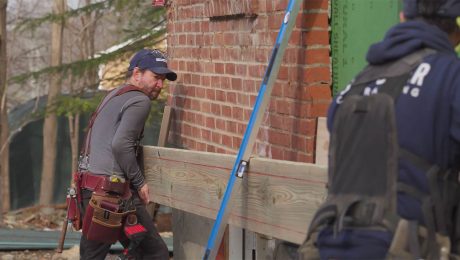
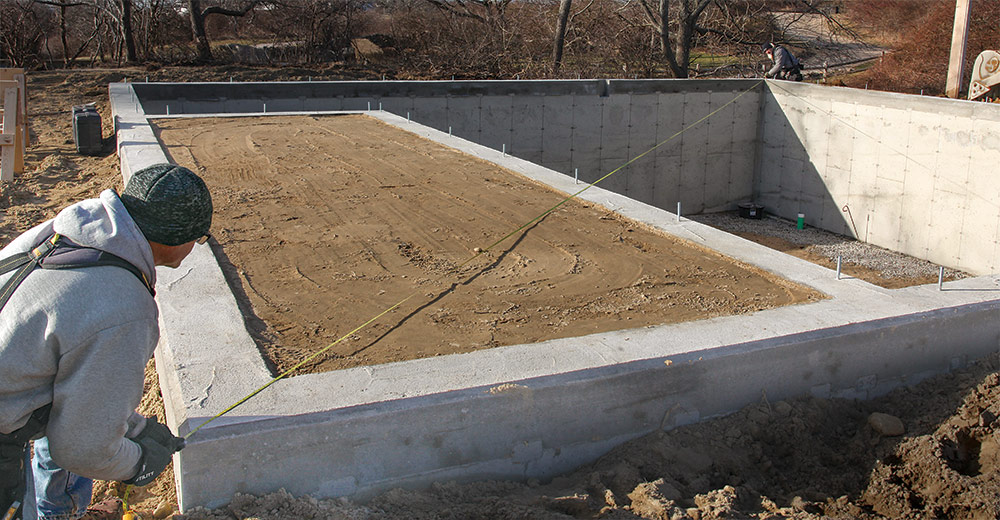
Arriving on-site with a new foundation and a big pile of ­lumber is an exciting and important day in the life of a project. A good start here carries through to every part of the build that follows, from framing and sheathing to installing tile and trim. And the first part of a successful start is getting the mudsills square and level.

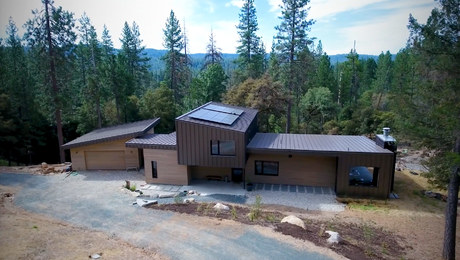
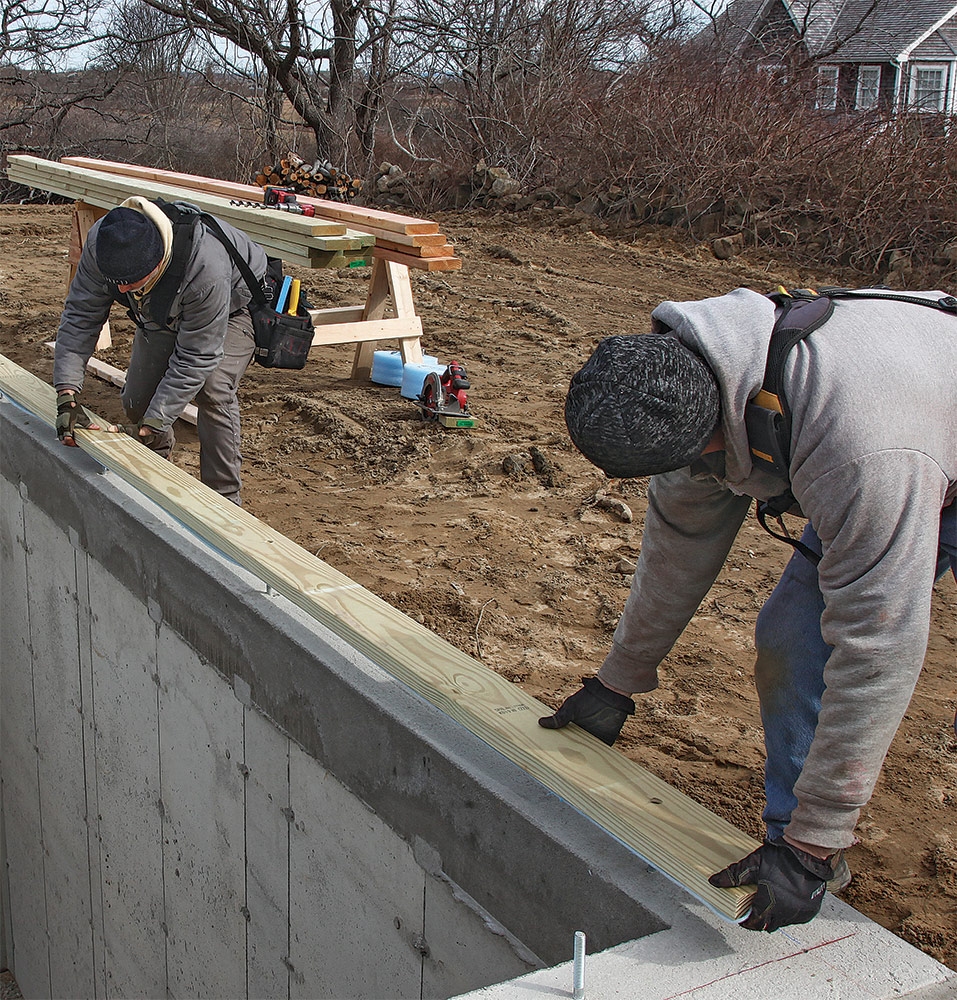
This house has a pair of details that affect mudsill placement. First, there’s a stone plinth that sits on top of the concrete foundation. This meant that the mudsills needed to be set back 6-1⁄2 in. from the foundation’s outside edge. The architect also specified a 1-in.-wide decorative chamfer on the top of the foundation’s exterior.

But even with the stone plinth and chamfer, the process for setting mudsills is the same on most of our projects. I highlight each of the critical steps here, and suggest how to deal with flaws in the foundation so your builds are framed square, level, and plumb.

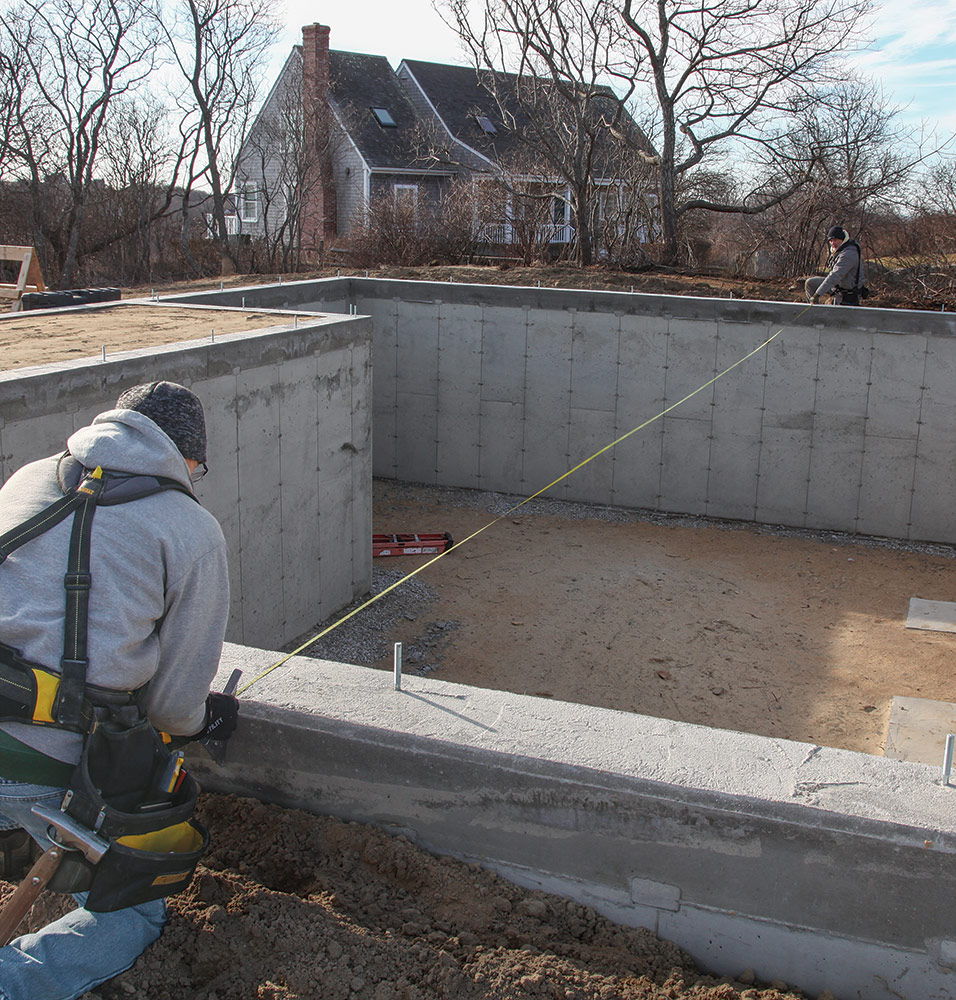
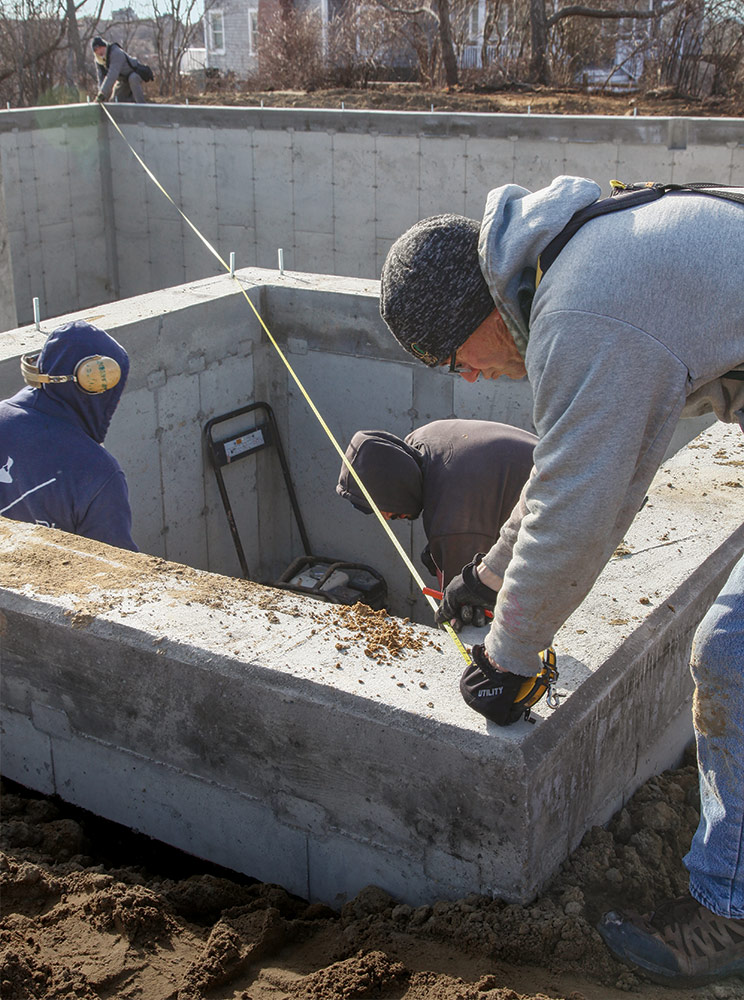
In order to square mudsills—or most anything—I start by figuring out the diagonal dimensions of perpendicular walls with a 90° corner. This requires some grade-school geometry (see “Find square with a triangle” below). As we lay out the mudsill locations and fit the mudsill parts, we’ll check diagonal and wall measurements and make adjustments to keep the corners square if required. One important step that’s not shown in the photos is checking the concrete formwork, which I do a day or more before the scheduled pour, even if I have to do it after working hours so I don’t insult my trusted concrete subs. I do this even with concrete contractors I’ve worked with for years, because everyone has a bad day once in a while. A helper and I make sure that the walls are the right size, in the right place, and nearly perfectly square to each other, which eliminates a lot of problems later. If things aren’t right, I’ll have (and even help) the foundation contractor make changes before the concrete is placed.


Find square with a triangle

Find Square With a Triangle

Carpenters commonly use right triangles with side lengths in a ratio of 3:4:5 to determine if a house’s framing has square (90°) corners. Based on the 3:4:5 method, a right triangle with one 3-ft. leg and one 4-ft. leg will have a diagonal of 5 ft. Multiples of 3:4:5 also work. For example, when laying out a mudsill, a length of 21 ft. (3×7) on one side of a foundation corner and 28 ft. (4×7) on the other side has a diagonal of 35 ft. (5×7) if the mudsill corner is square. The longer the dimensions, the more accurate the result will be, so use the biggest 3:4:5 triangle that fits your foundation; even better is a construction calculator to calculate the diagonal based on the exact length of the foundation walls. If a rectangle is especially long and narrow, divide it in half into two shorter rectangles, creating diagonals with less-acute angles that are easier to measure accurately.


I have been asked whether it’s typical to use one mudsill plate or two. On my builds, I install two mudsill plates. When looking into the topic, I couldn’t find any regional norms, except that on the West Coast single 3x lumber plates are common because of the very tight spacing of nails for shear walls and to prevent anchor bolts from pulling through the sill in an earthquake. I like double plates because I think they make it much easier to establish a straight, square, and flat surface for the rest of the build. Proponents of a single mudsill say two is unnecessary and that the additional layer costs more in materials and labor.

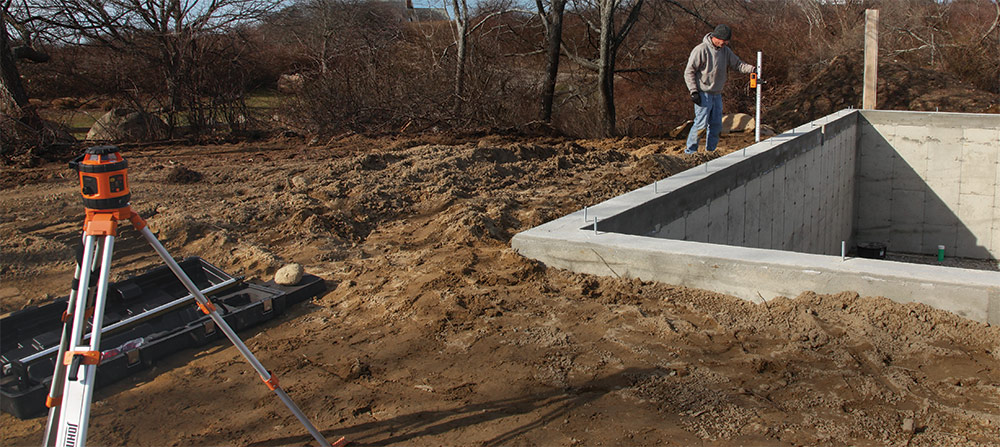
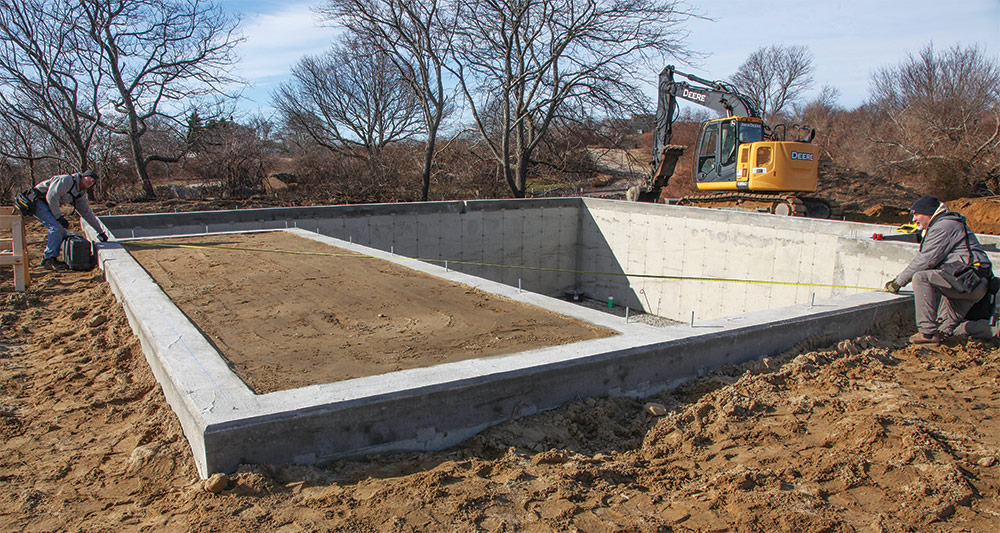
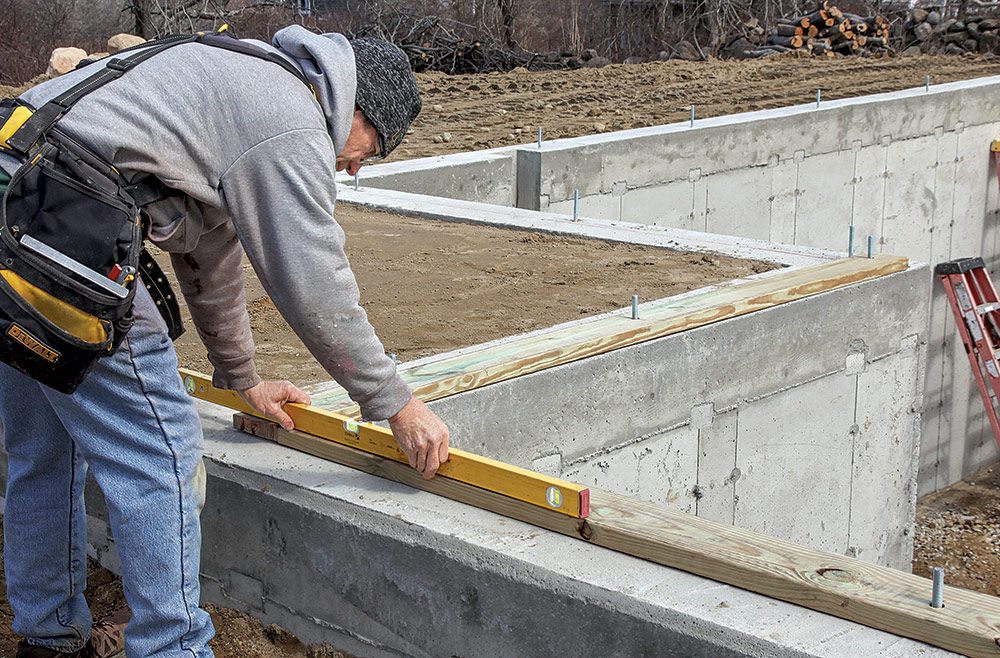
Check the Foundation

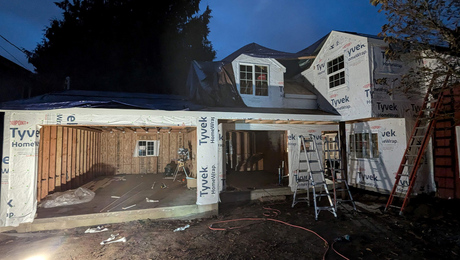
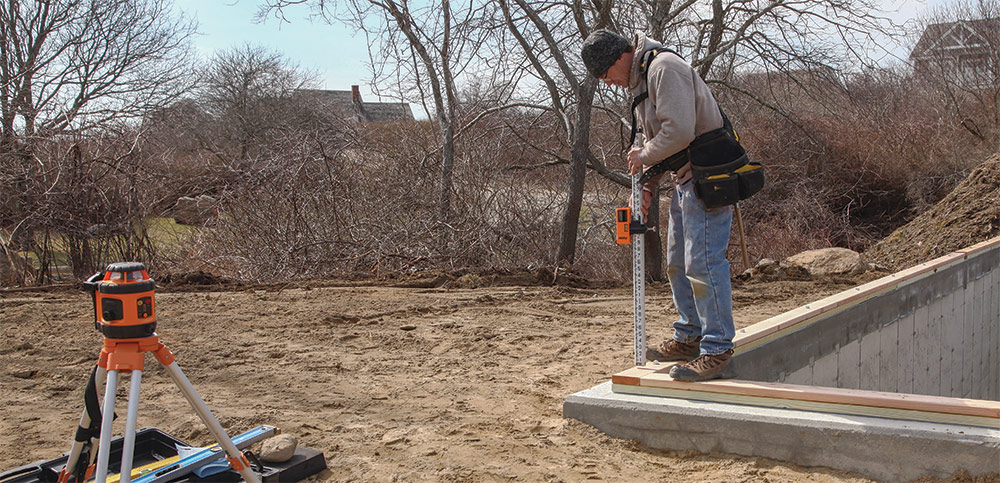
This house has a “T”-shaped gable roof with a pair of valleys. For the rafters to work out, the house has to be framed perfectly square. If the foundation contractor did a good job, all the final dimensions should be within 1⁄2 in. of those specified in the plan. If not, you or someone else will need to make corrections for a smooth build (see “Problem-foundation fixes” below).

Check for level
Check for Level: for level Once the forms are stripped and the foundation is sufficiently cured, set up a laser level to check the tops of the foundation walls for level. With the exception of a high spot at one wall intersection and a few lumps from final screeding, this foundation was level within 1⁄8 in. to 1⁄4 in. of perfect.


Check the lengths
Check the Lengths: Using a 50-ft. or 100-ft. steel tape, check the overall dimensions of the foundation wall to ensure they’re within 1⁄2 in. of the foundation plan.


Check for straight
Check for Straight: Foundation walls can bulge, so check measurements from one side to the other in the middle of the walls as well. A rafter square locates the edge of the foundation without the chamfer for an easier, more accurate measurement.


Check for square
Check for Square: Pull corner-to-corner diagonal measurements to check the foundation for square. Equal diagonal measurements mean the walls are square—but only if the opposing walls are of equal lengths, so make sure you’ve checked the wall lengths thoroughly.


Mark discrepancies
Mark for Discrepancies: Wherever high spots or low spots are found about 1⁄4 in. or more, write the dimensions on the foundation as a reminder of where you’ll need to plane or shim to make the mudsill level.


Problem-Foundation Fixes

The foundation contractors I work with on Block Island are skilled and experienced, but like other home-building trade workers, concrete foundation contractors are scarce in many places and the work can reflect the relative inexperience of folks who are learning on the job. Wall lengths and placement that are way off their marks are ultimately going to require adjustments to the floor plan. These are a rarity, as multiple people involved in the build would have to neglect checking the wall locations. I’ve heard of foundations that are as much as 3 in. out of level or square. I’d suggest contract language that specifies that the foundation will be within 3⁄4 in. of square and within 1⁄2 in. of level. If your foundation is not as square or as level as this, you can use these strategies to get things on track.
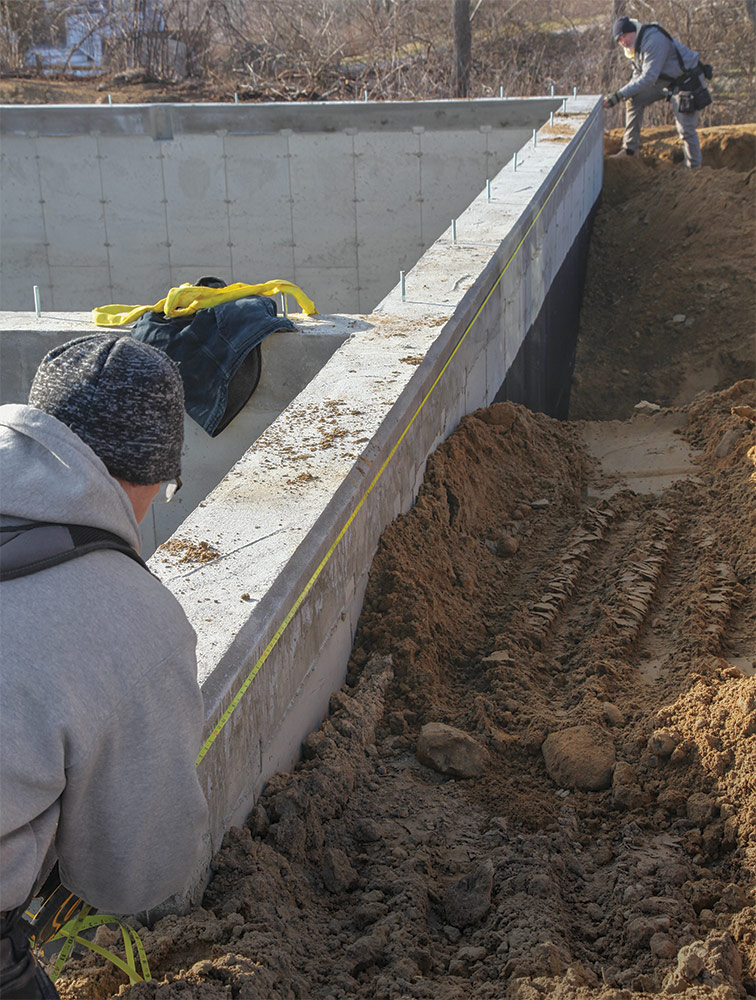
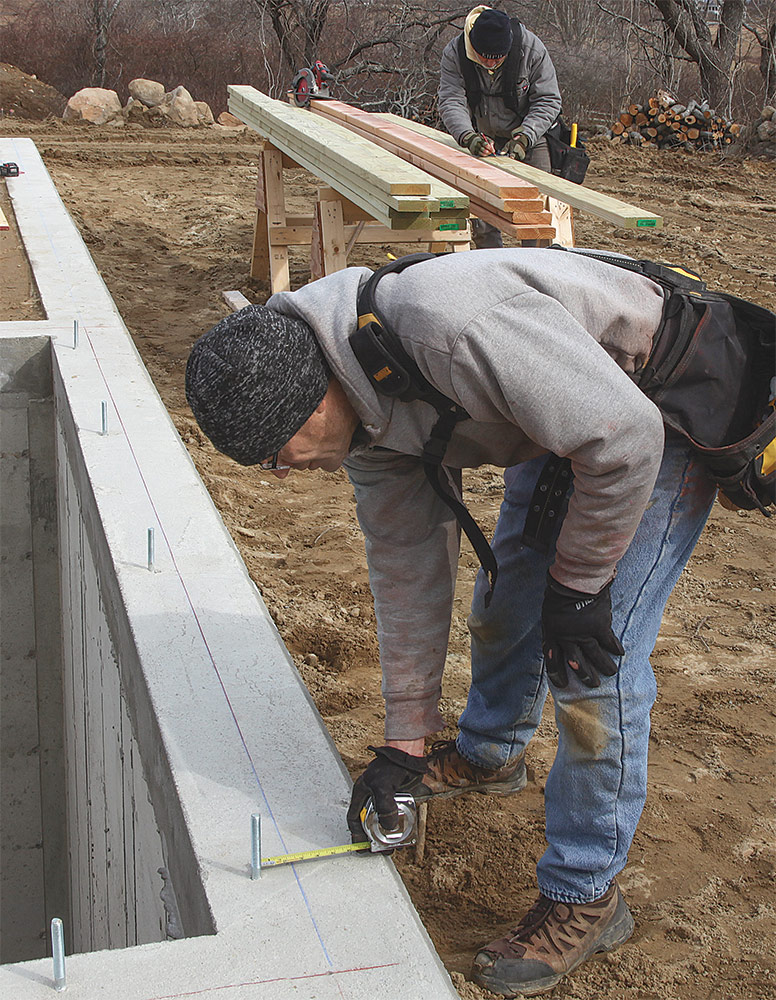
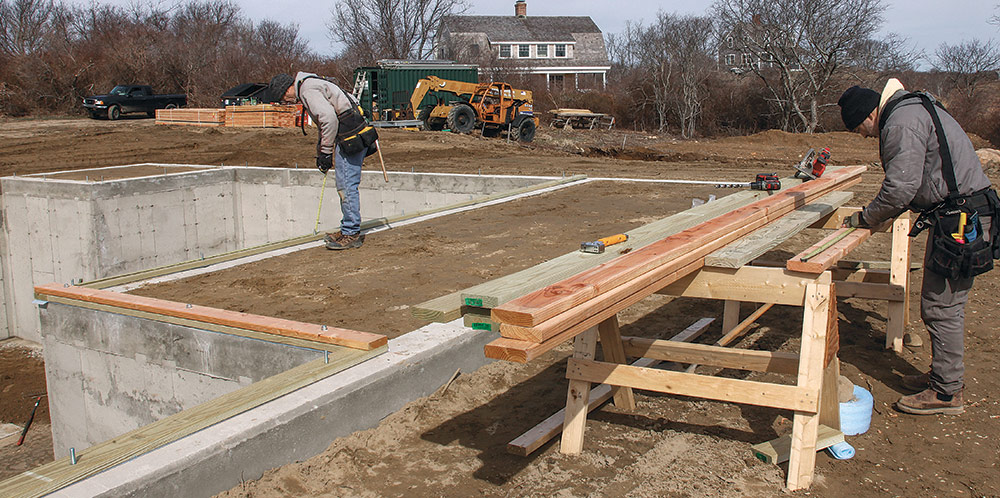
PROBLEM-FOUNDATIO FIXES


Locate the Mudsills

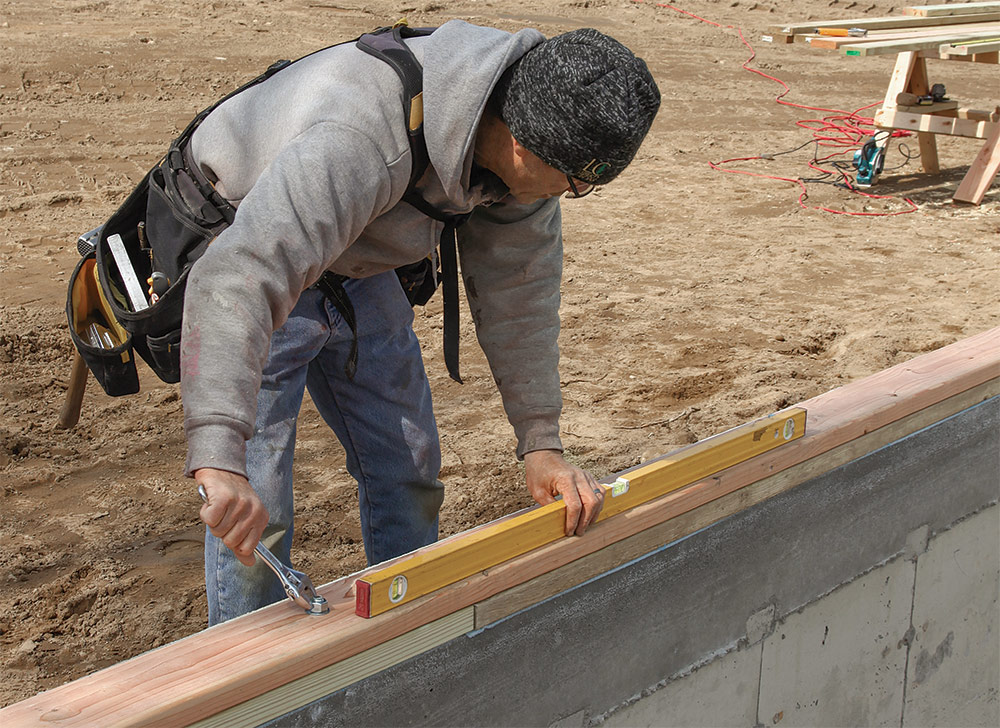
For this project, I chose the longest wall and its opposite as the starting point. When I’m locating mudsills, I don’t accept anything less than perfect for the layout, because errors will accumulate as the house goes to the second and third levels. If the diagonal measurements are off at all, I adjust the layout by moving the plate location slightly and then rechecking the diagonals. I do this as many times as necessary to ensure the corner of the building is square.
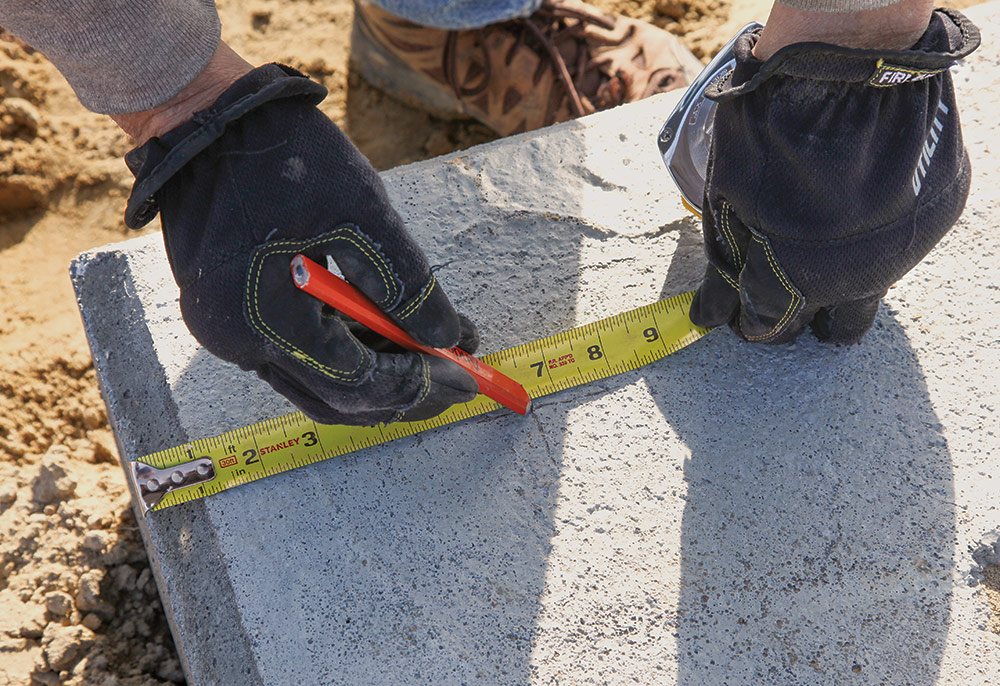
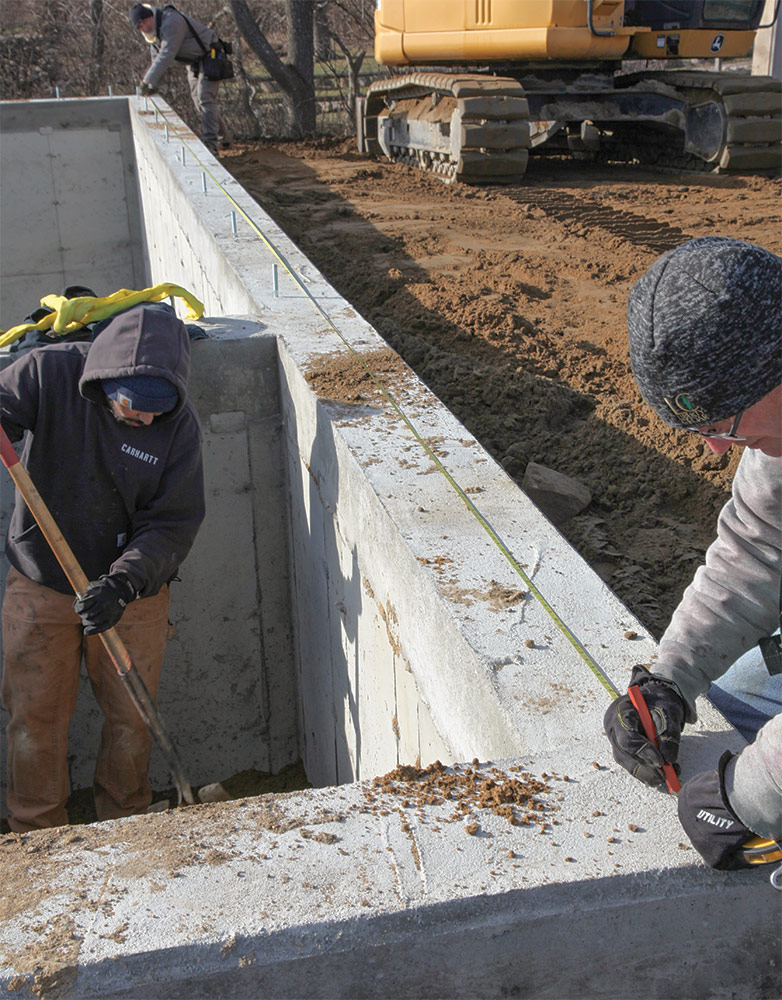
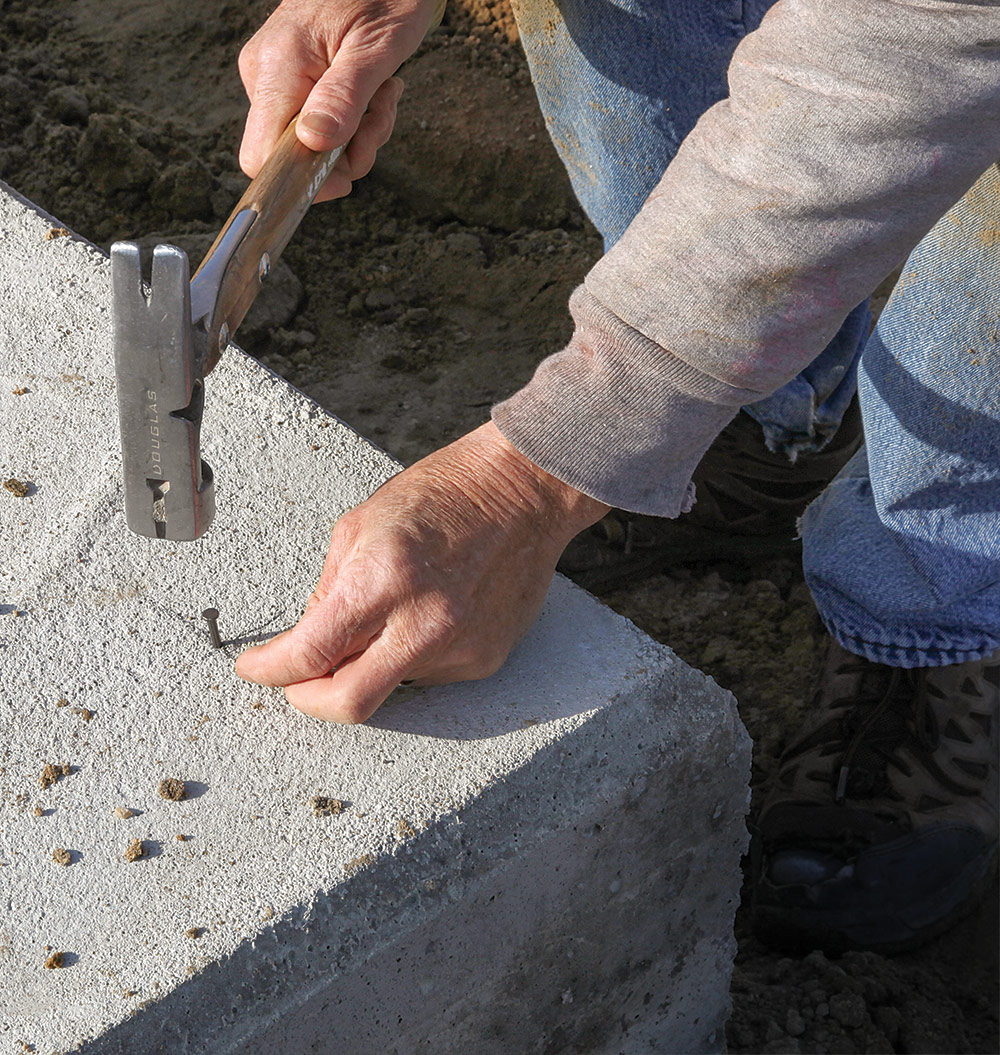
Start at a corner
Start at a Corner: Measure in from the outside edges of the foundation the width of the sill stock and any cladding on the foundation. In this case the distance from the outside edge of the mudsill to the outside of the foundation is 6-1⁄2 in.


Mark the other end
Mark the Other End: Pull a measurement from the first corner point and mark the length of the plate at the other end of the wall. Swing a line with a pencil against the tape. This provides a precise intersecting point for the perpendicular measurement. With the first wall laid out, measure over and mark the corners for the opposite wall, using the same setback for the stone veneer.


Check the layout for square
Check the Layout for Square: With the corners of the first rectangle theoretically laid out, check that the diagonals are equal. Then use a construction app or calculator to determine the length of the diagonal based on the length of the two walls forming the corner. Adjust the plate locations until the diagonal measurement matches the calculation.


Snap Layout Lines

With the corner points located, we snap preliminary layout lines using nonpermanent blue chalk so that we can erase lines if tweaks need to be made. When we’ve snapped all four walls, I check that the opposing diagonals are the same, indicating that the equal-length walls are square to each other. Then, I turn my attention to laying out the sills for shorter walls for any jogs, wings, or bays. This project had jogs for two porches. If you find that small rectangular sections cannot be made square to the main rectangle, you can slightly rotate the main rectangle on the foundation to make the smaller sections fit better.
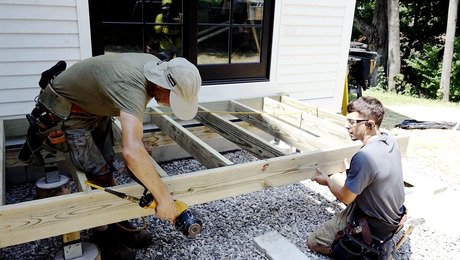
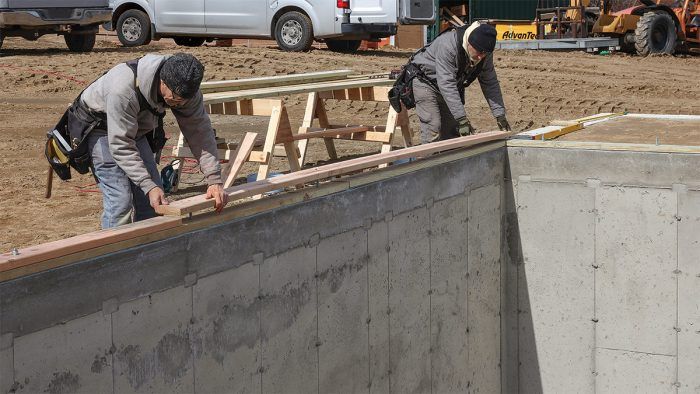
 

Nail the corners
Nail the Corners: To make the line-snapping process more accurate, drive masonry nails at each of the corner points, leaving the nail heads about 1⁄4 in. above the concrete.


Snap in two
Snap in Two: Hook the chalkline on the nail and stretch it to the opposite end. Then position a crew member in the middle of the line to hold the chalkline on the foundation and snap both sides.


3:4:5 is an easy check
3:4:5 is an Easy Check: To verify the walls are perpendicular to each other, use a 3:4:5 triangle to check a corner. From the corner point, mark a multiple of three along one wall and a multiple of four along the adjacent wall. The diagonal between the marks should be the same multiple of five.


Red means it’s ready
Red Means it’s Ready: Once you have established that all layout lines are square and the elements fit properly on the foundation, mark the lines again with permanent red chalk.


Set the Sill Plates

The Bottom Plate

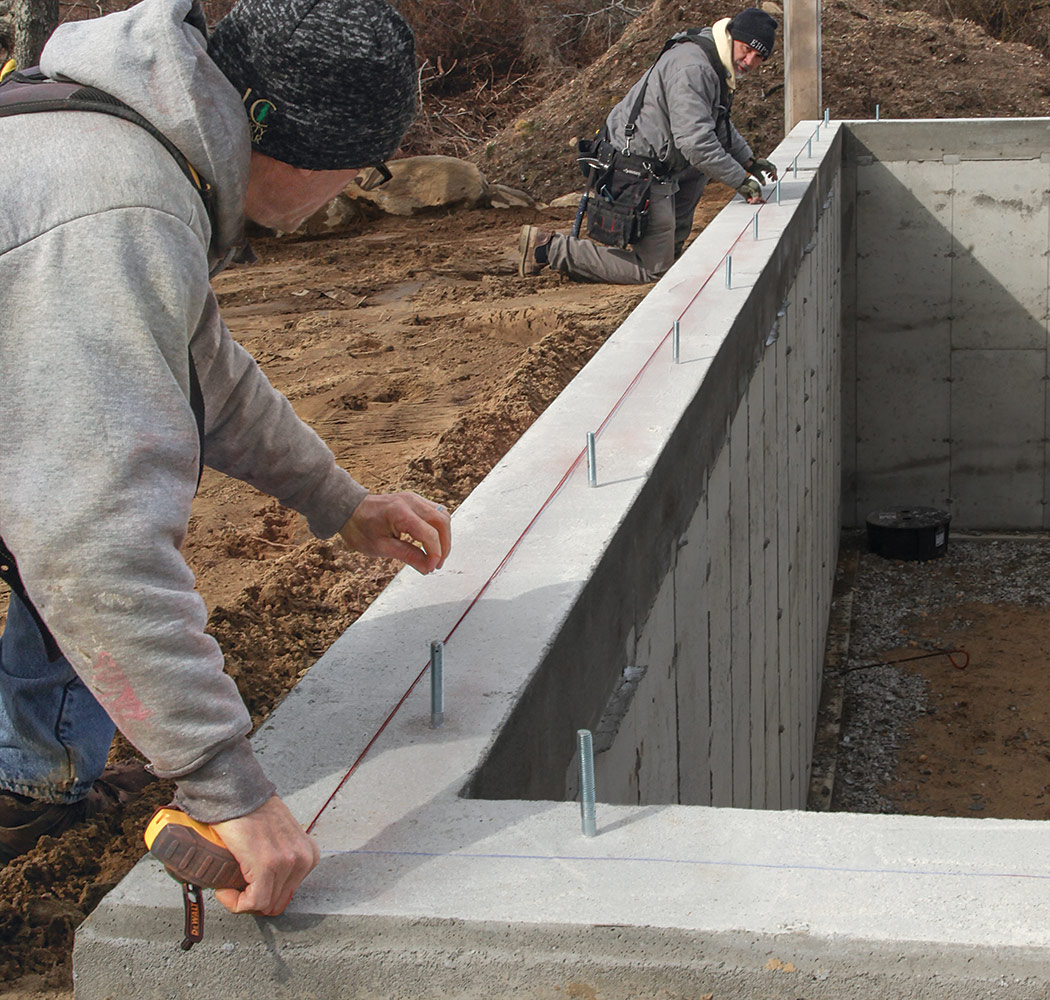
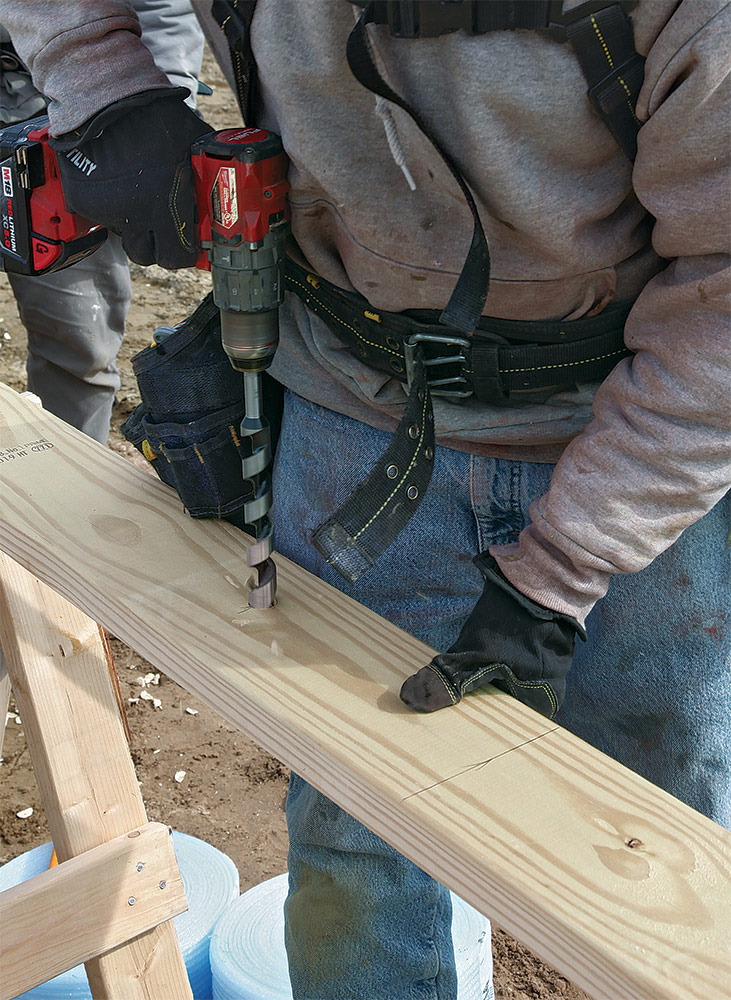
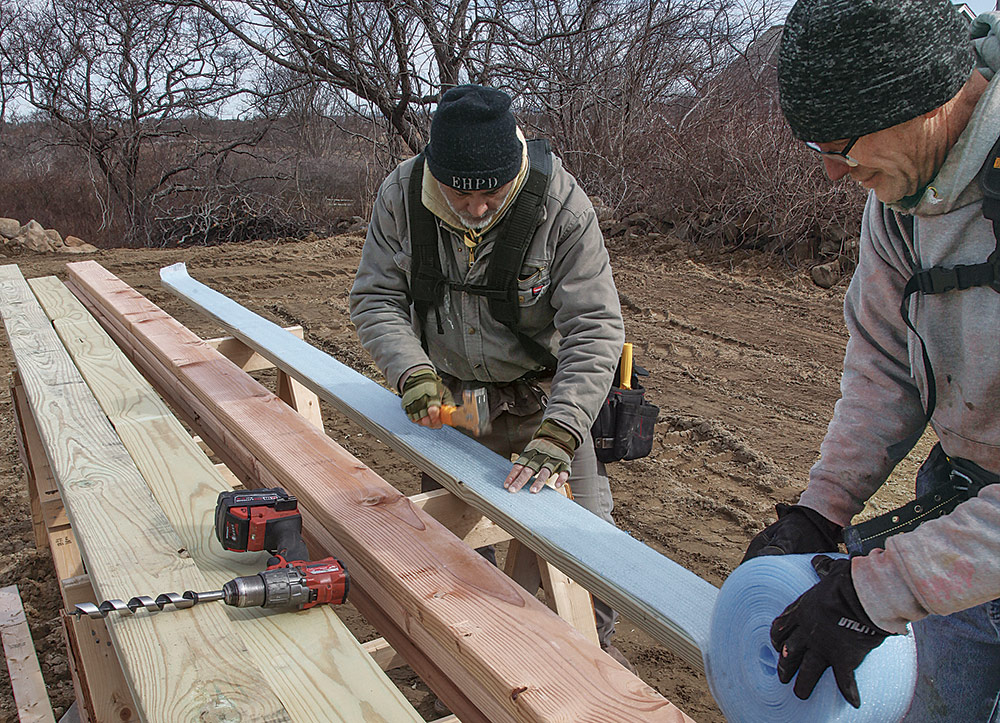
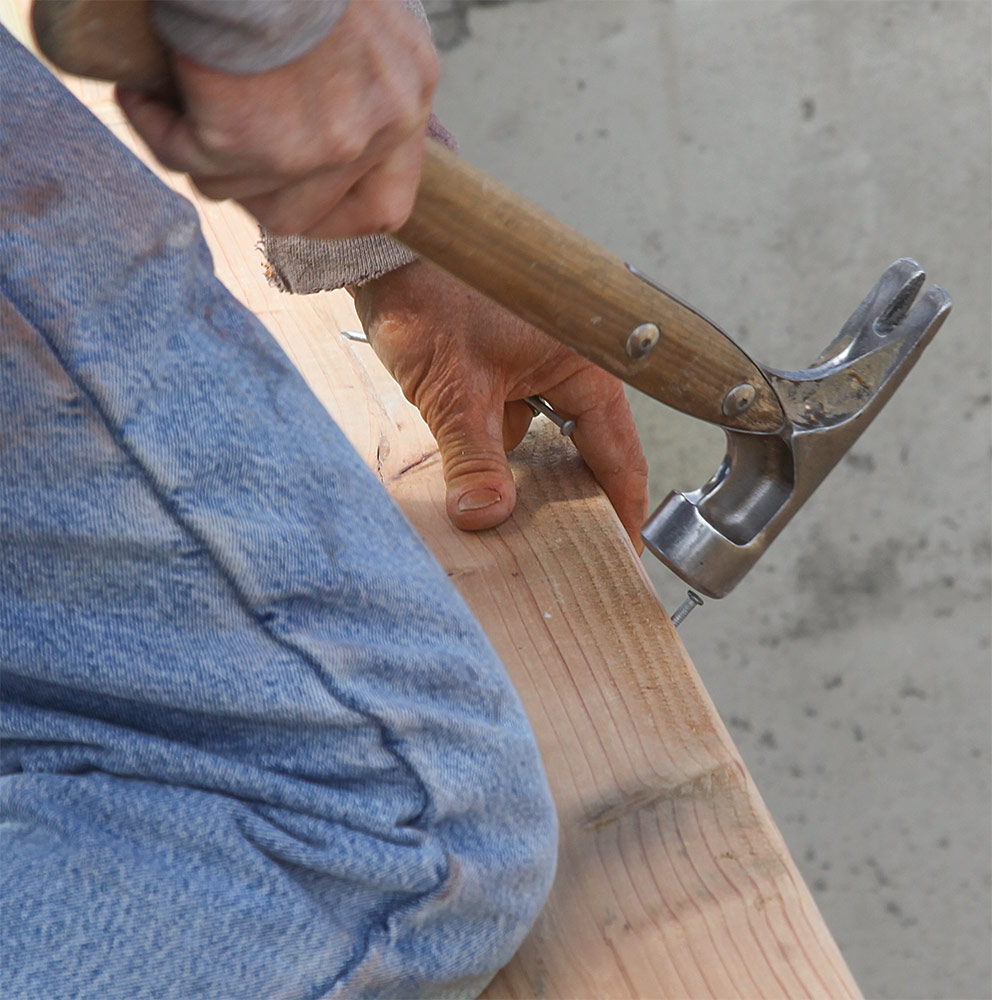
In our area, we install two mudsill plates, usually 2x6s, with the lower one made of pressure-treated lumber. These plates receive holes drilled to fit over the foundation’s anchor bolts, and are then set on top of a foam sill seal. The sill seal prevents air leaks between the foundation wall and the mudsill and acts as a capillary break between the foundation and mudsill. Before I start installing plates, I check the anchor bolts to make sure they are within an inch of the centerline of the plate layout, and placed high enough to fully thread a washer and nut over the plates. If one or more are significantly off, we cut them off with a reciprocating saw and drill a hole into the top of the foundation with a rotary hammer a few inches away from the cut bolt. We then clean the hole with a brush and compressed air and install an 8-in. length of high-strength threaded rod with epoxy adhesive.

Straighten up
Straighten Up: Straighten bolts that aren’t vertical by striking them as low as possible with a hammer to keep from damaging the top threads. A safer option is to thread a nut onto the top of the bolt and hit the nut.


Bolt layout in teams
Bolt Layout in Teams: One crew member at the foundation calls out dimensions for the hole locations and the overall lengths of the sill section, while another marks and drills the holes for the bolts, and cuts each piece to length.


Drill oversized holes
Drill Oversized Holes: Drill 3⁄4-in. holes for 5⁄8-in. bolts and 5⁄8-in. holes for 1⁄2-in. bolts. Keep the holes minimally oversized so you can use the bolts as a fulcrum to straighten warped mudsill stock.


Flip and seal
Flip and Seal: When the cutting and drilling is done, flip the mudsill section over and roll out the sill seal, stapling it to the bottom side.


Lay down the sill
Lay Down the Sill: Bring each prepped mudsill section to the foundation and slide it down over the bolts, making sure that it lines up with the snapped chalklines.


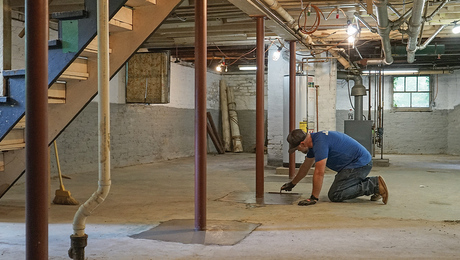
Two Remedies for High Spots in the Foundation

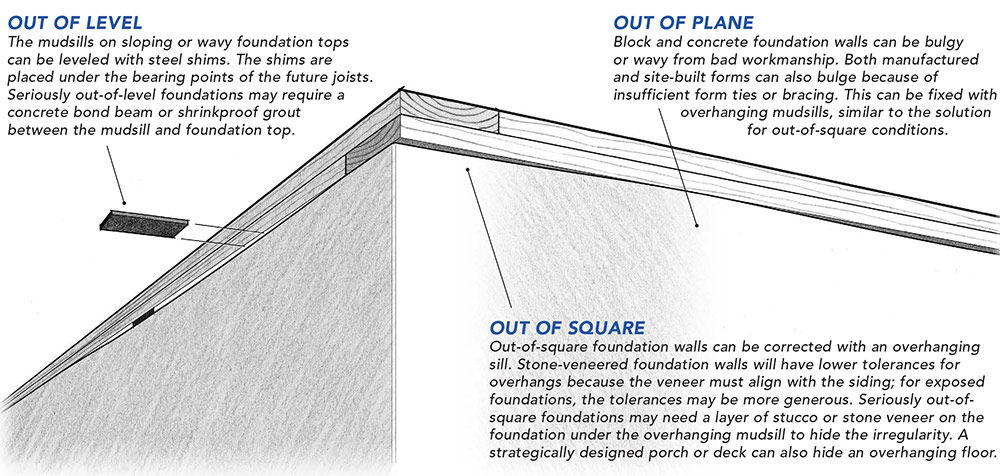
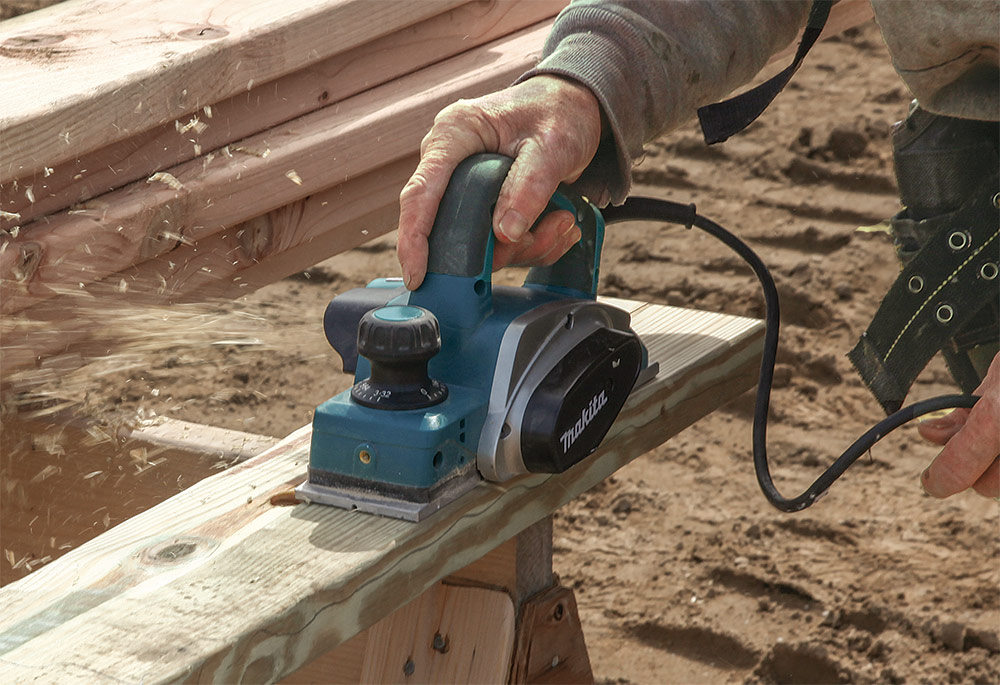
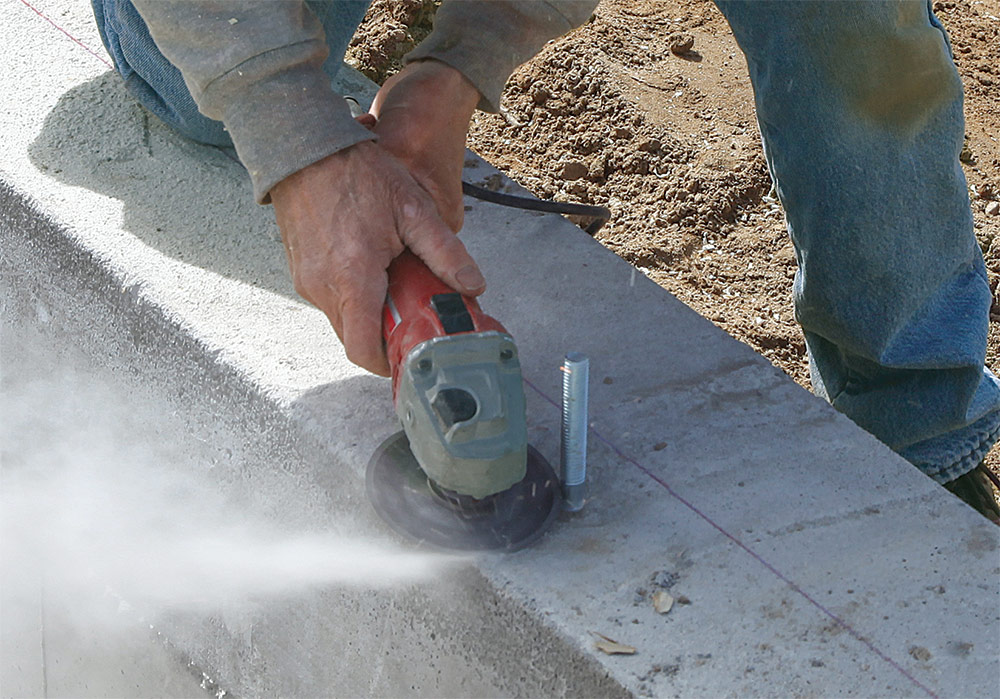
Almost no foundation is perfectly flat. There are always places where the concrete settles a little or the forms shift, or the finishers miss their height marks by just a little. How I level the mudsills depends on how bad the imperfections are. If there are just a couple of high spots, I plane the plate or grind the raised spots. If there are low spots, I fill them in with nonshrink grout, which slows the work while we wait for it to set. Don’t level the mudsills with cedar shims, which compress, causing future problems, especially where there are point loads.
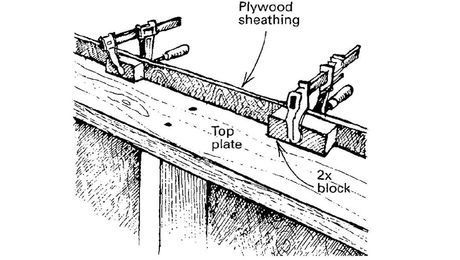
Shave the sill
Shave the Sill: Plane the bottom of the mudsill to remove stock where the foundation is slightly high. A power planer makes the process fast and easy.


Fit the adjusted board
Fit the Adjusted Board: After planing the board, put it in place over the anchor bolts and then double-check the height adjustment with a level.


Grind small lumps and ridges
Grind Small Lumps and Ridges: For bumps and lumps in the foundation surface, use a grinder with a diamond cup wheel to remove them.

The Top Plate

The pressure treated mudsill bottom plate is usually wider than the other plate stock, and most sills are laid out from the inside dimensions. Allow for the PT’s extra thickness, or you’ll end up with a flare at the bottom of your wall sheathing.

Second sill follows suit
Second Sill Follows Suit: For the second mudsill layer we follow the same process as the first, with one crew member measuring the bolt locations and another drilling holes and cutting the sill pieces to length.


Align and nail
Align and Nail: After setting each piece on top of the treated layer, drive a few nails to help align and hold the lined-up layers together.


Tighten the nuts
Tighten the Nuts: Snug the nuts on the anchor bolts just enough to keep the mudsill layers level and flat. Use a 6-ft. level to check for flatness as you tighten, and do not overtighten the nuts, which can distort the sills downward and complicate subsequent framing.


Final check
Final Check: After the nuts are all snugged down, check the foundation for level once more with the laser. To make the process go more quickly, set the detector/receiver on the rod about 1⁄8 in. low. At each location, the 1⁄8-in. gap between the rod and sill is easy to gauge.


Make Mudsills Square and LevelJohn Spier owns Spier Construction, a custom home builder on Block Island, R.I. Photos by Roe Osborn.

From Fine Homebuilding #318

To view the entire article, please click the View PDF button below.


RELATED STORIES

  • Locating and Installing Mudsills
  • Airtight Mudsill Connection
  • Air-Sealed Mudsill Assembly

Fine Homebuilding Recommended Products

Fine Homebuilding receives a commission for items purchased through links on this site, including Amazon Associates and other affiliate advertising programs.

Tajima Chalk Rite Chalk Line

Snapping a line should be quick, clean, and accurate, and the Tajima certainly doesn’t disappoint. It’s pro-grade and works as advertised.
Buy at Amazon

Stabila Classic Level Set

Plumb and level are the hallmarks of good craftsmanship, so having a complete set of professional levels on the job is crucial to success.
Buy at Amazon

Portable Wall Jack

Raise walls safely with the Guardian wall jack — we’ve personally seen small teams raise large walls with these devices, and they work great.
Buy at Amazon

Sign up for eletters today and get the latest how-to from Fine Homebuilding, plus special offers.

Signing you up...

This site is protected by reCAPTCHA and the Google Privacy Policy and Terms of Service apply.
See all newsletters
See all newsletters
×

Get home building tips, offers, and expert advice in your inbox

Signing you up...

This site is protected by reCAPTCHA and the Google Privacy Policy and Terms of Service apply.
See all newsletters
See all newsletters
View PDF

New Feature

Fine Homebuilding Forums

Ask questions, offer advice, and share your work

Log in or create an account to post a comment.

Sign up Log in

Become a member and get full access to FineHomebuilding.com

Up Next

Video Shorts

Featured Story

Fix Air Leaks in Old Houses

Simple air-sealing measures and spray-applied sealant lower energy bills and increase comfort without the need to tear the house apart.

Featured Video

A Modern California Home Wrapped in Rockwool Insulation for Energy Efficiency and Fire Resistance

The designer and builder of the 2018 Fine Homebuilding House detail why they chose mineral-wool batts and high-density boards for all of their insulation needs.

Related Stories

  • Step Up Your Stair-Gauge Game
  • Better Plumb Cuts on Hips or Valleys
  • Deck Details for Durability
  • Podcast Episode 662: Roof Venting, Roof Leaks, and High-Performance Framing

Discussion Forum

Recent Posts and Replies

  • |
  • |
  • |
  • |
  • |
  • |
View More Create Post

Highlights

Fine Homebuilding All Access
Fine Homebuilding Podcast
Tool Tech
Plus, get an extra 20% off with code GIFT20

"I have learned so much thanks to the searchable articles on the FHB website. I can confidently say that I expect to be a life-long subscriber." - M.K.

Get home building tips, offers, and expert advice in your inbox

Signing you up...

This site is protected by reCAPTCHA and the Google Privacy Policy and Terms of Service apply.
See all newsletters
See all newsletters

Video

View All Videos
  • FHB Podcast Segment: A Double Roof Discussion
  • Framing and Flashing a Small Deck
  • Details for Integrating an Addition
  • Podcast 596: Broken Trusses, Frost-Protected Foundations, and Air Control Methods
View All

Framing

View All Framing Articles
  • Jarod Coffman, Lead Carpenter and Trade-School Teacher
  • How a Pro Replaces Columns
  • Sheathing Walls Solo
View All Framing Articles

Fine Homebuilding Magazine

  • Issue 330 - April/May
    • Deck Details for Durability
    • FAQs on HPWHs
    • 10 Tips for a Long-Lasting Paint Job
  • Issue 329 - Feb/Mar 2025
    • Smart Foundation for a Small Addition
    • A Kominka Comes West
    • Making Small Kitchens Work
  • Issue 328 - Dec/Jan 2024
    • How a Pro Replaces Columns
    • Passive House 3.0
    • Tool Test: Compact Line Lasers
  • Issue 327 - November 2024
    • Repairing Damaged Walls and Ceilings
    • Plumbing Protection
    • Talking Shop
  • Issue 326 - October 2024
    • Paint Behind Strike Plates
    • Conceal Cut Ends
    • Ladder Slip Solution

Fine Home Building

Newsletter Sign-up

  • Fine Homebuilding

    Home building tips, offers, and expert advice in your inbox.

  • Green Building Advisor

    Building science and energy efficiency advice, plus special offers, in your inbox.

  • Old House Journal

    Repair, renovation, and restoration tips, plus special offers, in your inbox.

Signing you up...

This site is protected by reCAPTCHA and the Google Privacy Policy and Terms of Service apply.
See all newsletters

Follow

  • Fine Homebuilding

    Dig into cutting-edge approaches and decades of proven solutions with total access to our experts and tradespeople.

    Start Free Trial Now
    • Facebook
    • Instagram
    • X
    • LinkedIn
  • GBA Prime

    Get instant access to the latest developments in green building, research, and reports from the field.

    Start Free Trial Now
    • Facebook
    • YouTube
  • Old House Journal

    Learn how to restore, repair, update, and decorate your home.

    Subscribe Now
    • Facebook
    • Instagram
    • X

Membership & Magazine

  • Online Archive
  • Start Free Trial
  • Magazine Subscription
  • Magazine Renewal
  • Gift a Subscription
  • Customer Support
  • Privacy Preferences
  • About
  • Contact
  • Advertise
  • Careers
  • Terms of Use
  • Site Map
  • Do not sell or share my information
  • Privacy Policy
  • Accessibility
  • California Privacy Rights

© 2025 Active Interest Media. All rights reserved.

Fine Homebuilding receives a commission for items purchased through links on this site, including Amazon Associates and other affiliate advertising programs.

X
X
This is a dialog window which overlays the main content of the page. The modal window is a 'site map' of the most critical areas of the site. Pressing the Escape (ESC) button will close the modal and bring you back to where you were on the page.

Main Menu

  • How-To
  • Design
  • Tools & Materials
  • Video
  • Blogs
  • Forum
  • Project Guides
  • Reader Projects
  • Magazine
  • Members
  • FHB House

Podcasts

  • FHB Podcast
  • ProTalk

Webinars

  • Upcoming and On-Demand

Podcasts

  • FHB Podcast
  • ProTalk

Webinars

  • Upcoming and On-Demand

Popular Topics

  • Kitchens
  • Business
  • Bedrooms
  • Roofs
  • Architecture and Design
  • Green Building
  • Decks
  • Framing
  • Safety
  • Remodeling
  • Bathrooms
  • Windows
  • Tilework
  • Ceilings
  • HVAC

Magazine

  • Current Issue
  • Past Issues
  • Magazine Index
  • Subscribe
  • Online Archive
  • Author Guidelines

All Access

  • Member Home
  • Start Free Trial
  • Gift Membership

Online Learning

  • Courses
  • Project Guides
  • Reader Projects
  • Podcast

More

  • FHB Ambassadors
  • FHB House
  • Customer Support

Account

  • Log In
  • Join

Newsletter

Get home building tips, offers, and expert advice in your inbox

Signing you up...

This site is protected by reCAPTCHA and the Google Privacy Policy and Terms of Service apply.
See all newsletters
See all newsletters

Follow

  • X
  • YouTube
  • instagram
  • facebook
  • pinterest
  • Tiktok

Join All Access

Become a member and get instant access to thousands of videos, how-tos, tool reviews, and design features.

Start Your Free Trial

Subscribe

FHB Magazine

Start your subscription today and save up to 70%

Subscribe

We hope you’ve enjoyed your free articles. To keep reading, become a member today.

Get complete site access to expert advice, how-to videos, Code Check, and more, plus the print magazine.

Start your FREE trial

Already a member? Log in