FHB Logo Facebook LinkedIn Email Pinterest Twitter X Instagram Tiktok YouTube Plus Icon Close Icon Navigation Search Icon Navigation Search Icon Arrow Down Icon Video Guide Icon Article Guide Icon Modal Close Icon Guide Search Icon Skip to content
Subscribe
Log In
  • How-To
  • Design
  • Tools & Materials
  • Restoration
  • Videos
  • Blogs
  • Forum
  • Magazine
  • Members
  • FHB House
  • Podcast
Log In

New York 2023

Energy performance, affordability, and sustainability are at the core of our 2023 FHB House project. Building professionals across North America are in demand of common-sense approaches to air-sealing, insulating, and water management, as well as guidance for improving existing homes. With our Cornwall, N.Y.–based remodeling project, we aim to empower our building community with the information needed to retrofit homes with the most efficient and resilient assemblies, mechanical systems, and materials. Join FHB House 2023 builder Jon Beer as he takes you step-by-step through transforming his ranch-style house project into an efficient, modern home fit for a young family seeking ultimate performance and comfort.

How-To

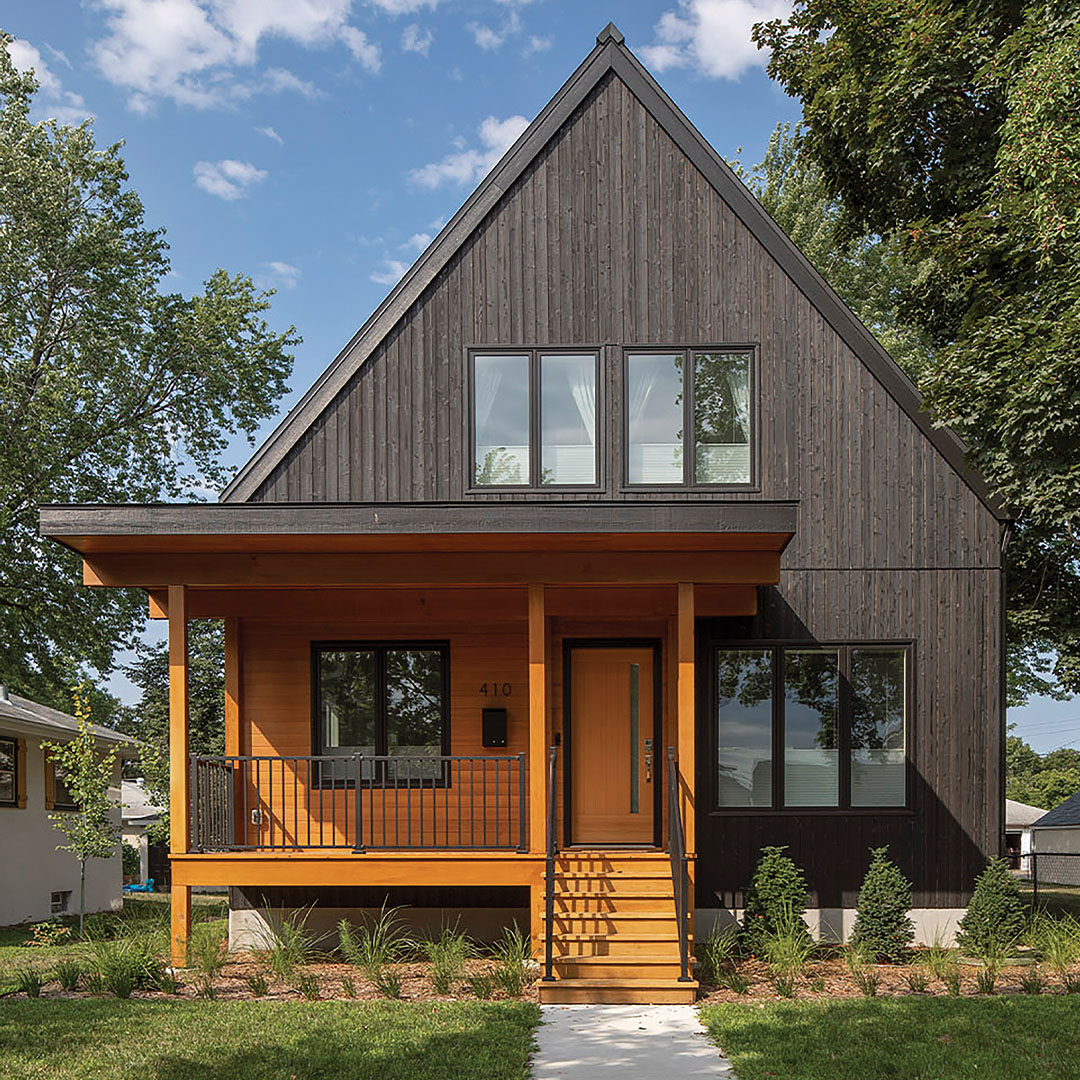
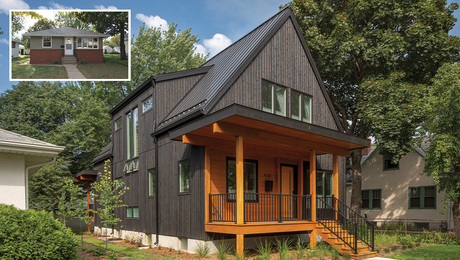
Details for Integrating an Addition

In this video, Jon overviews the elements of the addition, including building a deck-ledger-style floor system, closing off windows and doors, and framing the roof.

By Jon Beer

Integrating a modern addition into a 1950s-style ranch can pose a lot of challenges that require creative thinking and critical attention to detail. In this video, Jon Beer recounts some of the efforts taken to integrate new construction with old, including the ledger-style attachment to the old house, components of the floor system, removing an existing window to add a door, and the basics of roof framing.

Here’s the transcript:

I’m Jon Beer from Jon Beer Contracting, and we’re here in Cornwall, New York, at the Fine Homebuilding House for 2023. We got about a half inch of snow last night, which is not a big deal for us, but it makes things a little bit more interesting.

Ledger, floor system, and footings

We’re in the beginning stages of the last framing component of the house build, and it’s a really good moment to talk about how a ledger-style addition is built. Yesterday we started with the actual ledger itself. This addition is built like a deck. The ledger attaches to the house, and then the framing members of the floor system are supported on that ledger and then posted down onto the three footings that you can see behind me. Those three footings have been in place for a couple of weeks. They’re 30 in. wide, so pretty large and pretty easy for us to lay out onto.

LVL beams and placing the glulam

You can see that on each side of the addition there are two LVL beams that are sticking out and resting on a glulam. Those two LVLs were our first step after the ledger. They create the two sides of the square, so we got those in place. We roughly squared them and temporarily posted those. And then from there, we spent the rest of the day working on getting the glulam in place and eventually getting the 6×6 columns down onto the footings. That took the bulk of the afternoon. We’ve got those in place now. Everything has been plumbed and leveled.

Framing the floor system

From this point forward, we’re ready to start framing the rest of the floor system. The structure is stable, so now we’ll add a couple more LVLs on each side and then start infilling I-joists to start building out the floor system. Then once they’re all in place, we’ll snap a line across them and cut them all to length in one place. The reason we do that is because we don’t really know how square the existing house is, and this lets us adjust that after the fact, rather than cutting all the joists first and having something be wonky or out of square. In a situation like this with a retrofit, that’s how we would do that.

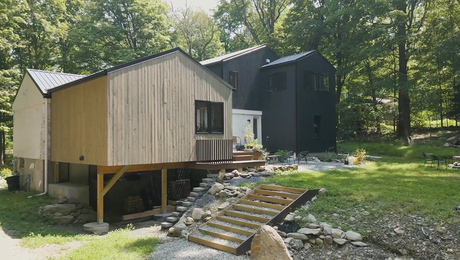
Sheathing and veneer brick

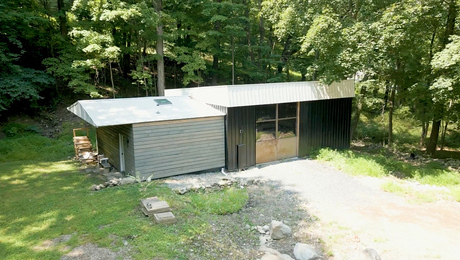
We’re going to be framing 2×6 walls on the actual addition, once we get the soffits down, and then just like the rest of the project, we’re cladding it with the 7/16-in. ZIP. We’re going to be using their product exclusively on the walls and on the roof for the whole house. Behind me what you see are three openings that are covered in ZIP sheathing. Those are the locations of pre-existing doors and windows that we’re planning to close off throughout our build. It’s a small detail, but it’s an important one, which is how we fill back in that masonry that’s there. The existing structure has a 2×4 wood framing, a fiberboard sheathing, and then a 1-in. air gap between the sheathing and the existing single-width veneer brick. Those veneer bricks aren’t floating on their own—every couple of courses they have a metal masonry tie embedded into the mortar that goes and connects to the existing sheathing. That detail is something that we’re going to match as we fill in.

For now, we’ve pulled the old doors and windows out, we’ve filled in the framing, we’ve added ZIP sheathing in place of fiberboard, and we’ve applied the ZIP flashing tape on the edge where the two substrates meet. From there we’ll just carry over the same detail. We’ll be recycling bricks from other parts of the project so that they match, and laying in new courses of brick, keying in new to old, and adding masonry ties that will get fastened to the sheathing there. We’re maintaining the air gap, we’re giving our new in-fill brick the same opportunity to dry on both sides of the wall, and maintaining the look of the existing structure.

Removing a window and adding a door

It probably looks a little bit funny behind me as the new wall intersects directly on an existing window in the house. That window is going to be removed and in its place is going to be a 3/0-wide door that lets out directly onto this deck. This space behind me in the original house is going to be kitchen and dining. And the reason why we’re adding a door there is that in case someone is using this new living room, they can come out directly from the kitchen onto the deck and outside without disturbing someone who might be using that space. Our plan with that is to basically figure out exactly where the far edge of the door is and cut the brick straight up all the way to the soffit where the masonry ends. But that clean cut will get us an exact location for the outside of that new door.

Roof layout and framing

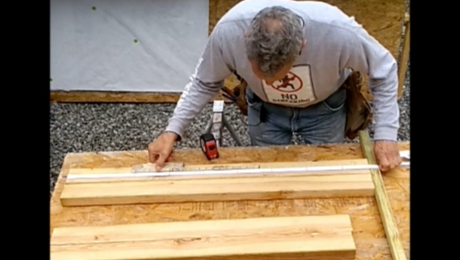
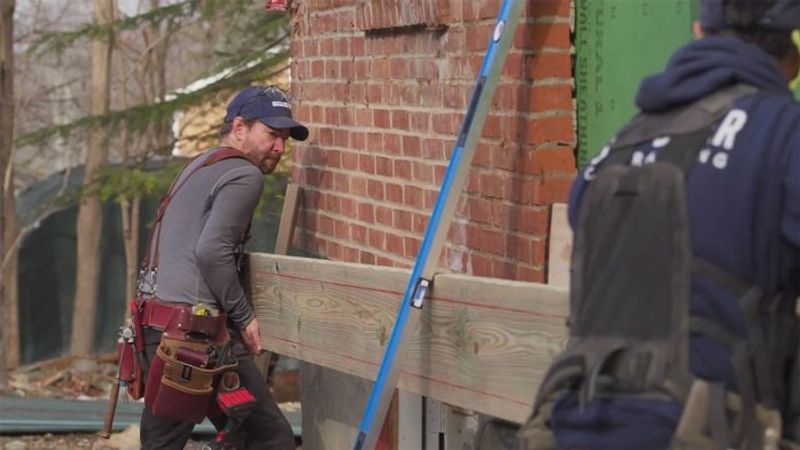
I asked a fellow carpenter from New Jersey to come up for two days and give us a hand framing the roof and walking us through the basics of roof rafter layout and roof framing math. We started off with a two-and-a-half-hour classroom portion this morning where we walked through the philosophy of roof framing and the basics of how you calculate things and why things are done certain ways. And then from there we translated that over into making our rafter template and then batching out all the rafters for the roof. In this case we were able to go through the different principles of rise and run, our height above plate number, our bearing number, and put all that together, and then cut the first couple rafters. We were able to check it, everything fit really well, and from there we knew that everything would be good after that.

Some of the valley framing is going to be a little bit more mentally challenging, just in the sense that you’re introducing a compound angle because you’re applying a valley plate onto a pitched surface already, and then having to extrapolate between those points on three dimensions, whereas the common rafters are a straight triangle that sits flat on the wall. What I’ve come to realize, as a boss, is that everyone learns really differently. It’ll be interesting to see, and probably a little bit challenging to make sure everyone comes up at the same level and understands the concepts as we lay them all out. I think the challenge there is just getting through that, making sure everyone gets it, and not rushing that part, but balancing that with us being all together here and wanting to try and get that accomplished by the end of the day.

We were able to take that knowledge and kind of put it right to work, and I think it’ll be something that sticks with us in the future as we do some more of this kind of work. Thanks for joining us here at the FHB House 2023 here in Cornwall, and we’ll see you for the next episode.


RELATED STORIES

  • Deck-Style Foundation for an Addition
  • Installing ZIP System Sheathing
  • Flashing Brick-Veneer Walls

Sign up for eletters today and get the latest how-to from Fine Homebuilding, plus special offers.

Signing you up...

This site is protected by reCAPTCHA and the Google Privacy Policy and Terms of Service apply.
See all newsletters
See all newsletters
×

Get home building tips, offers, and expert advice in your inbox

Signing you up...

This site is protected by reCAPTCHA and the Google Privacy Policy and Terms of Service apply.
See all newsletters
See all newsletters

New Feature

Fine Homebuilding Forums

Ask questions, offer advice, and share your work

New York 2023 Videos

Behind the Build

  • New York 2023
  • Kansas 2022
  • Wisconsin 2021
  • Nebraska 2021
  • Connecticut 2020
  • Kentucky 2019
  • California 2018
  • Vermont 2017
  • Rhode Island 2016
  • Twitter
  • Facebook
  • LinkedIn
  • Pinterest
  • Email

Log in or create an account to post a comment.

Sign up Log in

Become a member and get full access to FineHomebuilding.com

More New York 2023

View All
  • Building a Detached Shop with Full Utilities and HVAC
  • Interior and Exterior Finishing Details for a 1950s Ranch-Style Home
  • A Quiet Standby Generator Brings Peace of Mind
  • Interior Updates on FHB House New York
View All

New York 2023 Sponsors

  • Advantech SubFloor Assembly Logo
  • Coravent Logo
  • Loctitle PL Max Premium Logo
  • Loctite Tite Foam Logo
  • Nakamoto Forestry Logo
  • USG Sheetrock Brand Logo
  • ZipSystem Building Enclosures Logo
  • Zip System Roof Assembly Logo
  • Champion Logo

Up Next

Video Shorts

Featured Story

Podcast Episode 680: Knob-and-Tube Wiring, Vapor Movement, and Gutter Covers

Listeners write in about shower panels and cordless tools and ask questions about old wiring, air leaks, and gutter covers.

Featured Video

Micro-Adjust Deck-Baluster Spacing for an Eye-Deceiving Layout

No math, no measuring—just a simple jig made from an elastic band is all you need to lay out a good-looking deck railing.

Related Stories

  • Making and Installing Wood Wall Paneling
  • FHB Podcast Segment: A Permanent Wood Foundation in the Adirondacks
  • Step Up Your Stair-Gauge Game
  • Torched and Porched

Discussion Forum

Recent Posts and Replies

  • |
  • |
  • |
  • |
  • |
  • |
View More Create Post

Highlights

Fine Homebuilding All Access
Fine Homebuilding Podcast
Tool Tech
Plus, get an extra 20% off with code GIFT20

"I have learned so much thanks to the searchable articles on the FHB website. I can confidently say that I expect to be a life-long subscriber." - M.K.

Get home building tips, offers, and expert advice in your inbox

Signing you up...

This site is protected by reCAPTCHA and the Google Privacy Policy and Terms of Service apply.
See all newsletters
See all newsletters

Video

View All Videos
  • FHB Podcast Segment: Can a Pretty Good House Have a Fireplace?
  • Window Glazing with Traditional Putty
  • FHB Podcast Segment: A Permanent Wood Foundation in the Adirondacks
  • FHB Podcast Segment: Drywall-Free Half Wall Finish
View All

Remodeling

View All Remodeling Articles
  • Torched and Porched
  • Jeff Patterson, Remodeler and Home-Repair Educator
  • Making Small Kitchens Work
View All Remodeling Articles

Fine Homebuilding Magazine

  • Issue 330 - April/May
    • Deck Details for Durability
    • FAQs on HPWHs
    • 10 Tips for a Long-Lasting Paint Job
  • Issue 329 - Feb/Mar 2025
    • Smart Foundation for a Small Addition
    • A Kominka Comes West
    • Making Small Kitchens Work
  • Issue 328 - Dec/Jan 2024
    • How a Pro Replaces Columns
    • Passive House 3.0
    • Tool Test: Compact Line Lasers
  • Issue 327 - November 2024
    • Repairing Damaged Walls and Ceilings
    • Plumbing Protection
    • Talking Shop
  • Issue 326 - October 2024
    • Paint Behind Strike Plates
    • Conceal Cut Ends
    • Ladder Slip Solution

Fine Home Building

Newsletter Sign-up

  • Fine Homebuilding

    Home building tips, offers, and expert advice in your inbox.

  • Green Building Advisor

    Building science and energy efficiency advice, plus special offers, in your inbox.

  • Old House Journal

    Repair, renovation, and restoration tips, plus special offers, in your inbox.

Signing you up...

This site is protected by reCAPTCHA and the Google Privacy Policy and Terms of Service apply.
See all newsletters

Follow

  • Fine Homebuilding

    Dig into cutting-edge approaches and decades of proven solutions with total access to our experts and tradespeople.

    Start Free Trial Now
    • Facebook
    • Instagram
    • X
    • LinkedIn
  • GBA Prime

    Get instant access to the latest developments in green building, research, and reports from the field.

    Start Free Trial Now
    • Facebook
    • YouTube
  • Old House Journal

    Learn how to restore, repair, update, and decorate your home.

    Subscribe Now
    • Facebook
    • Instagram
    • X

Membership & Magazine

  • Online Archive
  • Start Free Trial
  • Magazine Subscription
  • Magazine Renewal
  • Gift a Subscription
  • Customer Support
  • Privacy Preferences
  • About
  • Contact
  • Advertise
  • Careers
  • Terms of Use
  • Site Map
  • Do not sell or share my information
  • Privacy Policy
  • Accessibility
  • California Privacy Rights

© 2025 Active Interest Media. All rights reserved.

Fine Homebuilding receives a commission for items purchased through links on this site, including Amazon Associates and other affiliate advertising programs.

X
X
This is a dialog window which overlays the main content of the page. The modal window is a 'site map' of the most critical areas of the site. Pressing the Escape (ESC) button will close the modal and bring you back to where you were on the page.

Main Menu

  • How-To
  • Design
  • Tools & Materials
  • Video
  • Blogs
  • Forum
  • Project Guides
  • Reader Projects
  • Magazine
  • Members
  • FHB House

Podcasts

  • FHB Podcast
  • ProTalk

Webinars

  • Upcoming and On-Demand

Podcasts

  • FHB Podcast
  • ProTalk

Webinars

  • Upcoming and On-Demand

Popular Topics

  • Kitchens
  • Business
  • Bedrooms
  • Roofs
  • Architecture and Design
  • Green Building
  • Decks
  • Framing
  • Safety
  • Remodeling
  • Bathrooms
  • Windows
  • Tilework
  • Ceilings
  • HVAC

Magazine

  • Current Issue
  • Past Issues
  • Magazine Index
  • Subscribe
  • Online Archive
  • Author Guidelines

All Access

  • Member Home
  • Start Free Trial
  • Gift Membership

Online Learning

  • Courses
  • Project Guides
  • Reader Projects
  • Podcast

More

  • FHB Ambassadors
  • FHB House
  • Customer Support

Account

  • Log In
  • Join

Newsletter

Get home building tips, offers, and expert advice in your inbox

Signing you up...

This site is protected by reCAPTCHA and the Google Privacy Policy and Terms of Service apply.
See all newsletters
See all newsletters

Follow

  • X
  • YouTube
  • instagram
  • facebook
  • pinterest
  • Tiktok

Join All Access

Become a member and get instant access to thousands of videos, how-tos, tool reviews, and design features.

Start Your Free Trial

Subscribe

FHB Magazine

Start your subscription today and save up to 70%

Subscribe

We hope you’ve enjoyed your free articles. To keep reading, become a member today.

Get complete site access to expert advice, how-to videos, Code Check, and more, plus the print magazine.

Start your FREE trial

Already a member? Log in