FHB Logo Facebook LinkedIn Email Pinterest Twitter X Instagram Tiktok YouTube Plus Icon Close Icon Navigation Search Icon Navigation Search Icon Arrow Down Icon Video Guide Icon Article Guide Icon Modal Close Icon Guide Search Icon Skip to content
Subscribe
Log In
  • How-To
  • Design
  • Tools & Materials
  • Restoration
  • Videos
  • Blogs
  • Forum
  • Magazine
  • Members
  • FHB House
  • Podcast
Log In
How-To

Episode 1: Drywall Tools for the First Coat

Learn about mechanical and automatic tools such as the taper, the compound tube, and the banjo to make your drywall job better and easier.

By Myron R. Ferguson

Sponsored by USG Sheetrock® Brand

There are a few different ways to finish drywall, but when you’re trying to be efficient, mechanical and automatic drywall tools make a big difference. I’ve developed a systematic approach to finishing drywall incorporating a variety of finishing tools, with specific tools I prefer to use in different situations.

The automatic taper

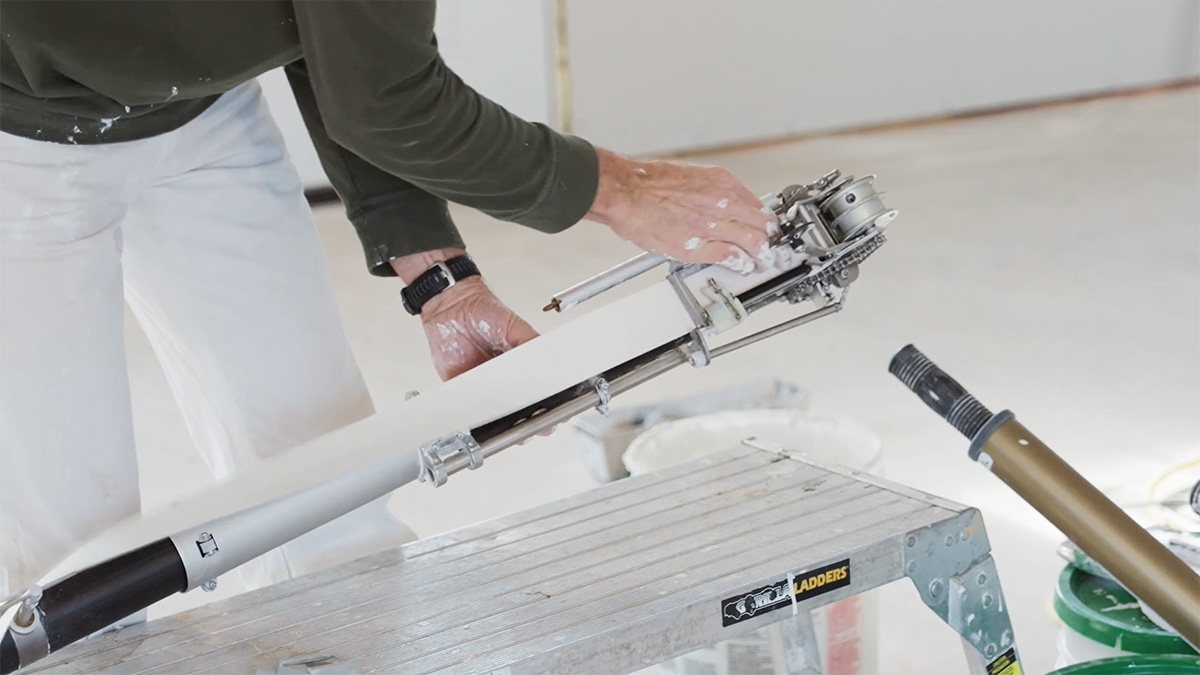
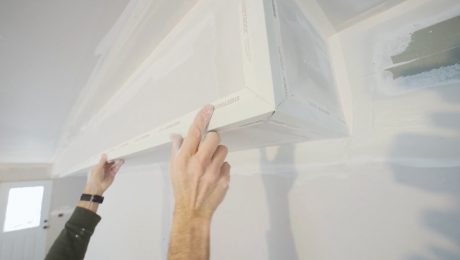
The first tool to get familiar with is the automatic taper. Compound fills the barrel, and tape is threaded through to the top. When pressed and run along the drywall, it applies compound and tape to walls, seams, and inside corners all in one step. To cut the tape at the end of a seam or an inside corner, you simply pull back on the handle, drawing a knife across the tape inside the head and cutting a nice straight line.

Myron showing the automatic taping tool for drywall

Embedding the tape in the proper compound is important. I use USG Sheetrock® Brand All Purpose joint compound. The only thing that is added to the Joint Compound is water; I don’t use any other additives (like dish soap, for example). It’s also important to mix the compound to get the right consistency, even if you buy it premixed from the supplier.

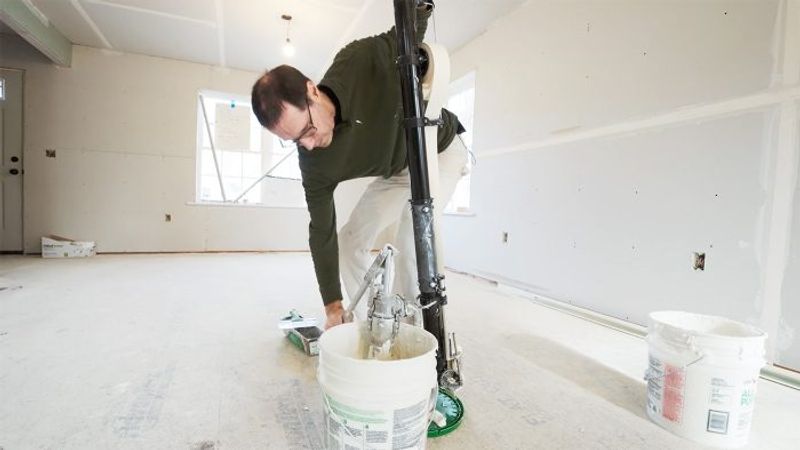
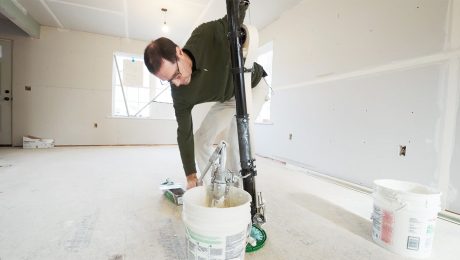
Filling the automatic taper with compound also requires a pump, which transfers compound from the bucket and into the taper. I keep my fingers tucked into the end so I can feel when it’s full. At this point, the tube probably weighs 30 lb. or more.

Once I’m ready to place the automatic taper against the wall and start putting compound on the seams, I begin with butted seams on the walls and ceilings. I put the tape on those seams first, embed it, and then go through and do the overlapping seams. I begin at the bottom of the seam, rolling the taper up. Once I get a few inches from the top, I pull back and forward on the handle to cut the tape.

I use an 8-in. taping knife with aluminum edges to embed the tape. When embedding, I put it really tight to the drywall because on a butted seam I want to make sure it’s as flat as can be. Occasionally, you might come across a little dry spot. If that happens, just fill it by hand as you go.

When it’s filled, the automatic taper uses about 75 ft. of tape per fill. So if I fill it three times, I’ll use a full 250-ft. roll of tape.

Corner rolling and flushing tools

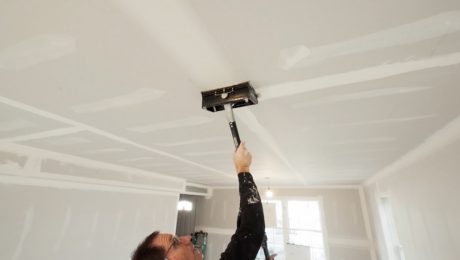
Next, I start working on inside corners, and because of the extra reach from the taper, I can stay on the ground; I don’t have to get on my stilts. Using this tool creases and places the compound and tape, but once it’s in place I need to embed the tape and smooth the compound out. This is called embedding and flushing, and I use corner roller tools to get these areas smooth. These tools are attached to a pole, and they roll the compound nice and tight into the corner. Before rolling the corner, I like to put a little compound on the roller by dipping it into the bucket of mud so I’m not starting out with a perfectly dry roller. Then I start right in the middle of the corner, rolling gently at first to avoid making wrinkles. Once it’s started, more pressure can be applied.

Myron holding a drywall corner finisher
Corner finisher

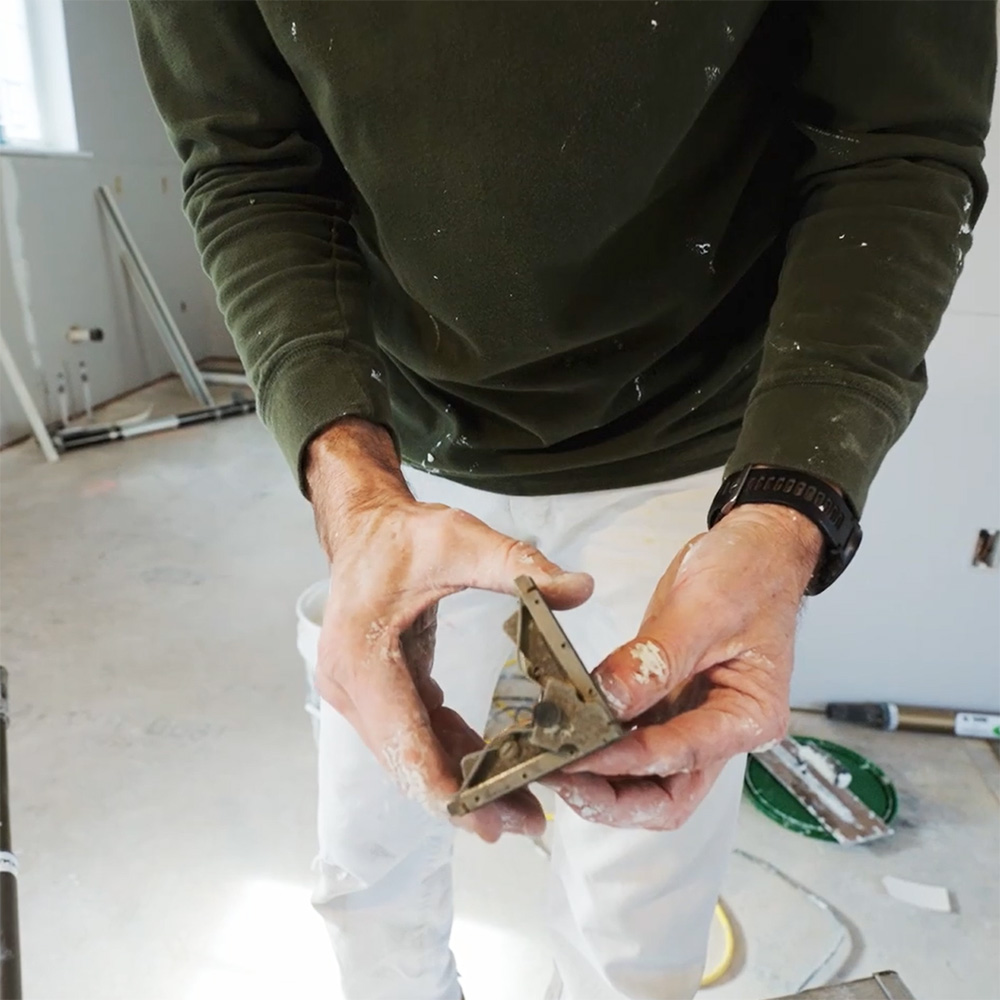
Once it’s rolled and embedded, the compound needs to be smoothed out with a corner flusher and a corner finisher. The corner finisher is a bit more complicated. It has springs in it that adjust to the degree of the corner, because corners are not always perfectly 90°. The edges of the tool smooth the compound out.

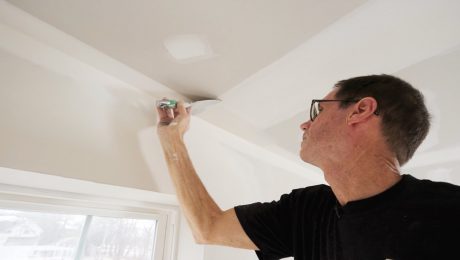
The corner flusher is a simpler version of the corner finisher. It doesn’t have all those moving parts, but it still does flex enough to adjust to different widths or different angled corners. The corner flusher is used to smooth the compound out, but once again, I like to dip it in the joint compound to get it acclimated before it goes on the wall.

Start by moving from the bottom, and push up so you don’t pull joint compound down and into a puddle on the floor. You can apply quite a bit of pressure, and I usually go over it twice. The poles that the corner flusher attaches to are telescopic, so I can make the handle a bit longer or shorter.

Typically I would do this process for the whole room or even the whole downstairs before I started pointing it up and cleaning it off. But if you have excess that drips down while you’re working, remove that as you go.

Compound tube and mud shoes

Applying compound with a compound tube

Although the automatic taper is very efficient, it’s a pretty complicated tool and quite expensive. If you’re looking for something more straightforward and cost-effective, an alternative is a compound tube, or a mud tube.

The mud tube is similar to the automatic taper in the sense that the whole tube fills with compound, but you don’t need the expensive pump to load it. It’s filled by pulling back on the tool’s handle like a big syringe. This tool is slower than the automatic taper, but still a lot faster than hand taping.

Myron holding a mud shoe
Mud shoe

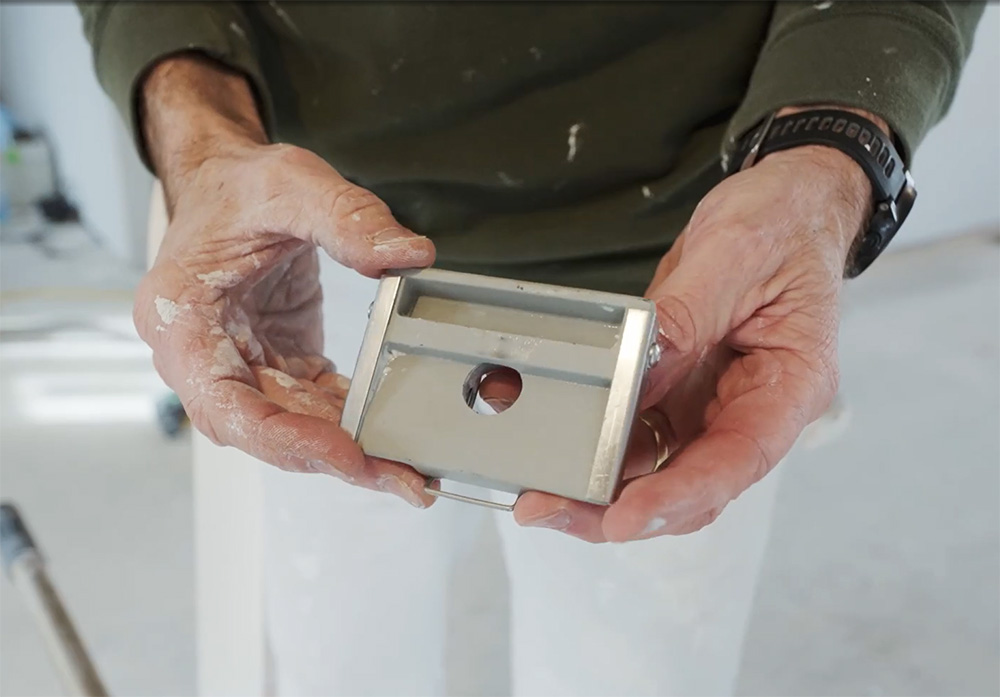
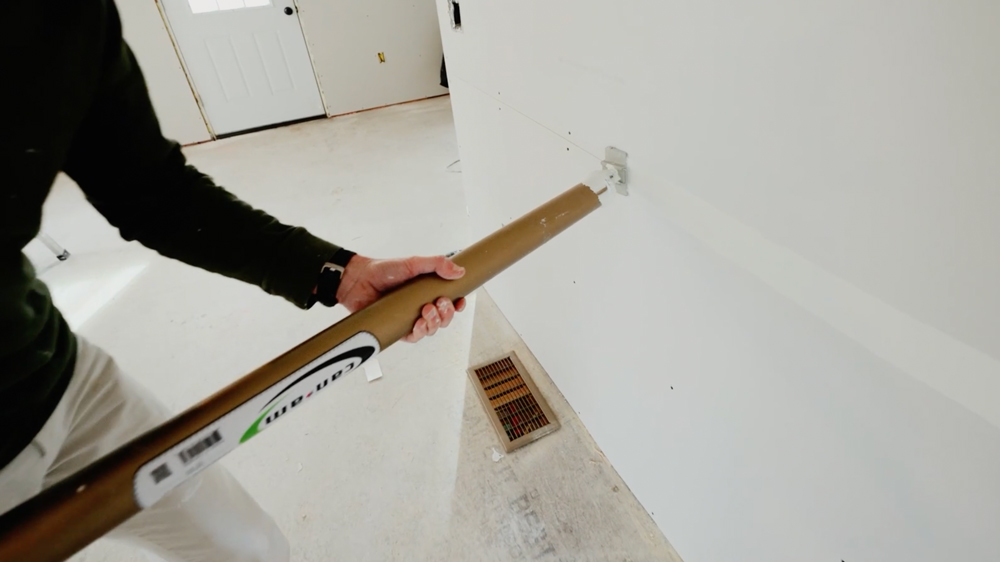
To get the compound onto the drywall seams, use a mud shoe, which attaches to the end of the mud tube. Apply compound to the wall by pushing on the handle of the mud tube while pressing and moving along the seam. If you find that you’re working hard to force the compound out of the tube, then it’s too thick. A different shoe goes on for inside corners. It’s a 90° corner mud shoe that puts a ribbon of joint compound on each edge of the inside corner.

Unlike the automatic taper that puts the compound and the tape on all at once, using the tube and mud shoes just puts the compound on; taping has to be done by hand. Once the tape is applied, I use the corner roller and corner flusher to get the compound smooth.

Drywall banjo

The last tool in this overview is called a banjo. It has a cavity for mud, and tape threads through it. This tool is used similarly to the automatic taper because it puts the mud and the tape on at the same time.

Myrond adding drywall tape to the banjo
Drywall banjo tool

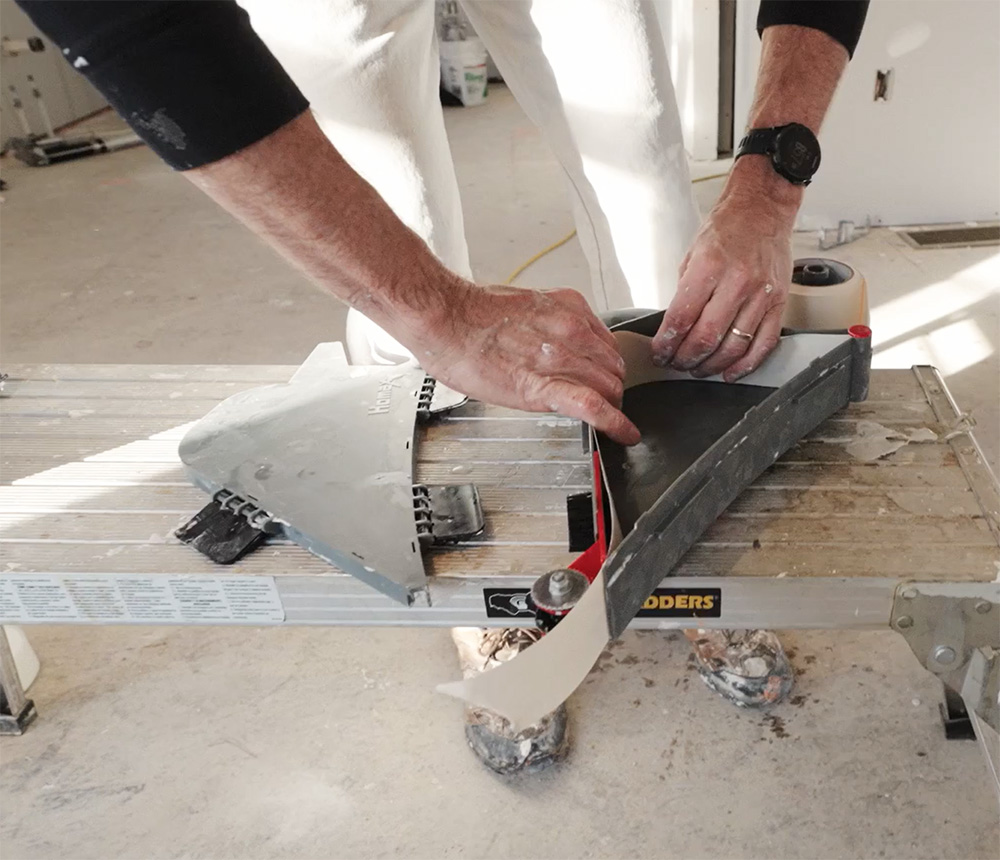
As the tape is being pulled out, compound is applied to the back side of the tape until the tool is empty. The compound does have to be relatively thin for this tool to work; otherwise, it pulls really hard.

After that, the tape gets embedded just as it does with the automatic taper. Once tape and compound are applied to the wall, just take the 8-in. knife and embed tight. The banjo is a commonly used tool that I believe works very well.

I’ve demonstrated several tools, techniques, and tips to help you decide what will work best for you. If you’re doing smaller jobs, maybe you’ll choose the banjo or the compound tube. For larger jobs, you may opt for the automatic taper. Whichever you choose, I hope you are now equipped to do better drywall work.


RELATED STORIES

  • Mechanical Taping
  • Taping Drywall: An Overview

Sign up for eletters today and get the latest how-to from Fine Homebuilding, plus special offers.

Signing you up...

This site is protected by reCAPTCHA and the Google Privacy Policy and Terms of Service apply.
See all newsletters
See all newsletters
×

Get home building tips, offers, and expert advice in your inbox

Signing you up...

This site is protected by reCAPTCHA and the Google Privacy Policy and Terms of Service apply.
See all newsletters
See all newsletters

Videos in the Series

  • Episode 1: Drywall Tools for the First Coat

    Learn about mechanical and automatic tools such as the taper, the compound tube, and the banjo to make your drywall job better and easier.

  • Episode 2: Installing Corner Bead

    Myron Ferguson demonstrates how to apply USG Sheetrock® Brand Paper-Faced Metal Corner Bead on an outside three-way corner.

  • Episode 3: Tools for an Efficient Fill Coat

    Myron Ferguson demonstrates how a flat box and corner-finishing tools help get a faster, consistent fill coat on drywall jobs.

  • Episode 4: Final Coat and Sanding

    In this video episode, Myron demonstrates how to get this last stage of drywall finishing in the best shape for a smooth final product.

New Feature

Fine Homebuilding Forums

Ask questions, offer advice, and share your work

About This Video Series

Sponsored by USG Sheetrock® Brand    Since drywall makes up approximately 80% of the visible interior of a home or building, the finishing process plays an extremely important role in the completion of a project. In this series, Myron Ferguson overviews a variety of mechanical and automatic drywall-taping tools and methods for a professional, efficient finish job.   More about this Video Series

View Comments

  1. dustindawind | May 25, 2023 01:55pm | #1

    Watching Myron work is a real revelation in process and efficiency. Not sure if I'll get the dispensing tools, but I've already identified areas where I can improve my own hobbyist process.

  2. thehistorydude | Jul 22, 2023 10:18am | #2

    Myron, you are still the master. I think it was 25 or 30 years ago that I saw your taping skills and it inspired me to roll up my sleeves and get taping. You do make it look easy. I've gotten better, my skills are no where close to yours on your worst day, but your tips and techniques have helped over the years. Thank you for this latest info and for helping us learn how to sling mud.

Log in or create an account to post a comment.

Sign up Log in

Become a member and get full access to FineHomebuilding.com

Up Next

Video Shorts

Featured Story

Fix Air Leaks in Old Houses

Simple air-sealing measures and spray-applied sealant lower energy bills and increase comfort without the need to tear the house apart.

Featured Video

How to Install Exterior Window Trim

Learn how to measure, cut, and build window casing made of cellular PVC, solid wood, poly-ash boards, or any common molding material. Plus, get tips for a clean and solid installation.

Related Stories

  • FHB Podcast Segment: Drywall-Free Half Wall Finish
  • Air Barrier Under Wood Paneling
  • Repairing Damaged Walls and Ceilings
  • FHB Podcast Segment: Ductwork in a Vented Attic

Discussion Forum

Recent Posts and Replies

  • |
  • |
  • |
  • |
  • |
  • |
View More Create Post

Highlights

Fine Homebuilding All Access
Fine Homebuilding Podcast
Tool Tech
Plus, get an extra 20% off with code GIFT20

"I have learned so much thanks to the searchable articles on the FHB website. I can confidently say that I expect to be a life-long subscriber." - M.K.

Get home building tips, offers, and expert advice in your inbox

Signing you up...

This site is protected by reCAPTCHA and the Google Privacy Policy and Terms of Service apply.
See all newsletters
See all newsletters

Video

View All Videos
  • FHB Podcast Segment: Drywall-Free Half Wall Finish
  • FHB Podcast Segment: Ductwork in a Vented Attic
  • Podcast 583: Members-only Aftershow — Drywall: Construction’s Unsung Hero
  • Episode 4: Final Coat and Sanding
View All

Drywall

View All Drywall Articles
  • Air Barrier Under Wood Paneling
  • FHB Podcast Segment: Ductwork in a Vented Attic
  • Prevent Bubbles in Joint Compound
View All Drywall Articles

Fine Homebuilding Magazine

  • Issue 330 - April/May
    • Deck Details for Durability
    • FAQs on HPWHs
    • 10 Tips for a Long-Lasting Paint Job
  • Issue 329 - Feb/Mar 2025
    • Smart Foundation for a Small Addition
    • A Kominka Comes West
    • Making Small Kitchens Work
  • Issue 328 - Dec/Jan 2024
    • How a Pro Replaces Columns
    • Passive House 3.0
    • Tool Test: Compact Line Lasers
  • Issue 327 - November 2024
    • Repairing Damaged Walls and Ceilings
    • Plumbing Protection
    • Talking Shop
  • Issue 326 - October 2024
    • Paint Behind Strike Plates
    • Conceal Cut Ends
    • Ladder Slip Solution

Fine Home Building

Newsletter Sign-up

  • Fine Homebuilding

    Home building tips, offers, and expert advice in your inbox.

  • Green Building Advisor

    Building science and energy efficiency advice, plus special offers, in your inbox.

  • Old House Journal

    Repair, renovation, and restoration tips, plus special offers, in your inbox.

Signing you up...

This site is protected by reCAPTCHA and the Google Privacy Policy and Terms of Service apply.
See all newsletters

Follow

  • Fine Homebuilding

    Dig into cutting-edge approaches and decades of proven solutions with total access to our experts and tradespeople.

    Start Free Trial Now
    • Facebook
    • Instagram
    • X
    • LinkedIn
  • GBA Prime

    Get instant access to the latest developments in green building, research, and reports from the field.

    Start Free Trial Now
    • Facebook
    • YouTube
  • Old House Journal

    Learn how to restore, repair, update, and decorate your home.

    Subscribe Now
    • Facebook
    • Instagram
    • X

Membership & Magazine

  • Online Archive
  • Start Free Trial
  • Magazine Subscription
  • Magazine Renewal
  • Gift a Subscription
  • Customer Support
  • Privacy Preferences
  • About
  • Contact
  • Advertise
  • Careers
  • Terms of Use
  • Site Map
  • Do not sell or share my information
  • Privacy Policy
  • Accessibility
  • California Privacy Rights

© 2025 Active Interest Media. All rights reserved.

Fine Homebuilding receives a commission for items purchased through links on this site, including Amazon Associates and other affiliate advertising programs.

X
X
This is a dialog window which overlays the main content of the page. The modal window is a 'site map' of the most critical areas of the site. Pressing the Escape (ESC) button will close the modal and bring you back to where you were on the page.

Main Menu

  • How-To
  • Design
  • Tools & Materials
  • Video
  • Blogs
  • Forum
  • Project Guides
  • Reader Projects
  • Magazine
  • Members
  • FHB House

Podcasts

  • FHB Podcast
  • ProTalk

Webinars

  • Upcoming and On-Demand

Podcasts

  • FHB Podcast
  • ProTalk

Webinars

  • Upcoming and On-Demand

Popular Topics

  • Kitchens
  • Business
  • Bedrooms
  • Roofs
  • Architecture and Design
  • Green Building
  • Decks
  • Framing
  • Safety
  • Remodeling
  • Bathrooms
  • Windows
  • Tilework
  • Ceilings
  • HVAC

Magazine

  • Current Issue
  • Past Issues
  • Magazine Index
  • Subscribe
  • Online Archive
  • Author Guidelines

All Access

  • Member Home
  • Start Free Trial
  • Gift Membership

Online Learning

  • Courses
  • Project Guides
  • Reader Projects
  • Podcast

More

  • FHB Ambassadors
  • FHB House
  • Customer Support

Account

  • Log In
  • Join

Newsletter

Get home building tips, offers, and expert advice in your inbox

Signing you up...

This site is protected by reCAPTCHA and the Google Privacy Policy and Terms of Service apply.
See all newsletters
See all newsletters

Follow

  • X
  • YouTube
  • instagram
  • facebook
  • pinterest
  • Tiktok

Join All Access

Become a member and get instant access to thousands of videos, how-tos, tool reviews, and design features.

Start Your Free Trial

Subscribe

FHB Magazine

Start your subscription today and save up to 70%

Subscribe

We hope you’ve enjoyed your free articles. To keep reading, become a member today.

Get complete site access to expert advice, how-to videos, Code Check, and more, plus the print magazine.

Start your FREE trial

Already a member? Log in