
Installing Step Flashing to Prevent Roof Leaks
The first rule of roof flashing is that water runs downhill; the second rule is that the first rule isn't without exceptions.
You may already know that step flashing is a series of bent pieces of metal that span the joint between roof shingles and adjacent walls, preventing water from getting into the walls as it runs down the roof. One piece of flashing is used at every course of roof shingles so that the flashing laps each course below, in the same fashion as the shingles, to make the joint watertight. Aluminum is the most common and affordable flashing material, while copper flashing is typically used on fancier roofing projects.
You need to stop water from moving up and in–not just down
Installing step flashing correctly is one of the first things I teach a new member of my crew. The first rule of flashing is that water runs downhill. The second rule of flashing is that sometimes rule No. 1 isn’t the whole truth, and that water also runs uphill, as when it wicks up inside debris or backs up behind ice. For this reason, I like to lap all flashing by at least 2 inches.
Only nailing on one side to allow for movement
It’s important to remember that a building always is moving. If you nail step flashing to the wall and to the roof, you’re asking for trouble. Most of the time, I like to avoid putting any extra holes in the roof surface, so I nail step flashing to the sidewall only, where both the next piece of flashing and the siding will cover the nail head. The bottom corner, where you start the course of flashing, is made from two pieces of bent step flashing lapped over each other and caulked in place.
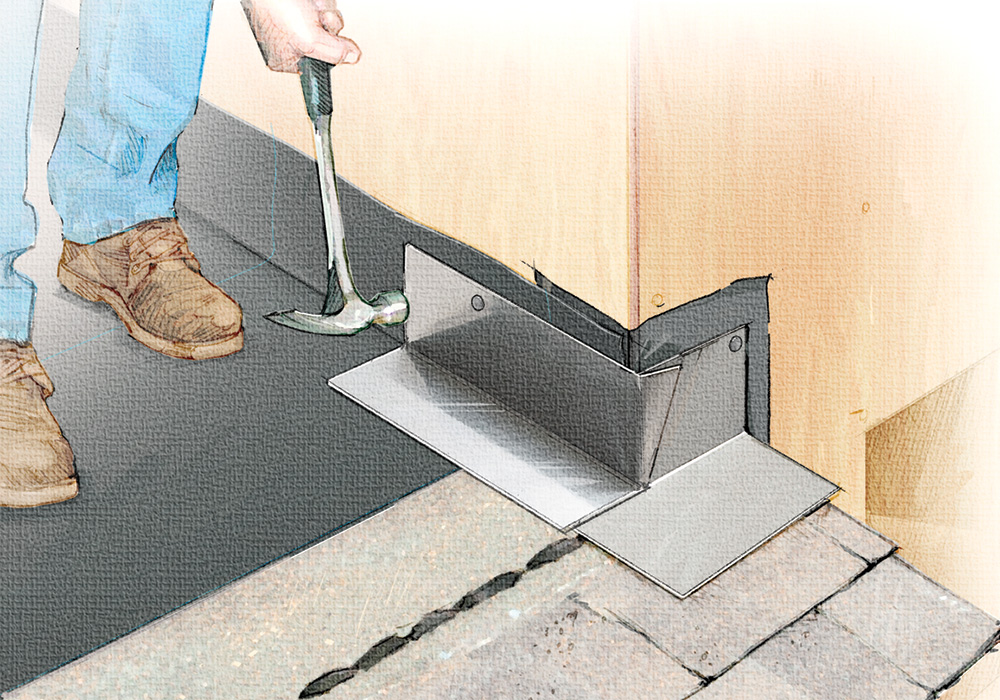
Corner flashing comes first
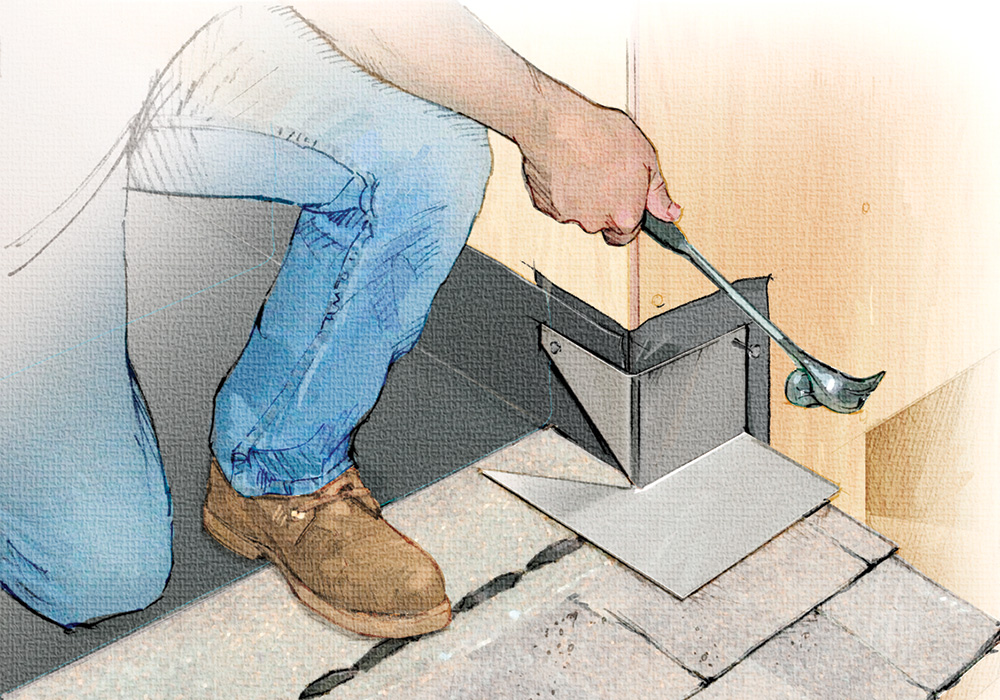
Step 1: Make corner flashing from step flashing. Once you’ve shingled up to the sidewall, cut a piece of step flashing at a 45º angle from the outside corner to the bent seam. Bend it down and back to sit flat on the corner. Then sink two nails in the wall near the top, one on each face.
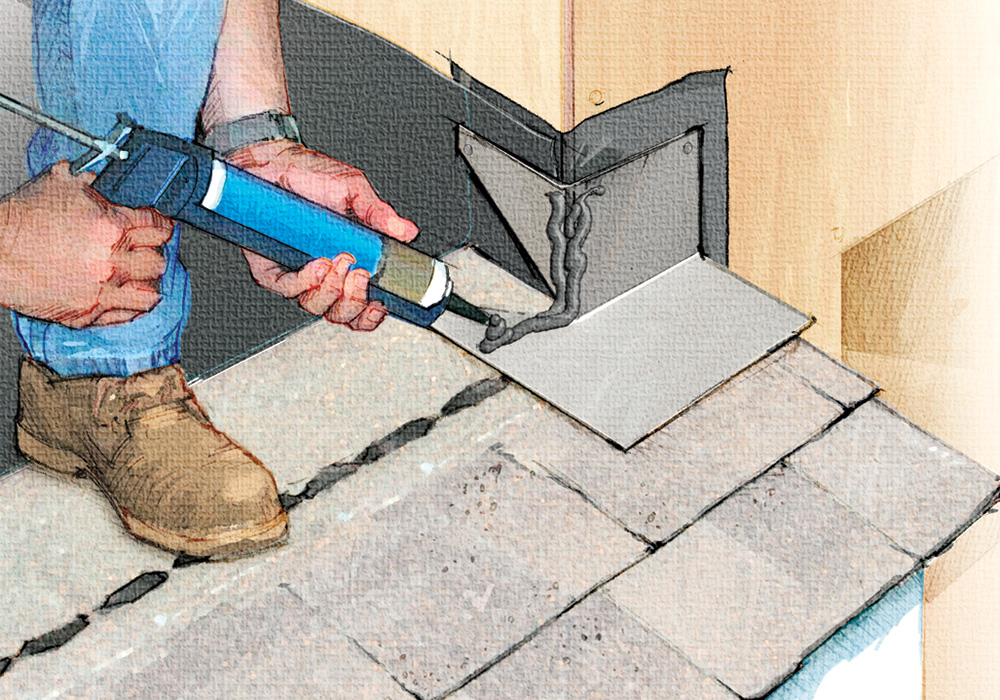
Step 2: Lay a bead of sealant. Where the next piece of flashing will overlap, apply a bead of caulk to seal the corner. This spot is prone to leaking because there is not a full 2 in. of overlap. Use a sealant designed for roofing. Not all caulks can withstand the heat and exposure of being on the roof.
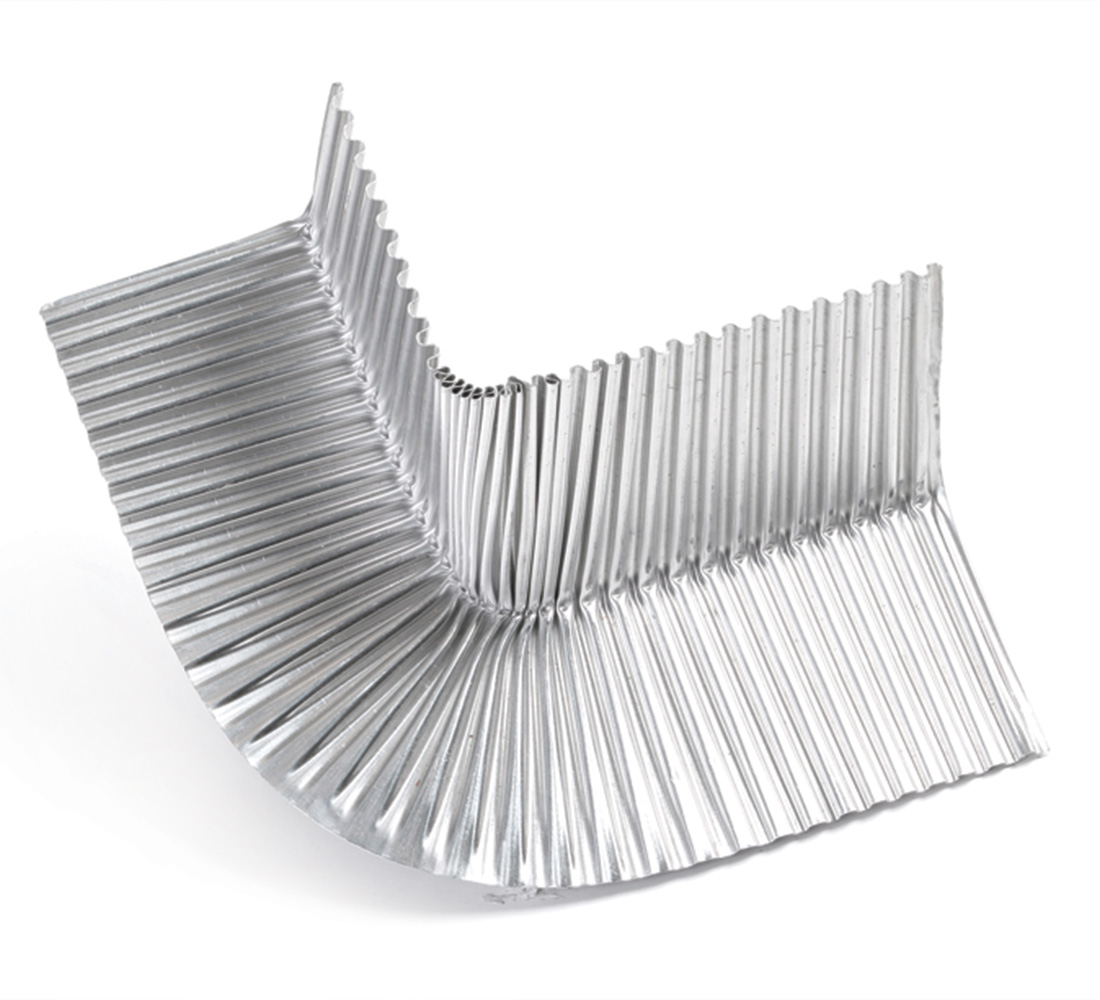
Flexible corner flashing
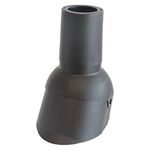
Instead of making your own bottom-corner flashing from two pieces that must be cut and caulked together, you can flash the bottom corner with a piece of corrugated aluminum made by amerimax home products (www.amerimax.com). The flashing has a 31/2-in. base (which rests on the roof) and a 2-in. stand (which fits against the wall). it can be twisted or bent to fit any roof pitch and can be used for left-hand or right-hand applications. generally available at larger home stores, a single piece sells for less than $3.
The flashing alternates with the shingles
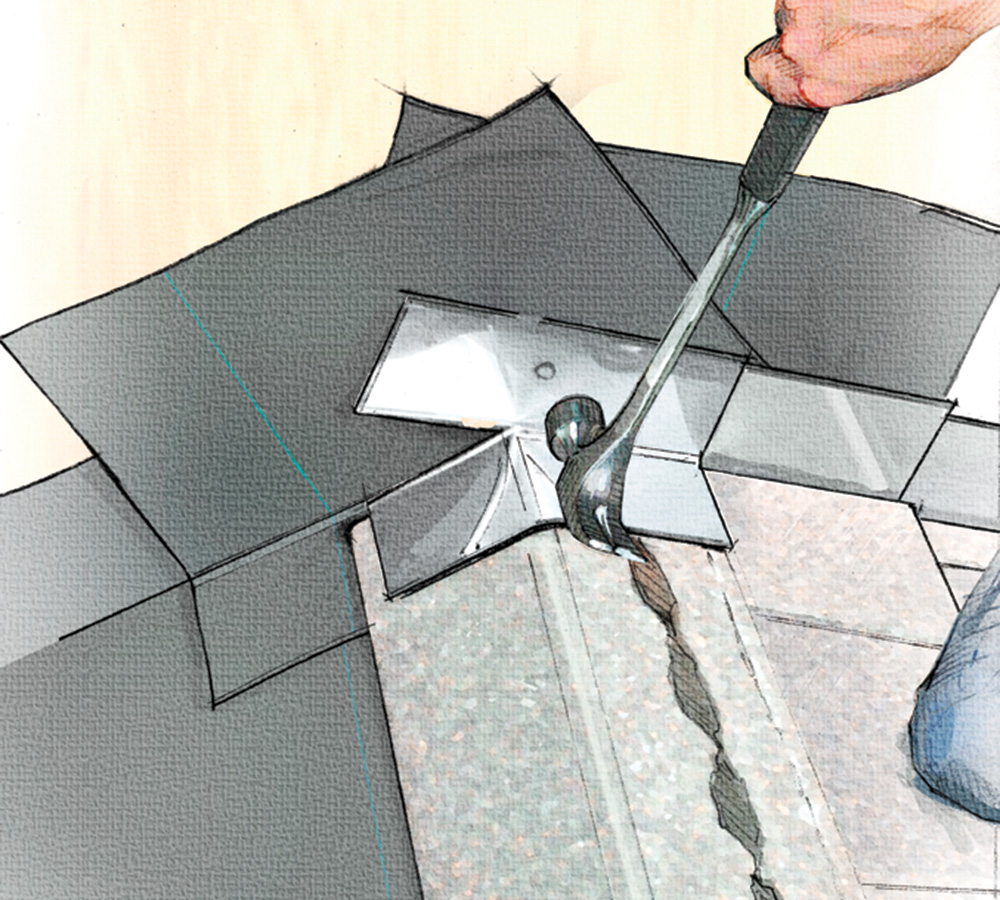
Step 3: Bend the first piece along the plumb line. The first piece of step flashing needs one bend so that it laps cleanly over the corner flashing installed in the previous step. Make sure the caulk joint between these two pieces is bedded evenly. Then sink one nail into the sidewall to hold the step flashing in place.

Step 4: Begin the weave. With step flashing, you do a little flashing, then a lot of roofing, then a little more flashing, and so on. Each piece of step flashing laps over the shingle below and under the shingle above. The bottom edge of the flashing should extend just below the nail line. Attach each piece with a single nail high enough to be covered by the next course of flashing, the building wrap, and the siding.
The top requires another custom piece
Step 5: This roof ends in a peak. For the first side, cut the step flashing along the fold line, and bend down the lower flap. Drive one nail to hold it in place.
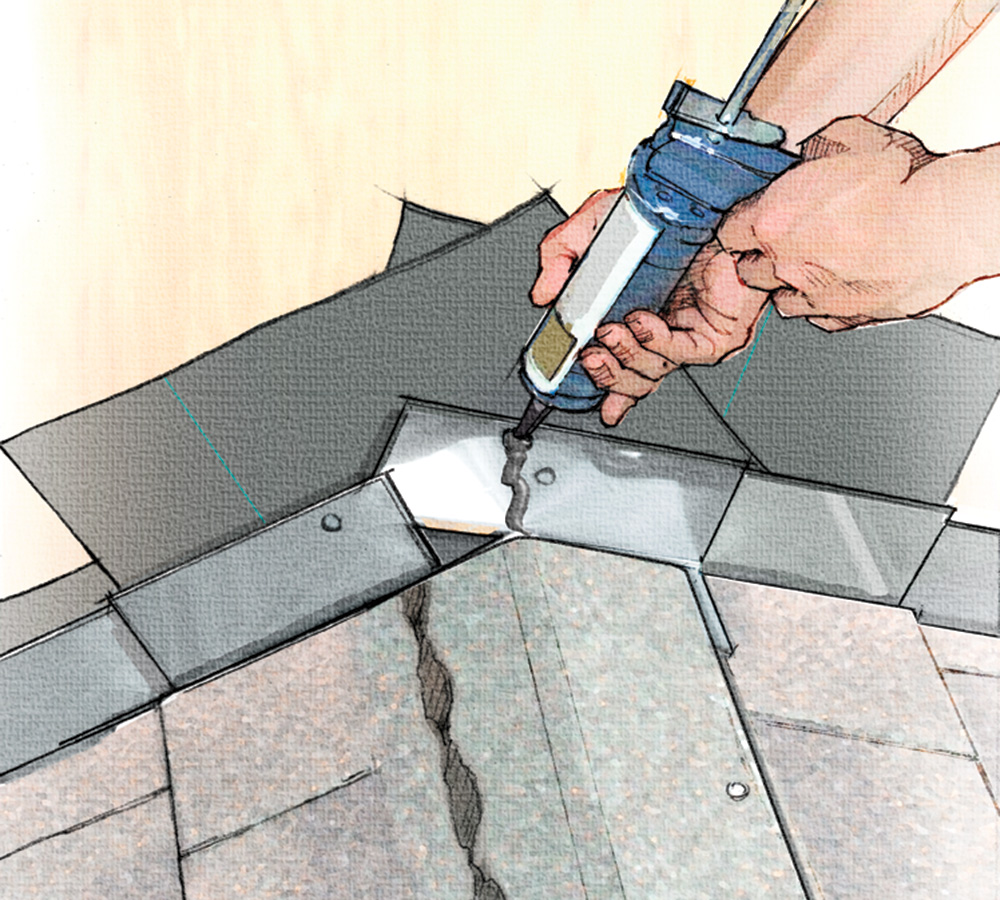
Step 6: Caulk the top. Once you’ve come up the other side with step flashing and shingles, you’re ready to put on the final piece. Apply a vertical bead of caulk as shown.
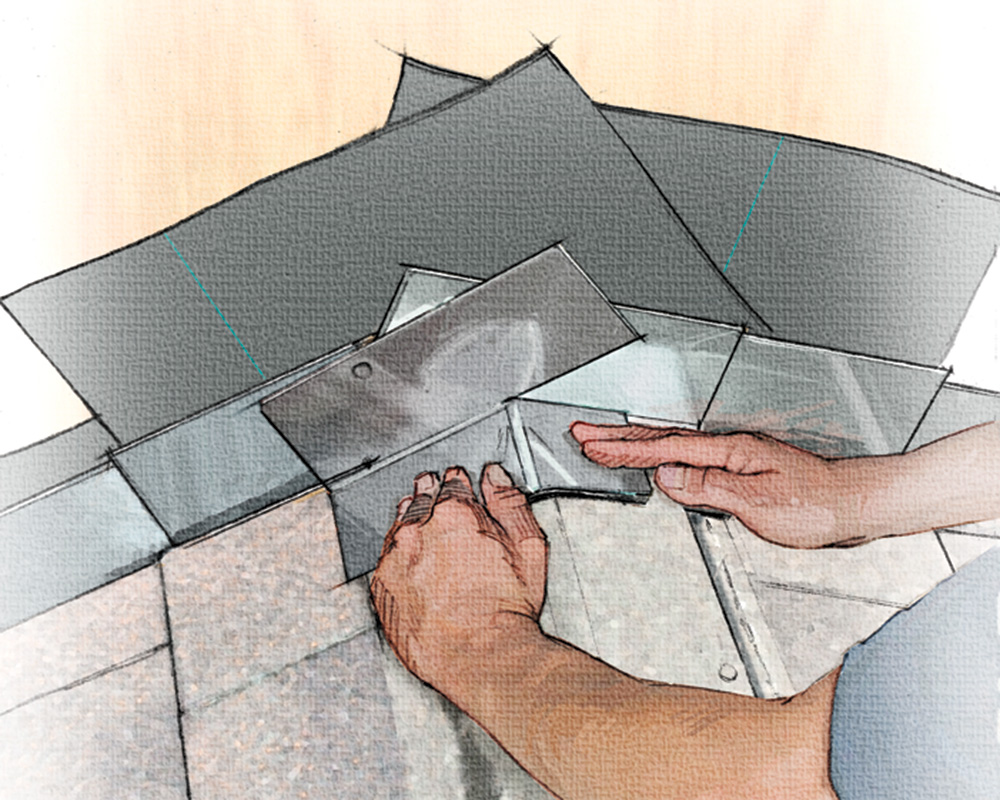
Step 7: Make the last piece of flashing. This is the brother to the one you already put on the peak. Cut along the fold line, bend down the flap, and press the pieces together along the caulk joint. Sink one nail into the wall to secure the last piece.
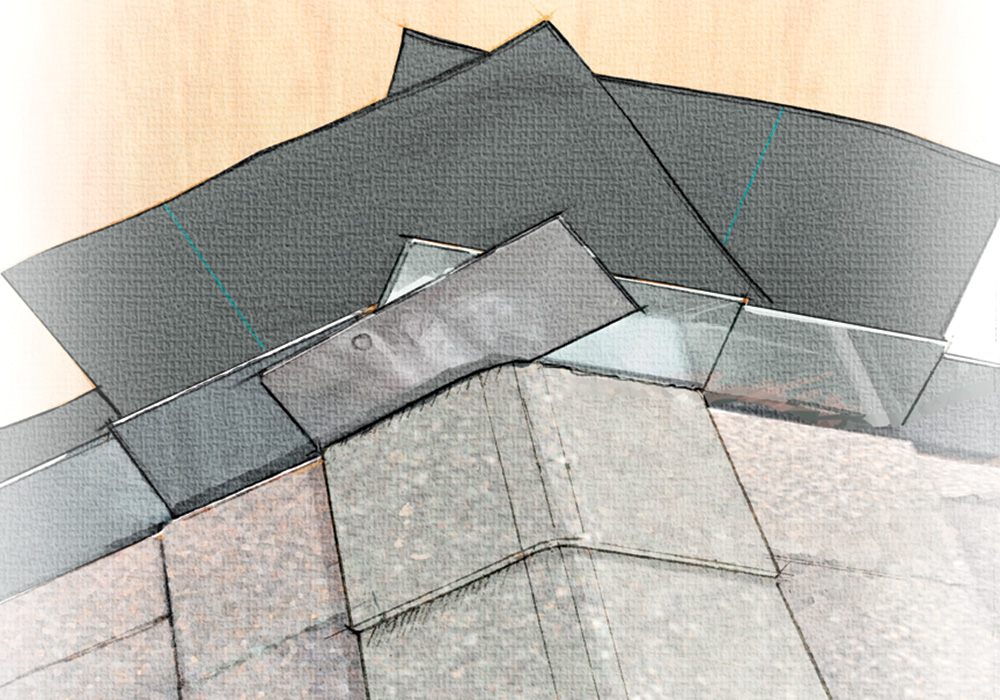
Step 8: Once you’re done, half of the flashing will be covered by shingles. After the building paper and the siding go on, almost all of it will be covered, which is one of the main reasons flashing has to be installed carefully to begin with.
More about roof flashing:
A Smarter Way to Flash – Removable two-part counterflashing allows access to roof flashings without digging in to the wall.
Kickout Flashing – How to flash troublesome roof-to-wall intersections.
Four Steps to Flash a Dormer – This leak-free approach begins with an impenetrable corner detail.
Vent Flashing Done Right – Back up roof vent boots with counterflashing and proper shingling to prevent leaks.
Time-Tested Approach to Chimney Flashing – Proven methods and durable materials keep out water for decades.
Using a Sheet-Metal Brake – A professional roofer demonstrates how to make bends for custom flashing.
Photos by: Krysta Doerfler; drawings by: Clark Barre
Fine Homebuilding Recommended Products
Fine Homebuilding receives a commission for items purchased through links on this site, including Amazon Associates and other affiliate advertising programs.

Roof Jacks
Flashing Boot Repair

Hook Blade Roofing Knife

View Comments
The Journal of Light Construction and their sister publication have stated in at least an excerpt from the Field Guide that step flashing should be nail to the roof deck rather than any adjacent vertical to allow for trouble free replacement on any future reroofing. The reason cited is that if nailed to the vertical plane the step flashing will be impossible to remove in the future without damaging the siding.
Youtube video where roofers actually demonstrate replacing / installing step flashing at all often as not nail to the roof deck after fitting under existing siding.
What is actual best practice, then?
I have a formal College and European manufacture automotive service technician education rather than a building trades one. We were always taught to install according to factory approved practice and to assemble systems and sub-assemblies with the idea that one day you may actually have to remove them again and not the "other guy" somewhere else. In short, for example, don't fit a hose clamp so that it is impossible, once everything is back in the car, to remove it without taking the engine or some other major system out to access it again.
Generally speaking, the roof leg of step flashing will get a nail from the course of shingles it underlies. I think it's arguable step flashing doesn't really need a nail- it's held in place by the siding and the shingles, with the eave and the peak as possible exceptions.
karlaudi makes an excellent point. If you want your work to last "forever," make sure it can be repaired.