
A Practical Guide to Fall Protection
Working safe on the job site can be as simple as avoiding risks, or as involved as installing a system of guardrails, ropes, and harnesses. Learn how to implement the options that match the requirements of your projects.
Synopsis: In 2018, more than 1,000 construction workers died on the job—one third of those from falls. It’s easy to feel like you have everything under control and don’t need safety gear on the job site, but all builders should take the time to learn about fall protection, which is required when working above 6 ft. Carpenter Tim Uhler lays out the options for staying safe during elevated work, including a rundown of types of anchors, harnesses, connectors, and ropes to use for fall protection. He uses drawings to map out anchor points for fall restraint or arrest, and includes formulas for planning anchor-point overlap and factoring fall distances.
We’ve always had a good safety record, but in the early ’90s one of the guys who had worked on our crew had a fall on another builder’s job site. He was 9 ft. off the ground when he broke the metal banding on a bundle of trusses and was knocked off the roof. Just like that, he was paralyzed from the neck down.
I’d like to say that we implemented a perfect safety plan after that, but we didn’t. Then in 2012, my brother and I took some disaster site-worker training. I was asked to oversee the framing for volunteer projects, and after discovering that only a few of my 150-person crew were experienced framers, my overseer asked me if I was ready to tell someone’s wife or child that their loved one died because of an accident we could have avoided. I’m very grateful I haven’t had to do that, but I couldn’t stop thinking about it, so since then we’ve progressively implemented personal fall protection.
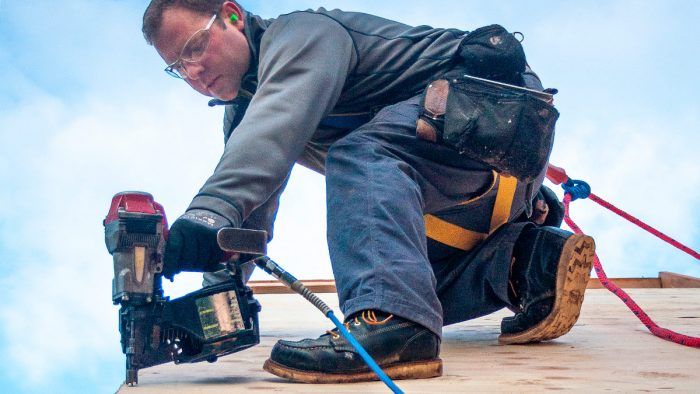
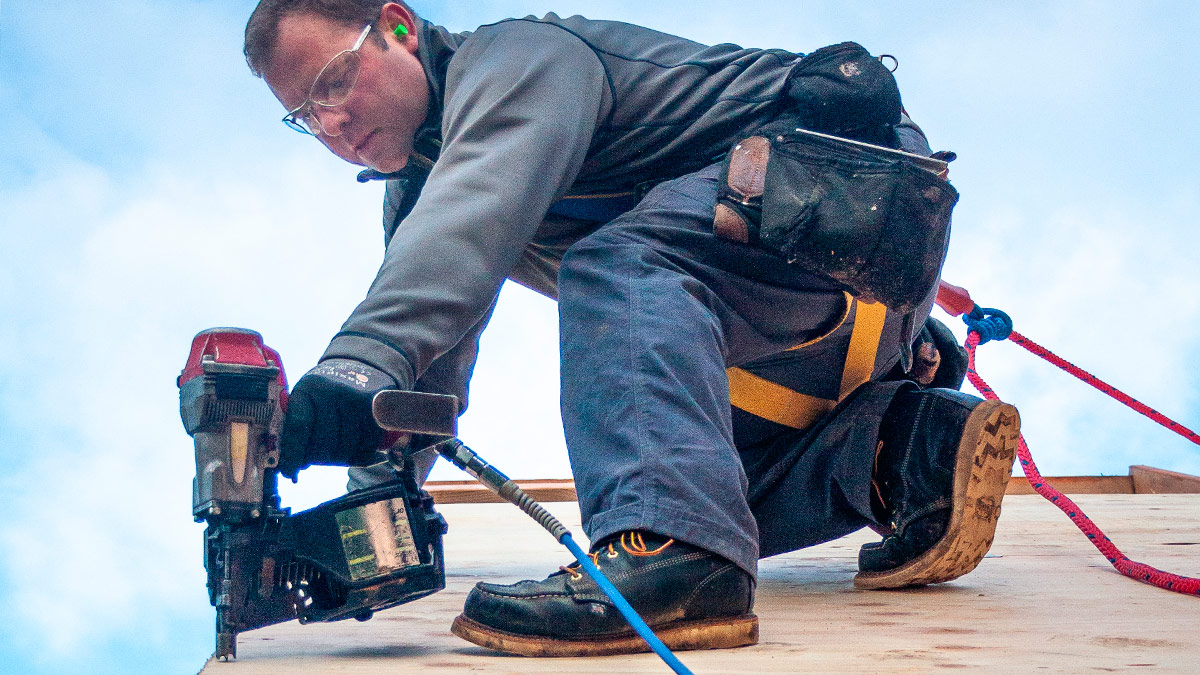
I want to be honest and admit that I still struggle with safety at times. Like many builders reading this, I was taught how to work on the roof without falling, and after more than two decades of accident-free framing, I feel like I have everything under control and don’t need a harness and lifeline. But in 2018, more than 1,000 construction workers died on the job—one-third of those from falls. Not included in this statistic are those who survived a fall but will never be the same. I don’t want that happening on my job site, so I strive to make safety measures a normal part of the daily routine. That said, what follows isn’t a substitute for formal safety training, but instead a look at what works for us when it comes to personal fall protection.
All builders should take the time to learn about fall protection, because it applies to all of us. According to OSHA requirements, construction work requires fall protection when working above 6 ft.,and where I live in Washington state, fall protection is required when working on a platform or walkway more than 48 in. from the ground. Fall protection is also required at ground level to protect workers from holes, stairway openings, and more.
The good news: Not every situation requires a harness and lifeline to be safe and compliant. In fact, we consider fall arrest as a last resort.
Fall arrest should be your last resort
One of the most common ways of providing personal fall protection is the use of a body harness and lifeline. But a harness and lifeline should really be the last resort for fall protection. Why? Because while fall-arrest setups mean you will survive a fall, you won’t necessarily walk away uninjured. In fact, death can still result in as little as 15 minutes due to suspension trauma. So before going right to fall arrest as an option, it makes sense to consider a couple of preventive safety measures. Plus, if you choose one of the first two options, it means you don’t have to wear a harness.
1·AVOID THE HAZARD
The first thing I like to consider is whether we can avoid the fall hazard to begin with, which we’ve been able to do in a few different ways.
One tool I love to use is the Simpson Strong-Tie Quik Stik, which is essentially an extension for a drill/driver. I can install structural screws 10 ft. to 11 ft. overhead while keeping both feet on the ground.
To minimize working off ladders, we balloon-frame walls as big as we have room for, frame and trim the soffits and overhangs, hang windows, and even install siding before lifting the wall.
We also frame non-load-bearing interior walls after the roof is framed and sheathed. This allows us to set up rolling baker scaffolding with guardrails and move around to set rafters and install bird blocks along the eaves. I also know some truss crews will set up planks about 36 in. off the floor along exterior walls and then roll and block trusses without having to walk the wall plates.
2·USE PHYSICAL BARRIERS
When we can’t eliminate the need for elevated work, our next choice is to prevent falls by using guardrails around stairwell openings and the perimeter of our deck frames. For second-floor exterior walls, we install the guardrails on the wall before lifting, which allows us to sheathe the floor and frame the next set of walls without wearing the harness. We order some extra 2x4s on each job and build our own guardrails, which we move around as the job progresses, and then disassemble and cut up to use for blocking. At first I resisted the idea of putting up guardrails, but have found there are lots of advantages. The rails can act as a second hand—for example, when I’m running rim, I don’t have to have someone hold the other end. I also feel much safer walking walls, and I can hang my saw or nailer from the rails.
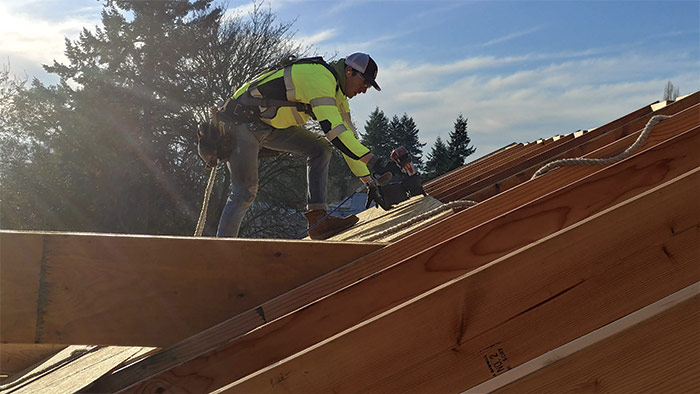
3·SET UP AN ANCHOR AND HARNESS
If working from the ground or setting up guardrails isn’t practical, then it’s time to set up an anchor and put on a harness. In that case, you have to decide whether the setup is being used as fall restraint or fall arrest.
Restraint is designed to keep a worker from walking off the edge of a building, while arrest is designed to catch the worker before they hit the ground. For obvious reasons, restraint is preferable to arrest.
Personalize your fall-protection system
There are so many choices for personal fall protection that it’s easy to get overwhelmed. The best approach is to tackle it one category at a time, following the industry’s ABC acronym, which stands for anchor, body harness, and connector.
Anchors
Whether temporarily or permanently installed, anchor points are where the worker ties into the structure, and each connection point must be capable of supporting 5000 lb. There is a huge variety of anchor styles, and unlike some other pieces of fall-protection gear, it makes sense to own an assortment.
Hinge-style metal anchors are popular in residential fall protection, and I always like to keep a few on hand. These metal plates can be fastened to framing using manufacturer-supplied screws (if you can manage to hang onto them from job to job), structural screws (check with the manufacturer), or 16d duplex nails. I like that I can put these anchors at the ridge for roof work, or I can screw them to a wall header for siding. They’re also the standard choice for roofers, since their work doesn’t allow for easy installation of tie-off straps.
|
|
|
Tie-off straps, my favorite all-around choice for framing work, can be tied around wall plates, beams, ridges, or other framing. Because the straps are just looped into place, and require no fasteners, they are fast to set up and later move or remove. I recommend buying the versions with a chafe guard, which last longer.
Using a safety bar for open framing, like floors and trusses, is a newer method for our crew, and I love it. Basically a bar that spans and clips onto the framing, this device will support two workers using shock-absorbing lanyards or self-retracting lifelines. A second bar means you can leapfrog the anchors and work your way across
the house.
Body Harnesses
You really can’t buy a “bad” harness—as long as it has “ANSI Z359” on the label, it’s safe. The choice of a harness is more about personal preference, comfort, and fit.
How the harness fits is crucial, and, if possible, I recommend trying it on before purchasing. When properly fit and adjusted, the dorsal D ring—the main point of connection—should land between your shoulder blades and the chest strap should be above your nipples. You want the leg straps snug enough that they don’t move during a fall, which can cause testicular trauma, but not so tight that you can’t work. The test for this is to pass your hand with fingers extended through the strap and then make a fist. If you can’t pull your fist back out, it is snug enough.
For many years I preferred the budget harnesses because they are low profile, but over time found them to bind and chafe. I now prefer a harness that has a lot of padding and quick-connect buckles. The more convenient it is, the more likely I’ll wear it.
Remember this final point: The harness is either all on or all off. When you are wearing it
for fall protection, everything must be buckled and fit properly. You aren’t just trying to survive a fall; you also need to minimize the injury.
Connectors
Running between the harness and the anchor point is some form of connector, which in residential work is typically either a shock-absorbing lanyard and rope grab, or a self-retracting lifeline clipped directly to the dorsal D-ring of the harness.
Rope grabs (below, right) are used to move up and down the vertical lifeline and come in a few different varieties. Mechanical metal rope grabs are either factory-installed on a lifeline or made to be removable so you can use them on different lifelines. They are either manually operated, usually by squeezing, or designed to move freely—known as self-tracking—locking only in the case of a sudden fall. The only nonmetal rope-grab option is a Prusik, a climber’s knot designed to be easily pushed up and down a rope, but hold tight under load.
| |
Energy absorbers
(above, left) are a must on every lanyard used for fall arrest, and also allowable in fall-restraint setups. In the event of a fall, the energy absorber decelerates the fall in order to reduce injury. The two most common types of energy absorbers are rip-stitch style and bungee style.
Self-retracting lifelines act like a seat belt. When sudden motion is sensed, the unit locks, preventing a fall. But this same functionality can also be annoying when it locks up accidentally while you work. We prefer not to use these lifelines because there is still the danger that a person can walk slowly off an edge.
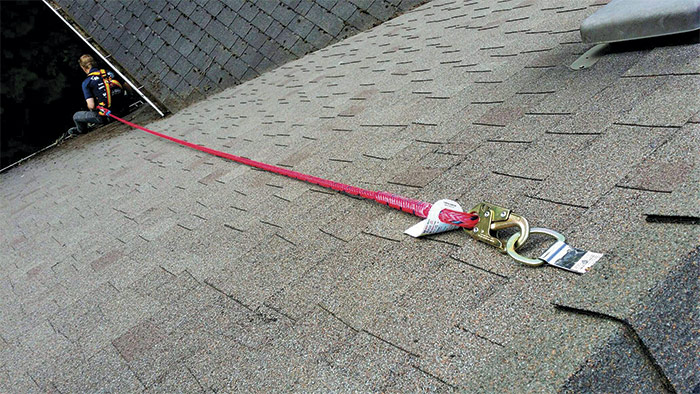
Rope options aplenty
The world of rope options is large, and the terminology can get confusing, but in general vertical lifeline ropes fall into either the “twisted” category or the “braided” category.
Twisted ropes are usually made from nylon, polyester, or a blend of materials. Typically the blended ropes intended for safety applications will have at least one strand in a different color than the others. If all of the strands in a twisted rope are the same color, it’s a good indication that the rope is only meant for utility purposes and is not safe for fall protection. Twisted ropes are, generally speaking, stiffer and not as strong as braided ropes, but are less expensive.
Braided ropes have more fibers intertwined in a smaller space, and those fibers are aligned in the same direction, making a strong lifeline that will stay straight rather than twisting one way or another. Braided ropes are more expensive than twisted ropes, but are also stronger and smoother, making them easier to use with mechanical rope grabs and also easier on the hands. If you buy braided rope, be sure to choose static rope, which has very little stretch, as opposed to dynamic rope, which is designed to stretch under load.
Safety gear is only as safe as your setup
I’ve heard stories of construction workers who were seriously injured while wearing a harness and hooked up to an anchor, and the reason was a lack of proper setup. To be safe in case of a fall, you have to set up your fall-protection system based on the specifics of the job, including the area being worked on, number of anchors, distance to the ground, and any potential for swinging.
Mapping out anchor points
When setting up for fall restraint or arrest, many builders either use too few anchors, or, not wanting to take the time to calculate anchor positions, space them every 8 ft. along the ridge and often end up with far more than necessary.
The best way to determine how many anchors are required and where they need to be placed is to grab a compass and the scaled building plans.
Place the pivot point of the compass on the ridge (A) and extend the pencil point so the widest part of its arc is about 2 ft. beyond the eave edge, and it also contacts the lower corner of the roof.
Then, without changing the setting on the compass, place the two points so the pencil is on the spot where the first arc crosses the eave (B) and the pivot point is on the ridge (C), then scribe a second arc. Repeat across the entire roof.
Knowing when to switch anchors
Planning the overlap of different anchor points on paper is one thing, but deciding when to switch anchors while on the actual roof is another. Here’s the trick: Take your height, say 6 ft. (or 72 in.), and subtract the distance from the working surface to the D-ring on your harness, which we’ll say is 52 in.
72 in. – 52 in. = 20 in.
Now, hook your lifeline to the first anchor and walk from the ridge down to the eave, keeping the line taut. From this taut position, measure 20 in. beyond the rope grab and tie a knot in the lifeline.
While working, when the rope grab hits the limiting knot, you have found the limit of your safe working angle and it’s time to unclip from the first anchor point and clip into the second anchor point. Without that limiting knot, you could just keep feeding out more line and put yourself at risk of exceeding the free-fall distance if you go over the edge.
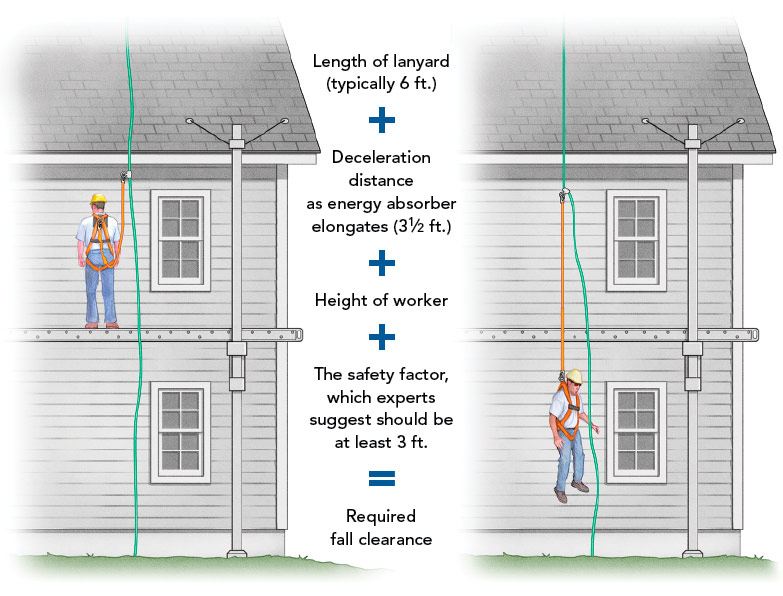
Factoring your fall distance
We prefer to stay in fall restraint whenever possible, but anytime you are relying on fall-protection equipment for fall arrest you have to factor in the length of the fall. We’re always mindful of the truism, “You want more air than rope.” Here’s how to calculate the potential fall distance.
Typically the below calculations will come out to about 18-1⁄2 ft., which is a good rule of thumb. But even when working on buildings where you have more than 18-1⁄2 ft. of distance from roof edge to the ground, you will be limited by the allowable free-fall distance, which is 6 ft.
Safety checkEach time a harness is donned, it needs to be inspected for wear. Many harnesses have red thread woven into the webbing—if you can see it, remember, “Red is dead,” and take the harness out of service. Many manufacturers also have expiration dates on the tag. If the harness looks good but is past the expiration date, take it out of service and destroy it. Make sure that in addition to inspecting your harness, you store it properly. Moisture and mold can damage the webbing. Dirt should be wiped off with a damp sponge and warm soapy water, and it should be stored out of direct sunlight. I like to hang mine by the rear D-ring to let it dry. |
From Fine Homebuilding #293
Fine Homebuilding Recommended Products
Fine Homebuilding receives a commission for items purchased through links on this site, including Amazon Associates and other affiliate advertising programs.
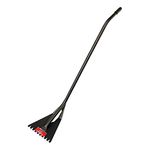
Shingle Ripper

Ladder Stand Off
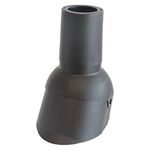
Flashing Boot Repair
