
Extension Ladder Basics
How to move, raise, and secure these essential tools safely.

Synopsis: An owner’s manual for extension ladders, this article uses photo and drawings to explain how to work with these common, but potentially dangerous tools. Duty ratings are explained, along with the appropriate uses for different ladders (fiberglass vs. aluminum, for instance). Throughout the article, tips illustrate how to level ladders, secure them, and prevent them from damaging your house.
Like extension cords or hammers, ladders are one of those tools that have no substitute: Nothing else will get you up to paint that gable. Unlike smaller tools, however, ladders can be downright cumbersome unless you know how to maneuver them.
As any Three Stooges fan can tell you, ladder safety is a big concern. The Consumer Product Safety Commission reports that every year, more than 164,000 people are treated in emergency rooms and clinics for injuries related to ladder use. Most of the injuries are cuts, bruises, and broken bones, but more than 200 people die every year from ladder-related incidents.
“If ladder users would read and heed the labels that every ladder carries, most accidents could be avoided,” according to Alan Kline, president of Lynn Ladder and Scaffolding, a big New England manufacturer. “On my drive to work, I often see people using ladders in ways that make me cringe—like they read the label and did the opposite. (They are) accidents waiting to happen.”
As it turns out, a safe setup is more comfortable for your body, which lowers stress, increases efficiency, and improves work quality. Safer, heavier ladders, while more expensive at the outset, last longer and wind up being more economical. Safe ladder use has no secrets—it’s printed right on the ladder—and you can safely reach anywhere you want if you take the time. Because the equipment itself seldom fails, nearly all ladder related injuries result from user errors. Please use this article’s guidelines to stay safe.
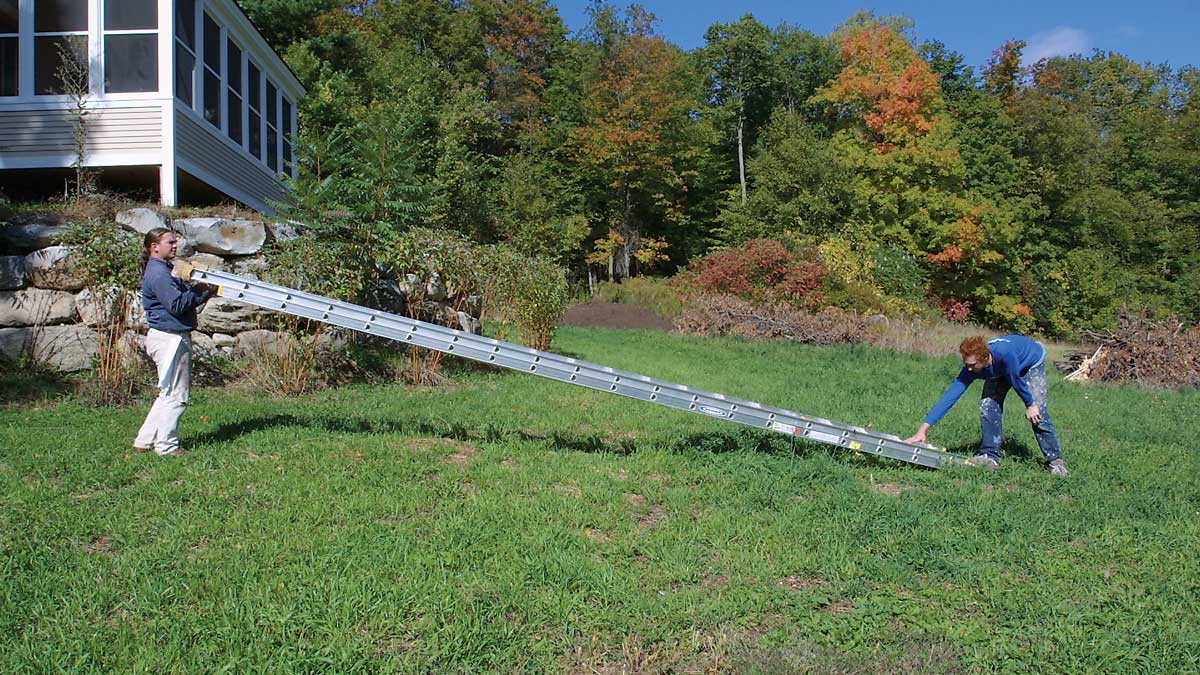
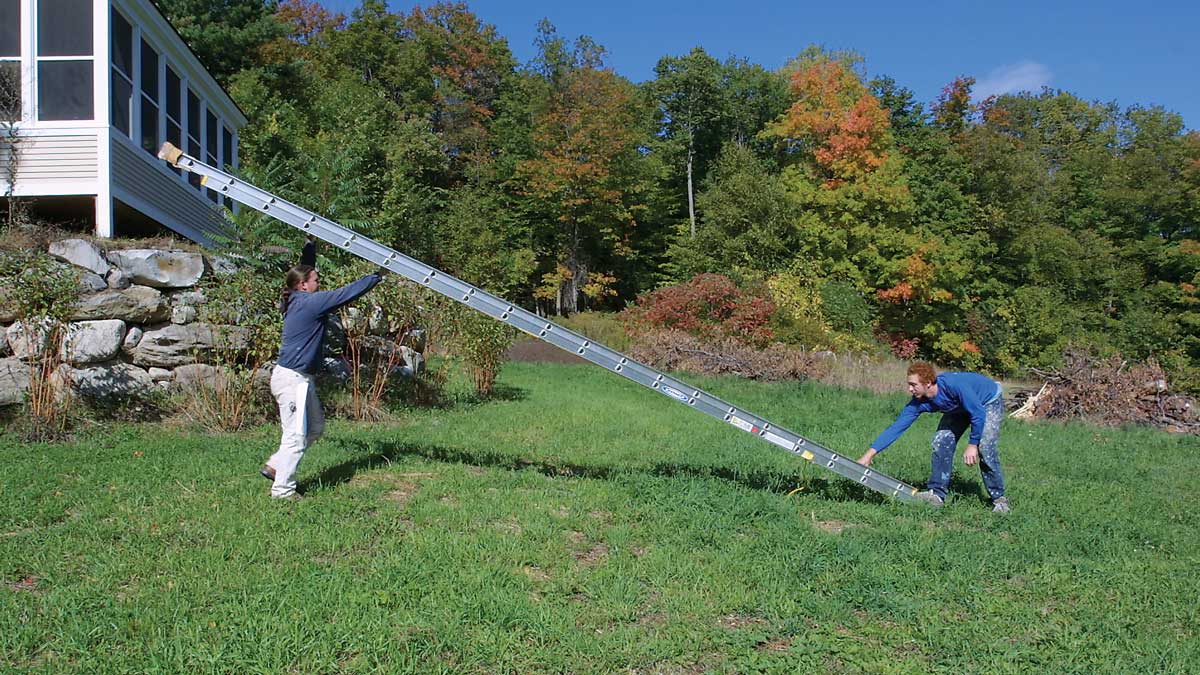
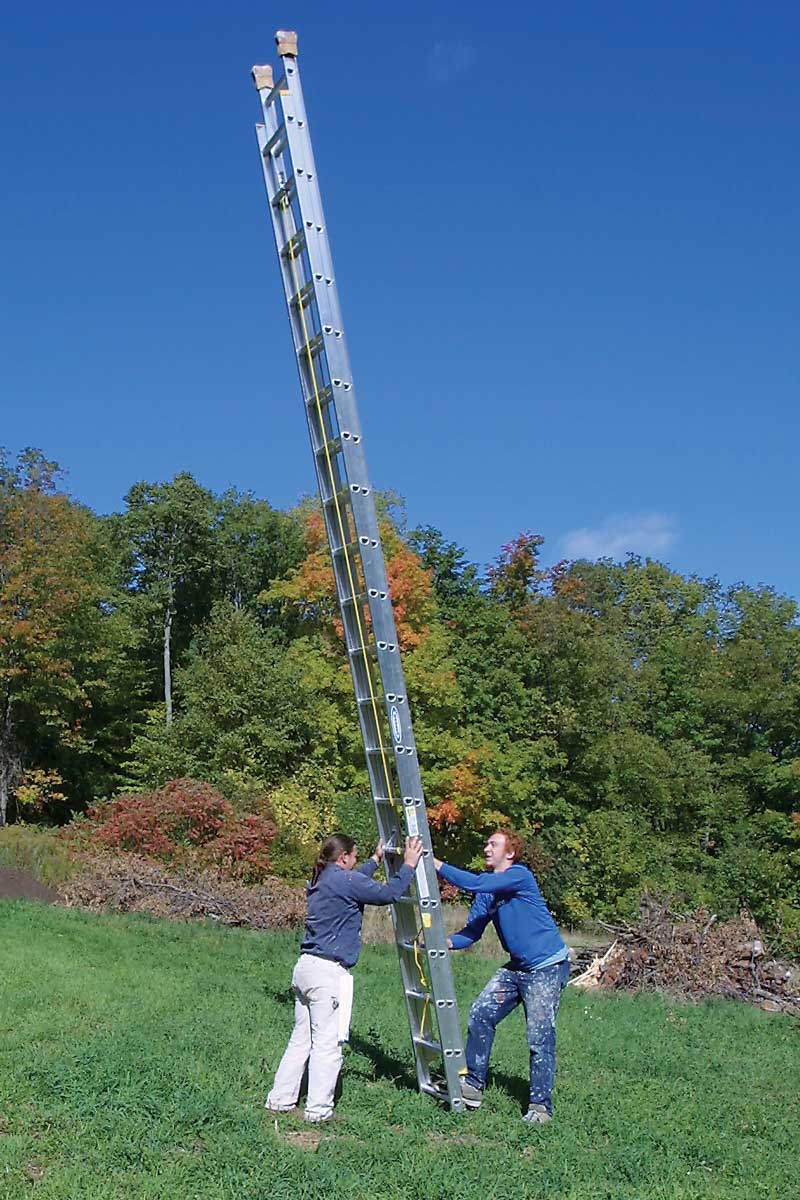
Raising a ladder with help
While one person holds down the bottom of the ladder, the other starts at the opposite end and lifts hand over hand until the ladder is vertical.
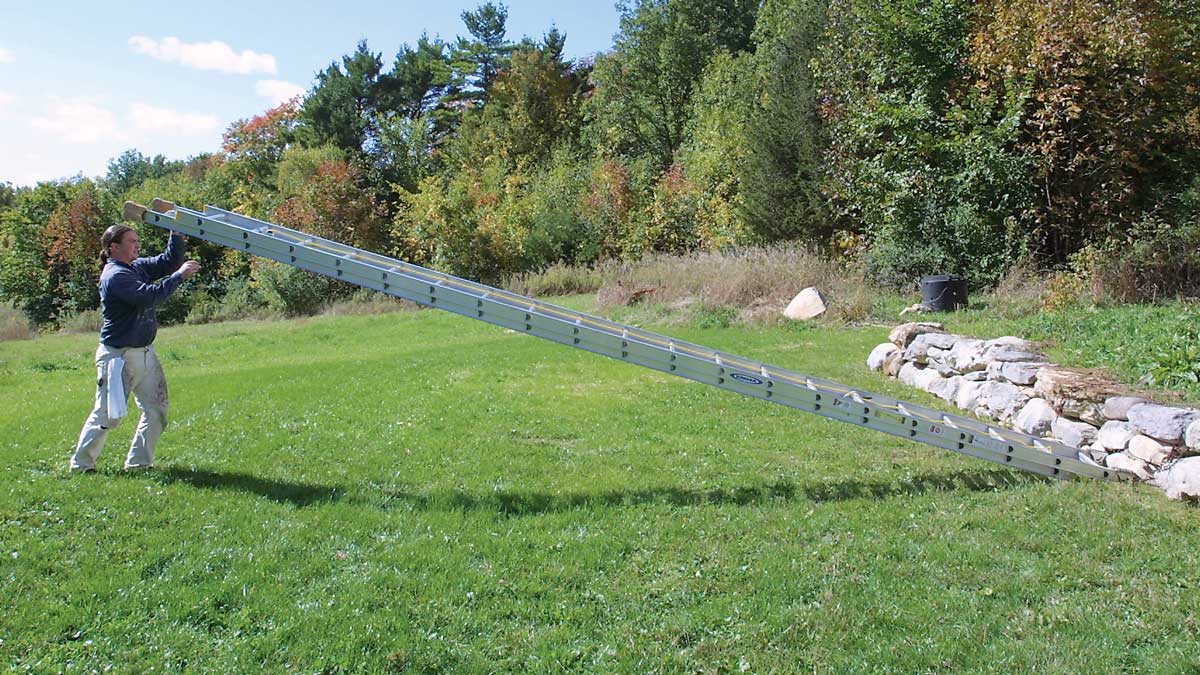
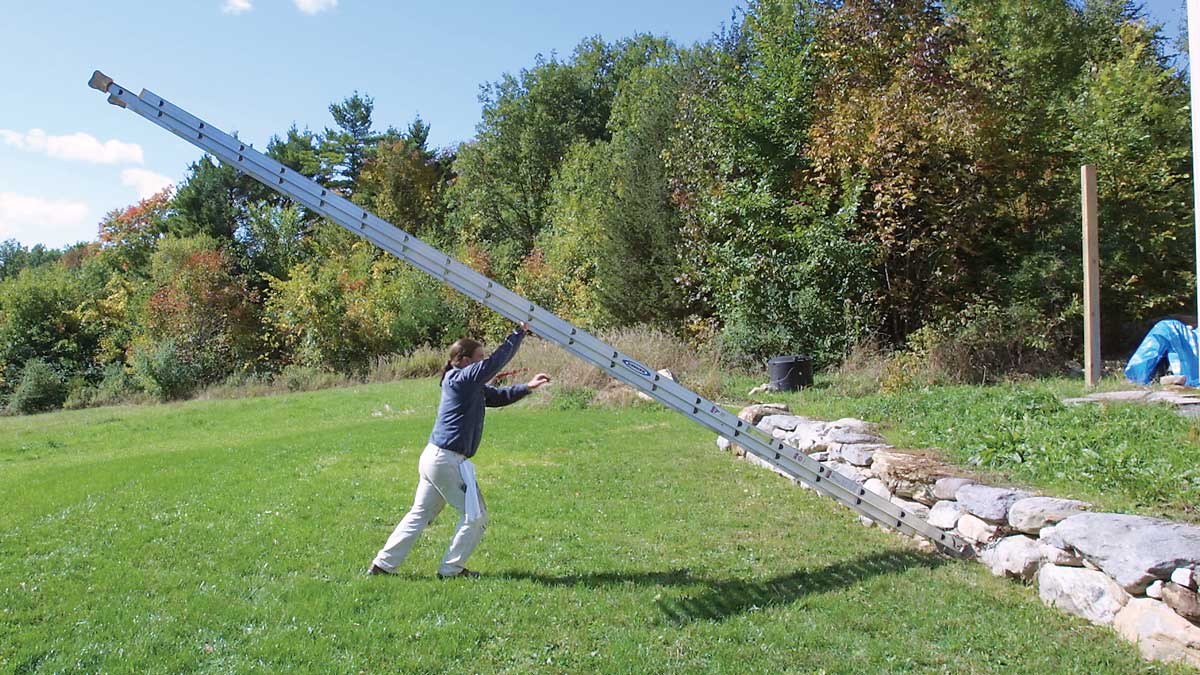
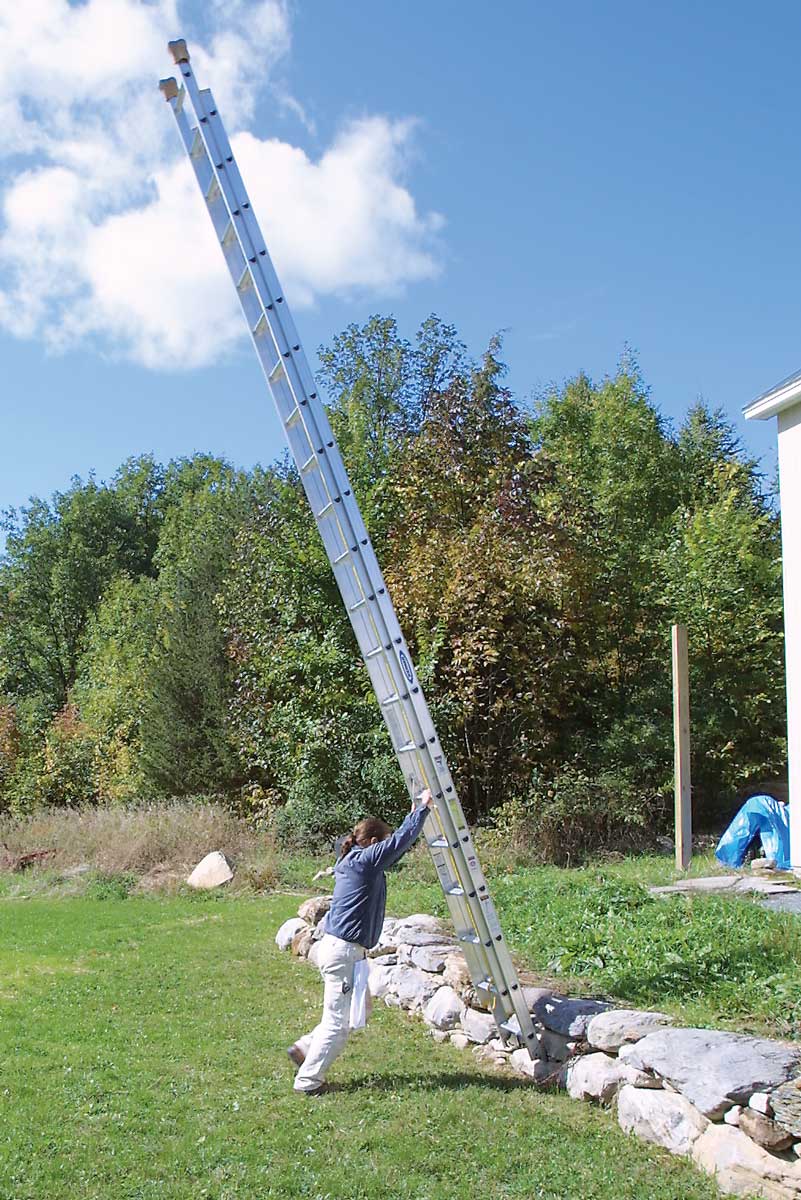
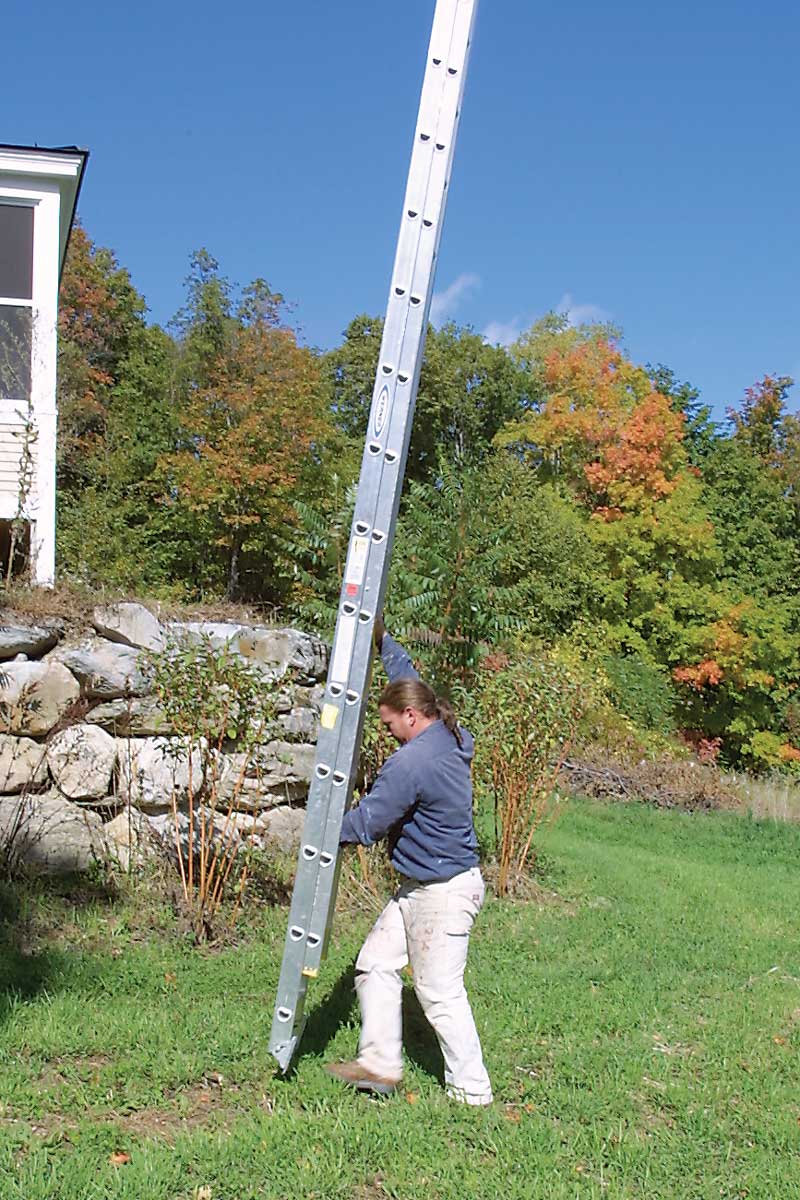
Raising a ladder alone
Secure the ladder by setting its feet against a foundation or wall, and walk the ladder into a vertical position. Alternatively, the feet can be placed against concrete porch steps, the curb, or, as a last resort, stakes driven into the ground.
Safety TipOverhead power lines can electrocute you. Never move a ladder without keeping a sharp eye out for electrical lines. Even a wooden ladder can conduct electricity under the right conditions. |
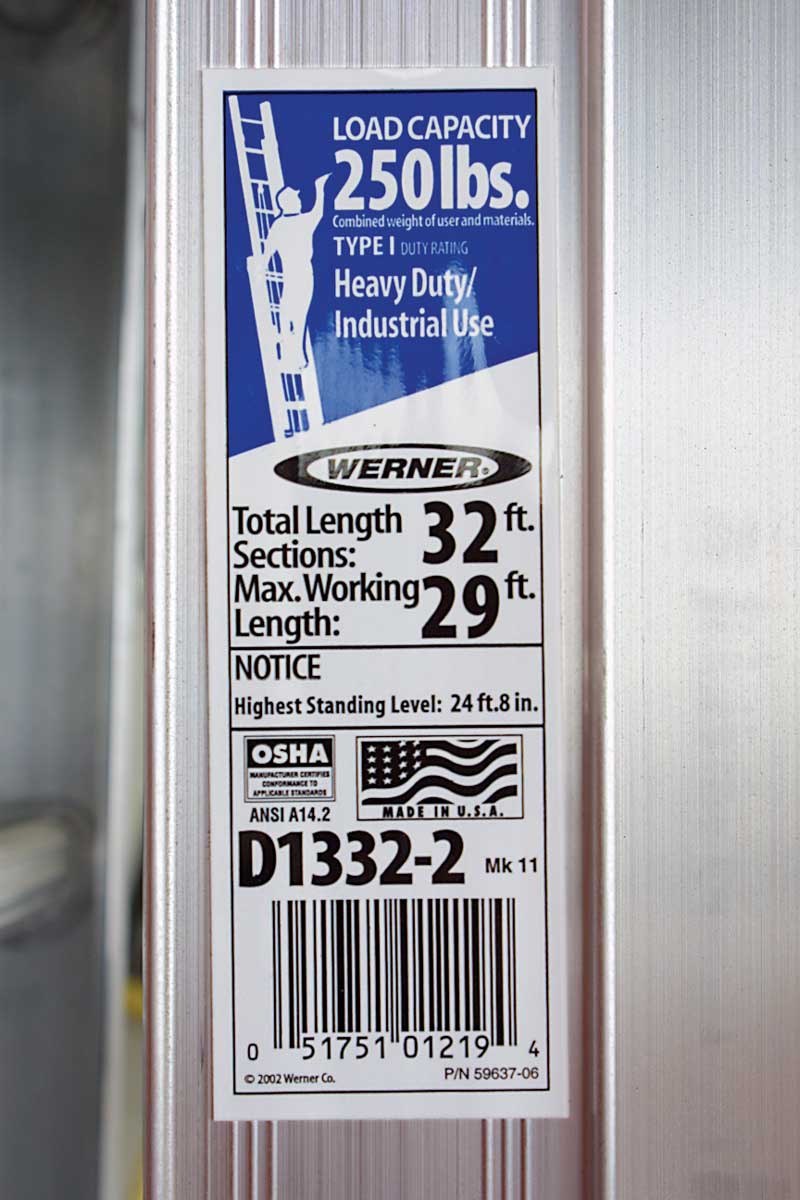
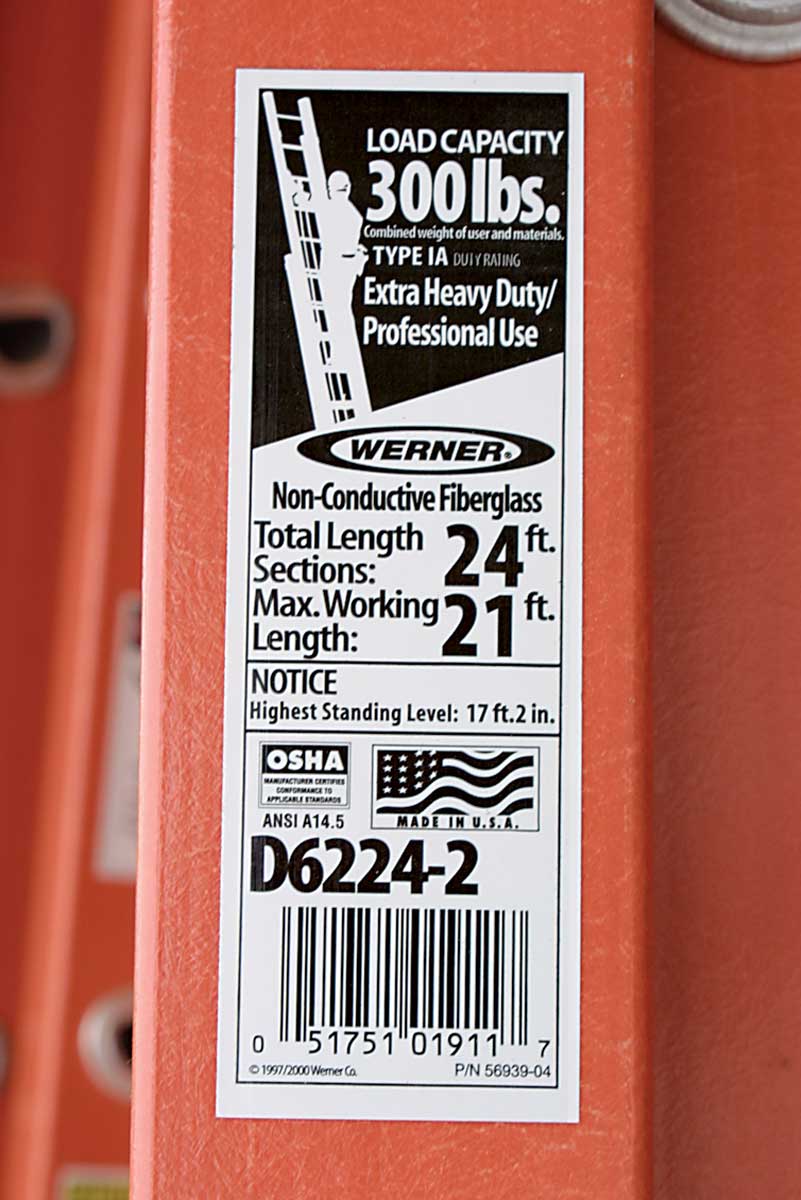
Materials and duty ratings determine a ladder’s useThere’s quite a range of extension-ladder types that are differentiated by their material and the total weight they can carry safely. Created by the American Ladder Institute, ladder ratings are as follows: type III, 200 lb.; type II, 225 lb.; type I, 250 lb.; type IA, 300 lb.; and type IAA, 375 lb. The light-duty type-III ladders are intended for occasional, nonprofessional use. Going up the rating scale gives you a stronger, more durable ladder that costs and weighs more. A 40-ft. fiberglass type-IA extension ladder might cost as much as $800 and weigh between 85 lb. and 120 lb. Aluminum extension ladders far outsell those of fiberglass; wooden ladders are a distant third. The reasons are weight and cost, areas where aluminum has a decided edge. Aluminum ladders can be found with any rating, but it seems that most manufacturers make fiberglass ladders in only type I or heavier. When you’re shopping, choose the lightest ladder that makes you feel comfortable facing the worst-case scenario (fully extended ladder, set at less-than ideal angle, wearing full tool belt, handling heavy materials). You probably will end up with a type II in the shorter lengths and a type I or IA in the longer lengths. Although light weight is always appreciated, if you plan to use ladder jacks and planks, you’d be better served with a heavier type-IA ladder. Incidentally, the type- IAA (375 lb.) ladder rating was developed recently in response to the increased rate of obesity in the American work force.
—B. R. |
Walking a ladder
Plan your route for safe footing, away from electrical wires or other overhead obstructions. Squat slightly and grab a low rung of the base (the ladder’s lower half) with your strong hand, reaching overhead with your off hand to grab a high rung. Don’t look up. You can judge how vertical the ladder is by looking at the bottom 4 ft. while watching your footing at the same time. On the other hand, if the ladder is fully extended, plant your feet wide, look up, and move the ladder a foot or two at a time. It may be safer to lower the ladder, move it, and raise it again.
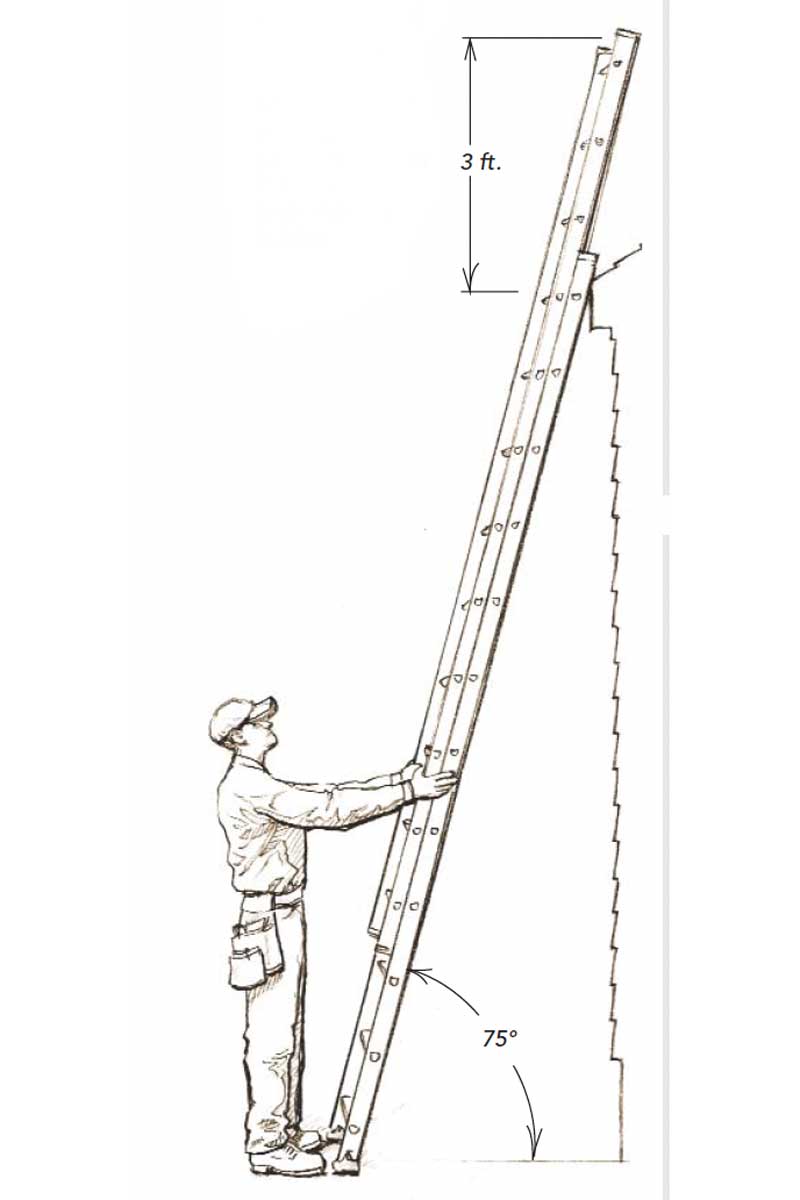
Safety TipKeep 3 ft. above a roof Keeping the ladder top above the roof edge means safer transitions between the roof and the ladder. Maintain the proper angle Most manufacturers and OSHA recommend setting a ladder at a 75 angle. The three ways to approximate this angle: 1. Eyeball the L-shaped guide on the ladder’s safety sticker. 2. Set the ladder so that its base is 1 ft. out from the wall for every 4 ft. of vertical rise. 3. Stand with your toes at the foot of the ladder, hands outstretched and just touching the rungs. |
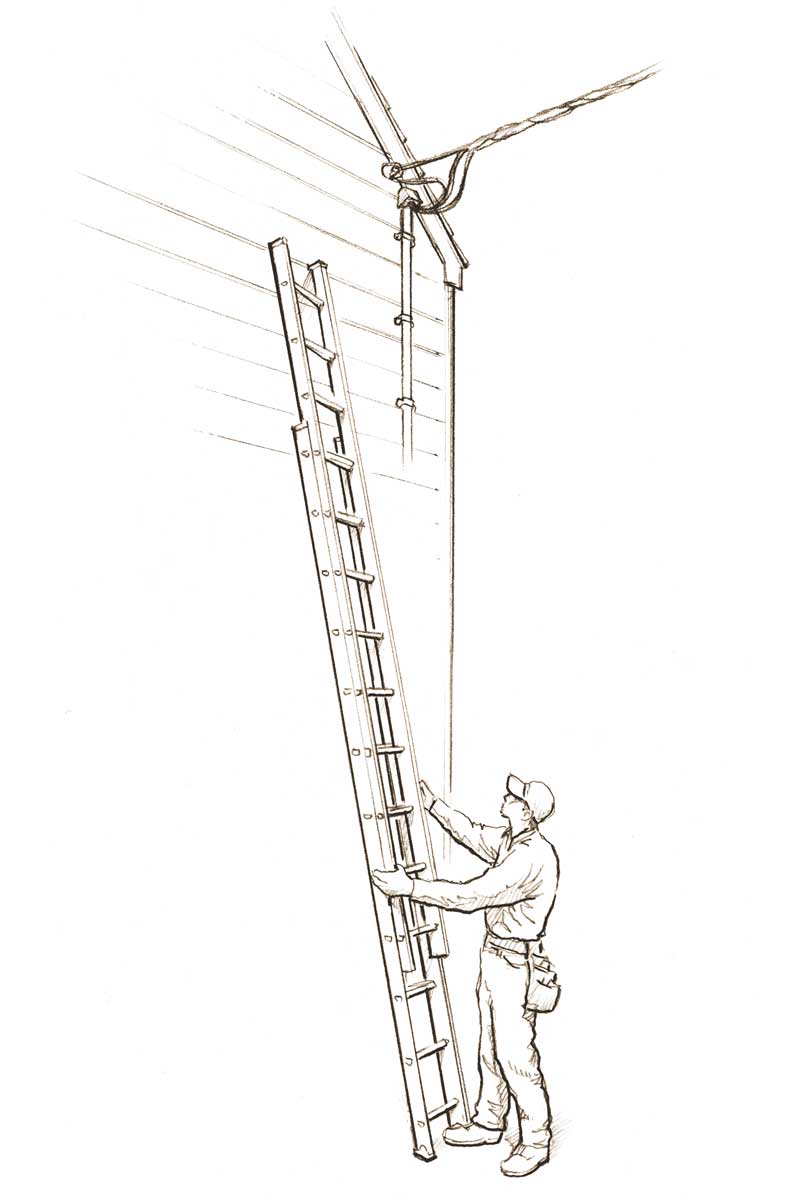
Extending the ladder
 |
Both ends of the rope should be tied firmly to the bottom rung of the top half, the flyer (photo above left). With your feet planted firmly, lift the flyer by hand one or two steps at a time until it is over your head. Reach around behind the ladder with your strong hand and pull down on the rope while pulling up on the rope in front with your other hand (photo above right). Hold the front rope tight while you get a new grip on the rear rope.
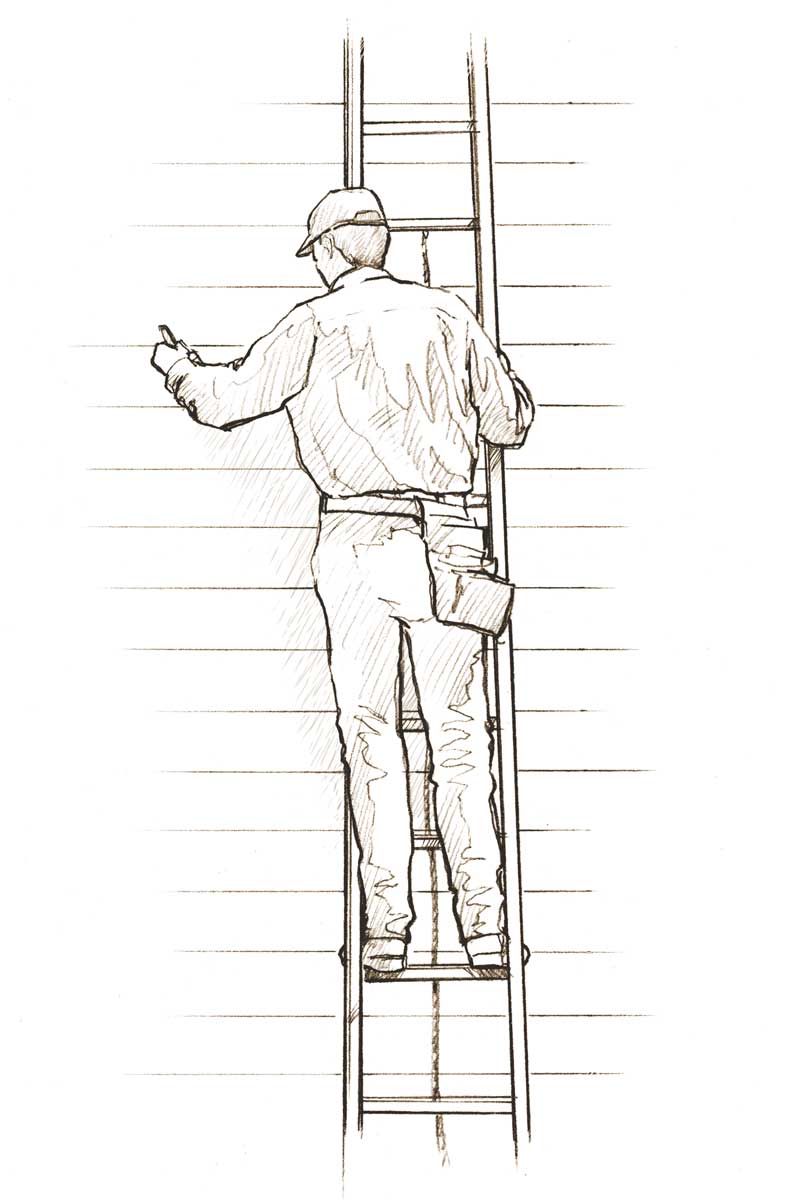
Safety TipDon’t reach If your belt buckle goes outside the rails, it’s time to move the ladder.
|

Tips for securing a ladder
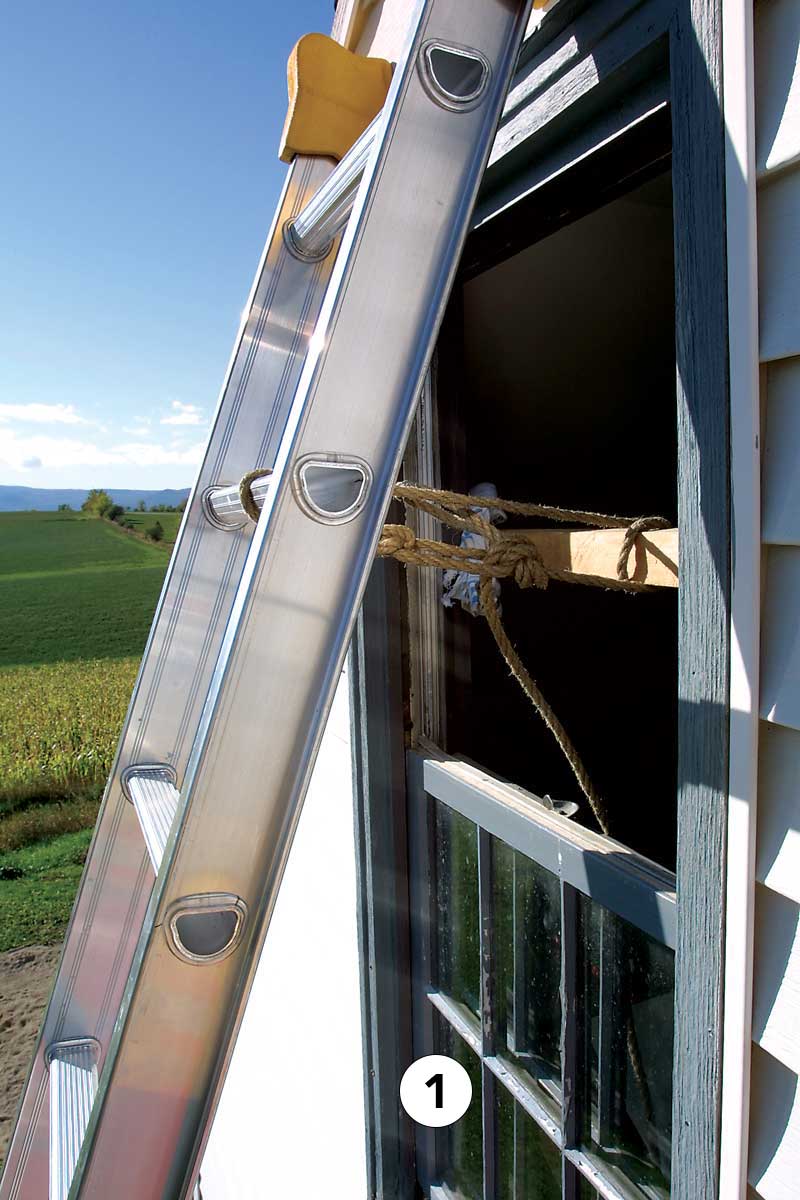 |
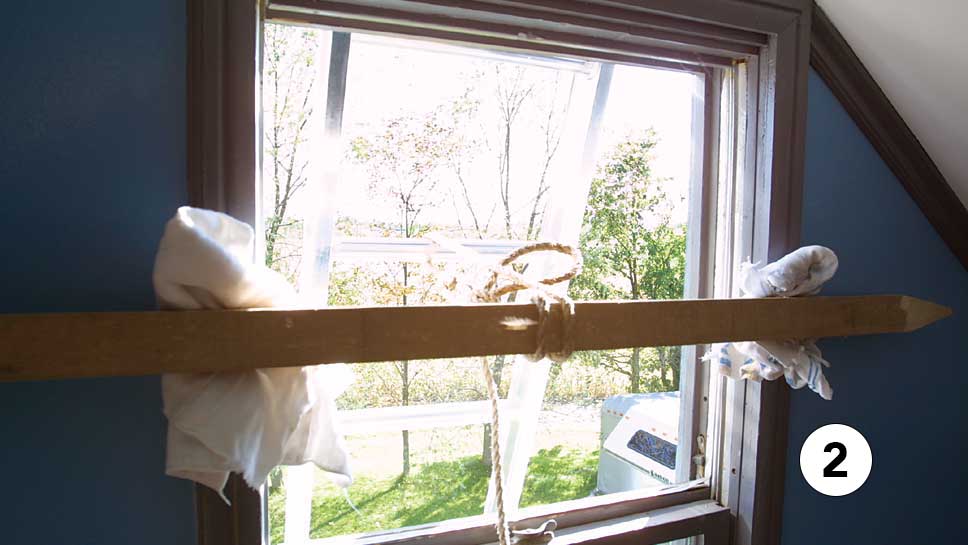
Top of the ladderIf the ladder feels unsafe, it can be tied to a padded 2×4 1 that’s placed against the upper portion of a window’s interior trim. The higher location keeps the 2x in position when the rope is tightened. 2 |
 |
 |
Bottom of the ladder
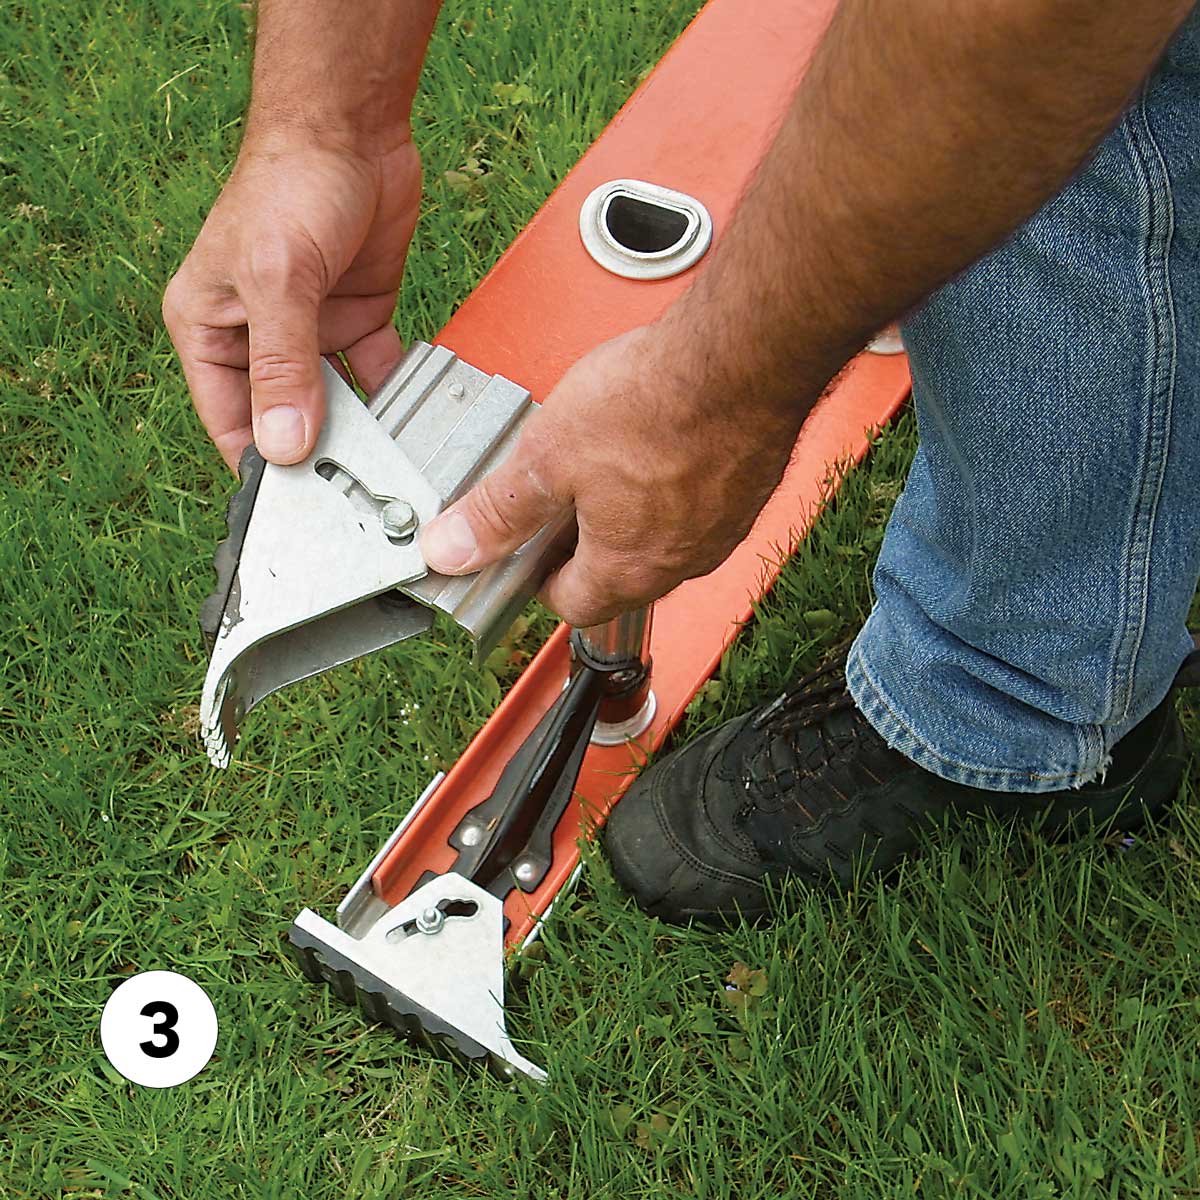
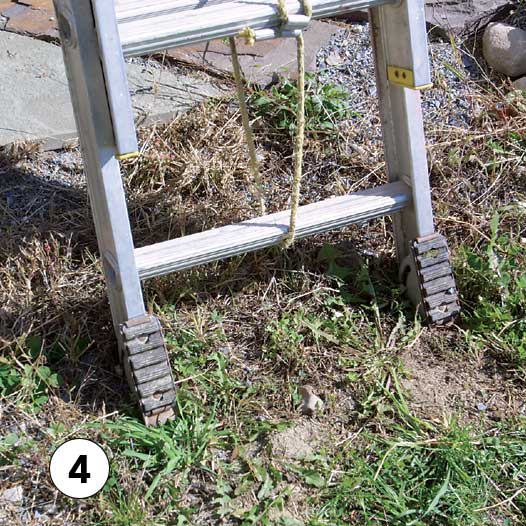
Ladder feet have teeth 3 that can be angled into the ground for stability. Rubber treads 4 provide traction on smoother surfaces. Stakes driven into the ground 5 can secure the base of the ladder.
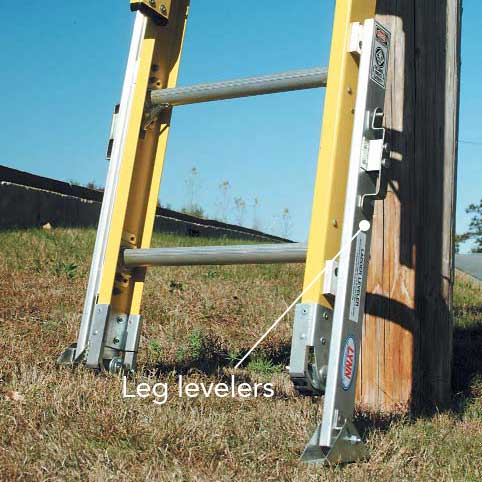
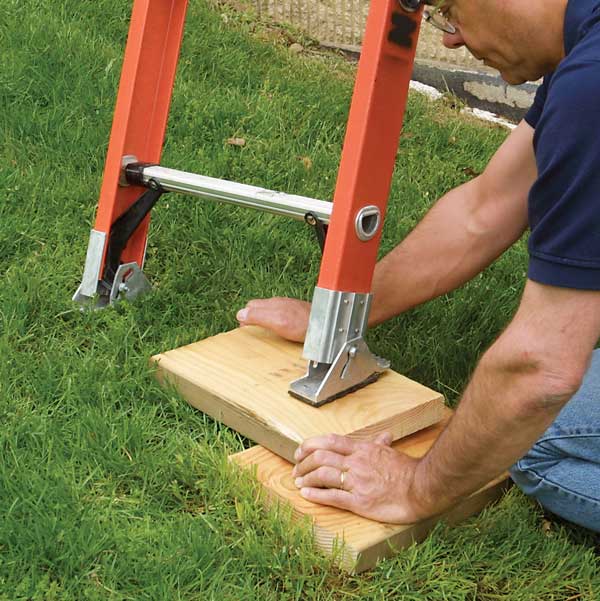
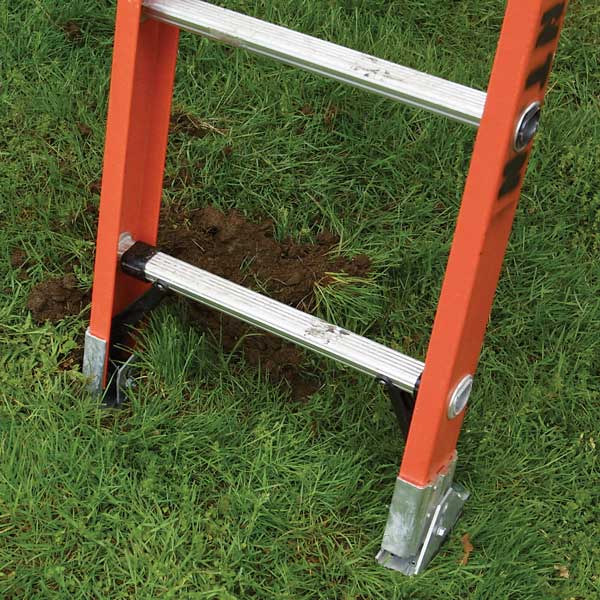
Three ways to level a ladder
One way to keep the ladder’s feet on an even keel is to use leg levelers (photo below left) that bolt to one or both legs and adjust to uneven ground. The author often levels one foot with a maximum of two 2×10 blocks (photo below middle) or excavates below the opposite foot (photo below right). To test the balance, just hop on the bottom rung, and pull the weight of the ladder off the wall. The ladder will tend to tip if one side is low or soft.
 |
 |
 |
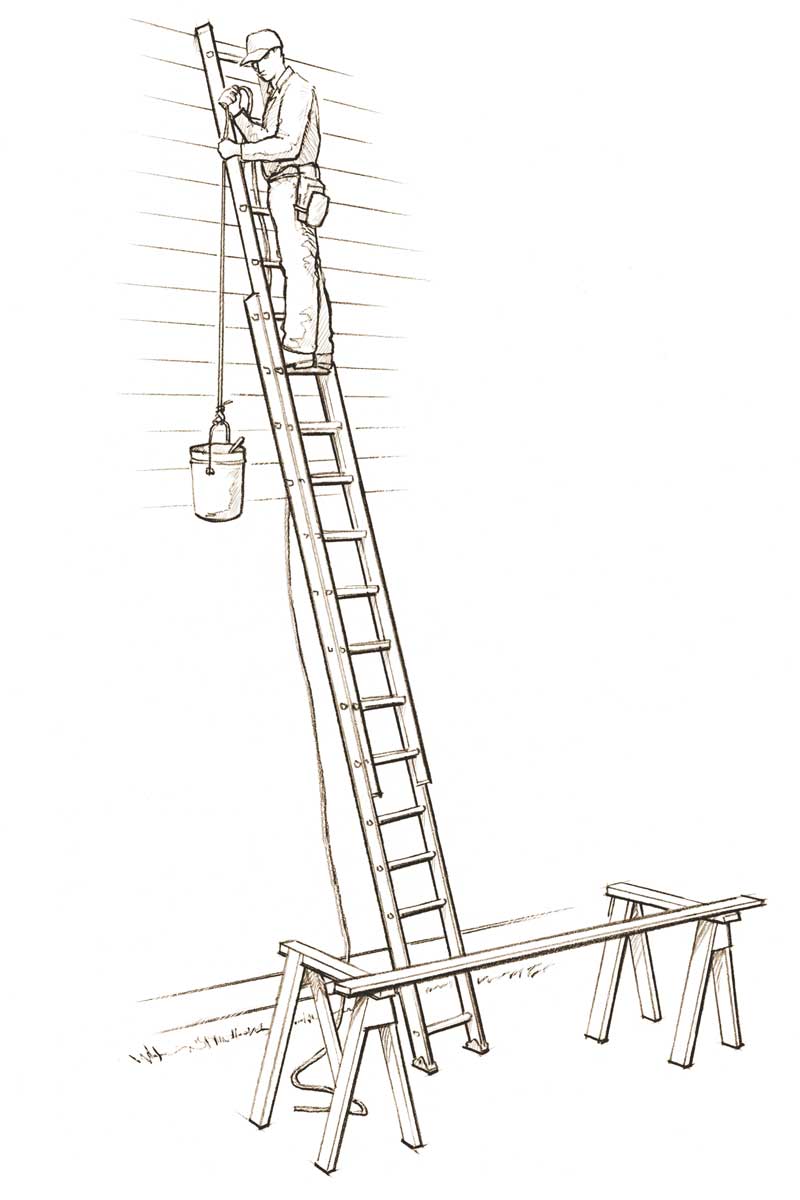
Safety TipOSHA recommends a hand line as a safe way to haul tools up and down. Keep traffic away from the ladder Sawhorses and planks, surveyor’s tape, or even signs alert other workers. If you are near a driveway, park your vehicle where it protects your ladder from inattentive drivers. |
Preventing house damage
Ladders can create a lot of cosmetic damage on a finished house. When an unsecured ladder is leaning unattended against a house, a gust of wind, a bump from a load of planks, or a yank on a power cord can send it down in a damaging arc, or worse, hurt someone. To avoid leaving a ladder unattended, it’s a good idea to have all tools and materials nearby before you set up. Also, take it down at. lunchtime, or tie it in.
|
|
|
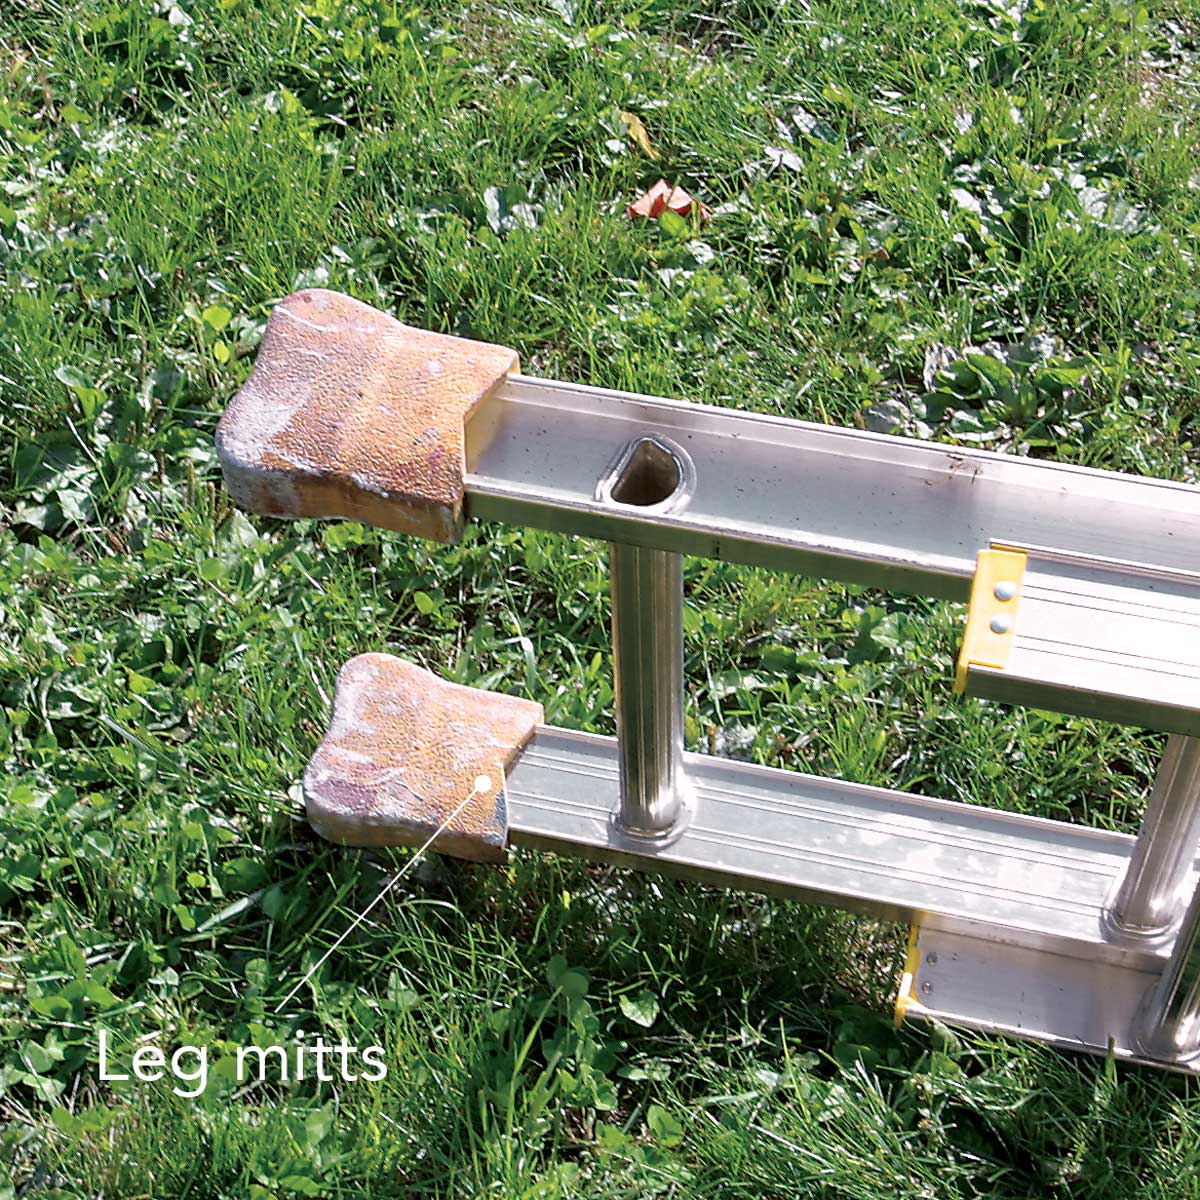
Even with the plastic end pieces found on most ladders, you risk leaving marks or dents on the siding or trim of a finished house. The first line of defense is ladder mitts (above photo left) on ladder ends. These mitts get dirty quickly, though, and you may need to cover them with a rag secured with zip ties or duct tape to keep painted surfaces clean.
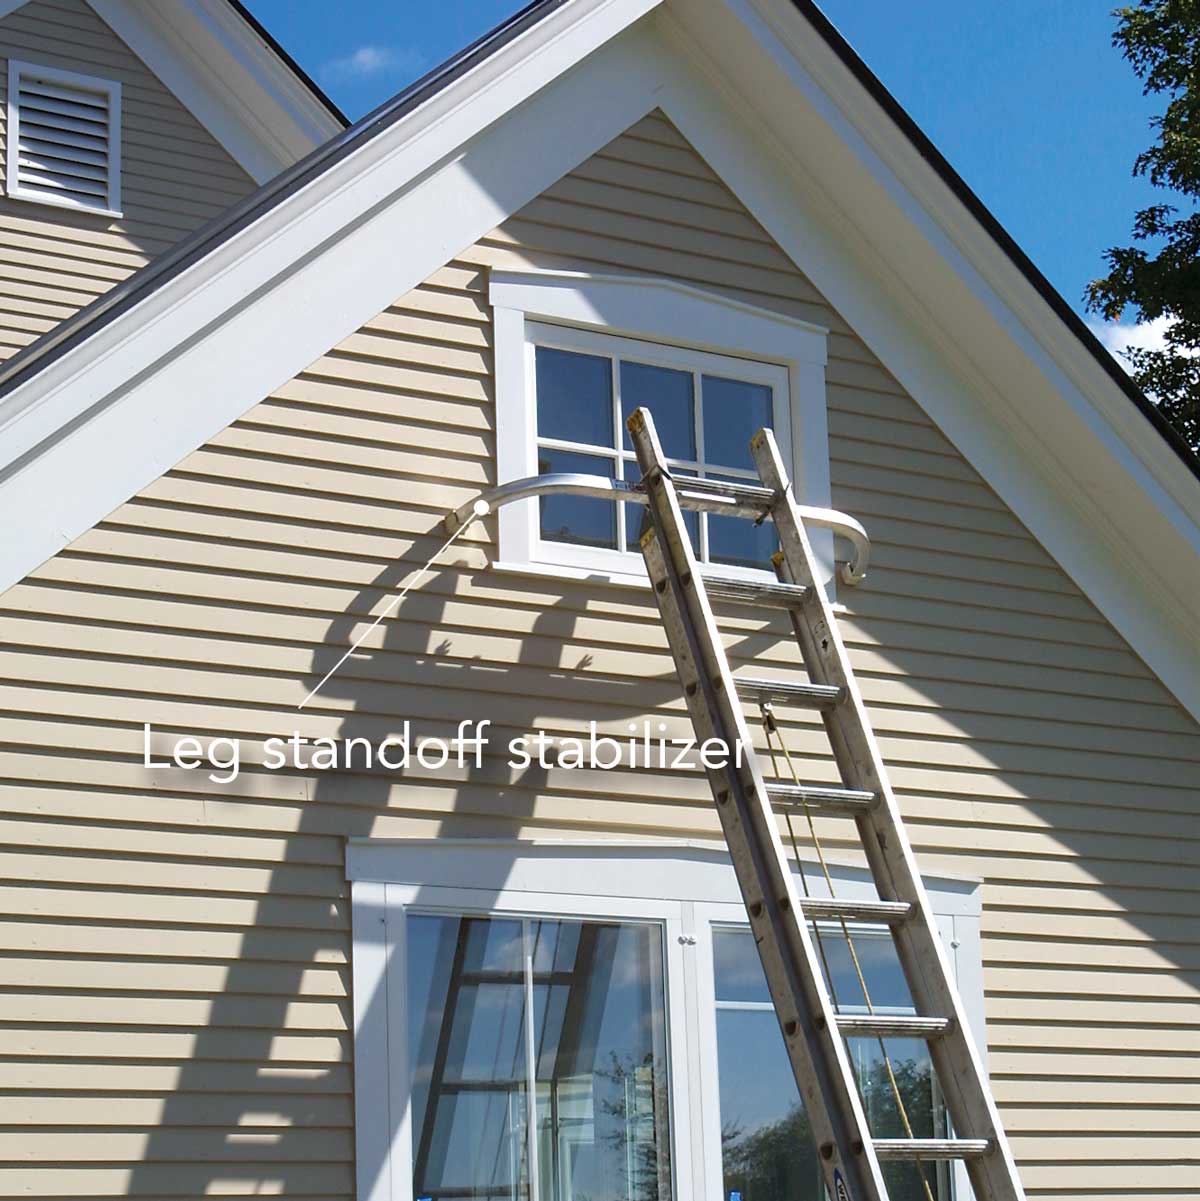
Drip edge, shingles, and rain gutters are damaged easily. This is where a standoff stabilizer comes in handy. Also called spreaders (above photo right), these simple U-shaped or C-shaped aluminum braces keep a ladder off the wall. Most stabilizers are one piece, 40 in. or 48 in. wide, with a standoff of 10 in. or 12 in., and they attach to the ladder rungs with U-bolts and wing nuts. Better-quality models clip to two rungs for a stronger attachment.
Adjustable stabilizers offer up to 39 in. of standoff. Attached 40 in. from the top of the ladder, they allow you to reach the most delicate roof while your weight rests on the wall below. Some stabilizers have large round pads that spread the load over a larger area. Be sure yours at least has rubber tips to protect painted surfaces.
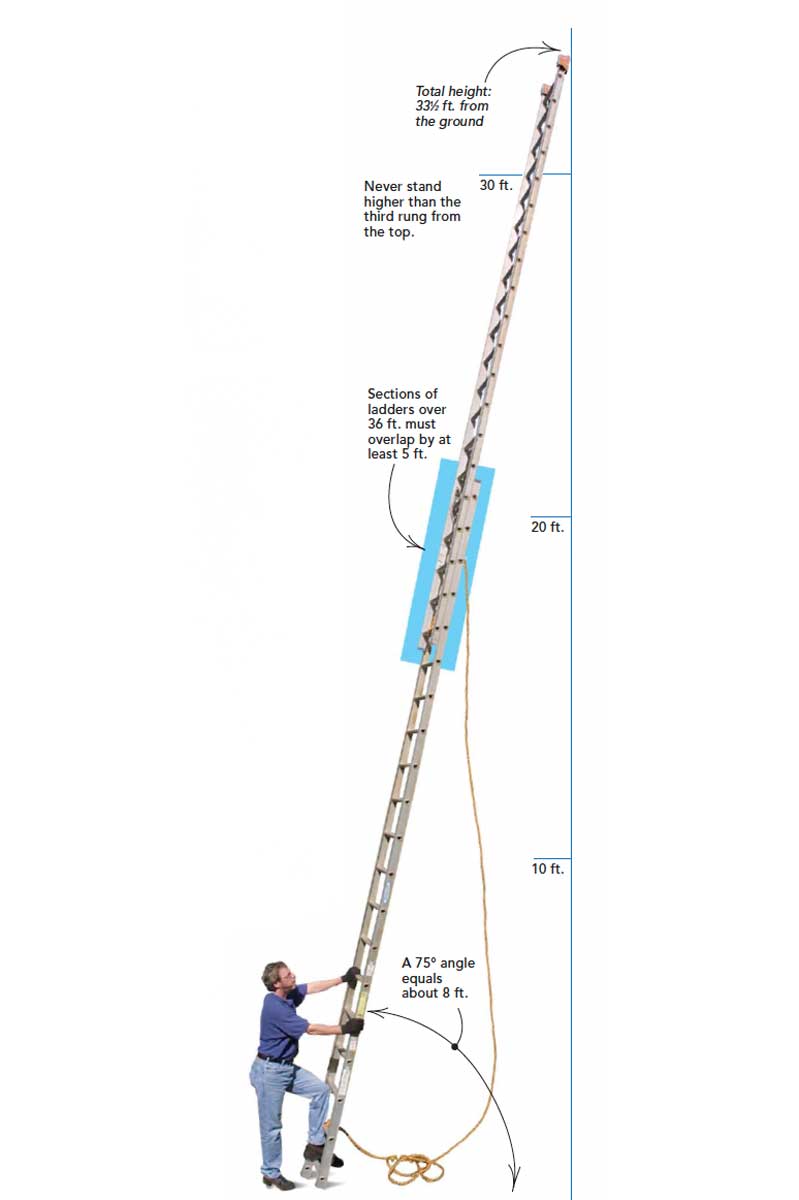
How far does a 40-ft. ladder reach?Commonly available from 20 ft. to 40 ft. in 2-ft. increments, extension-ladder lengths are not actually the length of the extended ladder, or the height you can climb on it. A 24-ft. extension ladder is comprised of two 12-ft. sections that must overlap by at least 3 ft.; over 32 ft. requires a 4-ft. overlap; over 36 ft. requires a 5-ft. overlap. A 40-ft. ladder leaned at an angle of 75 and extended to its full length of 35 ft. will touch the wall at a spot approximately 331⁄2 ft. from the ground. |
Reader Response
Firefighter says, “Grab the rungs” The article “Extension Ladder Basics” (FHB #157, pp. 86-91) recommended that when climbing or descending a ladder, you should grab the rails, not the rungs. As a former professional firefighter from the Los Angeles City Fire Department, I can state categorically that this is an all-too-common mistake. Our training in the use of ladders emphatically stated that the safest hand grip on the ladder is to place your hand straight out in front of your face near the center of the rung, maintaining one hand on the rung at all times, when ascending or descending. In the event of a misstep with your feet, your grip on the rung will afford you the best grip to prevent falling. Trying to sustain your entire body weight by gripping the rails is not as effective or safe.
Billy Romp is a freelance writer and former steeplejack living in Vermont. Photos by Charles Bickford, except where noted. Drawings:Dan Thornton
From Fine Homebuilding #157
Fine Homebuilding Recommended Products
Fine Homebuilding receives a commission for items purchased through links on this site, including Amazon Associates and other affiliate advertising programs.

Paslode Cordless Finish Nailer (IM250A)
Metabo HPT Impact Driver (WH18DBDL2)

Bosch Wall Scanner (GMS 120)

View Comments
Great Article! Thank you for sharing! Need safety climbing equipment? Contact Formetco Hardware (https://www.formetcohardware.com) for more information on safety types of equipment.