I-Beam to the Rescue
When a common remodeling project can't be accomplished with a common material, this builder turns to the strength of steel.
Replacing a bearing wall or a post and beam with a steel beam means determining where the beam ends are going to land, and the load path to the foundation. Builder Josh Edmonds walks through the process of installing steel I-beams in a farmhouse remodel, from building temporary walls and cutting out the old beam to raising and fastening the new beam in place.
A Steel-Beam Retrofit
We all aspire to building and remodeling projects that showcase our best design ideas and craftsmanship, but the reality is that frequently we find ourselves doing quite mundane work, like the steel-beam retrofit featured here. The good news, at least for us, is that remodeling projects like this are common and usually pay better than more fussy finish work. Even if that is just because I often underestimate the number of hours that the fussy work requires, it makes sense for us to tackle projects like this. And they do have an impact. This project opened the kitchen and living spaces in an old farmhouse, offering the new homeowners a more modern first-floor plan. It’s a common request in our remodeling work.
Don’t Be Scared of Steel
Steel isn’t our first choice for a project like this. Whenever possible we use built-up LVL beams. Our local lumberyard stocks them and we can install them one ply at a time. Solid-wood and engineered-wood beams have limitations, though, and for long spans, the beams can get very tall. When wood reaches its span limit, or the required beam height just won’t fit in the space, we turn to steel.
In the preconstruction phase of a project like this, I often do some preliminary load calculation. There is an old book by Fred Hodgson, published in 1902, called Modern Carpentry: A Practical Manual—it has some great chapters about loads and how to calculate stresses. And there are load charts available that spec how much weight per linear foot an LVL ply can support for given spans. If loads aren’t uniform, and there are point loads, the math gets more complicated. Sometimes I can determine if an LVL beam will work, or if steel will be necessary, and this is useful to drive conversations with designers, homeowners, and my crew. It also helps me get an idea of what the project will cost. At some point in the process an engineer will be required to dial in the load calculations, beam size, fastening, and other installation details.
If you’re a carpenter and haven’t worked with steel, there’s nothing to fear. I look at steel as a special hardwood that just happens to be magnetic. Even if the beam needs on-site modification, you most likely already have the tools you need to cut or drill the steel. And if you don’t, just look at it as an opportunity to pick up some new toys.
Determine the Load Paths
For this project, we were working on an old timber-frame house that had posts in the middle of the living room and the middle of the kitchen, both on the first floor. The clients wanted to remove them. The rooms are not connected, but are mirror images of each other at opposite ends of the house. They both had the same scenarios, so we did the work you see here twice on this project.
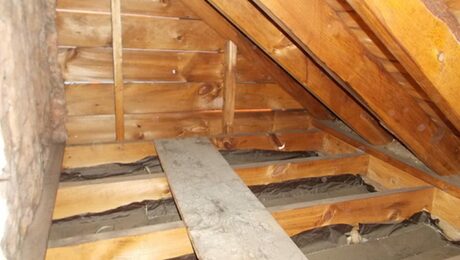
The first step of planning this work is to trace the load paths in the building—in other words, figure out what is resting on what. How is the roof built? Are there rafters or trusses, and where do they land? What about the floors? Are there any large openings that might have posts (point loads) hidden in walls? Basic observation usually provides most of the information we need to determine what loads a beam will carry.
In this house, the roof load was traveling down the exterior walls. The posts we would be removing were in the middle of the house, so they did not support the roof load at all. The next step was to determine where the load from the floors was resting. It was easy to see that each post was carrying half the floor load. Half was distributed on exterior walls and the rest was coming down these posts.
The existing floor system was 8 in. deep—pretty shallow for a wood beam—and the span was almost 15 ft. If we used LVLs, it would have required three or four 14-in. plys. This house does not have high ceilings, so ceiling height is at a premium. We were able to carry the same amount of weight with an 8-in. I-beam, which meant we could have a continuous finished ceiling unobstructed by a boxed beam. I-beams are usually specified by height and weight per foot. The two beams we used are W8x28, which specifies a wide-flange I-beam that is 8 in. tall and weighs 28 lb. per linear foot.
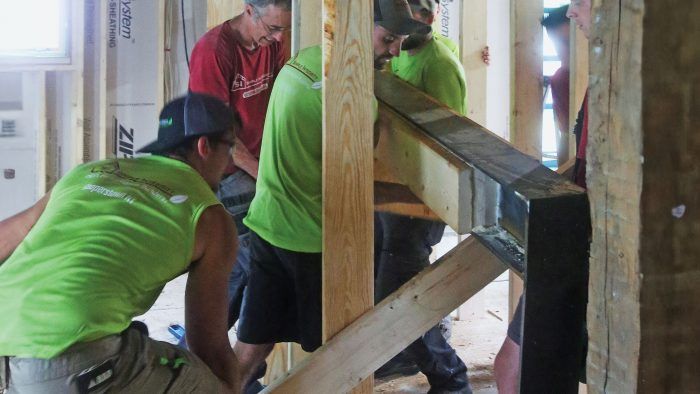
The Heavy Lifting
There are various options to move heavy beams around a job site that range from PVC rollers to heavy machinery to Popeye-like effort. We had a large crew on-site, so we were able to walk the beams into place and set them at chest height before starting the work. When it was time to lift the beams into place, we used simple hydraulic jacks and a lever that was essentially a stick of lumber screwed to a stud on one of our temporary walls. Material lifts are affordable and a safe way of lifting heavy beams too. If we’d had a light crew on-site, we might have used a material lift or a combination of cribbing and hydraulic jacks.
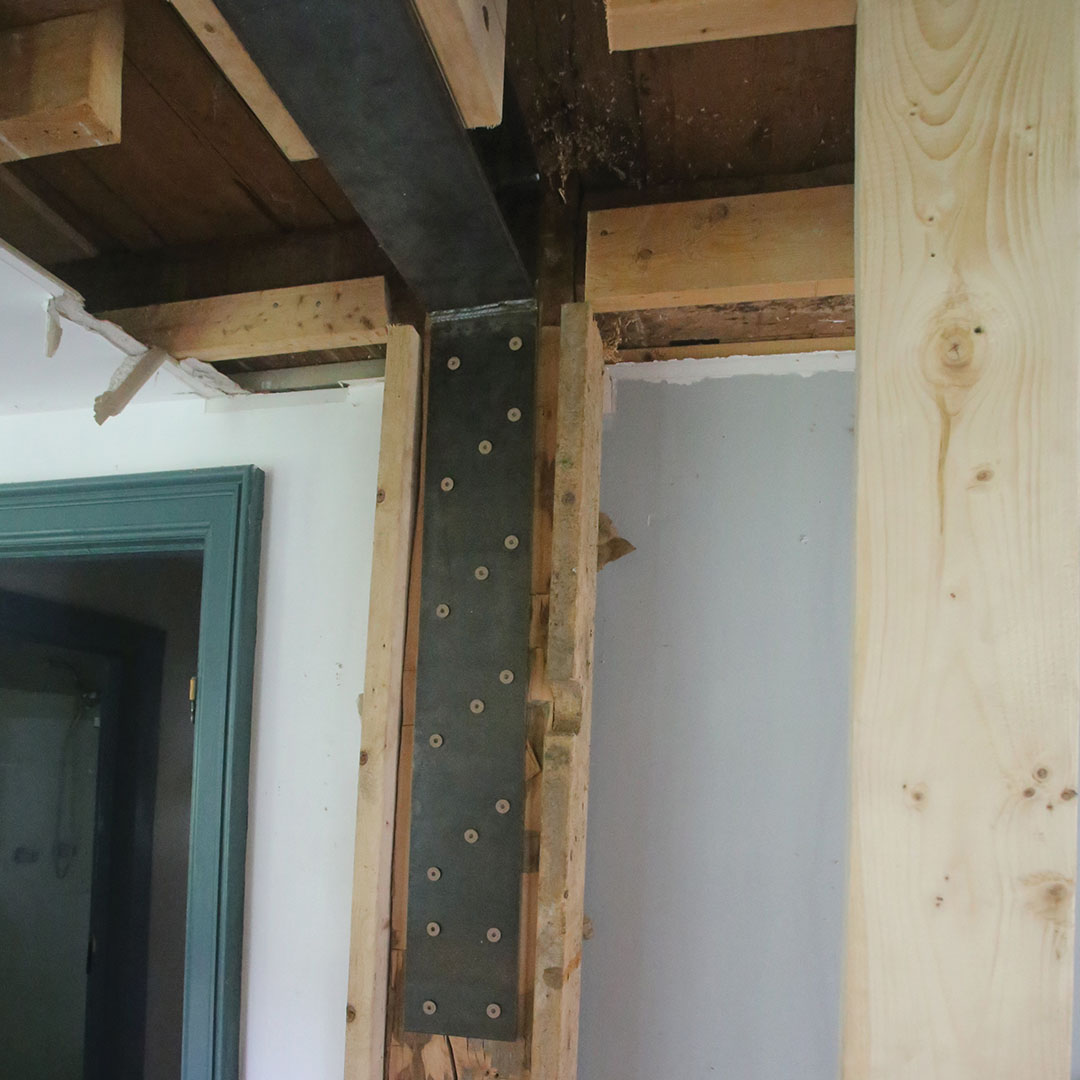
The process for installing a structural beam flush in a ceiling is similar for metal or wood, but we decided not to modify the timber frame to create a place for these beams to sit. The timbers on either end were acting as tie beams (they keep the building from spreading) and we wanted to avoid cutting them to slide a new beam in from an end. Without any roof load, our total load was not significant for a steel beam. The engineer was able to determine the shear strength needed to support each beam using long plates with an exact number of fasteners. This is similar to how joist hangers work; essentially, we created a specialty joist hanger by welding a flange to both ends of each beam. The flange was predrilled for structural screws, which we used to fasten the beams to the posts. That allowed us to slide the beams straight up and fasten them into the face of the beech posts, leaving the tie beams intact.
Because you are working between two temporary walls to do this job, space is tight. You have drywall repair to do no matter what, so don’t be afraid to cut back more of the drywall than you think you need to. We cut back about 18 in. to 24 in. of ceiling drywall on each side of the beam—any less usually doesn’t save time or money in the end.
If there are 150 million existing houses in the United States and only one million new homes are built each year, new construction is only a tiny piece of opportunity for builders. Being able to repair and upgrade existing homes safely and professionally is a beneficial skill set. A bit of creativity goes a long way too.
7 Steps to a Steel Beam Retrofit
Whether you are replacing a bearing wall or a post with a beam made of solid wood, engineered wood, or steel, you always need to determine where the beam ends are going to land—and the subsequent load path to the foundation. On this job, we replaced two beams that had existing posts on either end. We fit the new beams between the posts and fastened them to the posts by driving structural screws through predrilled holes in a flange welded to either end of the beams.
Step 1: Bring in the Beam
We were fortunate to have a big crew on this job, so we were able to carry the beams from the trailer to the house and slip them into the building through a window. Remember, in most cases you need to have the beam in place before building temporary support walls.

Step 2: Build Temporary Walls
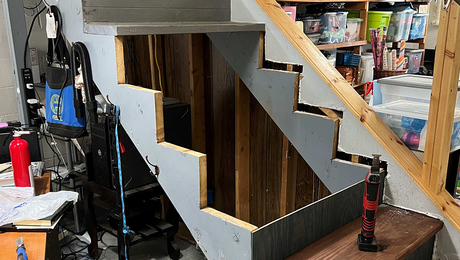
When replacing a beam that supports floor joists on both sides, we build temporary walls on each side of the beam. We leave enough room to work but keep the walls close enough to do their job. It is important to build temporary walls on each floor until you hit a surface with bearing. In this case, we built the same temporary walls below these in the basement. If we had skipped the walls in the basement, we would have transferred all the load onto the midspan of floor joists that were not designed to carry that load. The temporary walls can be useful too. If you screw a strut between them, you can catch the beam that is coming out or help support the new beam when it is being raised.
 |
 |
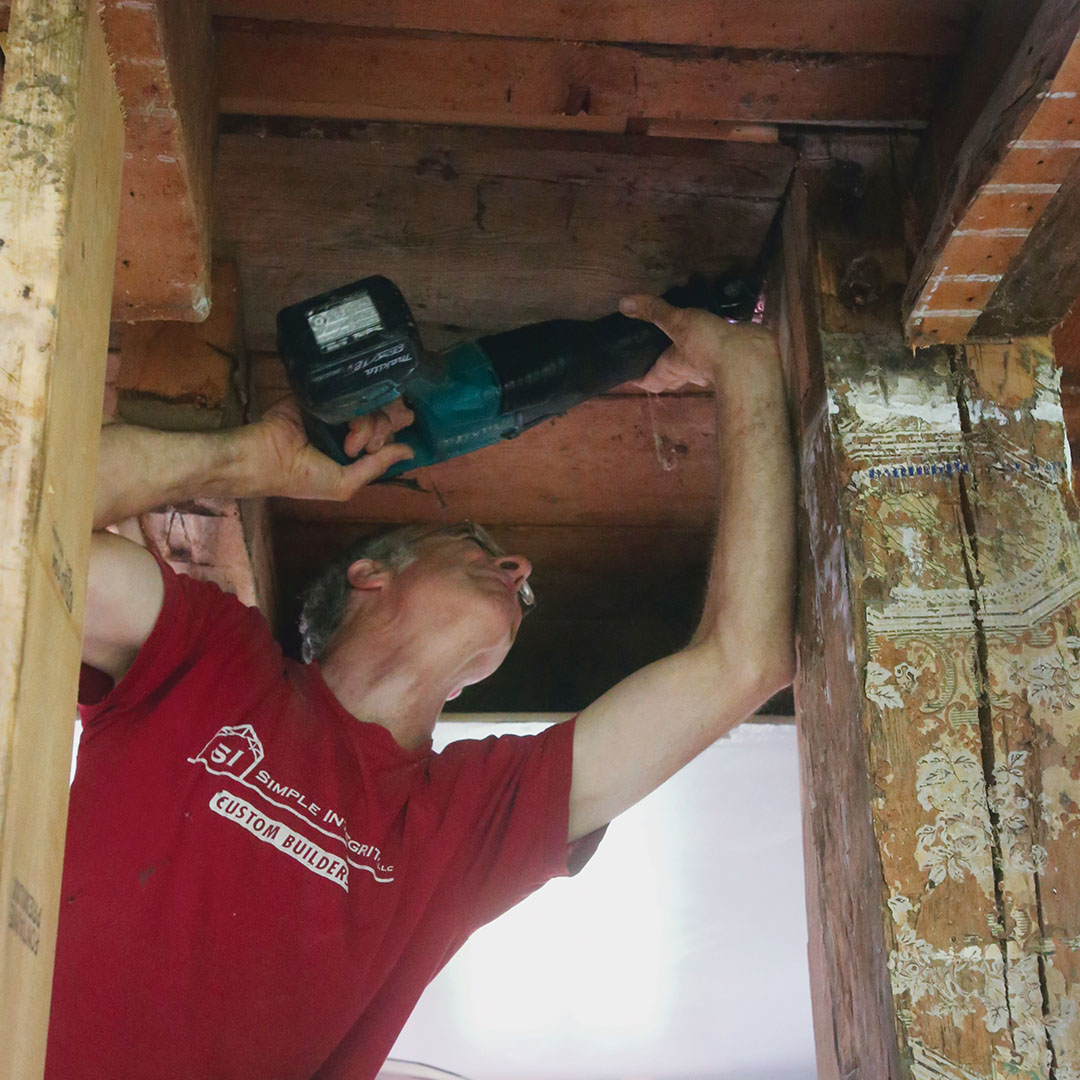
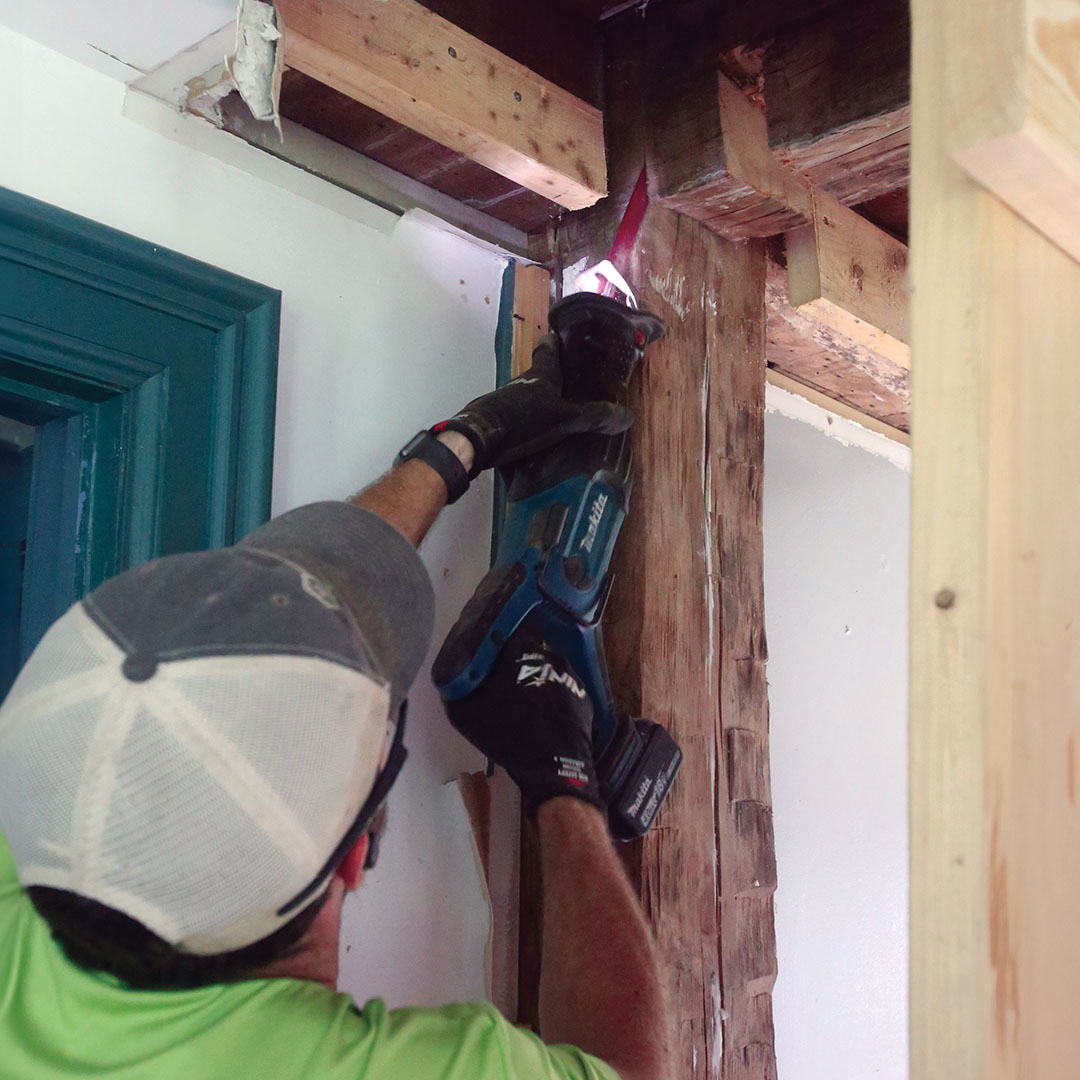
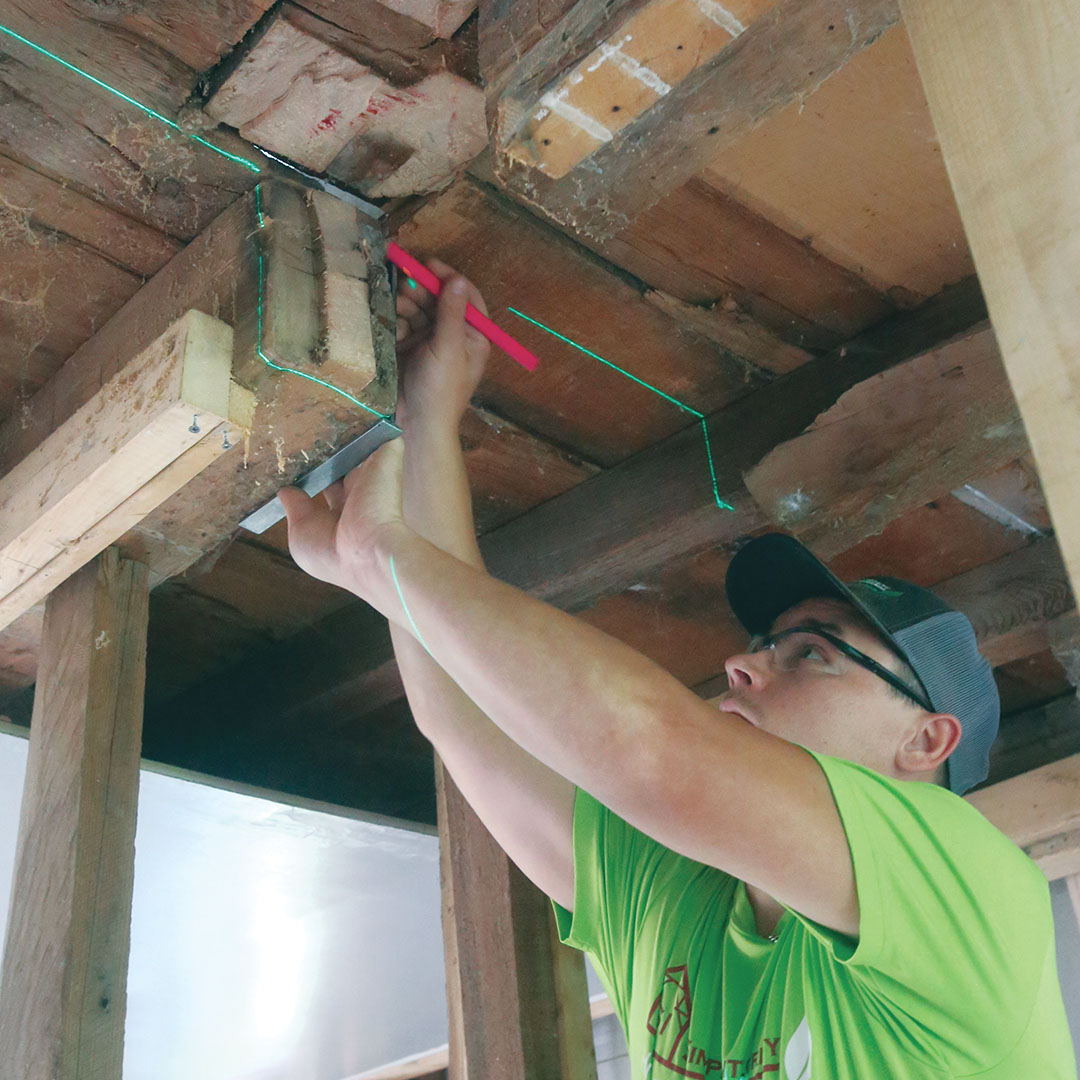
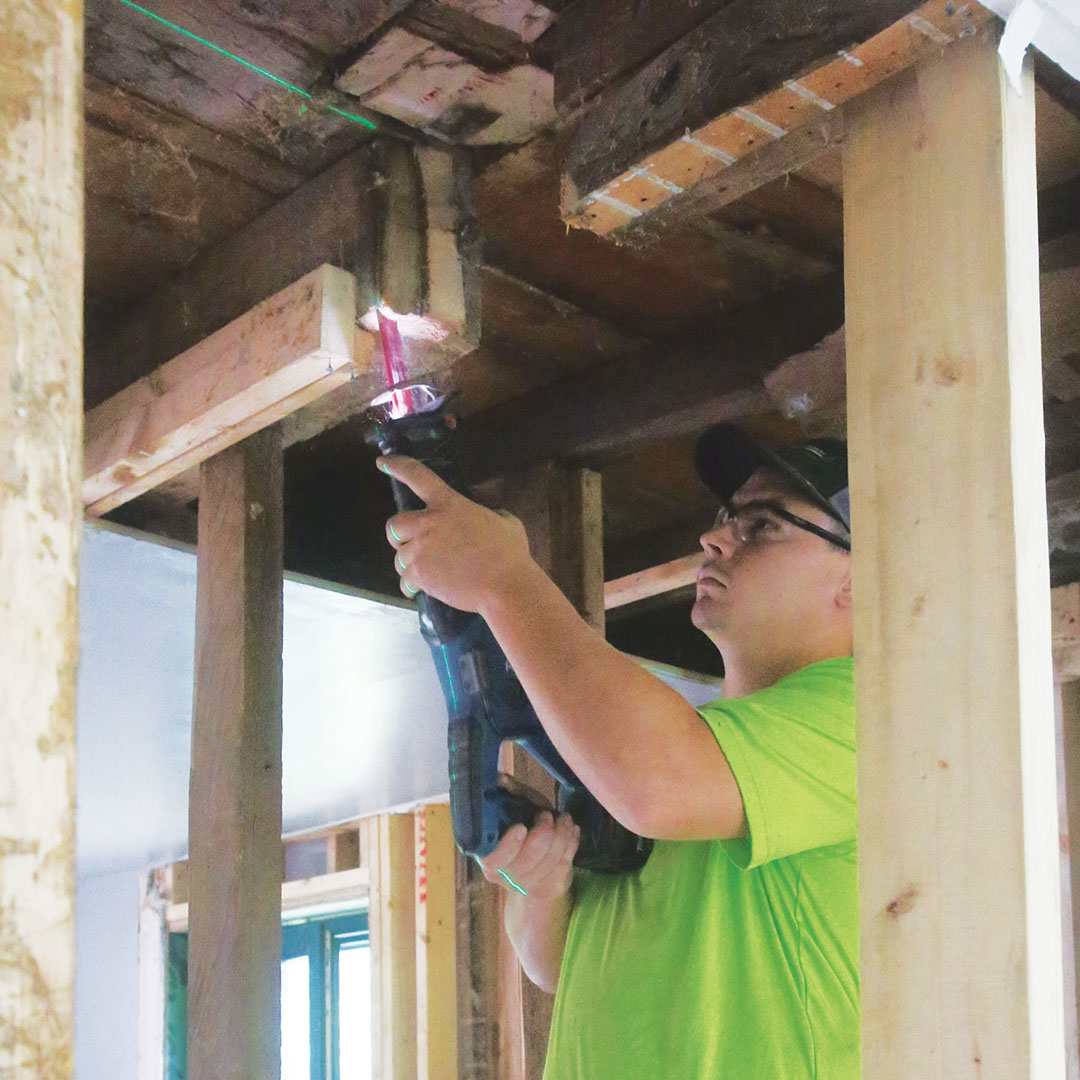
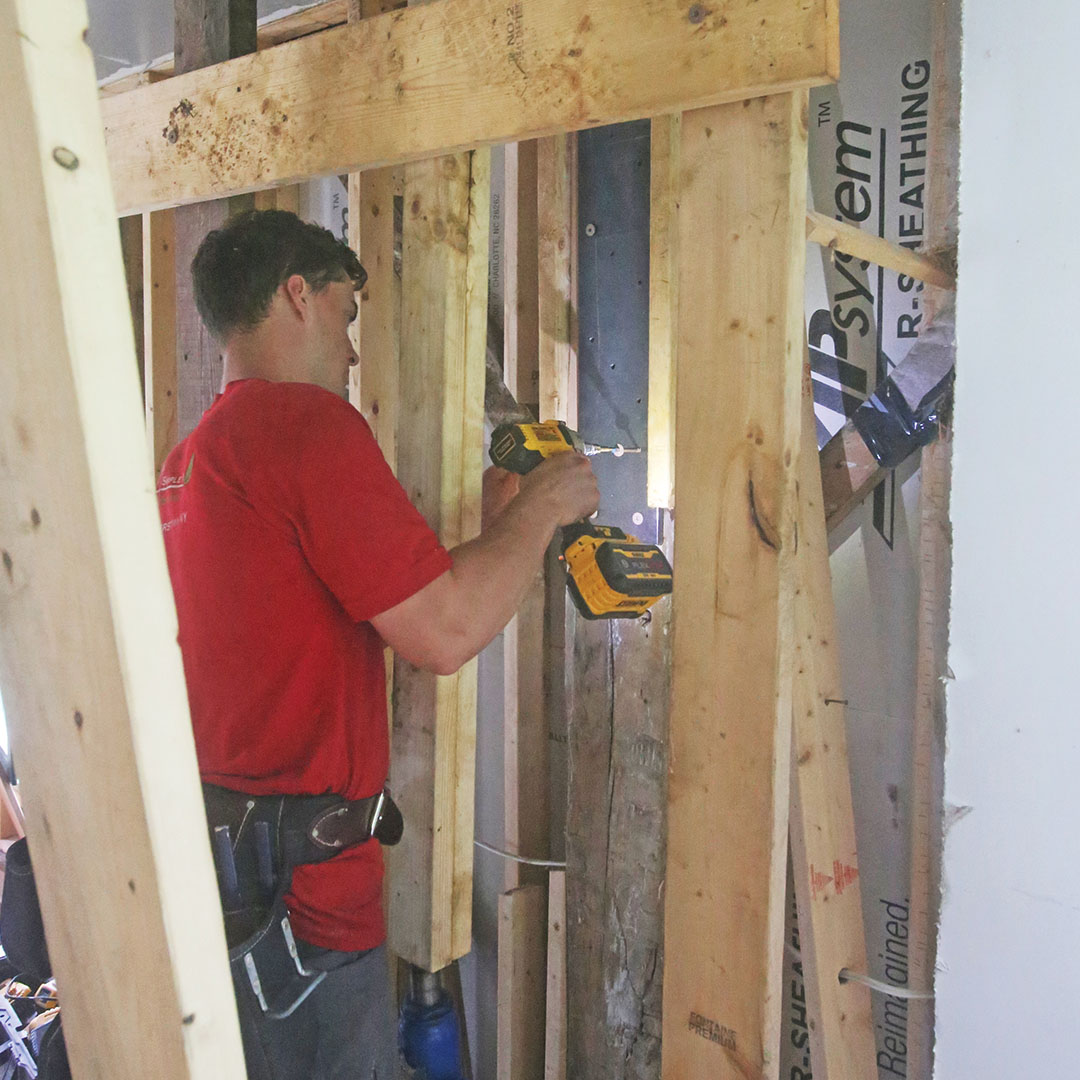
Step 3: Cut out the Old Beam
After removing the existing post and cutting out the old beam, we used a laser line as a guide to cut the joists back evenly. You can start these cuts with a circular saw and finish them with a reciprocating saw or multitool.
 |
 |
 |
 |
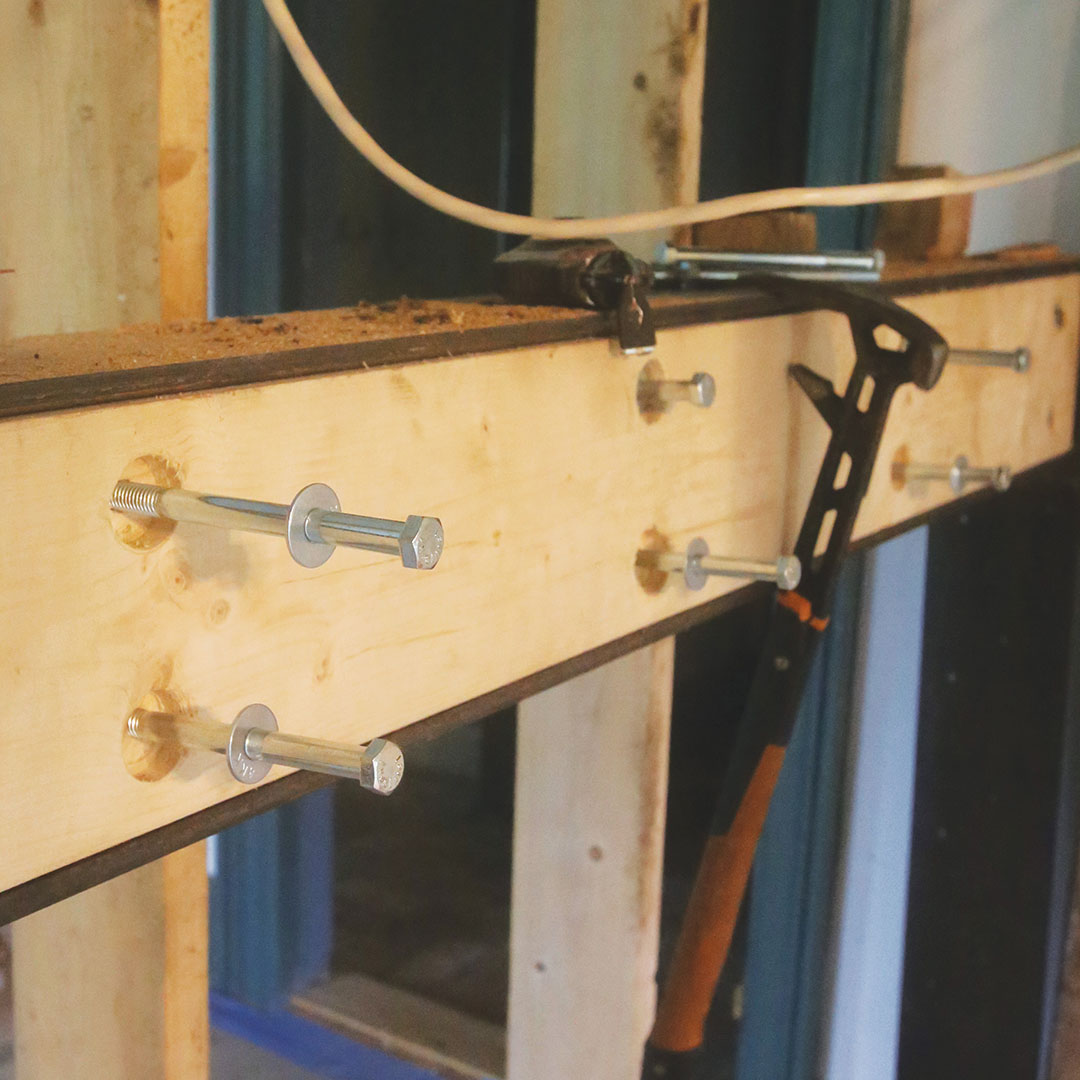
Step 4: Prep the New Beam
The common approach to using steel I-beams is to bolt dimensional lumber to either side so that joist hangers can be nailed on. Your engineer will specify the number and size of the bolts needed to fasten the dimensional lumber. Once the old beam is out, figure out the finished width of your new beam, which needs to be wider than the old beam or the old floor joists won’t reach it. You can always pad out the beam more if it is not wide enough.
 |
 |
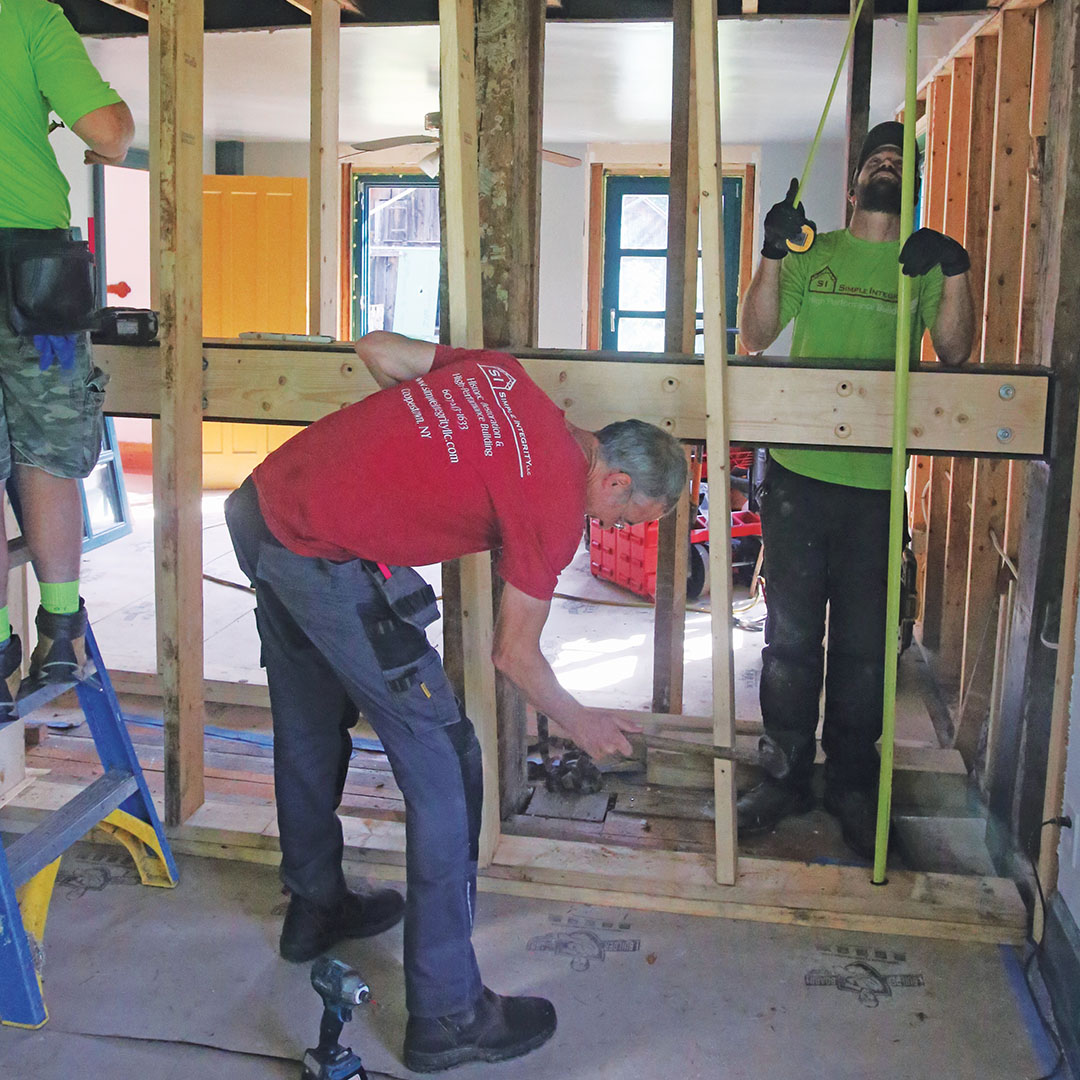
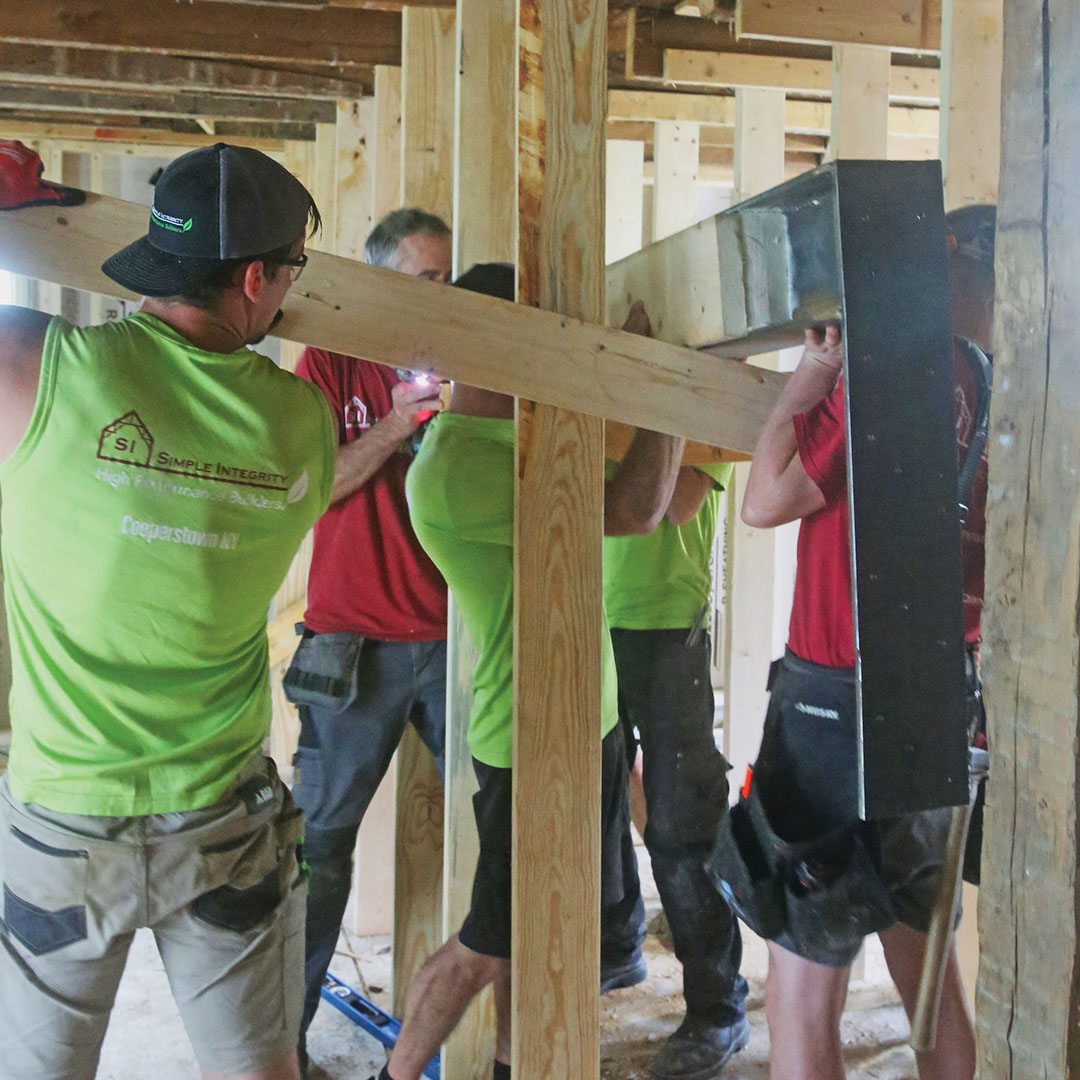
Step 5: Raise the New Beam
It is not usually possible to put a new beam into place at an angle, meaning the beam usually needs to go straight up or slide in from one end. If the new beam will be bearing on new posts, the posts can go in later. On this project we used hydraulic jacks on one beam and a lever on the other. Both worked great.
 |
 |
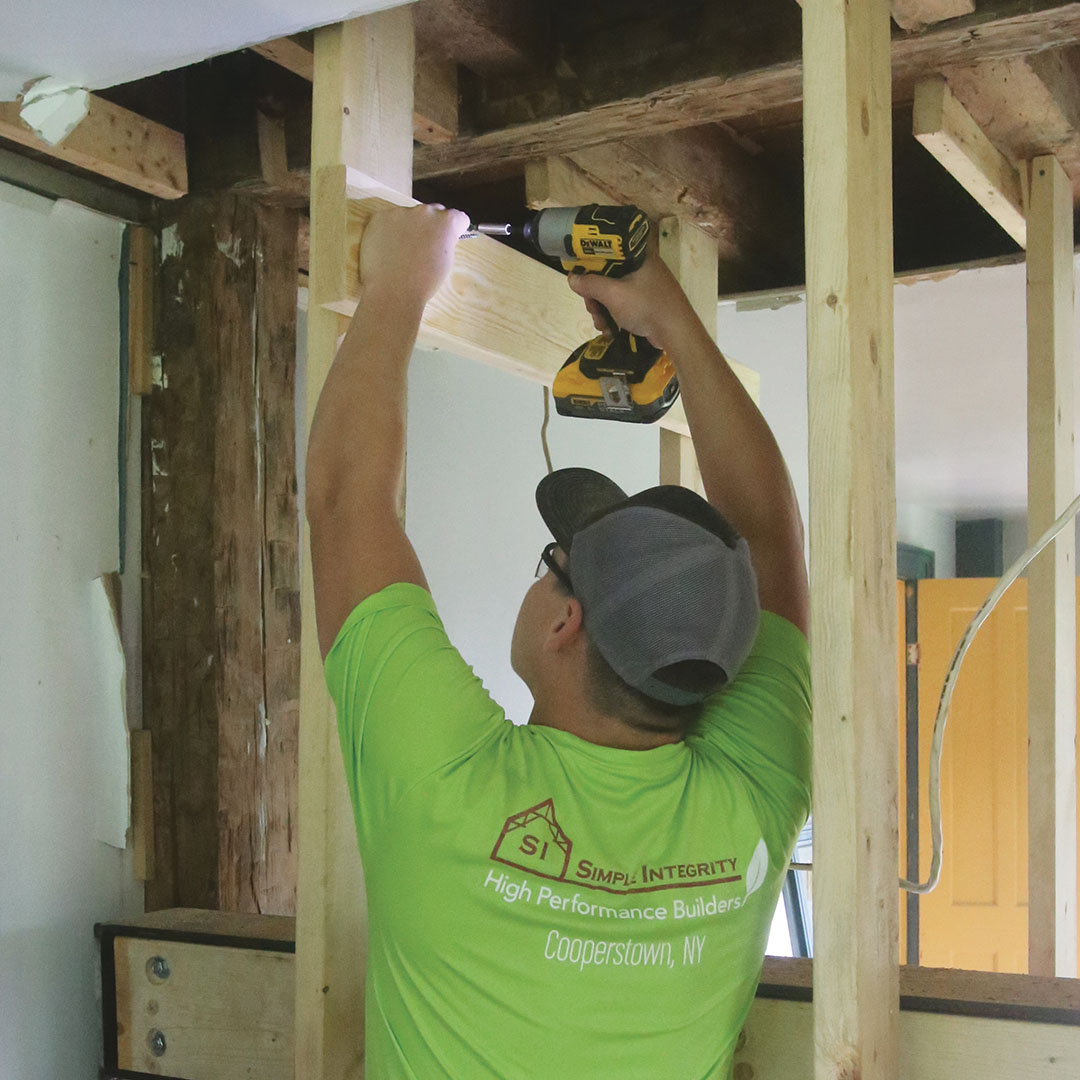
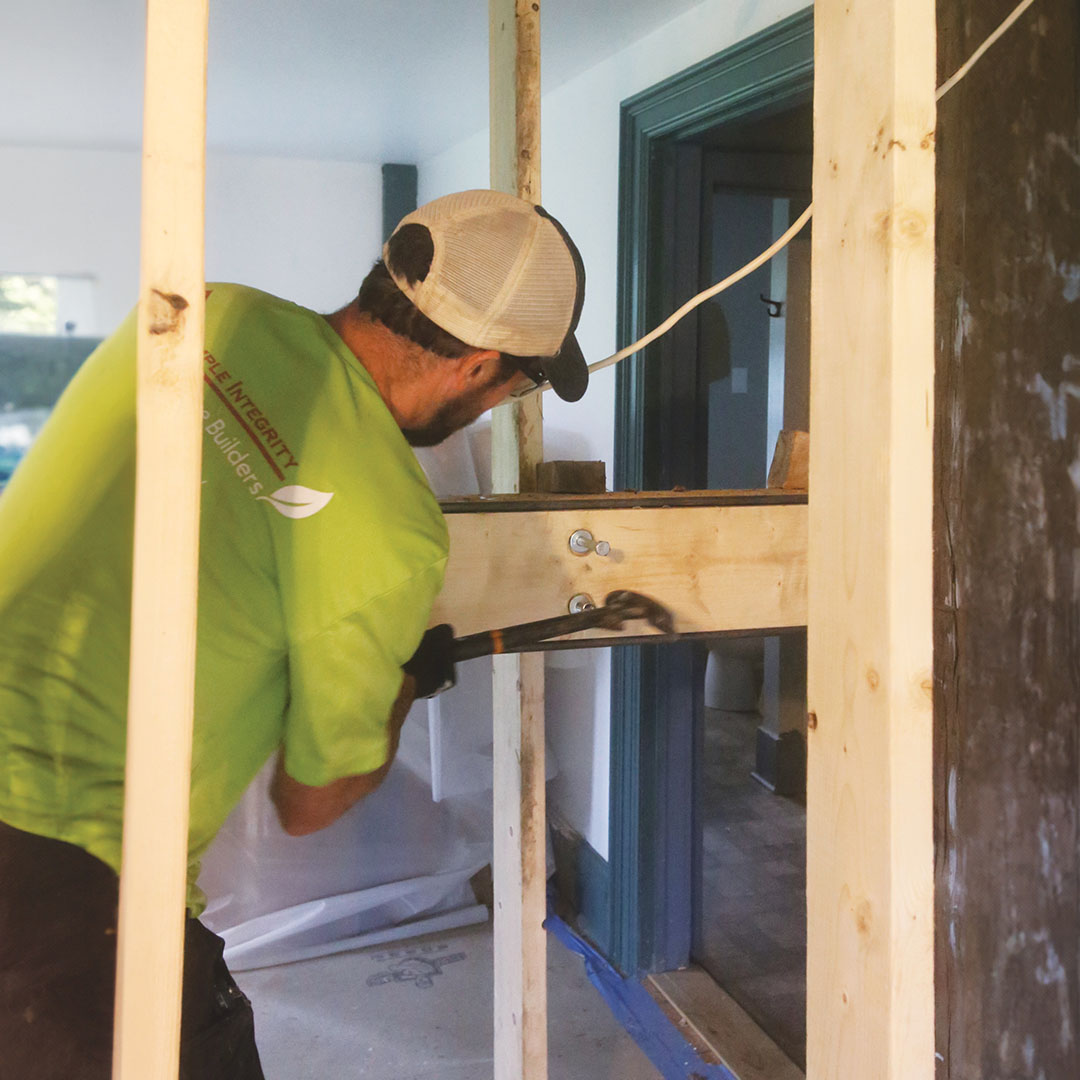
Step 6: Fasten the Beam
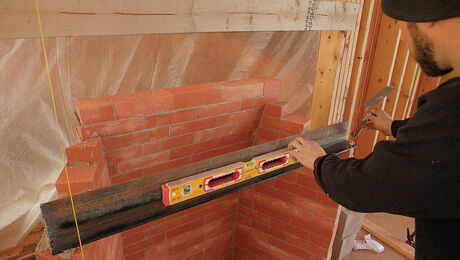
Check the floor upstairs prior to fastening to make sure you haven’t pushed a crown into the floor while raising the beam. We drove structural screws through all the predrilled holes in the flanges as specified by the engineer.
 |
 |
Step 7: Install Joist Hangers
Manufacturers make several sizes of joist hangers, but it is good to know that they make a common joist hanger for old rough-cut lumber that is 2 in. wide. On the old houses we work on, they come in handy. Once all the joists are fastened, the temporary walls can come down and the ceiling can be closed back up.

— Josh Edmonds, CPHC; managing partner at Simple Integrity LLC in Cooperstown, N.Y. Photos by Brian Pontolilo.
From Fine Homebuilding #324
RELATED STORIES


View Comments
Such remodeling projects meet common homeowner requests for more modern and open floor plans, adding value to their properties Fall Guys.