FHB Logo Facebook LinkedIn Email Pinterest Twitter X Instagram Tiktok YouTube Plus Icon Close Icon Navigation Search Icon Navigation Search Icon Arrow Down Icon Video Guide Icon Article Guide Icon Modal Close Icon Guide Search Icon Skip to content
Subscribe
Log In
  • How-To
  • Design
  • Tools & Materials
  • Restoration
  • Videos
  • Blogs
  • Forum
  • Magazine
  • Members
  • FHB House
  • Podcast
Log In

Fine Homebuilding Project Guides

Roofing

Guide Home
  • Tools and Materials
  • Roof Replacement and Reroofing
  • Roof Ventilation
  • Waterproofing
  • Installing Asphalt Shingles
  • Installing Other Types of Roofs
  • Roof Maintenance and Repair
How-To

Good-Looking and Long-Lasting Traditional Gutters

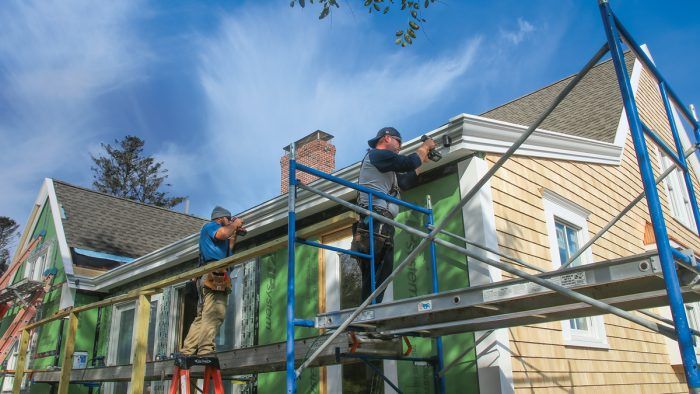
An extruded-aluminum gutter and matching rake trim recreate a classic eave-to-rake transition.
By David Hornstein Issue 306 - April/May 2022

Synopsis: Before aluminum gutters were introduced in the 1950s, architectural wood gutters were the norm. One of these old gutter profiles, known as the Boston pattern, has a shape that allows for a smooth transition from a wood gutter at the eave to a matching rake trim with the same profile. With wood gutters eventually leading to too many moisture and rot issues, aluminum gutters rose in popularity, but were no longer aesthetically matched to their homes. Light House Design’s David Hornstein ended up manufacturing his own extruded aluminum gutter with a profile identical to the Boston pattern, called Duragutter, and in this article he explains how it is installed on a Cape undergoing a complete renovation and gutter installation.


One of the great things about living in New England is seeing the traditional architectural details on old houses, and that includes the gutters. Gutters used to be fully integrated into the overall trim scheme of a home. From modest bungalows to extravagant Victorians, gutters were a key architectural element, treated as moldings that defined the roofline and created a visually seamless continuity with other trim elements.

But there were seams—and that was part of their demise. Now known locally as the Boston pattern, a standardized gutter and rake trim first appeared around 1880 and was developed to simplify and standardize the process of putting on gutters and cornices. Its defining feature is the seamless transition from a beautiful wood gutter at the eave to a matching rake trim with the same profile. With the new system, lumberyards could sell a single gutter and rake profile that worked for a variety of roof pitches and overhang details. 

The secret is the shape

The secret is the shape
Drawings: Christopher Mills

Gutters made with the Boston pattern have a concave section that’s smaller at the top and stretched at the bottom compared to a traditional ogee, allowing for a smooth eve-to-rake transition with roof pitches from 3-in-12 to 20-in-12. Duragutter OG is the same ogee profile and outside dimension as the Boston pattern wood gutter, but because aluminum is much thinner than wood, it holds twice the volume of water. Like the original Boston pattern gutter, it can be attached directly to the rafter tails or mounted to a fascia board underneath it or behind it. The gutter is available in 8-ft. and 29-ft. lengths.

Gutters and rakes made to match 

The sloping rake must mate up to the level gutter at roof corners, but their cross sections are different because one is horizontal and the other slopes. To get the two parts to line up at the miter, carpenters employ a number of strategies. You can use a gutter and rake with different widths. You can also adjust the spring angles to align the parts. The mill owners who introduced the Boston pattern figured out a brilliant solution to getting the two different cross sections to fit together. They modified the traditional ogee, making the top concave section smaller and extending the bottom section. This pleasing shape allows rake profiles to work with common roof pitches from 3-in-12 to 20-in-12 with a minimum of fitting at the rake miter. These gutter and rake profiles were used extensively, even during the Queen Anne era when rooflines had varied pitches and eccentric designs.  

Build and hang the gutter

The overflow lip of the gutter lines up with the top surface of the roof sheathing, following the slope. This sets the rake at the right height so that it just touches the underside of the roofing. A pitch toward the downspout at 1⁄16 in. per ft. is essential with wood gutters, but unnecessary with these aluminum gutters.

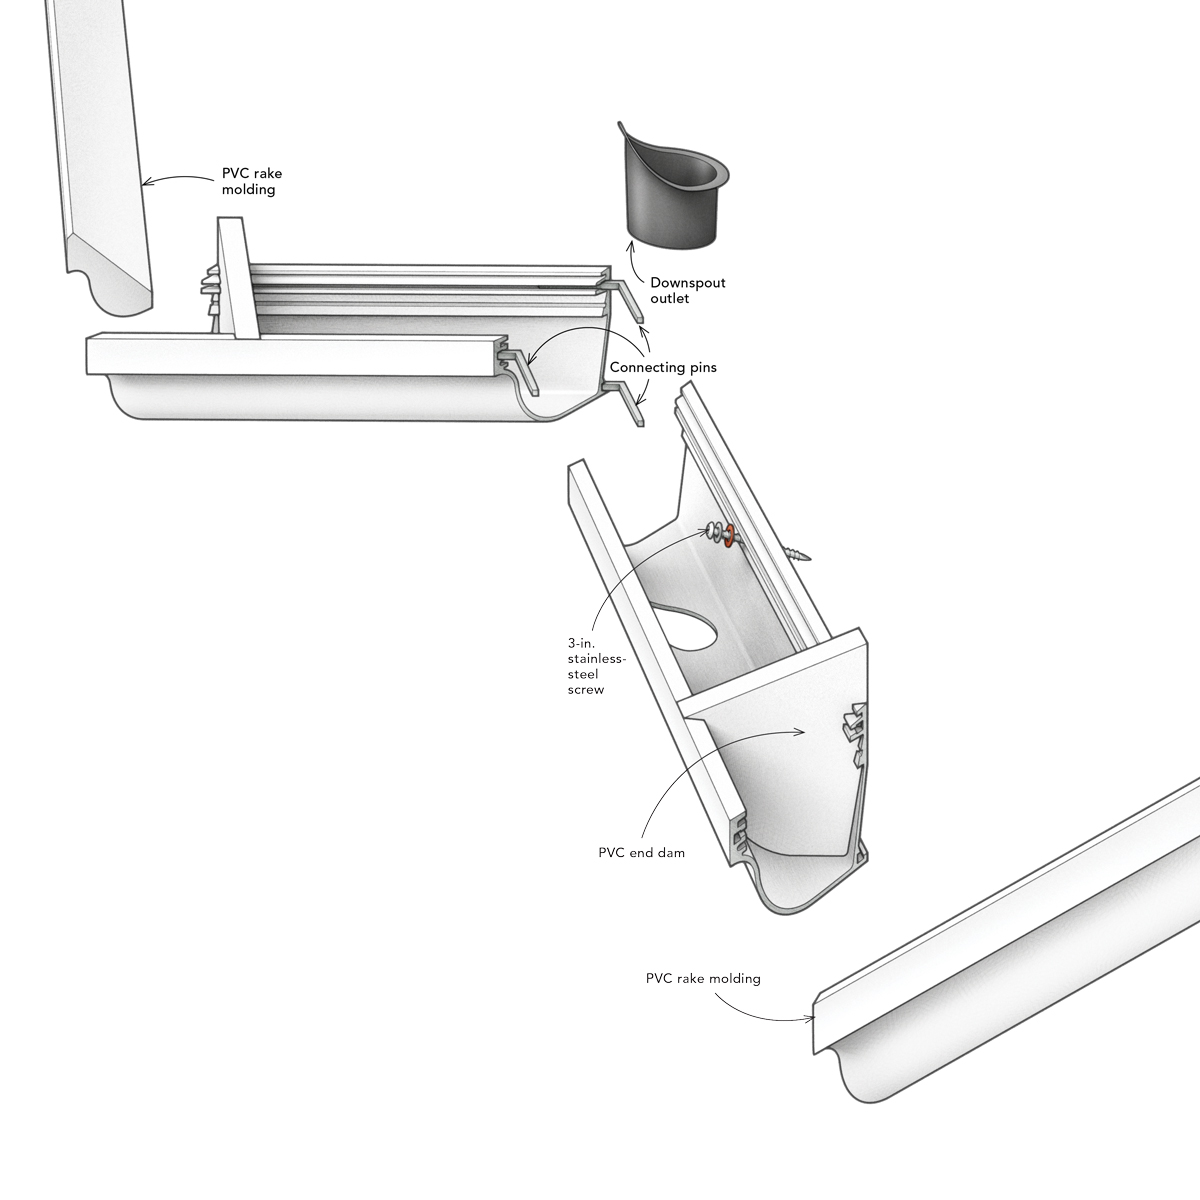
Join corners. The gutter extrusion has three channels that receive aluminum connecting pins for butt joints and miters. CA glue holds components together.

Join corners. The gutter extrusion has three channels that receive aluminum connecting pins for butt joints and miters. CA glue holds components together.

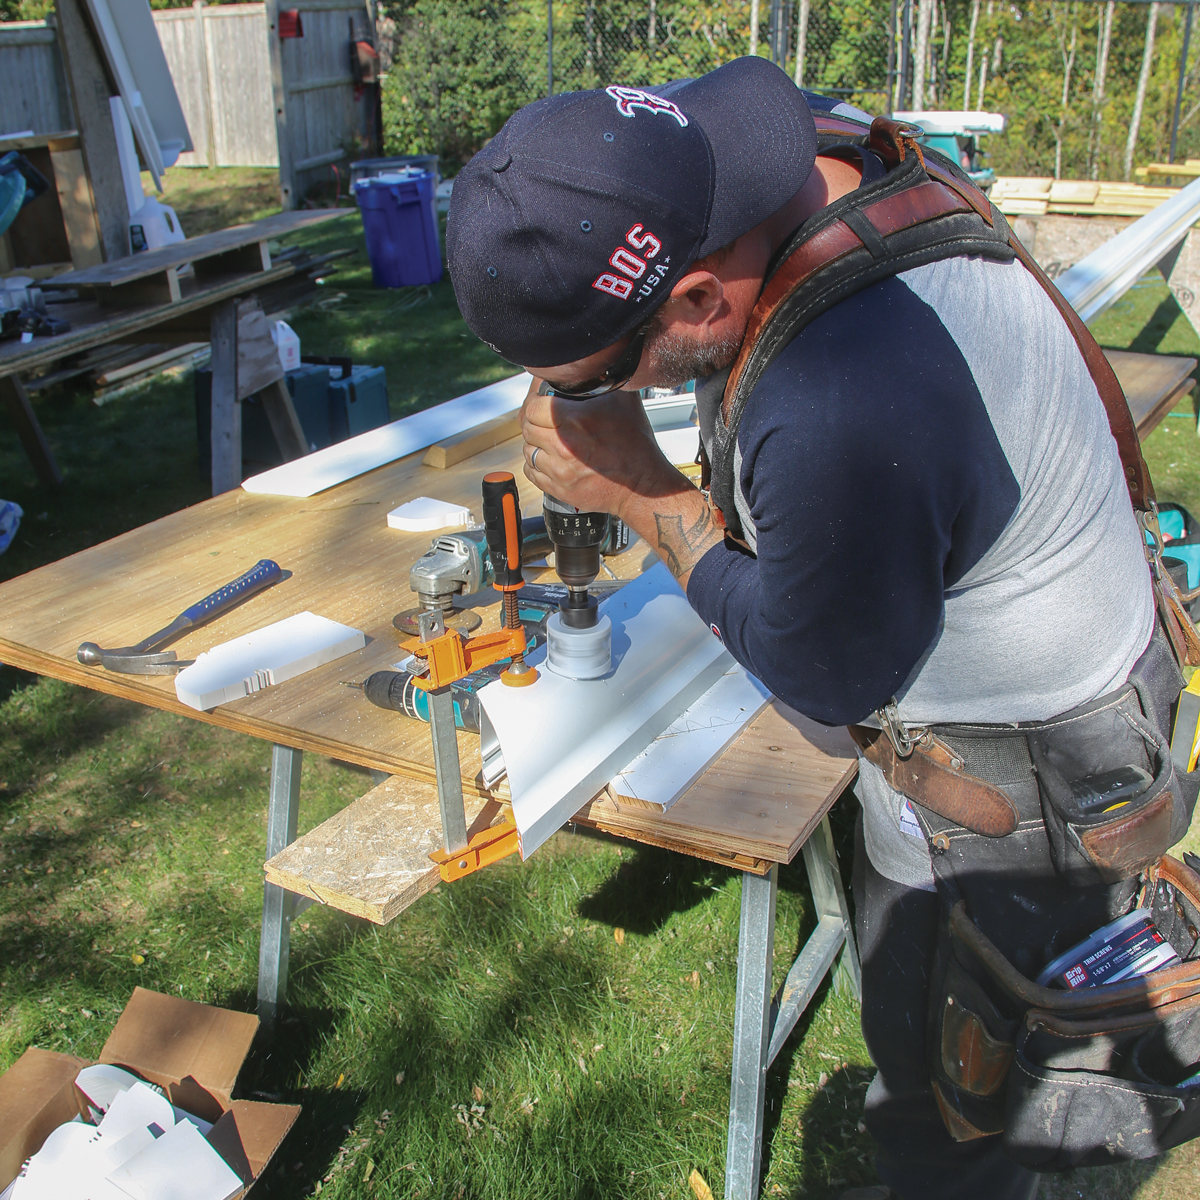
Make cuts and drill for drops.

Make cuts and drill for drops. The heavy-duty extruded-aluminum gutter is cut with a carbide-tipped blade on the miter saw with the gutter upside down on the sawtable, using a supplied block to raise the front edge. Holes for the outlet are made with a 2-1⁄2-in. bimetal hole saw. The drill must be held parallel to the gutter’s back to prevent an elongated hole.

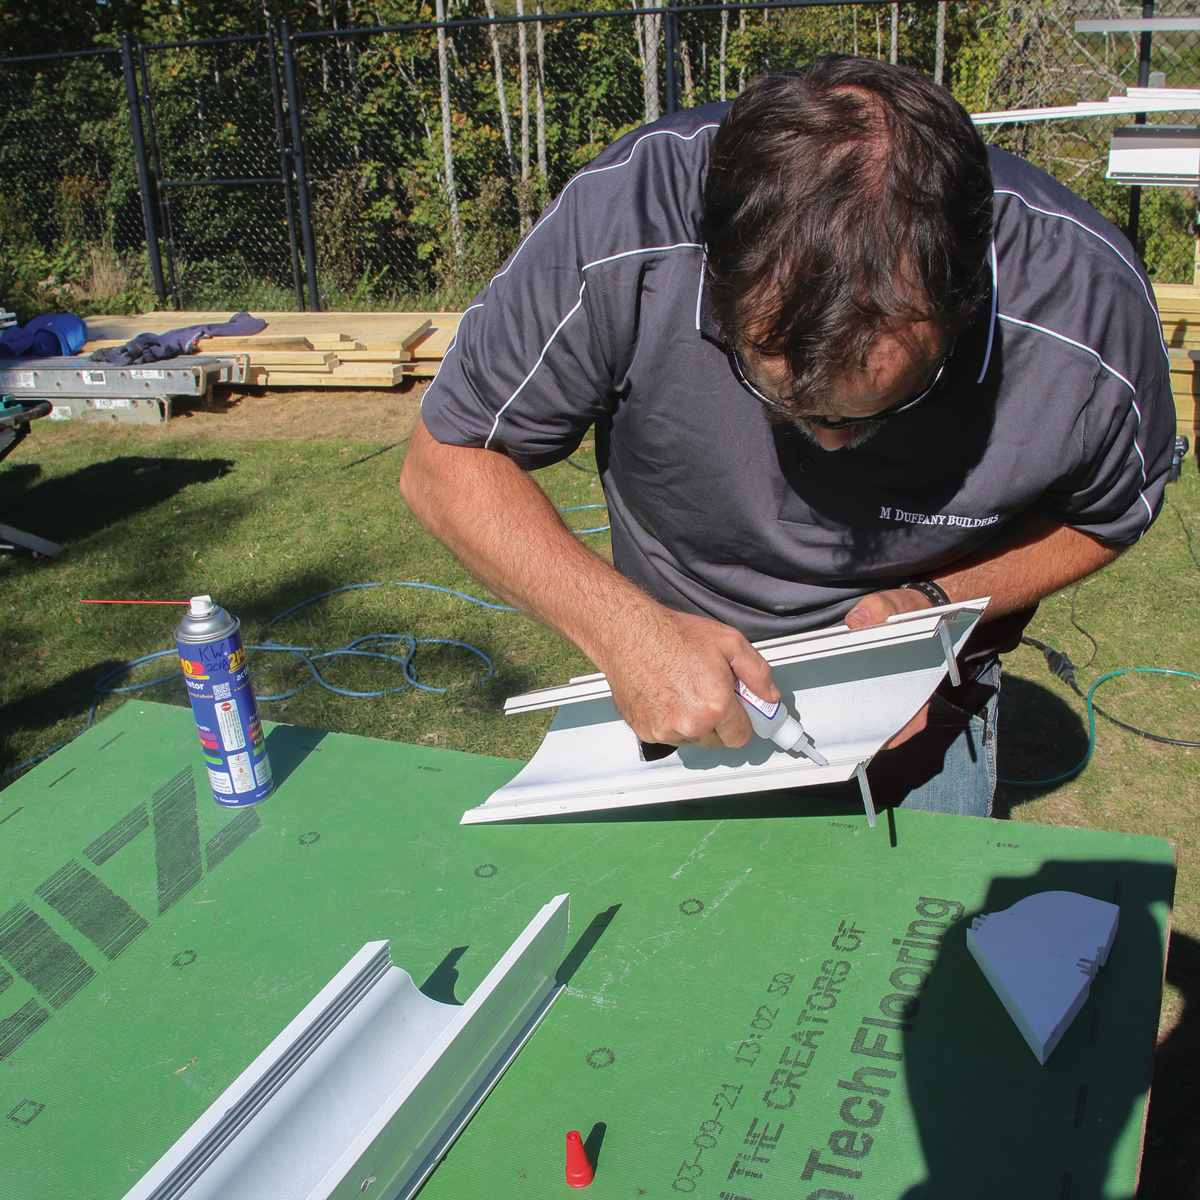
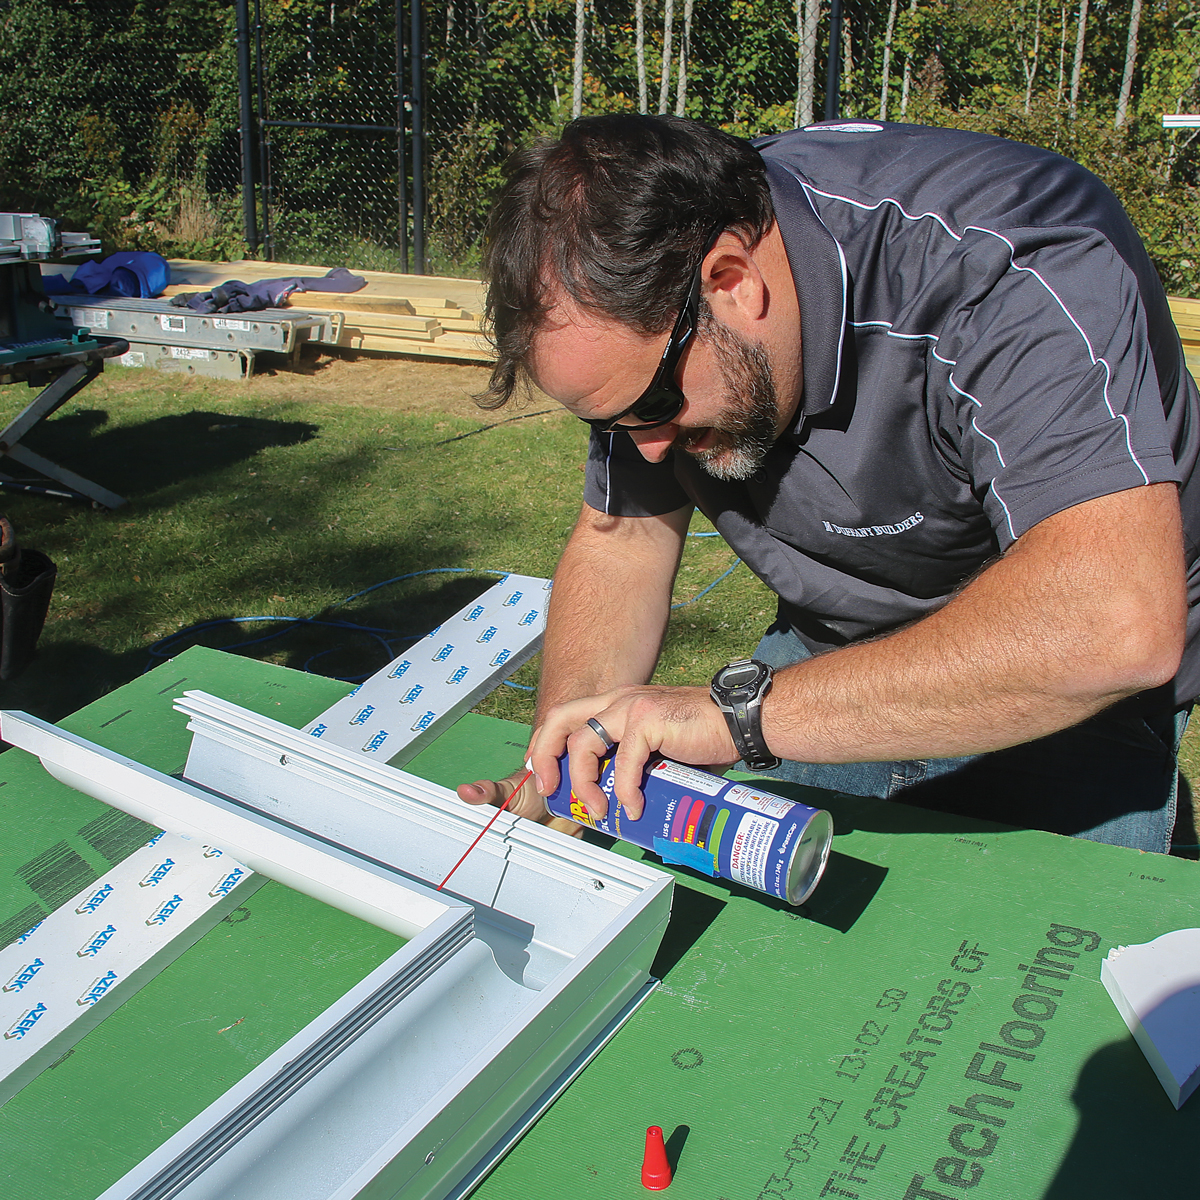
Activator speeds the bond.

Activator speeds the bond. CA glue activator is sprayed on the glue joint and connecting pins, which hold the separate pieces together.

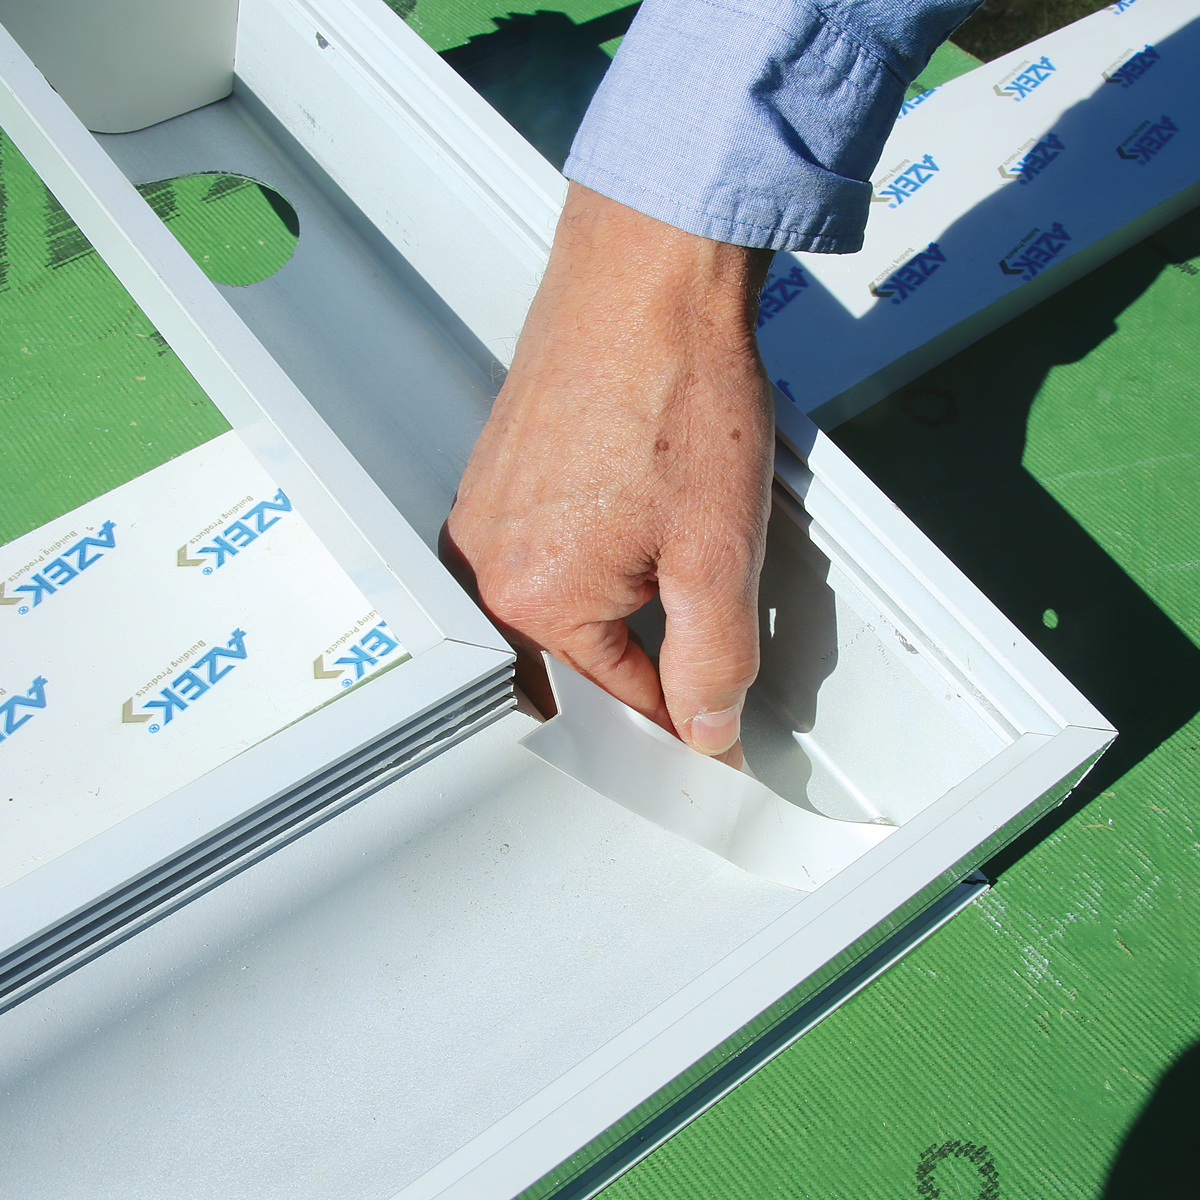
Tape seals the deal.

Tape seals the deal. Butyl tape­ is cut and fit at joints and corners. The small pieces of tape are supplied precut for easier assembly.

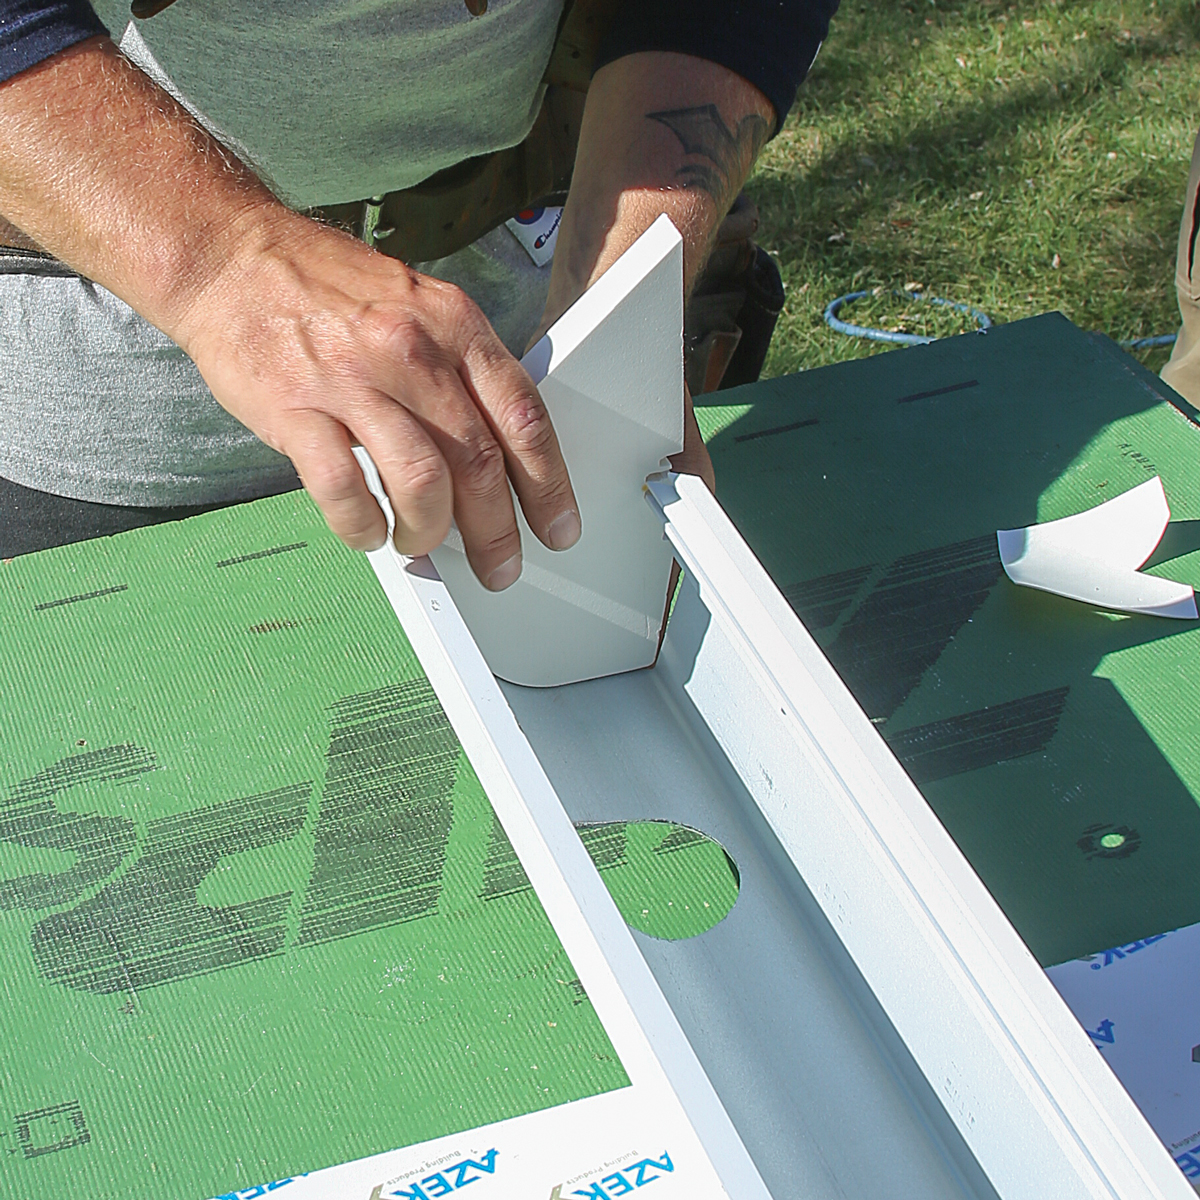
Install end dams.

Install end dams. Plastic blocks are fit near rake transitions and sealed so water never reaches the mitered joint where the gutter meets the rake board. The blocks are angle-cut in the field to match the roof pitch.

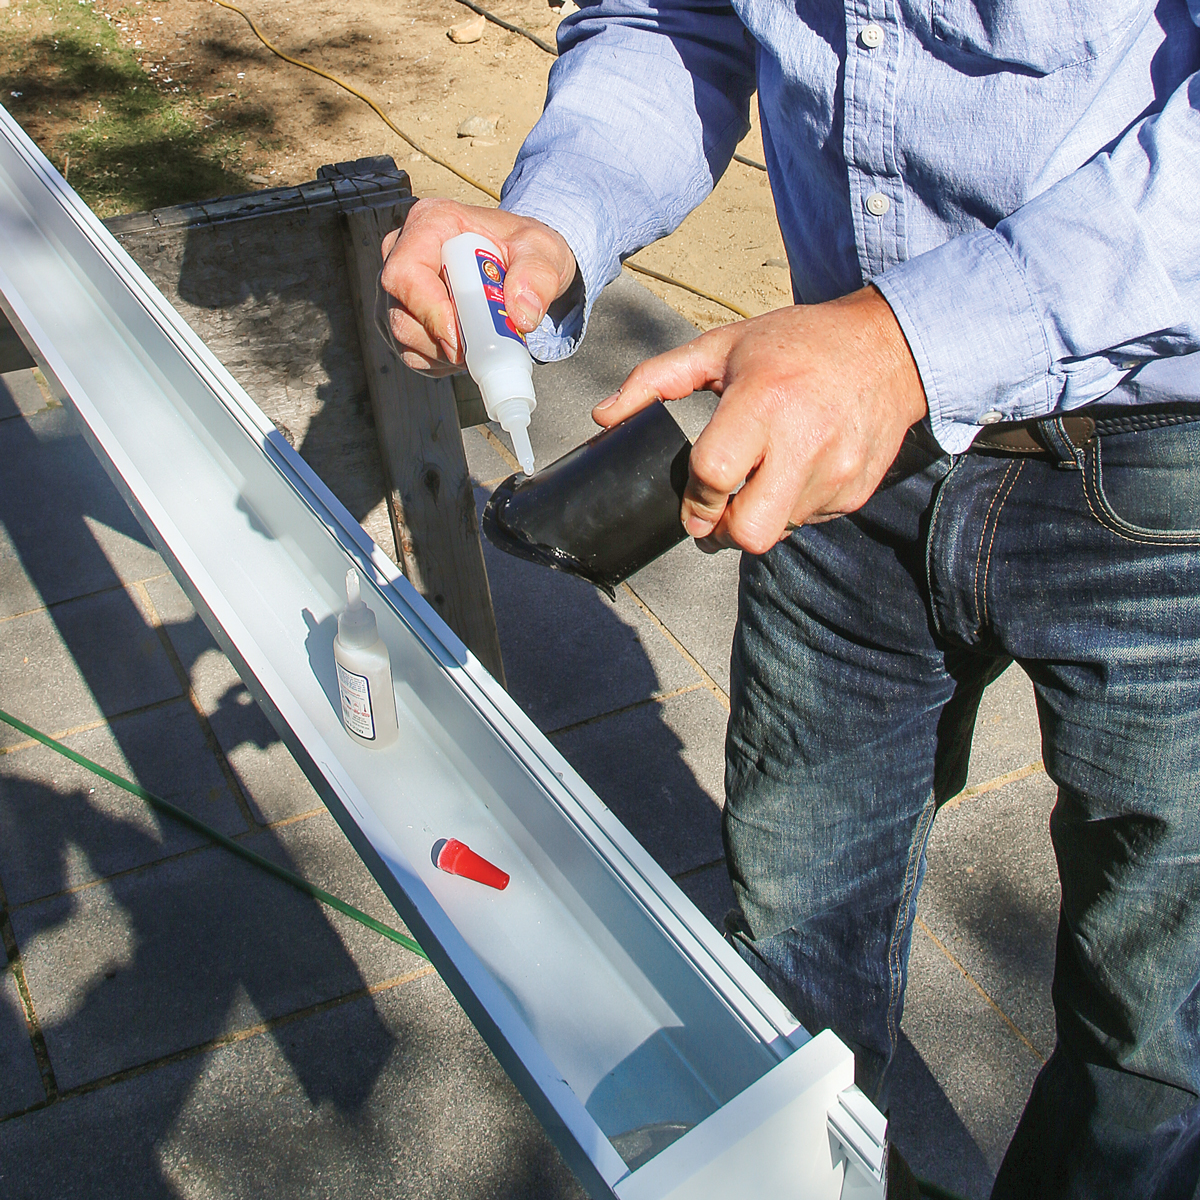
Glue the tube.

Glue the tube. CA glue is placed around the flange at the top of the downspout outlet. The outlets are ABS plastic, which is durable in warm and cold temperatures and UV-stable.

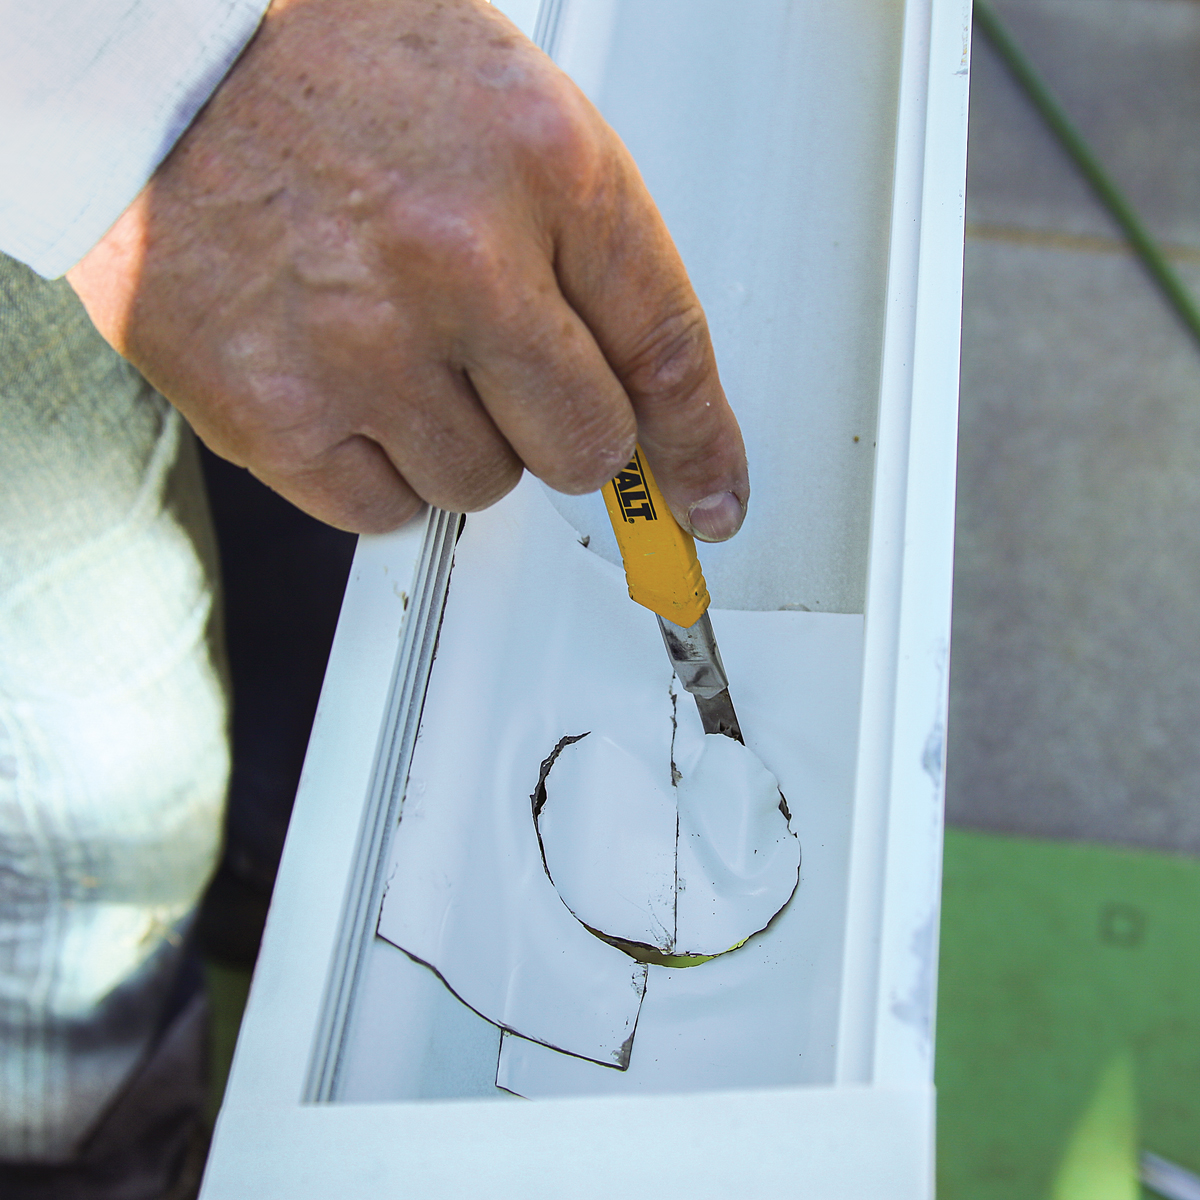
Make the opening.

Make the opening. The top of the downspout outlet is sealed with pieces of butyl tape that are rolled with a small roller for a strong bond. Then the downspout opening is cut with a knife.

Hang assembled sections.

Hang assembled sections. With the outlets installed and the inside corner assembled, this section of gutter is ready for hanging.

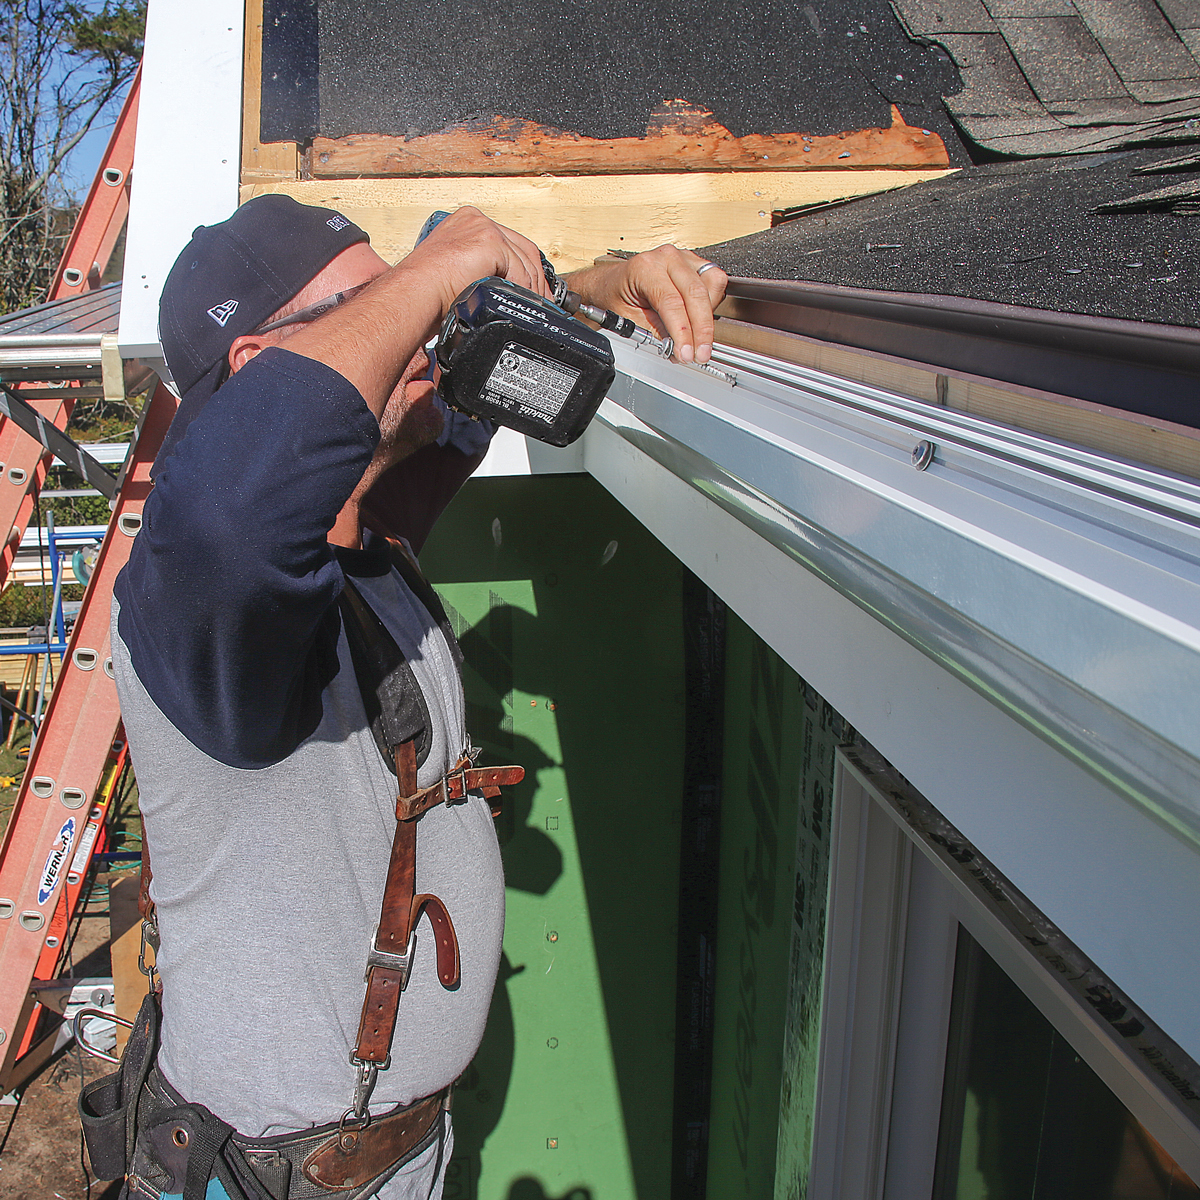
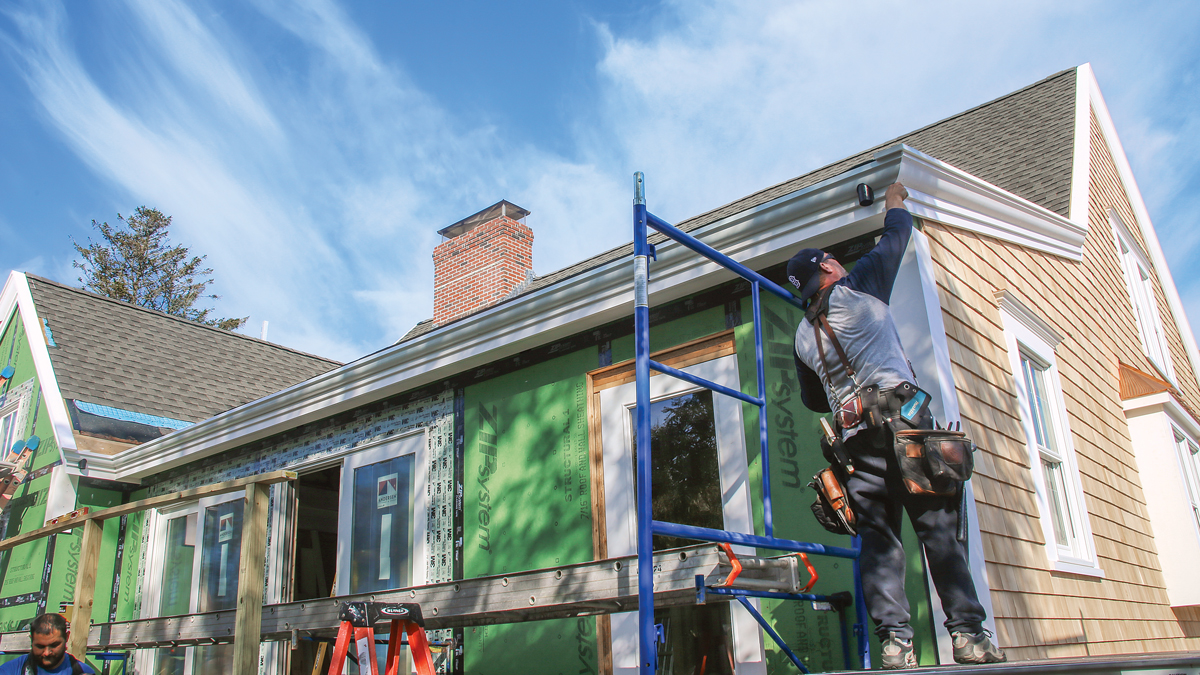
Fasten with screws.

Fasten with screws. Three-inch stainless-steel structural screws are used to hang the gutter, with one screw per rafter. The screws have a T30 torx head and include a flat washer and a flexible sealing washer.

Aluminum ends the Boston pattern

The joints, transitions, and downspout outlets on wood gutters were made watertight by carving out a recess on the inside for lead or copper flashing. Given the movement of wood, these joints would fail over time, leading to leaks and rot. Repairs required skilled carpenters and roofers, so when inexpensive, maintenance-free aluminum gutters came on the scene in the 1950s, wood gutters were quickly replaced.

There was one big problem, architecturally speaking: The profiles of aluminum gutters were different than wood gutters, so the new gutter could no longer integrate into the rake trim common to New England architecture. This led to some hideous hacking away of original details, compromising the integrity of many fine homes. Over time, many architects and builders forgot the historical details and developed new, “economized” versions that could be built with available materials. A few builders and design die-hards still insist on using authentic wood gutters, but unfortunately redwood and cypress have been replaced by less-durable cedar and fir. 

Cut and fit the Rake

When joining the gutter to the rake at a miter at a gable end, the gutter is always cut at a 45° angle regardless of the roof pitch. When doing an in-line rake miter (at a cross gable in the middle of a straight run), we reverse the miter and make it a 45° inside corner. In both configurations (gable end and cross gable) the special angles occur on the rake molding only, and these angles vary by pitch and are the same angle for inside and outside corners. 

Traditionally, carpenters wouldn’t know or calculate complex rake angles because they would cut a 45° angle on the gutter/cornice first and then cut the angle on the rake molding by holding it in place. Following the roof pitch and the 45° cut on the gutter, they’d cut the rake miter by eye using a handsaw. Unfortunately, today’s carpenters aren’t trained to cut freehand compound angles this way.

Add fascia and fillet. The sloping PVC 1x stock is in the same plane as the roof sheathing. This house will get a new roof as part of the renovation.

Install blocking. Two-by blocking with a beveled edge is fastened to the subfascia with 3-in. nails to reinforce the rake molding and provide for nailing. The sloping PVC 1x stock is in the same plane as the roof sheathing. This house will get a new roof as part of the renovation.

Add fascia and fillet.

A 1-3⁄4-in.-wide fillet strip is installed on top of a 3-1⁄2-in.-wide fascia board.

Add fascia and fillet. A 1-3⁄4-in.-wide fillet strip is installed on top of a 3-1⁄2-in.-wide fascia board. The boards are fastened with FastenMaster Cortex screws and plugs. The PVC plugs are made to match the grain of the various brands of PVC stock.

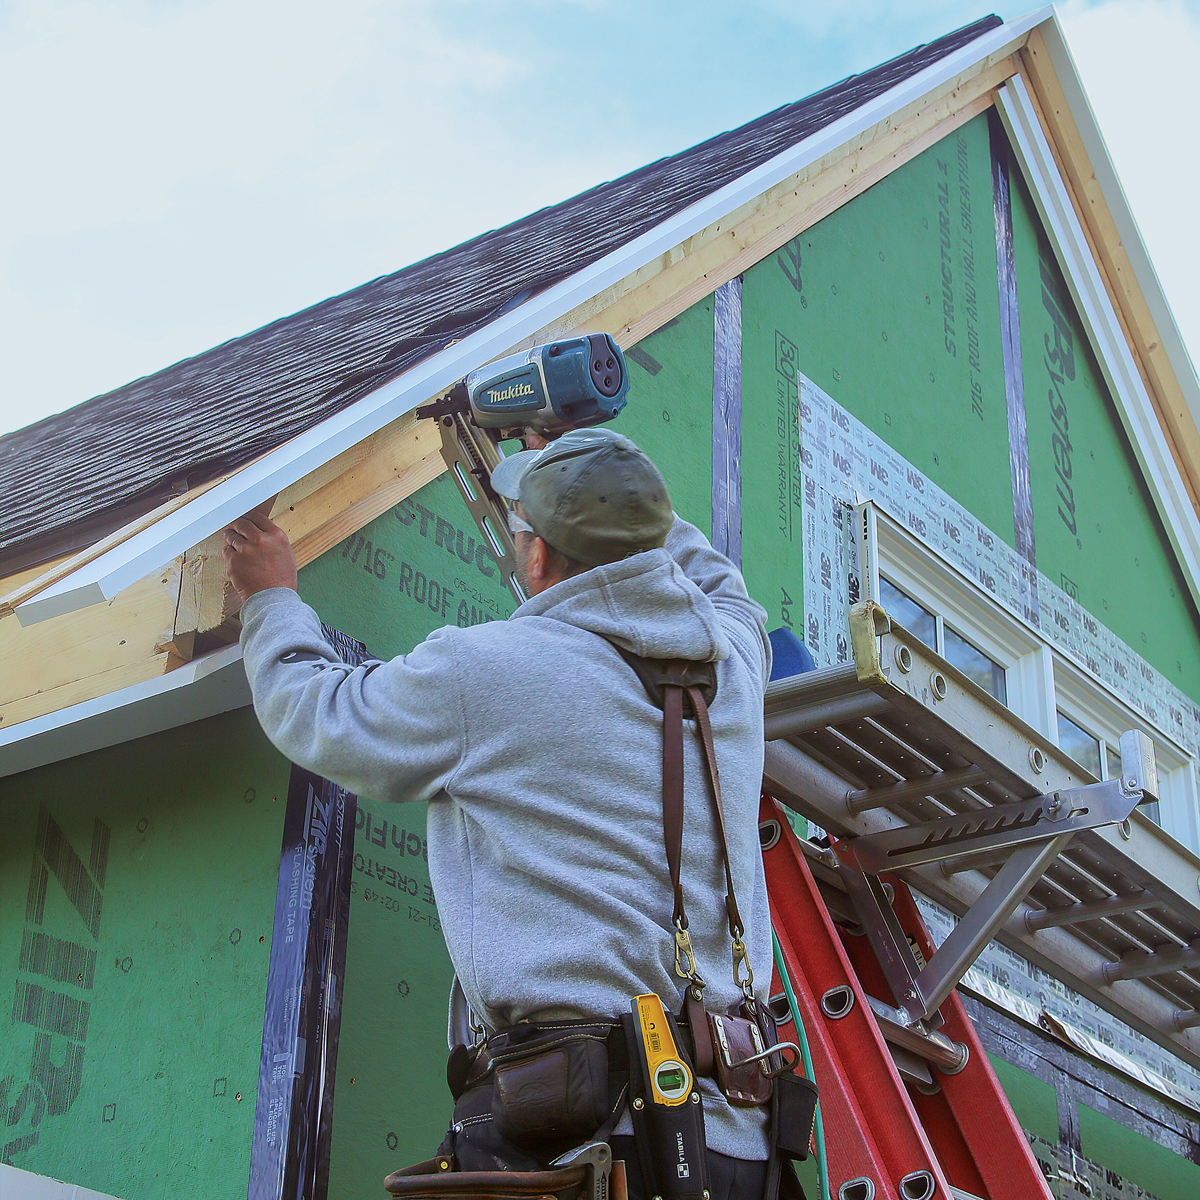
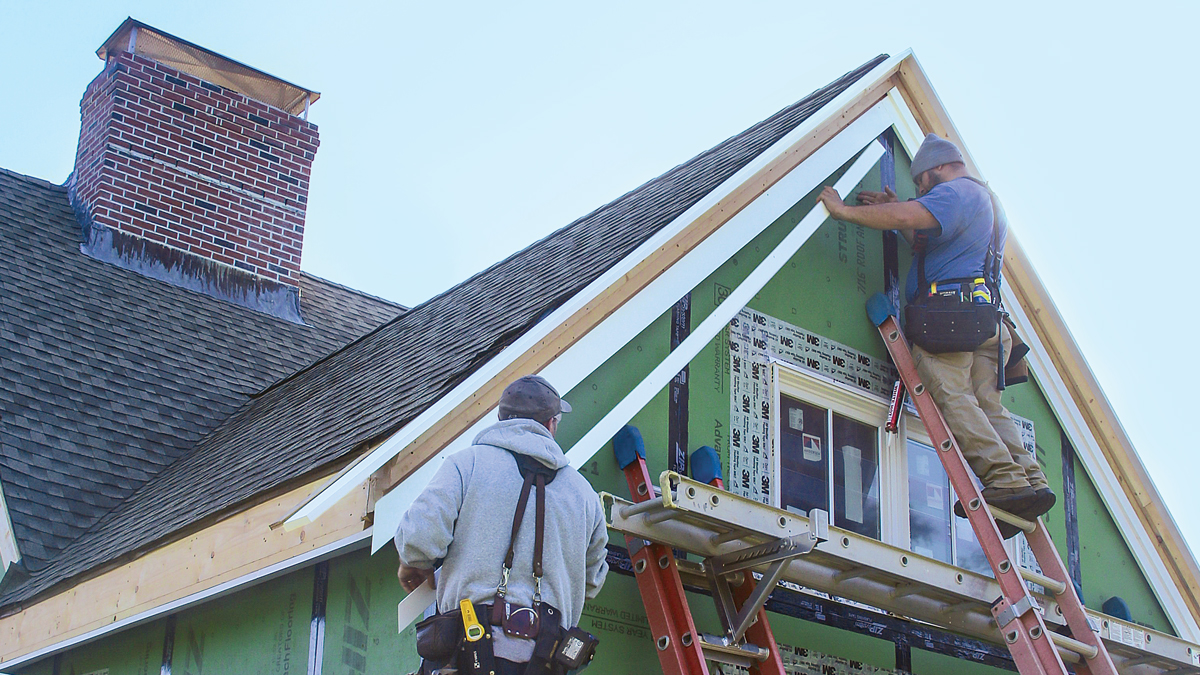
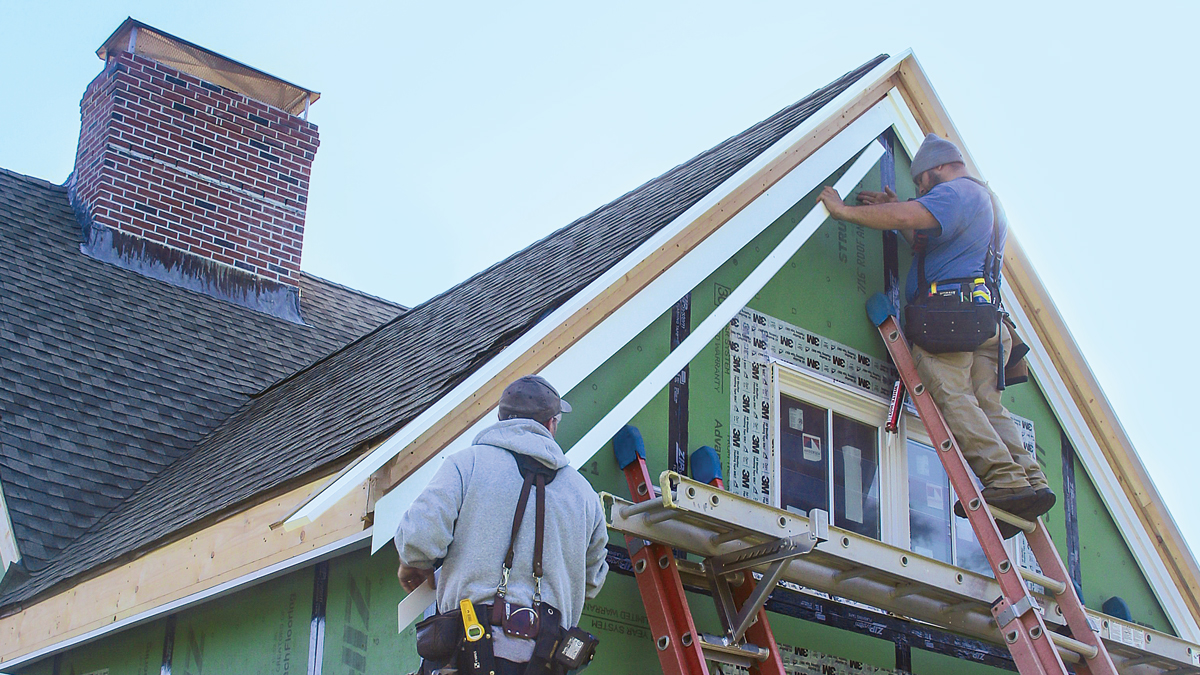
Fit and fasten the rake.

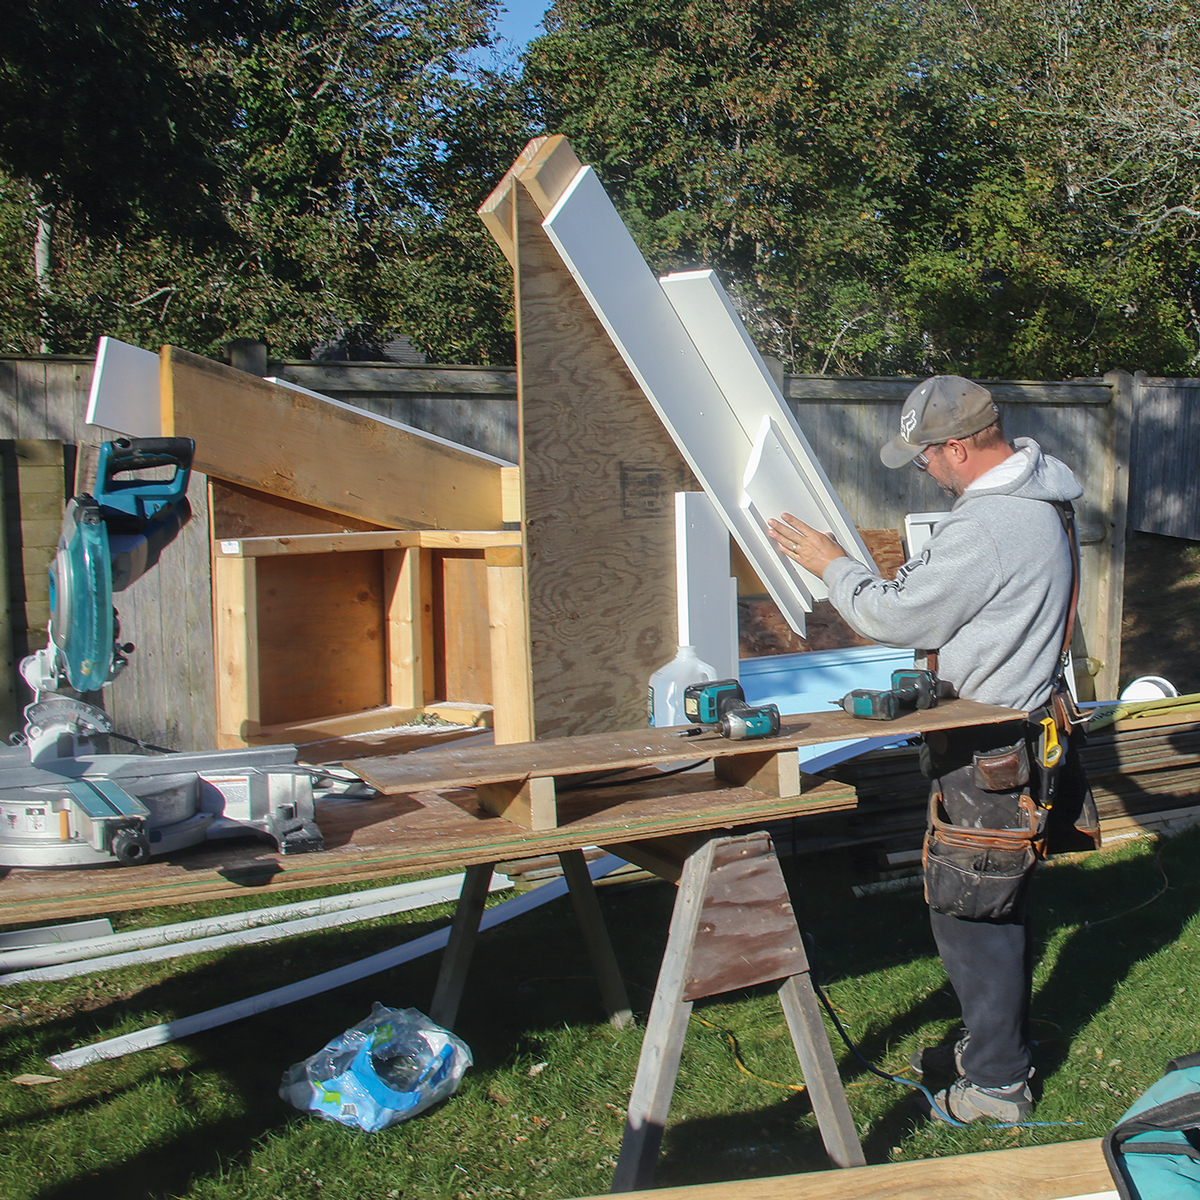
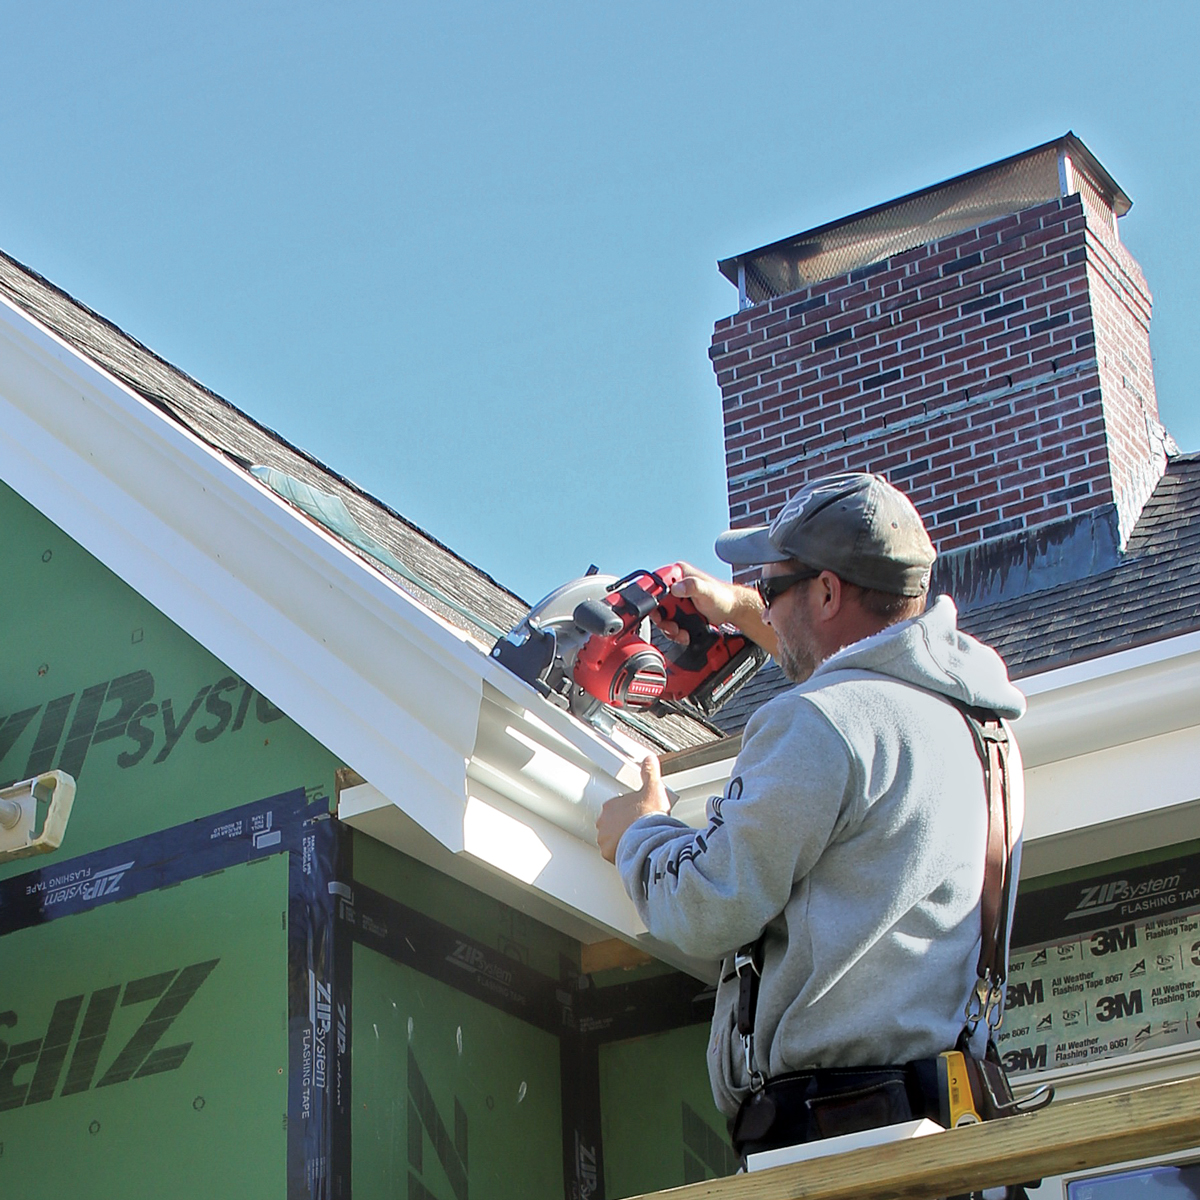
Figuring out the rake miter angles is series of trial-and-error cuts at the miter saw.

We use a small piece of stock to try the various miter and bevel angles and we minimize the number of trips from the saw to the roof with a mockup used to approximate the fit where the gutter meets the rake.

Fit and fasten the rake. Figuring out the rake miter angles is series of trial-and-error cuts at the miter saw. We use a small piece of stock to try the various miter and bevel angles and we minimize the number of trips from the saw to the roof with a mockup used to approximate the fit where the gutter meets the rake.

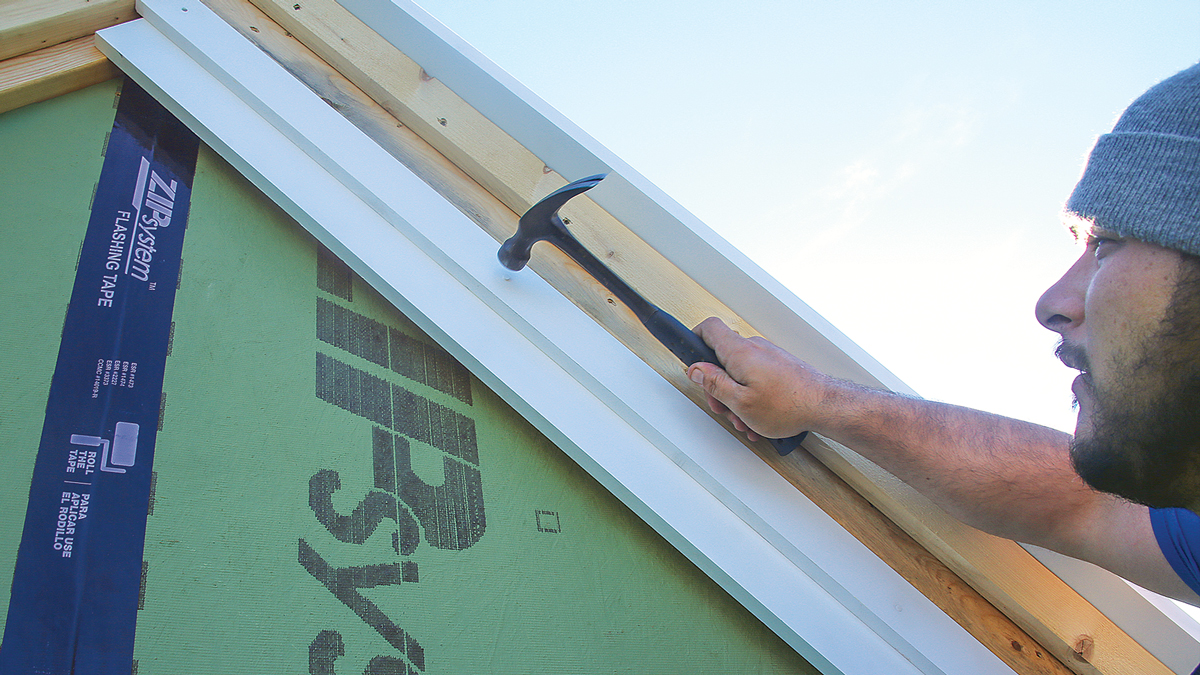
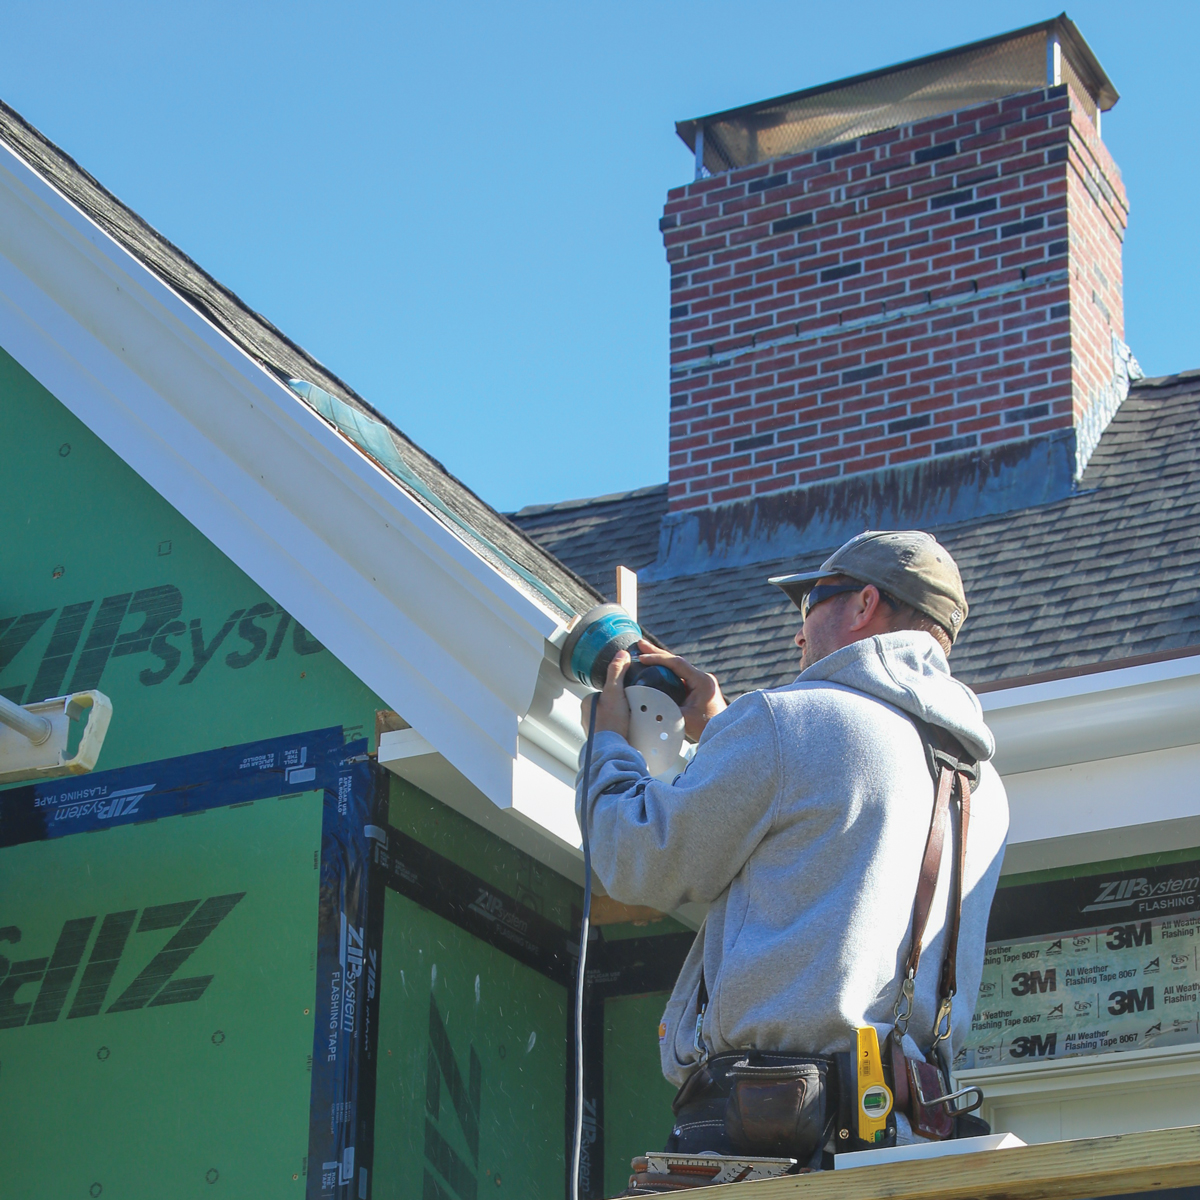
Trim the top. The trimboard that covers the rake’s projection is run long initially and trimmed on the roof.

This board is in plane with the roof sheathing and finishes the roof’s edge on the underside, which is visible from the ground.

Trim the top. The trimboard that covers the rake’s projection is run long initially and trimmed on the roof. This board is in plane with the roof sheathing and finishes the roof’s edge on the underside, which is visible from the ground. After trimming, the end of the board is sanded smooth.

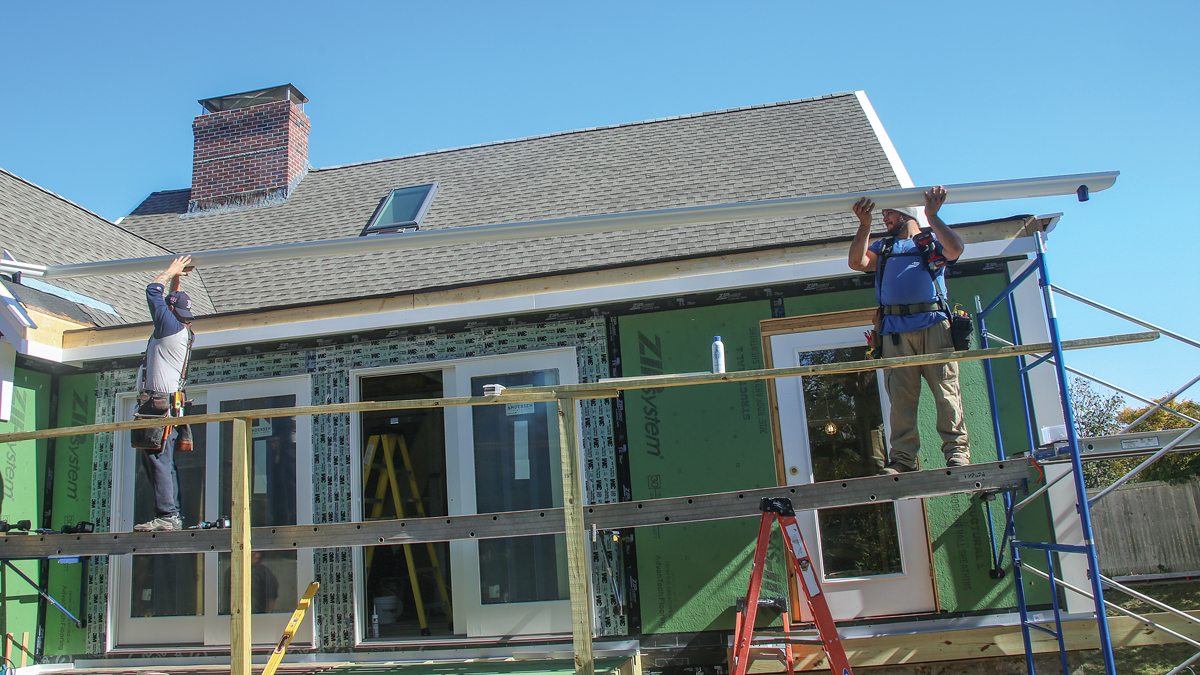
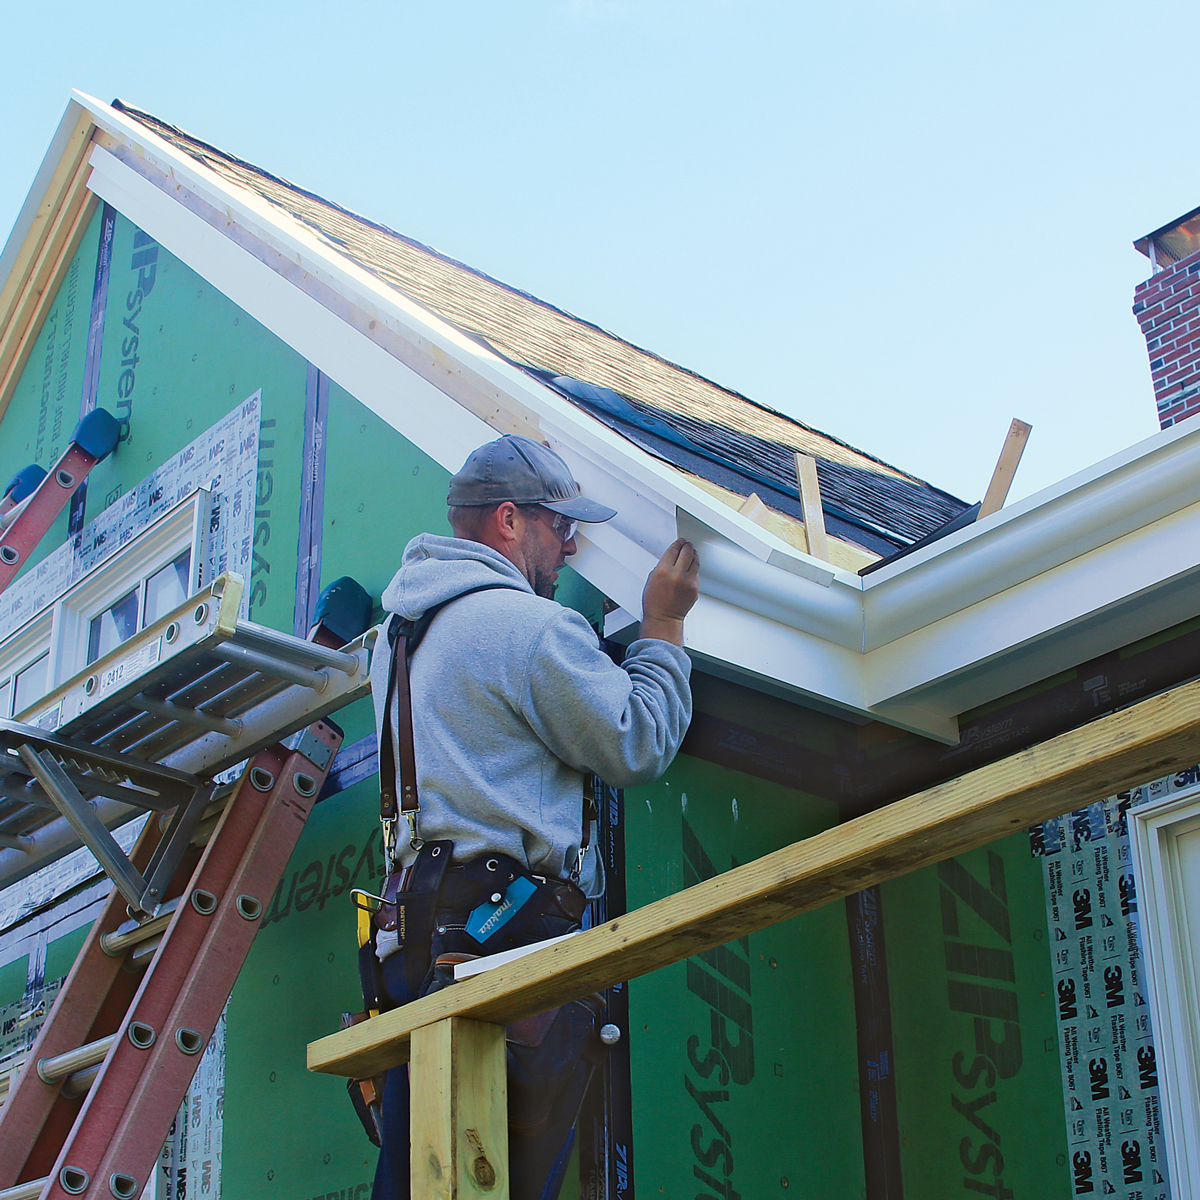
Timeless look. The completed gutter and rake trim make seamless turns at roof corners and intersecting gables without any eyesore transitions.

Timeless look. The completed gutter and rake trim make seamless turns at roof corners and intersecting gables without any eyesore transitions.

Modern materials, less maintenance

It killed me to see botched gutter jobs on otherwise beautiful homes, and I was inspired to find a better solution. I ended up manufacturing my own, seen in the project in this article. It’s an extruded aluminum gutter with a profile identical to the Boston pattern, called Duragutter. It enables designers and builders to replicate traditional details with low-maintenance materials. There is also a square profile designed for contemporary homes, as well as a flat-bottom version.

This article showcases a Cape undergoing a complete renovation and gutter installation. It was designed by Chatham, Mass., architect Leslie Schneeberger of SV Design and built by Duffany Builders. 

David Hornstein is a principal at Light House Design. Special thanks to John Moriarty of J. P. Moriarty & CO., Restoration Millwork in Somerville, Mass., for explaining the history of the Boston pattern.

Photos by Patrick McCombe.

From Fine Homebuilding #306


RELATED STORIES

  • Wood-Like Fiberglass Gutters
  • Is There Any Alternative to Roof Gutters?
  • Sloping and Placing Gutters

Sign up for eletters today and get the latest how-to from Fine Homebuilding, plus special offers.

Signing you up...

This site is protected by reCAPTCHA and the Google Privacy Policy and Terms of Service apply.
See all newsletters
See all newsletters
View PDF
Previous: Is There Any Alternative to Roof Gutters?

Guide

Roofing

Chapter

Waterproofing

View Comments

  1. user-5422101 | Mar 14, 2022 01:42pm | #1

    1/16" per foot is 3.125" over 50'. A flat gutter will drain just fine, the only reason for a slope like that is for waterflow for washing itself out. The final product does look amazing. Cyprus is readily available, why not make another 100 year wood gutter?

  2. dgeist | Mar 14, 2022 01:51pm | #2

    Tried looking for the manufacturer online. Slight typo in the text. I believe it's "duragutter" (www.duragutter.com).

Log in or create an account to post a comment.

Sign up Log in

Become a member and get full access to FineHomebuilding.com

Roofing

Roofing

A complete resource that includes the best materials and the right techniques to build a sturdy, leak-free, attractive roof on any house

View Project Guide

View All Project Guides »

Become a member and get unlimited site access, including the Roofing Project Guide.

Start Free Trial

Tools and Materials
  • Roof Coverings
  • Roofing Materials
  • Power Tools
  • Handy Helpers
  • Staging and Ladders
  • Safety Equipment
Roof Replacement and Reroofing
  • Preparing the Old Roof
  • Sheathing
  • Installing the New Roof
Roof Ventilation
  • Venting Basics
  • Installation
Waterproofing
  • Underlayment
  • Drip Edge
  • Flashing Adjoining Walls
  • Dormer and Skylight Flashing
  • Chimney Flashing
  • Vent Flashing
  • Gutters
Installing Asphalt Shingles
  • Calculating Shingles
  • Layout
  • Installation
  • Valleys
Installing Other Types of Roofs
  • Cedar Shingles
  • Metal
  • Low-Slope Roofs
  • Slate and Tile
Roof Maintenance and Repair
  • Assessing the Problem
  • Repairing Asphalt-Shingle Roofs
  • Other Roofing Repairs

Fine Home Building

Newsletter Sign-up

  • Fine Homebuilding

    Home building tips, offers, and expert advice in your inbox.

  • Green Building Advisor

    Building science and energy efficiency advice, plus special offers, in your inbox.

  • Old House Journal

    Repair, renovation, and restoration tips, plus special offers, in your inbox.

Signing you up...

This site is protected by reCAPTCHA and the Google Privacy Policy and Terms of Service apply.
See all newsletters

Follow

  • Fine Homebuilding

    Dig into cutting-edge approaches and decades of proven solutions with total access to our experts and tradespeople.

    Start Free Trial Now
    • Facebook
    • Instagram
    • X
    • LinkedIn
  • GBA Prime

    Get instant access to the latest developments in green building, research, and reports from the field.

    Start Free Trial Now
    • Facebook
    • YouTube
  • Old House Journal

    Learn how to restore, repair, update, and decorate your home.

    Subscribe Now
    • Facebook
    • Instagram
    • X

Membership & Magazine

  • Online Archive
  • Start Free Trial
  • Magazine Subscription
  • Magazine Renewal
  • Gift a Subscription
  • Customer Support
  • Privacy Preferences
  • About
  • Contact
  • Advertise
  • Careers
  • Terms of Use
  • Site Map
  • Do not sell or share my information
  • Privacy Policy
  • Accessibility
  • California Privacy Rights

© 2025 Active Interest Media. All rights reserved.

Fine Homebuilding receives a commission for items purchased through links on this site, including Amazon Associates and other affiliate advertising programs.

X
X
This is a dialog window which overlays the main content of the page. The modal window is a 'site map' of the most critical areas of the site. Pressing the Escape (ESC) button will close the modal and bring you back to where you were on the page.

Main Menu

  • How-To
  • Design
  • Tools & Materials
  • Video
  • Blogs
  • Forum
  • Project Guides
  • Reader Projects
  • Magazine
  • Members
  • FHB House

Podcasts

  • FHB Podcast
  • ProTalk

Webinars

  • Upcoming and On-Demand

Podcasts

  • FHB Podcast
  • ProTalk

Webinars

  • Upcoming and On-Demand

Popular Topics

  • Kitchens
  • Business
  • Bedrooms
  • Roofs
  • Architecture and Design
  • Green Building
  • Decks
  • Framing
  • Safety
  • Remodeling
  • Bathrooms
  • Windows
  • Tilework
  • Ceilings
  • HVAC

Magazine

  • Current Issue
  • Past Issues
  • Magazine Index
  • Subscribe
  • Online Archive
  • Author Guidelines

All Access

  • Member Home
  • Start Free Trial
  • Gift Membership

Online Learning

  • Courses
  • Project Guides
  • Reader Projects
  • Podcast

More

  • FHB Ambassadors
  • FHB House
  • Customer Support

Account

  • Log In
  • Join

Newsletter

Get home building tips, offers, and expert advice in your inbox

Signing you up...

This site is protected by reCAPTCHA and the Google Privacy Policy and Terms of Service apply.
See all newsletters
See all newsletters

Follow

  • X
  • YouTube
  • instagram
  • facebook
  • pinterest
  • Tiktok

Join All Access

Become a member and get instant access to thousands of videos, how-tos, tool reviews, and design features.

Start Your Free Trial

Subscribe

FHB Magazine

Start your subscription today and save up to 70%

Subscribe

We hope you’ve enjoyed your free articles. To keep reading, become a member today.

Get complete site access to expert advice, how-to videos, Code Check, and more, plus the print magazine.

Start your FREE trial

Already a member? Log in