FHB Logo Facebook LinkedIn Email Pinterest Twitter X Instagram Tiktok YouTube Plus Icon Close Icon Navigation Search Icon Navigation Search Icon Arrow Down Icon Video Guide Icon Article Guide Icon Modal Close Icon Guide Search Icon Skip to content
Subscribe
Log In
  • How-To
  • Design
  • Tools & Materials
  • Restoration
  • Videos
  • Blogs
  • Forum
  • Magazine
  • Members
  • FHB House
  • Podcast
Log In
How-To

Dialing In a Job-Site Tablesaw

Tune up your saw and add a few simple jigs for an efficient, accurate, and dependable tool.

By Gary Striegler Issue 318 - October 2023

Synopsis: In this article, Gary Striegler shares his tips for adjusting a job-site tablesaw to enhance safety and accuracy. He covers these procedures: truing the blade and fence for precise cuts, providing infeed and outfeed support, ripping tapers, and making safe plunge cuts. He also shares his design for an easy-to-build sled for when he needs to crosscut pieces that are too wide for the miter saw, and he gives instructions for using the sled.


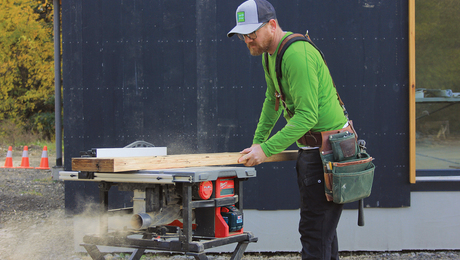
When I started my construction business, a tablesaw was one of my very first ­purchases. Since buying it, I have learned volumes about tablesaw setup and technique. And by working around dozens of great carpenters over the years, I have built up a sizable collection of tips and tricks for working safely and effi­ciently with a tablesaw.

As versatile as this tool can be, it can also be one of the most dangerous if not operated properly and carefully. A good starting point is “Make Any Tablesaw Safer” (FHB #293), an article that outlines the basics for how to use a tablesaw safely, including making a simple job-site push stick, understanding the benefits of riving knives and guards, using the right blade, and having the correct blade insert for the work you’re doing. With those basics out of the way, I’ll demonstrate here how to get a saw in shape for high-end trimwork.

Before turning on my tablesaw, I always check that it is adjusted correctly to help ensure the safest and most accurate cuts. After walking you through the process of adjusting the various parts of the saw, I will show you a must-have cross-cut sled and jigs for making long tapered rips safely and easily.

True the blade and the fence for precise cuts

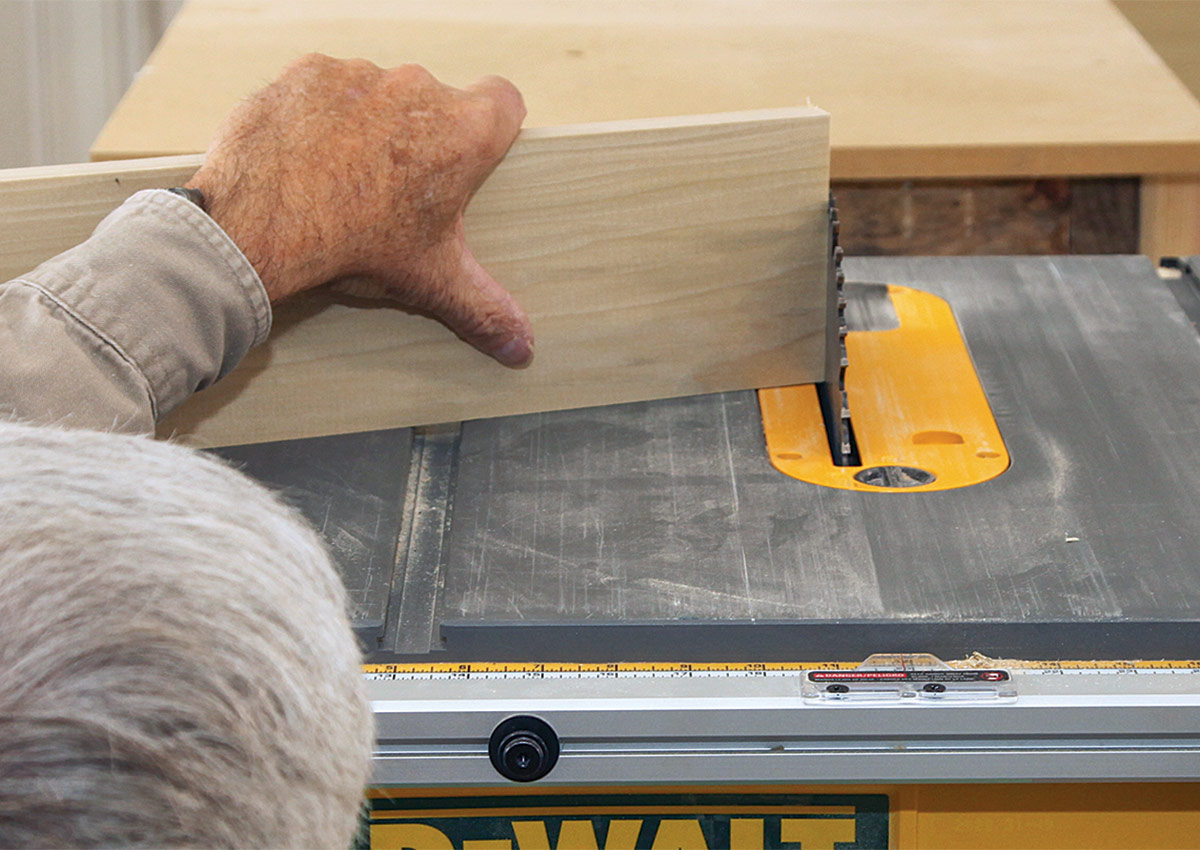
Square the blade to the table

Every time I move my tablesaw to a new location, I make sure that the blade is square to the table. This is critical for doing fine finish work. Many carpenters use a framing or rafter square, but I find it easier to use a board cut square on the miter saw. Once I have set the blade square and set the angle stop and pointer at 0°, I repeat the process to set the 45° angle stop.

checking blade of tablesaw is square with a cut board
A cut board checks for square. After cutting a board square on a miter saw, angle the board slightly so that the crisp edge puts a fine line against the tablesaw blade while adjusting for square. Sight down the table, and adjust the angle until there is no gap between the board and the blade.
adjust tablesaw blade to square then set to zero
Lock in zero. Once the blade is adjusted square, set the angle stop to ensure that the blade angle returns to 0° after every blade-angle change, and set the pointer on 0° as well.

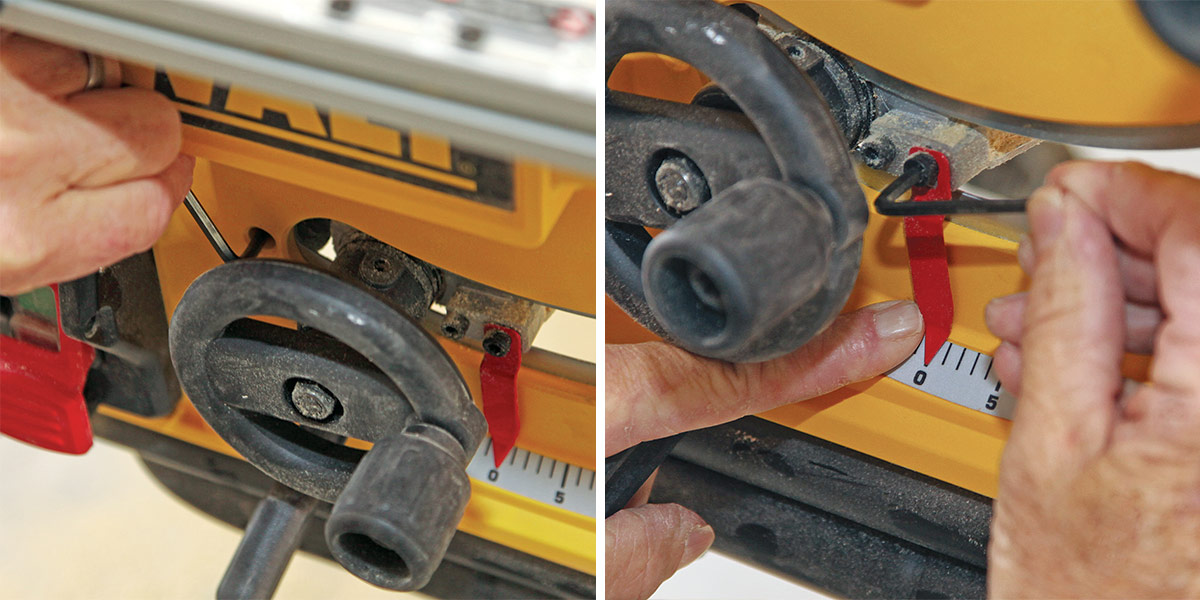
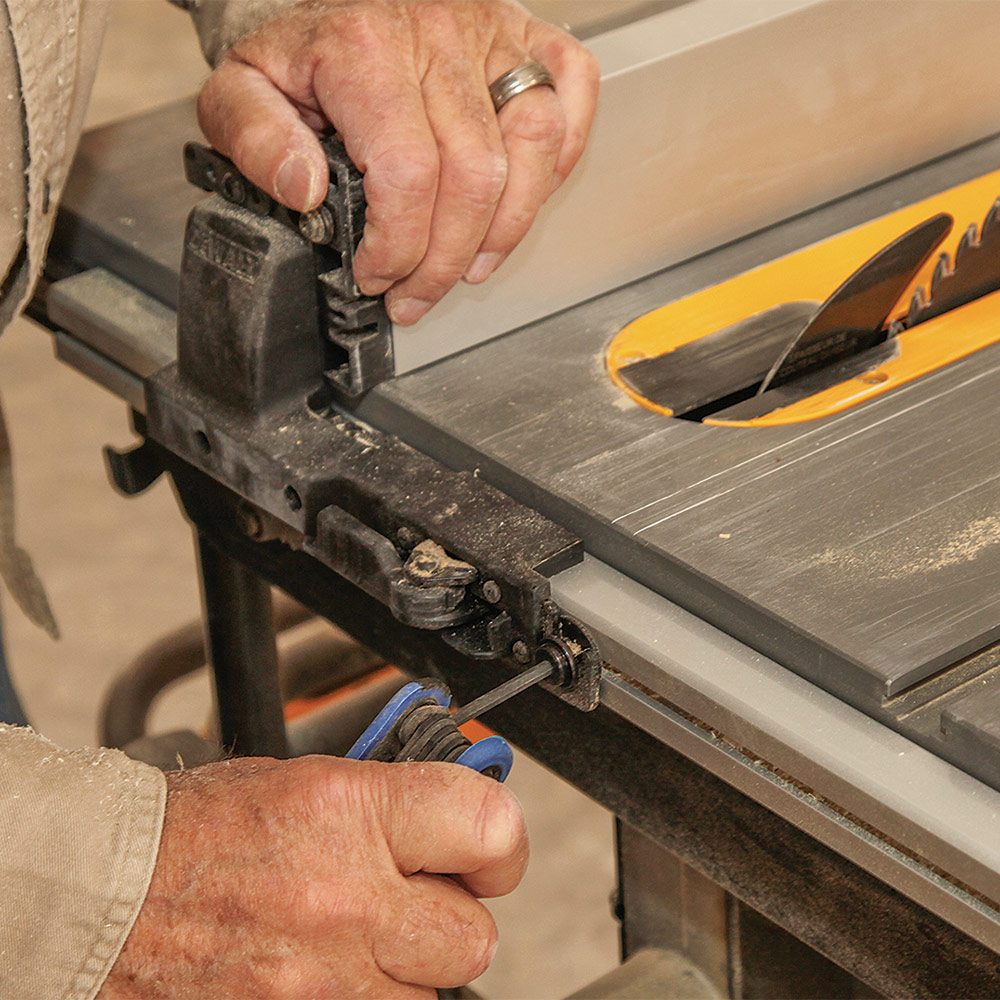
Align the blade to the miter slots

Another more subtle adjustment is making sure that the track of the blade is perfectly parallel to the miter slots in the table. That adjustment usually involves moving the motor housing slightly. This adjustment is absolutely critical for making and using a sled jig.
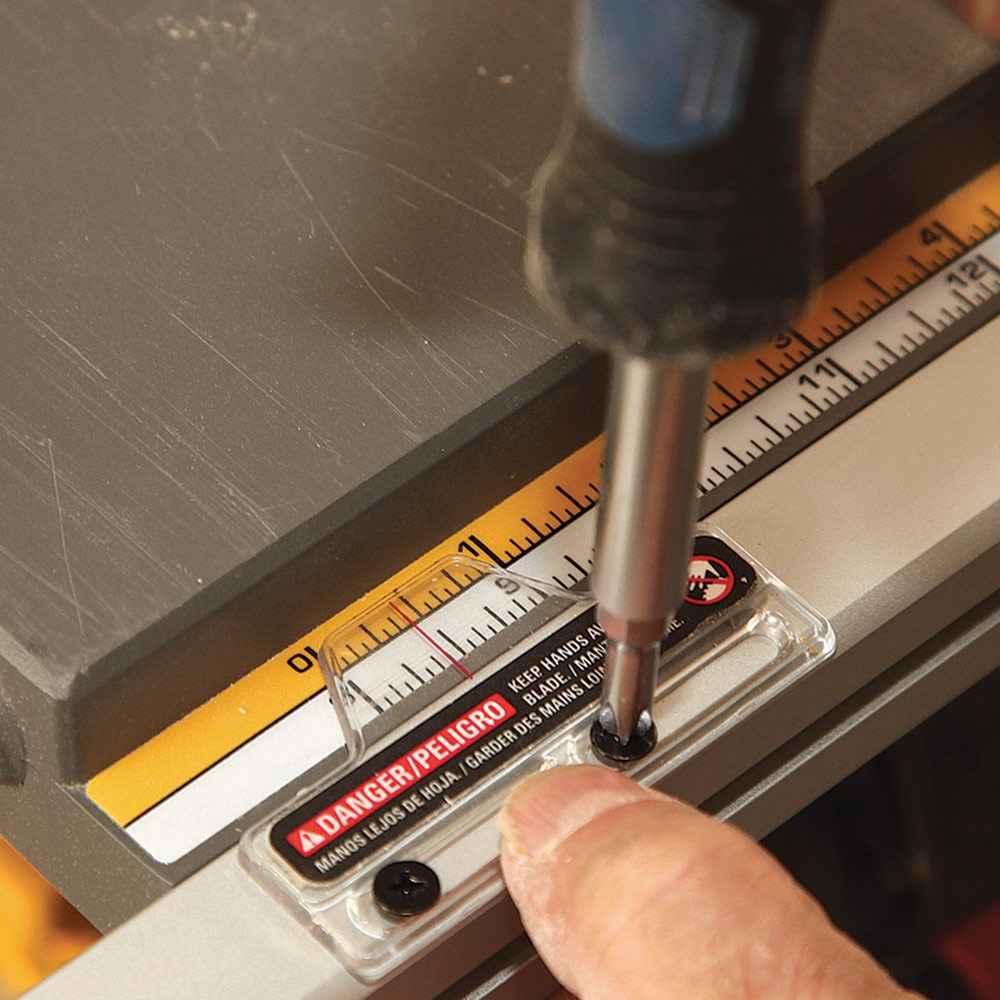
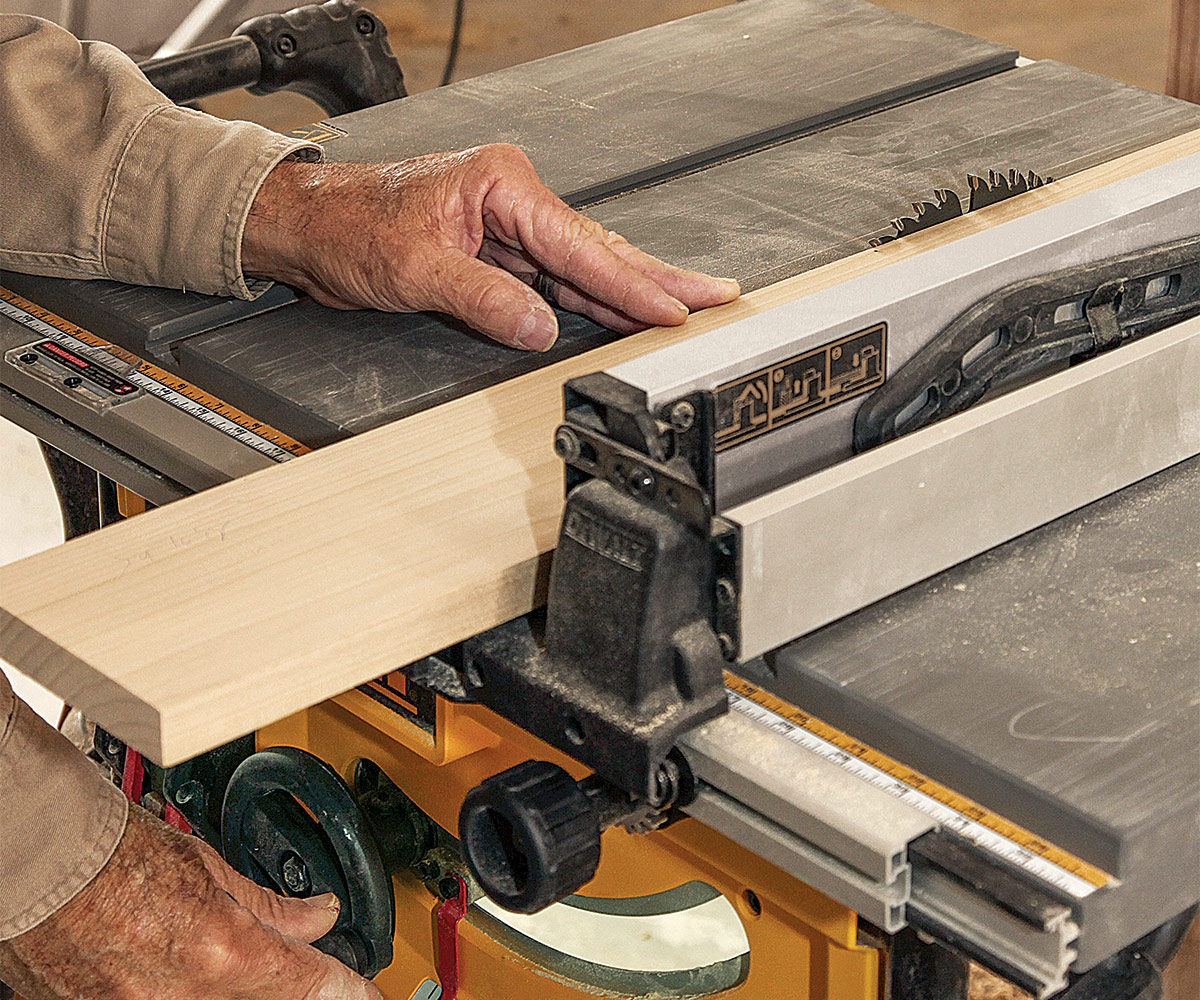
measure the distance between the saw teeth and the miter slot
Parallel alignment. Raise the blade, and measure the distance between the saw teeth and the miter slot at both the front and back of the blade. If the distance doesn’t match, adjust the motor housing and carriage.

Adjust the fence

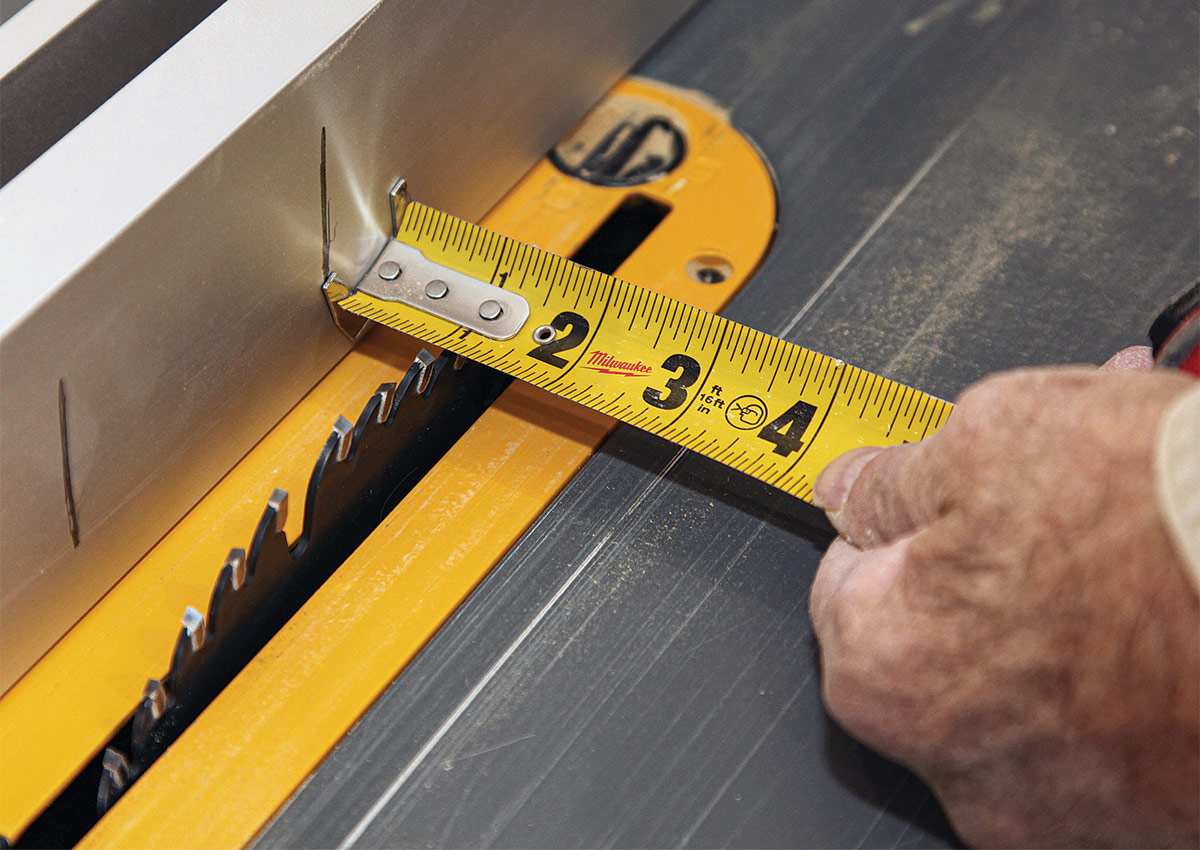
With adjustments to the blade locked in, the final thing I check is the rip fence in the locked position. If work is starting to bind or burn, it’s usually a sign that the fence is out of parallel with the blade and too tight on the outfeed side. I adjust the fence accordingly with a slight gap on the outfeed side. For efficient work, I like to use the measuring scale on the rail that holds the fence to set the width of my rips. So while I’m adjusting the rip fence, I also calibrate the rip scale.

check the fence with a board
Check the fence. I rip a board and then set it back against the fence with the motor turned off. With the board against the blade, it should be touching the fence at the infeed point, with a gap of about 1/64 in. at the outfeed end.
adjust tablesaw outfeed
Tweak as needed. Every fence adjusts a little differently, but most have a screw or Allen screw to adjust the outfeed in or out.
adjusting tablesaw measuring scale pointer
Calibrate the rip scale. After making a rip, check the width of the cut board and adjust the measuring scale pointer to that measurement.

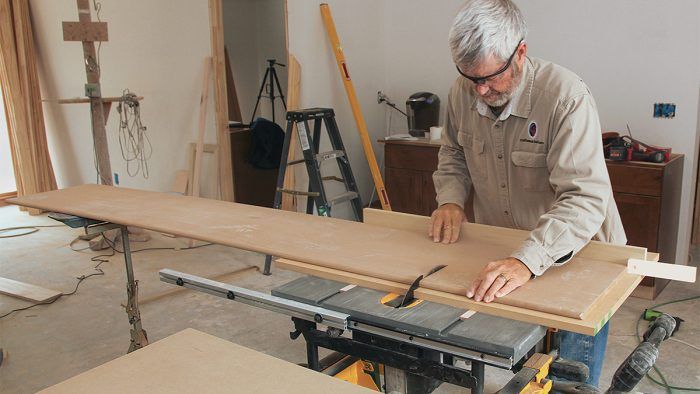
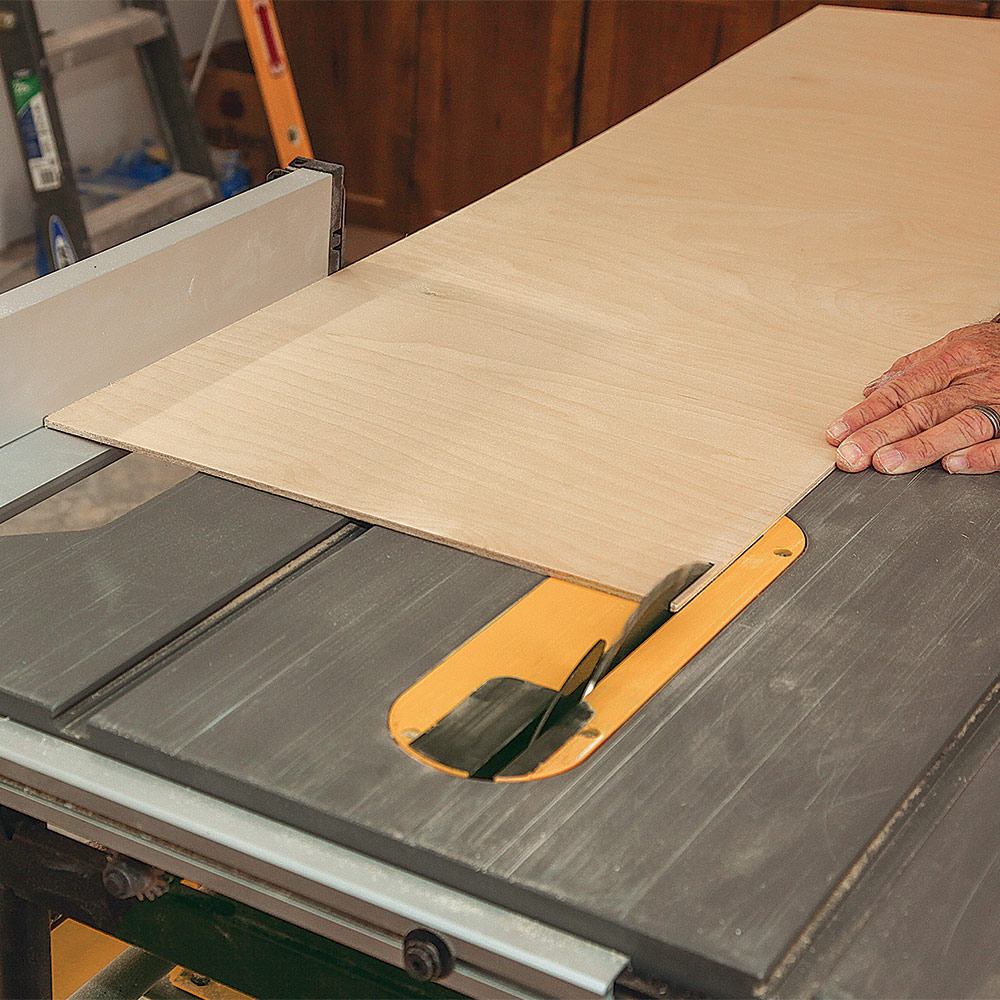
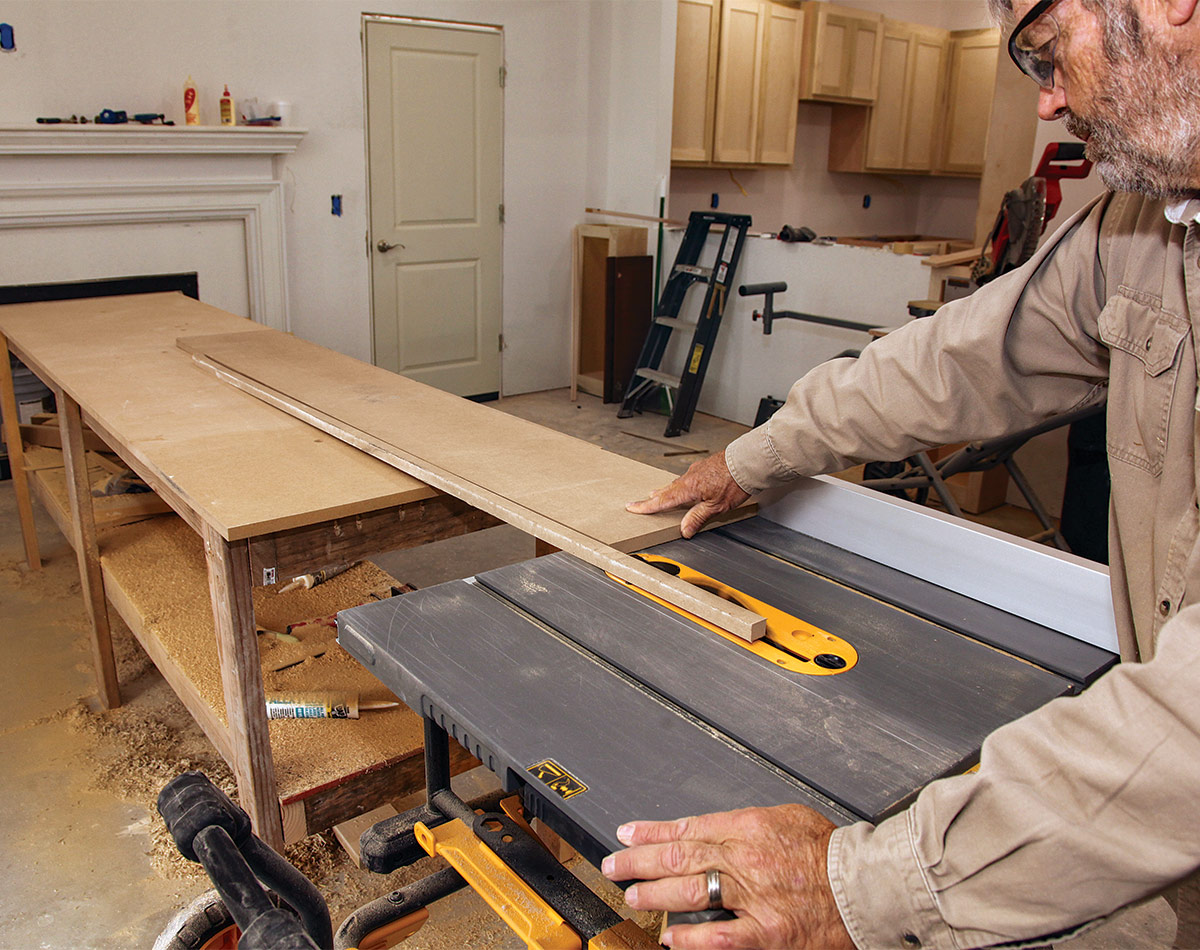
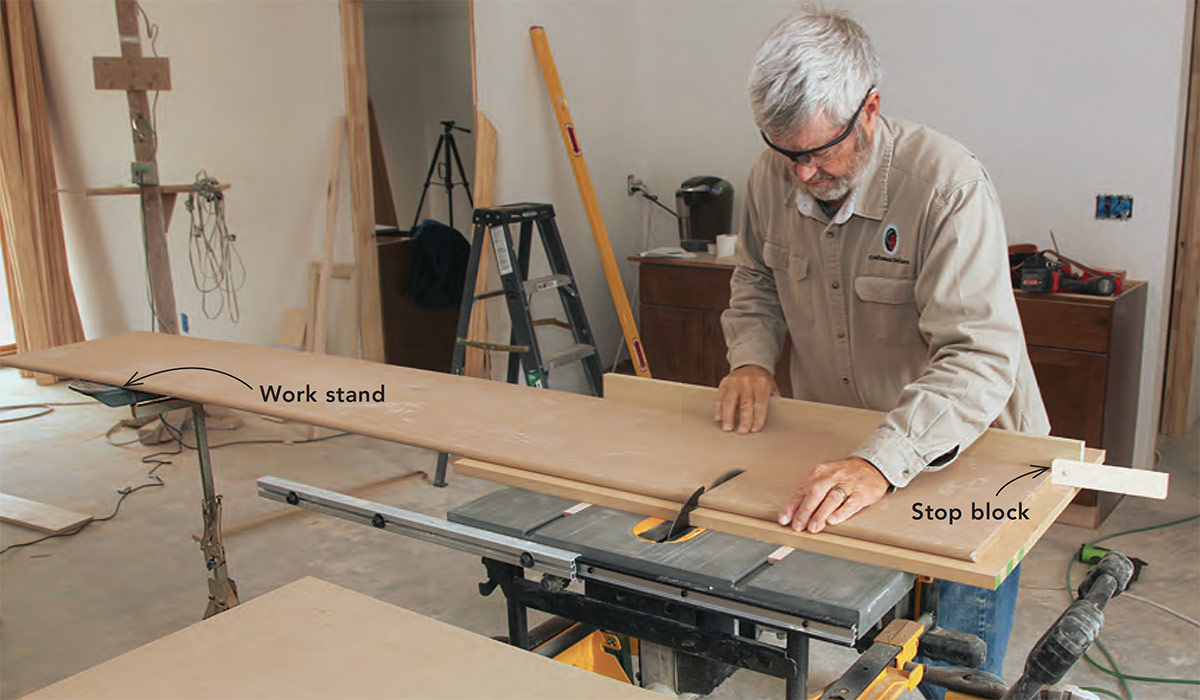
Support infeed and outfeed

On most projects, I need a workbench and an outfeed table for my tablesaw. By building a bench to the right height, I can position it to be both my work surface and outfeed support for ripping long boards. There are a couple critical safety concerns when feeding material through a tablesaw: Be sure to push the material well past the blade after each rip, and always keep material flat on the saw table as you feed it into the blade.

setting tablesaw blade height
Set the right blade height. Typically 1/2 in. to 3/4 in. of the blade should extend above the wood while cutting. One general rule is to set the blade height so that the top of the work is even with the bottom of the gullet between sets of saw teeth.
using a workbench as tablesaw outfeed support
Outfeed support. A workbench that is about 3⁄4 in. lower than the saw table is a great way to support material sent through the tablesaw. Long rips bend down slightly before landing on the bench top. If the bench top is much higher, there is a risk of the work bumping into the workbench rather than riding over it.
keeping material flat against tablesaw when feeding it into blade
Flat-out approach. Always keep material flat against the saw table when feeding it into the blade.
pushing work past blade on tablesaw
Push work past the blade. When ripping material, always push the work well past the blade before turning off the saw. Try to keep your fingers a minimum of 3 in. from the blade at all times.

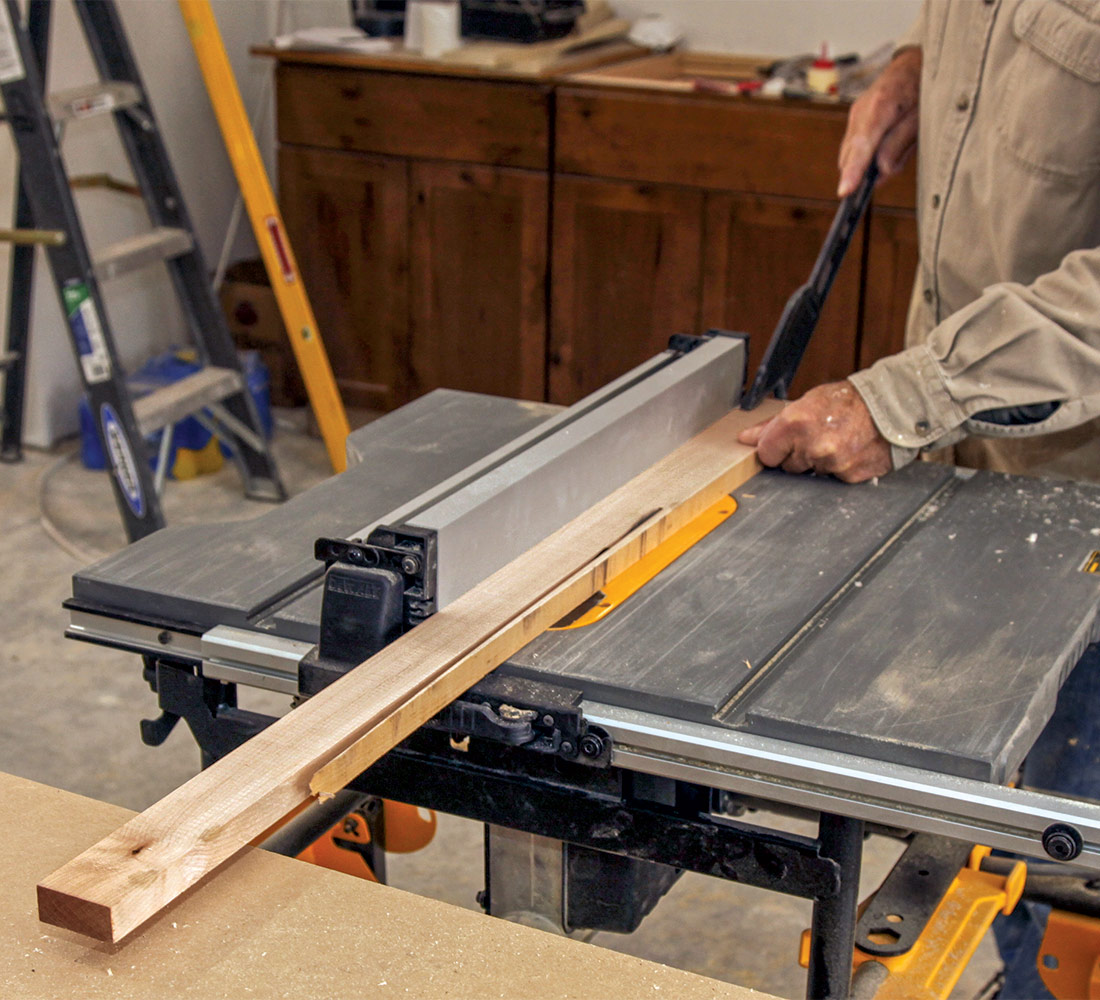
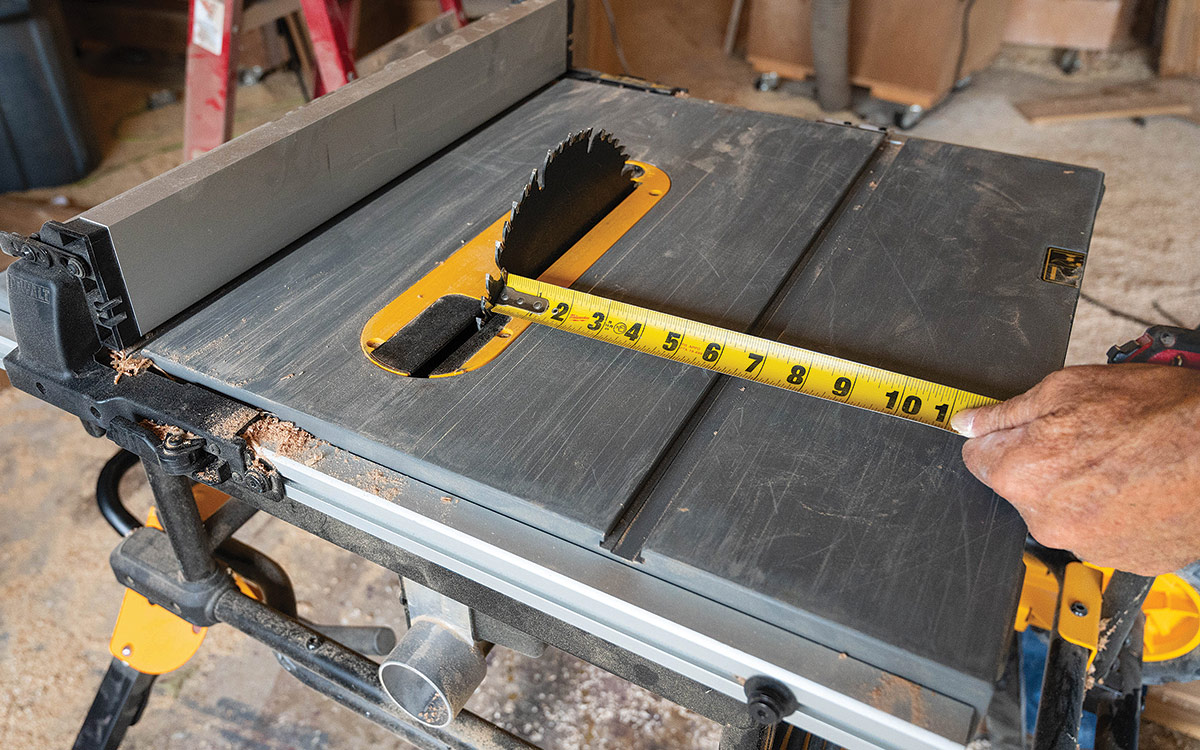
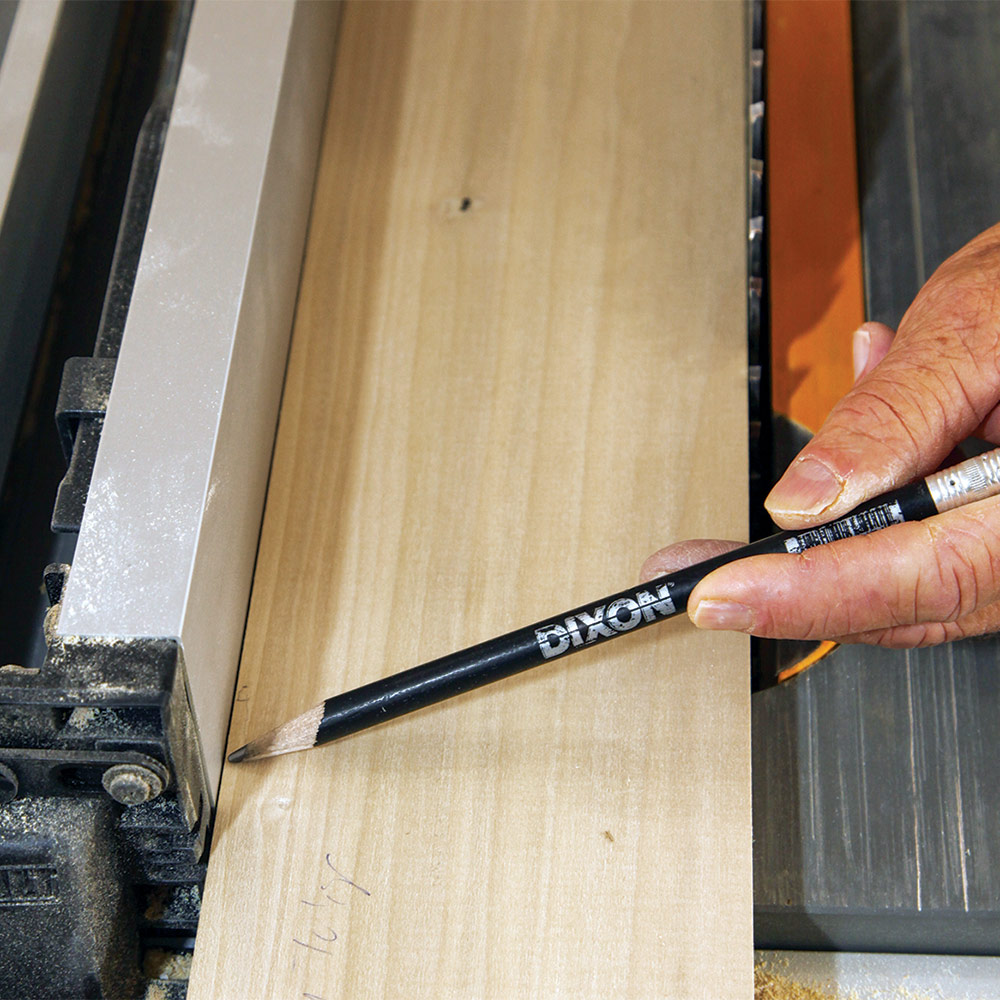
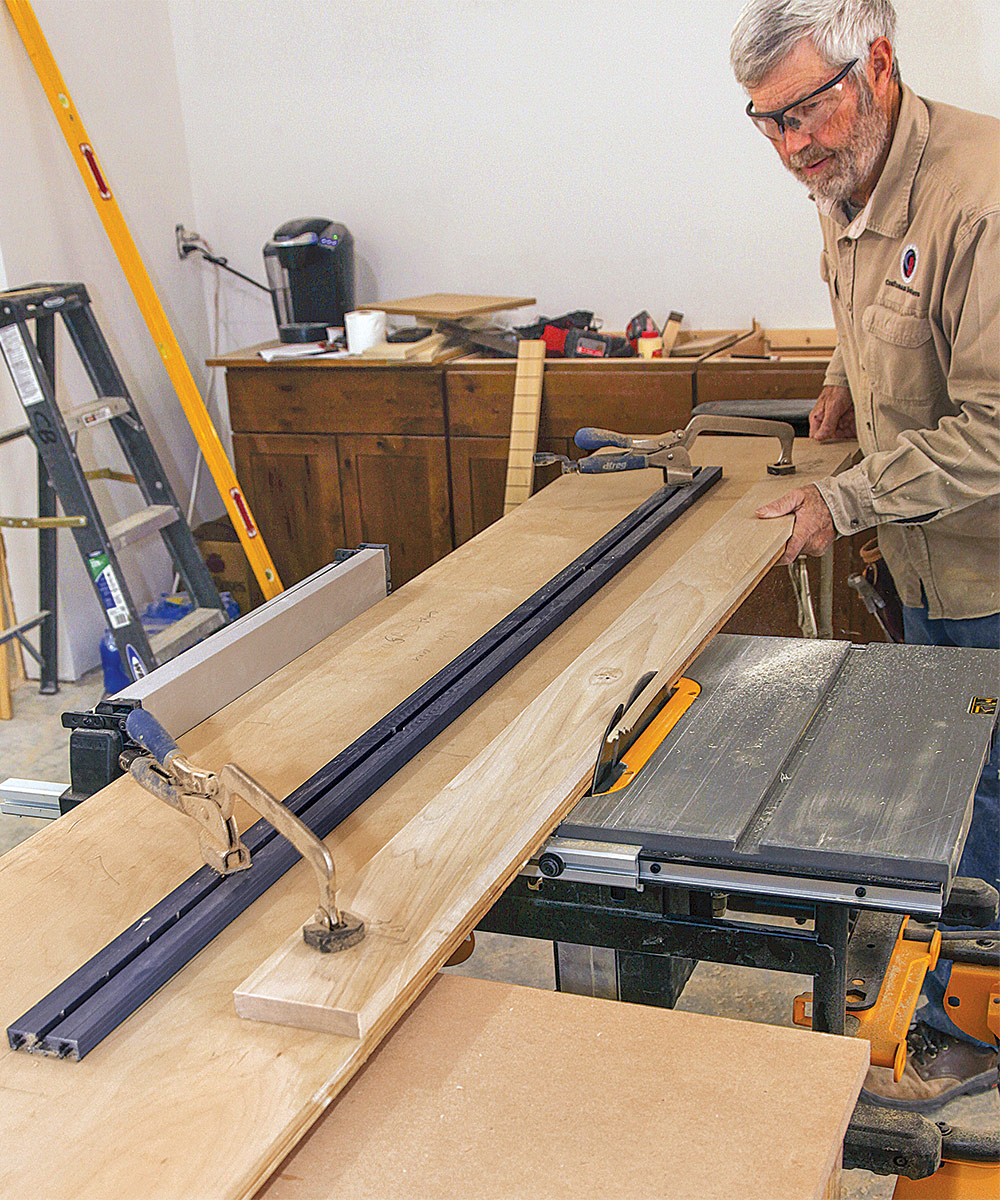
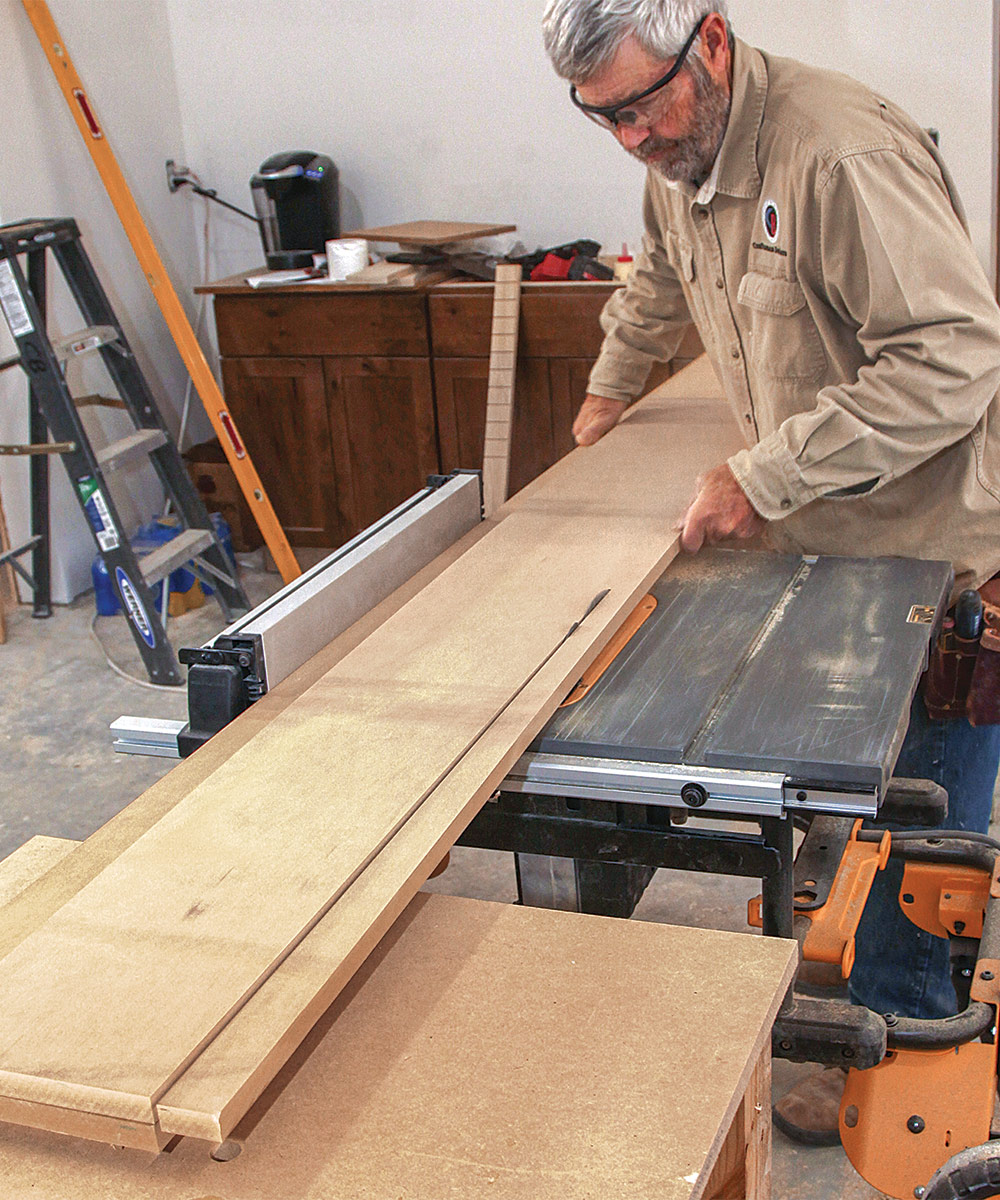
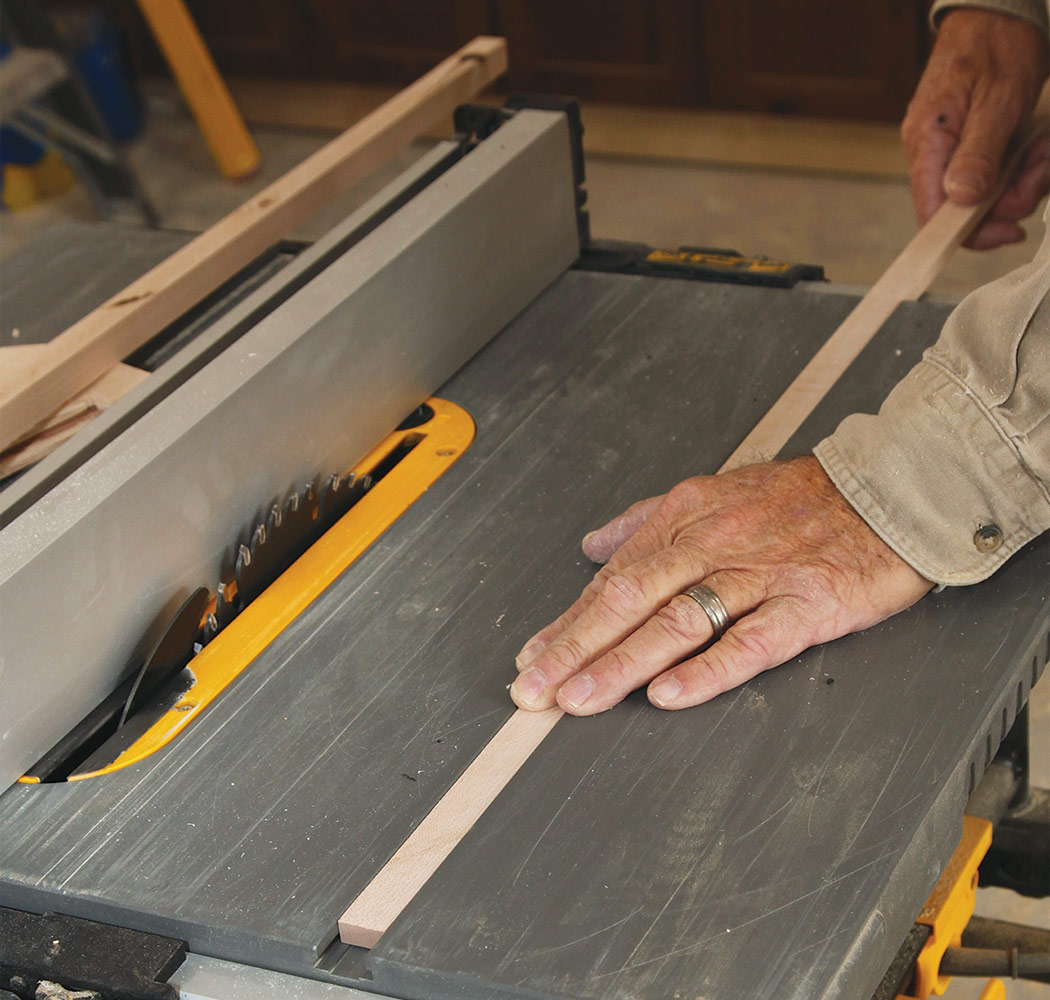
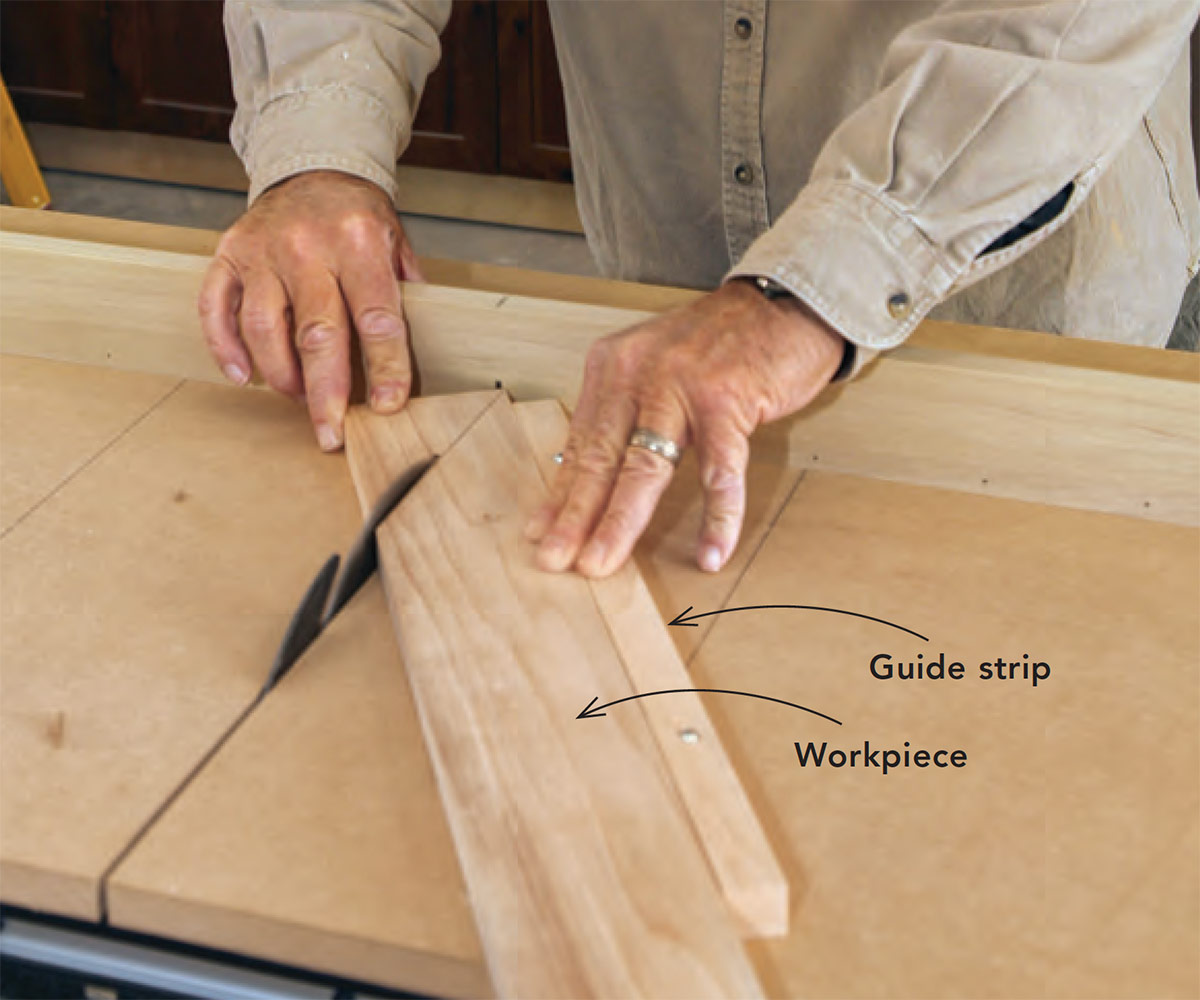
Three ways to rip tapers

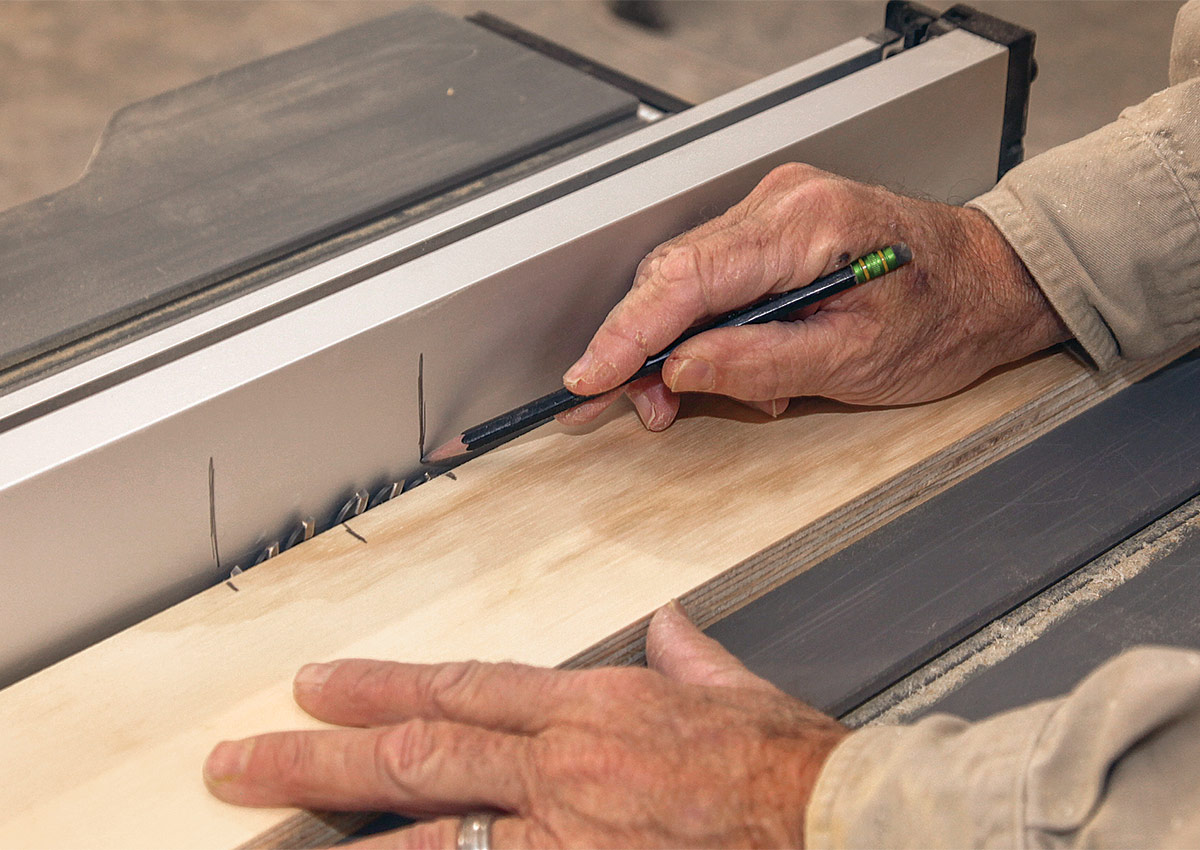
I use a couple of different sled jigs for making long tapered rips when I need them for things like extension jambs. Each of these options starts with a length of shelf stock 10 in. to 12 in. wide placed next to the tablesaw fence so that the shelf stock just touches the saw blade. I measure the width of my tapered rip from the edge of the shelf stock and mark those widths at each end. Then it’s just a matter of lining up the work with the marks and choosing a strategy for securing the work to the shelving stock.
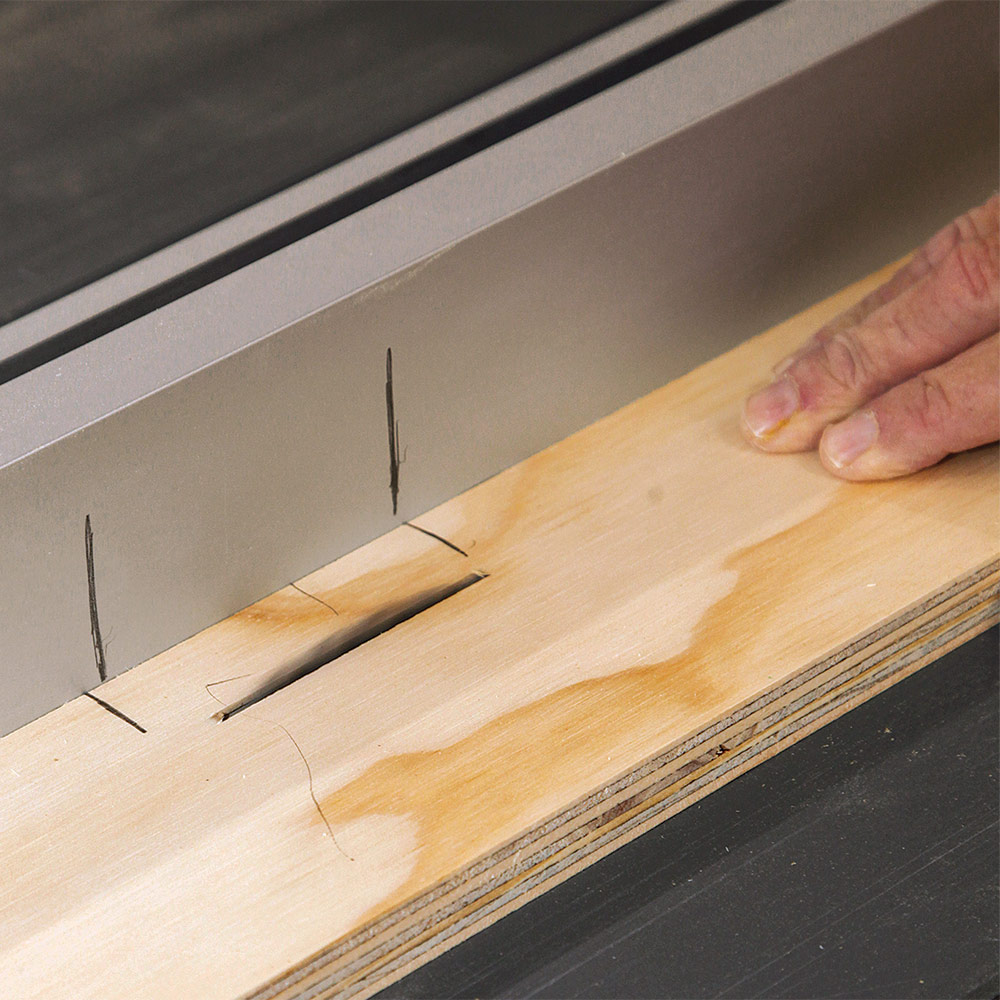
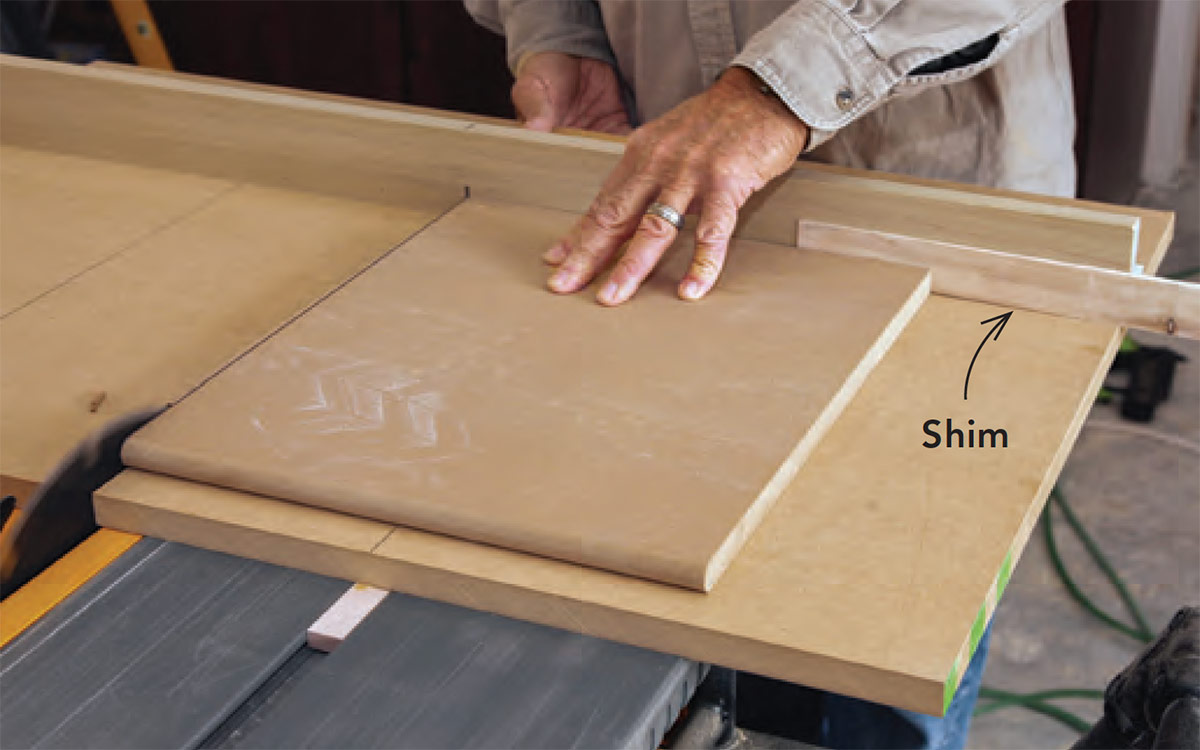
using a clamp track for long tapered rip on tablesaw
Clamp-track ripping. The simplest sled jig for making long tapered rips uses a section of clamp track tacked to the shelving stock. Clamps in the track hold the work in place as you line up the cut with the edge of the sled.
using narrow strips of wood to set the width of taper on tablesaw
Strips control the taper. In this version of the ripping jig, I position the work using narrow strips of wood tacked to the shelving. A strip on the long side sets the width of the taper, while a shorter strip at the back end helps push the material through the saw.
using sled jig to make a tapered rip on tablesaw
Tack the work to the sled jig. With this option, the work attaches directly to the shelving stock with small nails or screws for making a tapered rip.

Safe plunge cuts

Although it’s somewhat infrequent, carpenters can face the challenge of making a partial cut in plywood or trim stock on the tablesaw. Plunge-cutting involves raising the blade into the work when a full rip cut is not called for. One example is the hinge mortising jig that I’m working on here. I start with a length of ¾-in. plywood as long as the door and lay out the hinge positions along one edge.

marking a tablesaw blade location on a board
Mark the blade location. With the saw turned off, center a hinge location on the raised blade and transfer the marks to the fence.
measuring width of required cut to outside of tablesaw blade
Set the width of the cut. To set the fence position, measure the width of the required cut to the outside of the blade.
raising tablesaw blade to cut out hinge
Raise the blade. Lower the blade fully, and align the hinge locations on the board with the locations marked on the fence. While holding down the board, turn on the saw. Crank the blade up slowly and carefully to the proper height. Move the board slightly until the saw kerf meets the layout lines. Repeat the process at each hinge location.
using crosscut sled to remove waste for hinge
Crosscuts remove waste. Using the crosscut sled shown on the following pages, make cuts at each of the cut lines to remove the waste. The resulting hinge-routing template is ready for a router’s pattern-cutting bit.

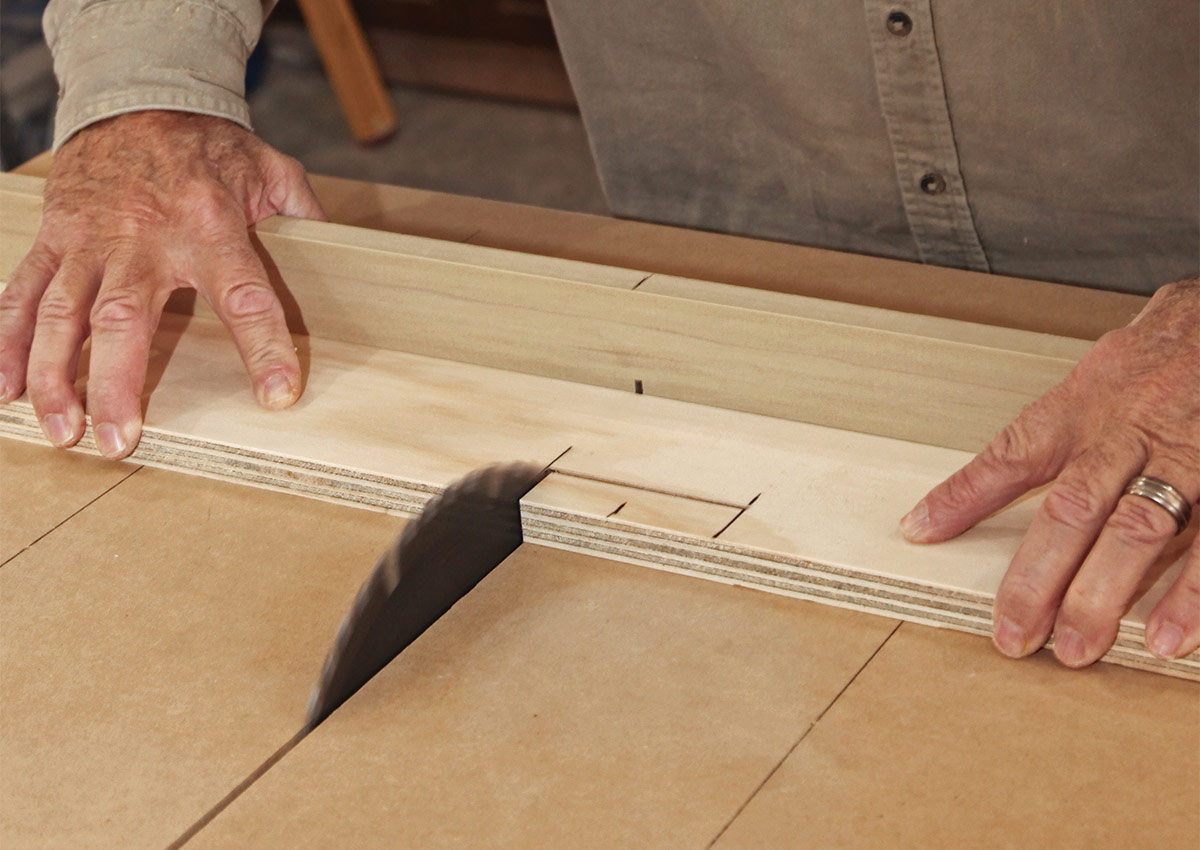
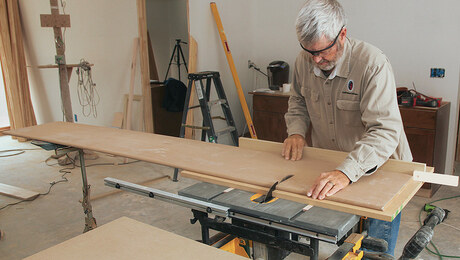
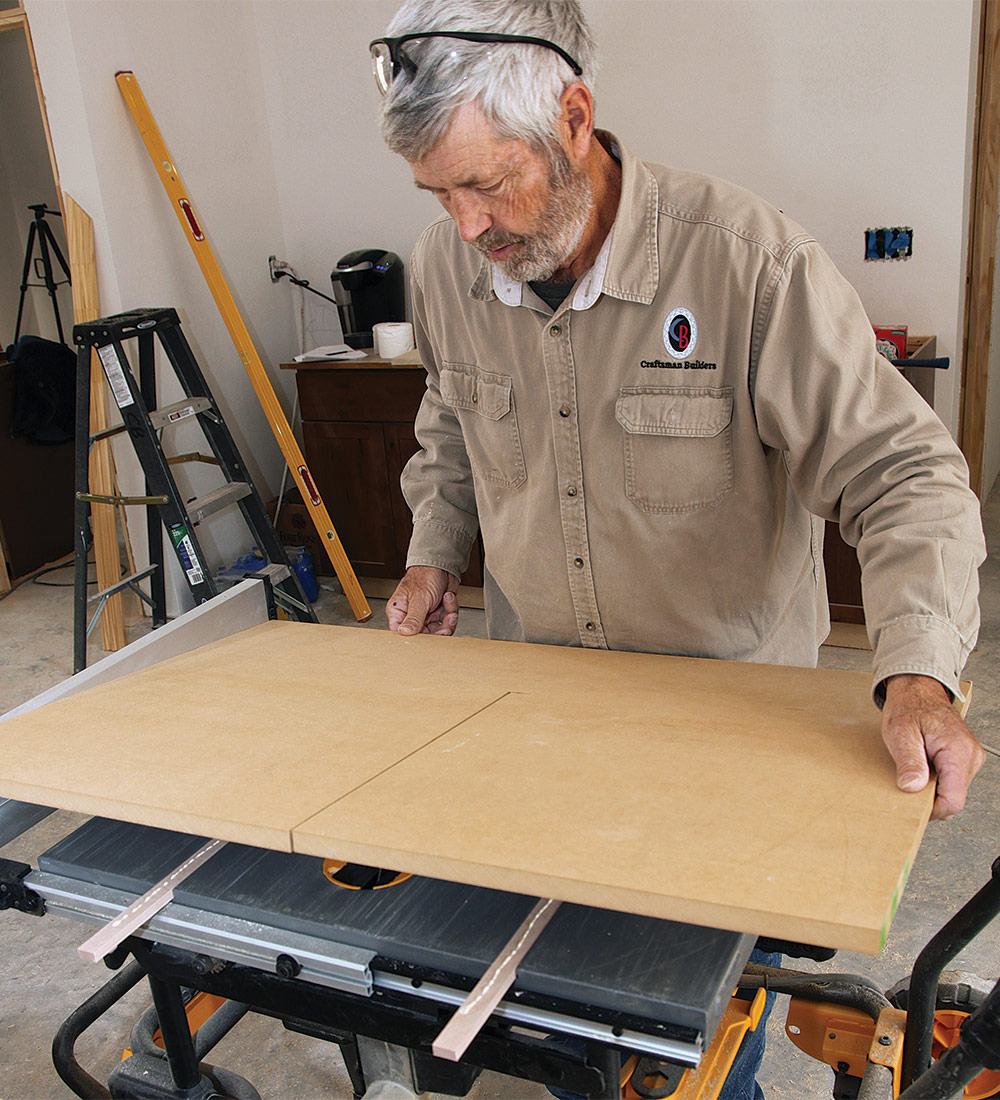
An easy-to-build crosscut sled

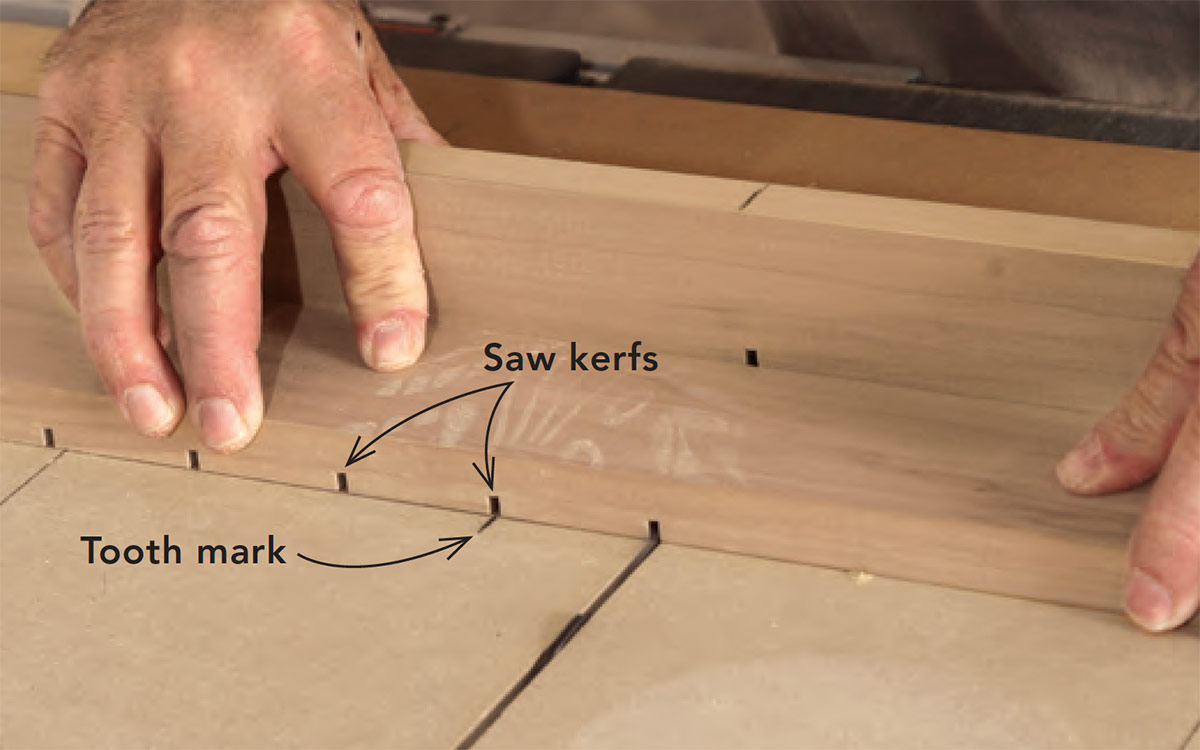
I use a tablesaw primarily for ripping, but when I need to crosscut pieces that are too wide for the miter saw, such as deep shelving, I use a shop-built sled. The accuracy and smooth operation of the sled depend on having the blade perfectly aligned to the miter slots in the saw table.

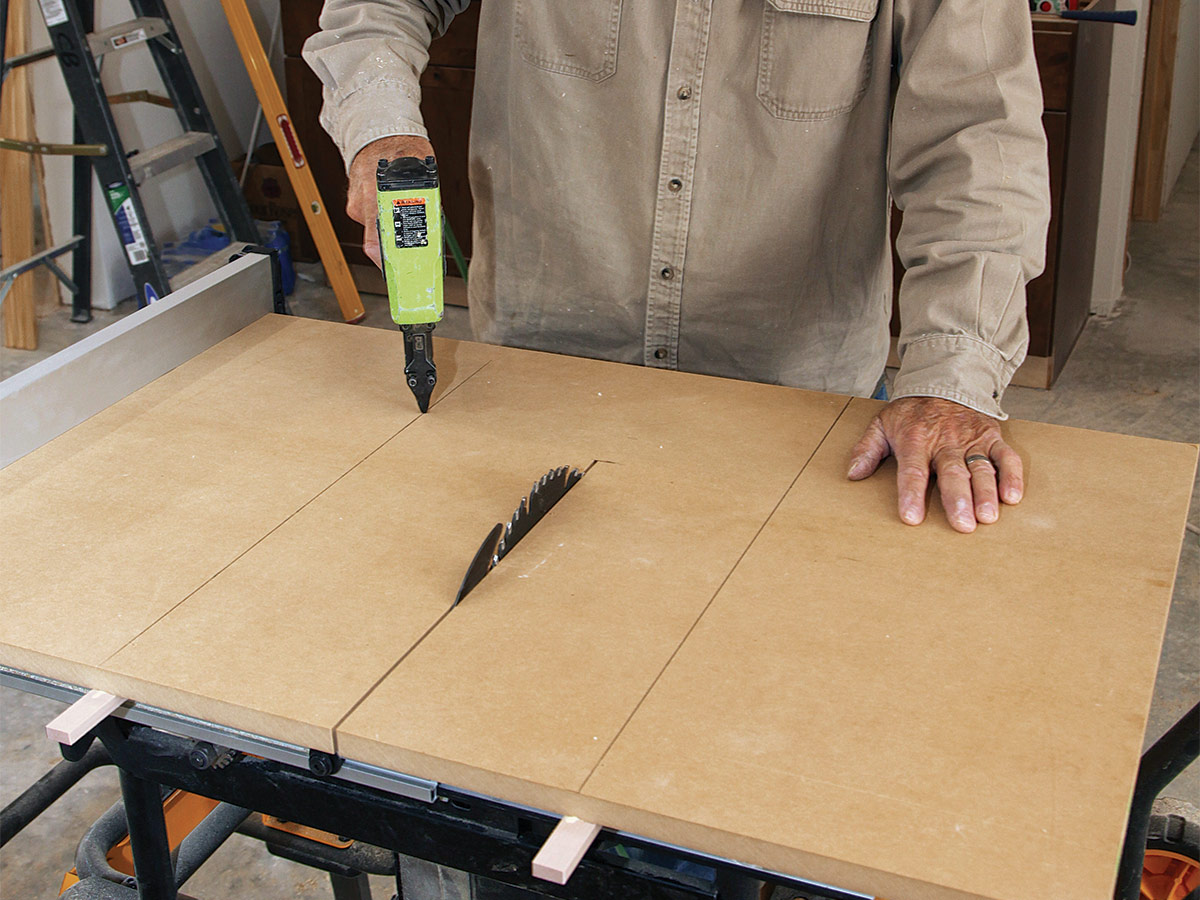
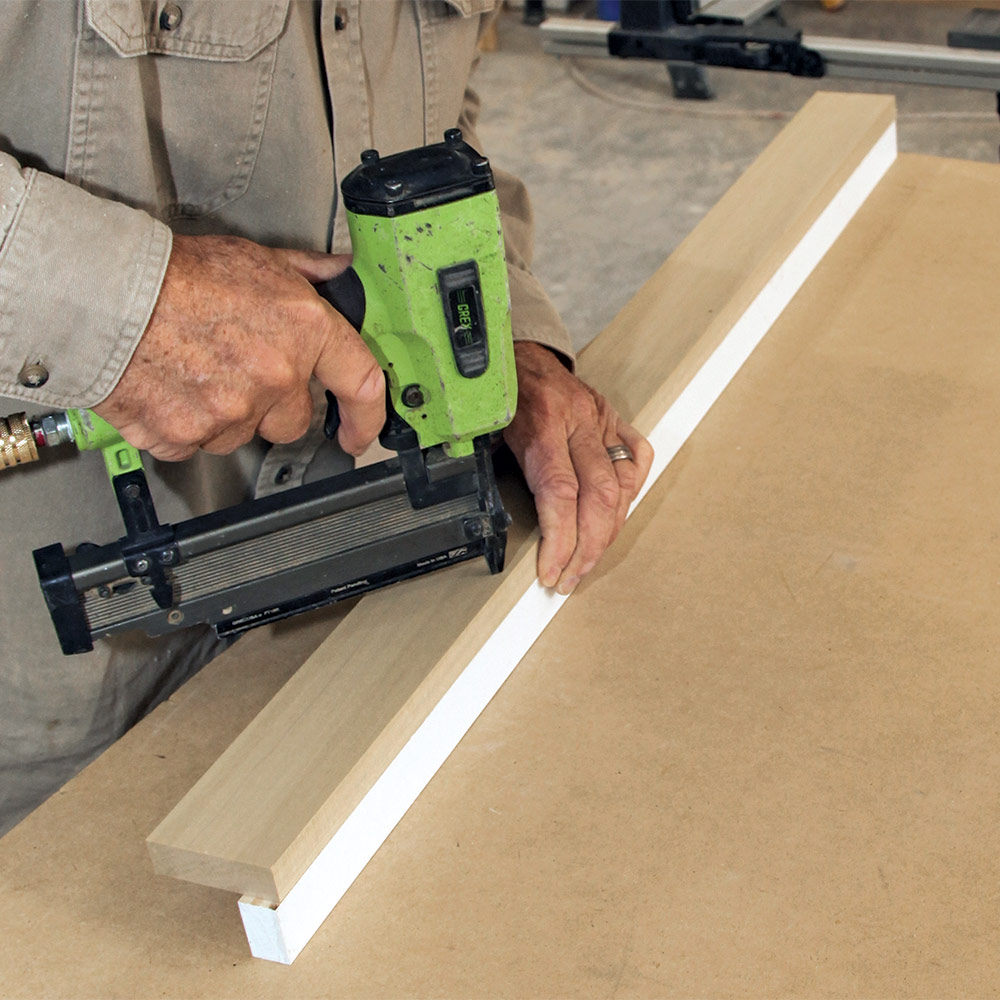
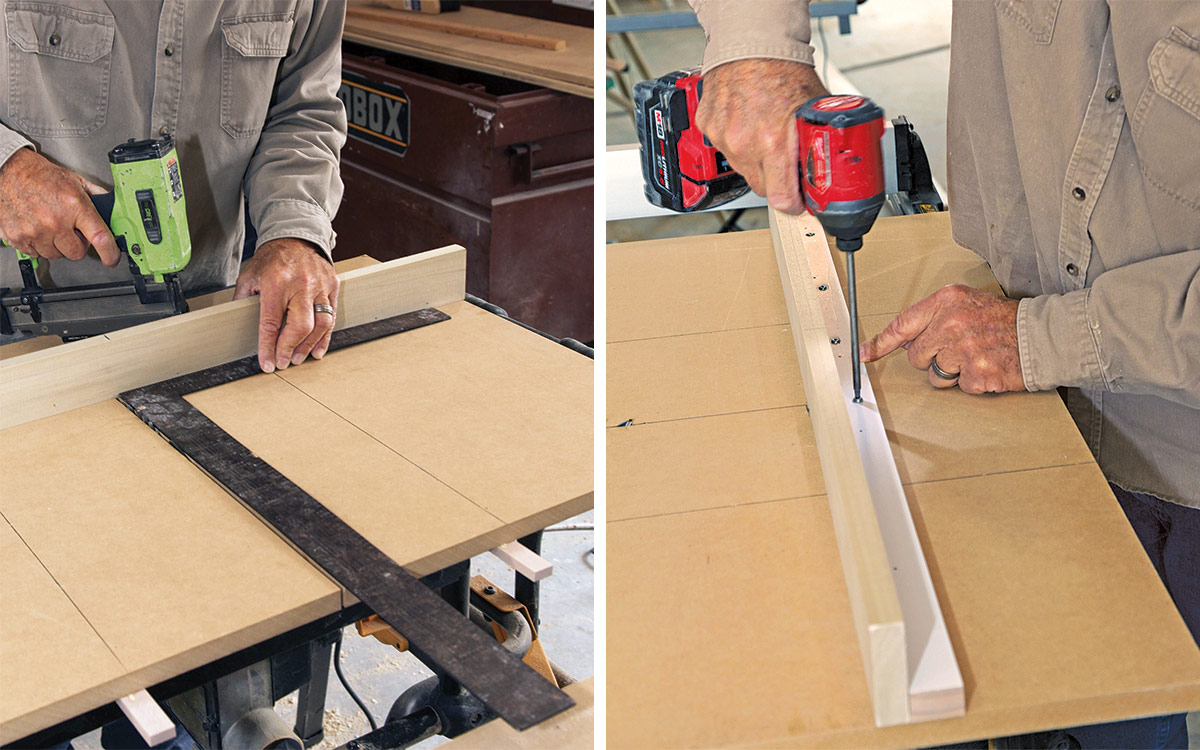
I begin by making the guide strips that fit closely but slide easily in the tablesaw miter slots. Next, I make the table for the sled and attach the strips to the table. I draw reference lines for nailing the table to the strips. After flipping the table over, I tap the strips down with a hammer. Finally, I make a simple fence for the sled and attach it to the sled table.

1. Fit the guide strips

fitting strips into tablesaw miter slot
Plane 1x stock to fit snugly into the tablesaw’s miter slots, then rip the strips to the depth of the slots.

2. Prep the sled table

cutting a piece of 3/4 in. MDF down the middle
Take a piece of 3/4-in. MDF or plywood about 2 ft. by 3 ft. and make a cut down the middle, stopping about 8 in. from the back edge. Be sure to turn off the saw before removing the sheet.

3. Glue the strips to the sled

gluing strips in miter slots to sled
Place the strips in the miter slots, and after applying a bead of glue to them, drop the table into position using the stationary saw blade to align the table.

4. Tack the sled to the strips

driving brad nails to attach table to strips
With lines drawn to guide the nail placement, drive brads to attach the table to the strips. Flip the sled table over and hammer the strips tight to the underside of the table to fully engage the brads while the glue sets up.

5. Make the fence

nailing two pieces of material together to make the sled fence
For the sled fence, nail two pieces of 1x material together in the shape of an “L.”

6. Square the fence

using a framing square to set the fence perpendicular to tablesaw blade and fasten fence with screws
Use a framing square aligned with the cut on the sled table to set the fence perpendicular to the blade. Tack the fence to the table with brads, then fasten it securely with screws.

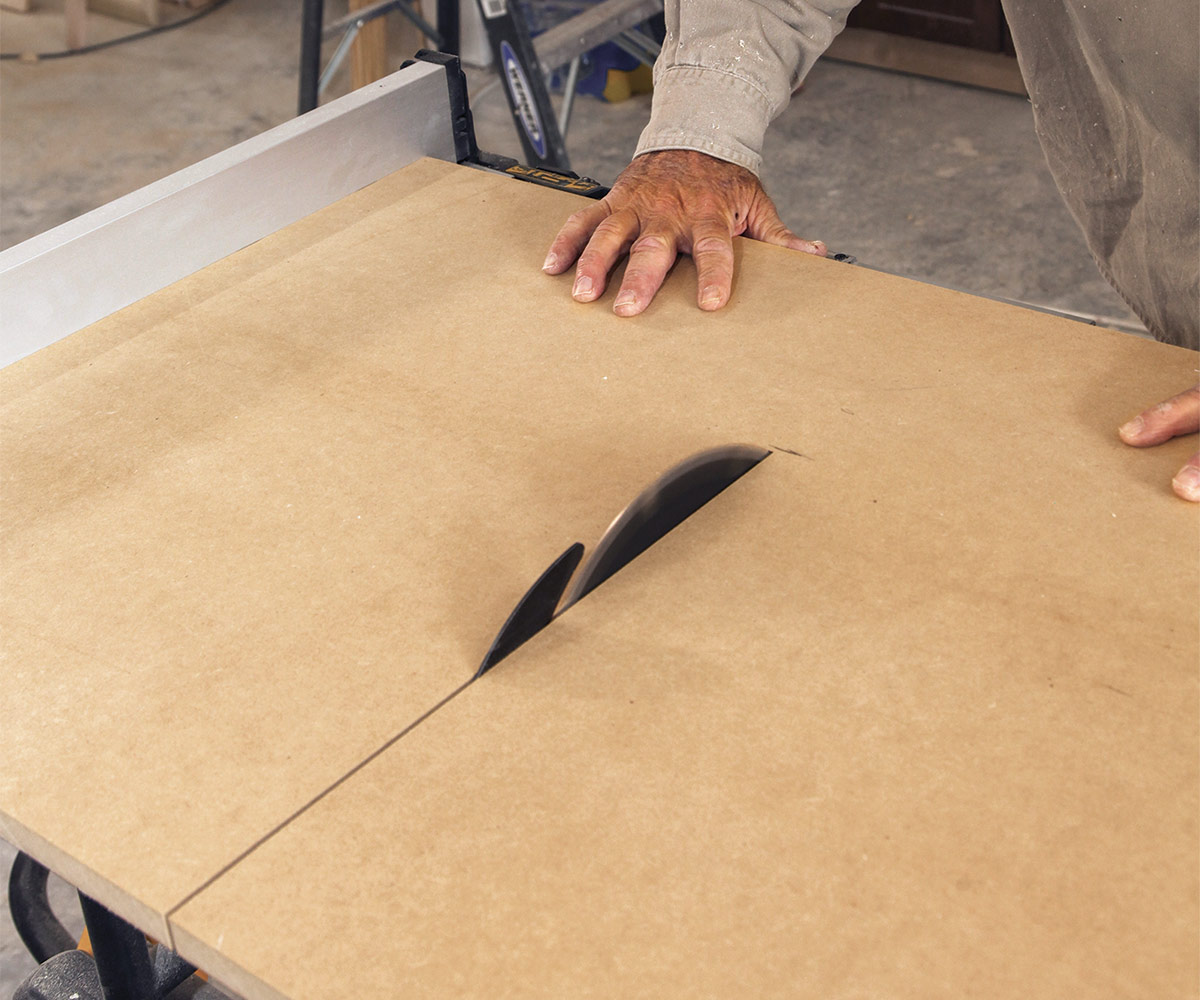
Putting the sled to work

A crosscut sled allows me to cut stock that’s too wide or too long to cut safely on the miter saw. With the sled I can also safely make angled cuts beyond the capabilities of the miter saw. In addition, I use the sled to make dentil molding.

using the crosscut sled with work stand to make wide cut
Make wide cuts. A work stand helps support the material where it extends past the edge of the sled. Note the stop block screwed to the sled fence for making consistent repetitive cuts.
using crosscut sled with attached guide strip to cut steep angles
Cut steep angles. If the angle of a cut is beyond the capacity of the miter saw, screw a guide strip to the sled table to hold the work at the proper angle while cutting.
using crosscut sled and a shim to make a cut slightly out of square
Shim for out of square. If the cut on a board needs to be slightly out of square, slip a shim behind the work until the cut line is parallel with the saw kerf on the sled before cutting.
cutting dentil molding with crosscut blade on tablesaw
Simplify dentil molding. To make quick and easy dentil molding, mark the width of a “tooth” on the sled table out from the blade and set the blade height. Then line up the saw kerfs with the mark for each successive cut.

Second-generation builder and frequent Fine Homebuilding contributor Gary Striegler owns Craftsman Builders, a Fayetteville, Ark., company specializing in millwork and interior ­details.

Photos by Roe Osborn.


RELATED STORIES

  • Compact Tablesaw for the Job Site
  • Heavyweight Portable Tablesaw
  • Tool Test: Cordless Tablesaws

Sign up for eletters today and get the latest how-to from Fine Homebuilding, plus special offers.

Signing you up...

This site is protected by reCAPTCHA and the Google Privacy Policy and Terms of Service apply.
See all newsletters
See all newsletters
×

Get home building tips, offers, and expert advice in your inbox

Signing you up...

This site is protected by reCAPTCHA and the Google Privacy Policy and Terms of Service apply.
See all newsletters
See all newsletters
View PDF

New Feature

Fine Homebuilding Forums

Ask questions, offer advice, and share your work

Log in or create an account to post a comment.

Sign up Log in

Become a member and get full access to FineHomebuilding.com

Up Next

Video Shorts

Featured Story

FHB Podcast Segment: Gutter Covers 101

Gutter covers may be riskier than you think.

Featured Video

Video: Build a Fireplace, Brick by Brick

Watch mason Mike Mehaffey construct a traditional-style fireplace that burns well and meets current building codes.

Related Stories

  • Hazard-Free Hot Tubs
  • Eight Common Electrical Myths and Mistakes
  • The Right Spots for Smoke Alarms
  • Building Confidence, Community, and Inclusive Trades

Discussion Forum

Recent Posts and Replies

  • |
  • |
  • |
  • |
  • |
  • |
View More Create Post

Highlights

Fine Homebuilding All Access
Fine Homebuilding Podcast
Tool Tech
Plus, get an extra 20% off with code GIFT20

"I have learned so much thanks to the searchable articles on the FHB website. I can confidently say that I expect to be a life-long subscriber." - M.K.

Get home building tips, offers, and expert advice in your inbox

Signing you up...

This site is protected by reCAPTCHA and the Google Privacy Policy and Terms of Service apply.
See all newsletters
See all newsletters

Video

View All Videos
  • Vents for Wildfire Protection
  • Removing Lead Paint: DIY or Hire a Contractor?
  • Vented vs. Ventless Gas Heater
  • Podcast Short: Knob-and-Tube Wiring
View All

Tablesaws

View All Tablesaws Articles
  • Convenient Dust Collection
  • Dialing In a Job-Site Tablesaw
  • Tool Test: Cordless Tablesaws
View All Tablesaws Articles

Fine Homebuilding Magazine

  • Issue 330 - April/May
    • Deck Details for Durability
    • FAQs on HPWHs
    • 10 Tips for a Long-Lasting Paint Job
  • Issue 329 - Feb/Mar 2025
    • Smart Foundation for a Small Addition
    • A Kominka Comes West
    • Making Small Kitchens Work
  • Issue 328 - Dec/Jan 2024
    • How a Pro Replaces Columns
    • Passive House 3.0
    • Tool Test: Compact Line Lasers
  • Issue 327 - November 2024
    • Repairing Damaged Walls and Ceilings
    • Plumbing Protection
    • Talking Shop
  • Issue 326 - October 2024
    • Paint Behind Strike Plates
    • Conceal Cut Ends
    • Ladder Slip Solution

Fine Home Building

Newsletter Sign-up

  • Fine Homebuilding

    Home building tips, offers, and expert advice in your inbox.

  • Green Building Advisor

    Building science and energy efficiency advice, plus special offers, in your inbox.

  • Old House Journal

    Repair, renovation, and restoration tips, plus special offers, in your inbox.

Signing you up...

This site is protected by reCAPTCHA and the Google Privacy Policy and Terms of Service apply.
See all newsletters

Follow

  • Fine Homebuilding

    Dig into cutting-edge approaches and decades of proven solutions with total access to our experts and tradespeople.

    Start Free Trial Now
    • Facebook
    • Instagram
    • X
    • LinkedIn
  • GBA Prime

    Get instant access to the latest developments in green building, research, and reports from the field.

    Start Free Trial Now
    • Facebook
    • YouTube
  • Old House Journal

    Learn how to restore, repair, update, and decorate your home.

    Subscribe Now
    • Facebook
    • Instagram
    • X

Membership & Magazine

  • Online Archive
  • Start Free Trial
  • Magazine Subscription
  • Magazine Renewal
  • Gift a Subscription
  • Customer Support
  • Privacy Preferences
  • About
  • Contact
  • Advertise
  • Careers
  • Terms of Use
  • Site Map
  • Do not sell or share my information
  • Privacy Policy
  • Accessibility
  • California Privacy Rights

© 2025 Active Interest Media. All rights reserved.

Fine Homebuilding receives a commission for items purchased through links on this site, including Amazon Associates and other affiliate advertising programs.

X
X
This is a dialog window which overlays the main content of the page. The modal window is a 'site map' of the most critical areas of the site. Pressing the Escape (ESC) button will close the modal and bring you back to where you were on the page.

Main Menu

  • How-To
  • Design
  • Tools & Materials
  • Video
  • Blogs
  • Forum
  • Project Guides
  • Reader Projects
  • Magazine
  • Members
  • FHB House

Podcasts

  • FHB Podcast
  • ProTalk

Webinars

  • Upcoming and On-Demand

Podcasts

  • FHB Podcast
  • ProTalk

Webinars

  • Upcoming and On-Demand

Popular Topics

  • Kitchens
  • Business
  • Bedrooms
  • Roofs
  • Architecture and Design
  • Green Building
  • Decks
  • Framing
  • Safety
  • Remodeling
  • Bathrooms
  • Windows
  • Tilework
  • Ceilings
  • HVAC

Magazine

  • Current Issue
  • Past Issues
  • Magazine Index
  • Subscribe
  • Online Archive
  • Author Guidelines

All Access

  • Member Home
  • Start Free Trial
  • Gift Membership

Online Learning

  • Courses
  • Project Guides
  • Reader Projects
  • Podcast

More

  • FHB Ambassadors
  • FHB House
  • Customer Support

Account

  • Log In
  • Join

Newsletter

Get home building tips, offers, and expert advice in your inbox

Signing you up...

This site is protected by reCAPTCHA and the Google Privacy Policy and Terms of Service apply.
See all newsletters
See all newsletters

Follow

  • X
  • YouTube
  • instagram
  • facebook
  • pinterest
  • Tiktok

Join All Access

Become a member and get instant access to thousands of videos, how-tos, tool reviews, and design features.

Start Your Free Trial

Subscribe

FHB Magazine

Start your subscription today and save up to 70%

Subscribe

We hope you’ve enjoyed your free articles. To keep reading, become a member today.

Get complete site access to expert advice, how-to videos, Code Check, and more, plus the print magazine.

Start your FREE trial

Already a member? Log in