FHB Logo Facebook LinkedIn Email Pinterest Twitter X Instagram Tiktok YouTube Plus Icon Close Icon Navigation Search Icon Navigation Search Icon Arrow Down Icon Video Guide Icon Article Guide Icon Modal Close Icon Guide Search Icon Skip to content
Subscribe
Log In
  • How-To
  • Design
  • Tools & Materials
  • Restoration
  • Videos
  • Blogs
  • Forum
  • Magazine
  • Members
  • FHB House
  • Podcast
Log In
How-To

Maximize HVAC Efficiency

This critical five-task commissioning process ensures forced-air heating and cooling is quiet, comfortable, and problem-free.

By Chris Hughes Issue 320 - Dec 2023/Jan 2024

Synopsis: A critical element in the HVAC installation process is making sure the HVAC system was installed according to the plan and is working at maximum efficiency for energy savings and whole-house comfort. Called HVAC commissioning, this process involves five steps. In addition to explaining how each step works, author Chris Hughes shares key questions to ask when designing an HVAC system in the first place.


A comfortable and energy-efficient home requires a well-insulated building envelope that effectively controls air and moisture flowing through it. To regulate temperature and humidity, it also needs a properly designed and installed HVAC system with equipment and ductwork that matches the requirements of individual rooms for airflow and for heating and cooling. 

But there is a critical step in the HVAC installation process that is frequently overlooked: making sure the HVAC system was installed according to the plan and is working at maximum efficiency for energy savings and whole-house comfort. This five-step series of tests is called HVAC commissioning and is usually part of the HVAC contractor’s job, but I’m going to go step by step through the process so you’ll know if your HVAC contractor is skipping one or more of the steps or fudging numbers.

Standard 310 is a new and widely accepted process for commissioning residential forced-air heating and cooling systems. This standard resulted from a collaboration among three organizations: the American National Standards Institute (ANSI), the Air Conditioning Contractors of America (ACCA), and the Residential Energy Services Network (RESNET). Commissioning pays huge dividends in comfort and energy savings for homeowners, and if the system is designed and installed according to the plan, commissioning is a relatively easy process that confirms everything is working properly. It can also reveal problems with the new system that if left unresolved could cause equipment damage or comfort complaints down the road.

Before commissioning: Start with a ­successful design

What are the system’s design conditions?

Commissioning confirms that a system is working to spec, but it won’t improve a system that’s performing poorly because of a flawed design. In addition to egregious errors like rule-of-thumb sizing or intentional
upsizing, there are subtle ways an HVAC design can deviate from actual heating and cooling loads. Before signing off on a system, confirm these design parameters when evaluating a prospective Manual J calculation.

What is the building’s airtightness target?

Many HVAC designs use default estimated rates for air leakage, which can lead to oversized equipment that provides poor comfort and humidity control. The 2021 International Residential Code (IRC) recommends less than three air changes per hour (3 ACH50) as the airtightness goal for a comfortable home and efficient HVAC system. Airtightness should be specified in the Manual J load calculations and should be tested with a blower door before interior finishes are in place so that leaks can be corrected more easily. At a minimum, the airtightness specified in the Manual J should be confirmed with a blower-door test after system installation and before commissioning.

What is the planned ­ventilation system?

When a home is at or below 3 ACH50, most jurisdictions require mechanical ventilation. Whole-house supply-only and exhaust-only systems, as well as spot ventilation like bath fans and range hoods, can add to HVAC loads. In hot, humid climates a ventilating dehumidifier is better, and balanced ventilation systems—HRVs and ERVs—are the preferred solution for comfort and energy efficiency. The design should reflect the correct system.

What is the house’s Solar orientation?

South- and west-facing windows and doors can add greatly to cooling loads, but north-facing windows have little impact on the solar load of a house. North-facing windows also add significantly to the heating load. Solar orientation matters more than you would think, so check carefully that the design has it right.

What is the window performance?

Energy-performance ratings for windows include U-factor and solar heat-gain coefficient (SHGC) measurements. U-factor is an indication of heat transfer, and SHGC is a measure of how much solar radiation the windows ­allow into the home. Lower numbers are better for both measurements. HVAC system designers may assume a code-minimum U-factor or SHGC, so it is important to be specific if you are using glazing with better performance numbers.

Where is the HVAC system located?

This is a big one: Keep the equipment and ductwork in a conditioned space when possible—or expect higher energy bills and comfort complaints. Simply put, if you are putting ductwork in an unconditioned space (a vented crawlspace or attic or an unconditioned garage), you are essentially putting it outside of your building envelope and accepting a huge potential hit to comfort and efficiency.

How many people will be in the house?

Occupants add to ­cooling loads, and a residential load calculation includes one person per bedroom plus one. Some designers add extra people to justify a bigger system when it is not needed.

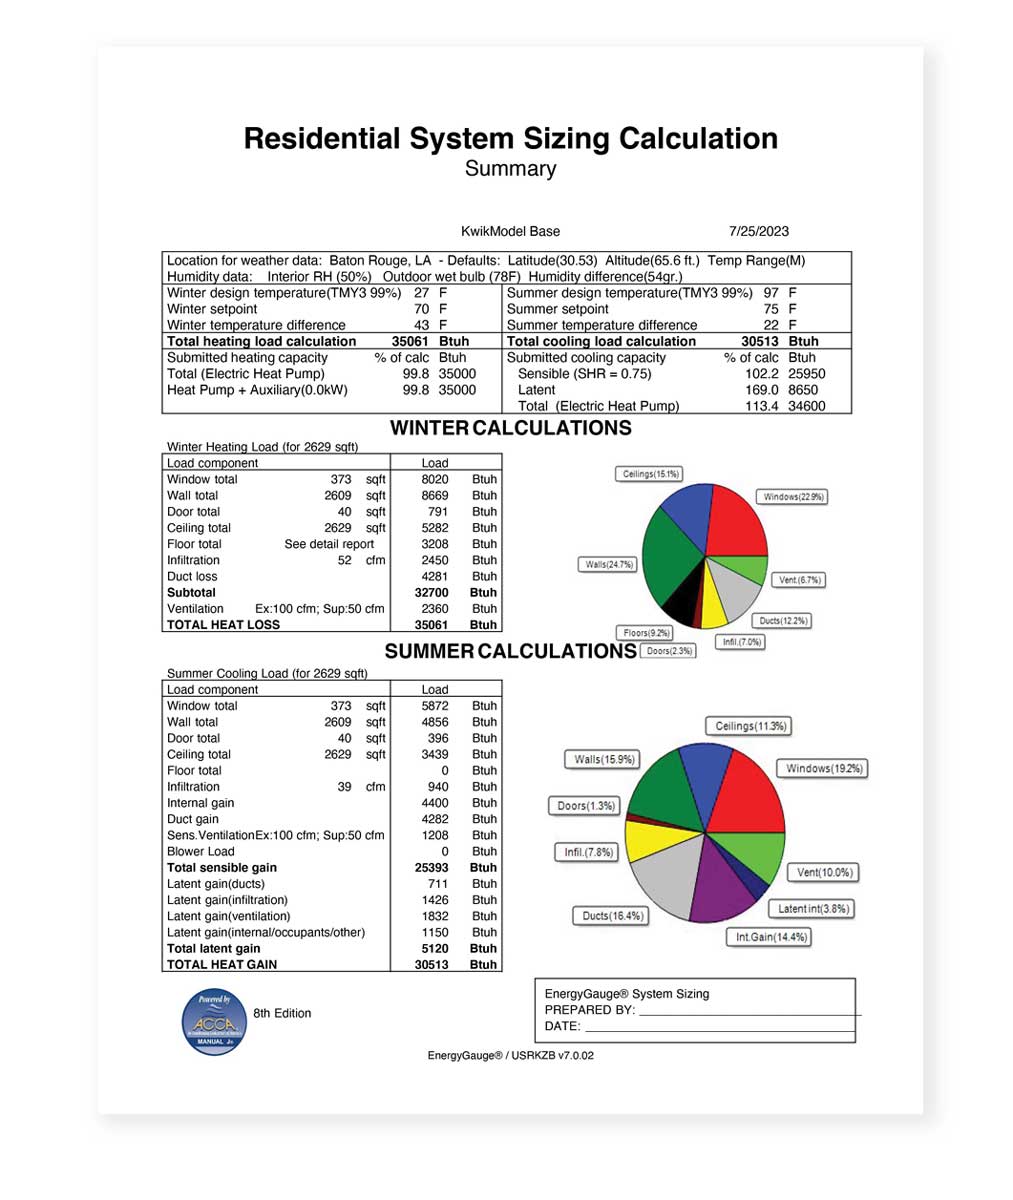
You can think of commissioning as tuning the system. It starts with verifying that the system is designed properly, with an accurate heating and cooling load calculation and proper equipment selection based on the loads. For commissioning, the system must be fully complete, with ductwork installed and sealed according to the plan, with equipment fully operational, and with all grilles, registers, and specified filters in place.

In an ideal scenario, every new HVAC system would undergo commissioning by the HVAC contractor or a reputable third party, often an energy rater, to ensure that the system is working to spec. Unfortunately, commissioning is seldom part of residential HVAC installations, so you’ll need to be clear when hiring a contractor to install a new ­system that you want it to be properly commissioned per Standard 310.

Homeowners and home builders have an incentive to undergo commissioning because they can benefit through tax credits. If you hire a certified HERS rater to perform a commissioning process like the one shown here, then the property owner can apply for Zero Energy Ready Home tax credits for every home with a passing score.

Task 1: Evaluate the design

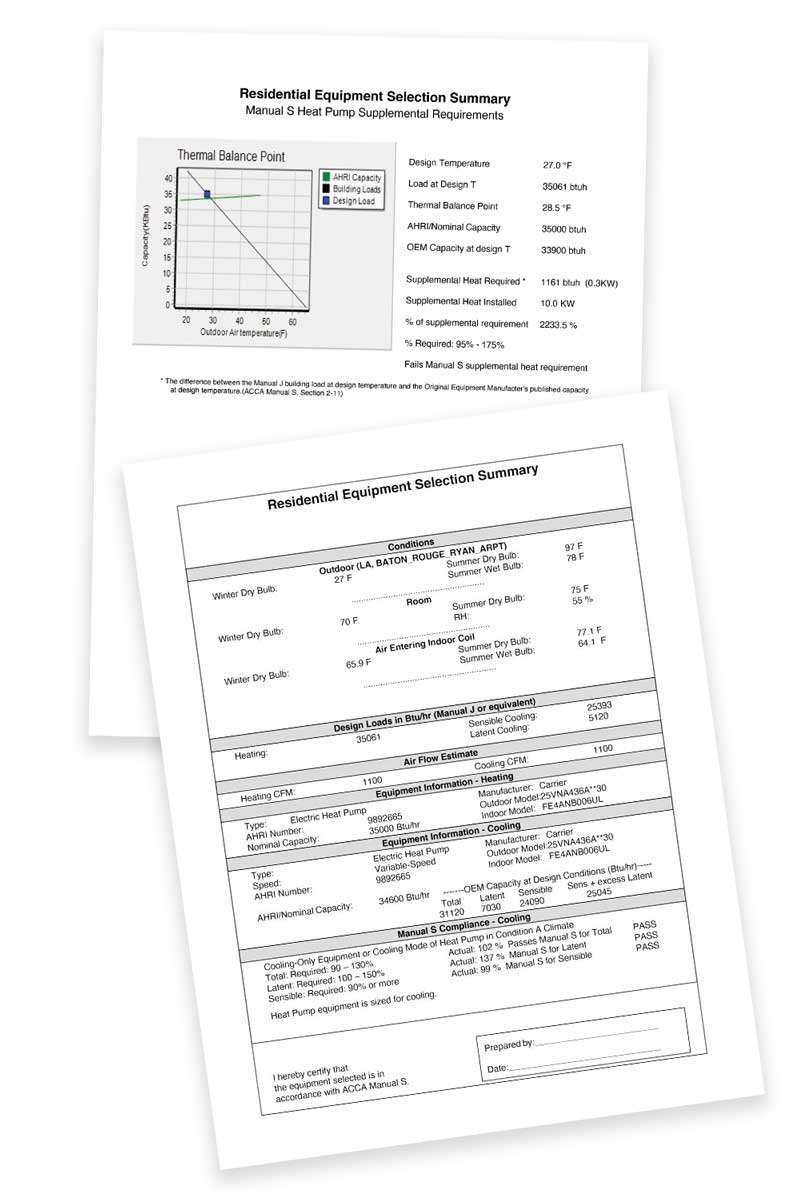
The design is the most important part of an HVAC installation, so the first task of commissioning is to evaluate the design specs for accuracy and then ensure that the components of the system match the specs. High-performance builders increasingly are using third-party design services because the designs by HVAC techs are almost always oversized, and some HVAC contractors don’t offer design services. I’ve seen badly designed or installed systems cost a great deal of money, time, and aggravation—maybe even one marriage. In order to right-size an HVAC system, a load calculation using Manual J should have been completed on the dwelling. A load calculation determines the home’s room-by-room heating and cooling loads, taking into account climate, airtightness and insulation values, size, window glazing and locations, and solar orientation. Load calculations are usually performed in a computer program or painstakingly done by hand.

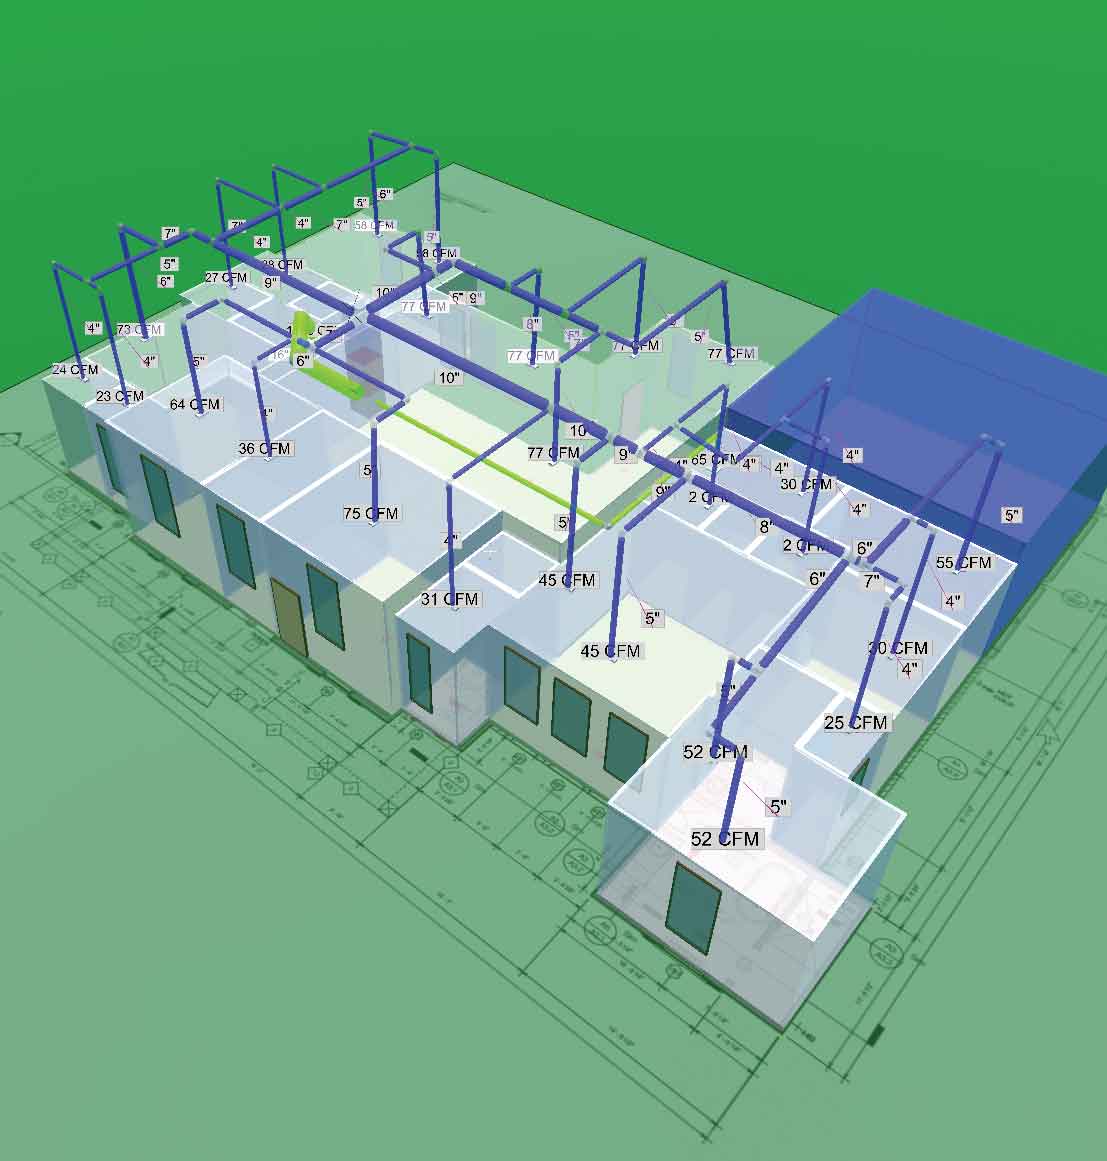
After the load calculations come equipment selection (Manual S) and duct design (Manual D). Manual T is a subsection of Manual D and addresses the grille and diffuser selection; it’s sometimes overlooked in retrofits, but should be included in new-construction projects. These technical manuals are important components of a quiet, efficient, and comfortable heating and cooling system.

Load calculation Manual J load calculations for each room consider construction details like windows and insulation levels, as well as local climate and other variables.
Load calculation. Manual J load calculations for each room consider construction details like windows and insulation levels, as well as local climate and other variables.
Equipment selection Manual S calculations right-size an air handler and outdoor unit that are matched to heating and cooling loads and are sufficiently airtight to minimize leakage from the cabinet and filter assembly.
Equipment selection.  Manual S calculations right-size an air handler and outdoor unit that are matched to heating and cooling loads and are sufficiently airtight to minimize leakage from the cabinet and filter assembly.


Duct design A duct system properly designed with Manual D is quiet, delivers the specified airflow, and is well-sealed so that conditioned air gets to where it’s supposed to go.
Duct design. A duct system properly designed with Manual D is quiet, delivers the specified airflow, and is well-sealed so that conditioned air gets to where it’s supposed to go.

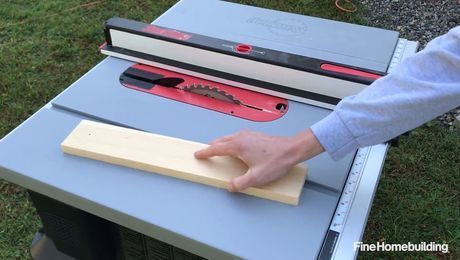
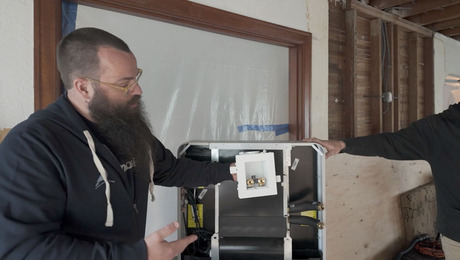
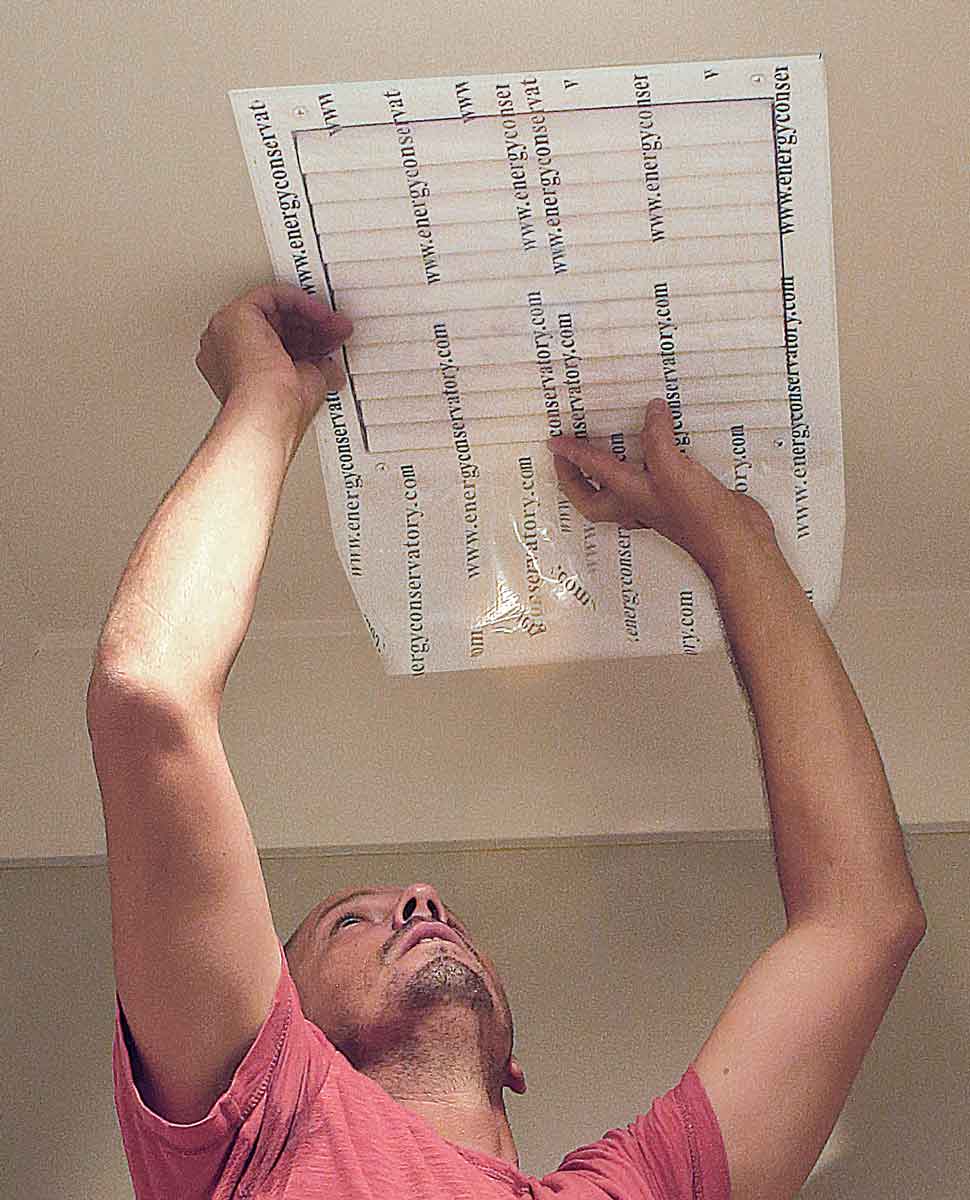
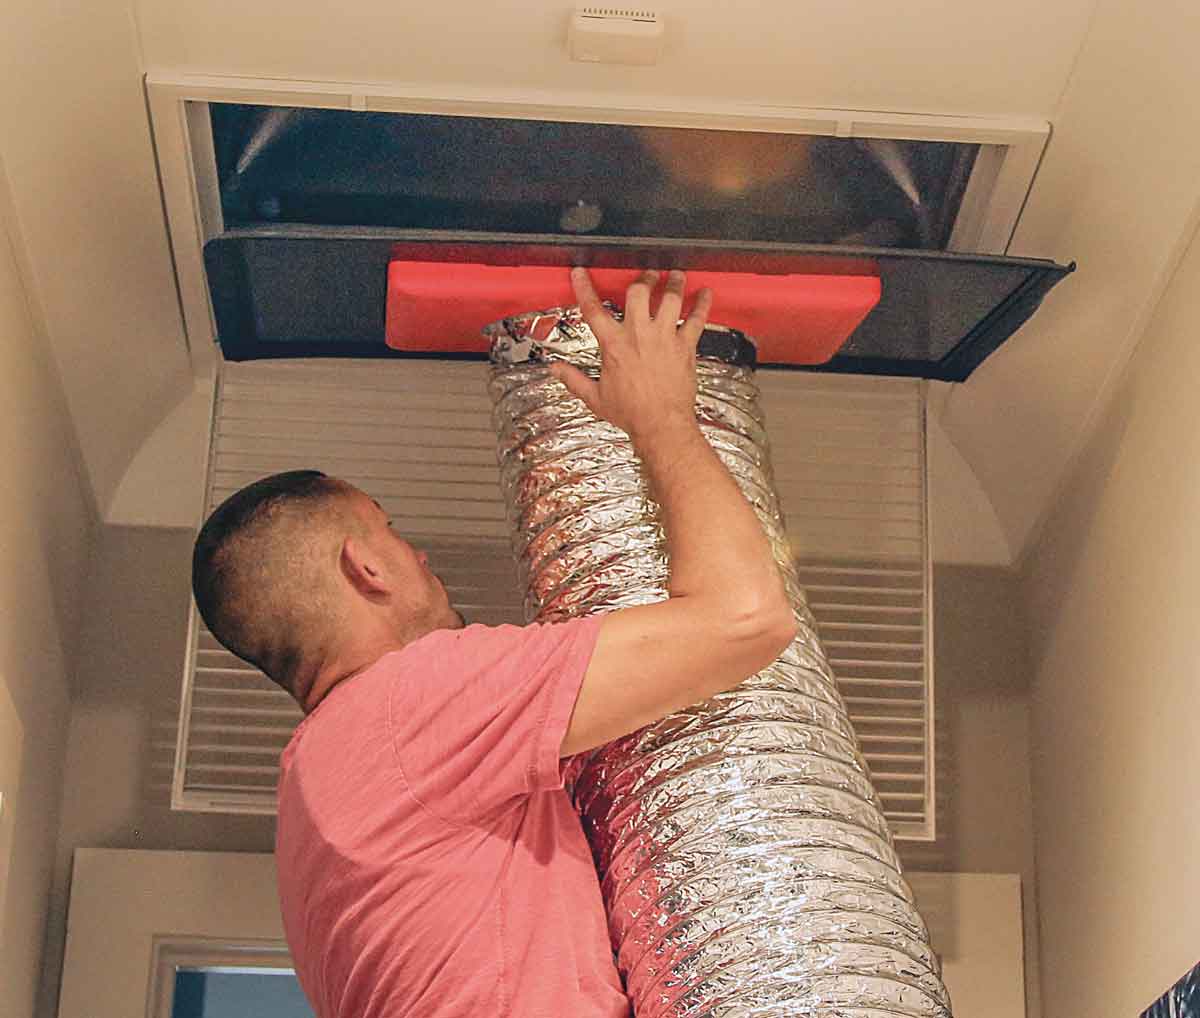
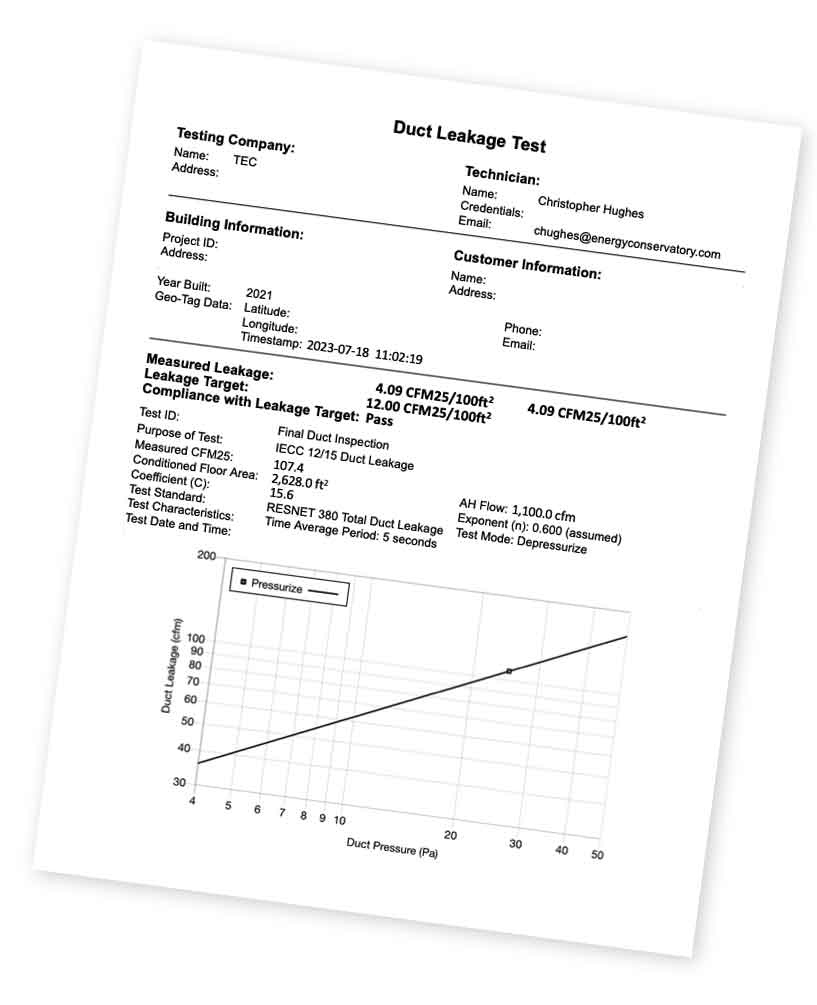
Task 2: Test duct leakage

Duct leakage is measured by connecting a duct-leakage fan and manometer to the installed ductwork. The tester pressurizes (or depressurizes) the HVAC system and measures the leakage flow rate in cubic feet per minute (cfm) per 100 sq. ft. of living space. Allowable leakage rates are listed in the International International Residential Code (IRC). Many jurisdictions don’t require duct-leakage testing, but if you have ductwork in unconditioned spaces, I advise it. Leaky ducts in unconditioned spaces have a significant impact on comfort, capacity, energy usage, and durability. Even if all the ductwork is inside the conditioned space, leaky ducts can cause isolated comfort problems by preventing conditioned air from reaching all of the registers, resulting in a bedroom that is too hot and humid in the summer, for example.

Duct-sealing mask or film is the most common approach for sealing registers during duct-leakage testing

Block grilles and registers Duct-sealing mask or film is the most common approach for sealing registers during duct-leakage testing. Mask provides the tightest seal but is a single-use item. Another option is to use Vent Caps (ventcapsystems.com). These have a gasketed surface and are reusable.
Block grilles and registers. Duct-sealing mask or film is the most common approach for sealing registers during duct-leakage testing. Mask provides the tightest seal but is a single-use item. Another option is to use Vent Caps (ventcapsystems.com). These have a gasketed surface and are reusable.

connect the TEC Duct Blaster fan

Blast a central return We connect the TEC Duct Blaster fan to a central return using cardboard and tape or a preformed plastic adapter. If you use tape and cardboard, the setup must be sufficiently strong to resist the fan pressure during the test. I connect one side of a two-channel digital manometer, which measures air pressure expressed in pascals (Pa), to a pressure port on a Vent Cap and the other to a port on the fan. The ducts are pressurized to 25 Pa for the test.
Blast a central return. We connect the TEC Duct Blaster fan to a central return using cardboard and tape or a preformed plastic adapter. If you use tape and cardboard, the setup must be sufficiently strong to resist the fan pressure during the test. I connect one side of a two-channel digital manometer, which measures air pressure expressed in pascals (Pa), to a pressure port on a Vent Cap and the other to a port on the fan. The ducts are pressurized to 25 Pa for the test.
How much leakage is OK? For the postconstruction commissioning test, the IRC allows duct leakage up to 4 cfm per 100 sq. ft. of conditioned space. An addition to the 2021 code states that if all the ducts are in the conditioned space (as is preferred), air-leakage amounts can be up to 8 cfm per 100 sq. ft. of conditioned floor area.

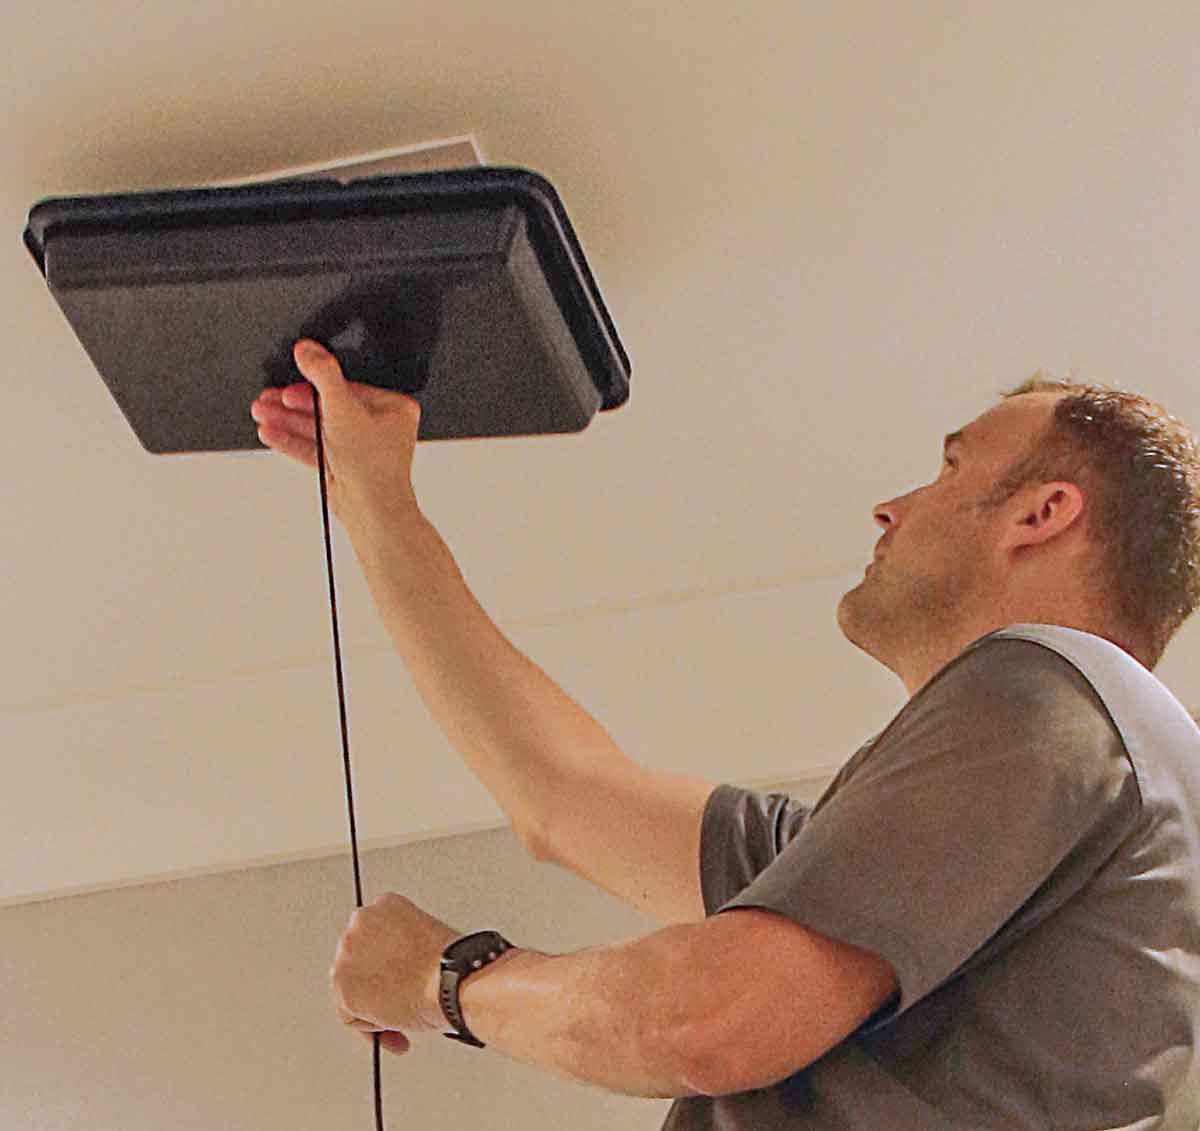
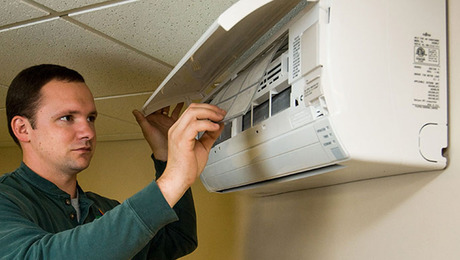
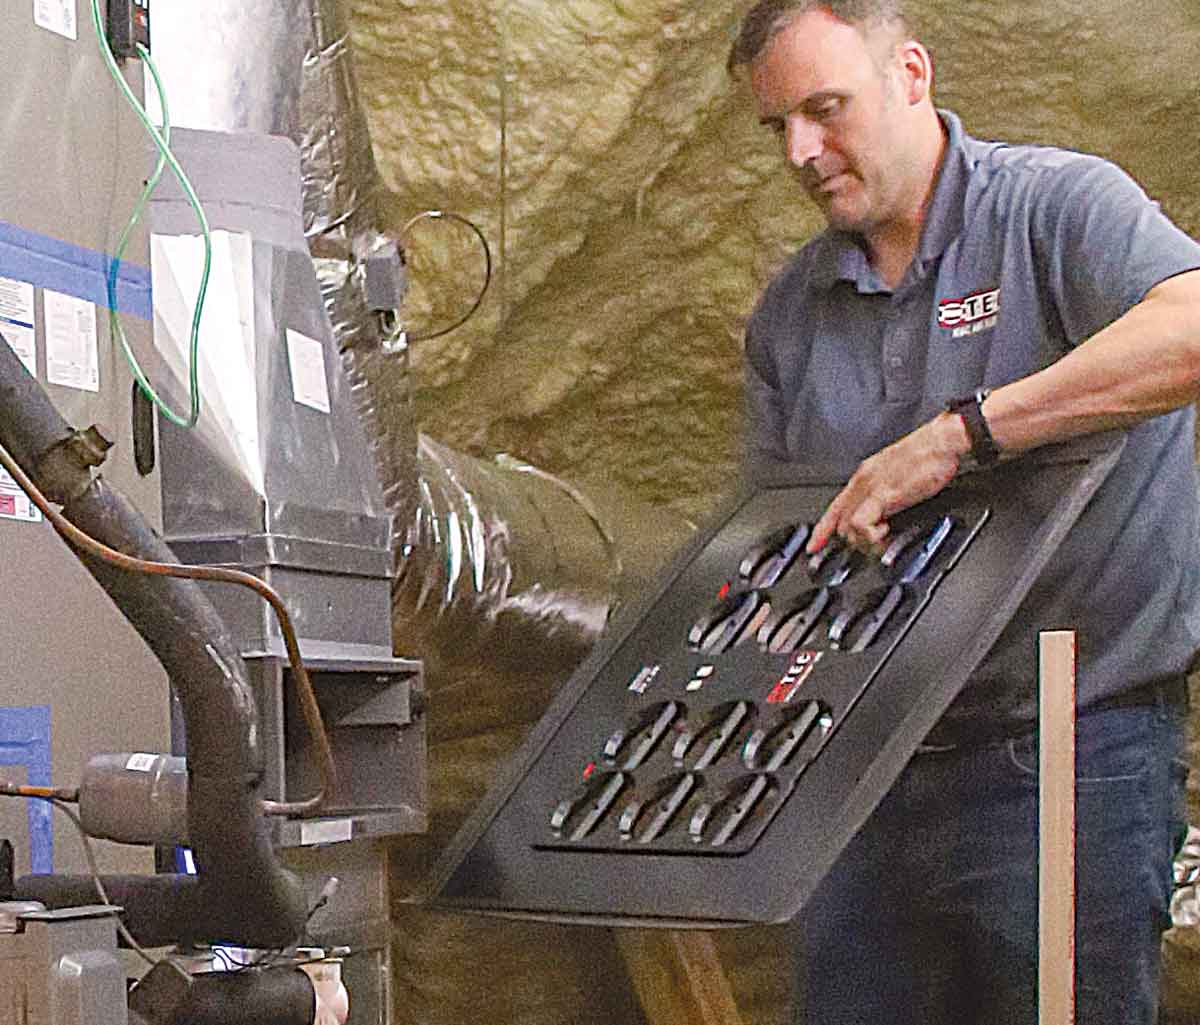
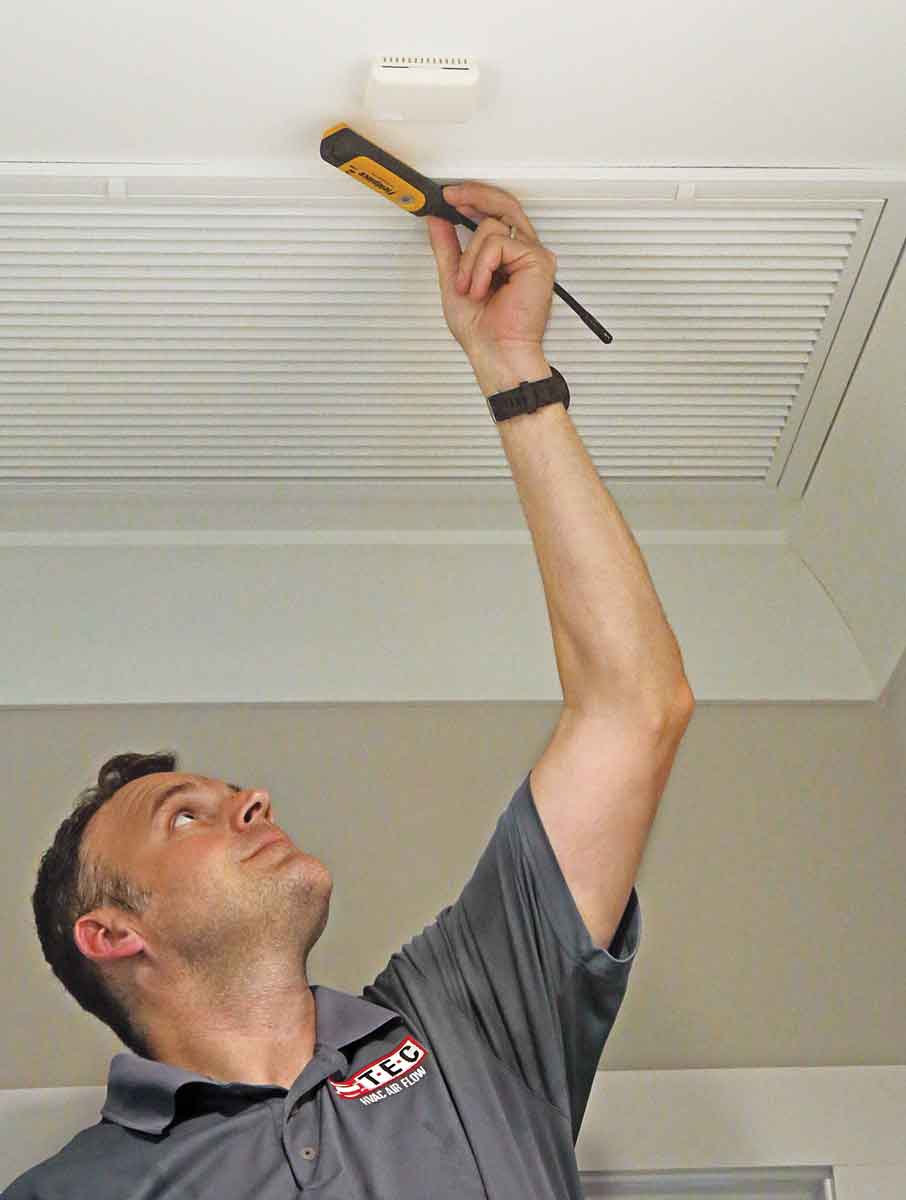
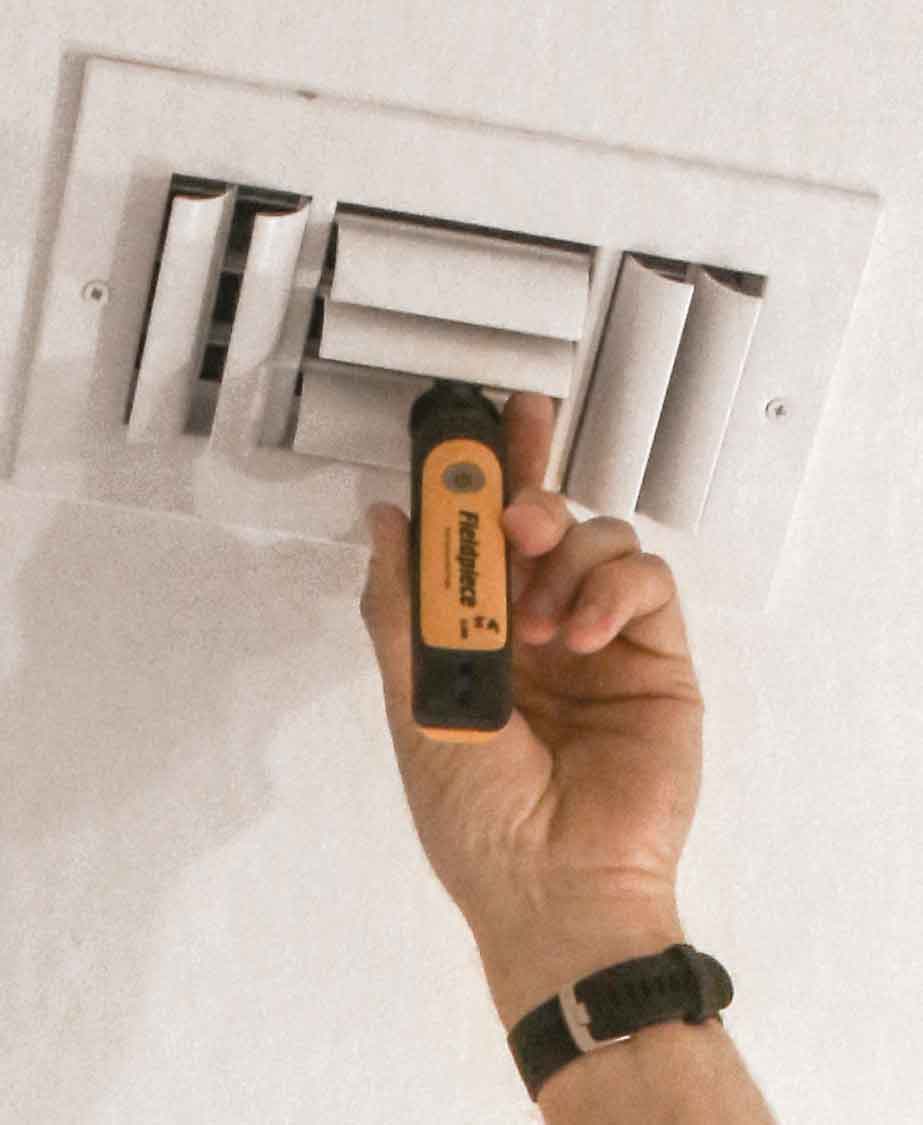
Task 3: Confirm system airflow

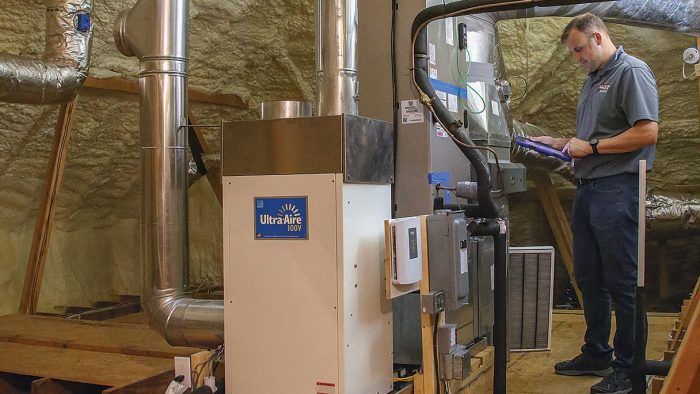
Ensuring that the system airflow across the cooling or heating coil within the air handler is set correctly is fundamental to ensuring that a system will properly condition and dehumidify a house. The Manual S system selection will have a total system airflow target for summer and winter. The commissioning process includes verifying this airflow target and confirming the correct fan speeds are selected for both heating and cooling. Proper fan speed is a balancing act with a vital role in protecting equipment and controlling humidity and temperature. System airflow tests should be completed after the system has run for at least 10 minutes to ensure that measurements are made at operational conditions.

Measure Flow at the filter slot I use a digital manometer and a Digital TrueFlow Grid from TEC to measure total system airflow. Using the corresponding TrueFlow app allows me to compare this number to the design airflow from task 1.
Measure flow at the filter slot. I use a digital manometer and a Digital TrueFlow Grid from TEC to measure total system airflow. Using the corresponding TrueFlow app allows me to compare this number to the design airflow from task 1.
Monitor pressure in the plenum I measure the static pressure in the supply plenum, the return plenum, and other locations to verify that the system blower isn’t over-stressed trying to achieve the required airflow. This can also help identify trouble spots.
Monitor pressure in the plenum. I measure the static pressure in the supply plenum, the return plenum, and other locations to verify that the system blower isn’t over-stressed trying to achieve the required airflow. This can also help identify trouble spots.

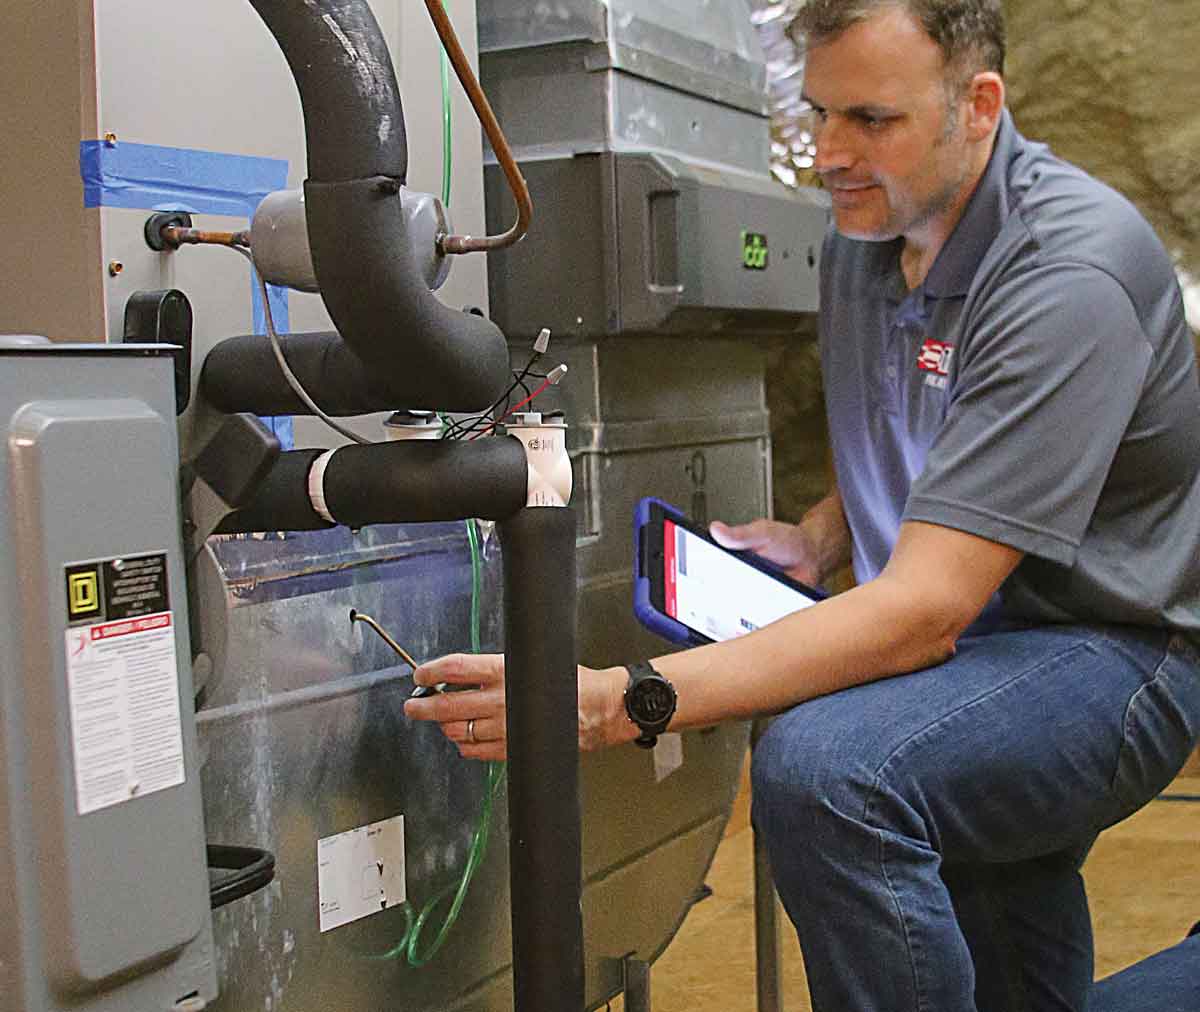
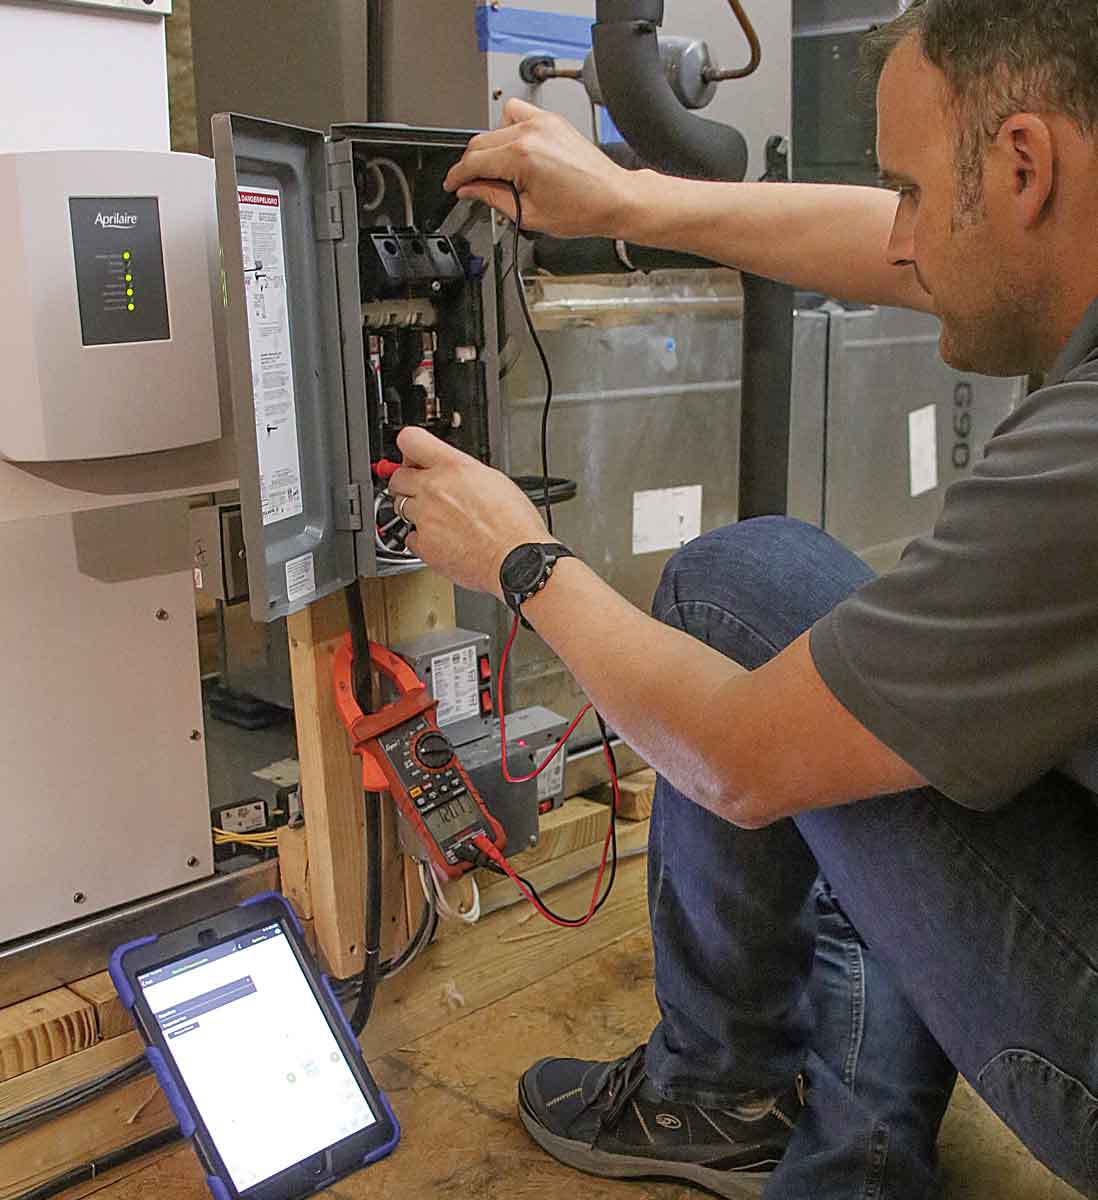
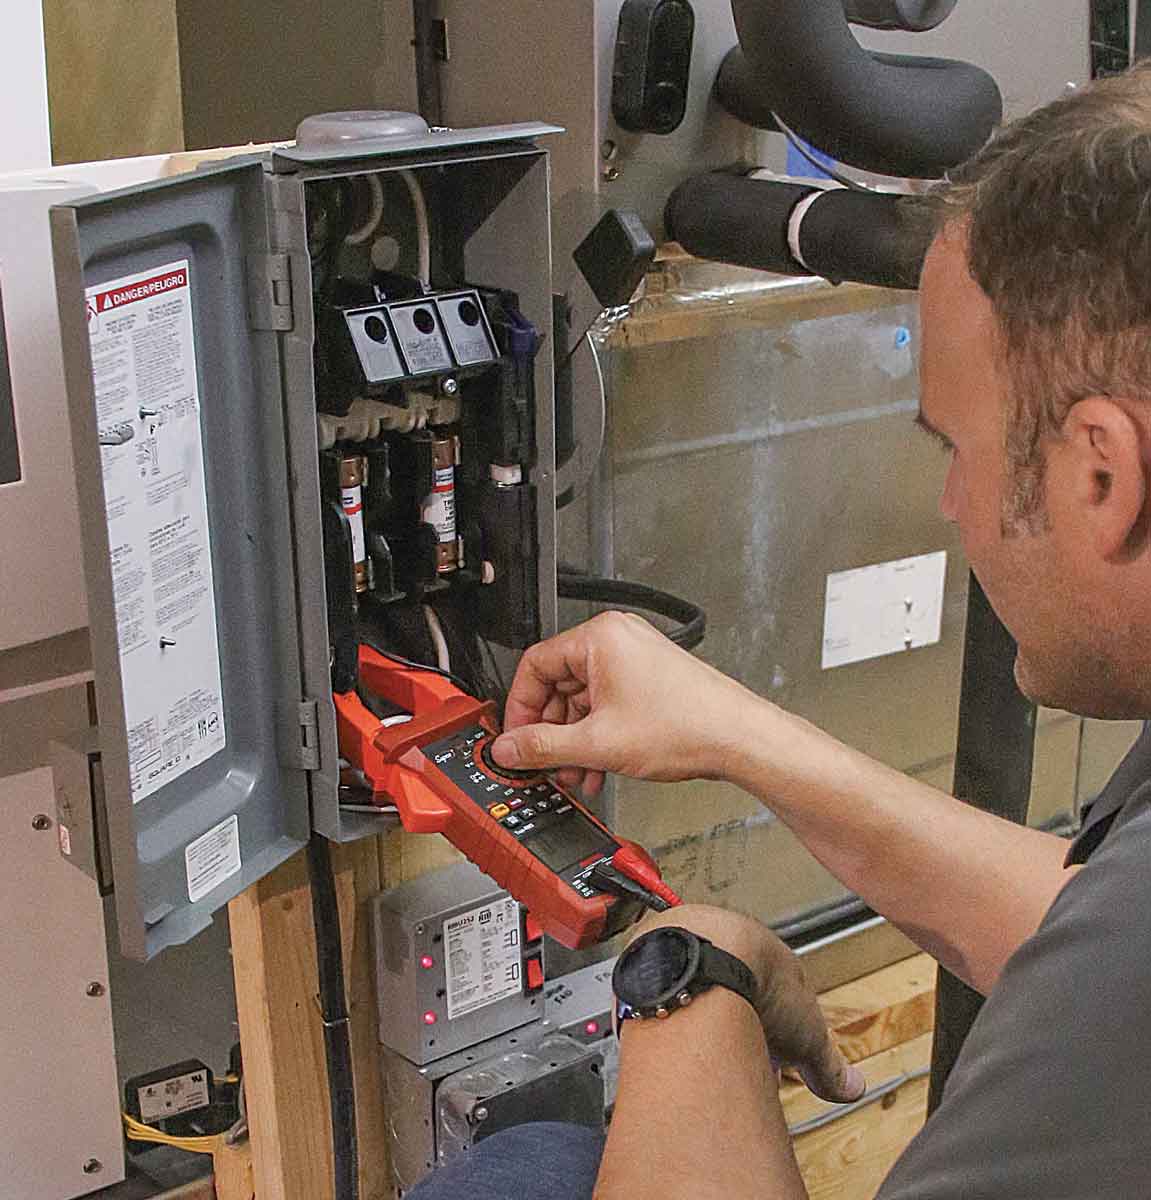
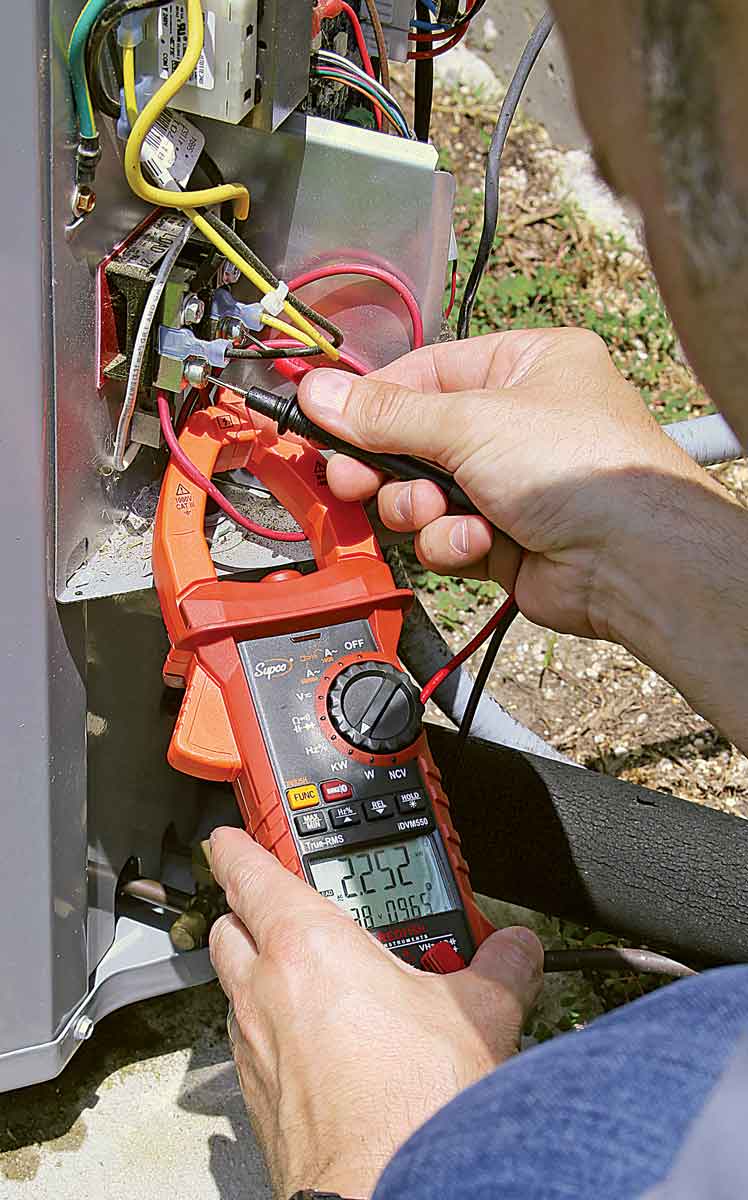
Task 4: Check power consumption

Checking the air handler’s blower for its wattage draw confirms that the ducts aren’t too restrictive and that the blower motor is working correctly. Some HVAC systems have on-board diagnostics that monitor wattage draw of the blower. More commonly, a clamp-on multimeter is used during commissioning to determine the watts consumed by the running blower motor.

check voltage on both of the 120v legs at the air handler’s service

se a clamp-on multimeter to measure the blower’s wattage on both legs
Measure volts and watts indoors. I adjust the thermostat to call for cooling or turn the system to test mode if it has one. Then I check voltage on both of the 120v legs at the air handler’s service disconnect with a multimeter’s test leads. Utility power can vary by 5% more or less than the nominal 120v/208v/240v specified in the U.S. electric grid, and using the actual voltage makes the wattage test more accurate. With the system running at full speed, I use a clamp-on multimeter to measure the blower’s wattage on both legs for at least 10 seconds each.

use the test leads on a multimeter to measure the voltage on both legs supplying the terminal block on the outdoor unit

Check VOLTS AND WATTS OUTSIDE With the air handler still running at full speed or on test mode, I first use the test leads on a multimeter to measure the voltage on both legs supplying the terminal block on the outdoor unit. Finally I measure the watts consumed by the system’s outdoor unit with the system running at full speed by using a clamp-on multimeter.
Check volts and watts outside. With the air handler still running at full speed or on test mode, I first use the test leads on a multimeter to measure the voltage on both legs supplying the terminal block on the outdoor unit. Finally I measure the watts consumed by the system’s outdoor unit with the system running at full speed by using a clamp-on multimeter.

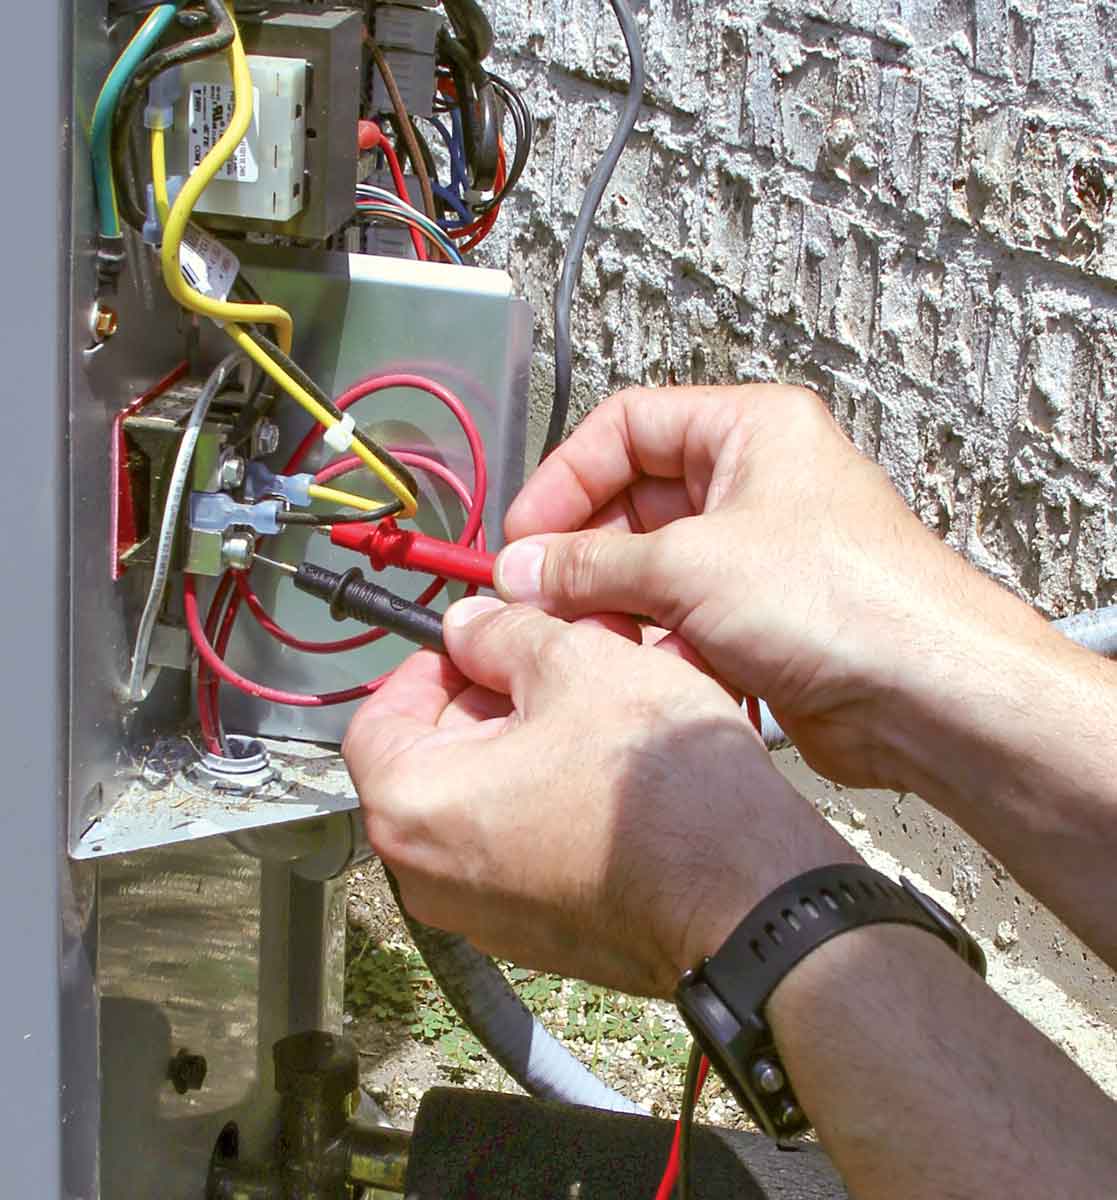
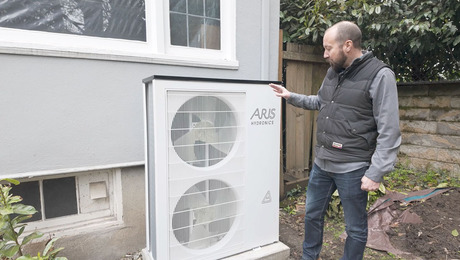
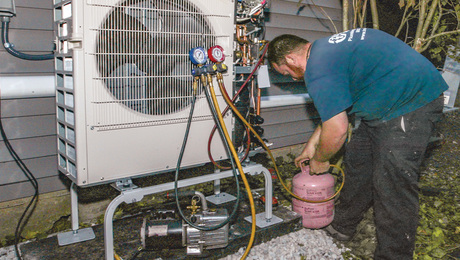
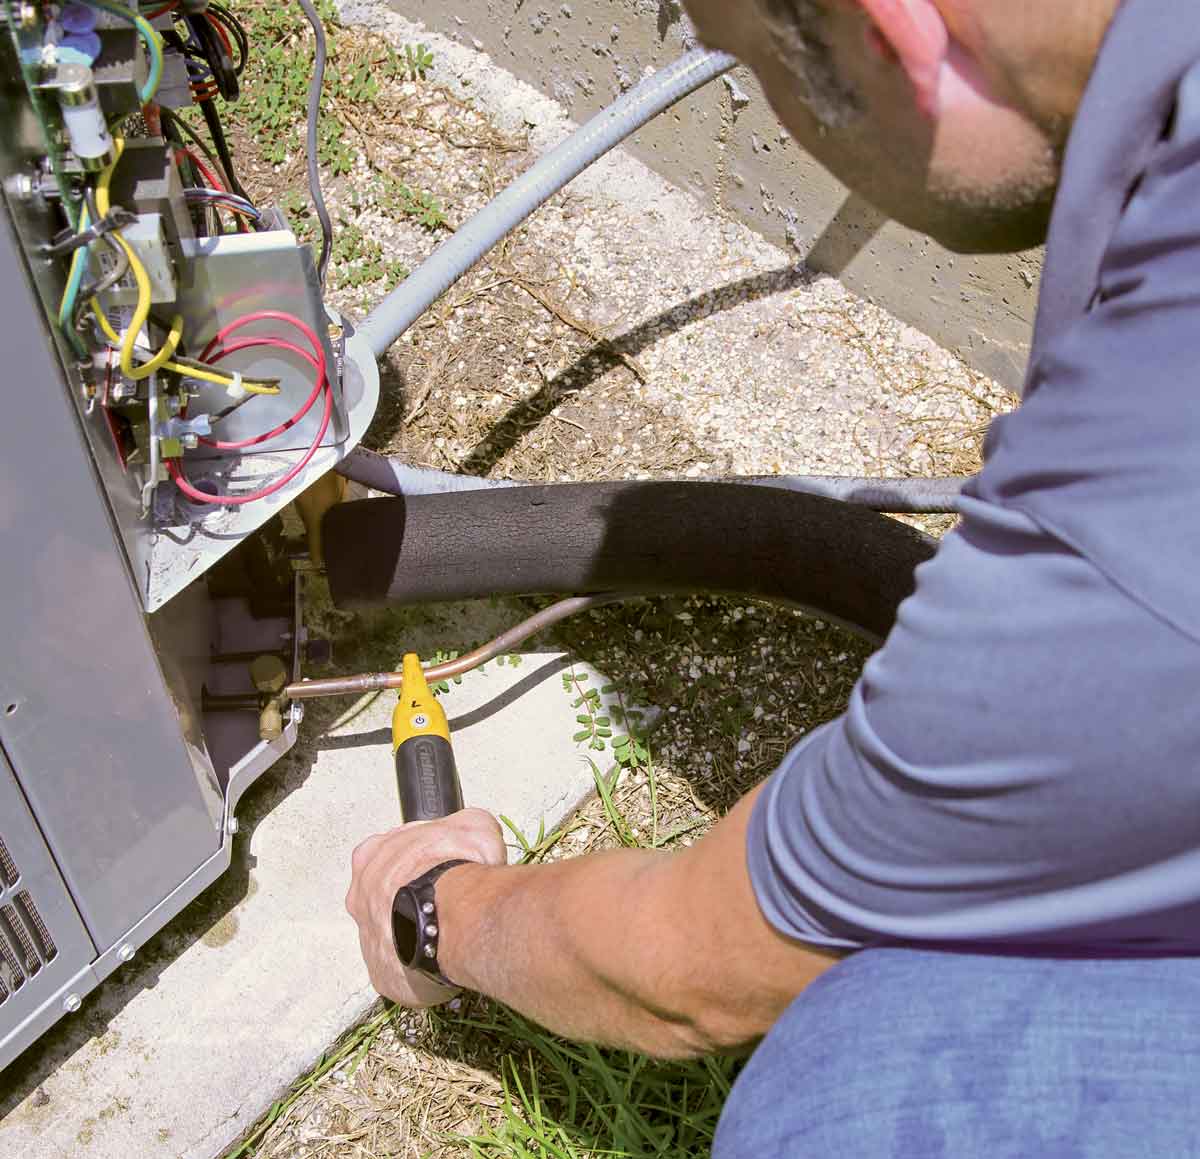
Task 5: Measure refrigerant charge

The amount of refrigerant in the system is described as its “charge,” and having the right charge plays an enormous role in the cooling capacity of the system. Traditional methods for establishing the refrigerant charge require HVAC training, because you have to connect pressure gauges to the refrigerant lines, but the measureQuick app allows you to measure the refrigerant charge without using a traditional refrigeration manifold set. If the refrigerant levels are low or high, the charge must be adjusted by a trained HVAC technician.

Measure refrigerant temperatur
Measure refrigerant temperature. I check the temperature of the refrigerant lines close to the outdoor unit with clamp-on thermometers from Fieldpiece. I sand the tubing first for an accurate measurement.

Check air temperatures
measure the air temperature from a supply grille

measure the temperature of ambient outdoor air coming into the outdoor unit
Check air temperatures. Back inside, I measure the temperature of the air entering a large return-air grille as far away from the air handler as possible. Then I measure the air temperature from a supply grille as close to the air handler as possible. Finally, I measure the temperature of ambient outdoor air coming into the outdoor unit on the side opposite to the refrigeration lines.


MeasureQuick downloadable HVAC app Commissioning companion

MeasureQuick is a downloadable HVAC app that makes it easier to complete tasks 3 through 5 of the commissioning process. The app automatically captures data measured with Bluetooth-enabled instruments such as the TrueFlow Grid, Supco Redfish iDVM 550 clamp meter, and Fieldpiece non­invasive thermometers shown in the photos. It then allows the HVAC technician to generate a report that details airflow, power consumption, and refrigerant charge. The report includes a lot of information, but key things to look for are “air-side performance,” “capacity calculations,” and “system efficiency.”

Chris Hughes is business development manager for TEC (The Energy Conservatory). Photos by Patrick McCombe.

From Fine Homebuilding #320


RELATED STORIES

  • Managing HVAC Load Calculations
  • HVAC and Indoor-Air Quality
  • Find Air Leakage with the Minneapolis Blower Door

Sign up for eletters today and get the latest how-to from Fine Homebuilding, plus special offers.

Signing you up...

This site is protected by reCAPTCHA and the Google Privacy Policy and Terms of Service apply.
See all newsletters
See all newsletters
×

Get home building tips, offers, and expert advice in your inbox

Signing you up...

This site is protected by reCAPTCHA and the Google Privacy Policy and Terms of Service apply.
See all newsletters
See all newsletters
View PDF

New Feature

Fine Homebuilding Forums

Ask questions, offer advice, and share your work

Log in or create an account to post a comment.

Sign up Log in

Become a member and get full access to FineHomebuilding.com

Up Next

Video Shorts

Featured Story

Podcast Episode 680: Knob-and-Tube Wiring, Vapor Movement, and Gutter Covers

Listeners write in about shower panels and cordless tools and ask questions about old wiring, air leaks, and gutter covers.

Featured Video

SawStop's Portable Tablesaw is Bigger and Better Than Before

The 10-in. Jobsite Saw PRO has a wider table, a new dust-control port, and a more versatile fence, along with the same reliable safety mechanism included in all SawStop tablesaws.

Related Stories

  • HVAC for a Slab-on-Grade House
  • The Best Way to Protect Heat Pumps from Rain and Snow
  • Which Refrigerant?
  • Controlling Mold in Minisplits

Discussion Forum

Recent Posts and Replies

  • |
  • |
  • |
  • |
  • |
  • |
View More Create Post

Highlights

Fine Homebuilding All Access
Fine Homebuilding Podcast
Tool Tech
Plus, get an extra 20% off with code GIFT20

"I have learned so much thanks to the searchable articles on the FHB website. I can confidently say that I expect to be a life-long subscriber." - M.K.

Get home building tips, offers, and expert advice in your inbox

Signing you up...

This site is protected by reCAPTCHA and the Google Privacy Policy and Terms of Service apply.
See all newsletters
See all newsletters

Video

View All Videos
  • Wall-Mounted Fan Coil Unit for an Air-to-Water Heat Pump
  • FHB Podcast Segment: Sizing a Minisplit for Different Heating and Cooling Needs
  • Efficient Home Heating and Cooling
  • Podcast Episode 631: HVAC Systems, Foundation Footings, and Sinking Garages
View All

HVAC

View All HVAC Articles
  • Which Refrigerant?
  • Controlling Mold in Minisplits
  • Podcast Episode 644: High Indoor Humidity, Underfloor HVAC Returns, and Textured Ceilings
View All HVAC Articles

Fine Homebuilding Magazine

  • Issue 330 - April/May
    • Deck Details for Durability
    • FAQs on HPWHs
    • 10 Tips for a Long-Lasting Paint Job
  • Issue 329 - Feb/Mar 2025
    • Smart Foundation for a Small Addition
    • A Kominka Comes West
    • Making Small Kitchens Work
  • Issue 328 - Dec/Jan 2024
    • How a Pro Replaces Columns
    • Passive House 3.0
    • Tool Test: Compact Line Lasers
  • Issue 327 - November 2024
    • Repairing Damaged Walls and Ceilings
    • Plumbing Protection
    • Talking Shop
  • Issue 326 - October 2024
    • Paint Behind Strike Plates
    • Conceal Cut Ends
    • Ladder Slip Solution

Fine Home Building

Newsletter Sign-up

  • Fine Homebuilding

    Home building tips, offers, and expert advice in your inbox.

  • Green Building Advisor

    Building science and energy efficiency advice, plus special offers, in your inbox.

  • Old House Journal

    Repair, renovation, and restoration tips, plus special offers, in your inbox.

Signing you up...

This site is protected by reCAPTCHA and the Google Privacy Policy and Terms of Service apply.
See all newsletters

Follow

  • Fine Homebuilding

    Dig into cutting-edge approaches and decades of proven solutions with total access to our experts and tradespeople.

    Start Free Trial Now
    • Facebook
    • Instagram
    • X
    • LinkedIn
  • GBA Prime

    Get instant access to the latest developments in green building, research, and reports from the field.

    Start Free Trial Now
    • Facebook
    • YouTube
  • Old House Journal

    Learn how to restore, repair, update, and decorate your home.

    Subscribe Now
    • Facebook
    • Instagram
    • X

Membership & Magazine

  • Online Archive
  • Start Free Trial
  • Magazine Subscription
  • Magazine Renewal
  • Gift a Subscription
  • Customer Support
  • Privacy Preferences
  • About
  • Contact
  • Advertise
  • Careers
  • Terms of Use
  • Site Map
  • Do not sell or share my information
  • Privacy Policy
  • Accessibility
  • California Privacy Rights

© 2025 Active Interest Media. All rights reserved.

Fine Homebuilding receives a commission for items purchased through links on this site, including Amazon Associates and other affiliate advertising programs.

X
X
This is a dialog window which overlays the main content of the page. The modal window is a 'site map' of the most critical areas of the site. Pressing the Escape (ESC) button will close the modal and bring you back to where you were on the page.

Main Menu

  • How-To
  • Design
  • Tools & Materials
  • Video
  • Blogs
  • Forum
  • Project Guides
  • Reader Projects
  • Magazine
  • Members
  • FHB House

Podcasts

  • FHB Podcast
  • ProTalk

Webinars

  • Upcoming and On-Demand

Podcasts

  • FHB Podcast
  • ProTalk

Webinars

  • Upcoming and On-Demand

Popular Topics

  • Kitchens
  • Business
  • Bedrooms
  • Roofs
  • Architecture and Design
  • Green Building
  • Decks
  • Framing
  • Safety
  • Remodeling
  • Bathrooms
  • Windows
  • Tilework
  • Ceilings
  • HVAC

Magazine

  • Current Issue
  • Past Issues
  • Magazine Index
  • Subscribe
  • Online Archive
  • Author Guidelines

All Access

  • Member Home
  • Start Free Trial
  • Gift Membership

Online Learning

  • Courses
  • Project Guides
  • Reader Projects
  • Podcast

More

  • FHB Ambassadors
  • FHB House
  • Customer Support

Account

  • Log In
  • Join

Newsletter

Get home building tips, offers, and expert advice in your inbox

Signing you up...

This site is protected by reCAPTCHA and the Google Privacy Policy and Terms of Service apply.
See all newsletters
See all newsletters

Follow

  • X
  • YouTube
  • instagram
  • facebook
  • pinterest
  • Tiktok

Join All Access

Become a member and get instant access to thousands of videos, how-tos, tool reviews, and design features.

Start Your Free Trial

Subscribe

FHB Magazine

Start your subscription today and save up to 70%

Subscribe

We hope you’ve enjoyed your free articles. To keep reading, become a member today.

Get complete site access to expert advice, how-to videos, Code Check, and more, plus the print magazine.

Start your FREE trial

Already a member? Log in