FHB Logo Facebook LinkedIn Email Pinterest Twitter X Instagram Tiktok YouTube Plus Icon Close Icon Navigation Search Icon Navigation Search Icon Arrow Down Icon Video Guide Icon Article Guide Icon Modal Close Icon Guide Search Icon Skip to content
Subscribe
Log In
  • How-To
  • Design
  • Tools & Materials
  • Restoration
  • Videos
  • Blogs
  • Forum
  • Magazine
  • Members
  • FHB House
  • Podcast
Log In
How-To

How to Reuse Salvaged Wood

A historical-home renovation gives lessons into the process of reclaiming lumber, from careful demolition to remilling and refinishing.

By Jim Wolffer Issue 320 - Dec 2023/Jan 2024

Synopsis: Using a recent gut-and-expansion project as an example, builder Jim Wolffer explains how his company reuses salvaged wood. He covers how to assess whether lumber is worth saving or not, the importance of developing a reuse plan that includes the homeowner, and setting up an area for de-nailing, remilling, and refinishing the salvaged lumber.


New England farmhouseWe work in an area that has a lot of really old houses, some dating back to the 1600s. Our latest project, designed by architect Steve Baczek, was a complete gut and expansion of an 1870s New England farmhouse. All too often projects such as this result in dumpster loads of material being sent off to the landfill instead of being repurposed strategically in the renovation. With our company’s reputation for thoughtful use of salvaged material, these homeowners wanted us to save as much original building material as possible during demolition. We were then asked to incorporate some of that material into the renovation. This project is a perfect illustration of how that strategy can work successfully.

Start with careful demolition 

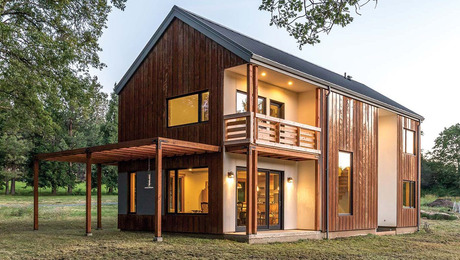
Our process begins by assessing what material can be saved from demolition. In this case, the existing farmhouse had gone through many renovations over the years, so there wasn’t much in the way of period moldings or detailed millwork to save. Instead, we opted to go after material such as the original flooring and structural lumber and timber. (If you’re reusing older painted material, take appropriate lead-safe precautions.)

de-nailing salvaged wood

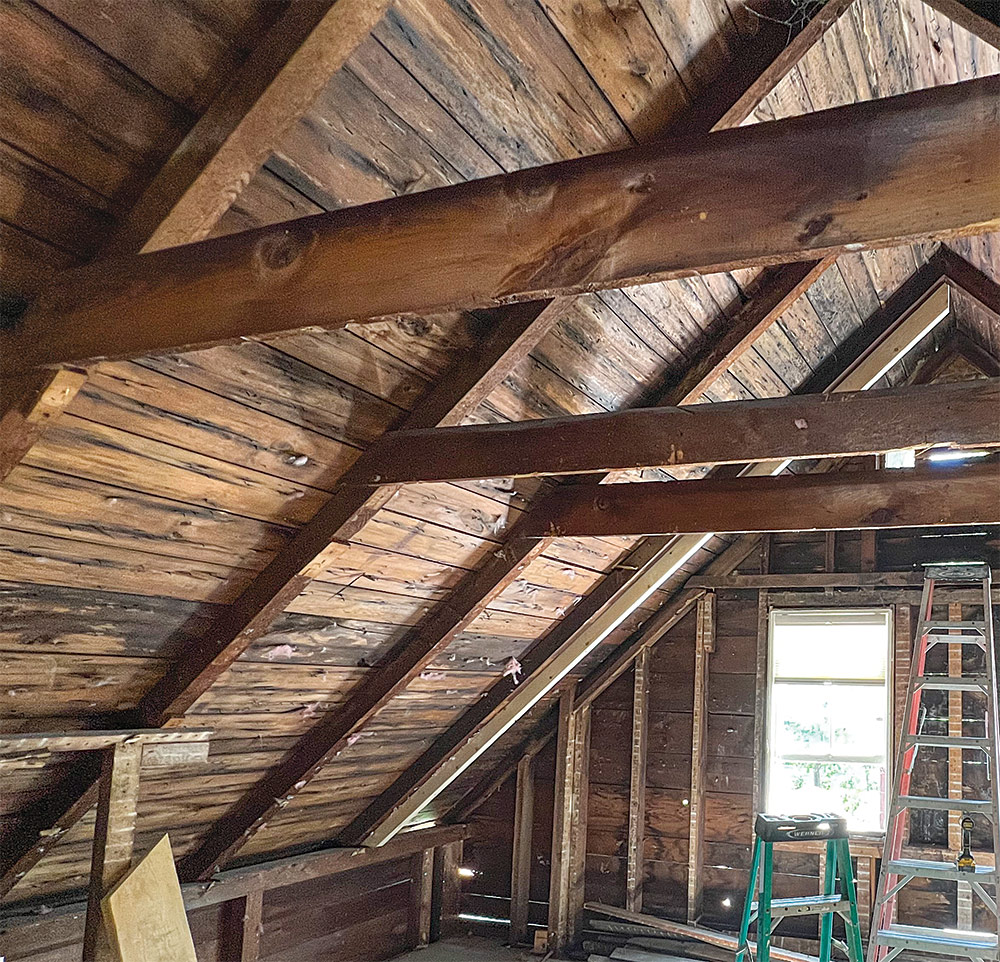
If your renovation plans require you to remove interior wall partitions or exterior walls, plan to save the framing lumber. Remove every board by hand, and keep each one as free of damage and as long as possible. This approach requires more patience and takes more time than the sledgehammer/­demo-saw method, but the result is more rewarding. Beautiful old wood gleaned from a careful demolition can then be put back into the house instead of the dumpster.

sanding salvaged wood

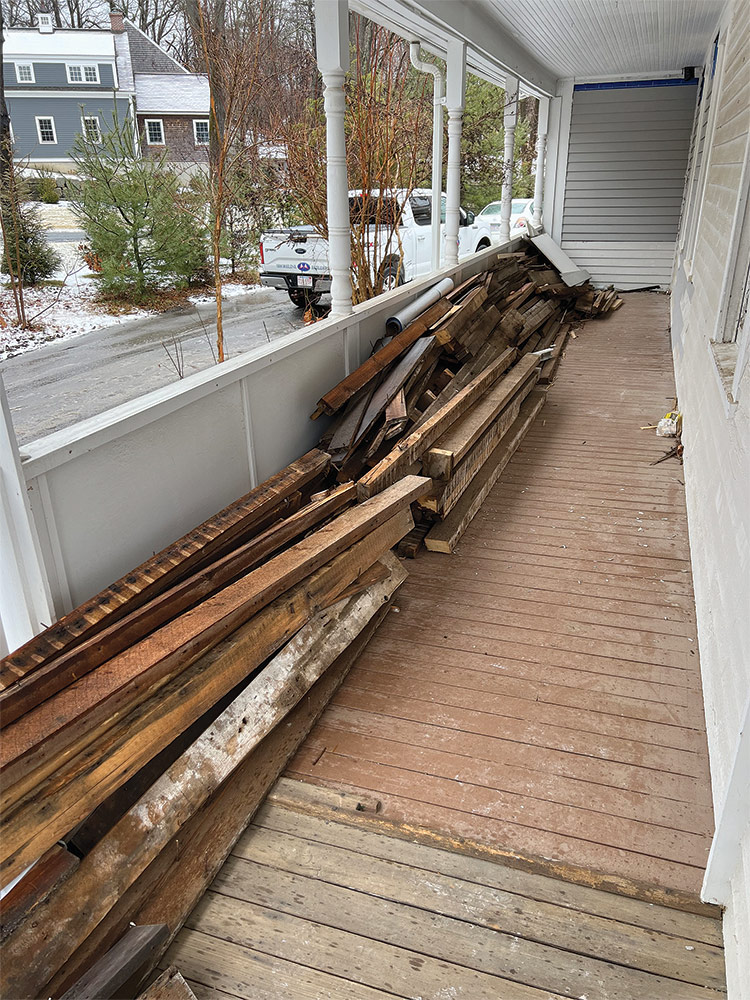
A big part of the demolition strategy is planning ahead for a place to put the wood as you take it out of the house. Ideally that place should be close by and should minimize the wood’s exposure to the weather. For the project pictured here, the home’s large wraparound porch provided a convenient place to pile the demolition wood. An alternative is to store the wood temporarily on pallets and cover it with a heavy-duty tarp.

Discover what you’ve got

As demolition progresses, you need a way to figure out what lumber is worth saving and what isn’t. Back 150 years ago, construction lumber all came from trees that themselves were centuries old. If you’re reclaiming wood from a house that was built in the 19th century or earlier, expect the wood grain—including that of the framing material—to be extremely tight.

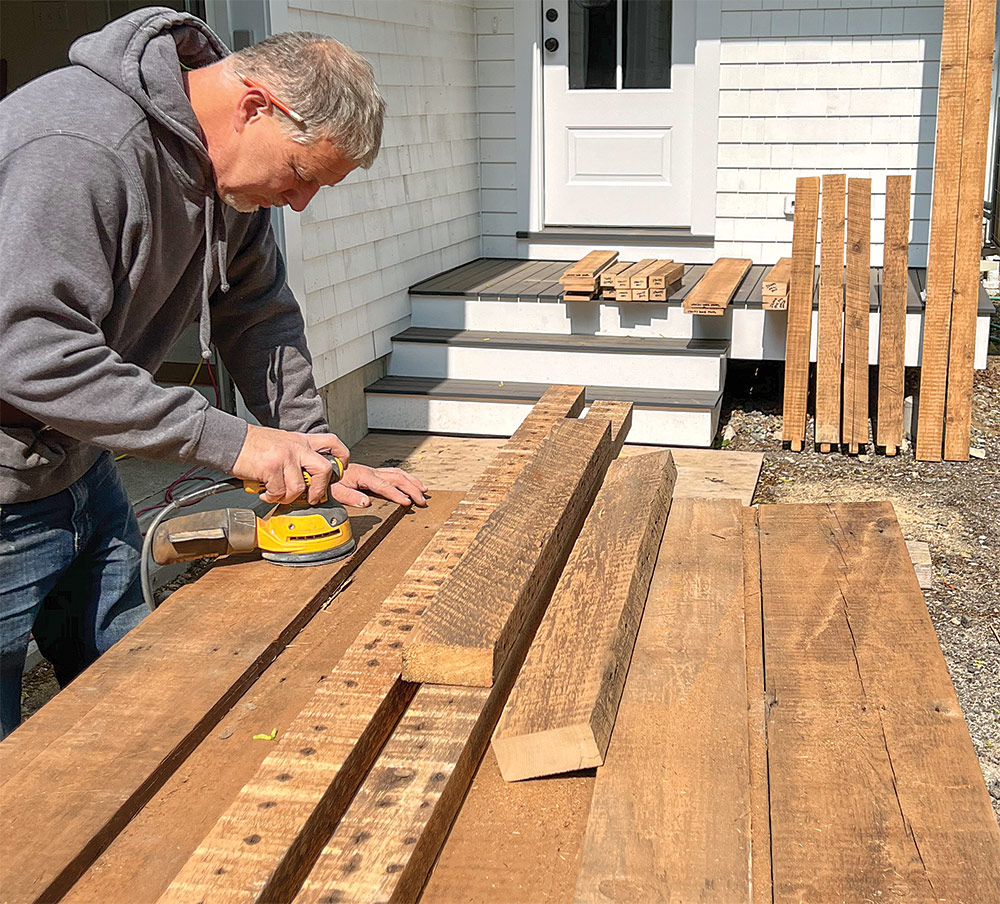
A good way to assess the quality of the wood is by running some samples through a planer. Exposing the grain of salvaged wood can be really exciting. The test pieces we planed revealed tight, mostly clear grain (top photos, facing page).

A peek inside old wood
A Peek Inside Old Wood: When first removed, old wood can appear dingy and uninteresting (left), but a quick pass through the planer can uncover rich, clear grain (right). Photos by Roe Osborn.

As the demolition progresses, keep an eye out for hidden caches of wood. In a room that had served as the kitchen in the original house, we found beautiful vertical-grain heart-pine floor boards under more-recently installed flooring. Heart pine—known for its extreme durability—was the flooring of choice for an 1870s hard­working kitchen, and those clear, tight-grained boards were still in wonderful shape.

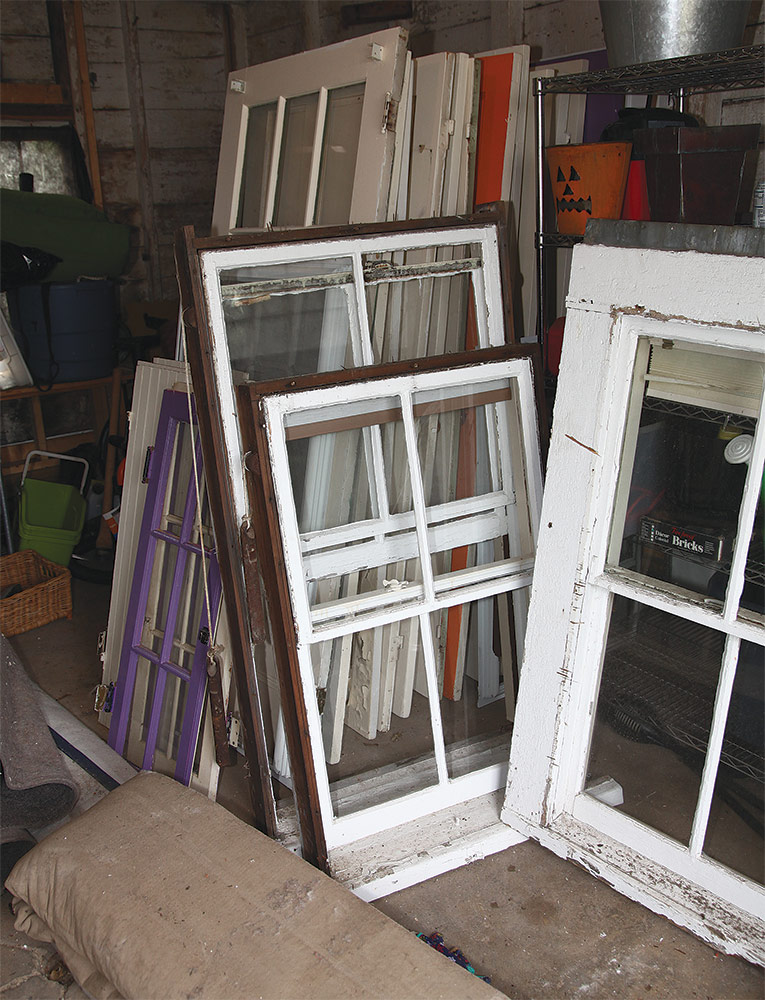
In addition to the flooring and framing, save any old doors and windows that are in decent condition. These can be incorporated creatively into your renovation. But be aware that much of the wood used for plaster lath and strapping is of inferior grades and probably isn’t worth saving. 

Don’t forget doors and windows
Don’t Forget Doors and Windows: Historical doors and windows were typically made from the old-growth lumber, and antique glass is always full of character. These can be included as design elements in a renovation. Photo by Roe Osborn.

As you examine the wood exposed in the planing, develop a system for separating boards that will make the best “smooth finish” lumber from those that will work better for a rougher, more rustic surface.

minimize the wood’s exposure to the weather
Out of the Weather: Plan ahead for a safe, dry place to bring the salvaged lumber as it is removed. A covered porch works well.

Develop a reuse plan

A common mistake is reusing salvaged wood randomly in a renovation, such as for a single window stool. Avoid having your finished project look like you just slapped a bunch of old wood around for the heck of it. At the project planning stage, identify areas where you might be able to incorporate reclaimed wood in a manner that is appropriate to the style of the renovation. Get the homeowners involved as early as possible to discuss where to use the materials.

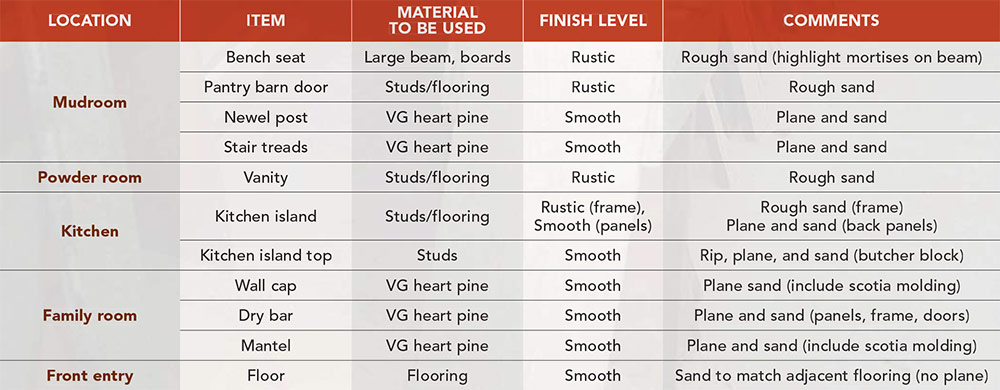
As the demolition on our project progressed and we moved closer to working on the interior, we met with the homeowners to outline which projects would best lend themselves to repurposing the reclaimed materials. We came up with an initial list of ideas for using the reclaimed lumber as major architectural accents in the various rooms being renovated. Besides identifying the material to be used, we also discussed the finish level we wanted for each item. We put all the information into a spreadsheet (reproduced in the chart, below), which is a great way to keep everything organized.

KEEP PROJECTS ORGANIZED
Keep Projects Organized: Create a chart that lists all the reclaimed-lumber projects in the house. The chart above, made for the remodel featured in this article, groups projects by finish and material. It also prioritizes the projects for completion based on the requirements for installation.

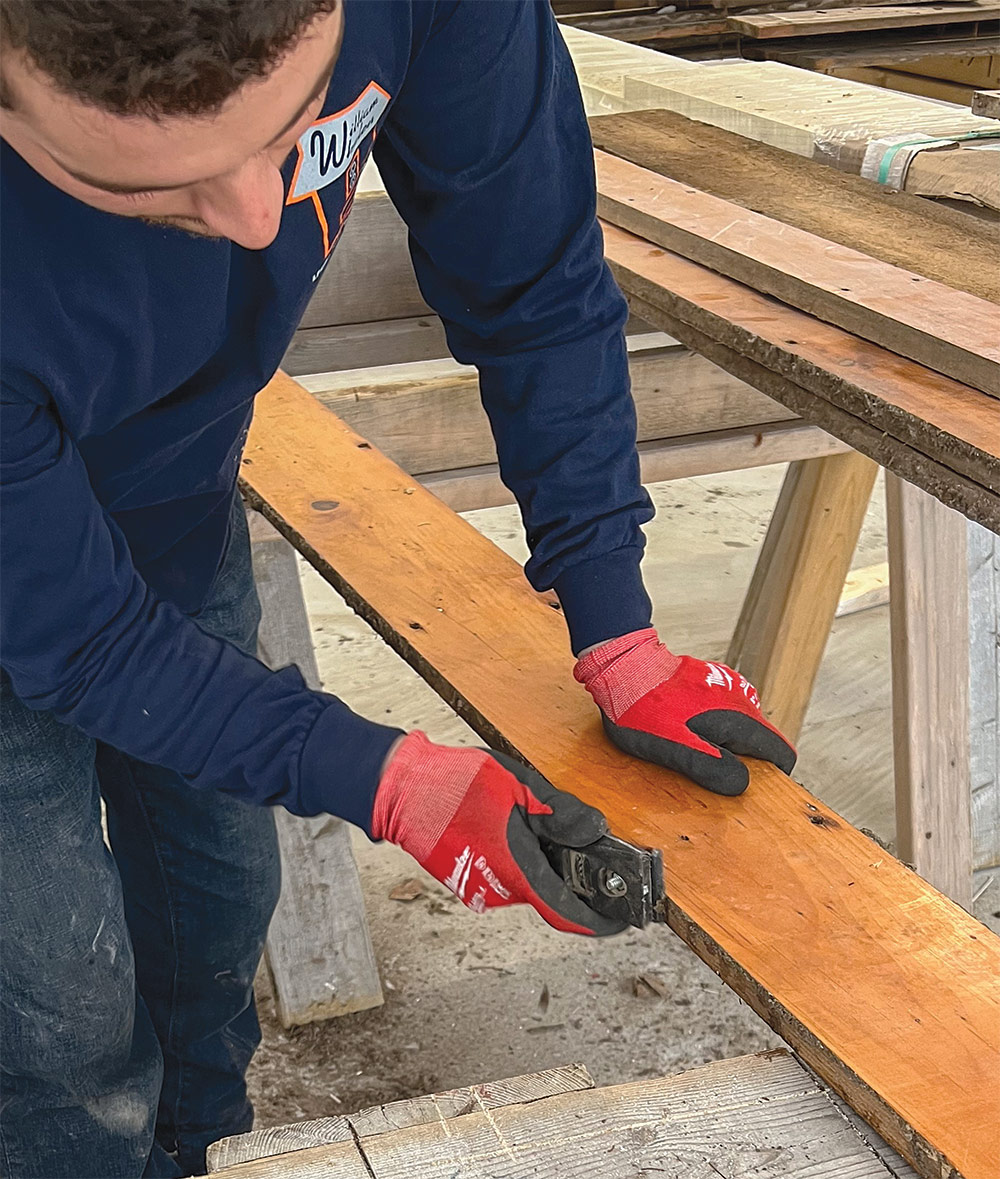
Start with de-nailing

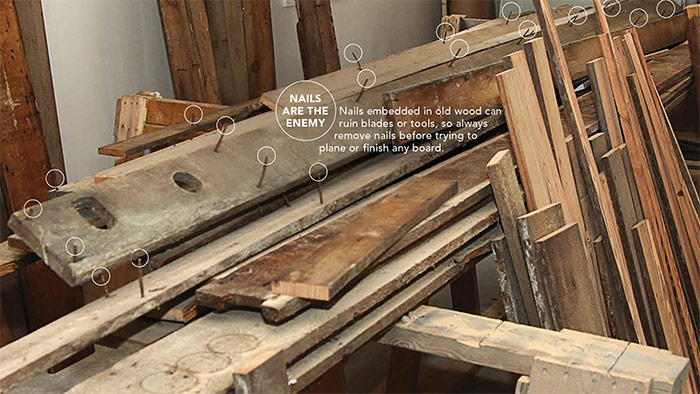
It’s always a good idea to have a specific room or nearby building for processing the salvaged wood. For this project, we set up that area in the new garage. Regardless of how you ultimately want to use the wood, the first step always is to remove all the nails. Initially we thought it would be more efficient to de-nail all the wood before we started building things, but de-nailing and cleaning up the boards is such an arduous task that we opted to de-nail as the wood was needed for each element to keep ourselves from getting bogged down in a tedious job. 

Nails are the enemy
Nails are the Enemry: Nails embedded in old wood can ruin blades or tools, so always remove nails before trying to plane or finish any board. Photo by Roe Osborn.

Use time and space efficiently

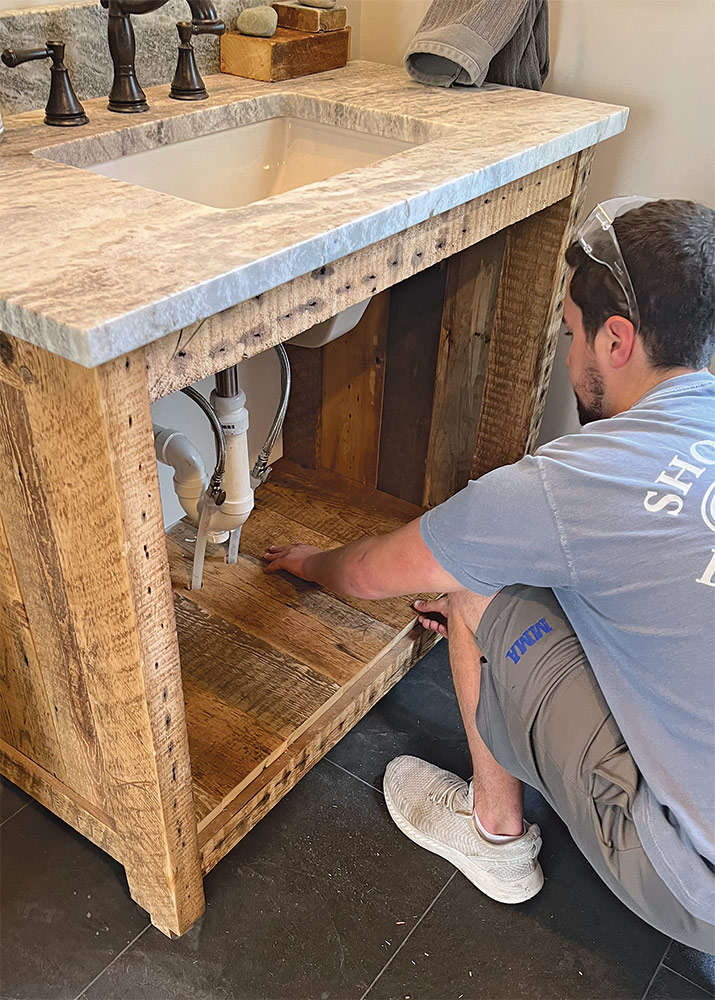
Always choose which project to build first based on the role it plays in the rest of the renovation. For example, we had to build and install the powder-room vanity before the plumbing could be finished. When the vanity was finished, we also had to template and order the countertop, which had a substantial lead time. 

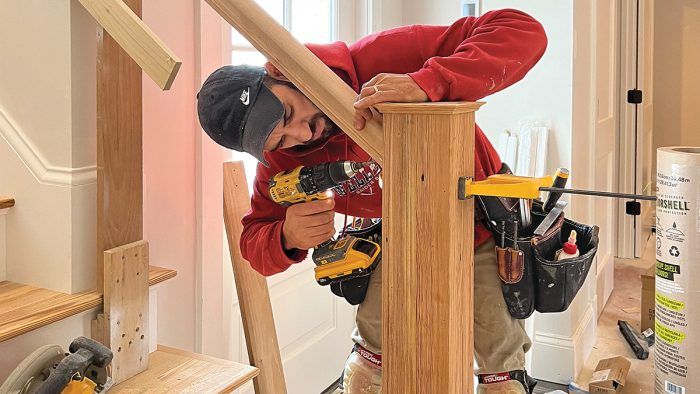
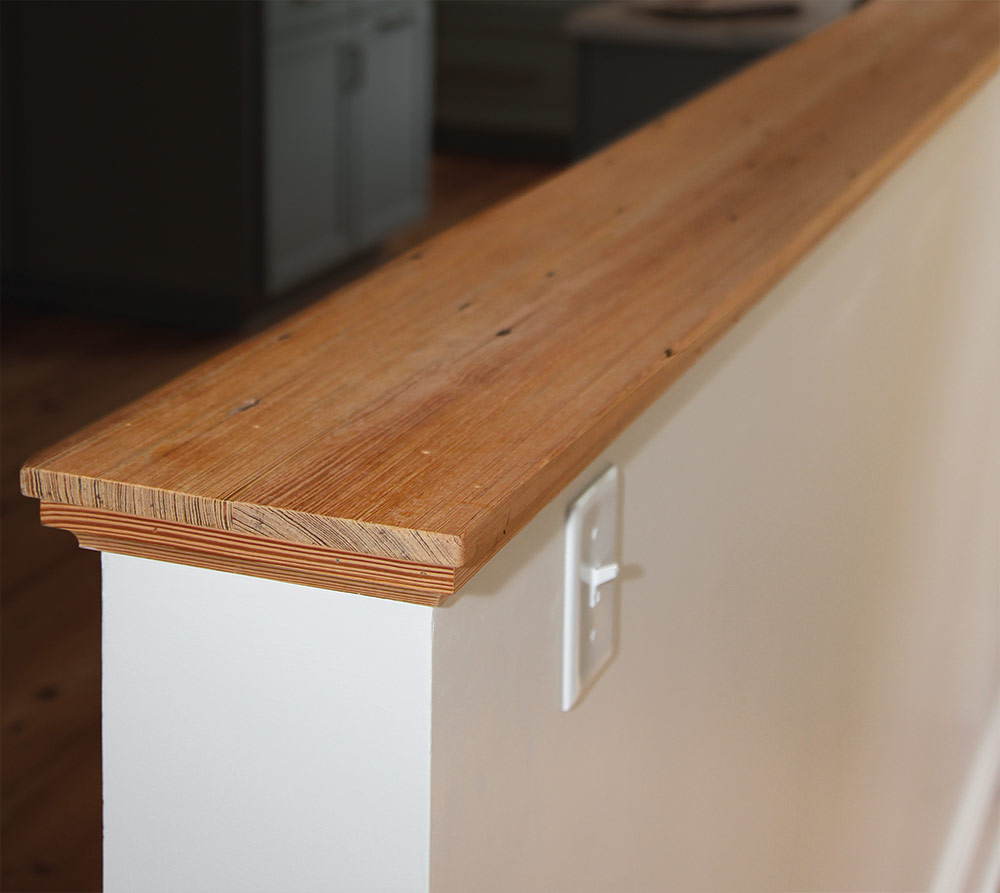
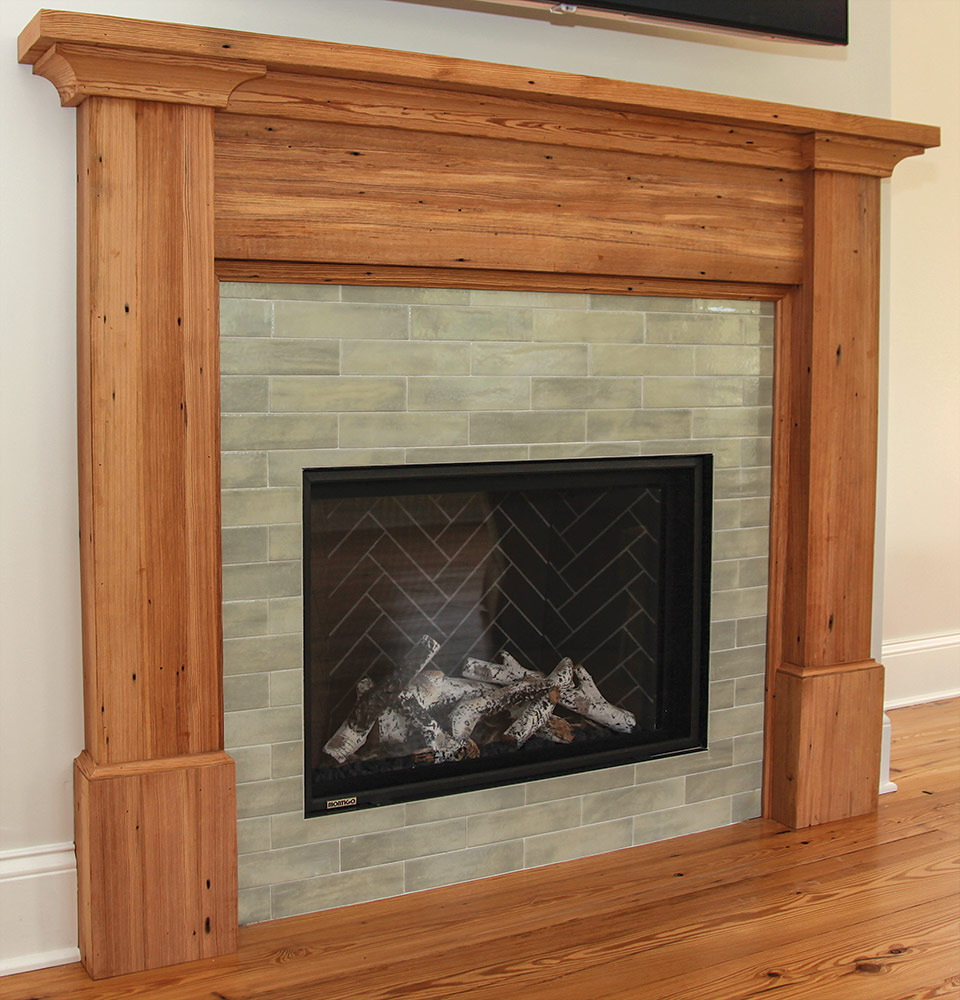
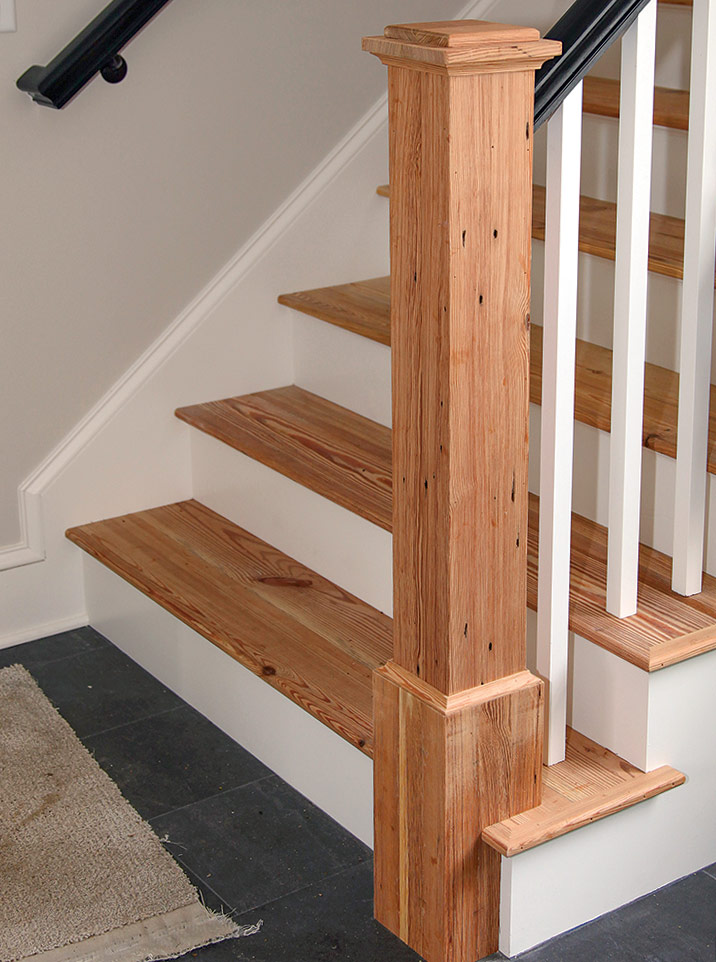
For the most efficient use of time and shop space, try to group together elements that use the same material, and then process the salvaged wood and fabricate the elements at the same time. We made three different elements from the original heart-pine flooring, planed down to a smooth finish: a mantel and fireplace surround, treads and a newel post for a new stairway, and a decorative cap for a separation wall (see photos, below). 


Different Elements, Same Material: We planed down the original heart-pine flooring to a smooth finish to fabricate a decorative cap for a separation wall, a mantel and fireplace surround, and treads and a newel post for a stairwell. A few coats of water-based polyurethane protect the remilled wood.

decorative cap for a separation wall
Photo by Roe Osborn.
mantel and fireplace surround
Photo by Roe Osborn.
newel post for a new stairway
Photo by Roe Osborn.

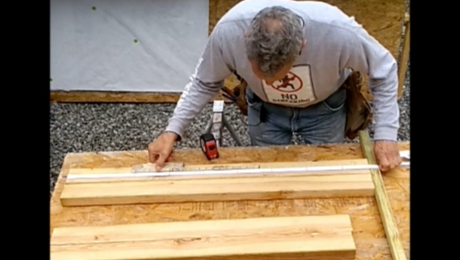
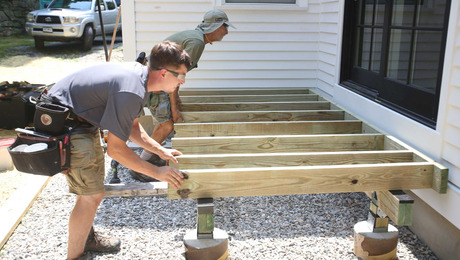
For the larger interior projects that require a lot of milling and more traditional construction techniques, it often makes sense to move your operations to a bigger shop. In our case, we rough-cut material for the vanity doors, the barn door, the kitchen island, and the dry-bar cabinet on-site, then labeled the pieces and took them to the shop, where we could take advantage of the shop tools and a little more elbow room.

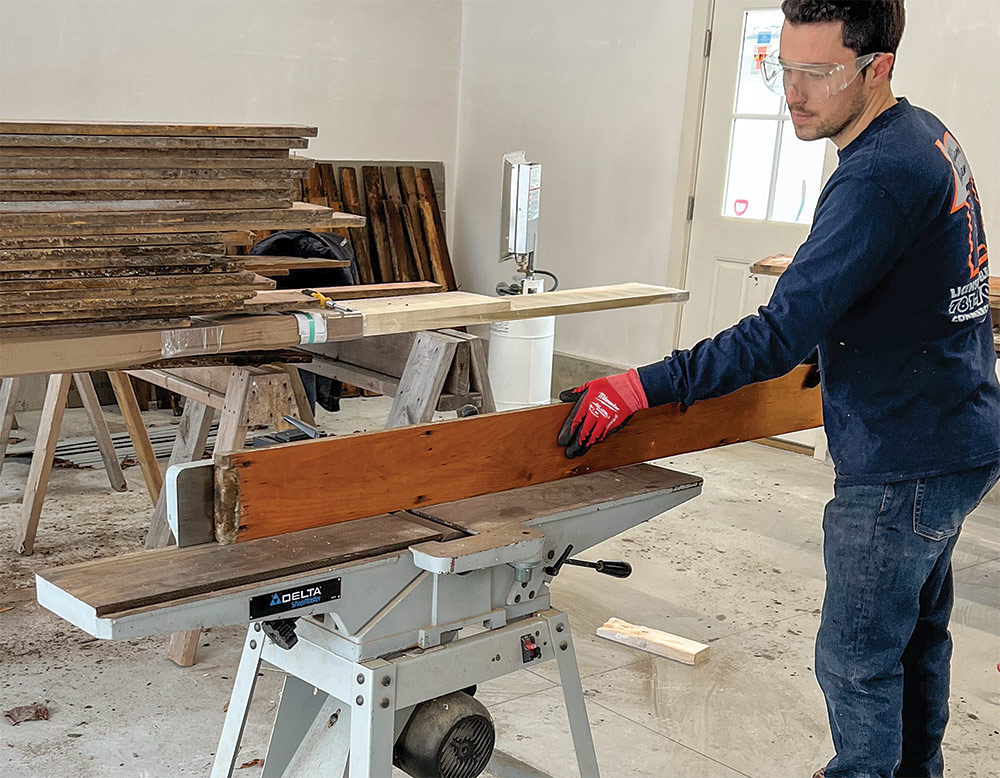
Salvaged materials are milled to a Smooth Finish in a sequence similar to that of rough lumber purchased at a lumberyard. But before running boards over a jointer, scrape the edges to remove any hardened varnish and debris. The jointer creates a straight edge and a flat surface to facilitate planing boards to thickness. The newly jointed edges allow you to glue boards together for wider panels and to fabricate moldings that match the rest of the finished elements. 

scrape the edges to remove any hardened varnish and debris

running boards over a jointer

planing boards to thickness
Photo by Roe Osborn.

glue boards together for wider panels


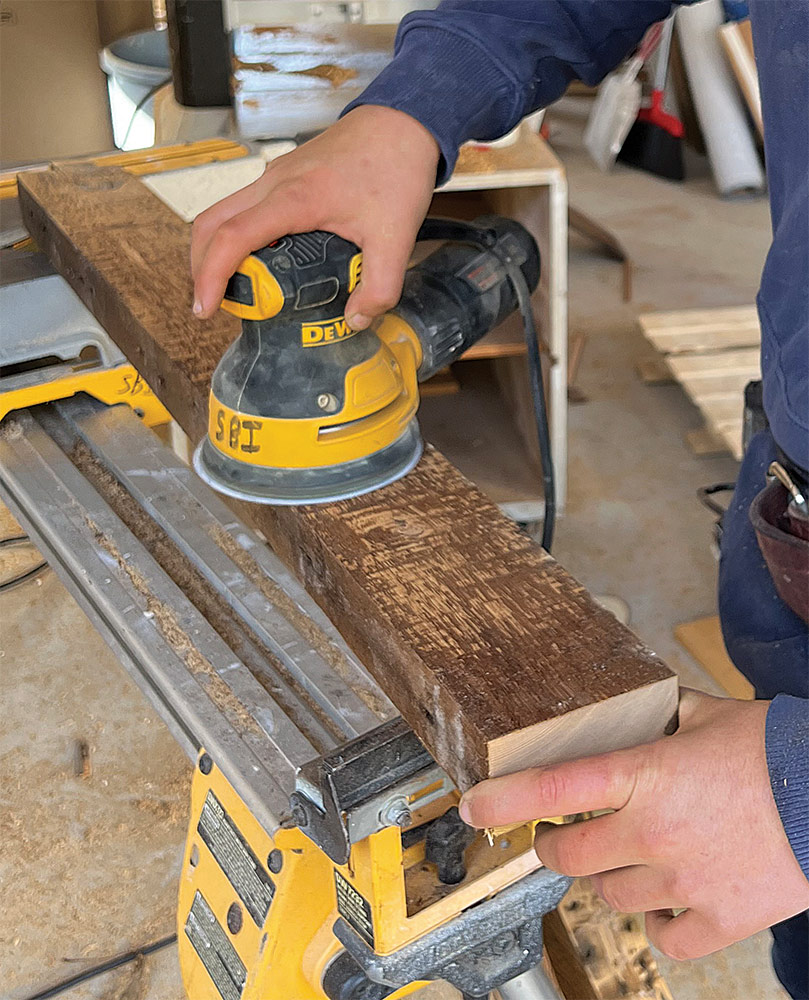
Where a Rustic Finish is desired, light planing or just sanding the surface of the material maintains much of the weathered color of the wood. This treatment can also leave saw marks from when the wood was originally milled and indexing marks from the original carpenters. For the framework of this powder-room vanity, the original stud tenons act as feet. As with a smooth finish, a few coats of water-based polyurethane seal the wood; they also preserve the rustic weathered texture.

light planing or just sanding the surface of the material maintains much of the weathered color of the wood

powder-room vanity with rustic weathered texture


Jim Wolffer and his wife, Judith, own Shoreline Builders, Inc., based in Scituate, Mass. Photos by the author, except where noted.

From Fine Homebuilding #320

To view the entire article, please click the View PDF button below.


RELATED STORIES

  • A Better Way to Demo
  • Salvage Solutions
  • Collected Old Wood in a New Kitchen

Sign up for eletters today and get the latest how-to from Fine Homebuilding, plus special offers.

Signing you up...

This site is protected by reCAPTCHA and the Google Privacy Policy and Terms of Service apply.
See all newsletters
See all newsletters
×

Get home building tips, offers, and expert advice in your inbox

Signing you up...

This site is protected by reCAPTCHA and the Google Privacy Policy and Terms of Service apply.
See all newsletters
See all newsletters
View PDF

New Feature

Fine Homebuilding Forums

Ask questions, offer advice, and share your work

View Comments

  1. bobbomax | Dec 04, 2023 02:12pm | #1

    100% denailing can be harder than it looks and can lead to damaged planer blades. Replacing them is both expensive and time consuming, so I keep a cheap Harbor Freight metal detector next to my planer. Saving even one set of blades is more than enough to pay itself off.

  2. [email protected] | Dec 13, 2023 03:47pm | #2

    Lots of great inside information in this piece. I've done a bunch of restoration work over the years and it's never quick & easy, but worth the time & effort for the end result.

    I did a 3-part video with FHB in 2009 about dismantling, moving, restoring and reusing original salvaged materials in an 18th century timber frame Connecticut house that proves the point.

Log in or create an account to post a comment.

Sign up Log in

Become a member and get full access to FineHomebuilding.com

Up Next

Video Shorts

Featured Story

FHB Podcast Segment: Gutter Covers 101

Gutter covers may be riskier than you think.

Featured Video

Micro-Adjust Deck-Baluster Spacing for an Eye-Deceiving Layout

No math, no measuring—just a simple jig made from an elastic band is all you need to lay out a good-looking deck railing.

Related Stories

  • Strategies for Making an Old House Airtight
  • Passive House 3.0
  • FHB Podcast Segment: Advice for an Efficient and Affordable New Build
  • High-Tech Batteries and More

Discussion Forum

Recent Posts and Replies

  • |
  • |
  • |
  • |
  • |
  • |
View More Create Post

Highlights

Fine Homebuilding All Access
Fine Homebuilding Podcast
Tool Tech
Plus, get an extra 20% off with code GIFT20

"I have learned so much thanks to the searchable articles on the FHB website. I can confidently say that I expect to be a life-long subscriber." - M.K.

Get home building tips, offers, and expert advice in your inbox

Signing you up...

This site is protected by reCAPTCHA and the Google Privacy Policy and Terms of Service apply.
See all newsletters
See all newsletters

Video

View All Videos
  • Podcast 604: Members-only Aftershow — Marc Rosenbaum's Energy-Efficient and Affordable Martha’s Vineyard Home
  • Podcast 562: PRO TALK With Builder and Author Dan Kolbert
  • Webinar: Getting to Net-Zero Energy
  • FHB Podcast Segment: Gutter Covers 101
View All

Sustainable Architecture

View All Sustainable Architecture Articles
  • Nantucket Timber Frame
  • FHB Podcast Segment: Energy Consumption in a Pretty Good House
  • Podcast Episode 646: Overhanging Floors, Sustainable Building, and Bath Fans
View All Sustainable Architecture Articles

Fine Homebuilding Magazine

  • Issue 330 - April/May
    • Deck Details for Durability
    • FAQs on HPWHs
    • 10 Tips for a Long-Lasting Paint Job
  • Issue 329 - Feb/Mar 2025
    • Smart Foundation for a Small Addition
    • A Kominka Comes West
    • Making Small Kitchens Work
  • Issue 328 - Dec/Jan 2024
    • How a Pro Replaces Columns
    • Passive House 3.0
    • Tool Test: Compact Line Lasers
  • Issue 327 - November 2024
    • Repairing Damaged Walls and Ceilings
    • Plumbing Protection
    • Talking Shop
  • Issue 326 - October 2024
    • Paint Behind Strike Plates
    • Conceal Cut Ends
    • Ladder Slip Solution

Fine Home Building

Newsletter Sign-up

  • Fine Homebuilding

    Home building tips, offers, and expert advice in your inbox.

  • Green Building Advisor

    Building science and energy efficiency advice, plus special offers, in your inbox.

  • Old House Journal

    Repair, renovation, and restoration tips, plus special offers, in your inbox.

Signing you up...

This site is protected by reCAPTCHA and the Google Privacy Policy and Terms of Service apply.
See all newsletters

Follow

  • Fine Homebuilding

    Dig into cutting-edge approaches and decades of proven solutions with total access to our experts and tradespeople.

    Start Free Trial Now
    • Facebook
    • Instagram
    • X
    • LinkedIn
  • GBA Prime

    Get instant access to the latest developments in green building, research, and reports from the field.

    Start Free Trial Now
    • Facebook
    • YouTube
  • Old House Journal

    Learn how to restore, repair, update, and decorate your home.

    Subscribe Now
    • Facebook
    • Instagram
    • X

Membership & Magazine

  • Online Archive
  • Start Free Trial
  • Magazine Subscription
  • Magazine Renewal
  • Gift a Subscription
  • Customer Support
  • Privacy Preferences
  • About
  • Contact
  • Advertise
  • Careers
  • Terms of Use
  • Site Map
  • Do not sell or share my information
  • Privacy Policy
  • Accessibility
  • California Privacy Rights

© 2025 Active Interest Media. All rights reserved.

Fine Homebuilding receives a commission for items purchased through links on this site, including Amazon Associates and other affiliate advertising programs.

X
X
This is a dialog window which overlays the main content of the page. The modal window is a 'site map' of the most critical areas of the site. Pressing the Escape (ESC) button will close the modal and bring you back to where you were on the page.

Main Menu

  • How-To
  • Design
  • Tools & Materials
  • Video
  • Blogs
  • Forum
  • Project Guides
  • Reader Projects
  • Magazine
  • Members
  • FHB House

Podcasts

  • FHB Podcast
  • ProTalk

Webinars

  • Upcoming and On-Demand

Podcasts

  • FHB Podcast
  • ProTalk

Webinars

  • Upcoming and On-Demand

Popular Topics

  • Kitchens
  • Business
  • Bedrooms
  • Roofs
  • Architecture and Design
  • Green Building
  • Decks
  • Framing
  • Safety
  • Remodeling
  • Bathrooms
  • Windows
  • Tilework
  • Ceilings
  • HVAC

Magazine

  • Current Issue
  • Past Issues
  • Magazine Index
  • Subscribe
  • Online Archive
  • Author Guidelines

All Access

  • Member Home
  • Start Free Trial
  • Gift Membership

Online Learning

  • Courses
  • Project Guides
  • Reader Projects
  • Podcast

More

  • FHB Ambassadors
  • FHB House
  • Customer Support

Account

  • Log In
  • Join

Newsletter

Get home building tips, offers, and expert advice in your inbox

Signing you up...

This site is protected by reCAPTCHA and the Google Privacy Policy and Terms of Service apply.
See all newsletters
See all newsletters

Follow

  • X
  • YouTube
  • instagram
  • facebook
  • pinterest
  • Tiktok

Join All Access

Become a member and get instant access to thousands of videos, how-tos, tool reviews, and design features.

Start Your Free Trial

Subscribe

FHB Magazine

Start your subscription today and save up to 70%

Subscribe

We hope you’ve enjoyed your free articles. To keep reading, become a member today.

Get complete site access to expert advice, how-to videos, Code Check, and more, plus the print magazine.

Start your FREE trial

Already a member? Log in