FHB Logo Facebook LinkedIn Email Pinterest Twitter X Instagram Tiktok YouTube Plus Icon Close Icon Navigation Search Icon Navigation Search Icon Arrow Down Icon Video Guide Icon Article Guide Icon Modal Close Icon Guide Search Icon Skip to content
Subscribe
Log In
  • How-To
  • Design
  • Tools & Materials
  • Restoration
  • Videos
  • Blogs
  • Forum
  • Magazine
  • Members
  • FHB House
  • Podcast
Log In

Fine Homebuilding Project Guides

Painting

Guide Home
  • Intro to Painting
  • Tools & Materials
  • Prep Work
  • Painting Walls, Ceilings, and Trim
  • Wallpaper
  • Windows and Doors
  • Spray Painting Interiors
  • Exterior Painting
How-To

Painting Solutions

A painting contractor shares advice to help you get professional results on your next interior paint job.

By Frank Sinicrope Issue 166

Synopsis: In this article a professional painting contractor answers the most frequently asked questions about interior painting. Among other topics, he covers prepping a room, covering stains, and painting windows and doors.


Most people think that painting the interior of a house is a job that requires just a couple of tools, a high level of boredom, and very little experience. Only after they’ve come to the end of their messy first job do they begin to wonder about that old guy in painter’s whites they once saw working at someone else’s house. How could he paint an entire room in a seamlessly choreographed sequence of brush and roller strokes before his second cup of coffee and not spill even a drop of paint? I’m not that old guy yet, but I am a painting contractor. People always ask me how they can improve their painting techniques. If you consider the act of painting on par with a trip to the dentist, the answers ahead will provide some Novocain to ease the pain of your next painting project.

How do I prep a room for paint?

How do I prep a room for paint?

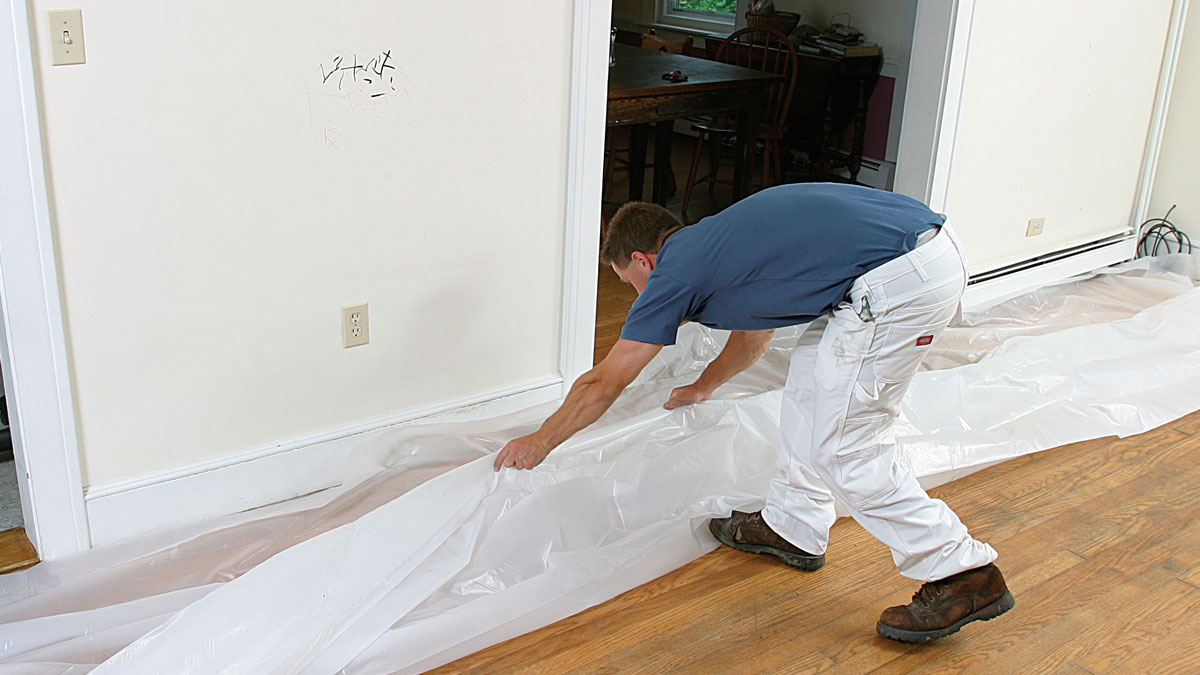
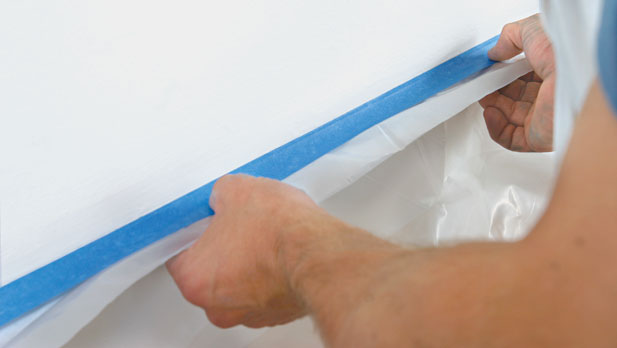
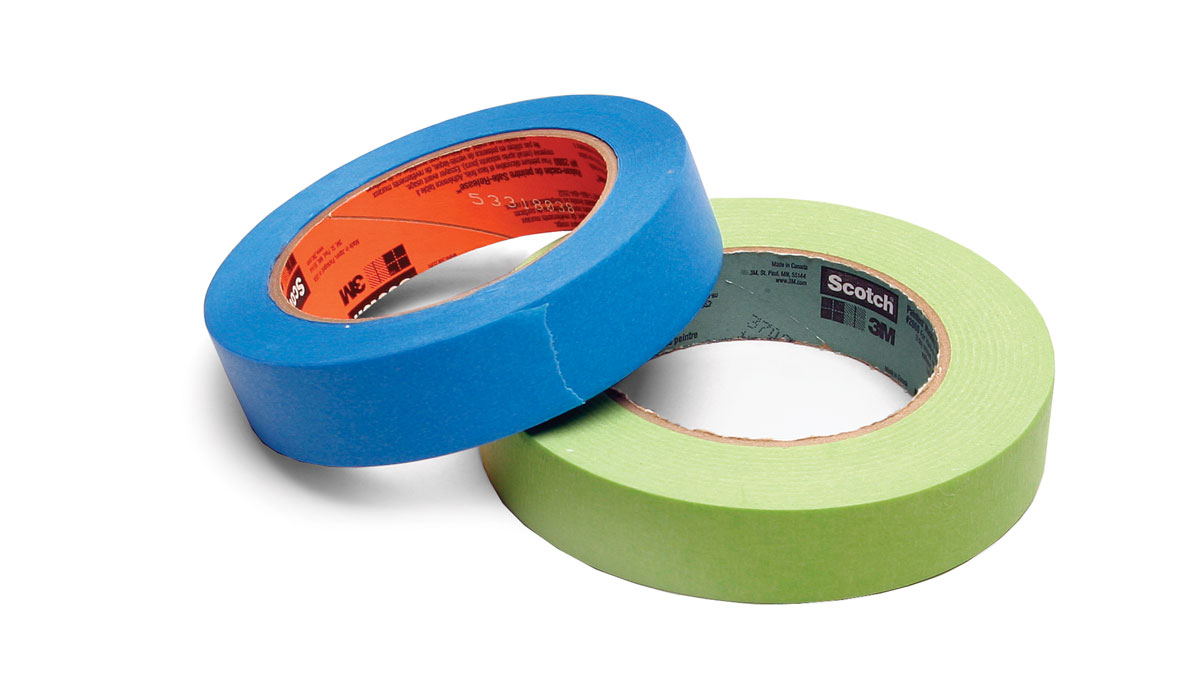
I like to move all furniture out or to the center of the room and cover it with plastic. To protect the floor, I roll out 4-mil plastic and tape it to the baseboard. Unless I’m painting the ceiling, it’s necessary to cover only the first 3 ft. or 4 ft. of floor from the wall. Blue masking tape is best; it adheres to most surfaces and peels off cleanly for up to 14 days. The green tape can stay on even longer.

Long-lasting, low-tack tape is best (3M Corp.; 888-364-3577; www.3m.com)
Long-lasting, low-tack tape is best (3M Corp.; 888-364-3577; www.3m.com).
Long-lasting, low-tack tape is best (3M Corp.; 888-364-3577; www.3m.com)

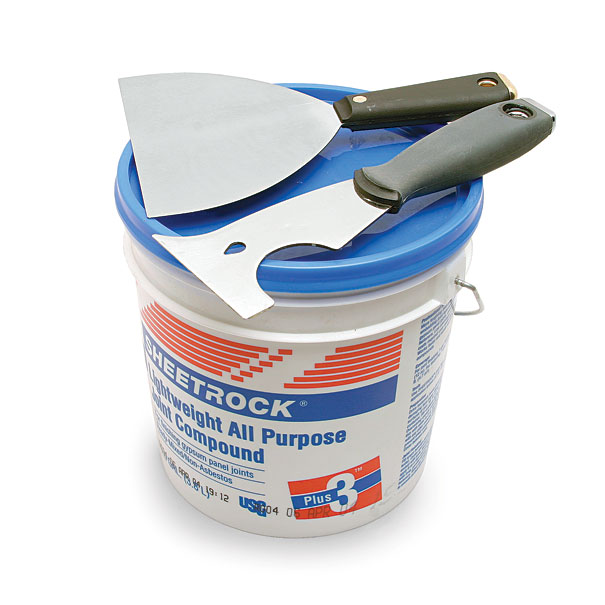
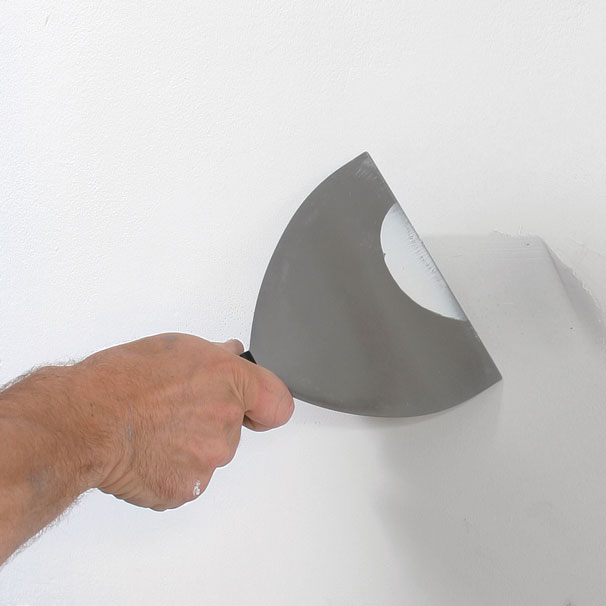
Next, I make sure walls and trim surfaces are clean, stain-free, and smooth. Nail holes, bumps, and cracks can be patched; for anything less than 1 ⁄4 in. deep, I use lightweight joint compound, which dries quickly.

Essential patching tools.

Essential patching tools. Use a 6-in. taping knife and a 5-in-1 tool for wall prep

How do I prevent stains from showing through the new paint?

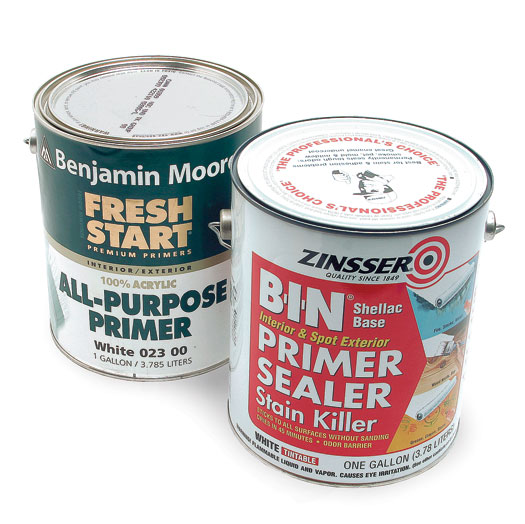
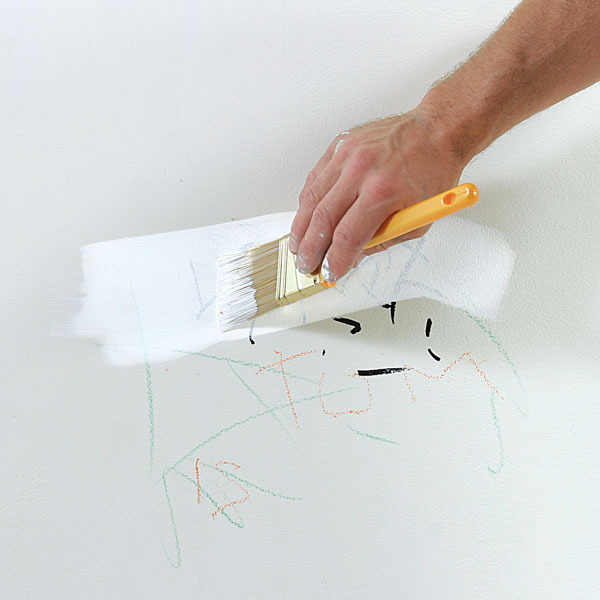
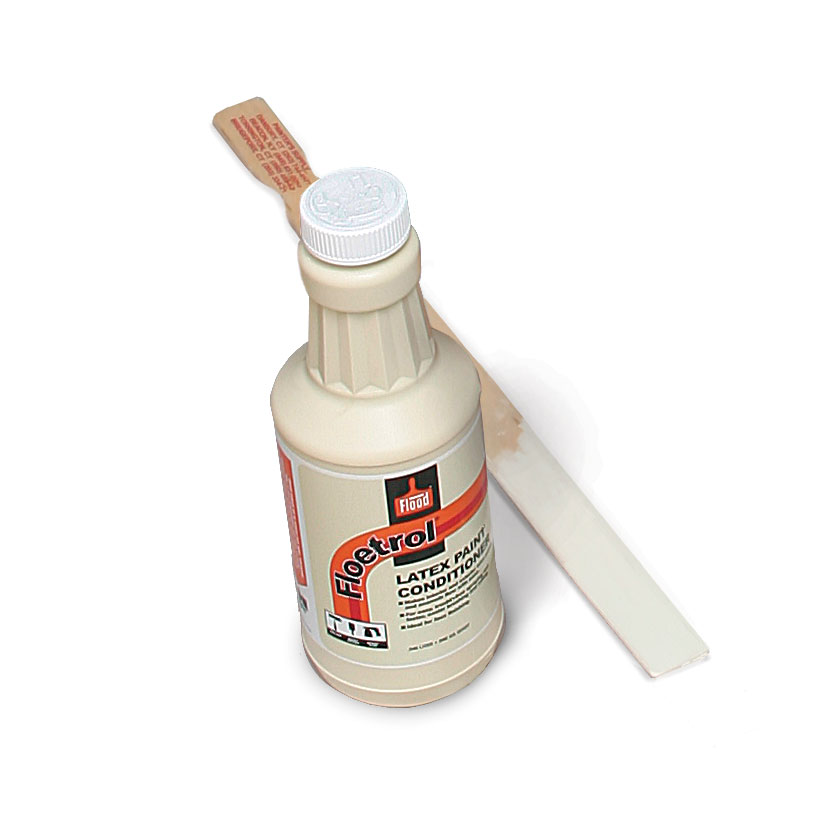
It’s a good idea to start any job with a quality primer. Stains including ink, crayon, water, and smoke soot can be blocked by a stain killing primer such as BIN or Benjamin Moore’s Fresh Start acrylic primer. After applying the primer, be sure to spot-prime the same area with the finish paint before applying the final coat. Otherwise, the spot will appear shiny when the wall is viewed from an angle.

Primers

Cover a multitude of sins.
Cover a multitude of sins. Begin the job with a stain-killing primer.
A $15, 3-in. tapered nylon bristle brush
Brush choice does matter. A $15, 3-in. tapered nylon bristle brush is the professional’s weapon of choice for the majority of interior latex-painting battles. Beginners might prefer a 21 ⁄2-in. brush; it’s easier to control. Use a China-bristle brush for oil paint. When spot-priming with any of the shellac-based stain-inhibiting paints, I use a 79¢ bristle brush and throw it away when I’m done.

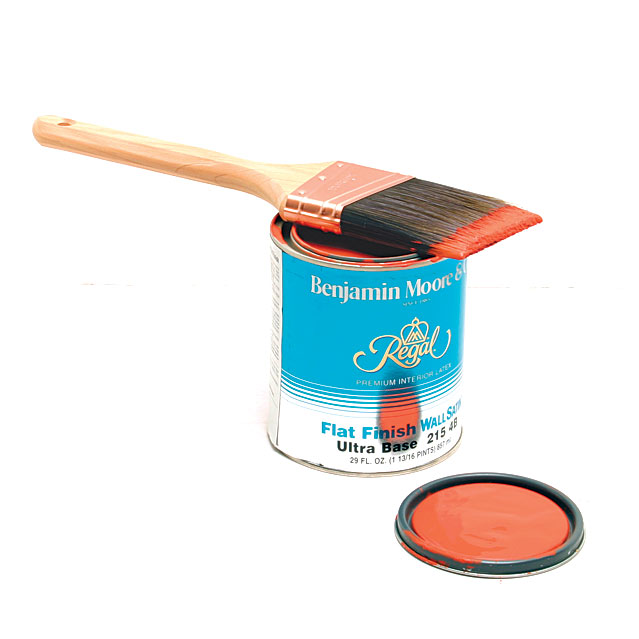
Which type of paint is best?

For a topcoat, there are two things to consider: latex vs. oil, and type of finish. Oil paint is made with an alkyd-base resin and cleans up with mineral spirits. I use it in kitchens and bathrooms because it is impervious to water. Latex paint is made from acrylic resins and cleans up with water. Because of their good durability and easy cleanup, I use latex paints everywhere else.

Flat Finish Wall Stain
Flat. Typically used for walls and ceilings in all but kitchens and baths; most successful at hiding surface imperfections.

Eggshell
Eggshell. Slightly more shine than flat; also used for walls.

Satin
Satin. Shinier than eggshell; can be used for trim, but is less durable than higher gloss paints.

Semigloss
Semigloss. The most common finish used for trim, it’s washable and durable.
Gloss
Gloss. Difficult to work with; dries quickly, but additives can improve its ability to flow. For the highest sheen, go with an oil-base gloss.

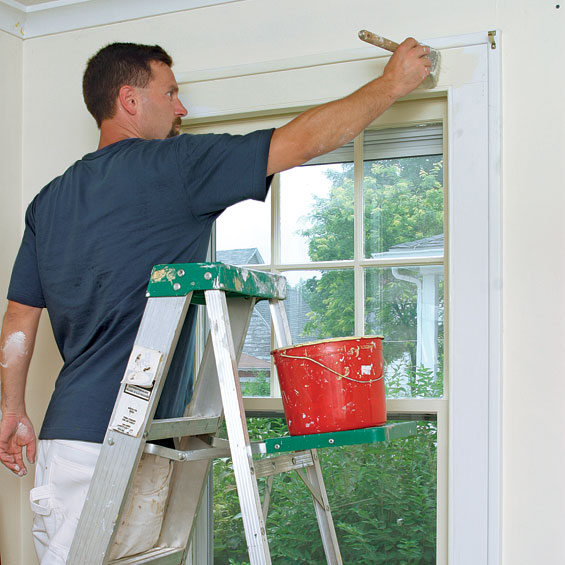
What do I paint first?

Use tape. Pros rely on a steady stroke to avoid using masking tape in many situations.
Don’t sweat it. Use tape. Pros rely on a steady stroke to avoid using masking tape in many situations. But tape ensures clean, straight lines while you’re still improving your skill.

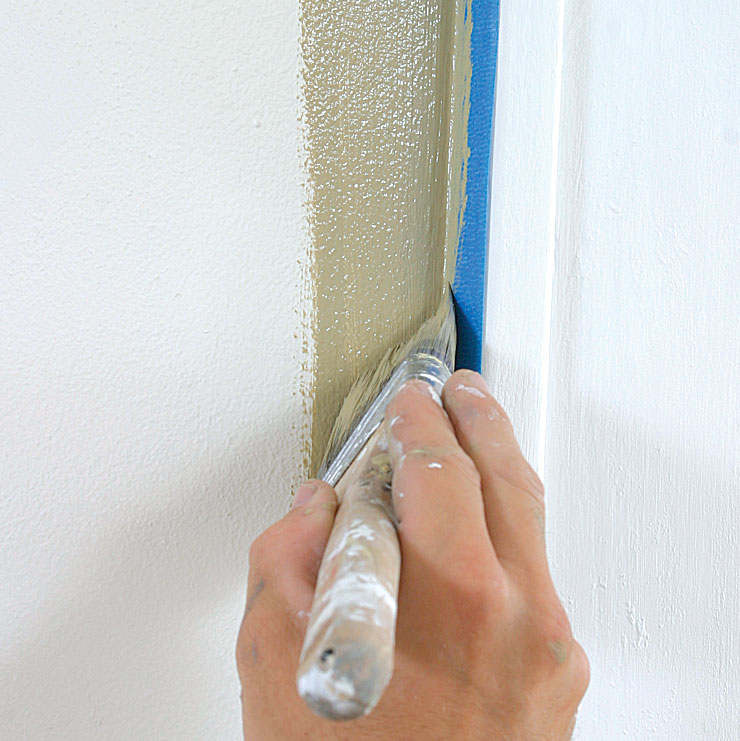
Pro painters have different preferences, but I like to paint the walls first, then the trim. I can roll out the walls quickly and not worry about any spray landing on the trim. Once the walls are finished, I wipe down the trim with a damp rag and start on it. I don’t mask off the trim when I cut in the walls, but masking is certainly a good option if you’d rather not worry about getting wall paint on the trim. Any one of the low-tack tapes works well.

Lap marks on walls are the visible transition between the textures made by a brush and by a roller. I cut in with a brush first, then try to roll as close to the trim as possible. I switch between cutting and rolling to ensure that the cutting stays wet, which also helps to eliminate marks. You’ll also find that the greater the paint’s sheen, the greater the likelihood of lap marks, which is a big reason to use flat paint on walls.

Easy does it. Too much pressure on the roller will leave lines called ropes.
Additives keep the paint flowing.
Additives keep the paint flowing. I use a product called Floetrol (800-321- 3444; www.floodco.com) to make trim paint flow better; it extends drying time and helps to reduce brush marks.

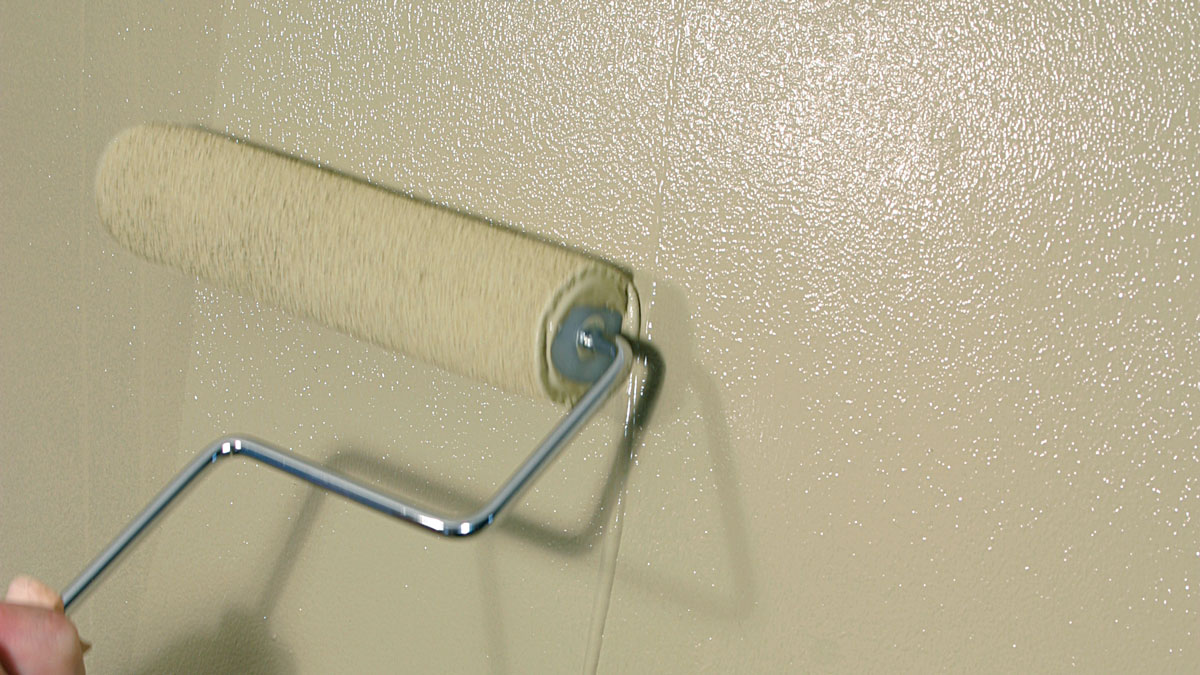
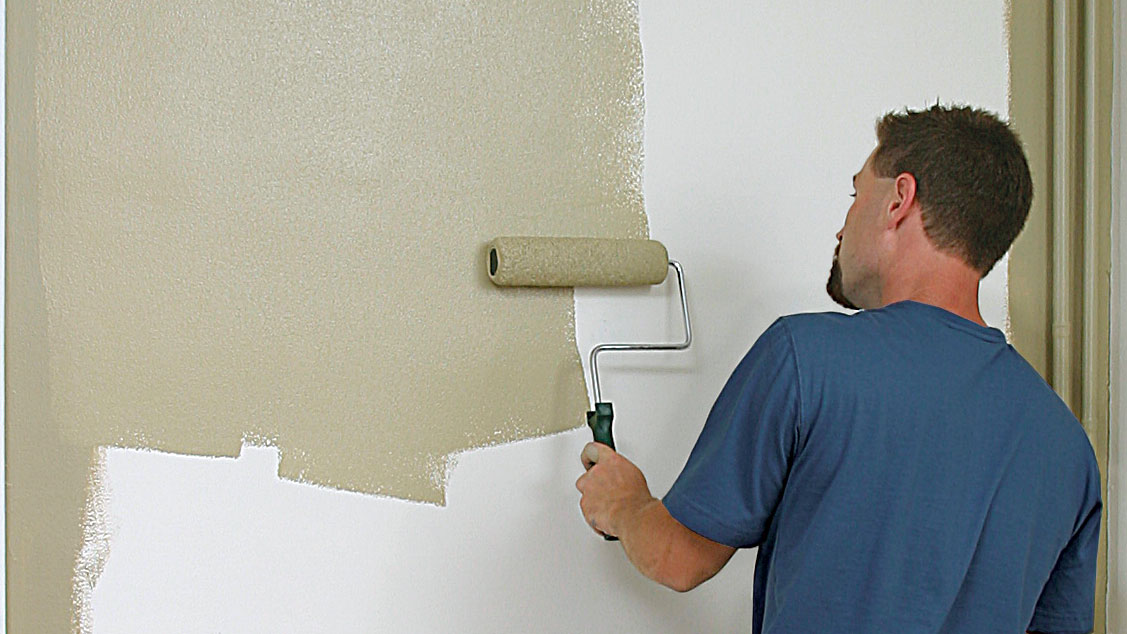
When rolling out a wall, how can I avoid lap masks and ropes?

Ropes, another type of lap mark, are caused by squeezeout from the roller’s edge and can be remedied by a lighter touch when rolling out a wall. After loading the roller with paint, I use short, easy strokes that overlap each other by at least half.

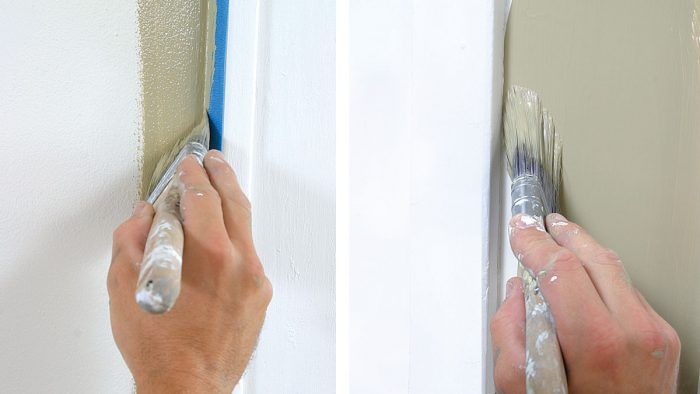
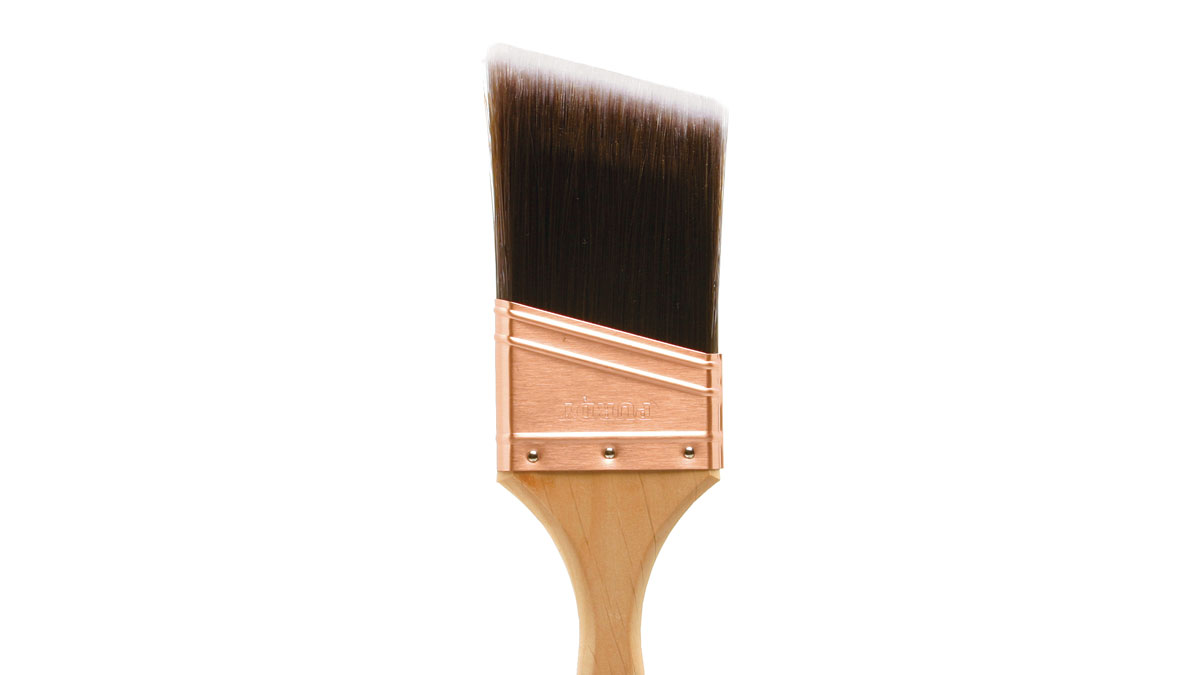
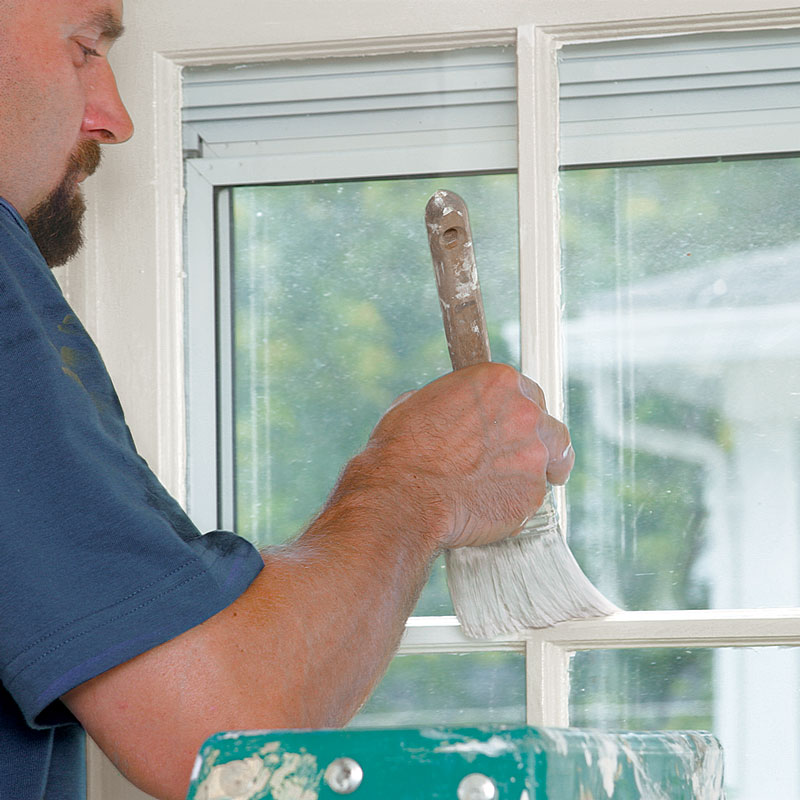
What’s the trick to painting a window?

I paint the muntins of the window first, then move to the face of the window. With a 21 ⁄2-in. sash brush, I angle the brush’s tip into the muntin’s edge and draw the paint along the muntin with one smooth stroke. (If you’re unsure of your technique or don’t want to bother, you can mask the glass with blue tape or scrape the glass once the paint has dried.) Don’t apply too much paint to the window frame; also, open and close the window during the drying period so that it doesn’t dry shut. If the window is painted shut, carefully run a razor blade between the window frame and casing to break the seal.​

Start inside and work outward. To avoid lap marks, paint the muntins first, then the window frame, and finish with the casing.
Paint window frames.

How do I paint a paneled door and not get lap masks?How do I paint a paneled door and not get lap masks?

Paneled doors should be primed with a highquality primer to eliminate bleed-through stains. Multiple finish coats (usually two) may be necessary to get good coverage. Ask your paint supplier to tint the color of the primer as close as possible to the color of the finalcoat paint. Again, the secret to stopping lap marks is to use a smooth last stroke with little paint and light pressure.

A final brush stroke defines joinery.

A final brush stroke defines joinery.

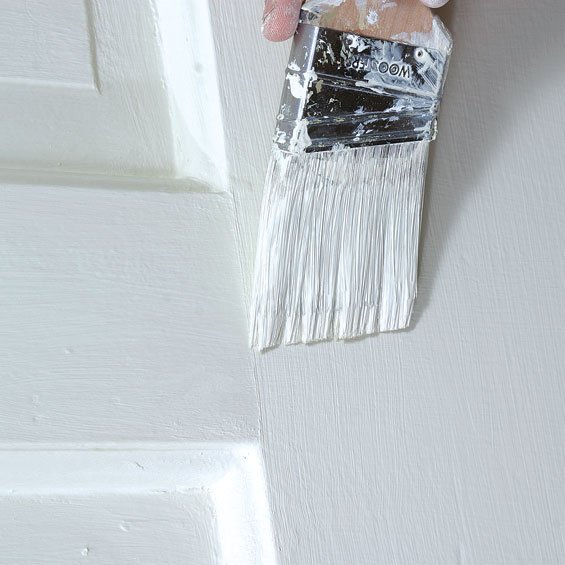
1. Start by painting at the top of the door, panels first, then rails, then stiles. Here, less paint is better to prevent drips; two coats lightly applied are better than than one heavy coat that drips or sags.

2. Be sure to keep the paint’s leading edge wet to prevent brush marks. A final light stroke across the panel faces and along the intersections of the rails and stiles will eliminate sags and brush marks.

3. When you reach the door knob, use even less paint to get a seamless stroke pattern. The trick is to brush around the knob with continuous strokes and avoid stops. Masking or removing the hardware is also an option.

4. Be sure to check your work for drips, particularly in recessed areas and along door edges. As long as the paint is still fairly wet, drips can be erased with a light brush stroke

What about cleaning up latex paint?

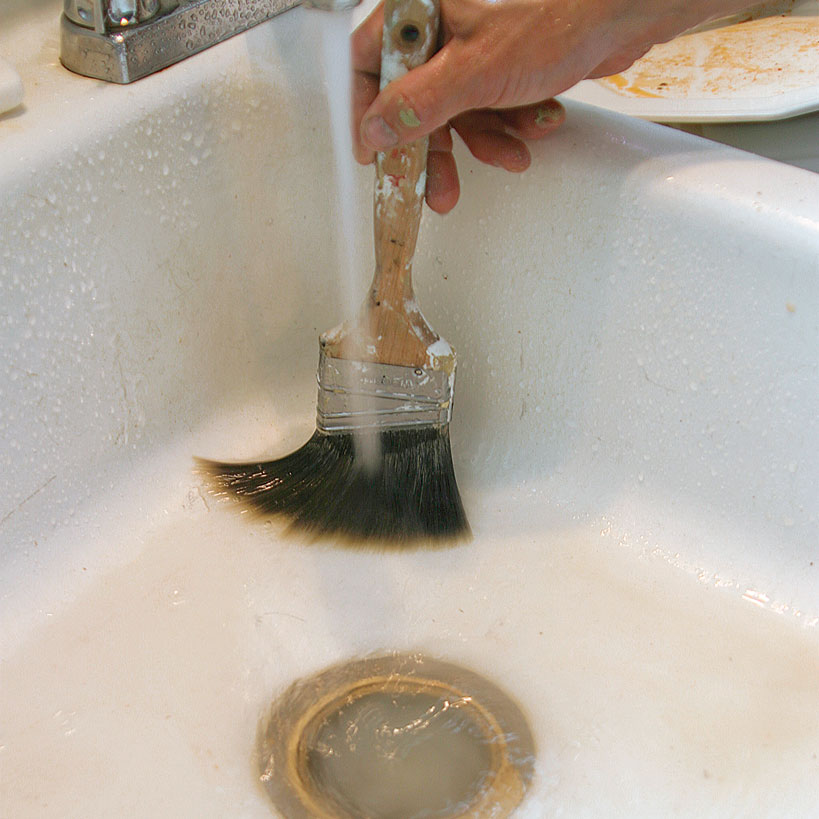
First, I flood the bristles with water, working out the majority of the paint. I use a wire brush gently to scrape out all remnants of dried paint. If not cleaned thoroughly, the brush will lose its flexibility. I use a little dish soap to remove the traces of oils that are in latex paint, rinse again, then shake or spin the brush dry.

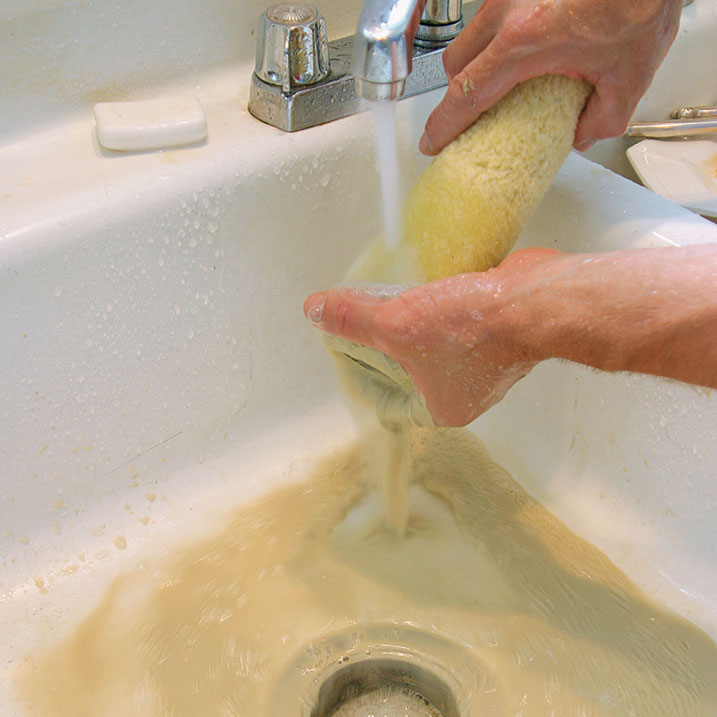
Rollers are certainly worth cleaning. If washed thoroughly, they can be used repeatedly. Scrape excess paint out of them with a 5-in-1 tool, then wash them using the same principle as the brushes, without the wire brush, of course.

A thorough washing saves both brushes and rollers.

A thorough washing saves both brushes and rollers.

For more photos and details on painting solutions, click the View PDF button below. 

From Fine Homebuilding #166

Sign up for eletters today and get the latest how-to from Fine Homebuilding, plus special offers.

Signing you up...

This site is protected by reCAPTCHA and the Google Privacy Policy and Terms of Service apply.
See all newsletters
See all newsletters
View PDF
Next: Painting Basics

Guide

Painting

Chapter

Intro to Painting

View Comments

  1. Suburbanguy | Oct 19, 2017 06:52pm | #1

    Brian Doherty's article in this same eLetter is how a true professional paints interior woodwork.
    Page 5. Frank can't even be bothered removing the hardware from the door and properly sanding the built-up coats of paint around the hardware, from previous hack jobs. Secondly, the accompanying picture is NOT how one paints a door.
    The correct method is to paint all panels going with the direction of the wood grain/moulding. Then paint the stiles in the middle of the door, overlapping the rails slightly. Then all the rails, carefully removing brush marks from having painted the middle stiles, with a "sweep through" action. Finally, the outside stiles, from top to bottom, "sweeping through" brush strokes from the horizontal rails. In this manner brush marks will be in the direction of the grain of the wood with a proper transition between rail and stile.
    Lightly tipping-off the painted work to remove heavy brush strokes seems to get only passing mention, even though it is extremely important with fast drying latex paints that don't have time to level.

Log in or create an account to post a comment.

Sign up Log in

Become a member and get full access to FineHomebuilding.com

Painting

Painting

Everything you need to know to get the perfect finish, from choosing the right paint to applying the final coat

View Project Guide

View All Project Guides »

Become a member and get unlimited site access, including the Painting Project Guide.

Start Free Trial

Intro to Painting
  • Painting Basics
  • Painting Inspiration
Tools & Materials
  • Paint
  • Brushes and Rollers
  • Caulks and Sealants
  • Spray Equipment
  • Prep and Cleanup
Prep Work
  • Getting Ready For Painting and Finishing
Painting Walls, Ceilings, and Trim
  • Painting Interior Surfaces
Wallpaper
  • How to Prep and Install Wallpaper
  • Removing Wallpaper
  • Wallcovering Choices
Windows and Doors
  • Painting Windows and Doors
  • Video Series: Finishing an Exterior Door
Spray Painting Interiors
  • How To Spray Walls, Trim, Cabinets, and More
Exterior Painting
  • Exterior Paint Prep
  • Exterior Painting Techniques

Fine Home Building

Newsletter Sign-up

  • Fine Homebuilding

    Home building tips, offers, and expert advice in your inbox.

  • Green Building Advisor

    Building science and energy efficiency advice, plus special offers, in your inbox.

  • Old House Journal

    Repair, renovation, and restoration tips, plus special offers, in your inbox.

Signing you up...

This site is protected by reCAPTCHA and the Google Privacy Policy and Terms of Service apply.
See all newsletters

Follow

  • Fine Homebuilding

    Dig into cutting-edge approaches and decades of proven solutions with total access to our experts and tradespeople.

    Start Free Trial Now
    • Facebook
    • Instagram
    • X
    • LinkedIn
  • GBA Prime

    Get instant access to the latest developments in green building, research, and reports from the field.

    Start Free Trial Now
    • Facebook
    • YouTube
  • Old House Journal

    Learn how to restore, repair, update, and decorate your home.

    Subscribe Now
    • Facebook
    • Instagram
    • X

Membership & Magazine

  • Online Archive
  • Start Free Trial
  • Magazine Subscription
  • Magazine Renewal
  • Gift a Subscription
  • Customer Support
  • Privacy Preferences
  • About
  • Contact
  • Advertise
  • Careers
  • Terms of Use
  • Site Map
  • Do not sell or share my information
  • Privacy Policy
  • Accessibility
  • California Privacy Rights

© 2025 Active Interest Media. All rights reserved.

Fine Homebuilding receives a commission for items purchased through links on this site, including Amazon Associates and other affiliate advertising programs.

X
X
This is a dialog window which overlays the main content of the page. The modal window is a 'site map' of the most critical areas of the site. Pressing the Escape (ESC) button will close the modal and bring you back to where you were on the page.

Main Menu

  • How-To
  • Design
  • Tools & Materials
  • Video
  • Blogs
  • Forum
  • Project Guides
  • Reader Projects
  • Magazine
  • Members
  • FHB House

Podcasts

  • FHB Podcast
  • ProTalk

Webinars

  • Upcoming and On-Demand

Podcasts

  • FHB Podcast
  • ProTalk

Webinars

  • Upcoming and On-Demand

Popular Topics

  • Kitchens
  • Business
  • Bedrooms
  • Roofs
  • Architecture and Design
  • Green Building
  • Decks
  • Framing
  • Safety
  • Remodeling
  • Bathrooms
  • Windows
  • Tilework
  • Ceilings
  • HVAC

Magazine

  • Current Issue
  • Past Issues
  • Magazine Index
  • Subscribe
  • Online Archive
  • Author Guidelines

All Access

  • Member Home
  • Start Free Trial
  • Gift Membership

Online Learning

  • Courses
  • Project Guides
  • Reader Projects
  • Podcast

More

  • FHB Ambassadors
  • FHB House
  • Customer Support

Account

  • Log In
  • Join

Newsletter

Get home building tips, offers, and expert advice in your inbox

Signing you up...

This site is protected by reCAPTCHA and the Google Privacy Policy and Terms of Service apply.
See all newsletters
See all newsletters

Follow

  • X
  • YouTube
  • instagram
  • facebook
  • pinterest
  • Tiktok

Join All Access

Become a member and get instant access to thousands of videos, how-tos, tool reviews, and design features.

Start Your Free Trial

Subscribe

FHB Magazine

Start your subscription today and save up to 70%

Subscribe

We hope you’ve enjoyed your free articles. To keep reading, become a member today.

Get complete site access to expert advice, how-to videos, Code Check, and more, plus the print magazine.

Start your FREE trial

Already a member? Log in