FHB Logo Facebook LinkedIn Email Pinterest Twitter X Instagram Tiktok YouTube Plus Icon Close Icon Navigation Search Icon Navigation Search Icon Arrow Down Icon Video Guide Icon Article Guide Icon Modal Close Icon Guide Search Icon Skip to content
Subscribe
Log In
  • How-To
  • Design
  • Tools & Materials
  • Restoration
  • Videos
  • Blogs
  • Forum
  • Magazine
  • Members
  • FHB House
  • Podcast
Log In

Fine Homebuilding Project Guides

Painting

Guide Home
  • Intro to Painting
  • Tools & Materials
  • Prep Work
  • Painting Walls, Ceilings, and Trim
  • Wallpaper
  • Windows and Doors
  • Spray Painting Interiors
  • Exterior Painting
How-To

7 Steps to a Perfect Exterior Paint Job

High-quality exterior painting depends on flawless prep and application.

By Brooke Cambridge Issue 311 - November 2022
Photo: Daniel St. John, Lightshed Photography Studio

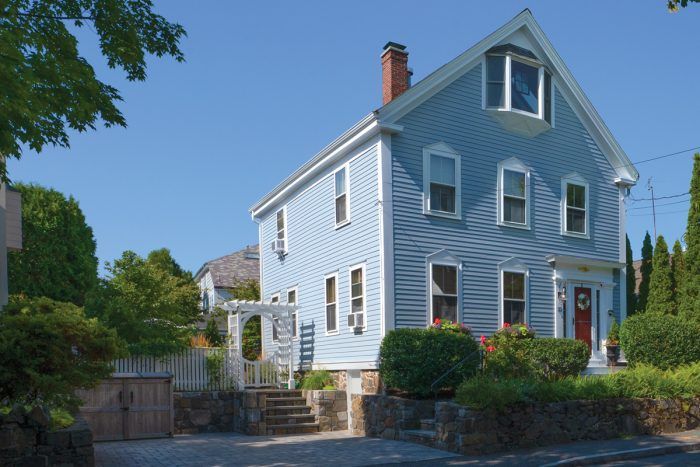
Synopsis: Planning and executing an exterior paint job can pose a challenge, as the slightest of mistakes can impact appearance and performance. Brooke Cambridge, owner of BLC Painting in Salem, Mass., breaks down a process of seven steps that her and her team like to follow for a successful exterior paint job.


When it comes to exterior painting, mistakes mean future appearance or performance problems, and nine times out of 10, the mistakes are made before the painting even starts. I’ve learned in my 20 years of painting that there are always new things to learn. Fortunately, my participation in a local pro-painter network and the national Painters Contracting Association (PCA) help keep me and my team up to date on procedures and problem prevention. One of the recurring themes I hear at meetings and from trade publications is that if you put sufficient effort into preparing for a paint job, the work your client often doesn’t see will pay dividends with an easier and longer-­lasting paint job. 

I’ve been painting exteriors in Boston for 20 years and now own my own painting company, BLC Painting. One of the ways I ensure quality is with a comprehensive approach to paint prep. While there are dozens of tools we use in our line of work as painters, one of the most effective has been our standard operating procedure checklist. This checklist has proved helpful in getting a typical exterior paint job done right, every time. 

Watch the weather

Waiting for the right conditions before you start priming and painting is critical. Paint failure is most often caused by not giving enough time for drying, which includes considering the weather. You’ll want to avoid temperatures below 50°F and above 80°F. Too cold, and condensation will start to form on the top layer. Too hot, and the paint will dry too quickly. Even in the right temperature, you’ll want to pay attention to the sun. If you paint in direct sunlight, the top surface of the paint can dry prematurely, leading to blistering and bubbling. If you rush, you may have to fix spots, or even redo everything at your expense.  

While there’s no set rule of thumb when it comes to deciding where on a house to start first with exterior painting, I do have a personal preference. With my team, I like to set up on one side and scrape it all down. Then we clean up and move half the crew to the back side to start that same process. Two people stay and power-wash the side we just scraped, and we move around the house like that. This leaves more time for drying and is most efficient to keep the job moving. 

Stepping back to admire your work is said to be the best part of the job, but even better is when your see your clients looking at their newly painted home and showing the same satisfaction. 

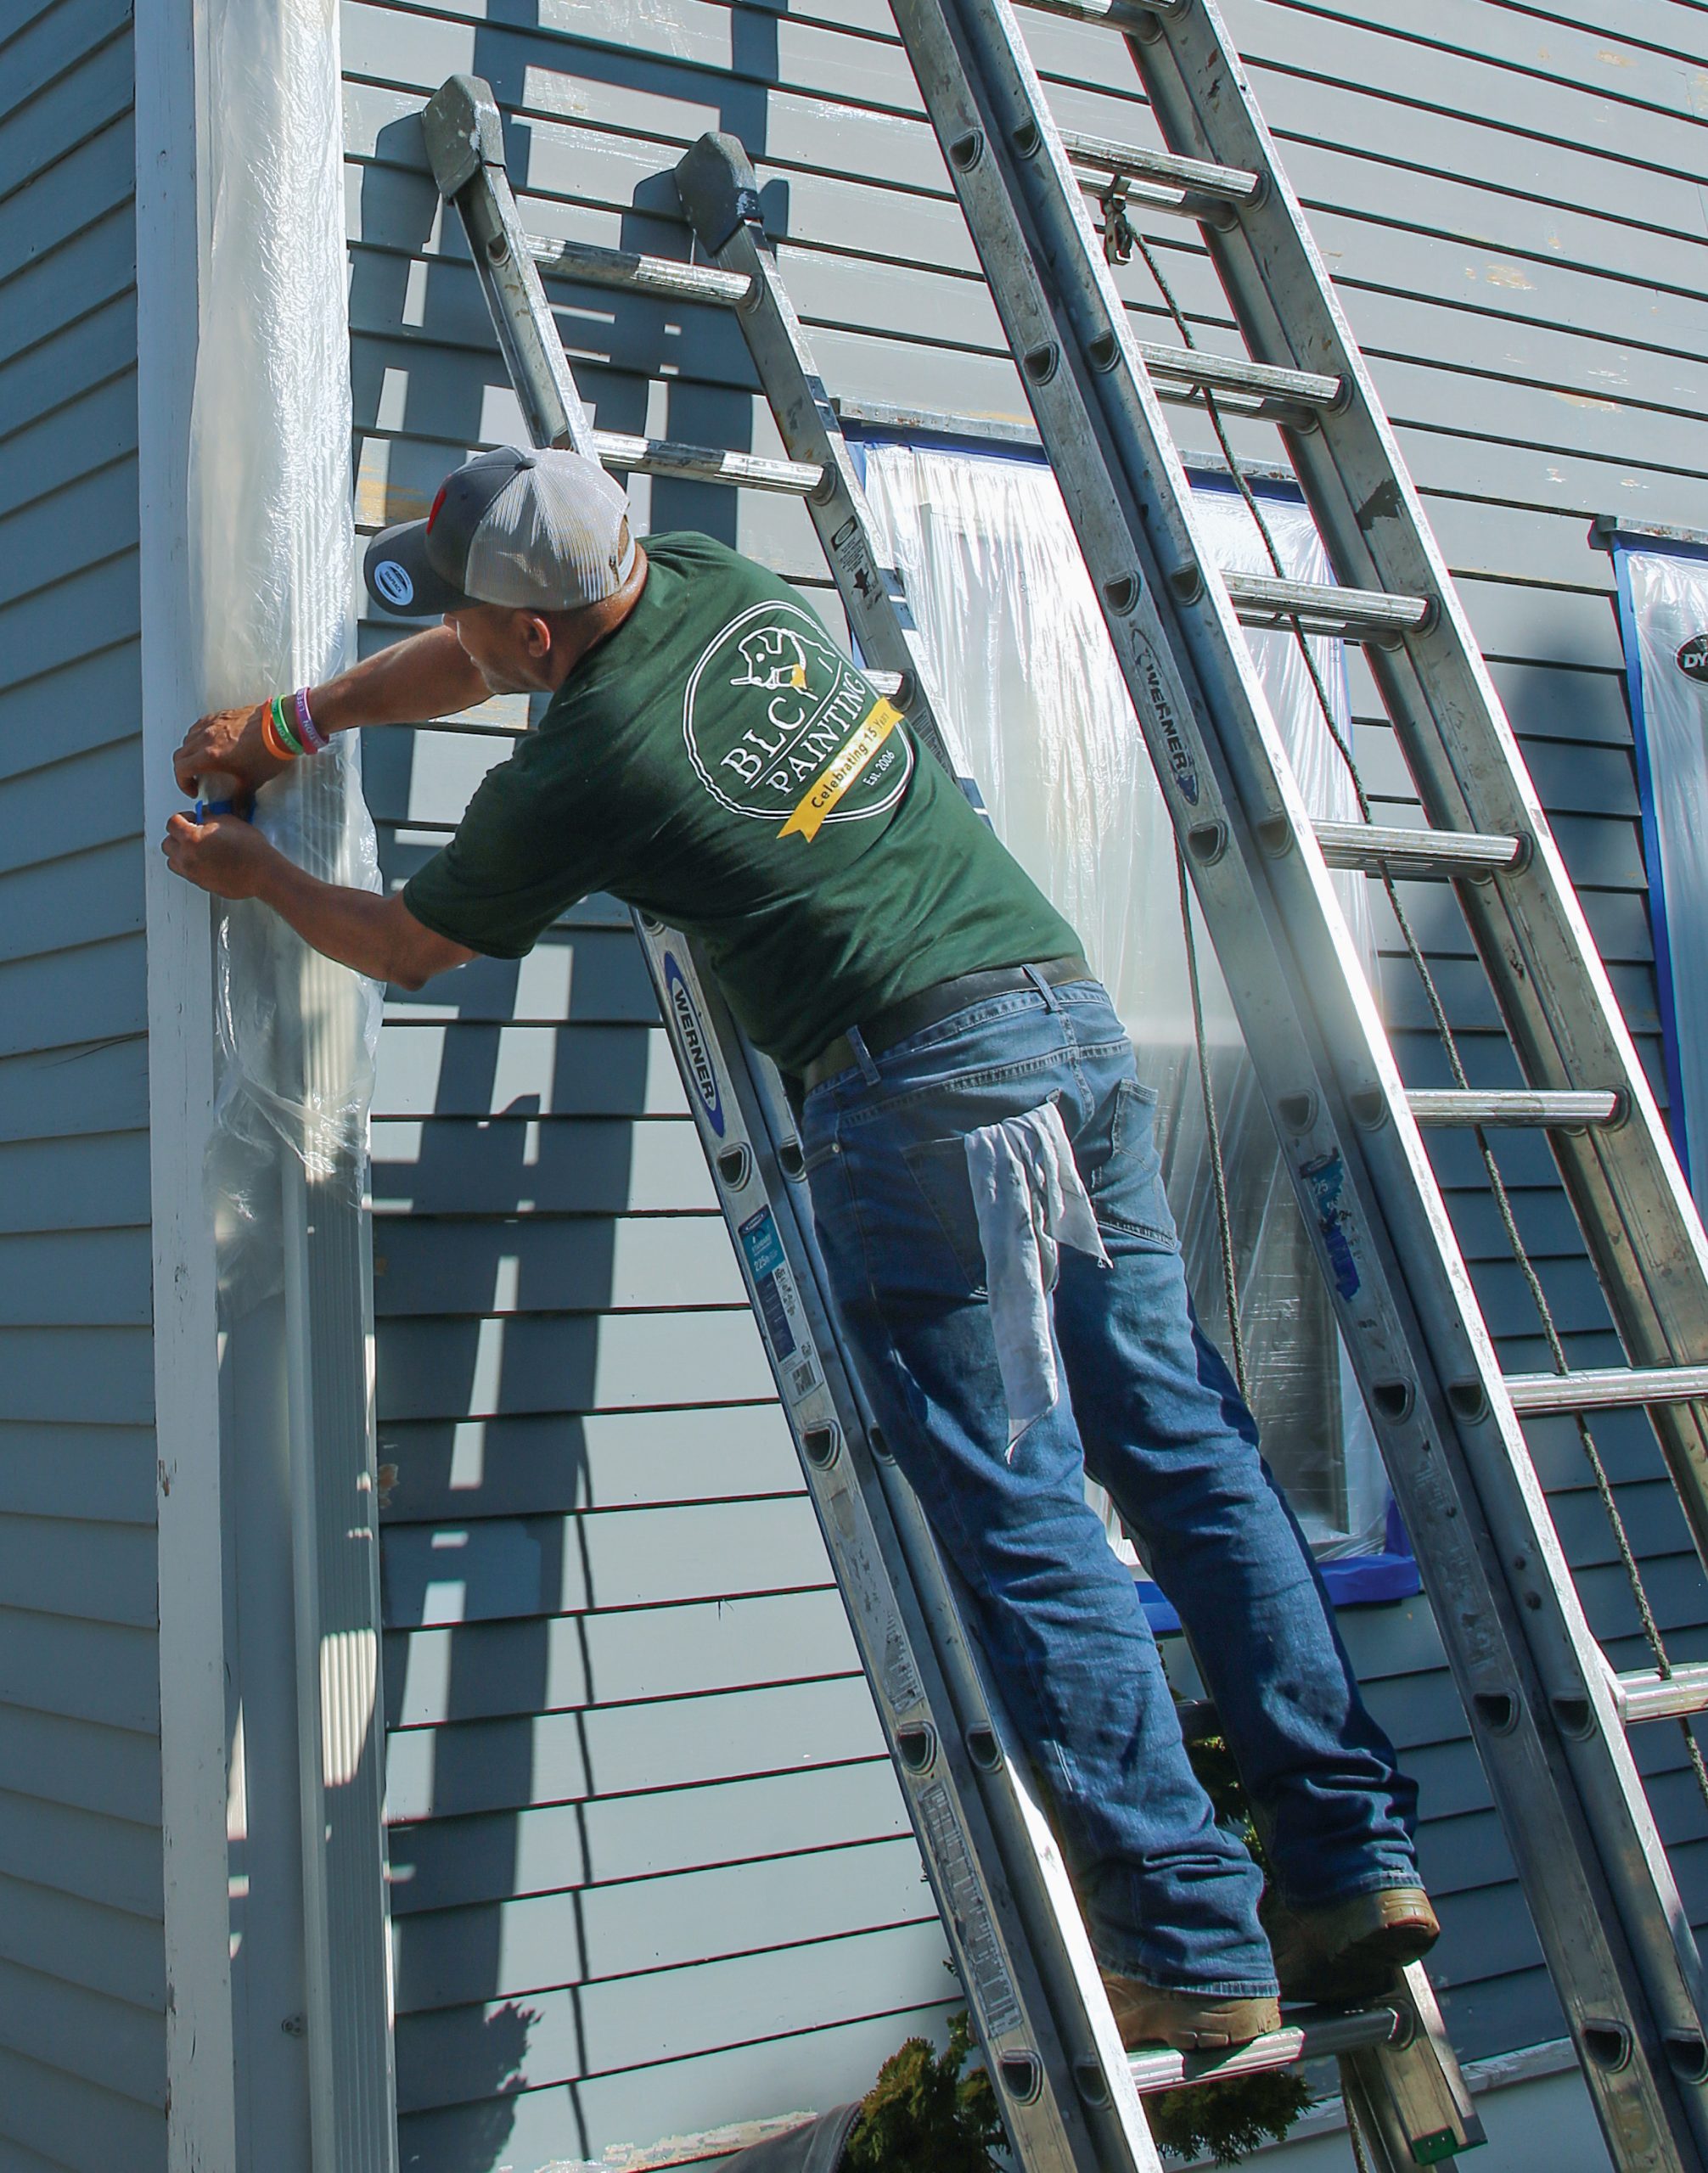
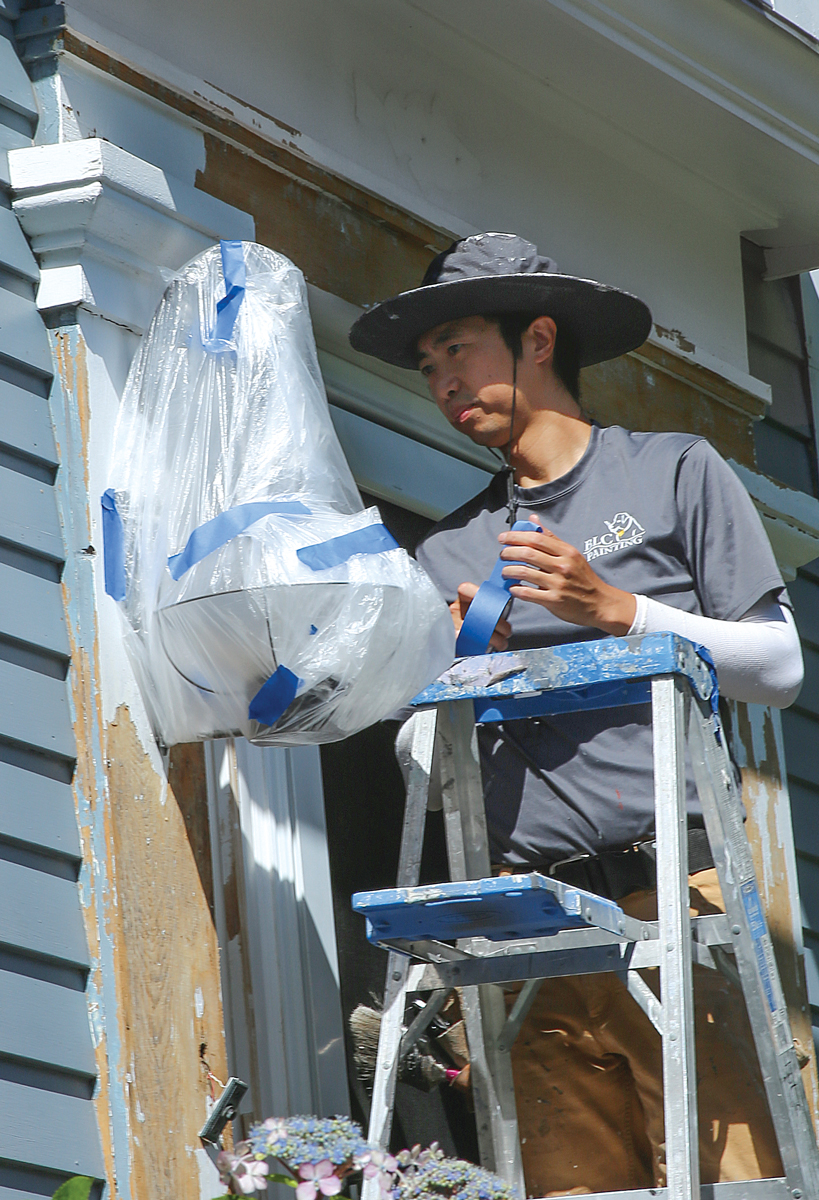
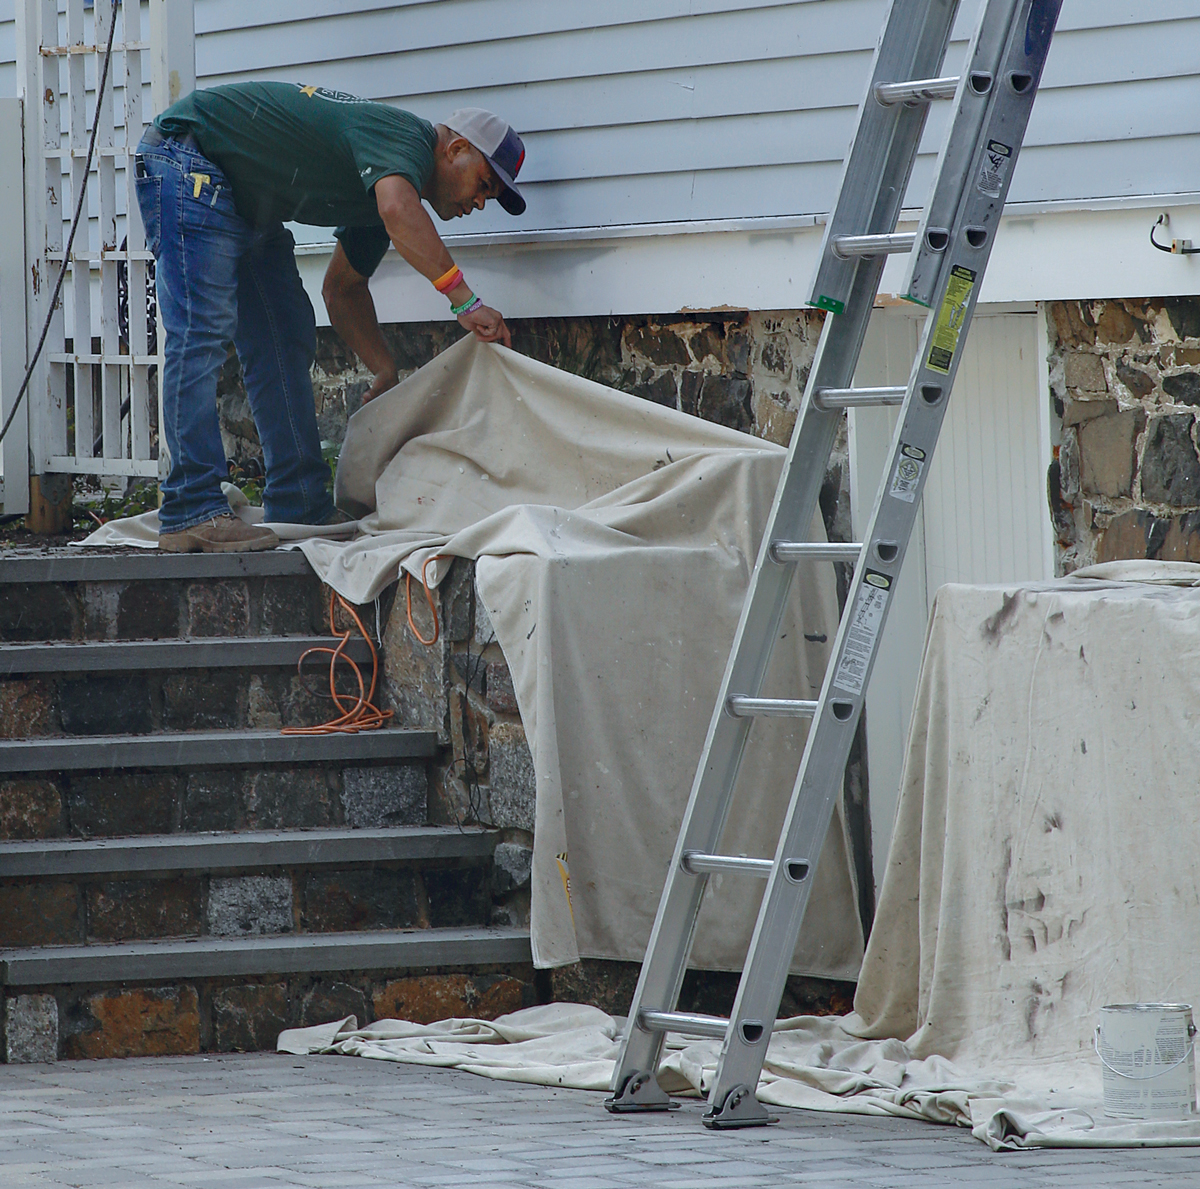
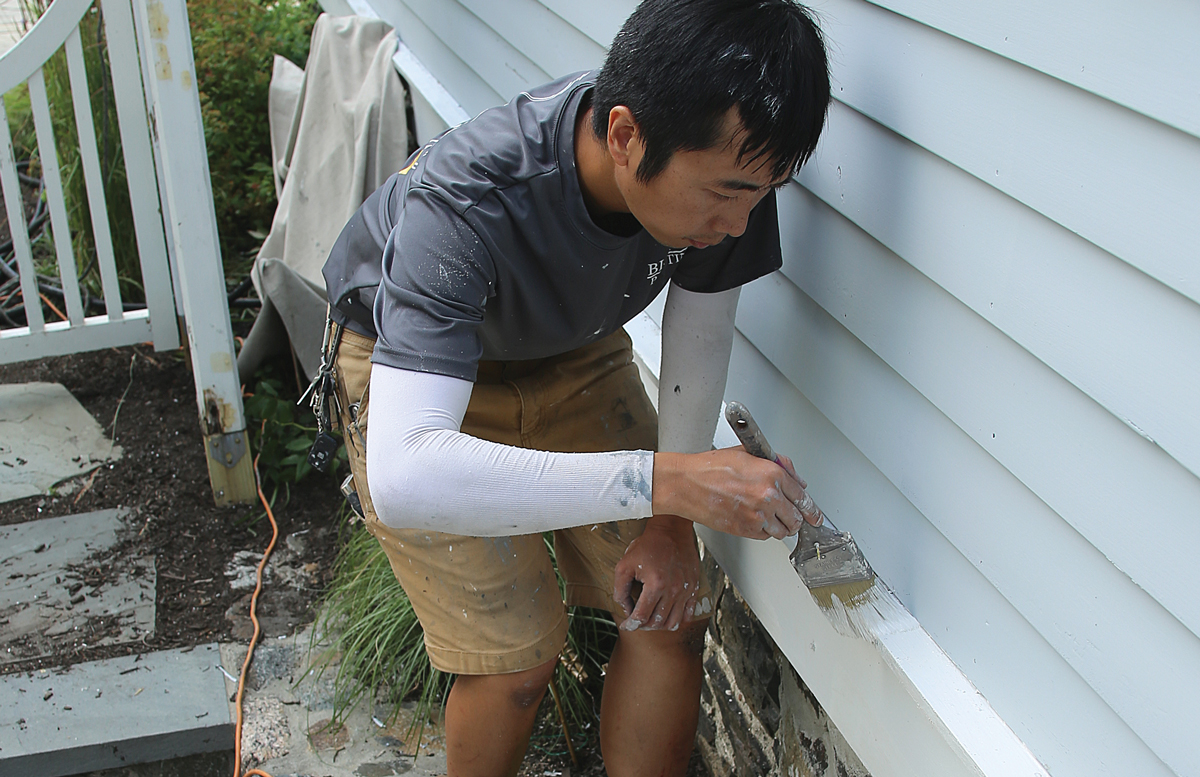
Step 1: Protect and cover 

One of the most important steps is to protect and cover anything not being painted. Drop cloths and masking not only prevent damage, they help you look organized and professional to clients and neighbors. 

Gutters and downspouts. Removing downspouts makes painting easier, but most homeowners don’t want to add to the scope of the project, so we mask them. Ladder placement: Our procedures follow OSHAs 4-to-1 rule: With every 4 ft. of height, the ladder is extended 1 ft. away from the house.
Exterior lights When possible we’ll ask homeowners remove lights, but when that’s not an option we thoroughly mask them with painter’s plastic and tape.
Exterior lights. When possible we’ll ask homeowners remove lights, but when that’s not an option we thoroughly mask them with painter’s plastic and tape.
window units If window air conditioners can’t be removed, we mask and unmask them every day so they’re usable when we’re not on-site.
Window units. If window air conditioners can’t be removed, we mask and unmask them every day so they’re usable when we’re not on-site.
plants and hardscaping We cover decks, walks, and walls with drop cloths or plastic. Use only light drop cloths to cover plants, because it gets hot enough under plastic to kill foliage.
Plants and hardscaping. We cover decks, walks, and walls with drop cloths or plastic. Use only light drop cloths to cover plants, because it gets hot enough under plastic to kill foliage. Lead paint warning. If your home was built before 1978, there’s a pretty good chance of it having lead-based paint. Lead paint is a neurotoxin and should be managed with care. Assume the existing paint on older homes has lead, or have it have it tested by a lead specialist or qualified laboratory. We have OSHA training for safely managing lead paint.

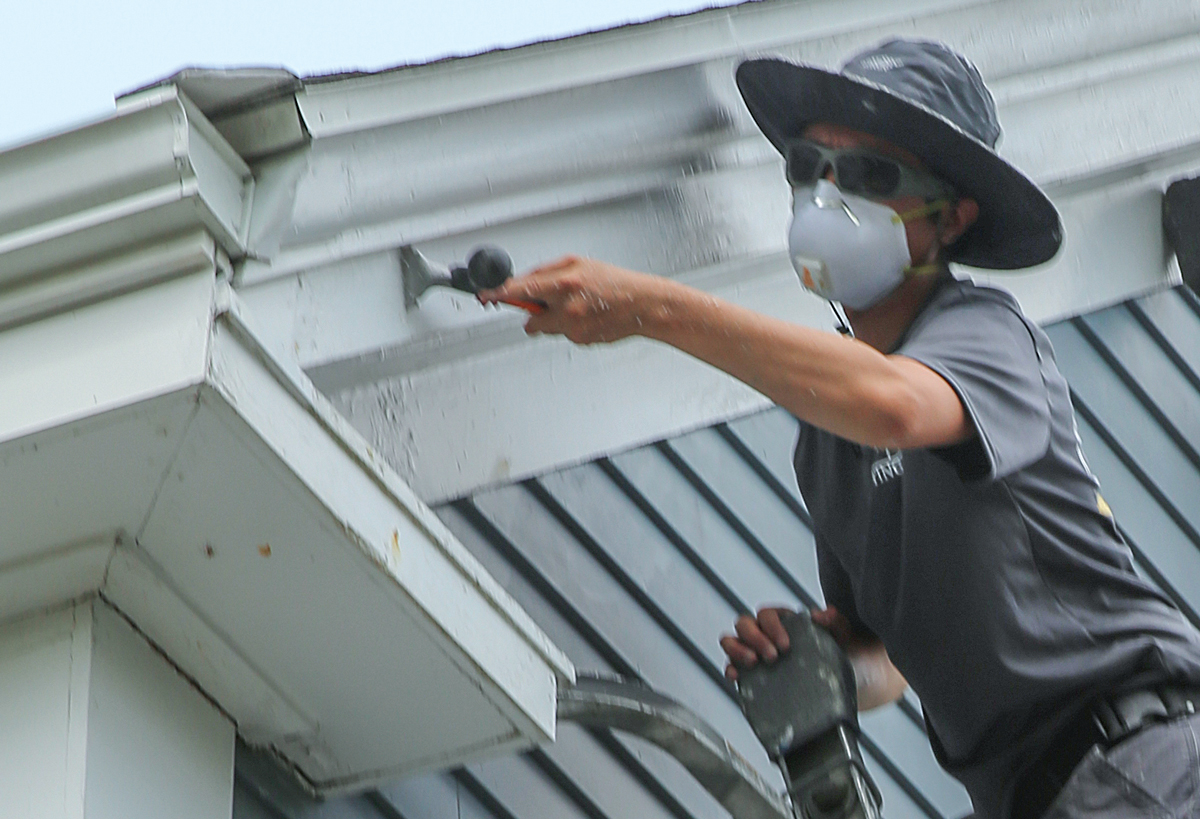
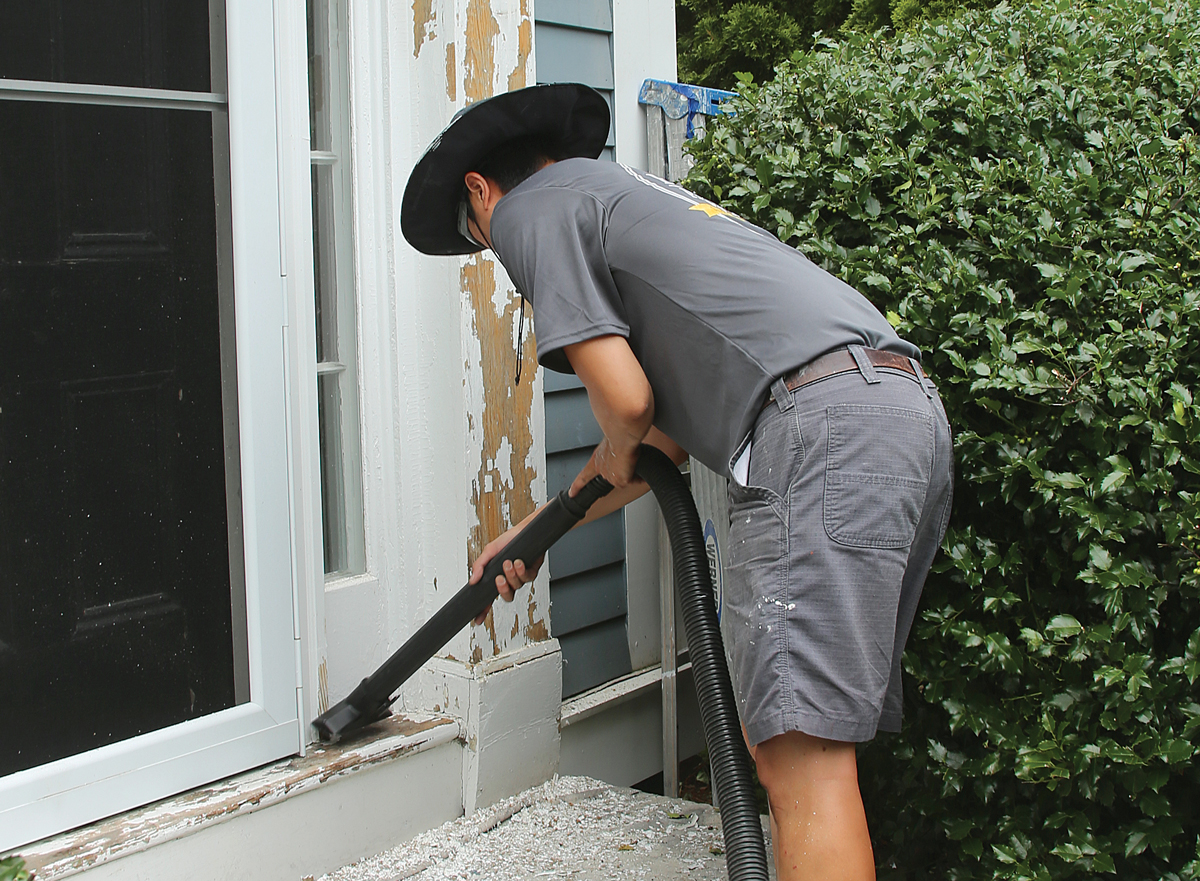
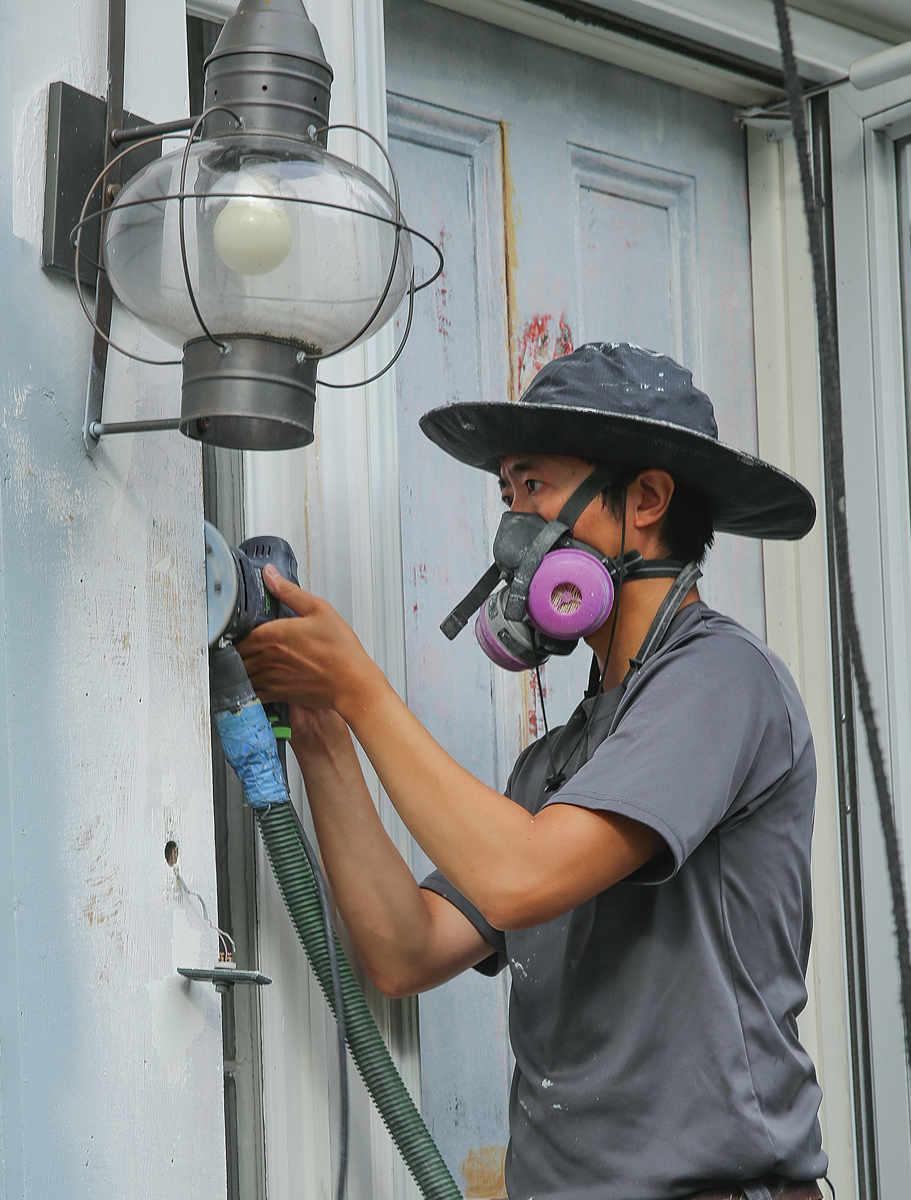
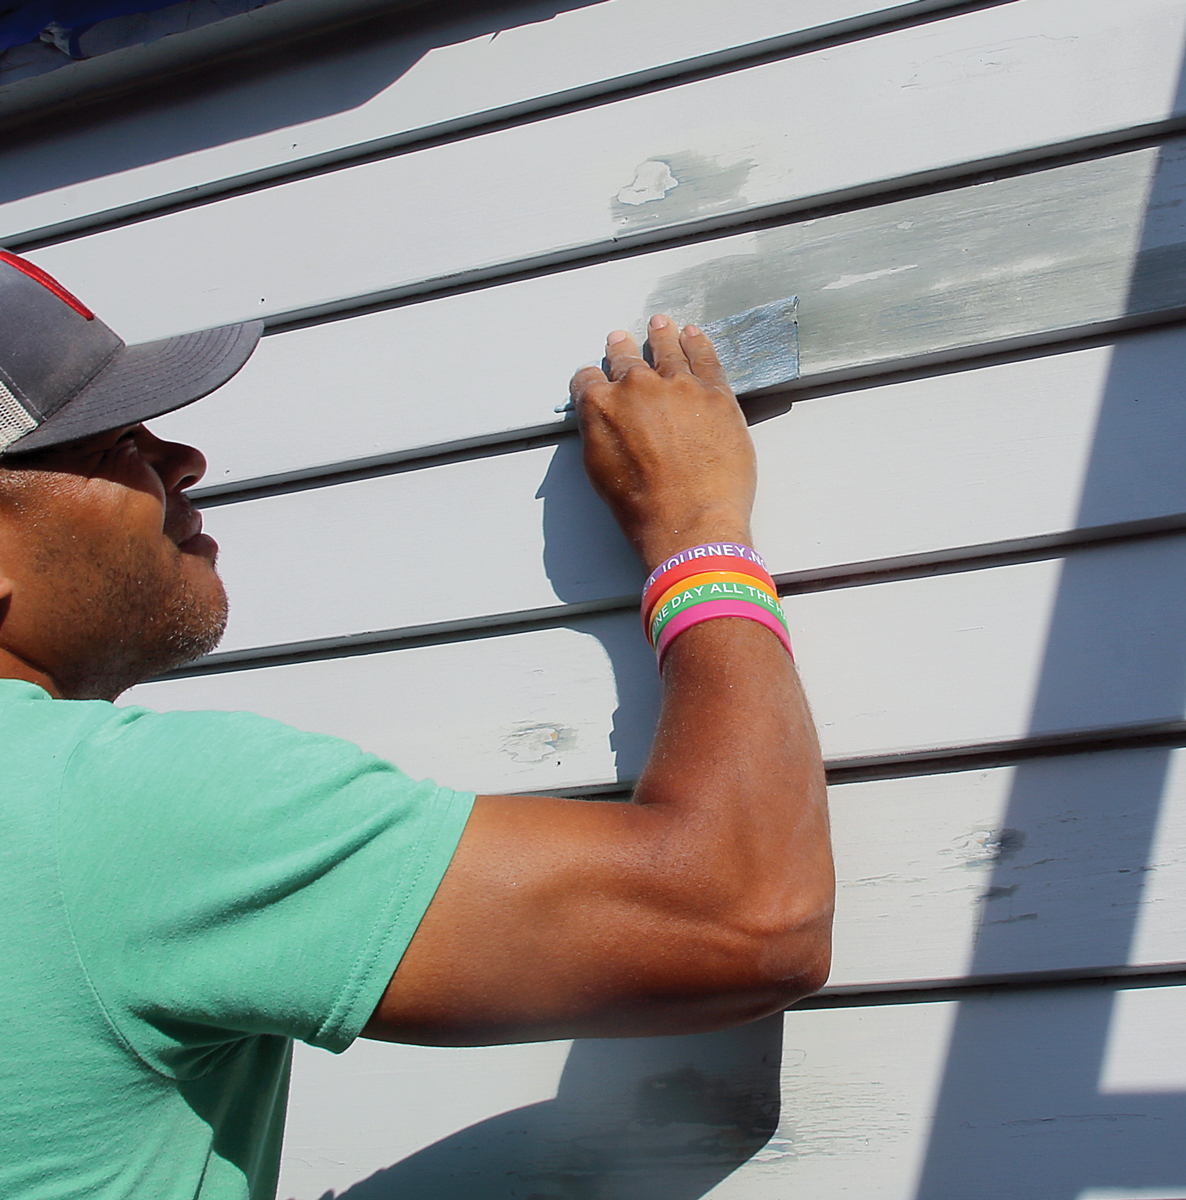
Step 2: Scrape and Sand 

Although some painters go straight for the pressure washer, you should first scrape off all loose, peeling, or bubbled paint with a carbide scraper, which will prevent you from blowing paint chips all over the lawn. After scraping, we sand all the scraped areas.

scrape first Scrapers with replaceable carbide blades are expensive, but the blades are sharp and stay that way a long time. A painters 5-in-1 tool is also indispensable for scraping.
Scrape first. Scrapers with replaceable carbide blades are expensive, but the blades are sharp and stay that way a long time. A painters 5-in-1 tool is also indispensable for scraping.
clean often Make sure places where chips may fall are covered with drop cloths or plastic. Vacuum up chips regularly with a HEPA vac to prevent any mess from being tracked around the property or blown around by the wind.
Clean often. Make sure places where chips may fall are covered with drop cloths or plastic. Vacuum up chips regularly with a HEPA vac to prevent any mess from being tracked around the property or blown around by the wind.
Sanding safety Dust collection and N95 particle respirators prevent the inhalation of dust when sanding.
Sanding safety. Dust collection and N95 particle respirators prevent the inhalation of dust when sanding.
sand next We typically sand scraped and rough areas with 220-grit or 150-grit paper. We connect our random-orbit sanders to a Festool vac with HEPA filter to eliminate dust. When sanding, apply even pressure and sand with the grain. Sand paint edges surrounding bare wood. (If lead paint is present, take precautions when scraping and do not sand at all.)
Sand next. We typically sand scraped and rough areas with 220-grit or 150-grit paper. We connect our random-orbit sanders to a Festool vac with HEPA filter to eliminate dust. When sanding, apply even pressure and sand with the grain. Sand paint edges surrounding bare wood. (If lead paint is present, take precautions when scraping and do not sand at all.)

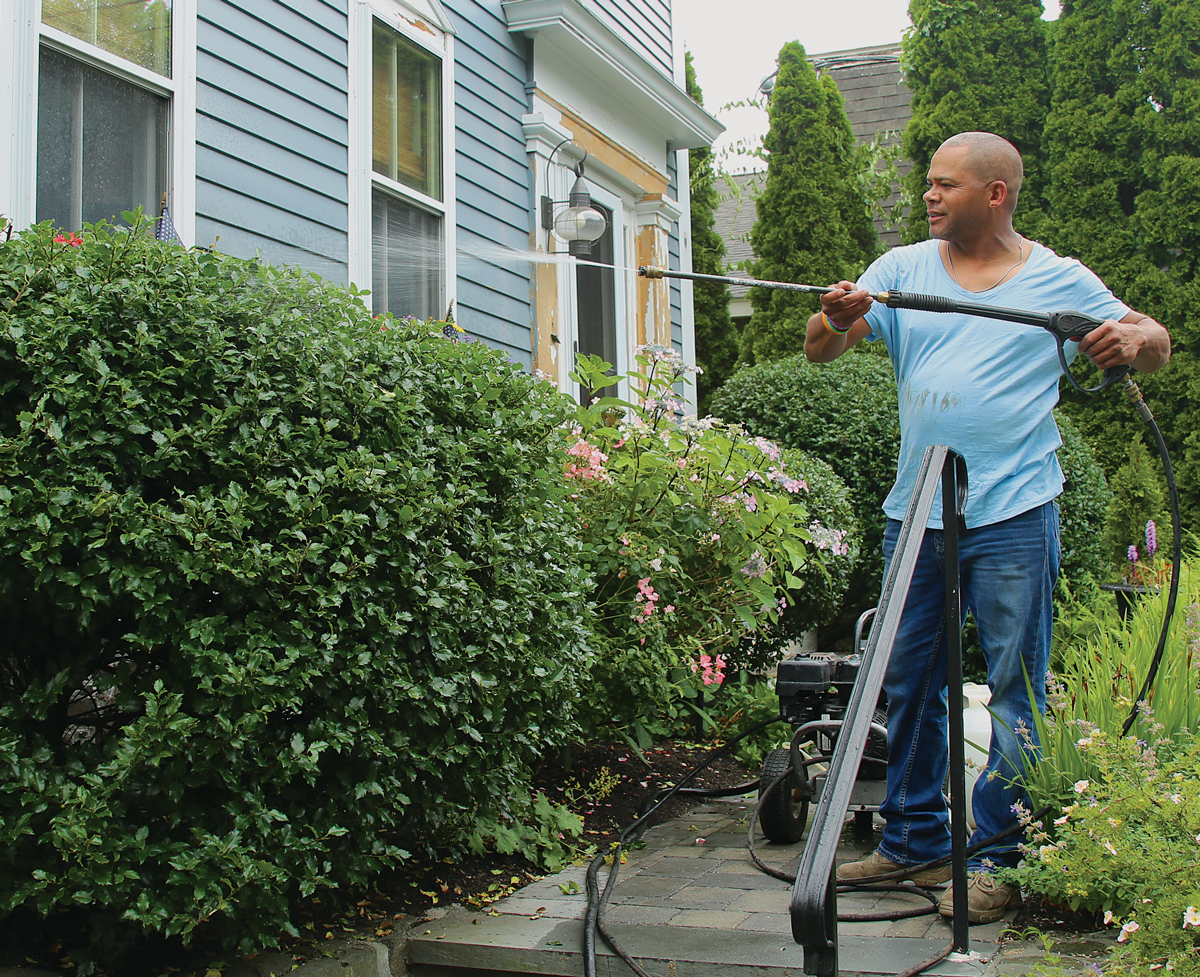
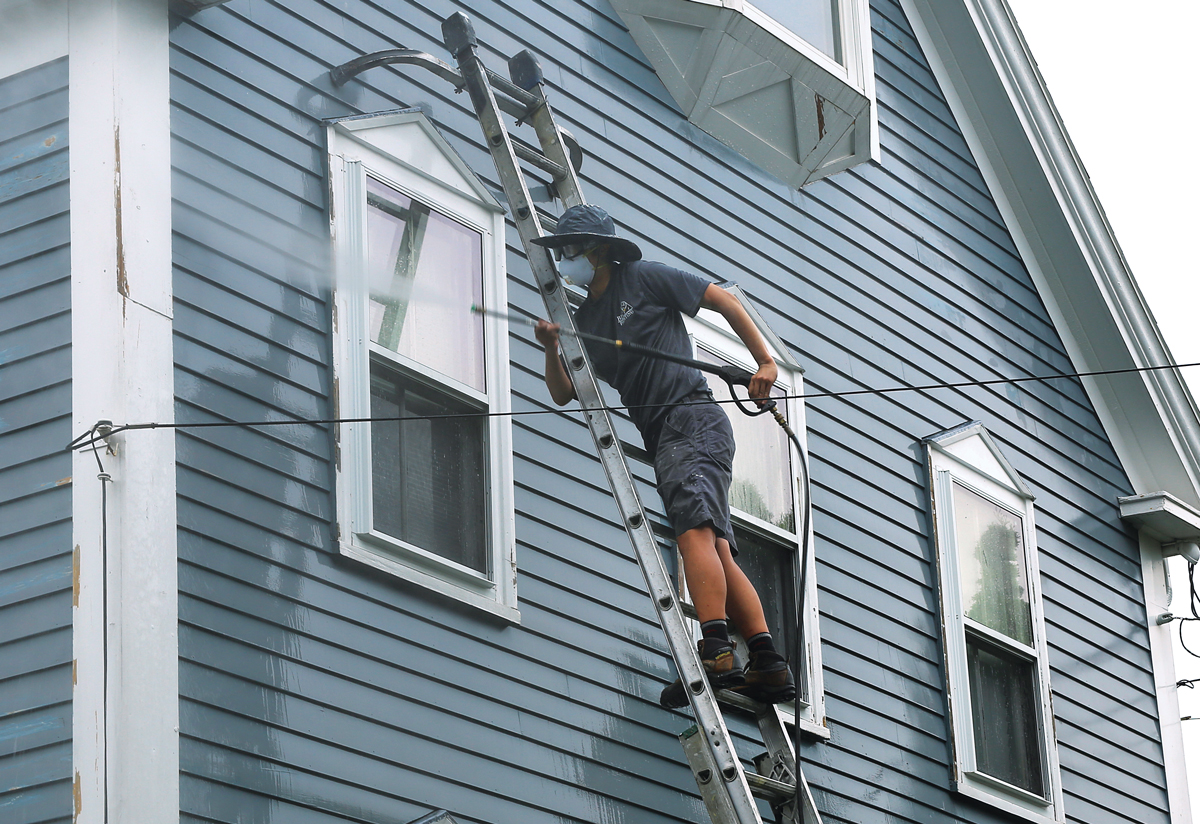
Step 3: Wash away dirt 

Now it’s time to address the mold, mildew, and dirt that’s collected over the years, but not every house will get the same washing treatment. We generally pressure-wash with a solution made from 1 cup of bleach to 5 gal. of water. We use bleach and TSP (trisodium phosphate) if a house is very dirty or to de-gloss old paint. For clients who prefer a greener product, we use Wicked Strong All-Purpose cleaner, which is phosphate-free. We use gas pressure washers so we don’t trip our clients’ breakers. When pressure-washing, closer is not better. We stand back several feet and stick with green and white spray nozzles, which provide a softer wash, to prevent damage to the home’s exterior.

wet landscaping Before pressure-washing over landscape plantings, we thoroughly wet their leaves with water, which prevents the cleaning agents from harming the plants.
Wet landscaping. Before pressure-washing over landscape plantings, we thoroughly wet their leaves with water, which prevents the cleaning agents from harming the plants.
clean thoroughly We work from extension ladders and stand back at least 5 ft., washing from the top down to prevent water from getting behind the siding and dirt from above from washing down onto previously cleaned sections. We don’t spray at windows, because most won’t fully keep out the stream of water. If we’re painting sashes, we wash them by hand with soft RV brushes.
Clean thoroughly. We work from extension ladders and stand back at least 5 ft., washing from the top down to prevent water from getting behind the siding and dirt from above from washing down onto previously cleaned sections. We don’t spray at windows, because most won’t fully keep out the stream of water. If we’re painting sashes, we wash them by hand with soft RV brushes.
Check the moisture content After pressure-washing, you’ll have to wait one to three days without rain or major temperature drops before priming. Don’t guess at whether the siding is dry enough. Instead, use a moisture meter to test the materials. Paint shouldn’t be applied above 17% moisture content because it has a greater chance of peeling or bubbling.
Check the moisture content. After pressure-washing, you’ll have to wait one to three days without rain or major temperature drops before priming. Don’t guess at whether the siding is dry enough. Instead, use a moisture meter to test the materials. Paint shouldn’t be applied above 17% moisture content because it has a greater chance of peeling or bubbling.

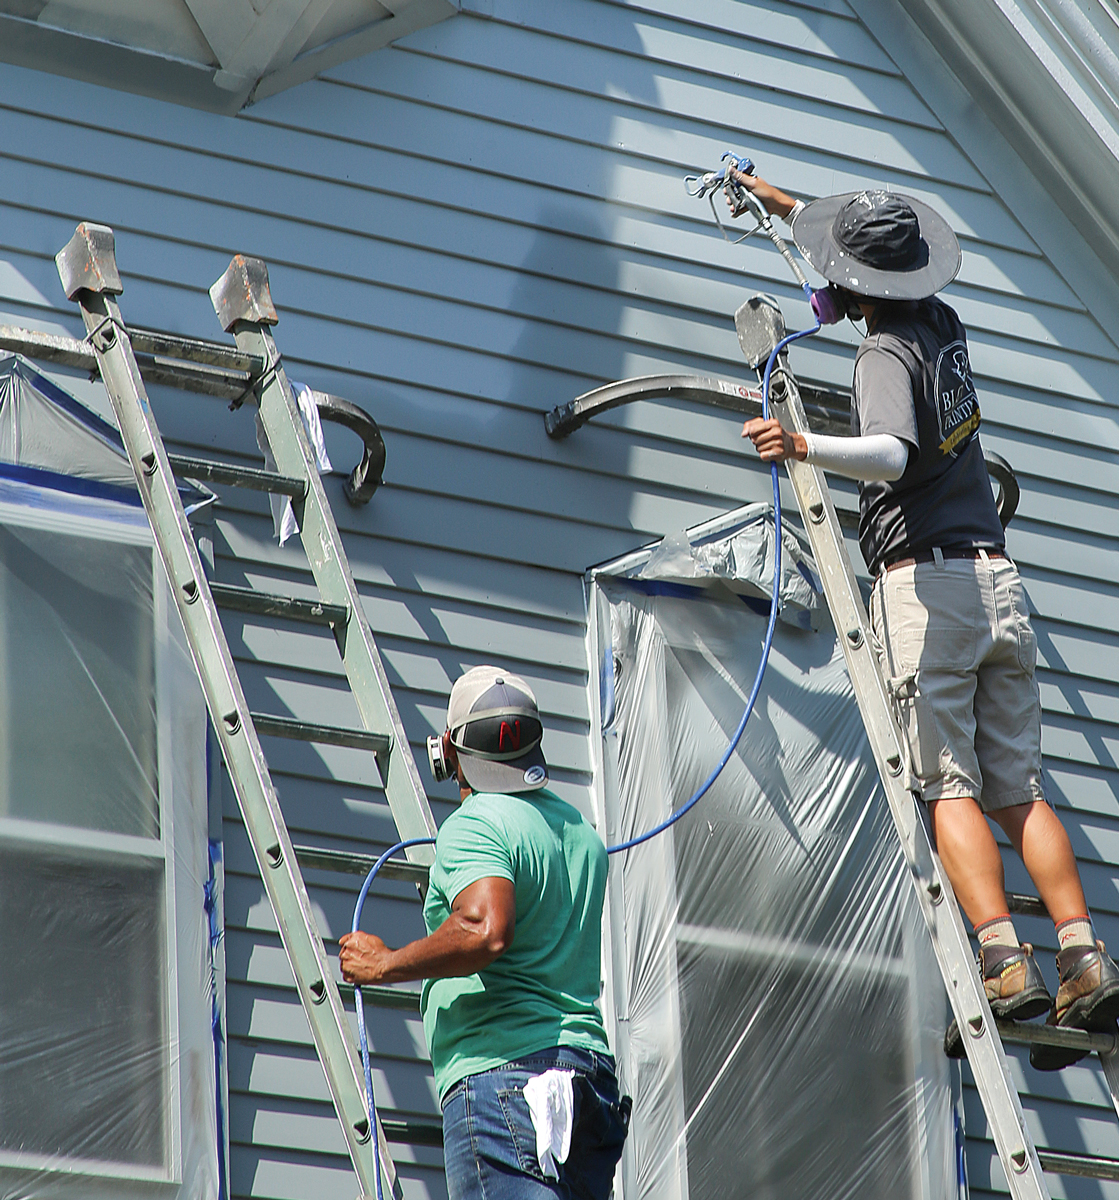
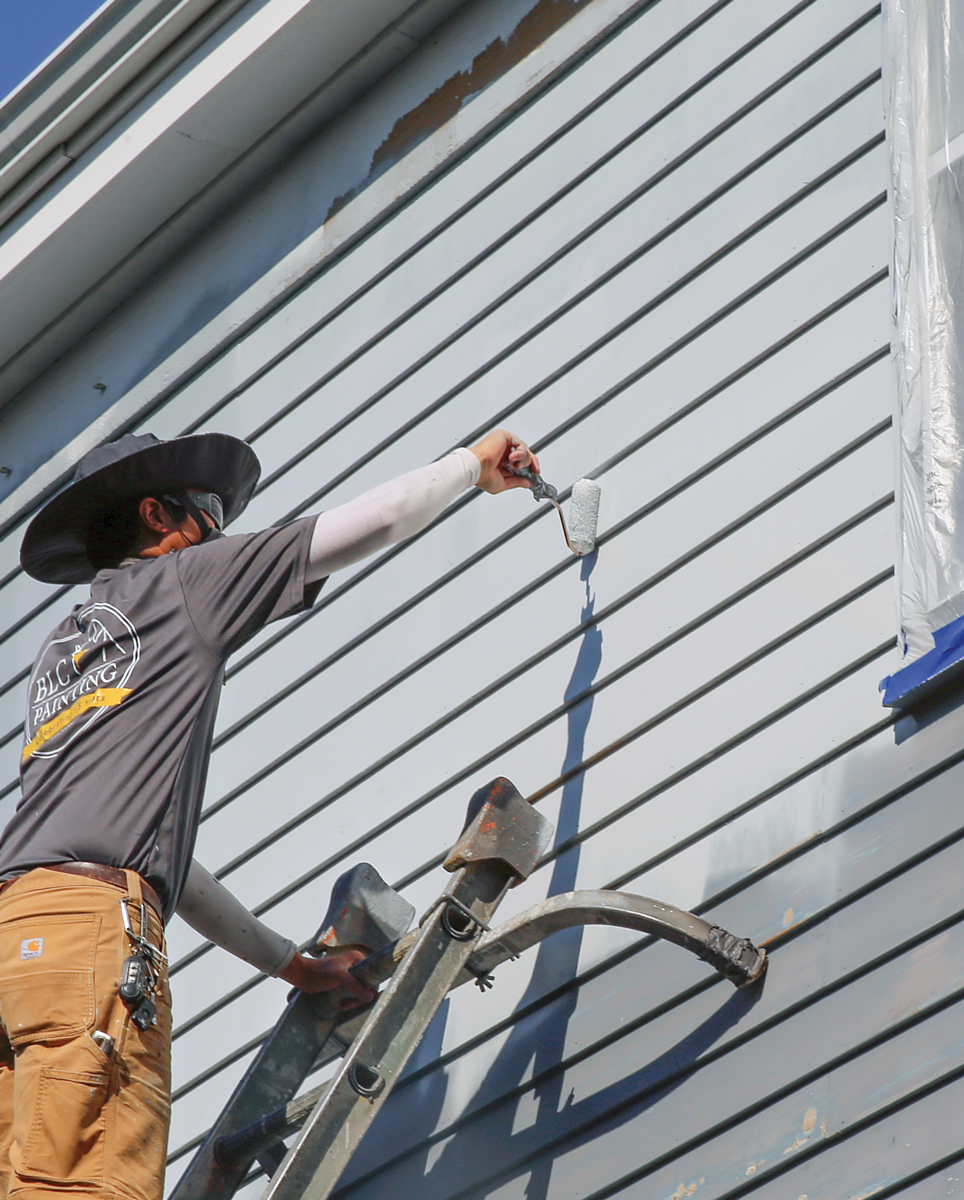
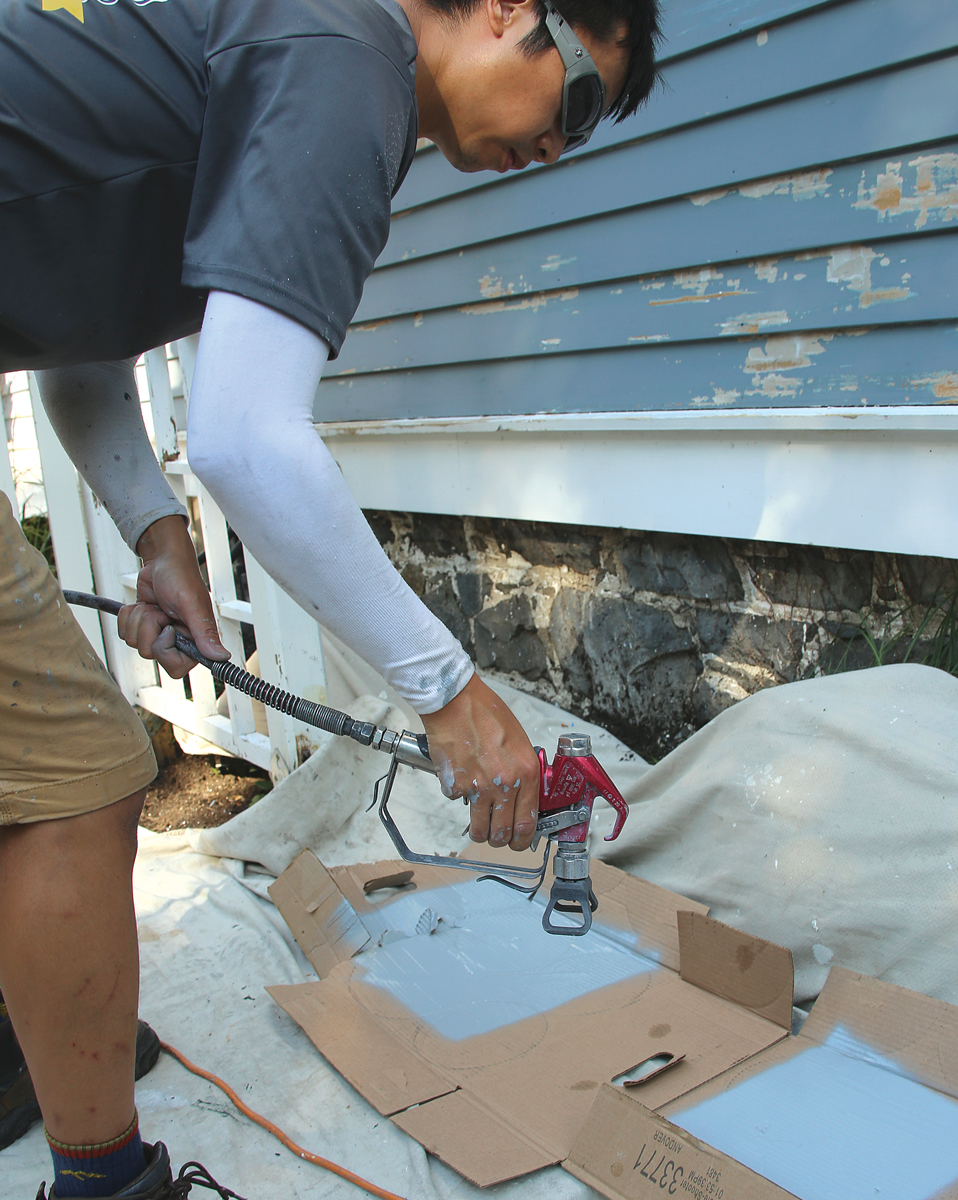
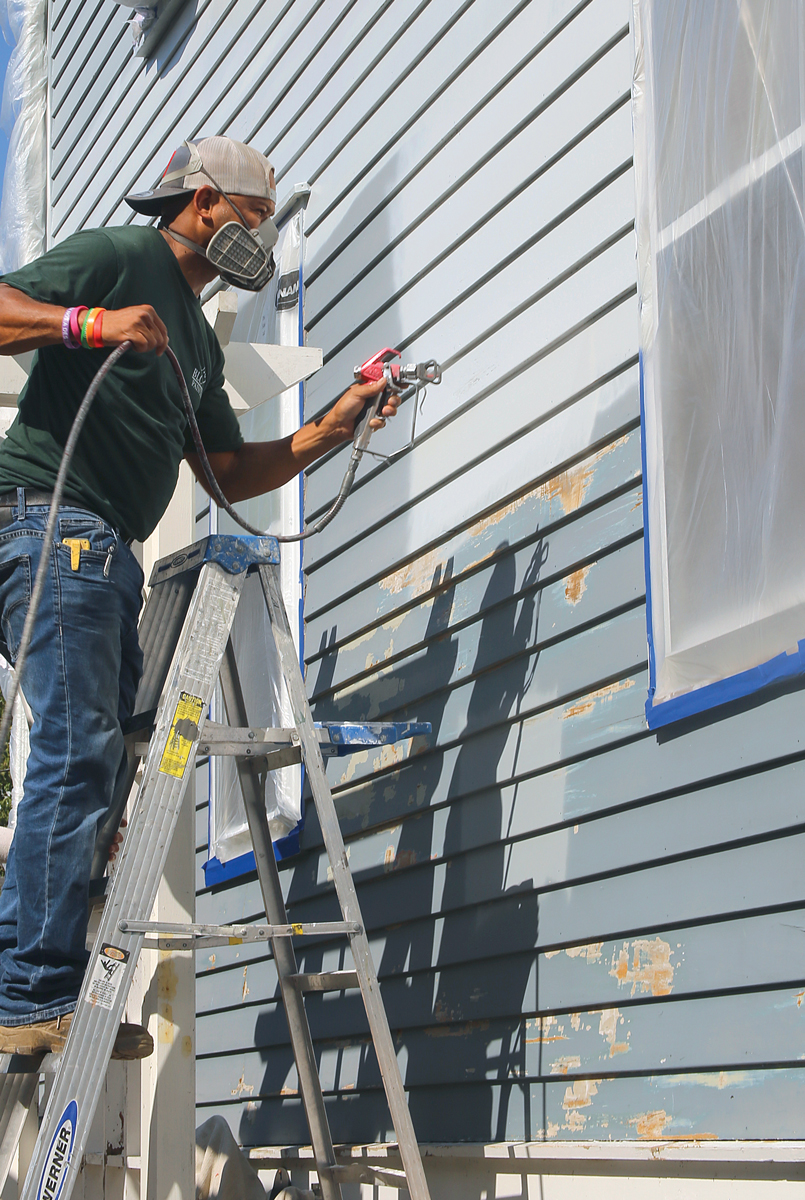
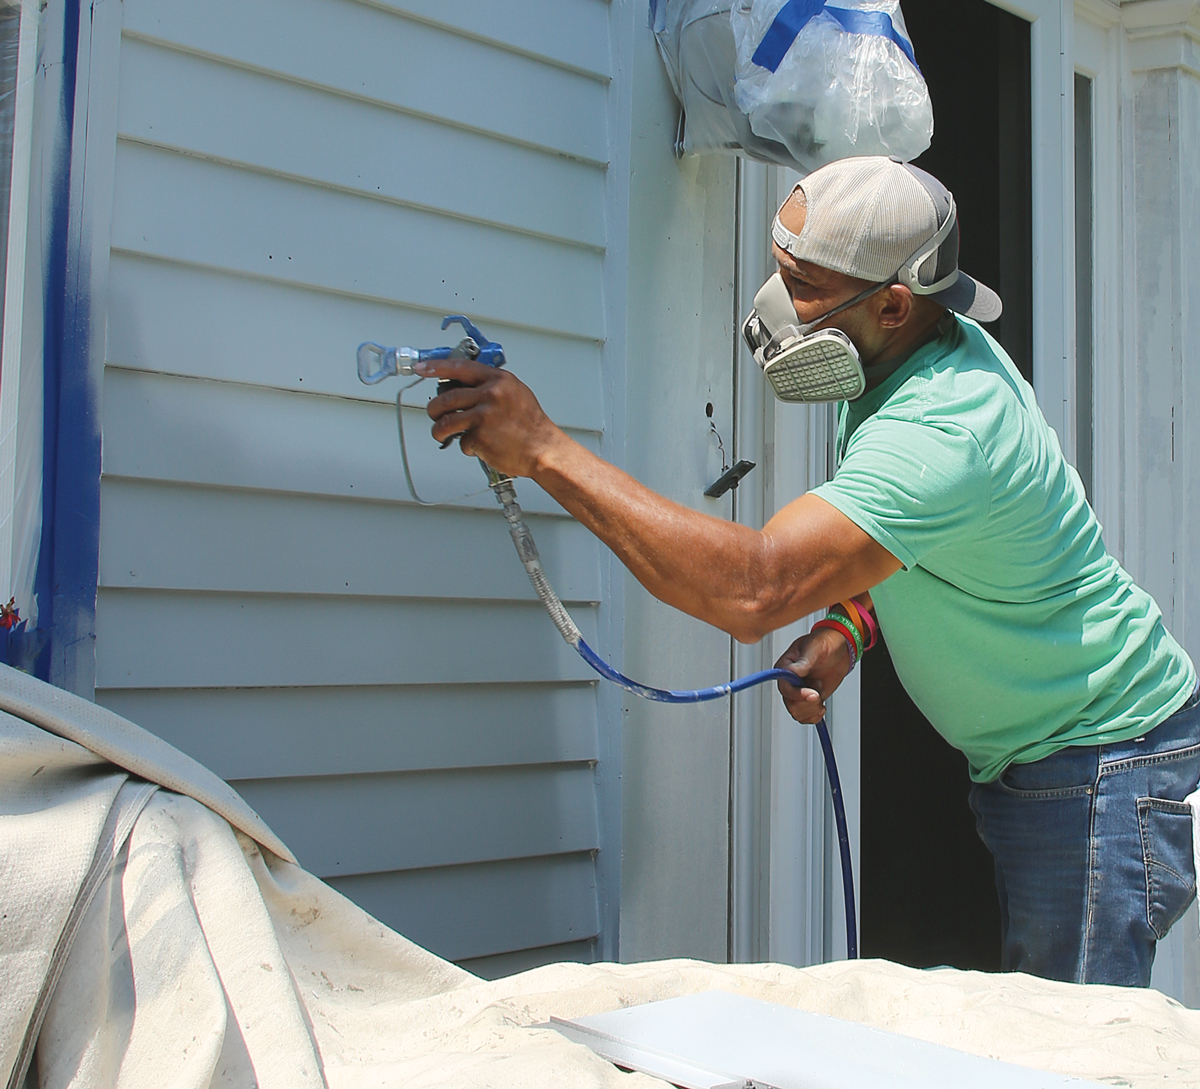
Step 5: Plan to spray or brush 

Spraying provides a nice even coat and it takes half the time of brushing, but the ability to spray depends on what’s around you and the weather. Brushing and rolling are preferred for small areas that take too long to mask and when neighboring structures or cars can’t be protected from overspray.

safe spraying When spraying, make sure to wear an appropriate respirator based on the coating.
Safe spraying. When spraying, make sure to wear an appropriate respirator based on the coating.
Brush or roll small sections. For trim and small sections of siding, it’s often faster to brush or roll, because less masking and surface protection is needed for brushing when you have skilled painters. My favorite brush for latex and oil paint and primers is a 2-1⁄2-in.-wide Chinex bristle brush from Corona. My favorite brush for oil-only is a Corona natural China bristle.
Rollers work in tight areas. We like mini rollers, which allow you to paint close to trim, at the bottom of lap siding, and in other tight corners.

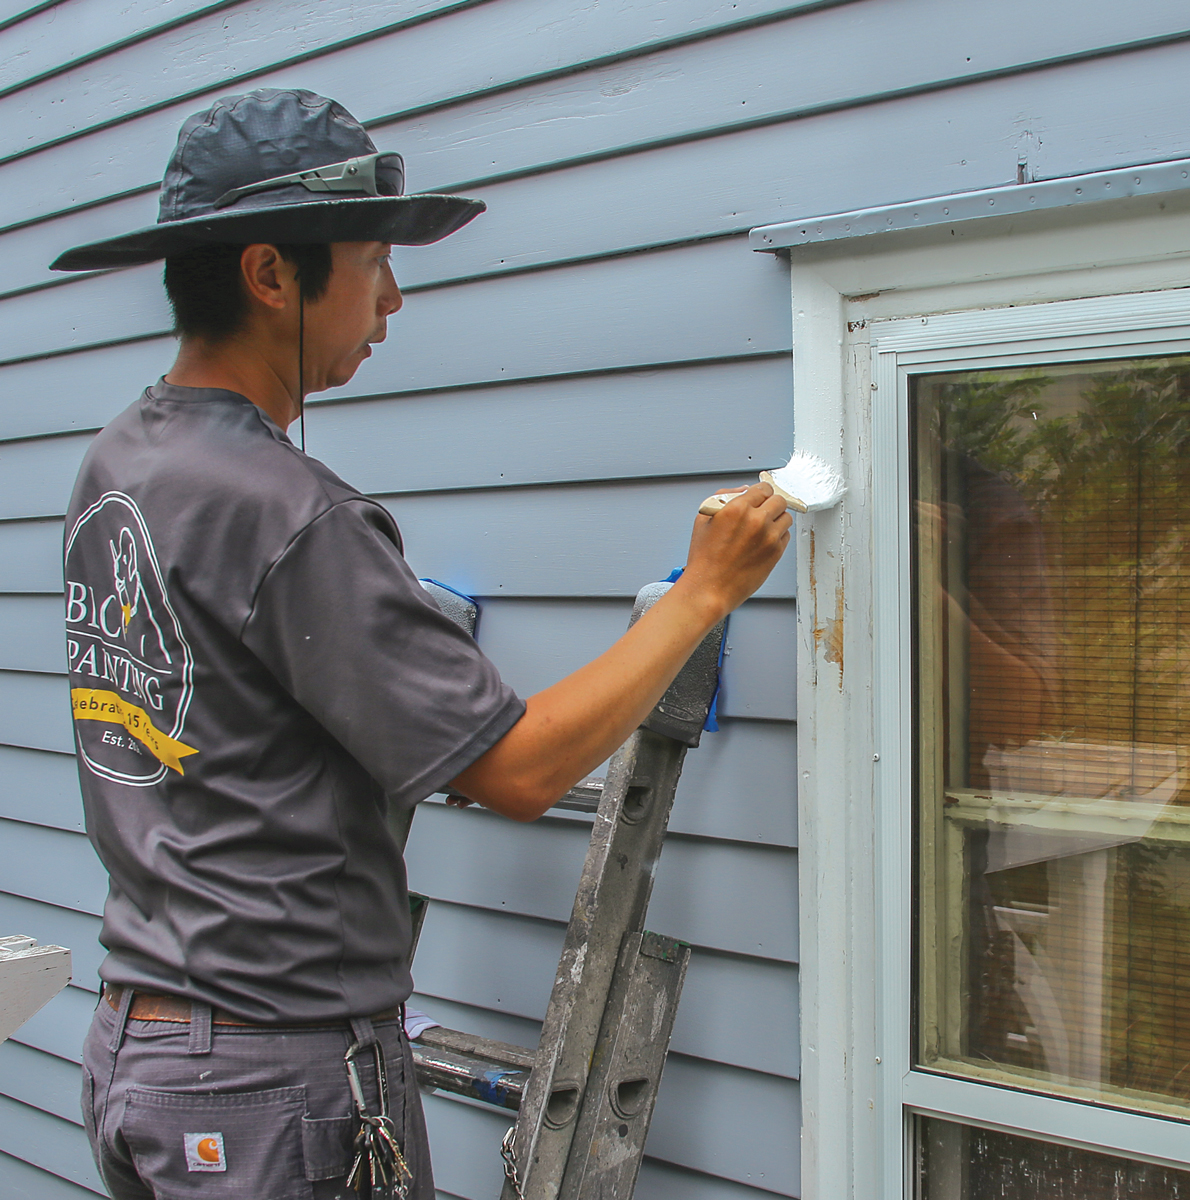
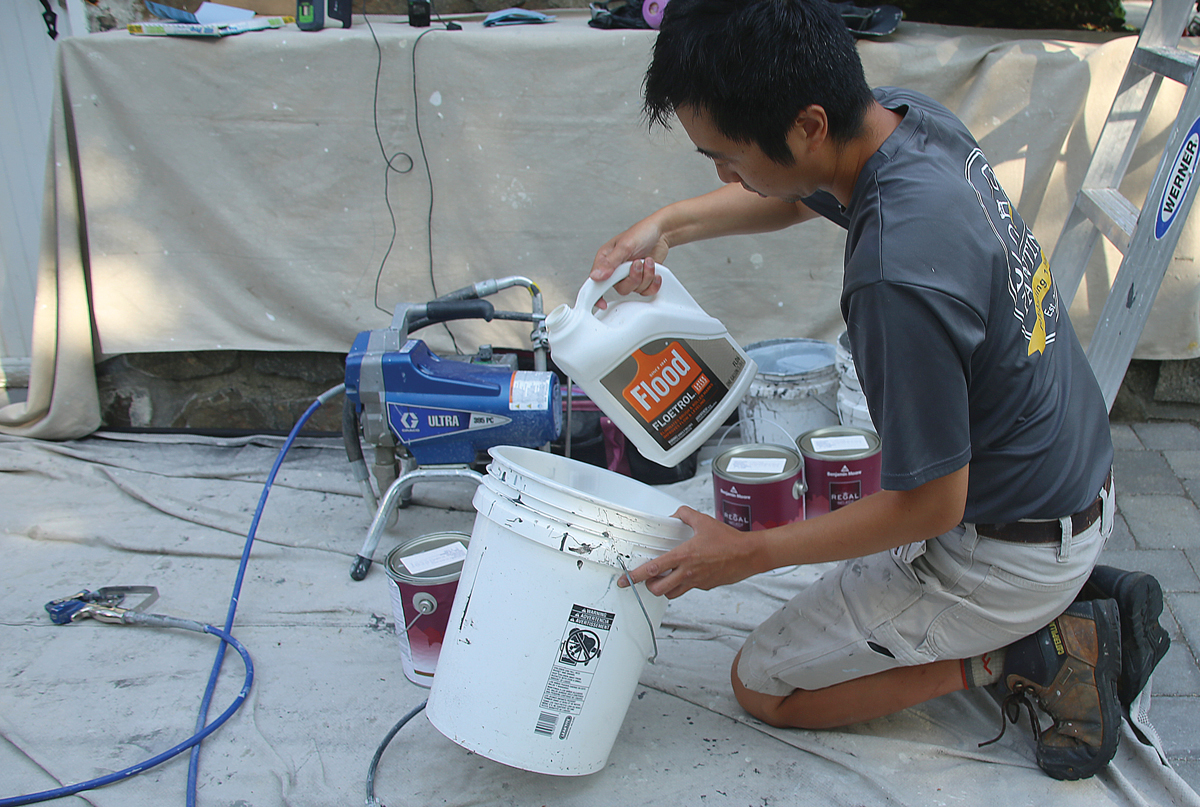
Step 6: Time to prime 

It’s best to prime the whole house versus spot-priming damaged areas, because the primer helps the paint stick and cover the substrate. We generally tint primer to the exact color of the top coat and we use oil because it seems to adhere better than water-based primer in our coastal New England climate.

Test the spray Make passes on cardboard before spraying the house to dial in the right pressure (see “Don’t be Afraid to Spray,” FHB #259). Check the coating manufacturer’s instructions for application help.
Test the spray. Make passes on cardboard before spraying the house to dial in the right pressure. Check the coating manufacturer’s instructions for application help.
Prime the field Spraying makes priming and painting go much faster, but wait for non-windy days so overspray won’t be carried to neighboring cars or properties.
Prime the field. Spraying makes priming and painting go much faster, but wait for non-windy days so overspray won’t be carried to neighboring cars or properties.

Step 7: Time to topcoat 

Modern acrylic latex paint is our preferred topcoat for most projects. Latex is more elastic, which prevents cracks that come with changes in temperature, and more vapor-permeable, which prevents peeling. 

Paint the trim We spray the field, but we paint the trim using mini rollers after cutting in with a brush.
Paint the trim. We spray the field, but we paint the trim using mini rollers after cutting in with a brush.
Dry slowly We often use extender in our coatings, which slows the dry time on warm days for better adhesion and self-leveling. There are formulas for oil- and water-based products.
Dry slowly. We often use extender in our coatings, which slows the dry time on warm days for better adhesion and self-leveling. There are formulas for oil- and water-based products.
coat the field Because we tint the primer to exactly match the paint color, the topcoat covers in one coat. This assumes you’re using high-quality paint and the sprayer is set up correctly.
Coat the field. Because we tint the primer to exactly match the paint color, the topcoat covers in one coat. This assumes you’re using high-quality paint and the sprayer is set up correctly.

Brooke Cambridge is the owner of BLC Painting in Salem, Mass. Photos by Patrick McCombe, except where noted.

From Fine Homebuilding #311


RELATED STORIES

  • How to Remove Exterior Paint
  • A Checklist for Exterior Painting
  • How to Choose Exterior Paint Colors for a Home

Sign up for eletters today and get the latest how-to from Fine Homebuilding, plus special offers.

Signing you up...

This site is protected by reCAPTCHA and the Google Privacy Policy and Terms of Service apply.
See all newsletters
See all newsletters
View PDF
Next: 10 Tips to Paint Like a Pro

Guide

Painting

Chapter

Exterior Painting

View Comments

  1. tom999 | Mar 14, 2024 08:18pm | #1

    What is most effective way to seal *slightly* rusty nail heads, to prevent stains from bleeding through acrylic-latex primers & top coats?

    My roofers installed about 240 feet of 2nd story, fascia boards.
    Boards were latex primed on site, before installation.
    Unfortunately, the primer-only boards weathered for over a year, nail heads rusted, and it's now time to overall prime again and topcoat.

    The nail heads are electro-galvanized (not hot-dipped) and sound metal.
    There are 100s, maybe 1000s of these nail heads

    I am thinking spot prime to seal nail heads, but with what?

    BIN original shellac primer?
    Cover Stain oil-base primer?
    Rustoleum "Rusty Metal" primer (oil base)?
    Something else?

    TIA

  2. [email protected] | Mar 16, 2024 01:07pm | #2

    Great article, but a note to the editorial staff regarding the Synopsis:

    ...a process of seven steps that SHE and her team like to follow..."

    Kind of like a big blemish in the middle of that beautiful paint job! :-)

  3. user-183982 | Oct 01, 2024 11:25pm | #3

    Dry scraping/sanding ONLY failed paint won't give a lasting base for the full paint job; intact paint around those areas likely will fail in the future. Removing all the paint down to bare wood is a stronger base for adhesion. Powerwashing with chemicals to kill mold, etc drives water into the bare wood which takes days to dry. The Eco-Strip method of infrared paint removal gets all the paint off fast, kills mold at the same time, and doesn't risk damaging wood or windows. No drying time; immediate painting.

Log in or create an account to post a comment.

Sign up Log in

Become a member and get full access to FineHomebuilding.com

Painting

Painting

Everything you need to know to get the perfect finish, from choosing the right paint to applying the final coat

View Project Guide

View All Project Guides »

Become a member and get unlimited site access, including the Painting Project Guide.

Start Free Trial

Intro to Painting
  • Painting Basics
  • Painting Inspiration
Tools & Materials
  • Paint
  • Brushes and Rollers
  • Caulks and Sealants
  • Spray Equipment
  • Prep and Cleanup
Prep Work
  • Getting Ready For Painting and Finishing
Painting Walls, Ceilings, and Trim
  • Painting Interior Surfaces
Wallpaper
  • How to Prep and Install Wallpaper
  • Removing Wallpaper
  • Wallcovering Choices
Windows and Doors
  • Painting Windows and Doors
  • Video Series: Finishing an Exterior Door
Spray Painting Interiors
  • How To Spray Walls, Trim, Cabinets, and More
Exterior Painting
  • Exterior Paint Prep
  • Exterior Painting Techniques

Fine Home Building

Newsletter Sign-up

  • Fine Homebuilding

    Home building tips, offers, and expert advice in your inbox.

  • Green Building Advisor

    Building science and energy efficiency advice, plus special offers, in your inbox.

  • Old House Journal

    Repair, renovation, and restoration tips, plus special offers, in your inbox.

Signing you up...

This site is protected by reCAPTCHA and the Google Privacy Policy and Terms of Service apply.
See all newsletters

Follow

  • Fine Homebuilding

    Dig into cutting-edge approaches and decades of proven solutions with total access to our experts and tradespeople.

    Start Free Trial Now
    • Facebook
    • Instagram
    • X
    • LinkedIn
  • GBA Prime

    Get instant access to the latest developments in green building, research, and reports from the field.

    Start Free Trial Now
    • Facebook
    • YouTube
  • Old House Journal

    Learn how to restore, repair, update, and decorate your home.

    Subscribe Now
    • Facebook
    • Instagram
    • X

Membership & Magazine

  • Online Archive
  • Start Free Trial
  • Magazine Subscription
  • Magazine Renewal
  • Gift a Subscription
  • Customer Support
  • Privacy Preferences
  • About
  • Contact
  • Advertise
  • Careers
  • Terms of Use
  • Site Map
  • Do not sell or share my information
  • Privacy Policy
  • Accessibility
  • California Privacy Rights

© 2025 Active Interest Media. All rights reserved.

Fine Homebuilding receives a commission for items purchased through links on this site, including Amazon Associates and other affiliate advertising programs.

X
X
This is a dialog window which overlays the main content of the page. The modal window is a 'site map' of the most critical areas of the site. Pressing the Escape (ESC) button will close the modal and bring you back to where you were on the page.

Main Menu

  • How-To
  • Design
  • Tools & Materials
  • Video
  • Blogs
  • Forum
  • Project Guides
  • Reader Projects
  • Magazine
  • Members
  • FHB House

Podcasts

  • FHB Podcast
  • ProTalk

Webinars

  • Upcoming and On-Demand

Podcasts

  • FHB Podcast
  • ProTalk

Webinars

  • Upcoming and On-Demand

Popular Topics

  • Kitchens
  • Business
  • Bedrooms
  • Roofs
  • Architecture and Design
  • Green Building
  • Decks
  • Framing
  • Safety
  • Remodeling
  • Bathrooms
  • Windows
  • Tilework
  • Ceilings
  • HVAC

Magazine

  • Current Issue
  • Past Issues
  • Magazine Index
  • Subscribe
  • Online Archive
  • Author Guidelines

All Access

  • Member Home
  • Start Free Trial
  • Gift Membership

Online Learning

  • Courses
  • Project Guides
  • Reader Projects
  • Podcast

More

  • FHB Ambassadors
  • FHB House
  • Customer Support

Account

  • Log In
  • Join

Newsletter

Get home building tips, offers, and expert advice in your inbox

Signing you up...

This site is protected by reCAPTCHA and the Google Privacy Policy and Terms of Service apply.
See all newsletters
See all newsletters

Follow

  • X
  • YouTube
  • instagram
  • facebook
  • pinterest
  • Tiktok

Join All Access

Become a member and get instant access to thousands of videos, how-tos, tool reviews, and design features.

Start Your Free Trial

Subscribe

FHB Magazine

Start your subscription today and save up to 70%

Subscribe

We hope you’ve enjoyed your free articles. To keep reading, become a member today.

Get complete site access to expert advice, how-to videos, Code Check, and more, plus the print magazine.

Start your FREE trial

Already a member? Log in