
Choosing Receptacles and Switches
Here's what to look for when you're buying standard duplex outlets and single-pole light switches.
First, some advice that’s true for all electrical devices: Buy quality. Receptacles and switches can differ greatly in capability, durability, and cost. Over the life of a device, the difference in price is trivial, but the difference in performance can be substantial. If, for example, you must call in an electrician to figure out why lights are flickering or outlets are dead, you’ll quickly spend what you thought you had saved by buying cheap devices. Money aside, faulty electrical connections are not just a nuisance, they’re not safe.
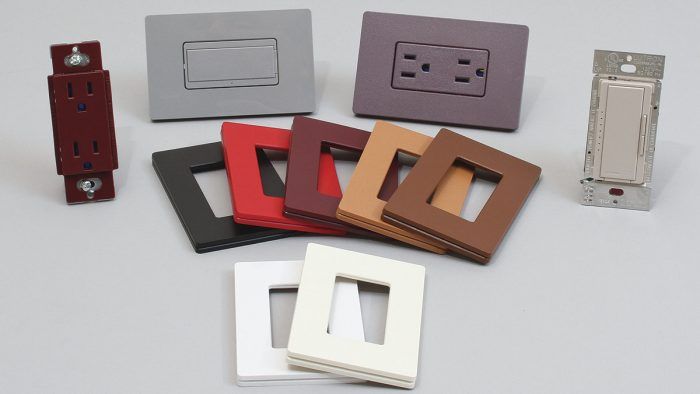
As you can see in the photo, cheap receptacles are pretty much all plastic, their thin metal mounting tabs will distort easily, and they tend to crack if subjected to heavy use. High-quality receptacles and switches tend to have heavier nylon faces and may have metal support yokes that reinforce the back of the device. Another indication of quality is how wires connect to a device, whether they are back-stabbed and held by a thin metal tension clamp or solidly secured by screws on the sides of the device or internal clamps.
Polarized ReceptaclesReceptacles, plugs, and fixtures are polarized so they can fit together only one way. A receptacle’s brass screw terminal connects to hot wires and, internally, to the hot (narrow) prong of a polarized plug. The receptacle’s silver screw terminal connects to neutral wires and, internally, to the neutral (wide) prong of a polarized plug. Finally, the green ground screw connects to the ground wire and the grounding prong of the plug. |
If your budget allows, we recommend that you buy specification-grade (spec-grade) or commercial-grade devices from an electrical supply house. The quality of the residential-grade devices sold by home centers varies widely—some of it good, much of it so-so.
Household wiring
Planning your project, ordering electrical supplies, and room-by-room requirements are covered are not covered here, but here are a few rules of thumb to guide you. General-use and lighting circuits are typically served by 14-gauge (AWG) cable protected by 15-amp breakers, so standard duplex 15-amp receptacles will comprise the bulk of what you buy. However, the NEC requires 20-amp circuits (wired with 12AWG cable) protected by 20-amp breakers for bathroom receptacles; at least two 20-amp circuits for small-appliance receptacles on kitchen countertops; and 20-amp circuits for laundry, garages, workshops, and so on.
GFCI protection
To reduce the risk of electrical shock, the NEC requires ground-fault-circuit-interrupter (GFCI) protection on all 15-amp and 20-amp receptacles located in bathrooms within 6 ft. of sinks, tubs, or shower stalls; in laundry areas; for all kitchen counter receptacles or any other receptacle located within 6 ft. of a sink; for dishwasher receptacles; and for receptacles that are outdoor, in garages, in accessory buildings, or in unfinished basements. GFCI protection may be achieved by installing a GFCI breaker or by installing GFCI receptacles.
Which GFCI device best protects the kitchen?Should you use GFCI breakers or GFCI receptacles to protect kitchen outlets? A veteran electrician weighs in: “I would probably install GFCI receptacles to protect countertop outlets where small appliances are constantly in use. Often, if you plug in an appliance cord a bit crooked—so that one prong engages before the other—that can nuisance-trip a GFCI breaker, which means walking to the panel to reset the breaker. But if the outlet is protected by a GFCI receptacle, you can set things right by just pressing the reset button on the device.” |
According to CodeAll new GFCI receptacles must have three important features. First, they must be self-diagnostic, with an LED indicator light that will flash or glow red to indicate device failure. Second, they must be self-locking. Should the GFCI fail, current will cease to flow through it; the device must be replaced. Third, GFCIs must be tamper-proof if installed less than 51⁄2 ft. above the floor, with plastic shutters that slide across terminal slots to prevent, say, a curious child’s inserting something into a slot. Shutters will slide open only if the two blades of a plug are inserted into both terminal slots simultaneously. |
AFCI protection
An arc fault is an explosive discharge of electrical current as it crosses a gap between two conductors, a serious condition because arcs can reach several thousand degrees Fahrenheit. Common causes of arcing in homes include corroded or loose electrical connections or a nail or screw driven through an electrical cable. To prevent house fires caused by arc faults, the NEC requires arc-fault-circuit-interrupter (AFCI) protection on all 15-amp and 20-amp receptacles in kitchens and laundry rooms, bedrooms, living rooms, rec rooms, parlors, libraries, dens, sunrooms, and hallways, and on switches serving any of those areas. AFCI protection may be achieved by installing an AFCI breaker, or by installing an AFCI receptacle at the beginning of a circuit and through-wiring the device to protect receptacles downstream.
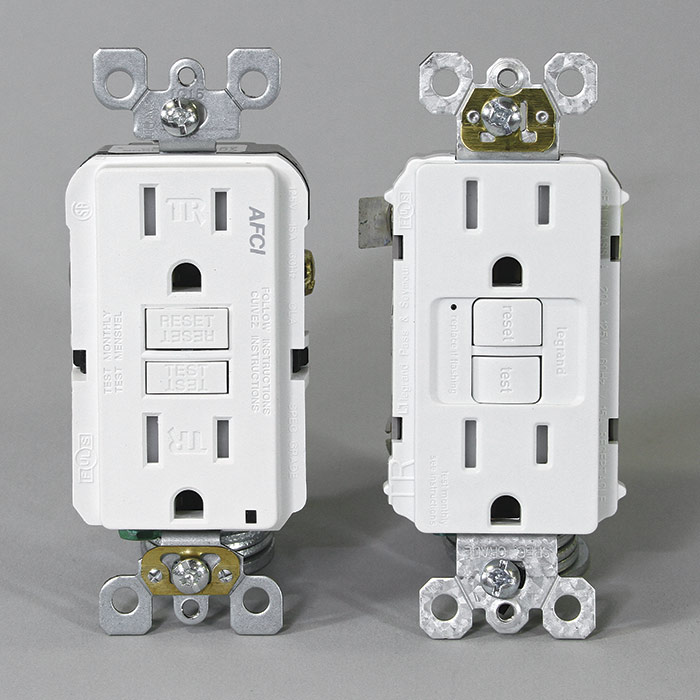
Although they protect against different hazards, GFCI and AFCI breakers and GFCI and AFCI receptacles look quite similar. GFCI and AFCI receptacles are also wired similarly, so when installing either type of breaker or receptacle, check the label on the device carefully to be sure you are installing the right one. On house circuits that require both AFCI and GFCI protection, you can now buy a dual-function breaker.
Tamper-resistant receptacles
Since 2011 the NEC has required that all receptacles (including GFCI and AFCI receptacles) be tamper-resistant, except for those more than 5 1⁄2 ft. above the floor, those behind a not easily moved appliance, those that are part of a light fixture, and non-grounding receptacles used for replacements in non-grounding wiring.
Large appliances, dedicated circuits
Appliances that use a lot of energy, such as electric water heaters, electric ranges and ovens, clothes dryers, central heating and cooling systems, furnaces, whirlpools, and spas, are typically on a dedicated circuit. Cable wire serving such circuits must be matched to the load rating of the appliance, as must receptacles, plugs, and switches (if any).
Switches
There is a plethora of switches from which to choose. For decades, single-pole, three-way, and four-way switches were the only choice—until dimmers (rheostats) allowed homeowners to gradually lower or raise the current that flowed to a bulb, thus reducing or increasing the light that bulbs emitted. These days, switches may be dimmers, timers, occupancy or vacancy sensors, or multi-way convertibles. Switches may communicate via wires or radio frequency (RF), or with apps on your smartphone. Or you can combine a master dimmer with companion dimmers to dim a light from up to 10 locations.
Wireless switches are a boon to renovators because they can be installed without tearing up walls and ceilings. Perhaps the single most important thing to remember about today’s switches is that they must be suitable to the load types they control, whether incandescent, halogen, compact fluorescent, or LEDs. LED fixtures with electronic components, for example, require electronic switches.
Matching load ratings
Circuit components must be matched according to their load ratings. That is, a 20-amp receptacle must be fed by 12AWG cable, which is also rated at 20 amps, and protected by a 20-amp breaker or fuse. A 15-amp receptacle or switch should be fed by 14AWG cable, which is rated for 15 amps, and protected by a 15-amp breaker or fuse. (Note that 15-amp receptacles on a multi-receptacle circuit may be installed on a 20-amp circuit as long as the receptacles are properly “pigtailed.”)
There is no harm in using “oversize” components on a circuit, however, and there may be a benefit in some cases: for example, using 12AWG cable on a 15-amp circuit if the length of the cable from the breaker to the load is more than 75 ft. and if the expected load is close to the 15-amp rating of the circuit. In that situation, if 14AWG cable were used, there would be an unacceptable voltage drop due to the impedance of the wire. And using a larger-gauge cable (12AWG) reduces voltage drop.
NM cable manufacturers color-code the cable sheathing for the commonly used gauges to help correctly match wire size to breakers: White sheathing denotes 14 gauge; yellow sheathing, 12 gauge; and orange sheathing, 10 gauge.
Excerpted from Wiring Complete, 3rd Edition (The Taunton Press, 2017) by Michael Litchfield and Michael McAlister
Available in the Taunton Store and at Amazon.com.
