FHB Logo Facebook LinkedIn Email Pinterest Twitter X Instagram Tiktok YouTube Plus Icon Close Icon Navigation Search Icon Navigation Search Icon Arrow Down Icon Video Guide Icon Article Guide Icon Modal Close Icon Guide Search Icon Skip to content
Subscribe
Log In
  • How-To
  • Design
  • Tools & Materials
  • Restoration
  • Videos
  • Blogs
  • Forum
  • Magazine
  • Members
  • FHB House
  • Podcast
Log In

Fine Homebuilding Project Guides

Plumbing

Guide Home
  • Plumbing Basics
  • Bathrooms
  • Kitchens
  • Roughing In
  • Water Heaters, Washers, and More
  • Maintenance and Repair
How-To

Installing a Dishwasher

To hook up a new dishwasher you'll need to connect the drain line, the water-supply line, and the electrical line.

By Steve Cory

Replacing an existing dishwasher is usually a straightforward job: The opening between cabinets should already be the correct width, as most dishwashers are the same size, and the electrical and plumbing lines can usually be reused. If you are installing a dishwasher where there was none before, your main task will be to prepare the opening.
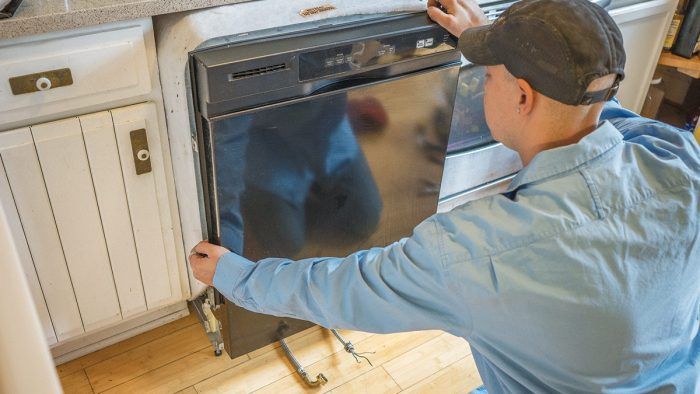
PREP THE OPENING
1. PREP THE OPENING. Make sure the opening is wide enough for the model you are installing. You’ll need (from left to right) a drain line, a cold-water-supply tube, and an electrical line (Note: be sure that the power is off before working with electrical wires).


Taking Out the Old Dishwasher

If you have an existing dishwasher, shut off the water supply (usually at a stop valve under the sink). Also shut off electrical power at the service panel and test to verify that power is off. Disconnect the water and wiring lines from the old machine. Remove the screws holding the dishwasher to the cabinetry. Have small pails on hand to catch water as you disconnect the water-supply line. You may choose to disconnect the drain line from behind the dishwasher or from where it is hooked up to the plumbing under the sink. Then slide the dishwasher out, using towels or pieces of cardboard to keep from scratching the floor.

Make sure the opening is 30 in. wide (unless you are installing an economy model that’s only 24 in. wide). If it doesn’t already exist, snake a drain line through holes or behind cabinets from the opening to below the sink, where it attaches to a garbage disposal or a special dishwasher tailpiece on the trap. Also supply cold water with a flexible supply tube made for dishwashers; it connects to a stop valve under the sink. You’ll have to supply electrical power in the form of a flexible “whip.” If you are adding a new electrical line, make sure you will not overload a circuit; otherwise, connect it to a new circuit in the service panel. (Hire a pro for this.)


HOOK THE DRAIN
2. CONNECT THE DRAIN. If your dishwasher has a permanently attached drain line, place the dishwasher near the opening and thread the line through holes in the back of cabinets and connect it to a garbage disposal or dishwasher tailpiece under the sink. If its drain line can be disconnected, you may choose to work in the opposite direction.


TIP: When running a dishwasher drain hose, be sure to loop it up as high as possible at one point, near the underside of the countertop. This will prevent water from siphoning backward. There is often a special clip on the hose for securing this loop. If your hose is not long enough, you can buy an extension.


SLIDE THE DISHWASHER IN
3. SLIDE THE DISHWASHER IN. Taking care not to kink the drain hose, and seeing that the electrical and water-supply lines are not pushed out of the way, slide the dishwasher most of the way into the opening.


CONNECT THE WATER
4. CONNECT THE WATER. Connect the water supply to the dishwasher’s inlet. This is usually a simple matter of tightening a hose-like fitting. If the existing water line is flexible copper, take care not to kink it as you work, and use a nut and ferrule to make the connection.


ELECTRICAL CONNECTION
5. ELECTRICAL CONNECTION. Remove the cover from the dishwasher’s electrical box. Slip the wires and the threaded electrical connector through the opening, and screw on a nut to tighten the cable to the box. (The cable shown is metal clad; yours may be plastic sheathed.) Use wire nuts to firmly connect the black or colored house wire to the dishwasher’s black lead, the white wire to the white lead, and the ground wire to a grounding screw. Replace the cover.


adjust the dishwasher legs
6. FINAL TOUCHES. Turn the adjustable legs to get the dishwasher aligned with the sides and the underside of the countertop. Drive screws at the sides or top to fasten the dishwasher to the cabinets and perhaps the countertop.
install the metal base pieces
Turn on the power and the water, and let the dishwasher run an entire cycle; make sure there are no leaks. Then install the metal base pieces.


Excerpted from Plumbing (The Taunton Press, 2016) by Steve Cory.

Sign up for eletters today and get the latest how-to from Fine Homebuilding, plus special offers.

Signing you up...

This site is protected by reCAPTCHA and the Google Privacy Policy and Terms of Service apply.
See all newsletters
See all newsletters
Previous: Connecting an Ice Maker Next: Installing a Garbage Disposal

Guide

Plumbing

Chapter

Kitchens

Log in or create an account to post a comment.

Sign up Log in

Become a member and get full access to FineHomebuilding.com

Plumbing

Plumbing

Trusted, comprehensive guidance from the pros for tackling any plumbing project

View Project Guide

View All Project Guides »

Become a member and get unlimited site access, including the Plumbing Project Guide.

Start Free Trial

Plumbing Basics
  • Plumbing Systems
  • Materials
  • Plumbing Tools
Bathrooms
  • Sinks
  • Showers & Tubs
  • Toilets
Kitchens
  • Kitchen Sinks
  • Water Filtration
  • Appliances
Roughing In
  • Layout
  • Installation
  • Copper Pipe
  • PEX Tubing
  • PVC Drainpipe
Water Heaters, Washers, and More
  • Water Heaters
  • Whole-House Filters
  • Sump Pumps
  • Washers
  • Sprinkler Systems
Maintenance and Repair
  • Sinks
  • Toilets
  • Showers & Tubs
  • Systems

Fine Home Building

Newsletter Sign-up

  • Fine Homebuilding

    Home building tips, offers, and expert advice in your inbox.

  • Green Building Advisor

    Building science and energy efficiency advice, plus special offers, in your inbox.

  • Old House Journal

    Repair, renovation, and restoration tips, plus special offers, in your inbox.

Signing you up...

This site is protected by reCAPTCHA and the Google Privacy Policy and Terms of Service apply.
See all newsletters

Follow

  • Fine Homebuilding

    Dig into cutting-edge approaches and decades of proven solutions with total access to our experts and tradespeople.

    Start Free Trial Now
    • Facebook
    • Instagram
    • X
    • LinkedIn
  • GBA Prime

    Get instant access to the latest developments in green building, research, and reports from the field.

    Start Free Trial Now
    • Facebook
    • YouTube
  • Old House Journal

    Learn how to restore, repair, update, and decorate your home.

    Subscribe Now
    • Facebook
    • Instagram
    • X

Membership & Magazine

  • Online Archive
  • Start Free Trial
  • Magazine Subscription
  • Magazine Renewal
  • Gift a Subscription
  • Customer Support
  • Privacy Preferences
  • About
  • Contact
  • Advertise
  • Careers
  • Terms of Use
  • Site Map
  • Do not sell or share my information
  • Privacy Policy
  • Accessibility
  • California Privacy Rights

© 2025 Active Interest Media. All rights reserved.

Fine Homebuilding receives a commission for items purchased through links on this site, including Amazon Associates and other affiliate advertising programs.

X
X
This is a dialog window which overlays the main content of the page. The modal window is a 'site map' of the most critical areas of the site. Pressing the Escape (ESC) button will close the modal and bring you back to where you were on the page.

Main Menu

  • How-To
  • Design
  • Tools & Materials
  • Video
  • Blogs
  • Forum
  • Project Guides
  • Reader Projects
  • Magazine
  • Members
  • FHB House

Podcasts

  • FHB Podcast
  • ProTalk

Webinars

  • Upcoming and On-Demand

Podcasts

  • FHB Podcast
  • ProTalk

Webinars

  • Upcoming and On-Demand

Popular Topics

  • Kitchens
  • Business
  • Bedrooms
  • Roofs
  • Architecture and Design
  • Green Building
  • Decks
  • Framing
  • Safety
  • Remodeling
  • Bathrooms
  • Windows
  • Tilework
  • Ceilings
  • HVAC

Magazine

  • Current Issue
  • Past Issues
  • Magazine Index
  • Subscribe
  • Online Archive
  • Author Guidelines

All Access

  • Member Home
  • Start Free Trial
  • Gift Membership

Online Learning

  • Courses
  • Project Guides
  • Reader Projects
  • Podcast

More

  • FHB Ambassadors
  • FHB House
  • Customer Support

Account

  • Log In
  • Join

Newsletter

Get home building tips, offers, and expert advice in your inbox

Signing you up...

This site is protected by reCAPTCHA and the Google Privacy Policy and Terms of Service apply.
See all newsletters
See all newsletters

Follow

  • X
  • YouTube
  • instagram
  • facebook
  • pinterest
  • Tiktok

Join All Access

Become a member and get instant access to thousands of videos, how-tos, tool reviews, and design features.

Start Your Free Trial

Subscribe

FHB Magazine

Start your subscription today and save up to 70%

Subscribe

We hope you’ve enjoyed your free articles. To keep reading, become a member today.

Get complete site access to expert advice, how-to videos, Code Check, and more, plus the print magazine.

Start your FREE trial

Already a member? Log in