FHB Logo Facebook LinkedIn Email Pinterest Twitter X Instagram Tiktok YouTube Plus Icon Close Icon Navigation Search Icon Navigation Search Icon Arrow Down Icon Video Guide Icon Article Guide Icon Modal Close Icon Guide Search Icon Skip to content
Subscribe
Log In
  • How-To
  • Design
  • Tools & Materials
  • Restoration
  • Videos
  • Blogs
  • Forum
  • Magazine
  • Members
  • FHB House
  • Podcast
Log In

Fine Homebuilding Project Guides

Windows & Doors

Guide Home
  • Choosing Windows
  • Installing Windows In New Walls
  • Retrofitting Windows
  • Window Repairs
  • Door Basics
  • Interior Doors
  • Exterior Doors
How-To

Build a Transom Above a Stock Door

A decorative transom fills in the space between a stock door and the home's 9-ft. ceiling, saving the cost of a custom door.

By Gary Striegler Issue 316 - July 2023

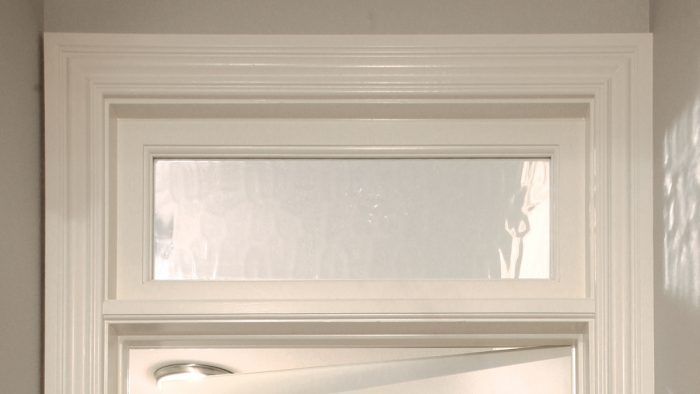
Synopsis: In a house with tall ceilings, you could spend a lot of money on custom doors. In these situations, trim carpenter Gary Striegler likes to use stock doors and give them a custom look by building a transom above them. In this article, he explains his process for building and installing a transom in a house with a 9-ft. ceiling.


Years ago, transoms were part of the climate-control system for rooms in buildings. They operated like awning windows, letting warm air escape near the ceiling when opened. None of the transoms I build today operate, but they do let in light. And with the high cost of custom doors, transoms are a great way to give basic doors a custom look with today’s higher ceilings.

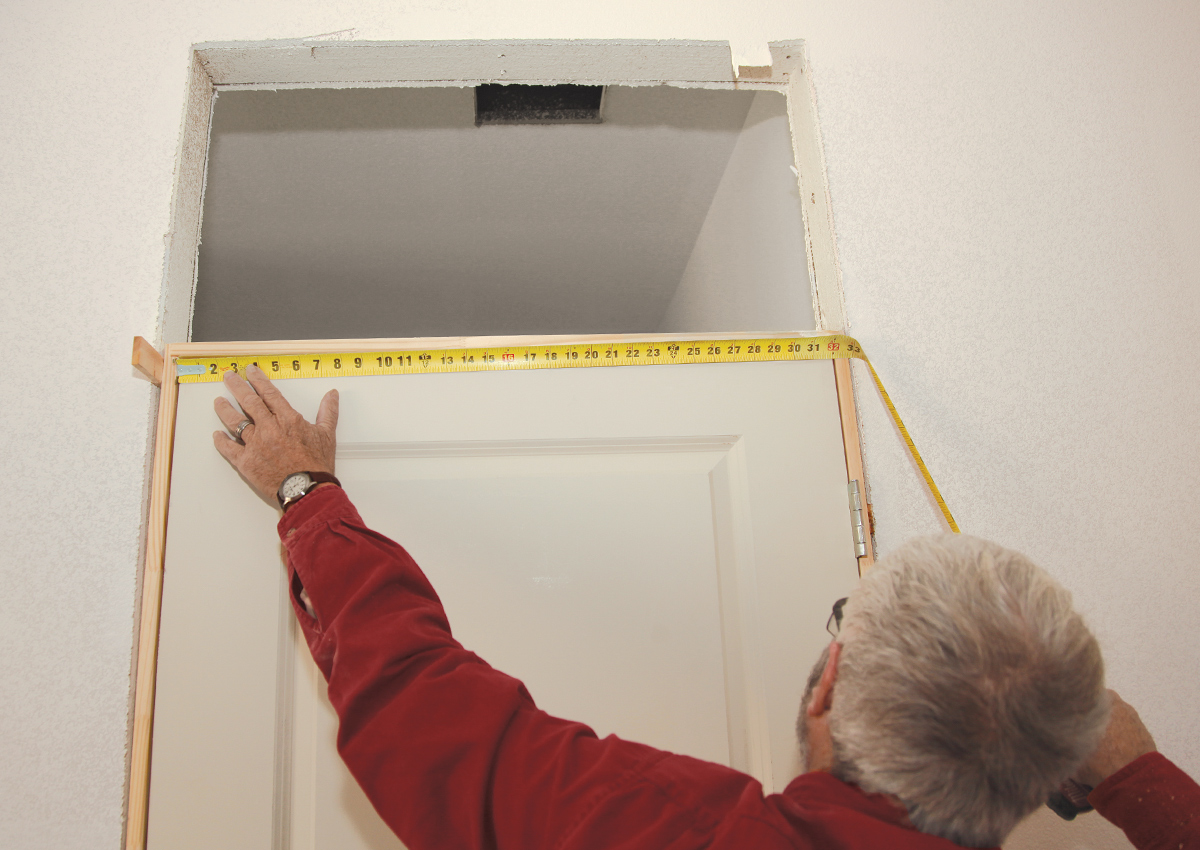
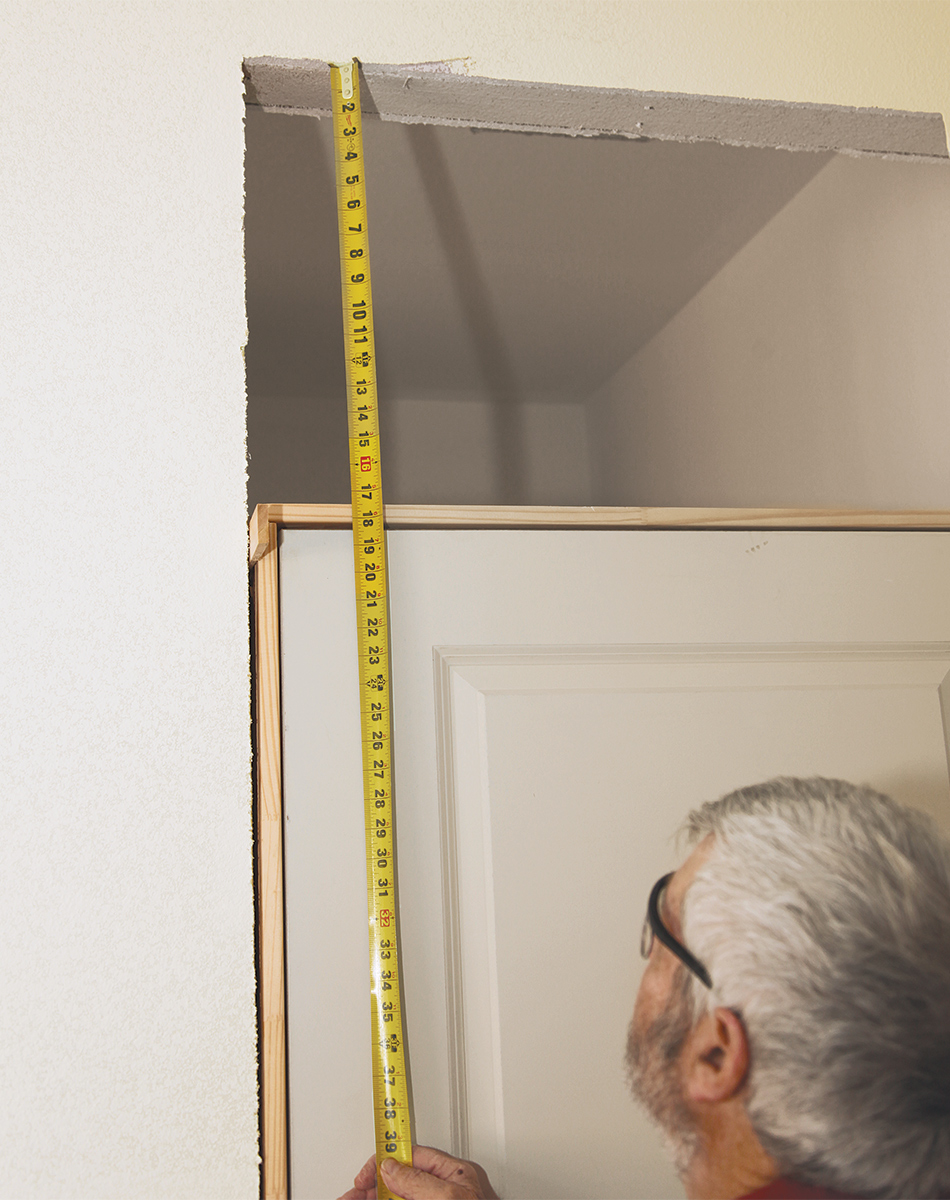
I’ve built many different types of transoms, but the one I cover here uses a paint-grade wood frame that looks a lot like the old operable transoms. It typically takes a minimum of 14 in. of space above the door jamb to build this type of transom. On this project we had 9-ft. ceilings, and the load-bearing walls had 2×10 headers snugged all the way up against the top wall plate. On non-load-bearing walls, I just have the framers header off the opening to give it the same height as a structural header. When the opening is ready, I install the door, leaving the open space above.

Build the transom jamb

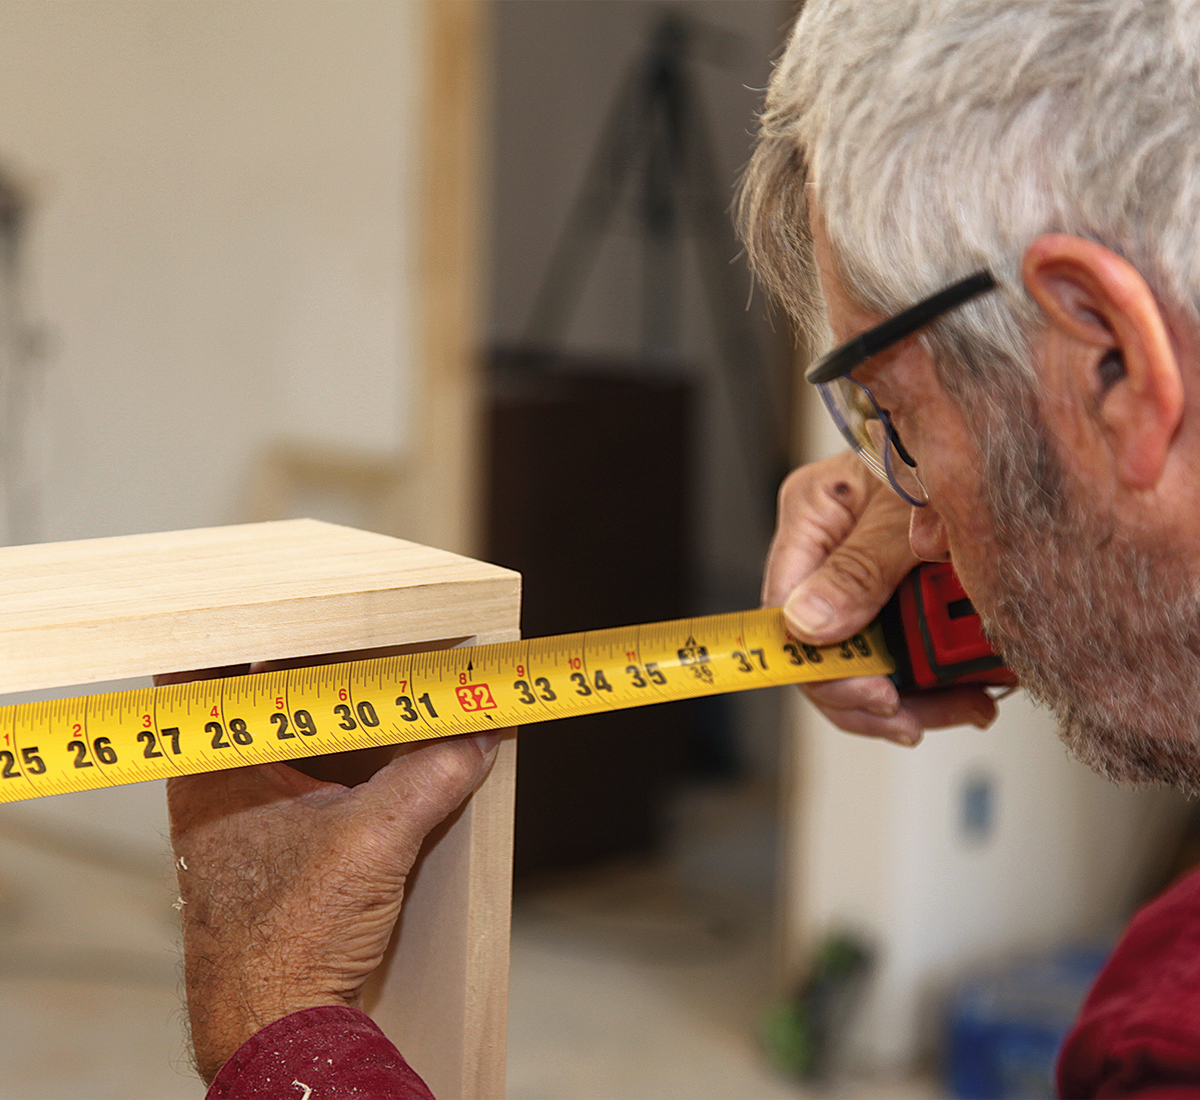
The transom jamb is made out of 1×6 poplar ripped to 4-9/16 in. wide. To make the transom jamb align with the door jamb when installed, the inside measurements of the two need to be the same. I want the transom to have as much height as possible, so I leave only a minimal 1/4-in. clearance at the top.

Measuring the inside width of the door jamb
Match the inside. Measure the inside width of the door jamb to get the matching width of the transom jamb.
measuring the height for the transom
Get the height right. To have the transom as large as possible, measure the height of the opening and subtract 1/4 in. for clearance. The measurement here was 17 in.
measuring the height of the jamb sides
No-brainer measurement. To measure the height of the jamb sides exactly, sandwich the top and bottom jambs together, and align the measuring tape with the 17-in. mark on one edge of the sandwich. The measurement on the other edge is the length of the transom side jambs (here, 15-7/16 in.).
assemble the pieces of the transom jamb into a four-sided frame
Simple assembly. After cutting all sides to length, assemble the pieces into a four-sided frame using 1/4-in.-crown, 1-1/2-in.-long staples.
double-check the jamb inside measurement
Critical check. When the jamb is finished, double-check that the inside measurement is the same as that of the door jamb.

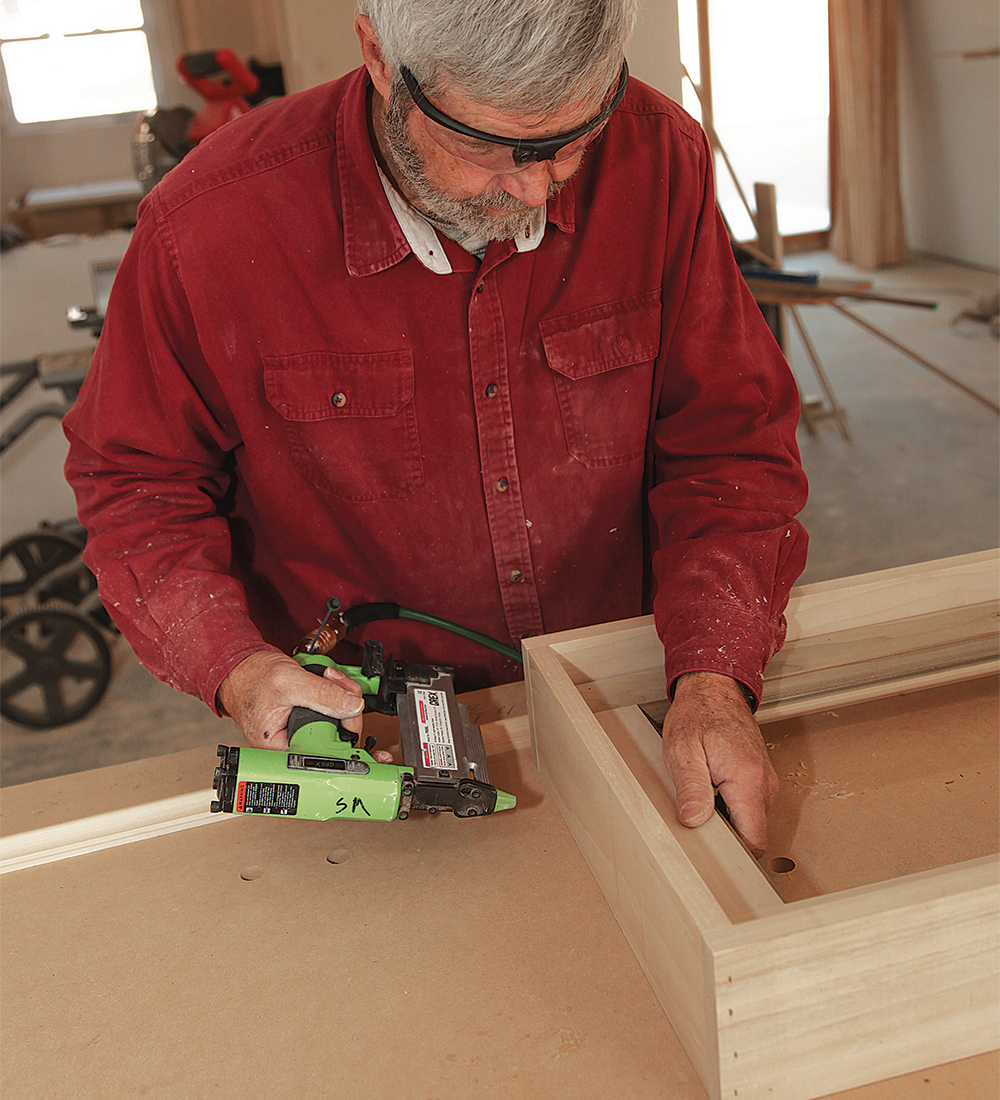
Build the transom sash

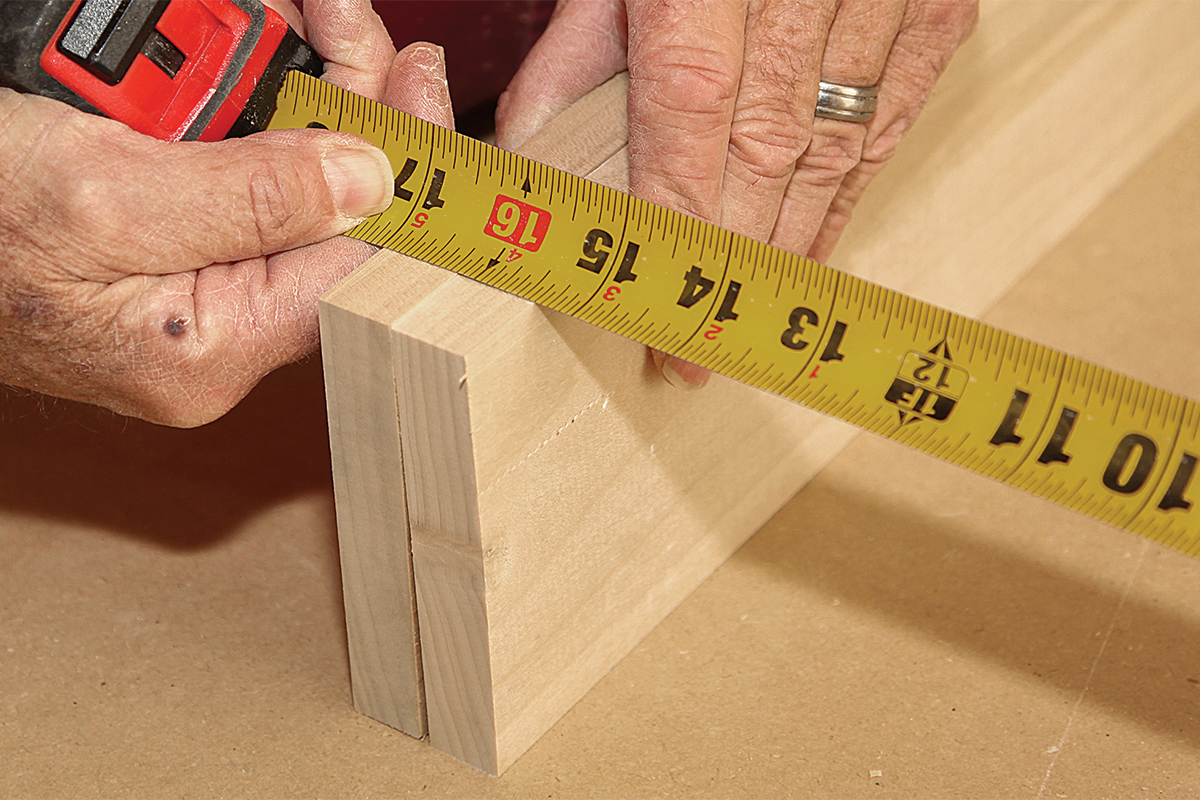
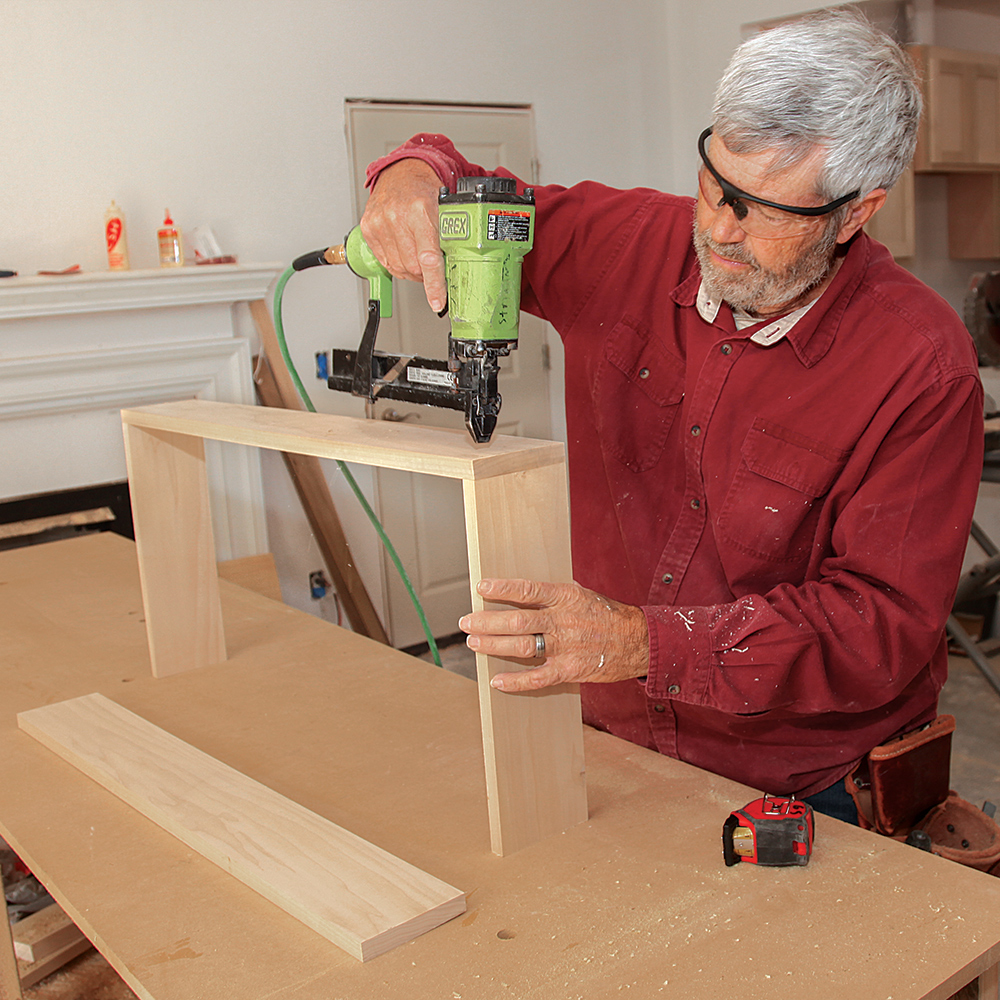
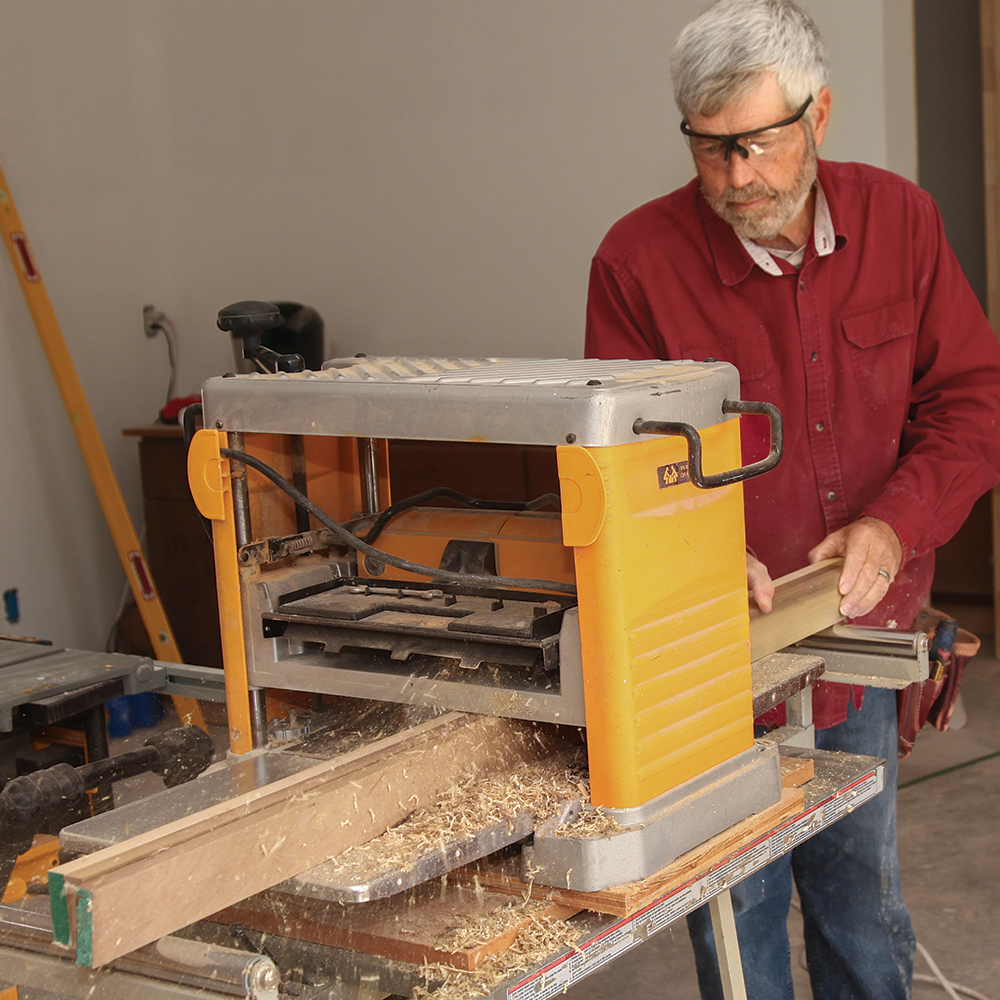
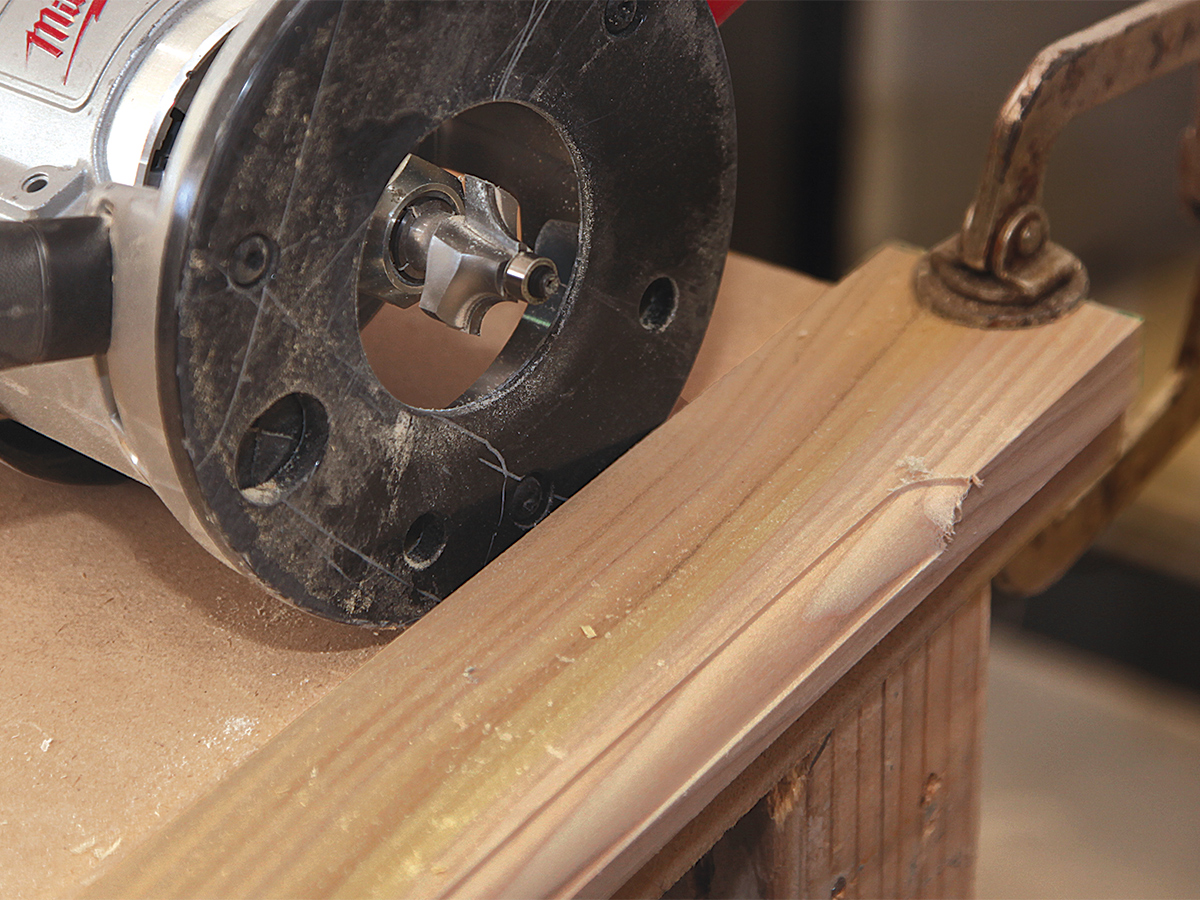
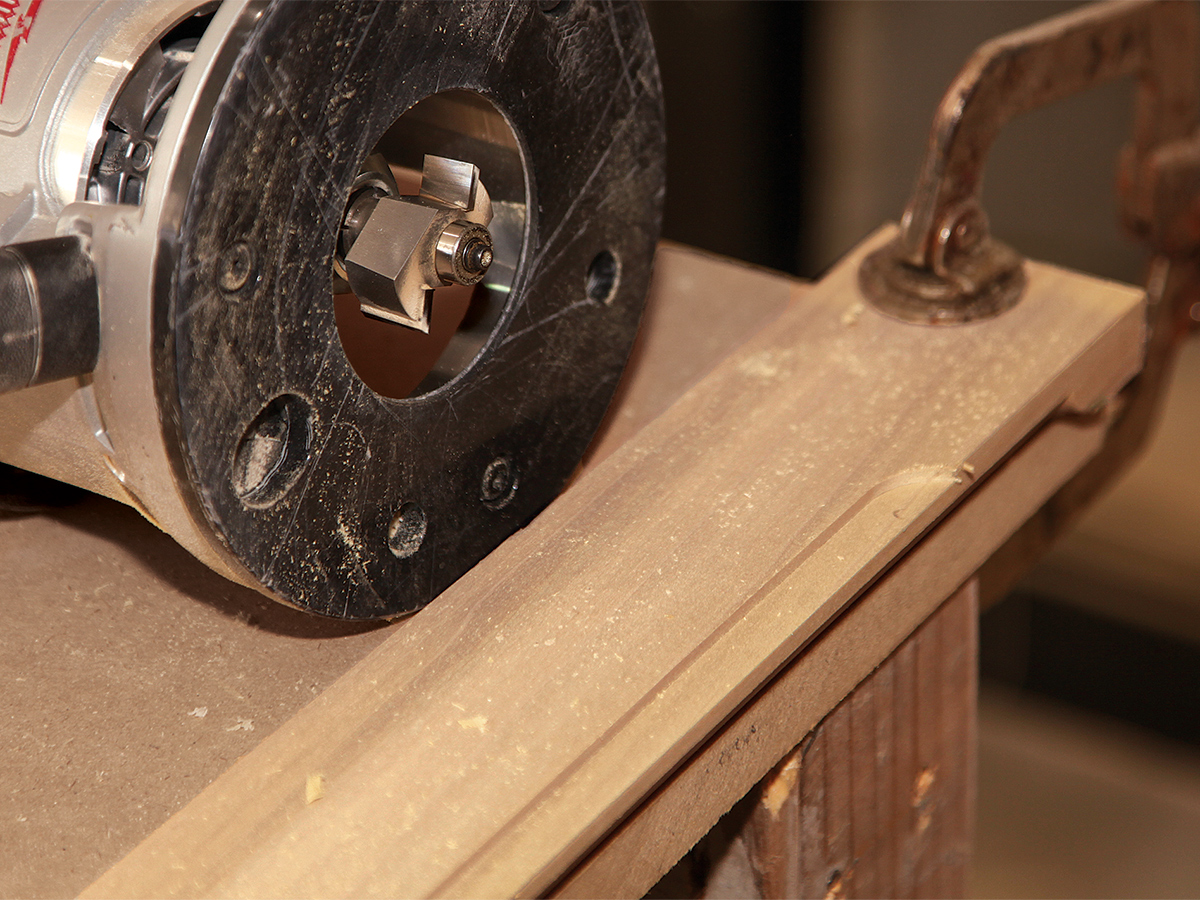
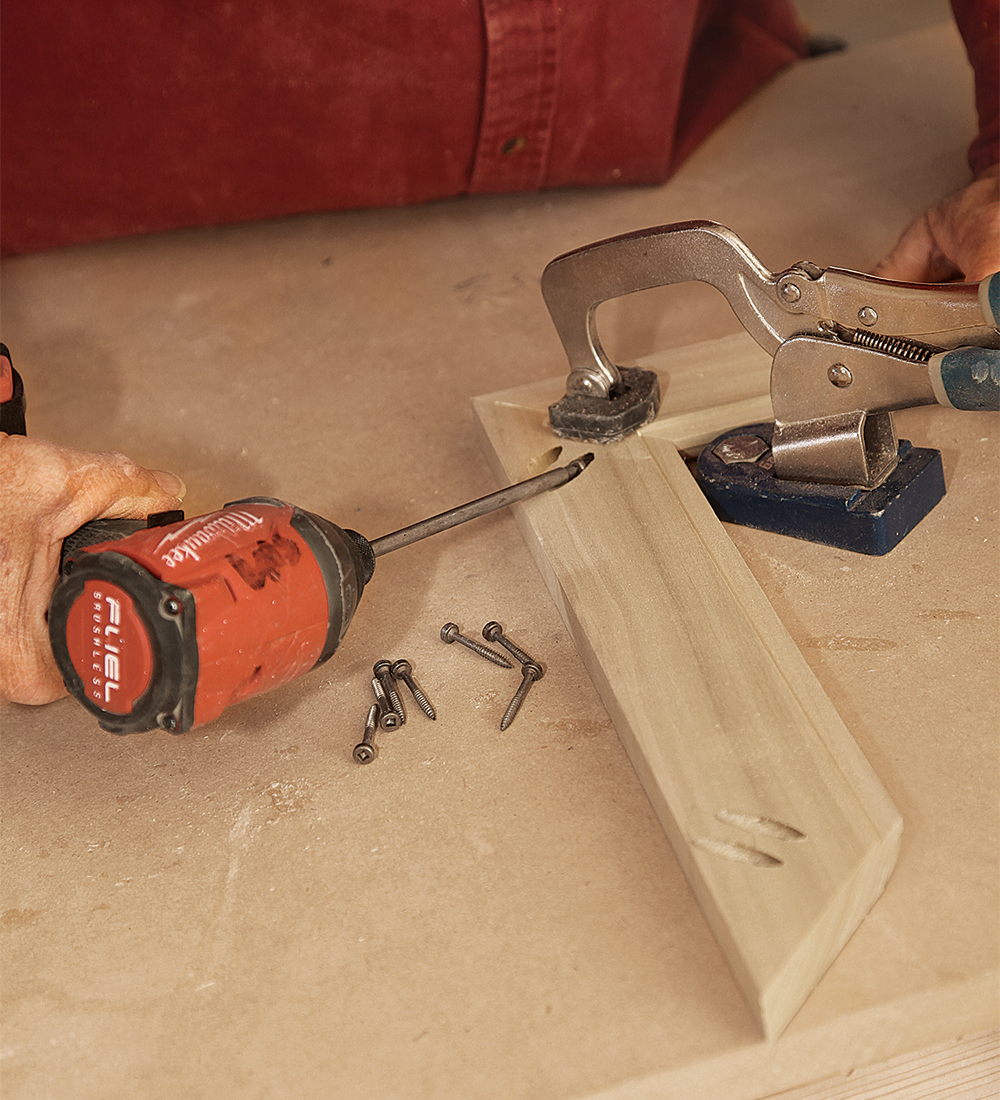
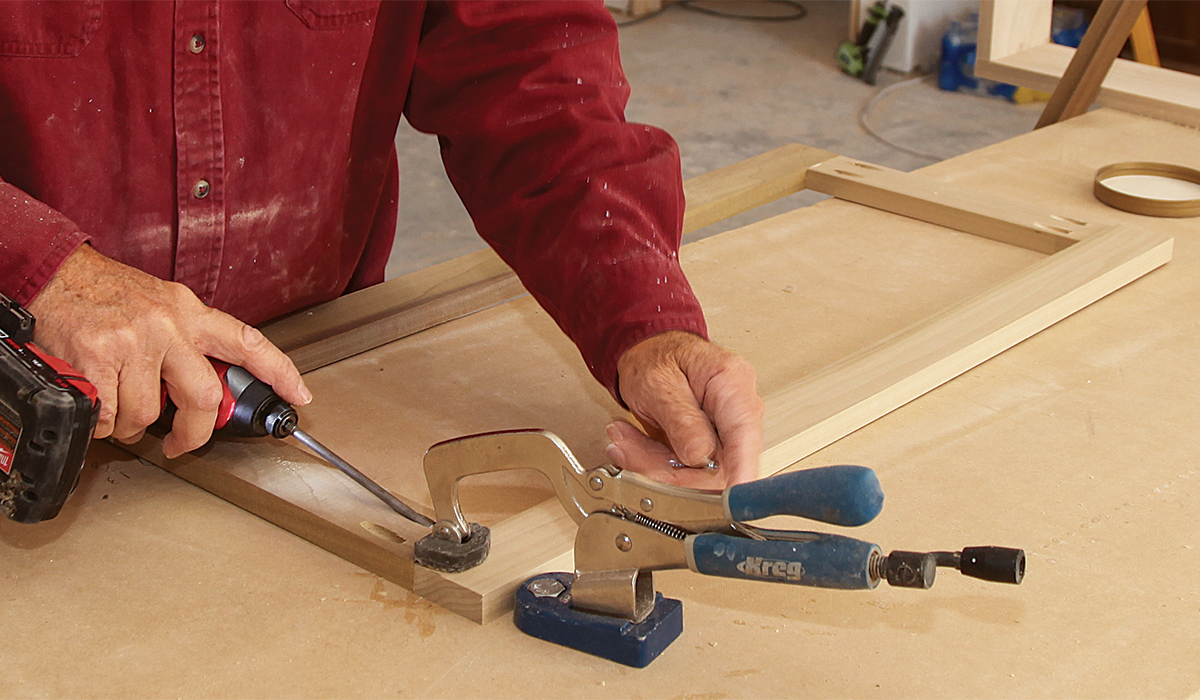
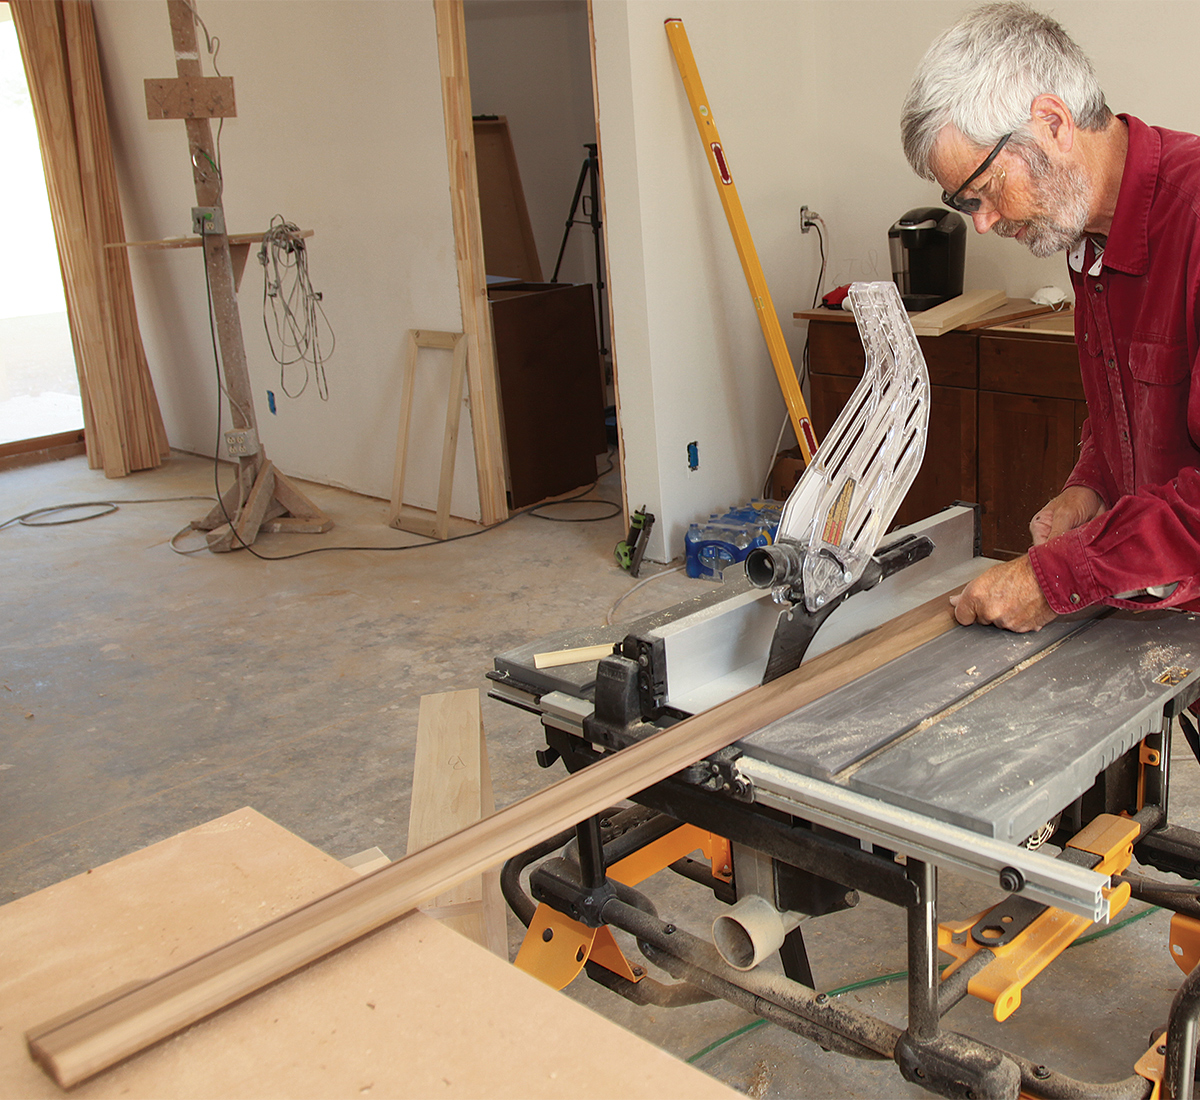
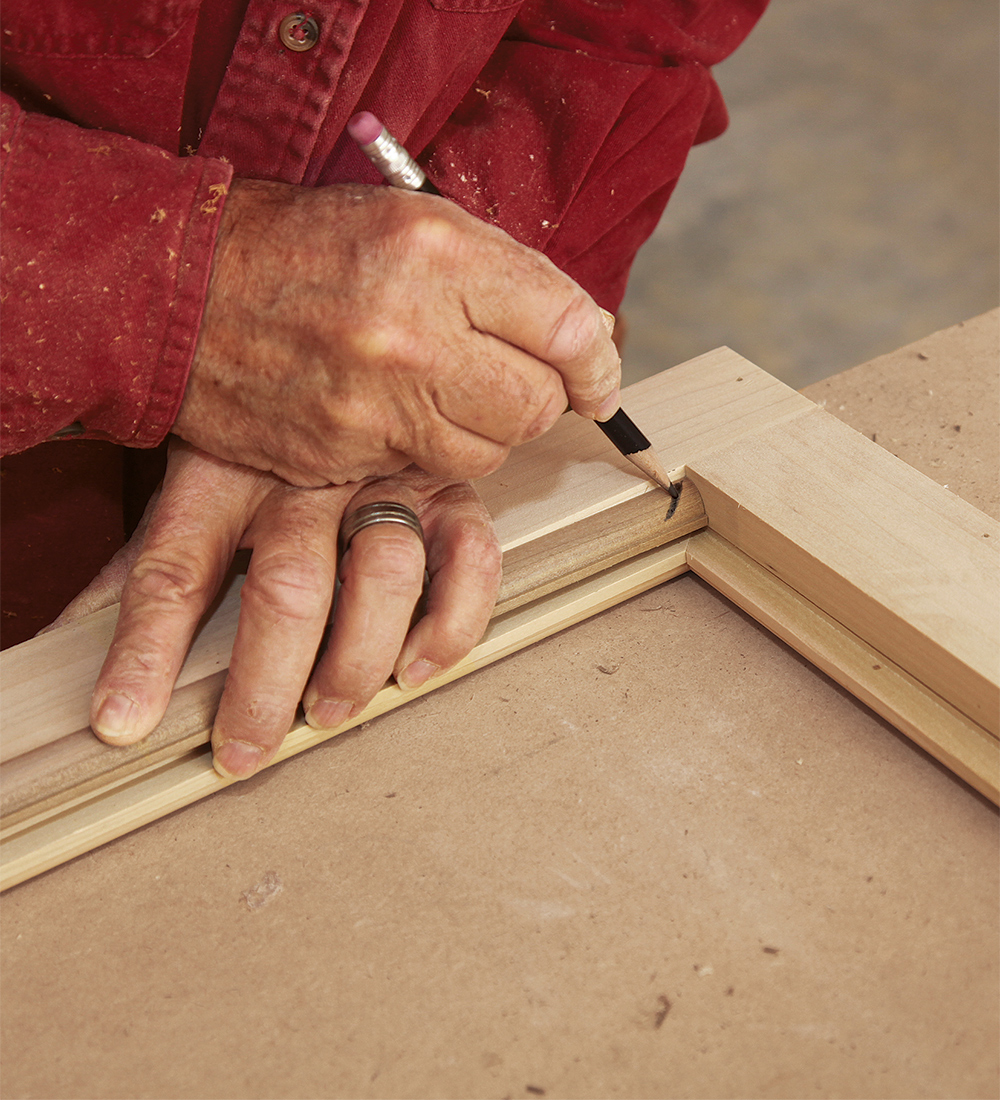
I build the transom sash out of two 3/4-in.-thick poplar frames that fit back-to-back inside the transom jamb. The first frame, which is for the outside (the most visible side) of the transom, has mitered corners. To build the frame, I rip the sash stock slightly wide, then run it through the planer to remove sawblade marks and to dial in the precise width. I also rout a decorative quarter-round profile along one edge of the stock for the money side of the sash, with a rabbet on the back side for the glass. I cut the frame pieces 1/8 in. shorter than the inside measurements of the jamb to give the sash plenty of room. Any gaps will be covered by panel molding that acts as a sash stop when the sash is installed.

illustration of a two-sided transom
A two-sided transom. Made to look like a vintage architectural feature, a glass transom is easy to build with basic tools. The jamb and sash are made from 1x poplar stock, with the sash made in two halves: the outside (more visible) half, and the inside or back half. The rest is done with routed profiles and applied moldings. Drawing: George Retseck

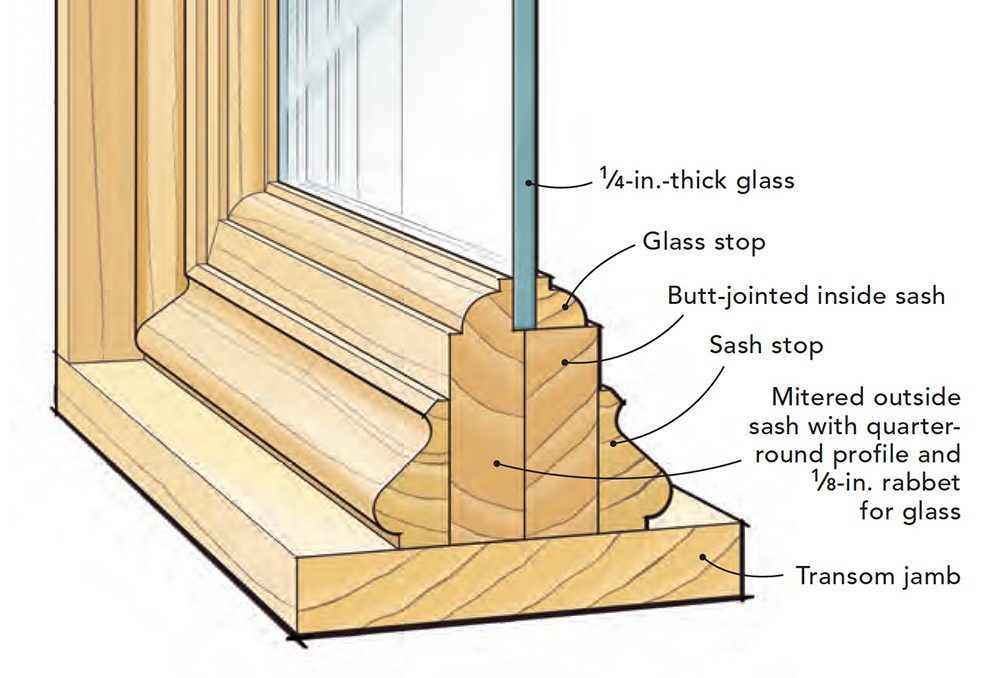
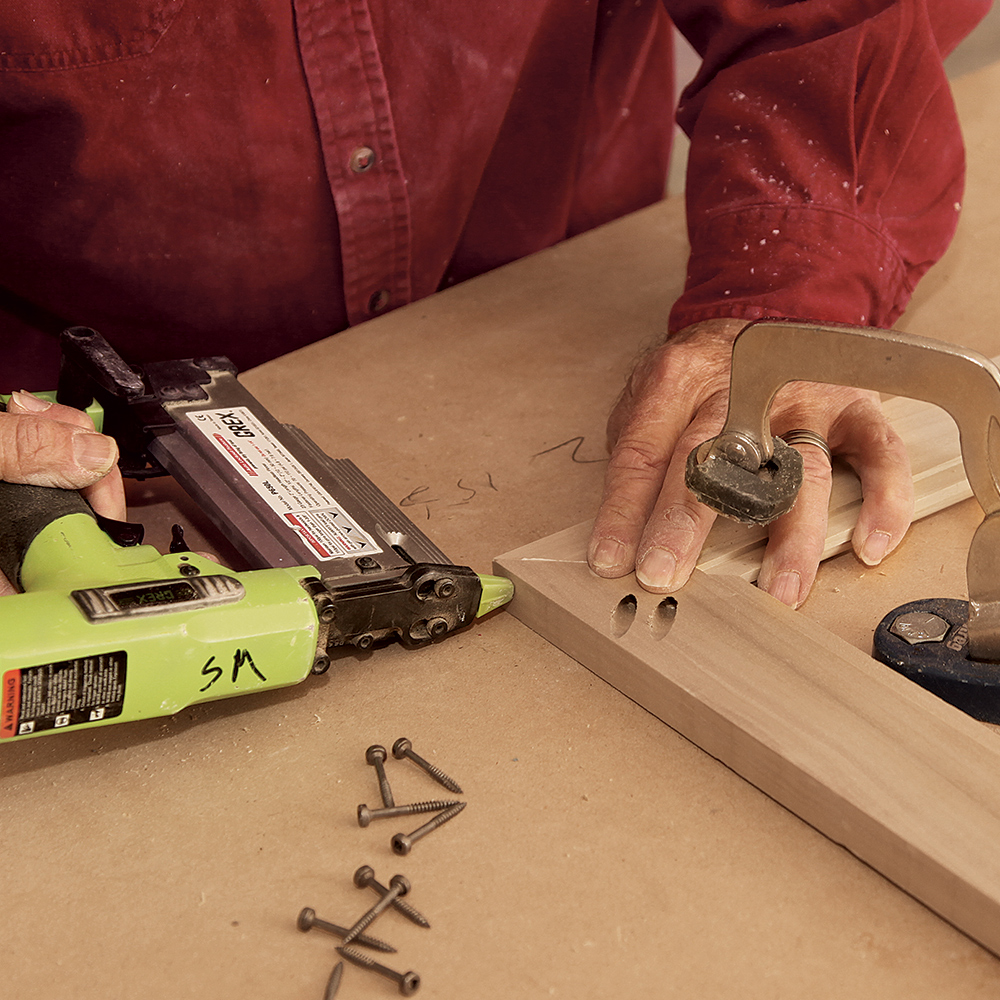
For the second frame (for the less visible side), I plane the material narrower than for the first frame so that the inside edge of the frame lines up with the shoulder of the rabbet in my first frame. That leaves space for the glass (which I get through my local glass supplier) and stop. To complete the sash, I make the glass stop using the same router bit that I used on the inside edge of the first frame. The glass and stop are not permanently installed until the painting contractor is finished, so I tack each piece in place temporarily with a single headless pin. It’s important to stain or paint the frame edge that the glass sits against, plus the back edge of the glass stop so that no raw wood is visible through the glass.

running poplar through a planer
Fast saw-mark cleanup. Rip 1×6 poplar to 2-5/8 in., then run the material on edge through a planer to get rid of sawblade marks.
Routing a quarter-round thumbnail profile
Routed embellishment. Clamp the sash stock securely to the work surface, leaving the stock long enough for the router to avoid bumping into the clamps at each end. Rout a 3/8-in.-radius quarter-round thumbnail profile along the inside front edge of the outside sash stock.
routing a rabbet that will keep the glass centered
Rabbet holds the glass. On the back of the outside sash opposite the routed profile, rout a 1/8-in.-deep rabbet that will keep the 1/4-in.-thick glass centered in the sash. Once the profile and rabbet have been routed, trim the sash stock on the miter saw to final length.
making sure pieces are the same length
Tight miter secret. To get tight mitered joints, you have to cut the height and width pieces accurately. After cutting the miter angles on each pair, line up the long edges side by side to make sure they are exactly the same length.
driving headless pins to keep corners aligned
Pocket-screw assembly. Drill pocket-screw holes in the shorter vertical pieces.
securing the corners with pocket screws
Drive headless pins to keep the corners aligned, then secure the corners with pocket screws.
assembling frame for the back side of sash
Butt joints for the back side. The frame for the back side is planed to 2 in., which leaves space for the glass between the frames. Butt joints are an easier way to build the back half of the sash, but pocket screws still make the strongest joints.
join the front and back sides of the sash
Two sides meet. When both the front and back sides of the sash are complete, join the two with glue and brads.
 ripping the stock to create glass stop
Mill the glass stops. Using the same router bit as you used on the outside sash, with the cutting depth set so that the profile has only one shoulder, rout the profile on the edge of 1/2-in.-thick stock. Then rip the stock to 1/2 in. square to create the stop.
mark the angle of glass stop cut
Take the guesswork out of cutting angles. To avoid confusion when cutting the glass stop, set the stop in place in the sash frame and mark the angle of the cut.
tack each length of stop in place with a headless pin
Temporary home for the stops. The glass stop is not installed for good until the painter is finished, so tack each length of stop in place with a headless pin. When the glass is in place and the stop is installed, the stop will leave a 1/8-in. shoulder to match the profile on the other side.

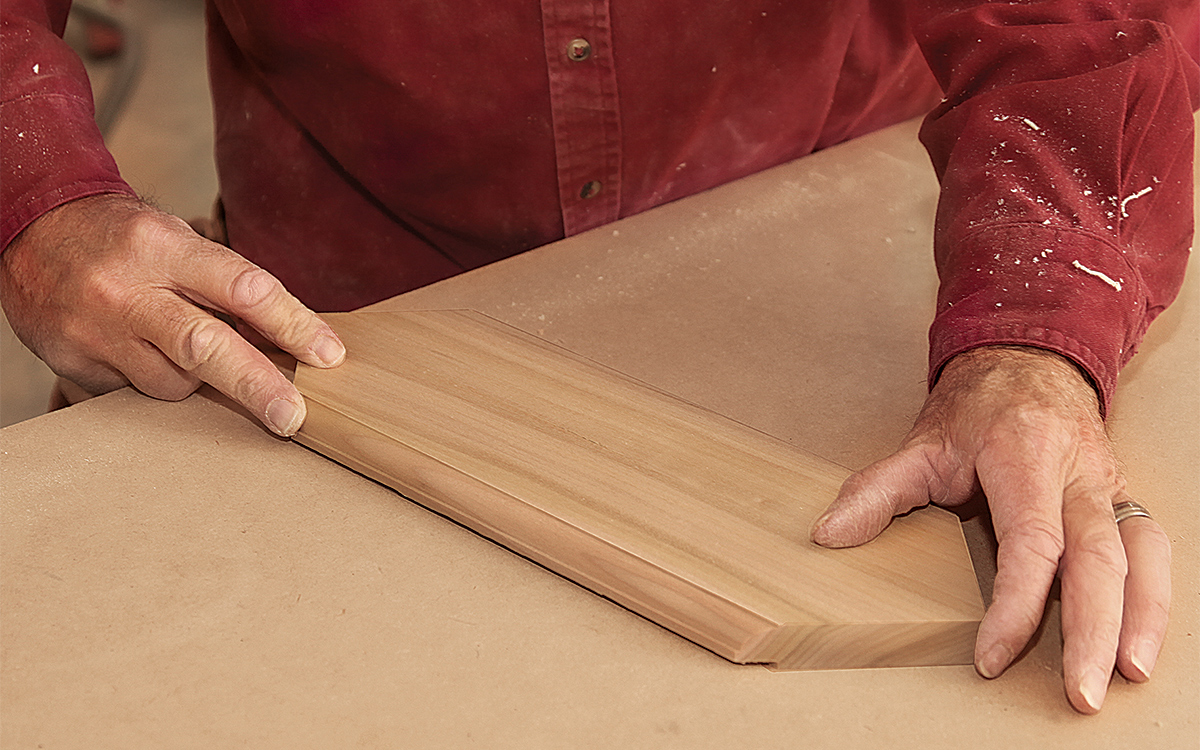
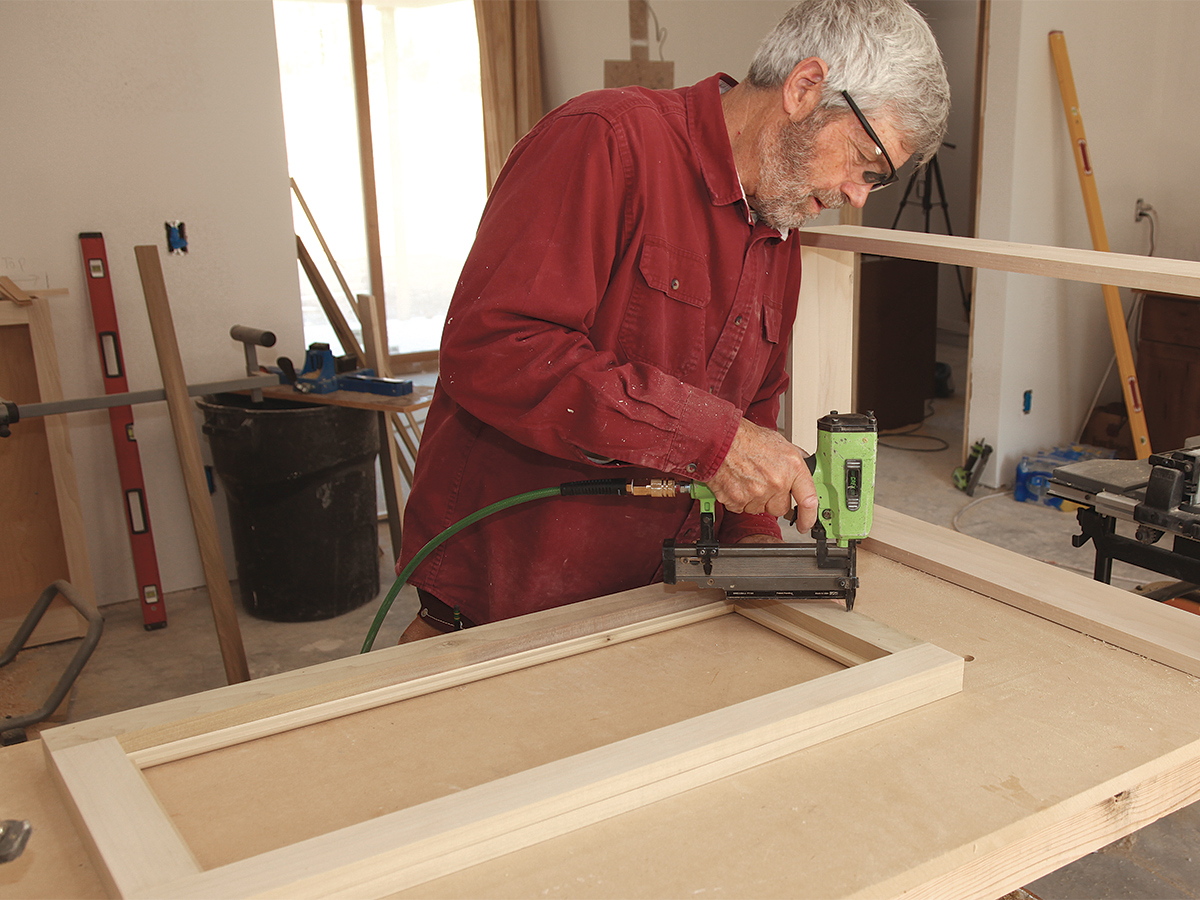
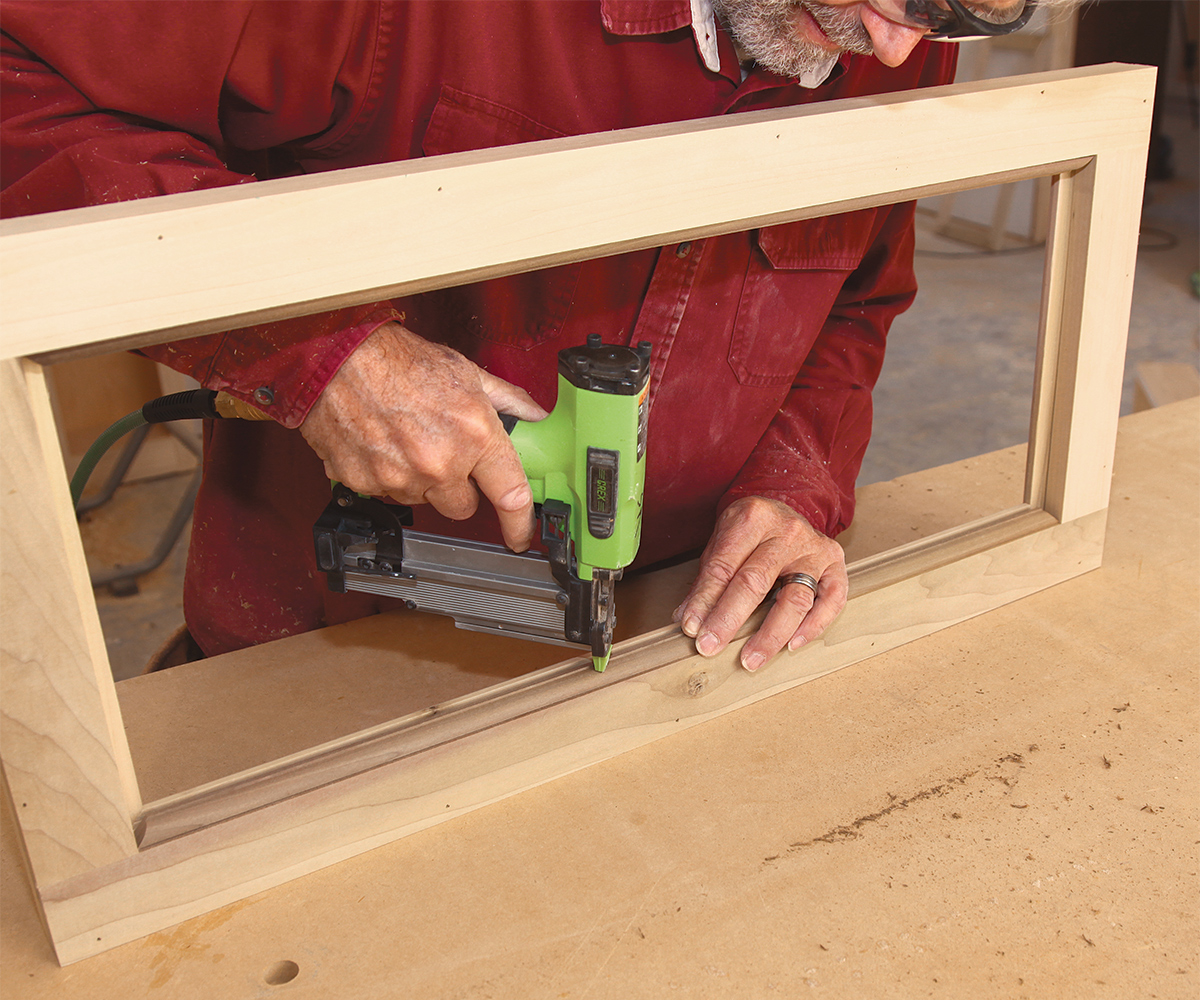
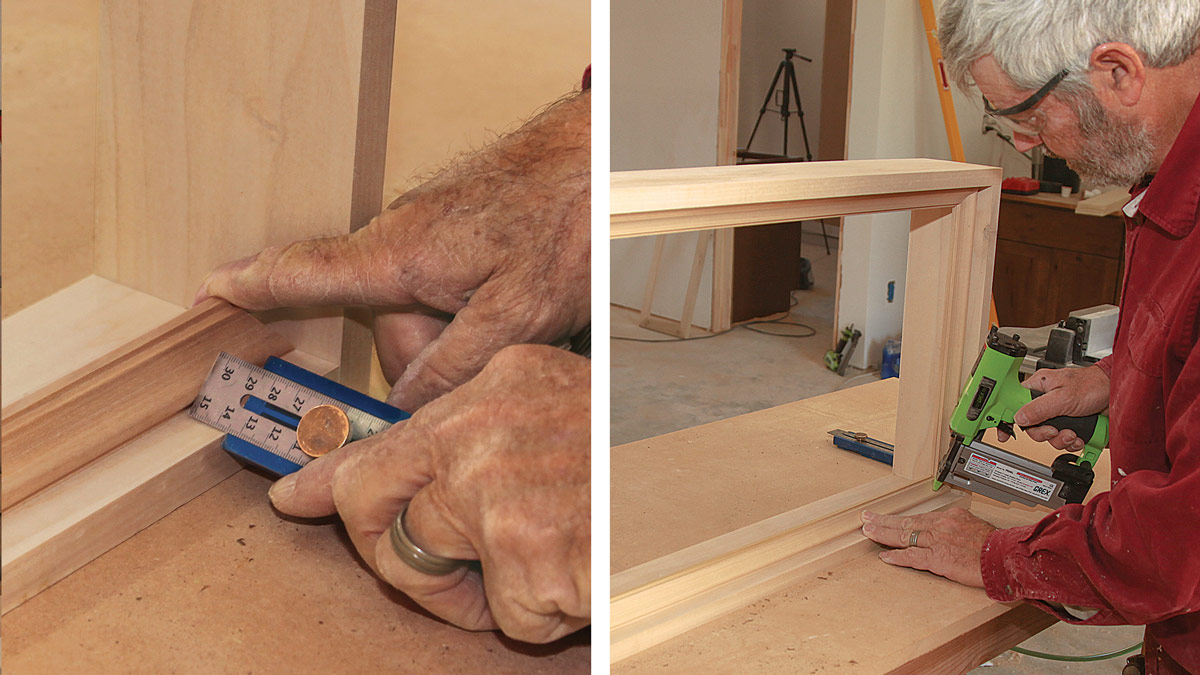
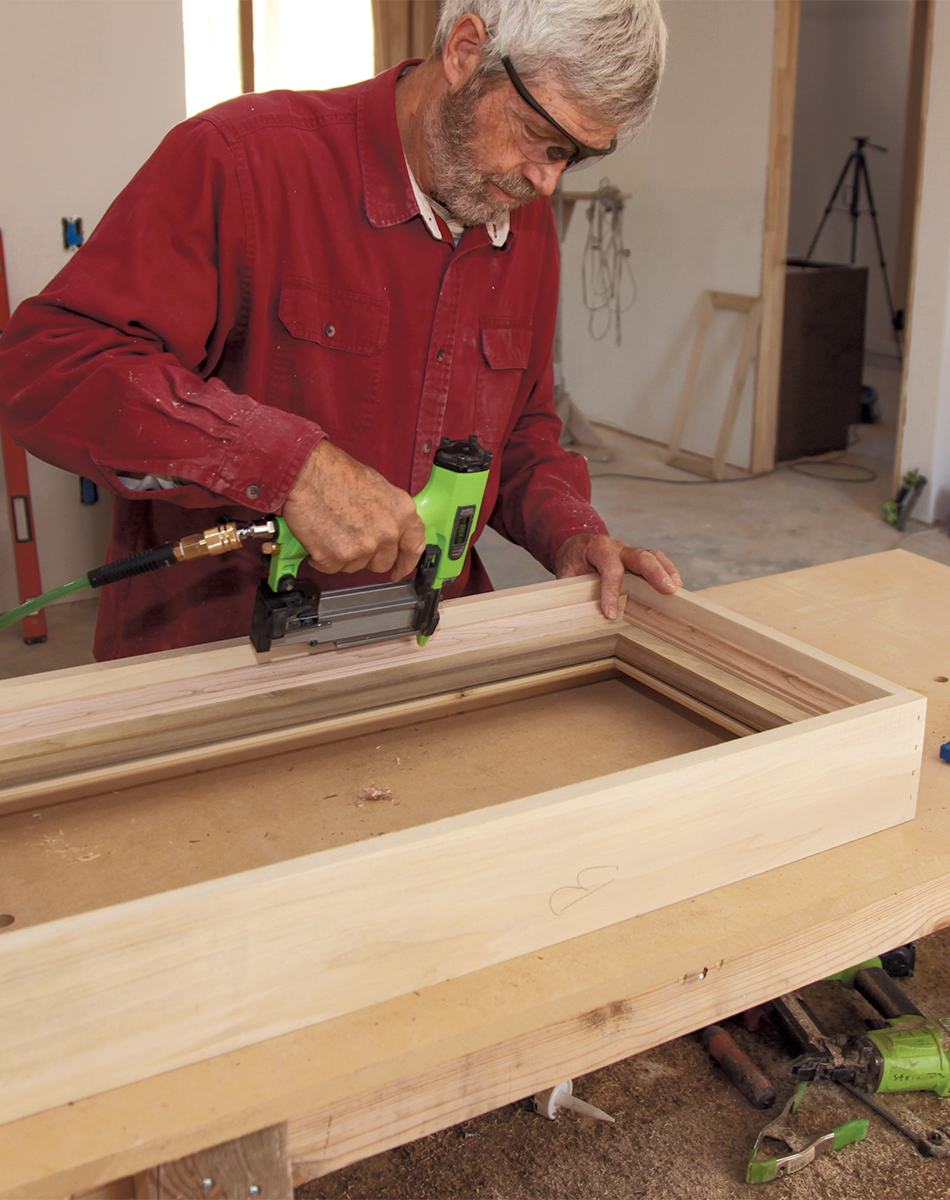
Fit the sash in the jamb

It’s easiest to fit the transom sash inside the jamb and then install the unit as a whole above the door. As mentioned, I use panel molding to hide the gap between the sash and the jamb, and that molding acts as a stop for the sash. Just about any base-cap molding will work for this application. As an alternative, you can make your own stop molding with a router.
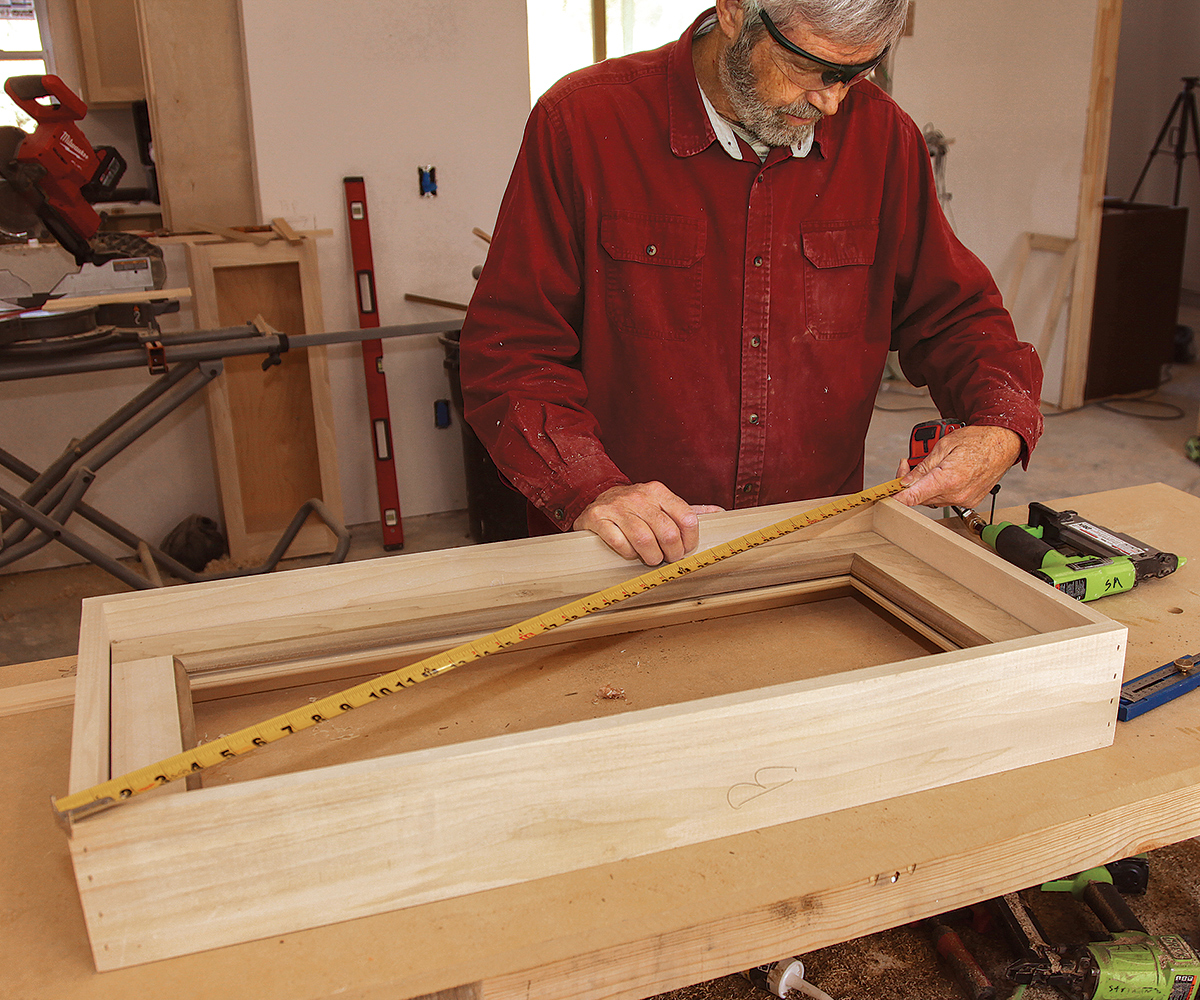
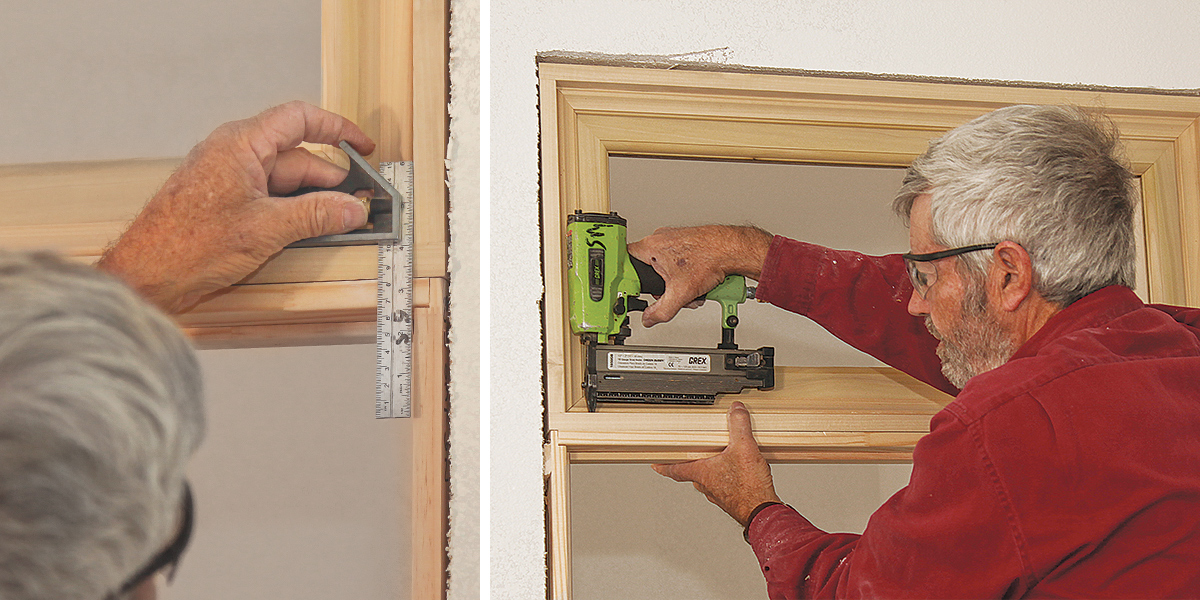
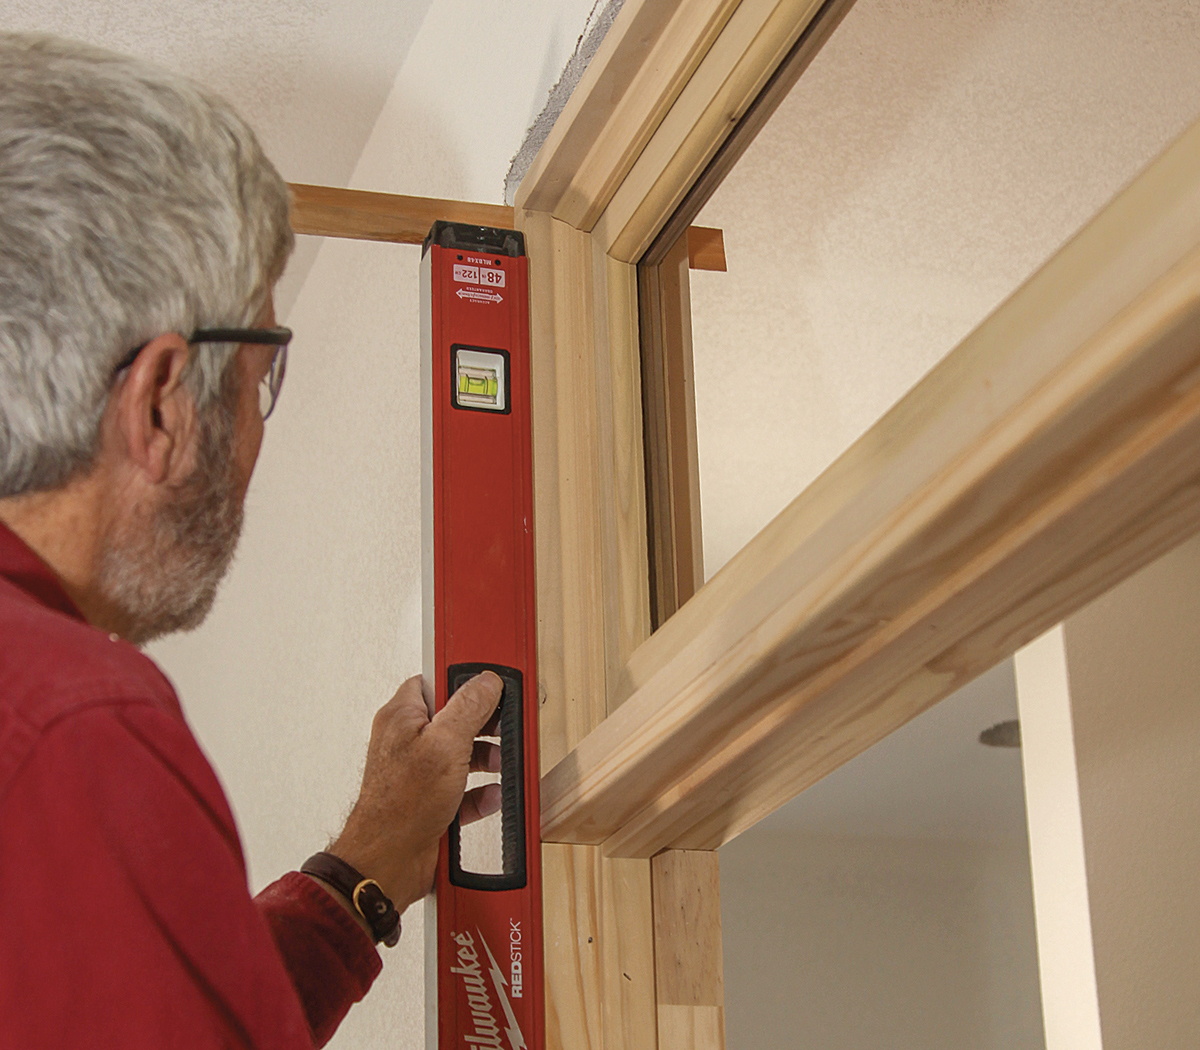
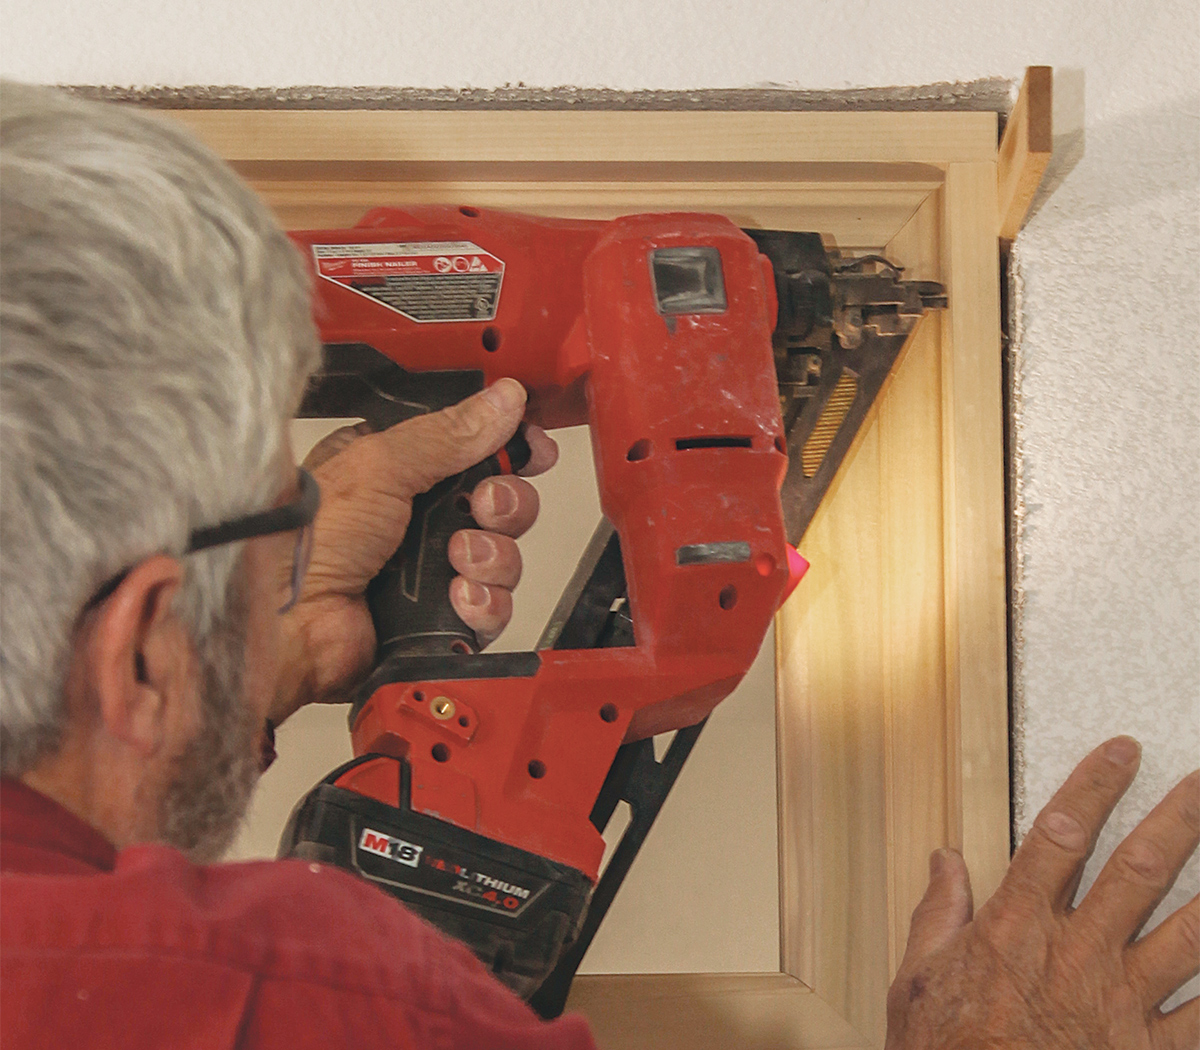
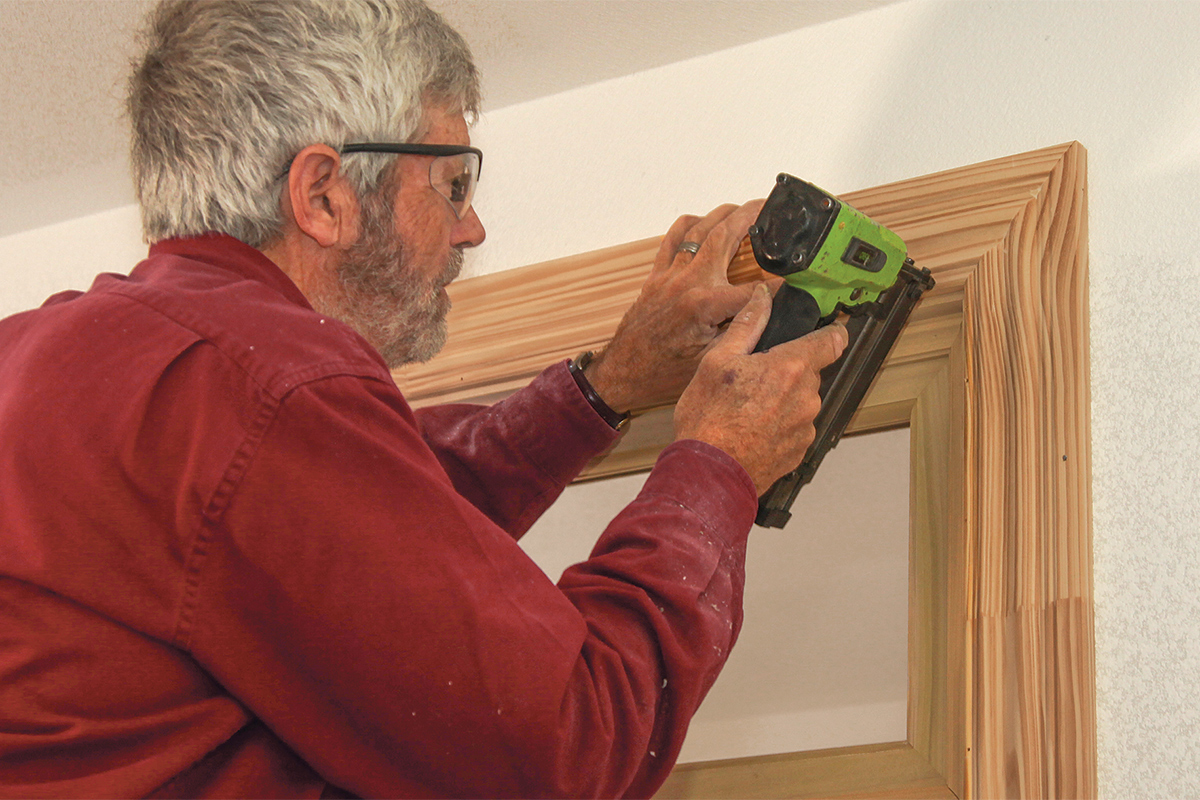
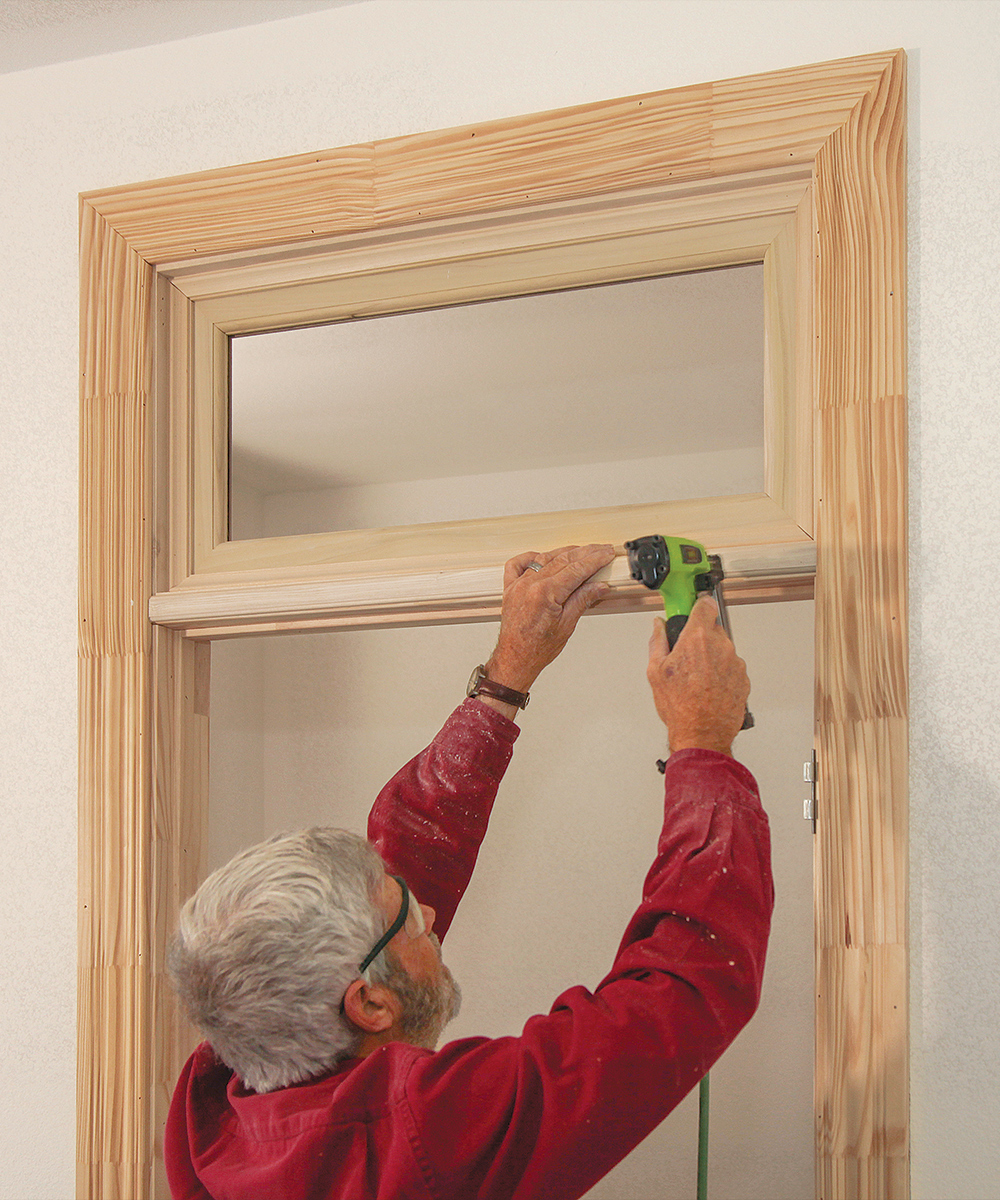
center the transom sash in the jamb
Stop centers the sash. To center the transom sash in the jamb, nail the sash stop molding 3/4 in. from the edge of the jamb.
measuring diagonally to confirm that the jamb is square
Square the jamb. Place the sash in the jamb on top of the installed sash stop. Before nailing the sash to the jamb, measure diagonally in both directions to confirm that the jamb is square. Then drive finish nails through the jamb and into the sash to hold it in place.
drive finish nails through the jamb and into the sash to hold it in place
Second stop holds the sash. Square the jamb and tack the sash in place.
permanently secure the sash in the jamb
Apply the inside bead of sash stop to permanently secure the sash in the jamb.

Install the transom

The most critical part of setting the transom is lining it up with the door jamb below so there’s a seamless transition to the transom jamb. I use a small square to align the side jambs and a long level to align the transom with the wall, making sure that it sits in plane with the door jamb. After the transom is installed, I finish by adding the door trim, which is just like trimming a tall door. The only catch is the horizontal mullion joint between the transom jamb and door jamb. I measure the width of the combined jambs and subtract a bit for a reveal on either side. After ripping the stock to the proper width, I plane down the thickness to match the inside edge of the door trim. I rout a simple bead along both edges of the mullion trim, cut it to length, and nail it in place to complete the installation.

line up the inside surfaces of the side jambs and lock the two together
Marry the jambs. To make the transom look continuous above the door, line up the inside surfaces of the side jambs with a small try square. When the transom jamb is perfectly aligned with the door jamb below, drive brad nails from above to lock the two together.
checking transom jamb and door jamb are level
Plumb positioning. A long level placed against the door jamb and transom jamb confirms that they are in the same plane. The level also aligns the transom jamb with the surrounding wall.
nailing the rough-opening frame with nails
Shim and nail. After positioning the transom assembly and lining it up with the door below, insert shims to lock the transom in place, and nail it to the rough-opening frame with 15-ga. nails.
applying trimming from floor to top of transom
Finish with trim. Apply the door casing as if trimming out a tall door, letting the molding extend from the floor to the top of the transom.
adding mullion molding to cover connection between door jamb and transom jamb
Hide the joint. A simple site-made mullion molding covers the connection between the door jamb and the transom jamb.

Frequent Fine Homebuilding contributor Gary Striegler owns Craftsman Builders, a Fayetteville, Ark., company specializing in millwork and interior details. Photos by Roe Osborn.

From Fine Homebuilding #316


RELATED STORIES

  • Building Big Doors, On Site
  • Hot to Cut a Prehung Exterior Door to a Custom Height
  • Step-by-Step Install Prehung Exterior Doors

Sign up for eletters today and get the latest how-to from Fine Homebuilding, plus special offers.

Signing you up...

This site is protected by reCAPTCHA and the Google Privacy Policy and Terms of Service apply.
See all newsletters
See all newsletters
View PDF
Previous: No-Trim Door Jambs Next: How to Mortise Hinges With a Chisel

Guide

Windows & Doors

Chapter

Door Basics

Log in or create an account to post a comment.

Sign up Log in

Become a member and get full access to FineHomebuilding.com

Windows & Doors

Windows & Doors

Trusted, comprehensive guidance from the pros for choosing, installing, replacing, and repairing windows and doors on any house

View Project Guide

View All Project Guides »

Become a member and get unlimited site access, including the Windows & Doors Project Guide.

Start Free Trial

Choosing Windows
  • Window Types
  • Design and Materials
  • Energy-Efficient Windows
Installing Windows In New Walls
  • Installation, Start to Finish
  • Head Flashing for Windows
  • Video Series: Nail-Fin Window over Zip System Sheathing
  • Video Series: Nail-Fin Window over Exterior Rigid-Foam Insulation
  • Video Series: Nail-Fin Window over Housewrap
  • Video Series: Nail-Fin Window over Peel-and-Stick Housewrap
  • Video Series: Nail-Fin Window over a Fluid-Applied WRB
  • Video Series: Weatherproof Window Installation
Retrofitting Windows
  • Removing the Old, Installing the New
  • Video Series: How to Replace a Window
  • Video Series: Install a Full-Frame Replacement Window in a Brick Wall
  • Video Series: Install an Insert Replacement Window in a Brick Wall
  • Video Series: Retrofit a Flanged Window
Window Repairs
  • Restoring Old Windows
  • Repairs and Upgrades
Door Basics
  • Tools & Jigs for Door Hanging
  • How to Install Doors
  • Hinges
  • Handles, Knobs, and Locksets
  • Fixing Door Problems
Interior Doors
  • Prehung Doors
  • Pocket Doors
  • Other Types of Doors
  • Custom-Built Doors
Exterior Doors
  • Door Choices and Design
  • Installing Entry Doors
  • Building Exterior Doors
  • Installing French Doors
  • Replacing a Door
  • Adding Weatherstripping and Sweeps

Fine Home Building

Newsletter Sign-up

  • Fine Homebuilding

    Home building tips, offers, and expert advice in your inbox.

  • Green Building Advisor

    Building science and energy efficiency advice, plus special offers, in your inbox.

  • Old House Journal

    Repair, renovation, and restoration tips, plus special offers, in your inbox.

Signing you up...

This site is protected by reCAPTCHA and the Google Privacy Policy and Terms of Service apply.
See all newsletters

Follow

  • Fine Homebuilding

    Dig into cutting-edge approaches and decades of proven solutions with total access to our experts and tradespeople.

    Start Free Trial Now
    • Facebook
    • Instagram
    • X
    • LinkedIn
  • GBA Prime

    Get instant access to the latest developments in green building, research, and reports from the field.

    Start Free Trial Now
    • Facebook
    • YouTube
  • Old House Journal

    Learn how to restore, repair, update, and decorate your home.

    Subscribe Now
    • Facebook
    • Instagram
    • X

Membership & Magazine

  • Online Archive
  • Start Free Trial
  • Magazine Subscription
  • Magazine Renewal
  • Gift a Subscription
  • Customer Support
  • Privacy Preferences
  • About
  • Contact
  • Advertise
  • Careers
  • Terms of Use
  • Site Map
  • Do not sell or share my information
  • Privacy Policy
  • Accessibility
  • California Privacy Rights

© 2025 Active Interest Media. All rights reserved.

Fine Homebuilding receives a commission for items purchased through links on this site, including Amazon Associates and other affiliate advertising programs.

X
X
This is a dialog window which overlays the main content of the page. The modal window is a 'site map' of the most critical areas of the site. Pressing the Escape (ESC) button will close the modal and bring you back to where you were on the page.

Main Menu

  • How-To
  • Design
  • Tools & Materials
  • Video
  • Blogs
  • Forum
  • Project Guides
  • Reader Projects
  • Magazine
  • Members
  • FHB House

Podcasts

  • FHB Podcast
  • ProTalk

Webinars

  • Upcoming and On-Demand

Podcasts

  • FHB Podcast
  • ProTalk

Webinars

  • Upcoming and On-Demand

Popular Topics

  • Kitchens
  • Business
  • Bedrooms
  • Roofs
  • Architecture and Design
  • Green Building
  • Decks
  • Framing
  • Safety
  • Remodeling
  • Bathrooms
  • Windows
  • Tilework
  • Ceilings
  • HVAC

Magazine

  • Current Issue
  • Past Issues
  • Magazine Index
  • Subscribe
  • Online Archive
  • Author Guidelines

All Access

  • Member Home
  • Start Free Trial
  • Gift Membership

Online Learning

  • Courses
  • Project Guides
  • Reader Projects
  • Podcast

More

  • FHB Ambassadors
  • FHB House
  • Customer Support

Account

  • Log In
  • Join

Newsletter

Get home building tips, offers, and expert advice in your inbox

Signing you up...

This site is protected by reCAPTCHA and the Google Privacy Policy and Terms of Service apply.
See all newsletters
See all newsletters

Follow

  • X
  • YouTube
  • instagram
  • facebook
  • pinterest
  • Tiktok

Join All Access

Become a member and get instant access to thousands of videos, how-tos, tool reviews, and design features.

Start Your Free Trial

Subscribe

FHB Magazine

Start your subscription today and save up to 70%

Subscribe

We hope you’ve enjoyed your free articles. To keep reading, become a member today.

Get complete site access to expert advice, how-to videos, Code Check, and more, plus the print magazine.

Start your FREE trial

Already a member? Log in