
Step-by-Step Install Prehung Exterior Doors
This straightforward method focuses on water management, air infiltration, and smooth operation.
Synopsis: Door manufacturer’s installation instructions for prehung exterior doors can vary from detailed to not-so-helpful. Fine Homebuilding’s technical editor Mark Petersen goes over his straightforward installation method that will result in a door that performs at a high level and will last for decades.
I still recall helping install a new-construction door for the first time many years ago. We applied some sealant to the subfloor, centered the door in the opening, and then drove four casing nails through each side brick molding and two through the top—that’s it. We didn’t even use a level. What this process lacked in finesse it certainly made up for in speed. In my boss’s defense, helpful installation guides were often hard to find back in the day, if they existed at all.
While many manufacturers have gotten better at informing and training installers, there’s still plenty of room for improvement. I recently completed a job where, due to supply-chain challenges, there were three different brands of exterior doors on the same project. I was amazed at how the manufacturer’s installation instructions varied from pretty good to completely incomprehensible. I’m not sure how long that first door I helped install lasted or how well it worked, but I’m confident that any door installed using the installation method I’ve put together in this article will perform at a high level, last for decades, and all but eliminate the fear of a callback. And no step of this installation requires any fasteners in the brick molding.
Prepare the rough opening
It requires more space to install a door into a cockeyed opening. So, when you measure the size of the rough opening to make sure it’s big enough, check that it’s relatively level, plumb, and square. If it’s not, you may need to shave off parts of the framing with a reciprocating saw. A rigid sill pan shrinks the opening 1/8 in. on both sides, so you may need to add 1/4 in. to accommodate the pan.
Cut open the WRB
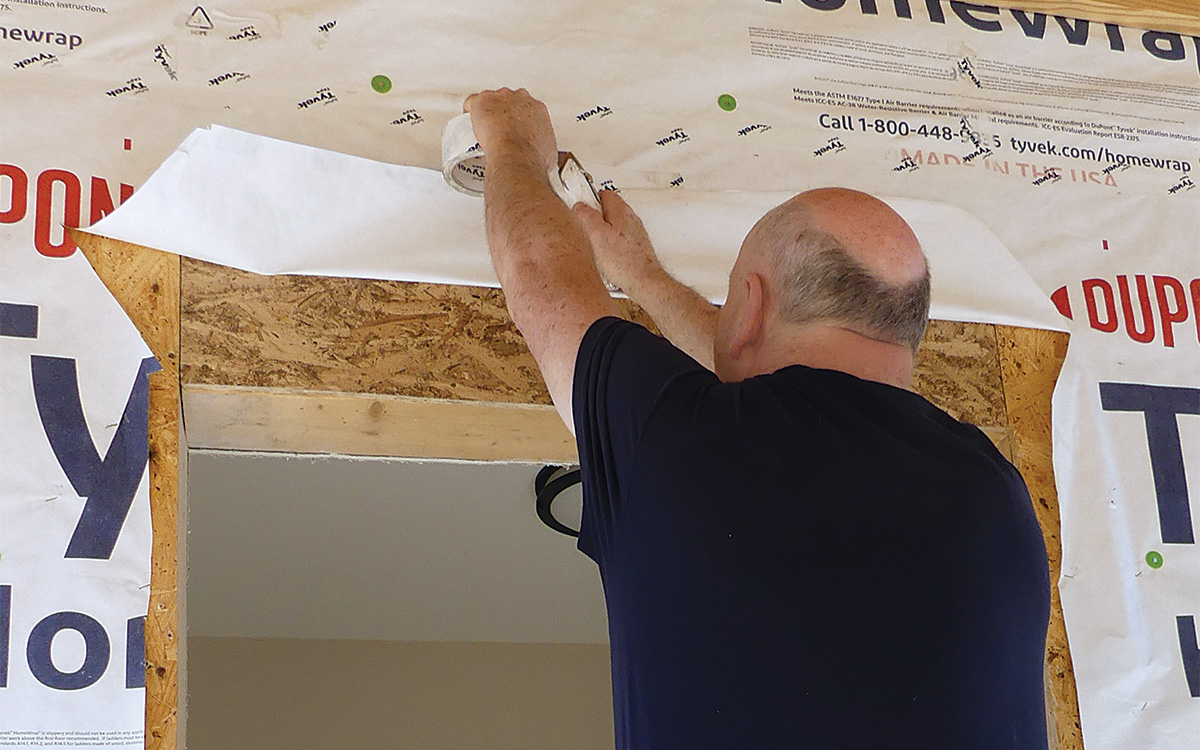
Cut the water-resistive barrier (WRB) flush at the bottom of the opening and leave about an inch of sheathing exposed at the sides and top. Cut up and away from the top corners about 6 in. and tape the flap up out of the way.
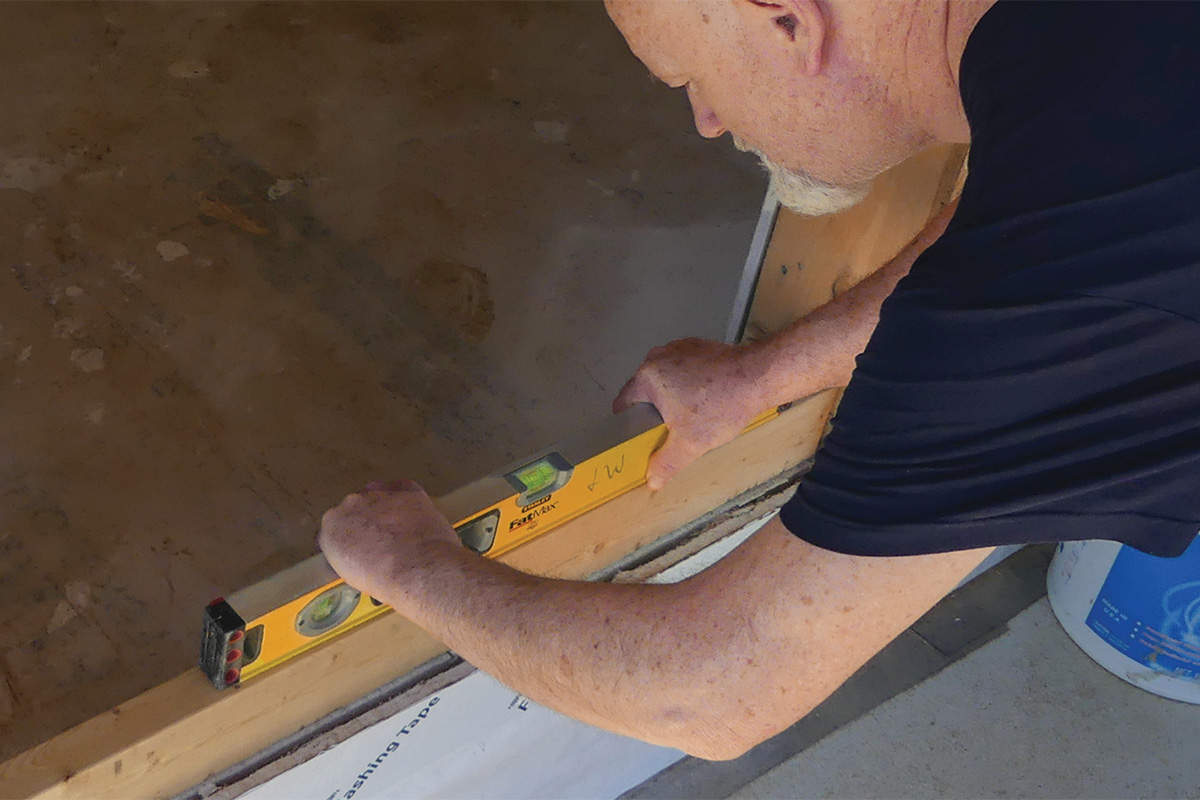
Level the subfloor
 |
 |
Starting with a flat, level surface may be the most important step in any successful door installation. The strike side of this opening needed to be raised about 3/16 in. Laying down strips of self-adhering membrane is a fast, simple, and effective way to straighten and level a subfloor. I started by installing a 16-in. strip away from the low corner. I then added another strip half that size, with another smaller strip on top of that one.
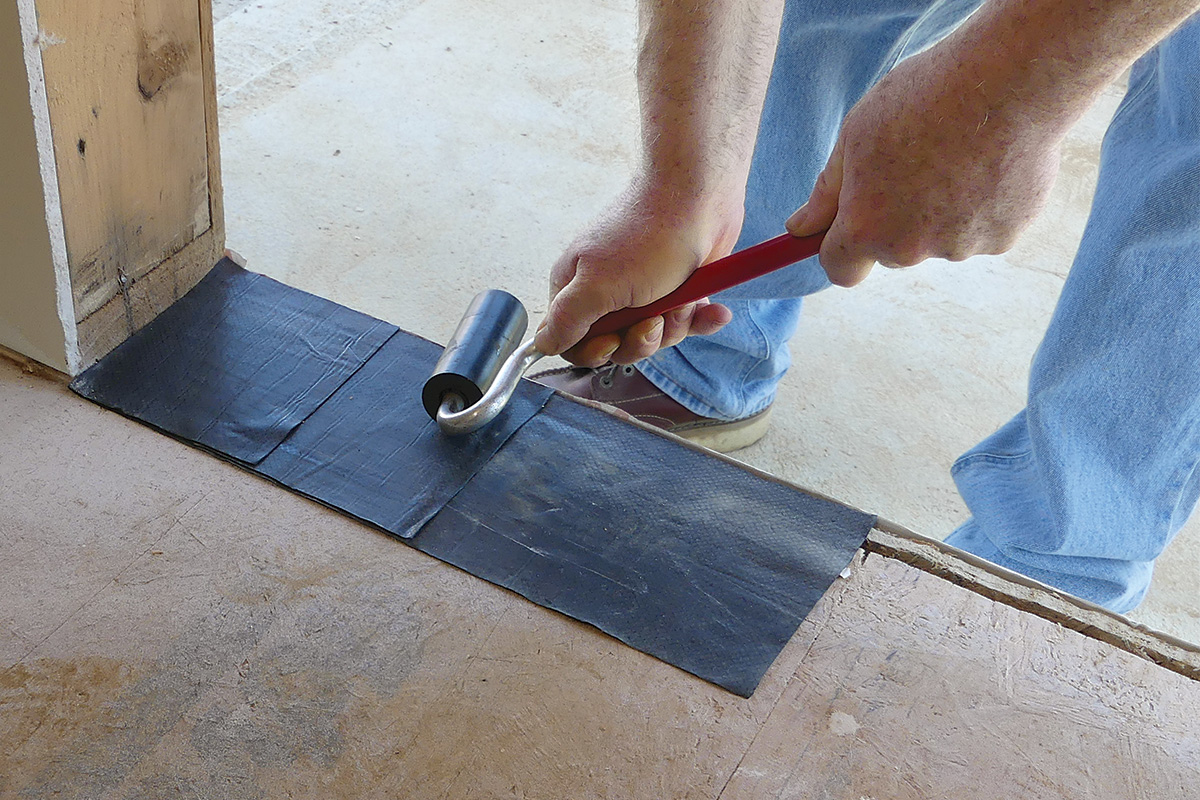
Install the flashing
A sill pan made from flashing tape is an effective way to protect the sill, but with this Therma-Tru door, the manufacturer offers a more comprehensive warranty if the door is set on their proprietary rigid flashing. Choose a window and door sealant rated for both exterior and indoor use. While most of the sealant will be isolated to the exterior side of the home, the sealant between the backdam of the pan and the sill is technically indoors.
1. Flash the sill
Install the sill flashing tight to the subfloor and wall sheathing and adhere it to the WRB with flashing tape and a roller. All sealants and tapes must be compatible with the WRB you’re working with—here both the WRB and flashing tapes are DuPont products.
2. Caulk under the pan flashing
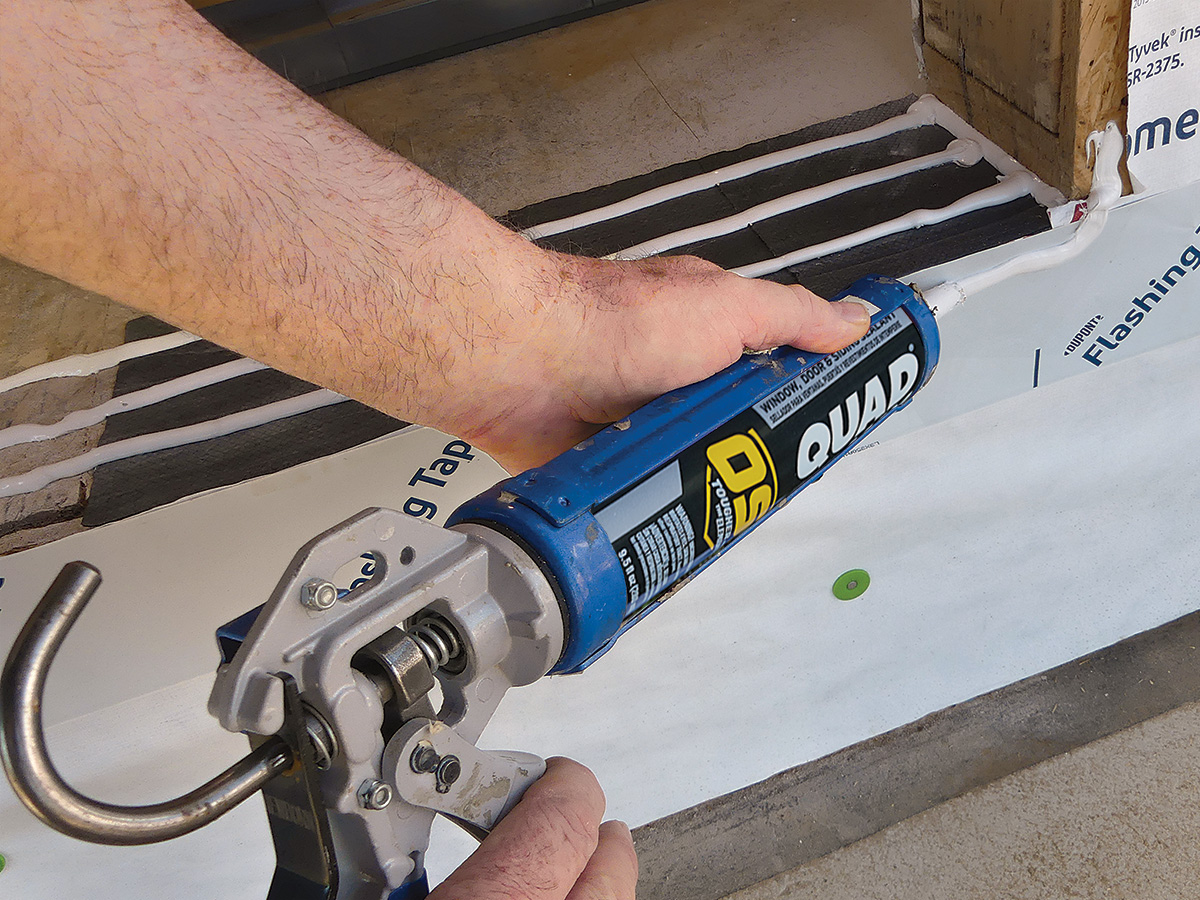
This rigid flashing requires three continuous beads of sealant on the subfloor, a bead along the bottom plates, and one bead along the face of the sheathing and up the corners a bit.
3. Glue the pan flashing
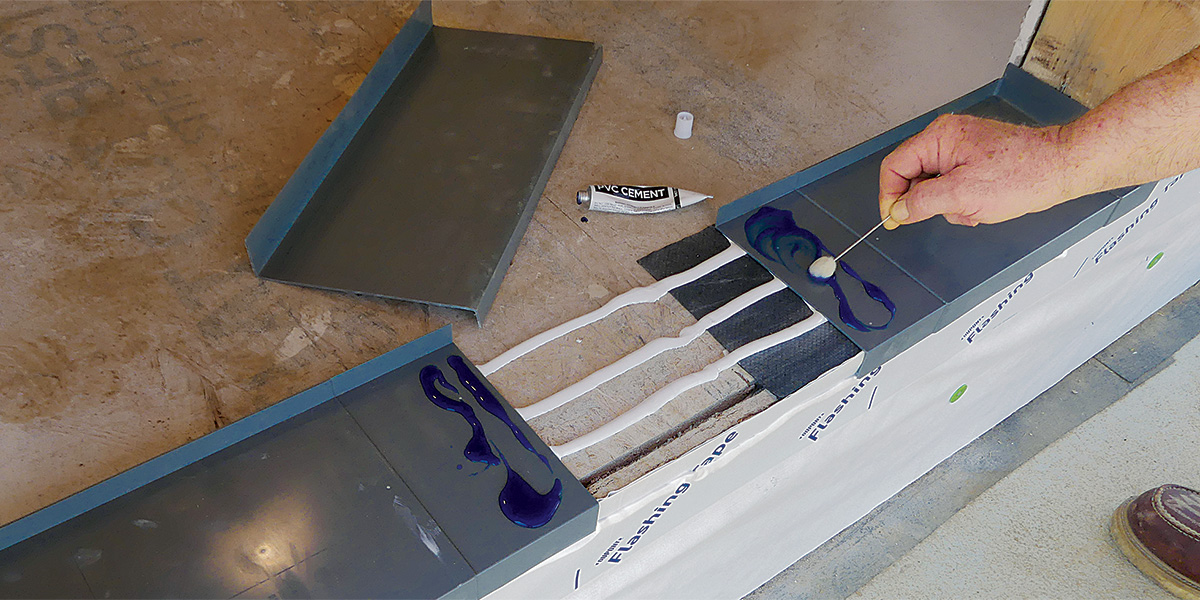
After the two outside sections of the flashing are in place, glue the middle section down with PVC cement, which in this case was included with the pan-flashing kit.
4. Seal the pan flashing
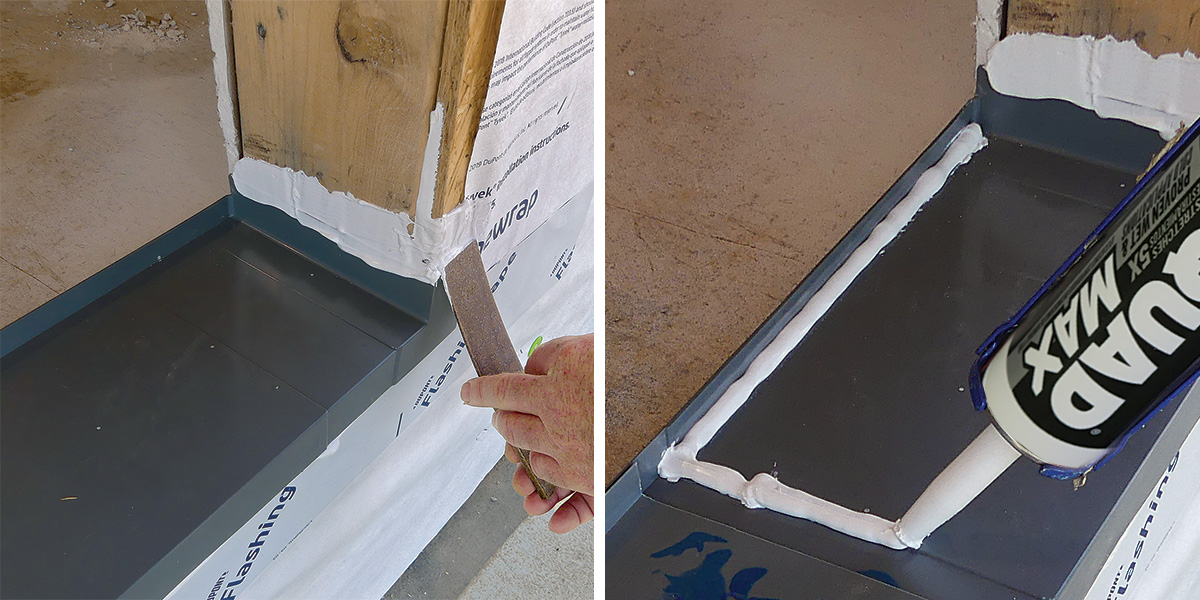
Caulk along the back edge of the backdam, the top edge on the sides, and the two seams in the middle of the pan. Smooth out the caulk on the sides and middle with a putty knife.
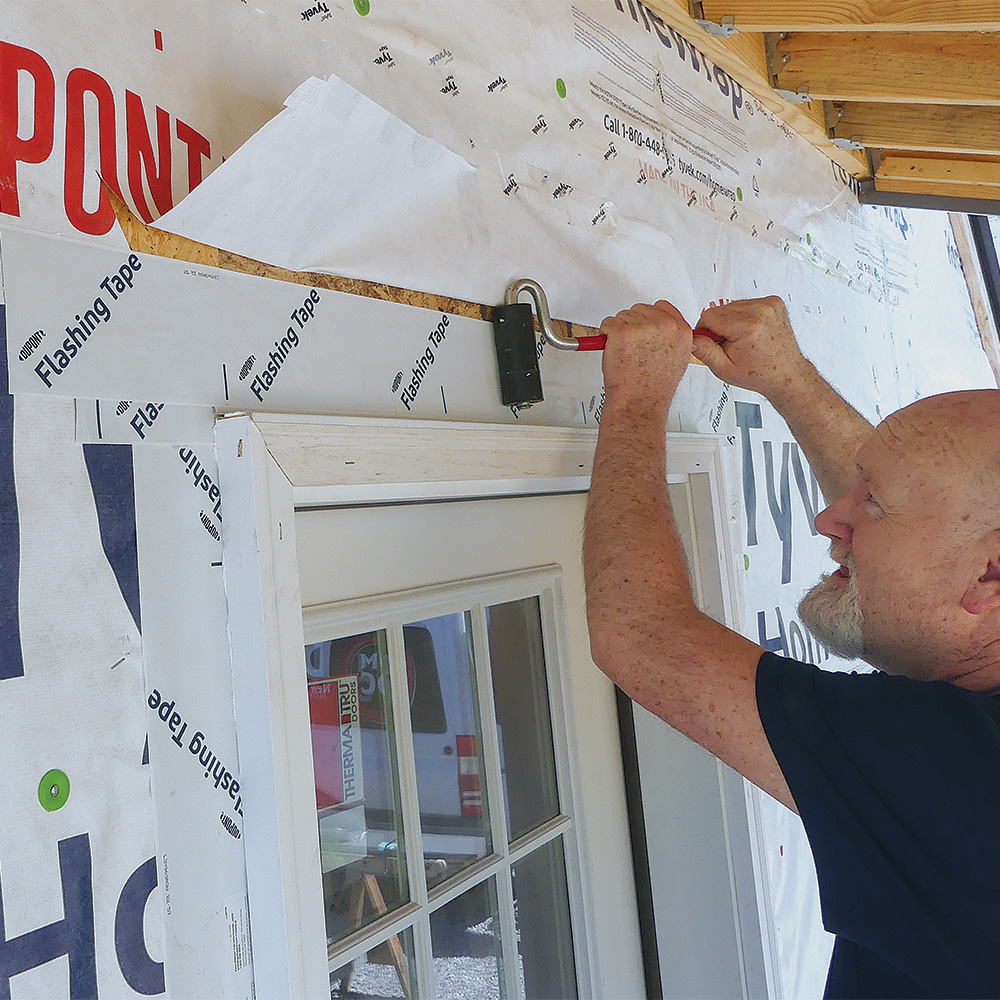
5. Finish the flashing
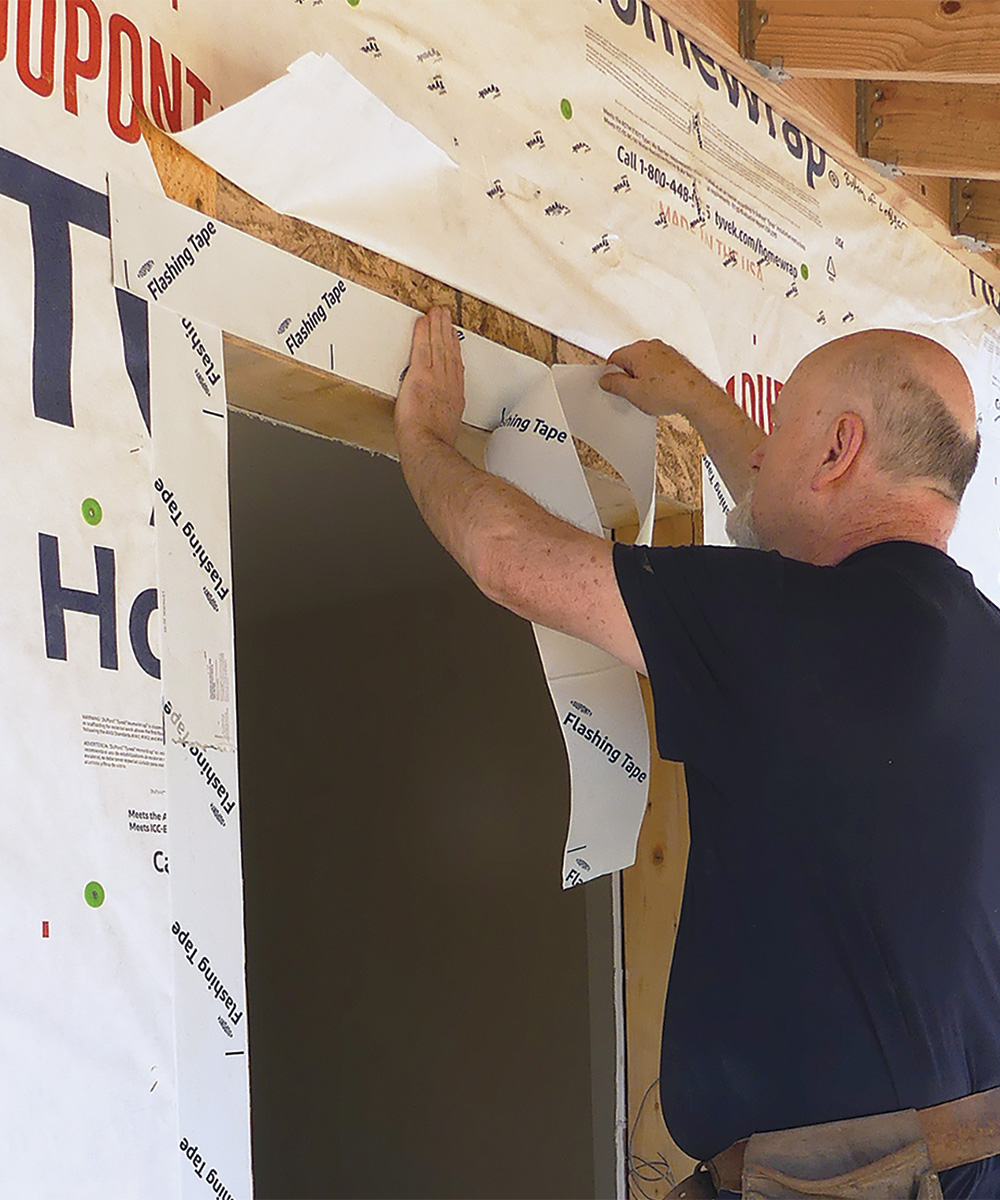
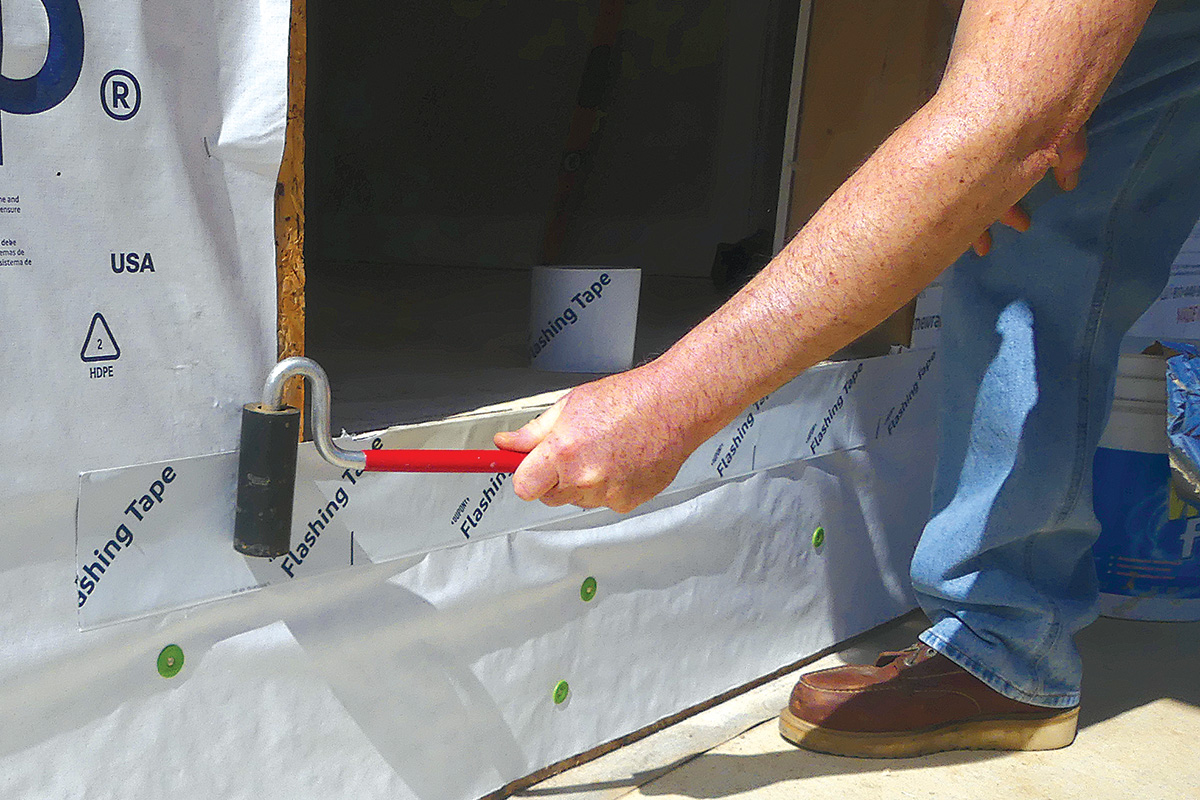
Start on the side jambs, and seal the WRB to the sheathing with flashing tape. Roll the tape over the upturned side of the pan flashing and down just past the sill flashing. Then install the head flashing so it extends just past the side-jamb flashing.
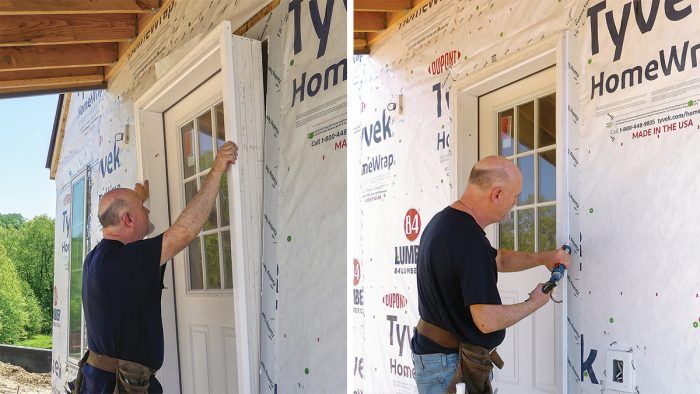
Secure the door in place
The goal of every installation is to end up with a door that opens easily, closes tightly, does not swing on its own, and keeps indoor spaces safe, dry, and comfortable. To achieve this, the door has to be installed plumb in the opening with its brick molding in consistent contact with the flashing behind it. If the wall or opening is out of plumb, these deficiencies should be fixed as part of preparing the rough opening before you’ve installed any flashing. Failure to fix these problems before setting the door will lead to compromises that can shorten the lifespan of the door and the integrity of its air- and watertightness.
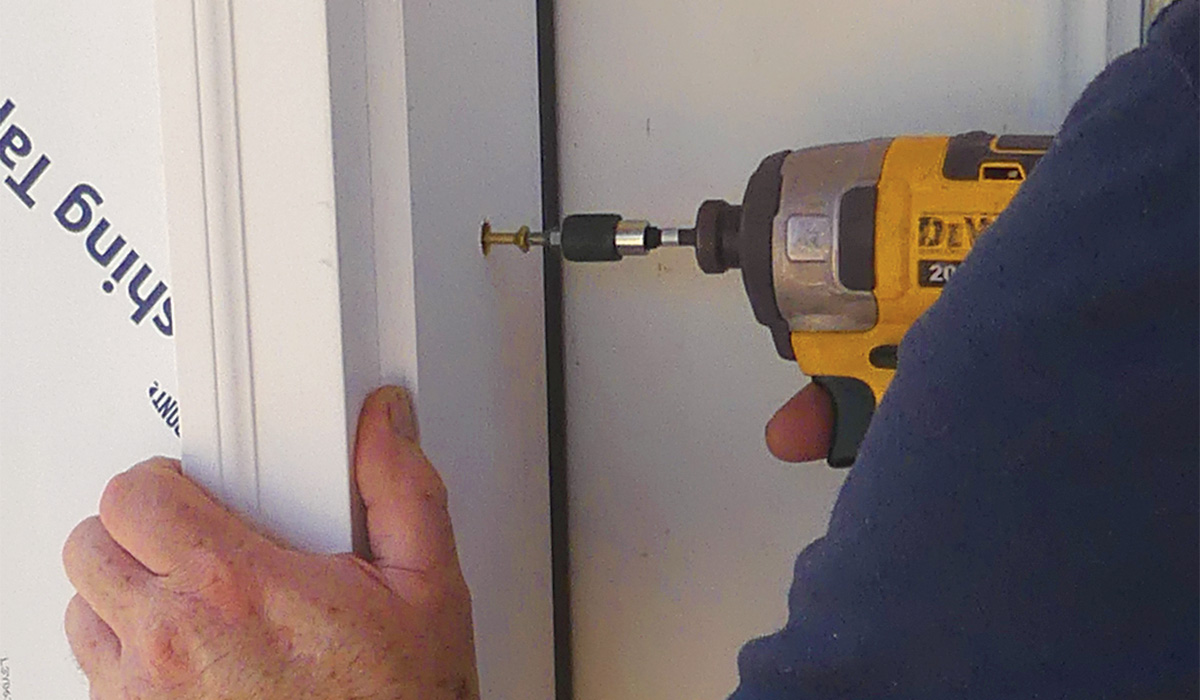
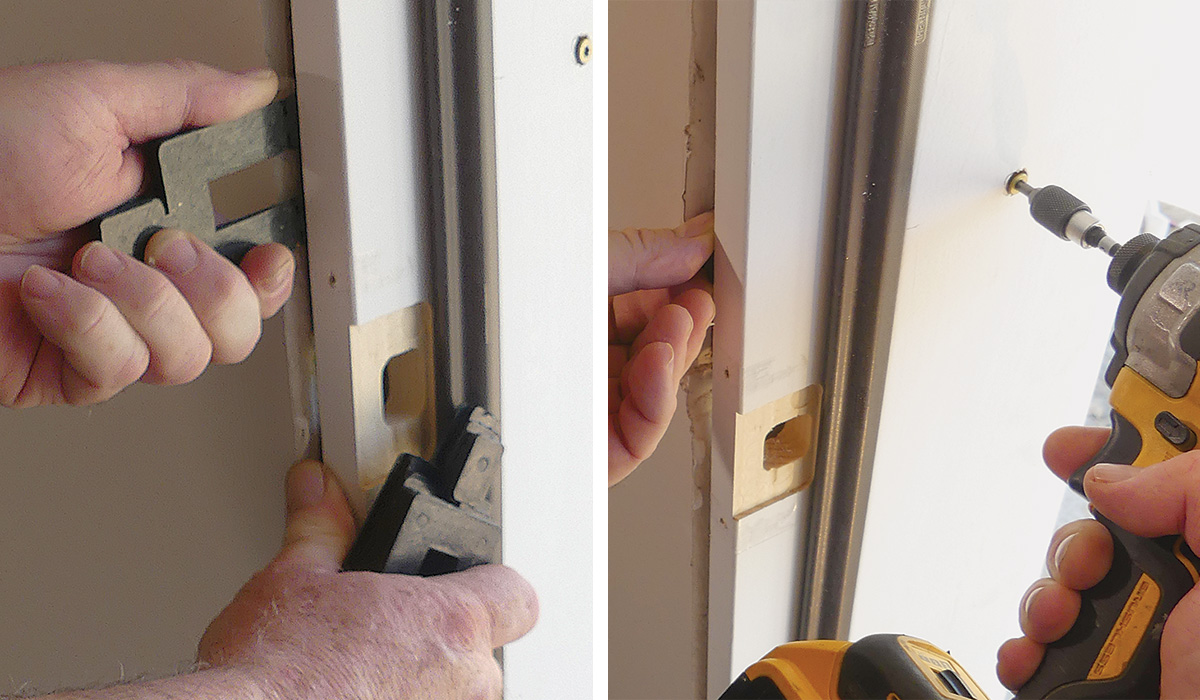
1. Predrill holes for jamb screws
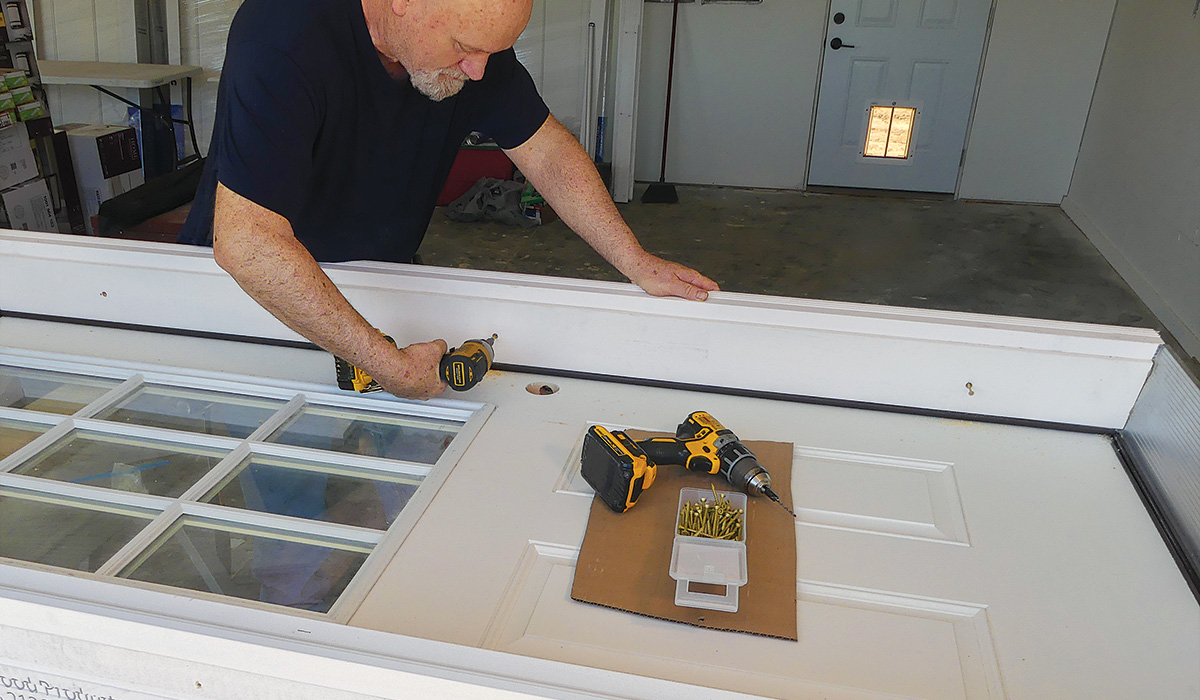
Predrill three 1/8-in. holes on each side jamb with a countersink bit. Drill through the “fat” part of the jamb at same height as the hinges on both sides. Some doors require additional fastening between these hinge-height screws. I like to run the countersink portion of the bit far enough in that I can conceal the screw heads with dowels.
2. Caulk the back of the brick molding
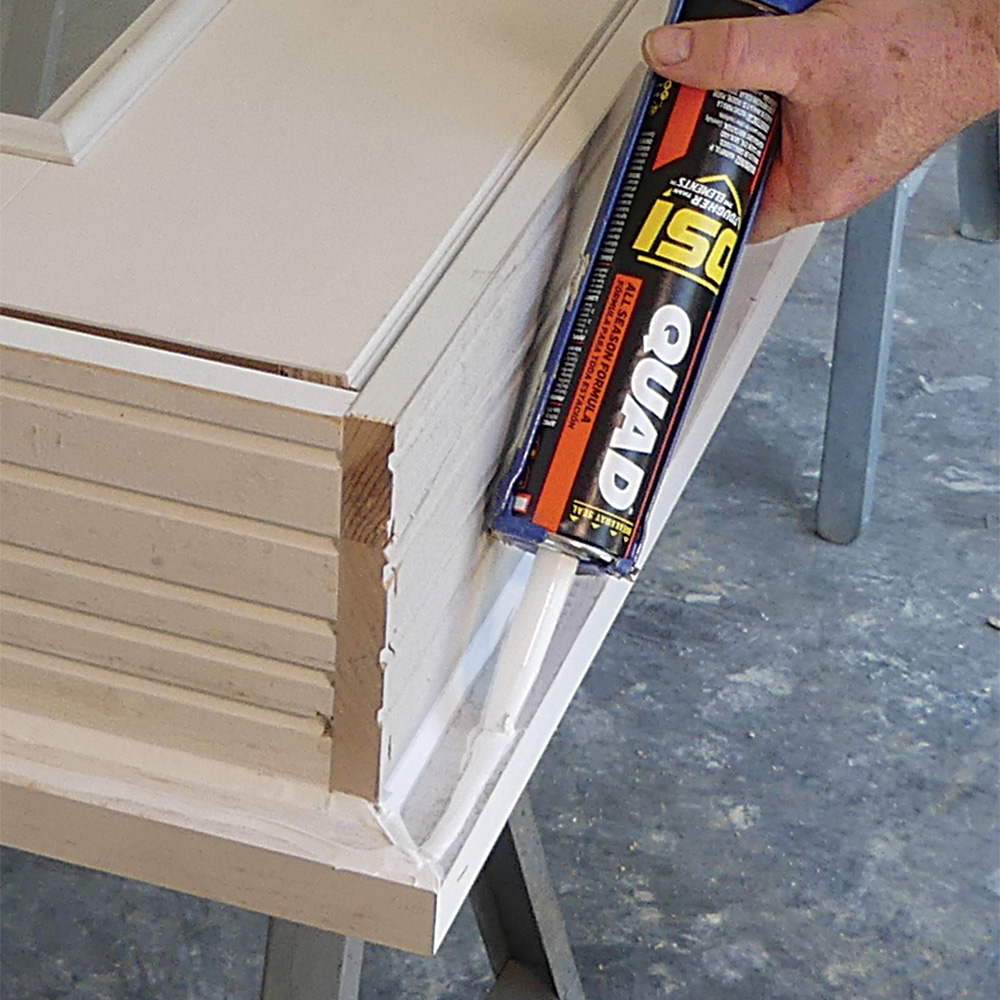
Caulk the brick-molding miters and the seam where it connects to the door jambs. Also run a bead around the entire outside edge of the brick molding to help seal it to the sheathing.
3. Plumb both sides in two directions
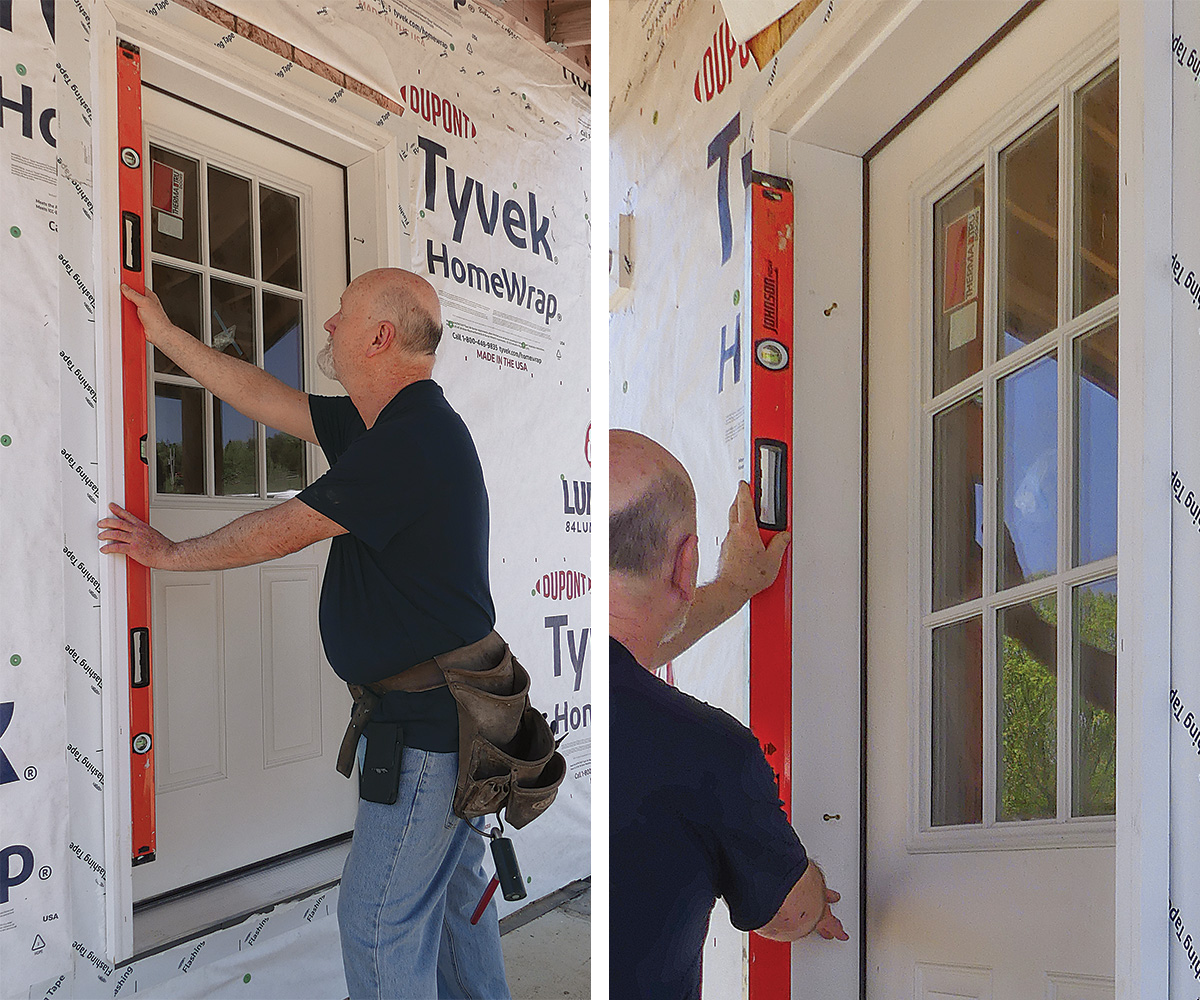
Set the door in place and center it in the opening. If your door has a plug holding the door closed that can’t be accessed once it’s tipped into place, remove it beforehand. Use a 6-ft. level to make sure the side jambs are plumb in both the in-to-out and side-to-side directions.
4. Partially set center screws
Drive #8 2-1/2-in. screws into the center holes on both side jambs. Drive the screws into the framing but don’t tighten them all the way. This will hold the door in place while you add the shims.
Fasten the hinge side
Double-check that the hinge side is plumb and drive the top and bottom screws into the framing, but do not drive them in all the way at this point.
1. Add shims and drive in the screws
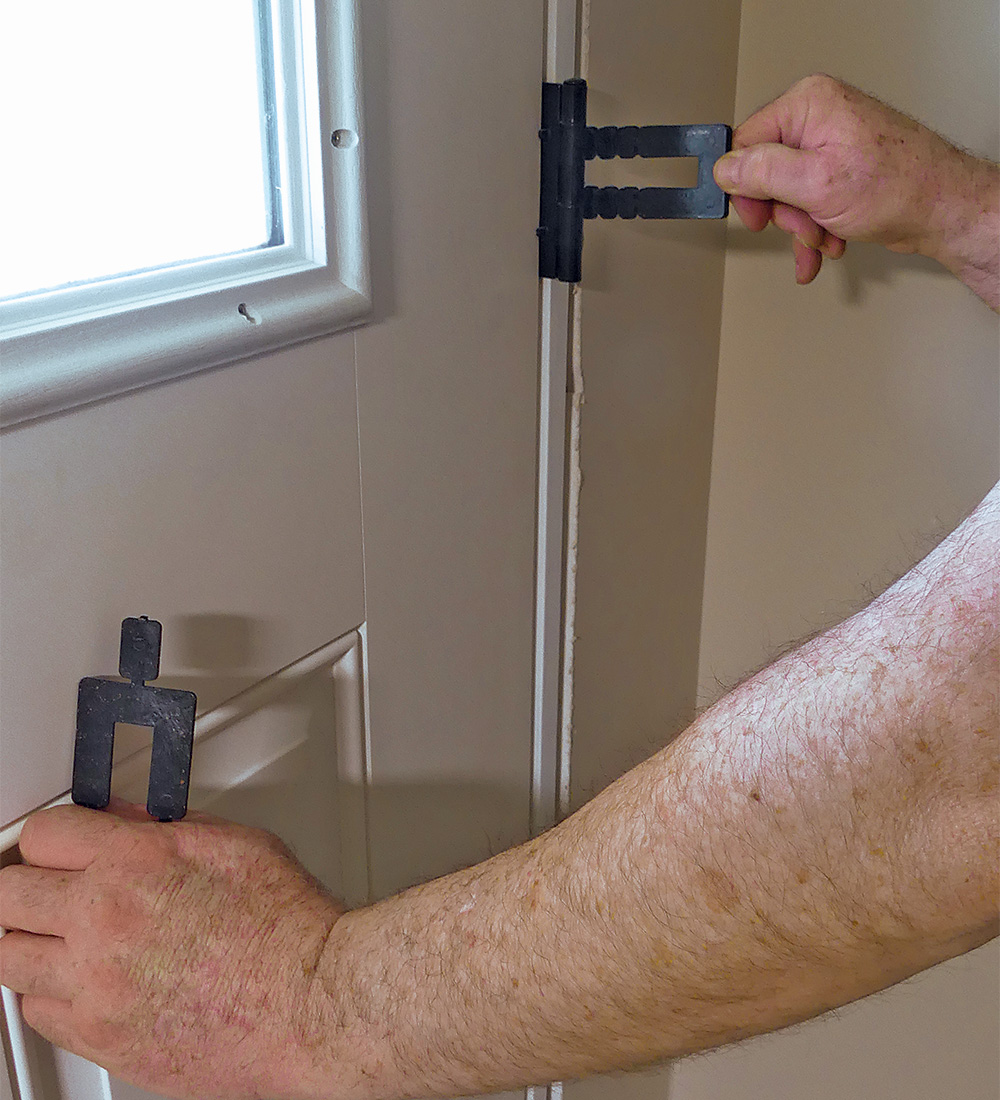 |
|
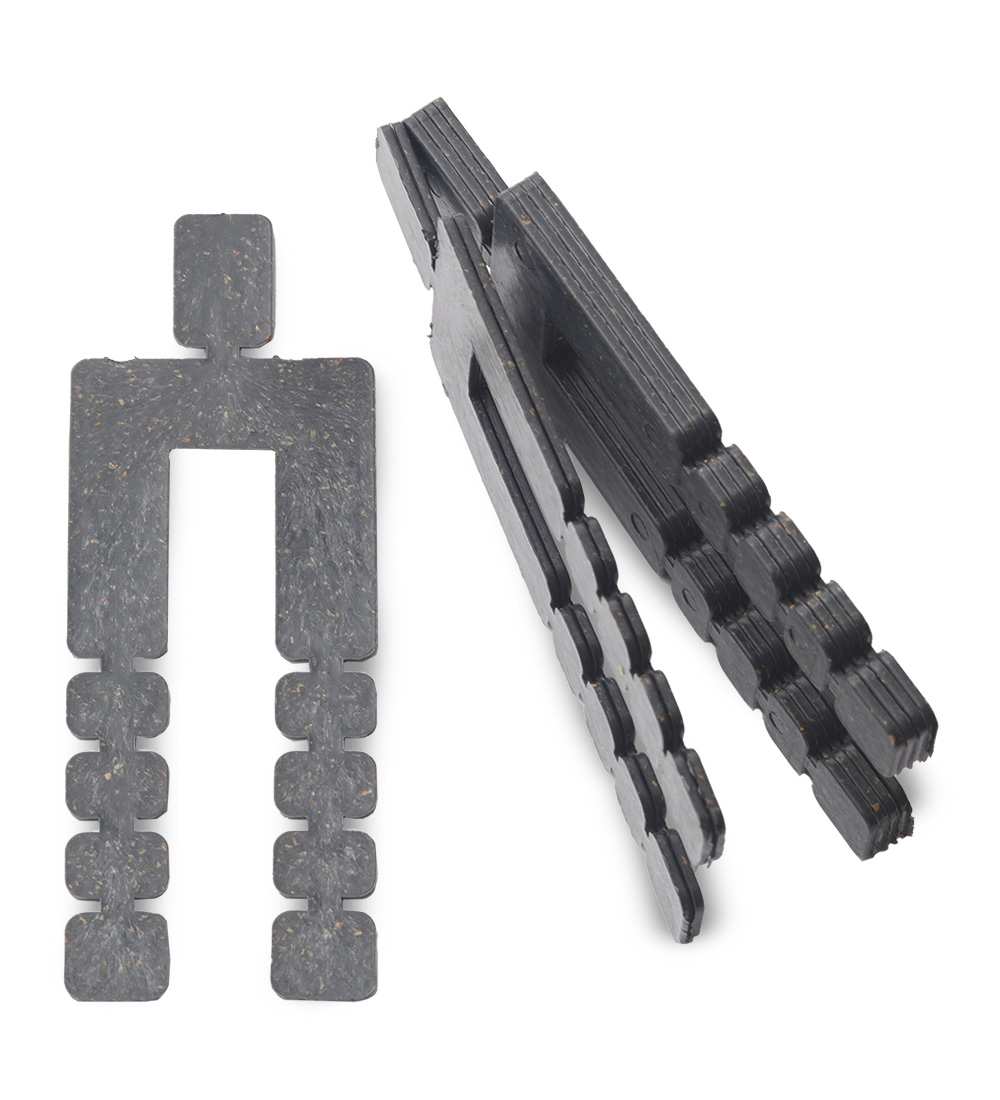
At each fastener location, fill the entire gap between the door and the opening with shims so the jamb does not get bowed or pulled out of plumb when fastened. I prefer horseshoe shims, but if the jack studs are twisted, use wedge-shaped shims to prevent the jamb from twisting when driving the screws home.
2. Reinforce the hinges
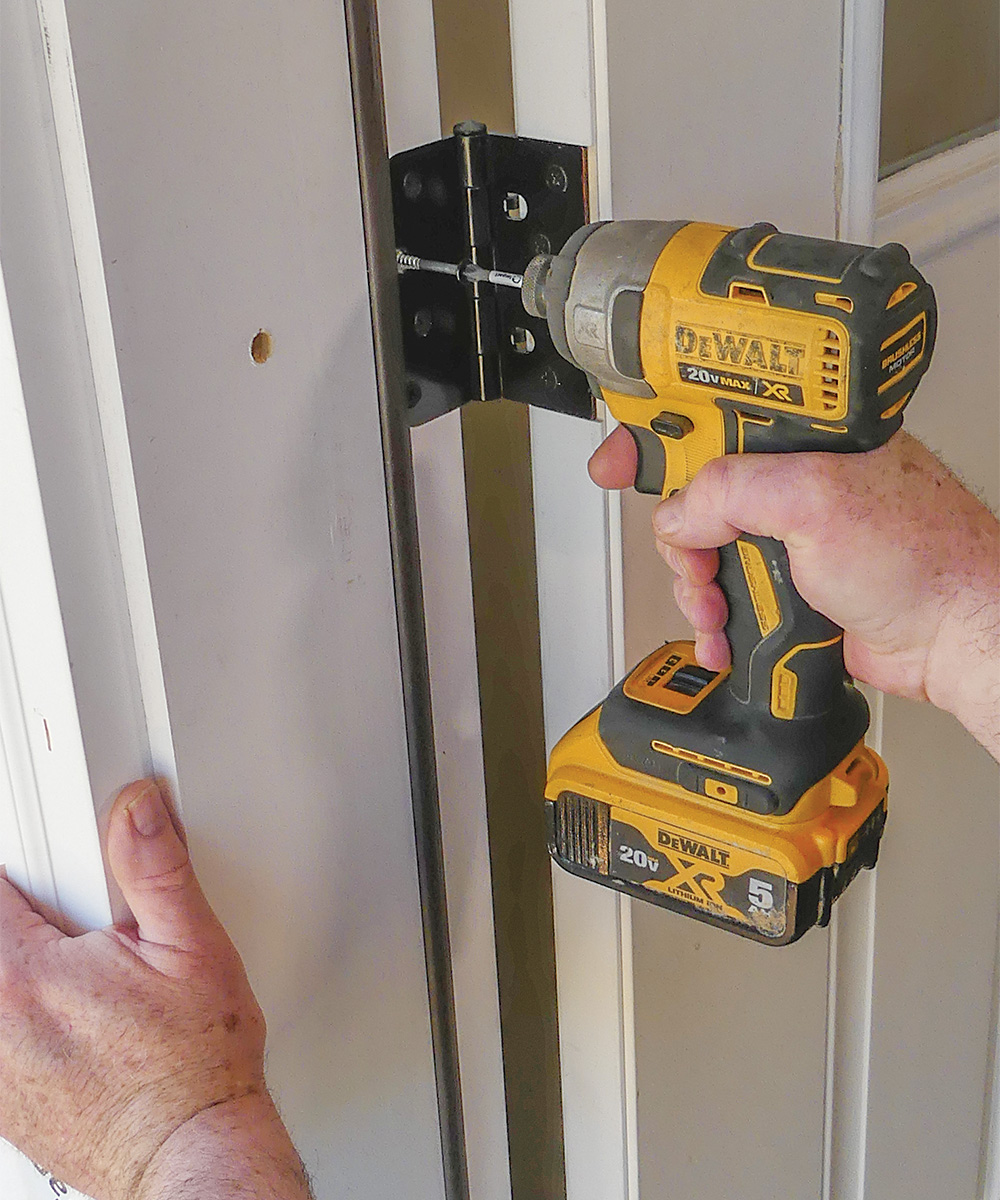
This door included two #10 2-1/2-in. screws to reinforce the top hinge, but I like to swap in a long screw for each of the lower hinges as well. I install them in the top hole closest to the weatherstripping. Predrill a 1/8-in. hole into the framing before installing the screws.
Fasten the strike side
1. Re-check for plumb
Check again for plumb in both directions on the strike side.
|
|
|
2. Inspect weatherstripping compression
With the door pulled closed, measure the top and bottom of the weatherstripping to ensure that it’s being compressed equally along the entire length of the strike side of the door. Also check to see that the reveal between the panel and jambs are even.
3. Partially set top and bottom screws

If the door panel is not contacting the weatherstripping evenly, adjust the strike-side jamb until it does align evenly, and then secure the top and bottom screws into the framing, but don’t fully drive them in yet.
4. Shim and finish driving screws
Install shims the same way you did on the hinge side and finish driving the screws into the strike-side jamb. Don’t install any fasteners through the head jamb. Leaving the head jamb detached from the framing allows the house to settle without distorting the door.
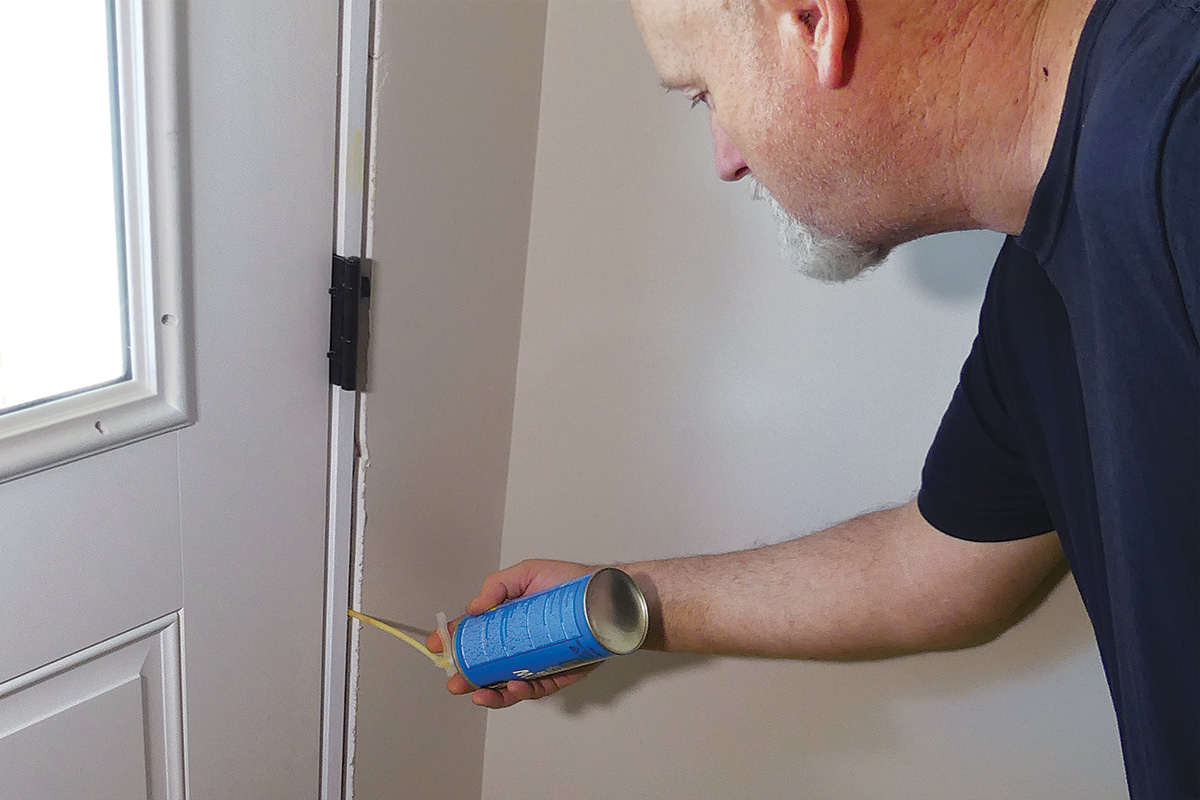
Seal things up
Setting a door that operates flawlessly is the most satisfying part of the process, but proper execution of these final steps is just as important. Don’t rely on the siding contractors to seal up around the door with the same attention to detail that you would. After all, if your door is not air- and watertight, you’ll be the one heading back to the job to fix it.
1. Adjust the sill
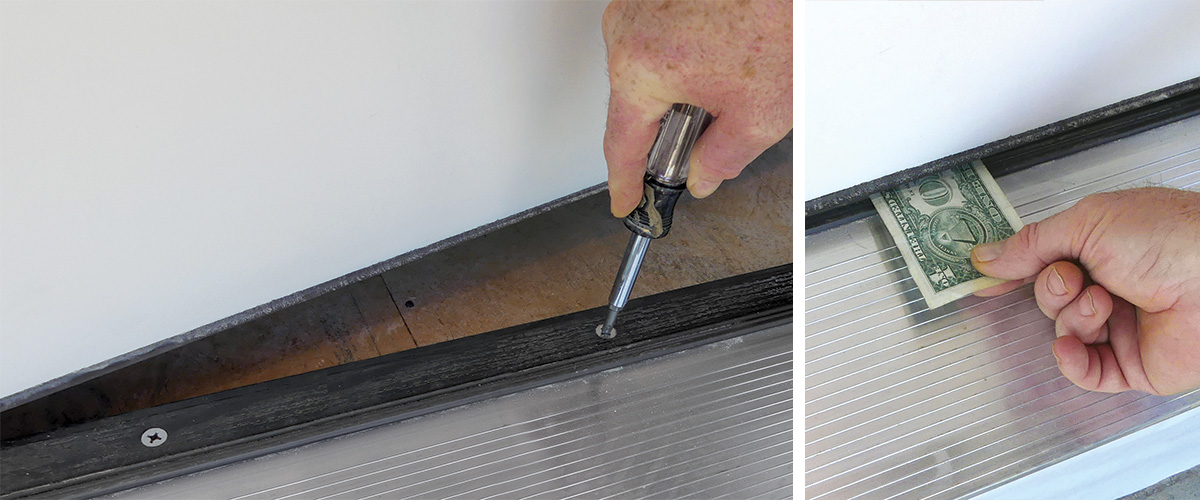
If your door has an adjustable sill, raise or lower the sill so that the door-sweep gasket presses down on a dollar bill to create enough tension as you pull it out, but not so much that you can’t slide it out without tearing it. Repeat this process near every adjustment screw.
2. Trim weatherstripping and add corner pads

Make sure that the weatherstripping on both side jams fits properly at the top and bottom after adjusting the sill. If it’s long, pull it out and trim it flush with the sill. Next, install the corner pads per the manufacturer’s instructions. Corner pads are designed to prevent the weatherstripping from sucking water up like a straw when the inside of the house experiences negative pressure during a storm—but they don’t work if you don’t use them.
3. Insulate behind the jambs
Fill the gap between the door jambs and framing with low-expanding spray foam.
4. Caulk and install rigid head flashing
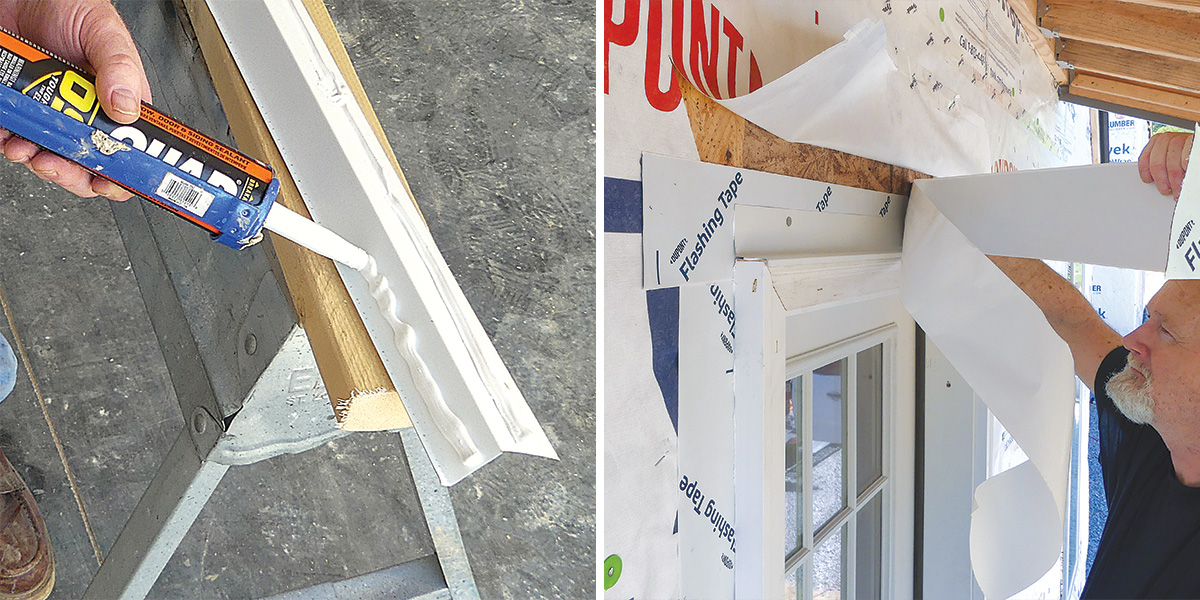
Caulk both the bottom and back side of the rigid head flashing before you install it. Check with the siding manufacturer to determine if the flashing should be trimmed flush, folded up, or wrapped down over on the ends of the brick molding.
5. & 6. Tape the head flashing and the WRB
|
|
|
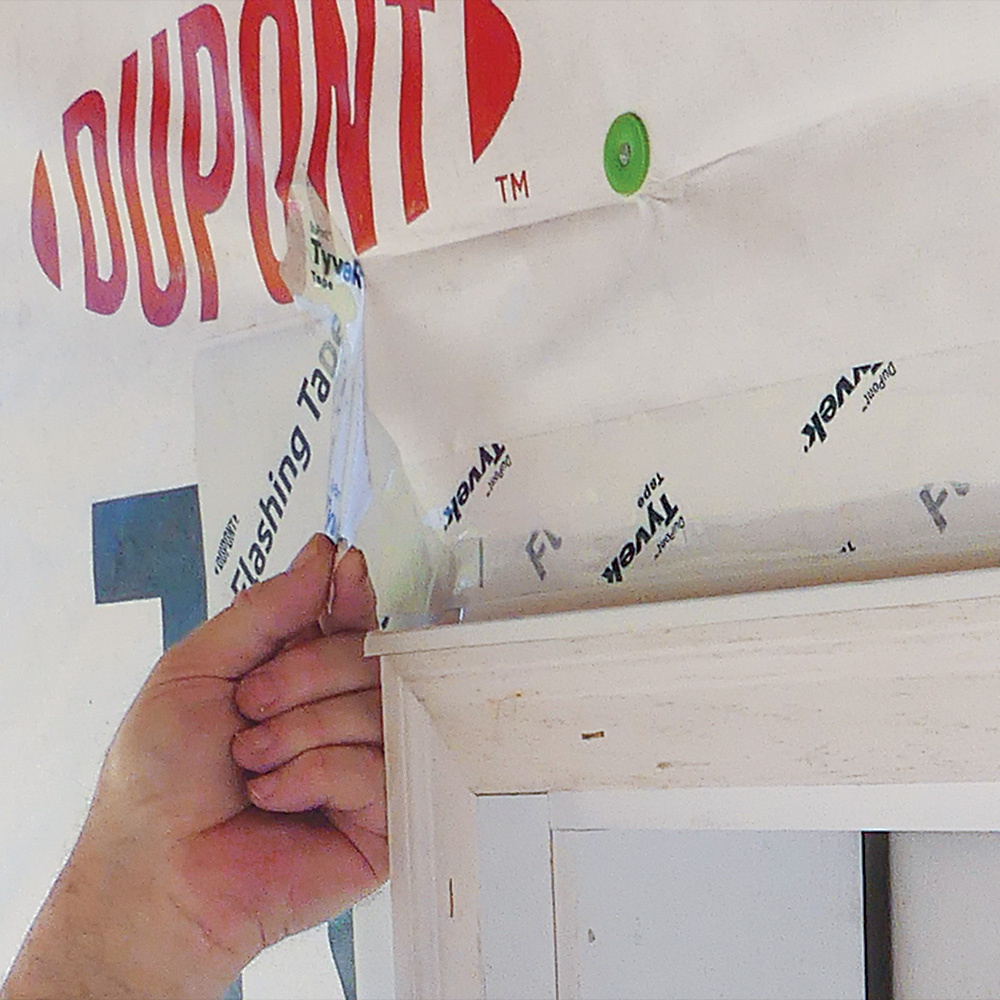
Seal the rigid head flashing to the sheathing with flashing tape, then fold down the WRB and cover the cuts and loose edge with seam tape. When installing a door below large unsheltered walls, I use the skip-tape method and leave gaps in that seam as an escape route for any water that may find its way behind the WRB.
7. Cover the screw heads
Glue, install, and trim the dowels, or fill the screw holes with wood filler.
8. Caulk the brick molding

Tool the caulking into the edge of the brick molding so a trim board is able to sit flush against it.
Mark Petersen is technical editor. Photos by the author.
RELATED STORIES
From Fine Homebuilding #310
