
An Addition Foundation
Learn techniques for grafting the right foundation onto a house that's neither square nor level.
Synopsis: Learn techniques for adding a concrete foundation to an old house that may be irregular. The author covers foundation layout, bracing, and how to set up the forms.
I recently poured a foundation for a fussy builder. After the forms were stripped, he checked the foundation. The length and width were okay. But the foundation was 1-1/4 in. out of square, and it was 1 in. out of level from one end to the other. The builder paused for a moment and proclaimed the foundation perfect. The foundation was for an addition to an old house.
A new-house foundation and an addition foundation are two different things. With a new house, I start with an empty hole in the ground and follow the plans: straight, square, plumb and level. But with an addition foundation, the existing house and its foundation play a big part in molding my strategy.
Sizing up the existing foundation
When I’m planning an addition foundation, the first thing I check is the existing foundation. Here in New England, we encounter three basic types of foundations: poured concrete, stone and what I call a modified-pier foundation. Poured concrete is the easiest to add to. The walls are usually straight and smooth, and there is a good chance that the foundation is somewhat square and level.
Stone foundations, standard fare in this area before 1900, are the most challenging to add to. It’s a lot of extra work to match concrete forms to the irregular surface of a stone foundation. Stone foundations usually move a great deal over their long lives, so you can bet that they’re well out of square and level.
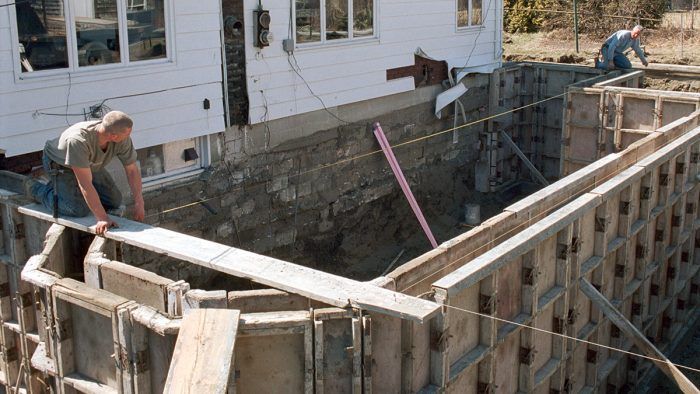
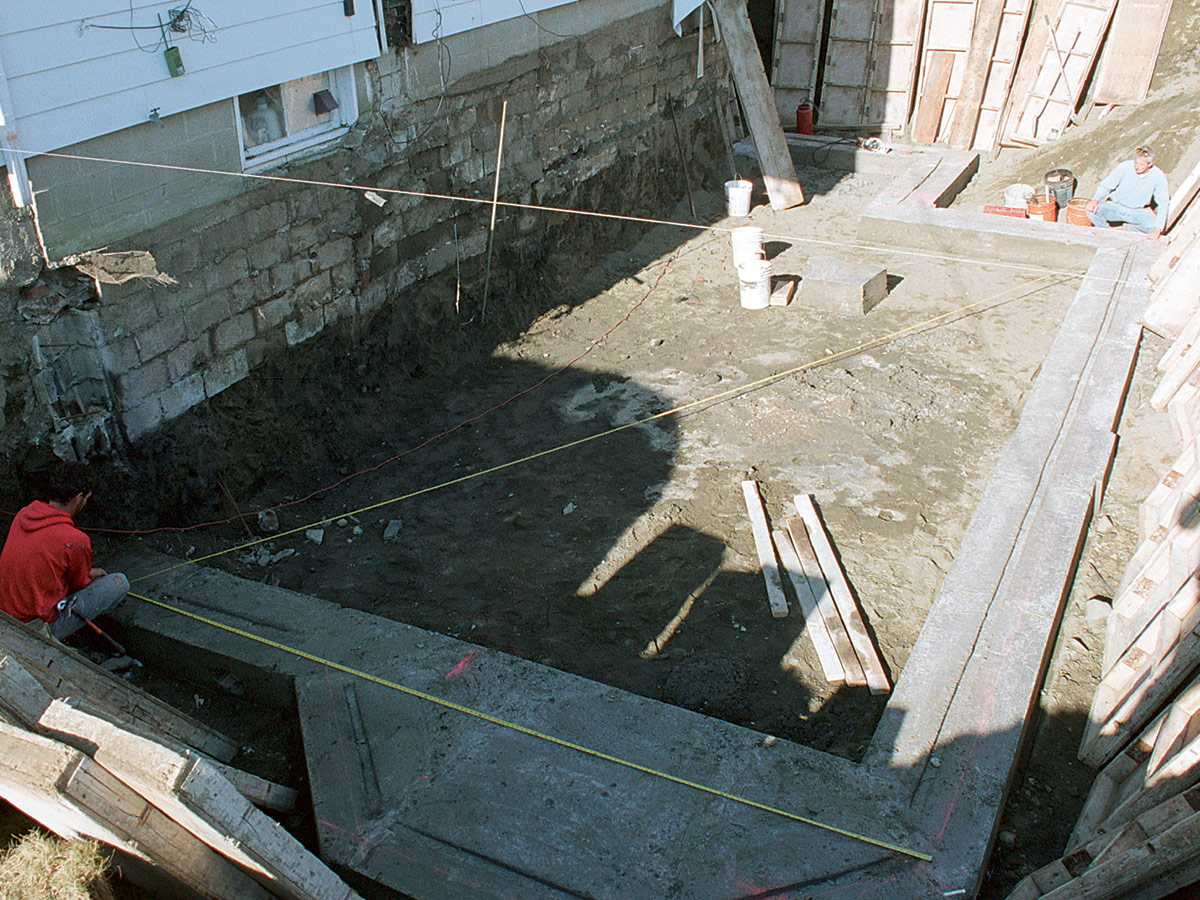
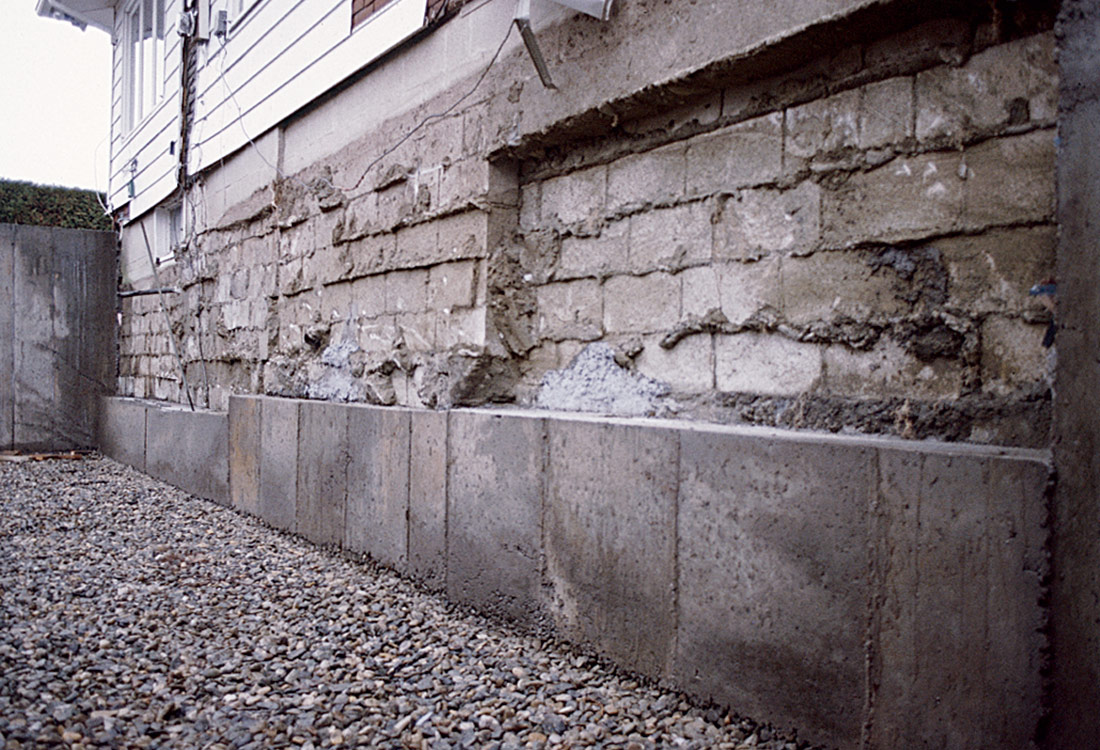
With the project shown in this article, the house was set on concrete piers poured into holes dug in the ground. Over the years, the spaces between the piers had been filled in with block that was not on footings. As is typical, this foundation as well as the house on it was neither square nor level.
The existing frame guides the addition foundation
Once I’ve looked at the existing foundation and determined where the addition foundation ties into it, I’m ready to begin layout. I locate the addition foundation according to the frame of the existing house to allow the addition framing to match seamlessly with the house framing.
The short explanation is that I run two sets of strings: one above grade off the mudsills of the house and the other on the floor of the excavation. The type of addition and its attachment to the house determine the degree of difficulty of this process.
If the addition is to be along one wall and away from its ends, such as for a simple bump-out, I set up a string parallel to the existing wall for the addition’s outside wall and then square back to the house for the sidewalls.
For the addition in this article, the foundation began at one corner of the house, with the wall of the addition continuing in the same plane as the house wall. If that plane wasn’t maintained, then the transition between the old house and the new would have become apparent.
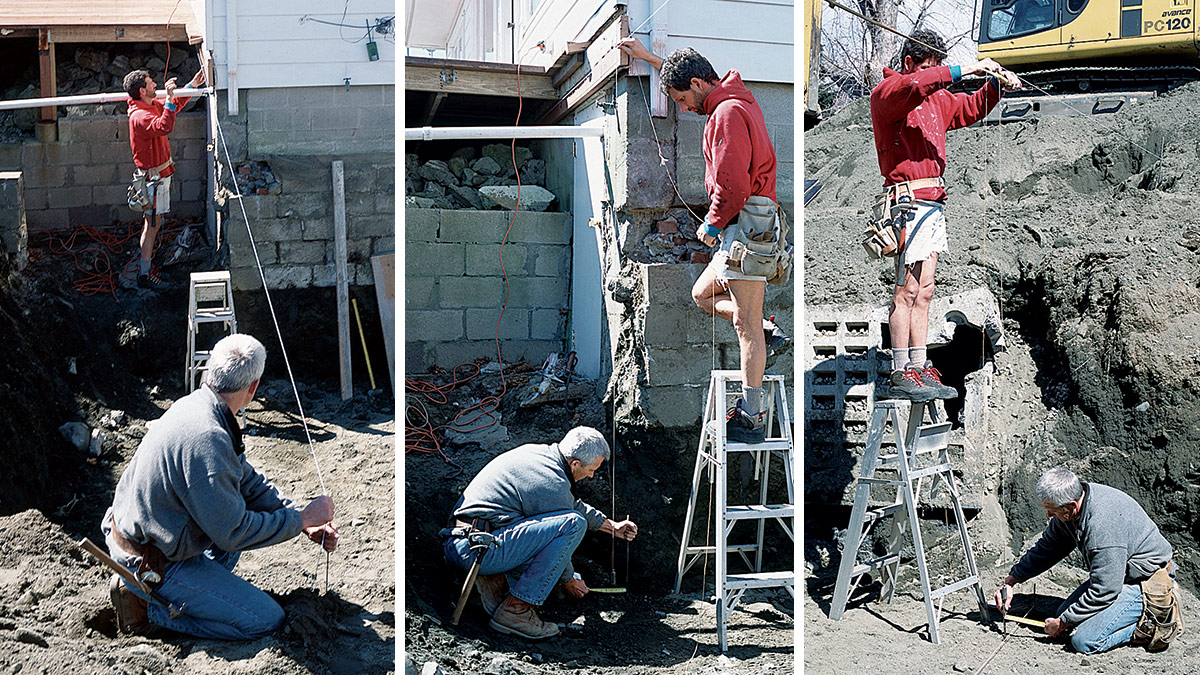
I start laying out foundations of this type by extending a string along the mudsill of the existing house and over to the opposite side of the foundation hole. There are usually obstructions along the house (in this case, a deck nailer), so I block the string out from the frame (3 in. for this project).
With that string anchored in place, I plumb down to the floor of the excavation at the corner of the house and at the outside corner of the addition, remembering to compensate for the 3-in. offset of the top string. I stretch a string between these two points and then set a third string for the outside wall of the addition, which I set parallel to the house by measuring out from each end.
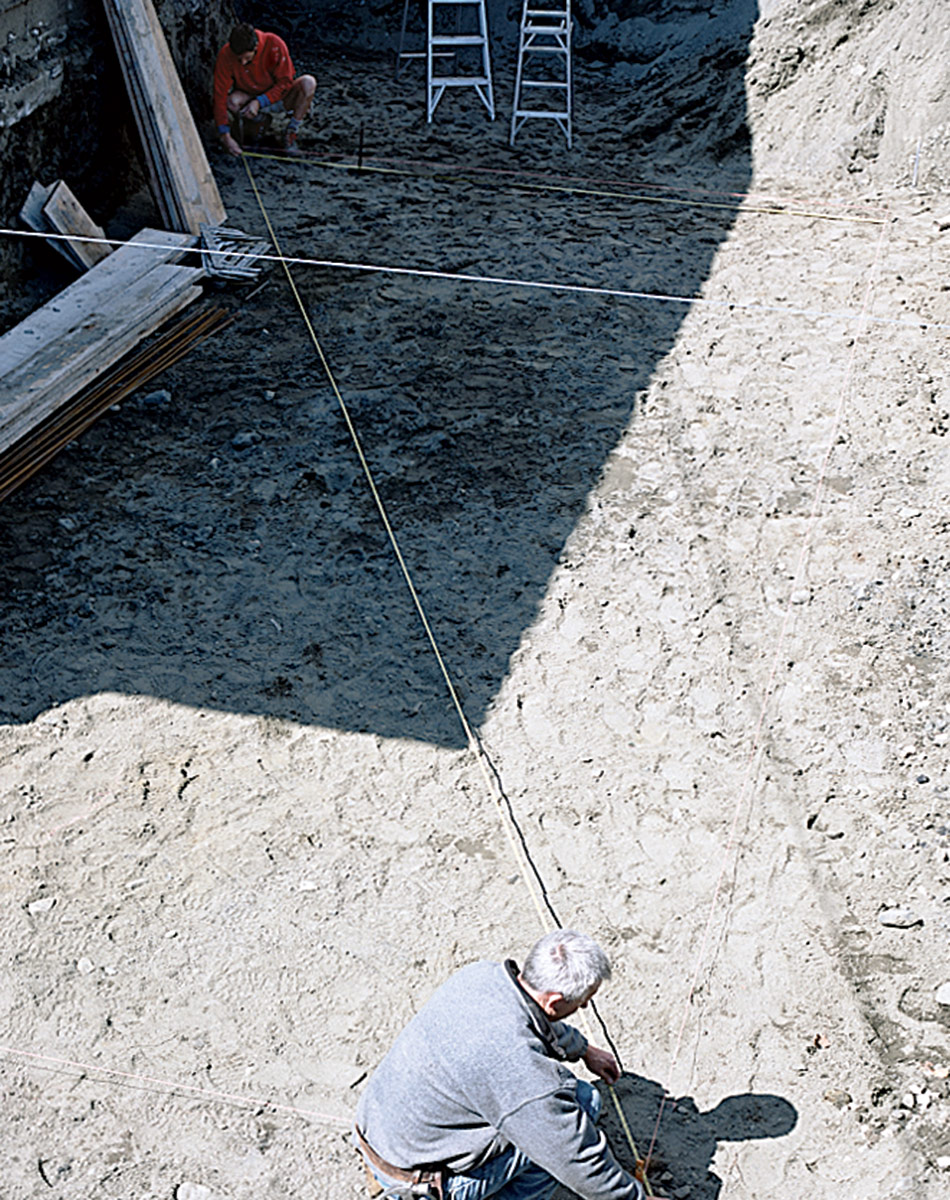
Square isn’t necessarily best
Before going any farther, I check to see if these two lines are square to each other. Some builders use a 3-4-5 triangle method. But I prefer the Pythagorean theorem so that I know how far out of square the layout is. I square the measurements of the two sides and add them together. The square root of that number should equal the length of the diagonal. I was pleased to find that the diagonal on this foundation was off less than 1 in.
At this point, I go over options with the contractor. Moving the line that runs along the plane of the existing wall usually is not an option. I can square the addition by moving one end of the parallel line in or out, but then the ends of the addition will be different lengths. Or I can leave the lines as is, which keeps all the measurements equal but results in corners that are not 90°.
The contractor’s answer usually depends on the details of the addition. In this case, the addition was for a kitchen, and the contractor wanted 90° corners for the cabinets. If the addition had been for bedrooms or for a family room, the builder may have preferred to work with equal measurements and out-of-square corners. Sometimes I’m asked to split the difference.
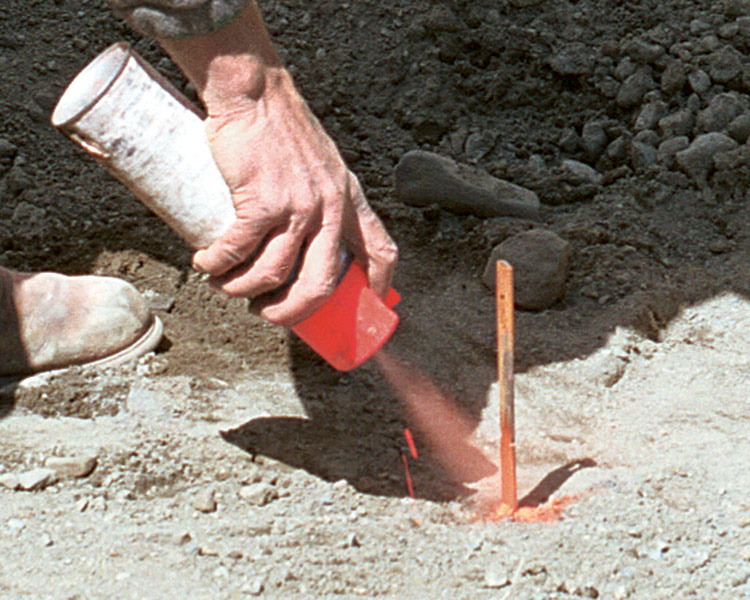
Once the decision is made, I adjust the lines accordingly and finalize the layout on the floor of the excavation. Working from the main addition foundation lines, I locate the comers of all the smaller walls and drive flat foundation rods or -in. rebar pins in these spots. I run strings between these pins, outlining the new foundation, then check the smaller walls for square. When satisfied with the layout, I spray-paint the pins orange for visibility.
Footings cast the layout in concrete
If the top string is going to be in the way while I’m moving and setting the footing forms, I keep the stakes that hold the string in place and temporarily remove the string.
Once the foundation is outlined, I set and pour the footings in the usual fashion (“Forming and Pouring Footings,” FHB #119). If the footings meet the existing foundation, I tie them together with 1/2-in. rebar pounded into holes drilled in the existing footing.
After the footings are poured and stripped, I set up the top line again and repeat the process of laying out the foundation. This time, instead of driving pins into the soil, I mark the top of the footing with a pencil, then snap chalklines between the marks.
The first forms go against the existing foundation
Before I form the walls, I drill a series of -in. holes into the existing wall where it will intersect with the new wall. I drill one hole for every 18 in. of wall height. Rebar driven into these holes ties the new foundation to the old. I drill the holes about 6 in. deep and let the rebar extend into the new formwork about 18 in. Some jurisdictions may require you to drill oversize holes and to epoxy the rebar in place, but a tight, dry fit satisfies our local code. When I’m tying an addition foundation to a stone foundation, the unevenness of the stone is usually enough to lock the two together.
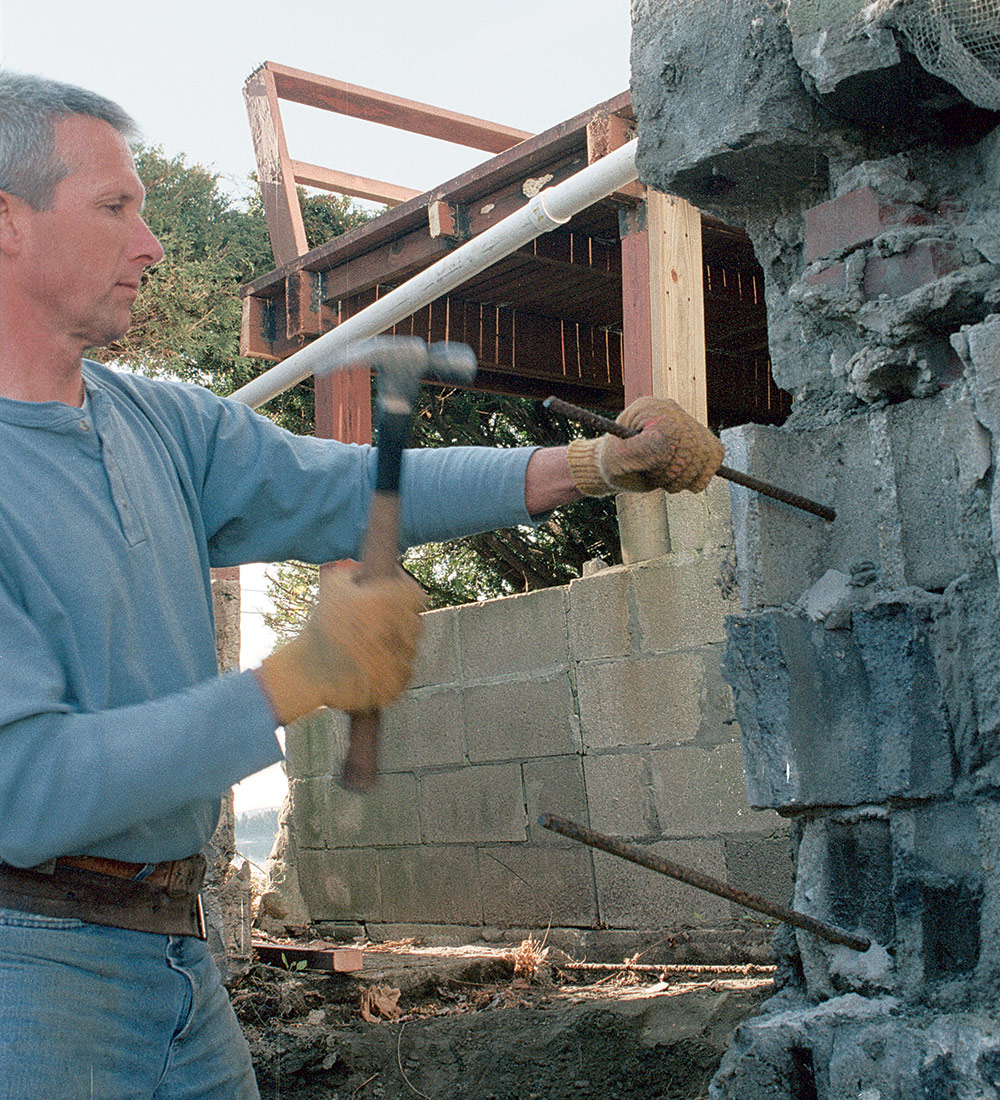
For the foundation on a new house, I begin setting forms at one corner. With an addition foundation, though, I always begin where it matches up with the existing foundation. For the first set of forms, I measure in the thickness of the foundation (in this case, 10 in.) from the snapped line and mark the footing for the inside form. Whenever possible, I make a plumb mark on the house foundation up from the mark on the footing. I then line up the first form with the two marks and drive a masonry nail through the form and into the old wall to tack the form in place.
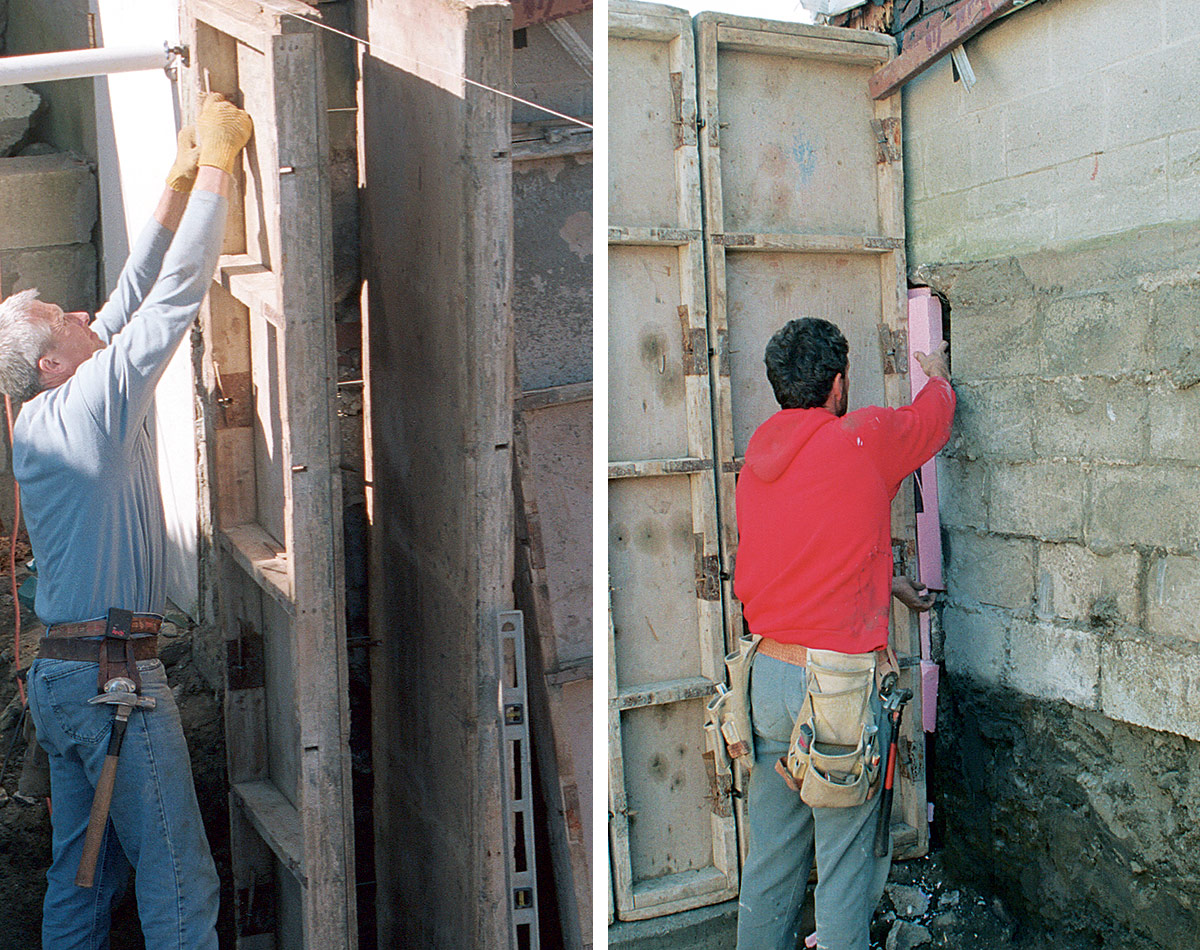
Because of the irregular block foundation on this project, I didn’t have a place to tack the form, so I nailed a scrap of 2×4 to the house above the sills and tacked the inside form to the 2×4 (photo above). I use the same method when adding to stone. Special jump or hook rods that join the free ends of the forms have to be installed on the first form before it goes into place. The masonry nails or the nails through the 2×4 just keep the form from moving laterally under its own weight; the rods keep the forms together as the concrete is being poured.
Once the inside form is set and plumbed, I set the outside form, which is automatically spaced 10 in. from the inside form by the hook rods. Steel wedges that are installed in the hook rods lock the outside panel in place, so there is no need to nail it to anything.
Rarely does the formwork match up with the existing foundation without there being voids to fill. Large deep voids can be filled with a scribed piece of plywood. However, I usually put the forms against the foundation and then fill the large voids using anything from pieces of wood to Styrofoam (photo left of center).
Once the first forms are set against the old foundation, I measure and set the remaining forms (“Forming and Pouring Foundations,” FHB #120). I never know the exact length of the formwork until the first forms are set, so I bring different-width forms and spacers to make up any odd distance.
I set and brace all the forms as I would with any new foundation. Then I restretch the reference lines between the original stakes over the tops of the forms. The forms now can be adjusted to their proper position, taking into account the 3-in. offset from the existing wall.
At this point, the builder establishes where the top of the pour, or grade, will be. For this project, he cut away a section of existing wall where the new-addition floor would match up with the existing floor. From that point, we subtracted all the elements of the floor and framing to determine the grade of the foundation. Because concrete usually settles a bit right after the pour, I add a good in., and then I shoot the grade inside the forms with a transit. I snap lines on the inside of forms and drive grade nails every few feet along the lines.
If the addition floor ties into the existing floor at more than one place or along a large area, I find the lowest point of the existing floor to establish the grade. If the existing house is extremely out of level, I’m sometimes asked to make the new foundation match the error.
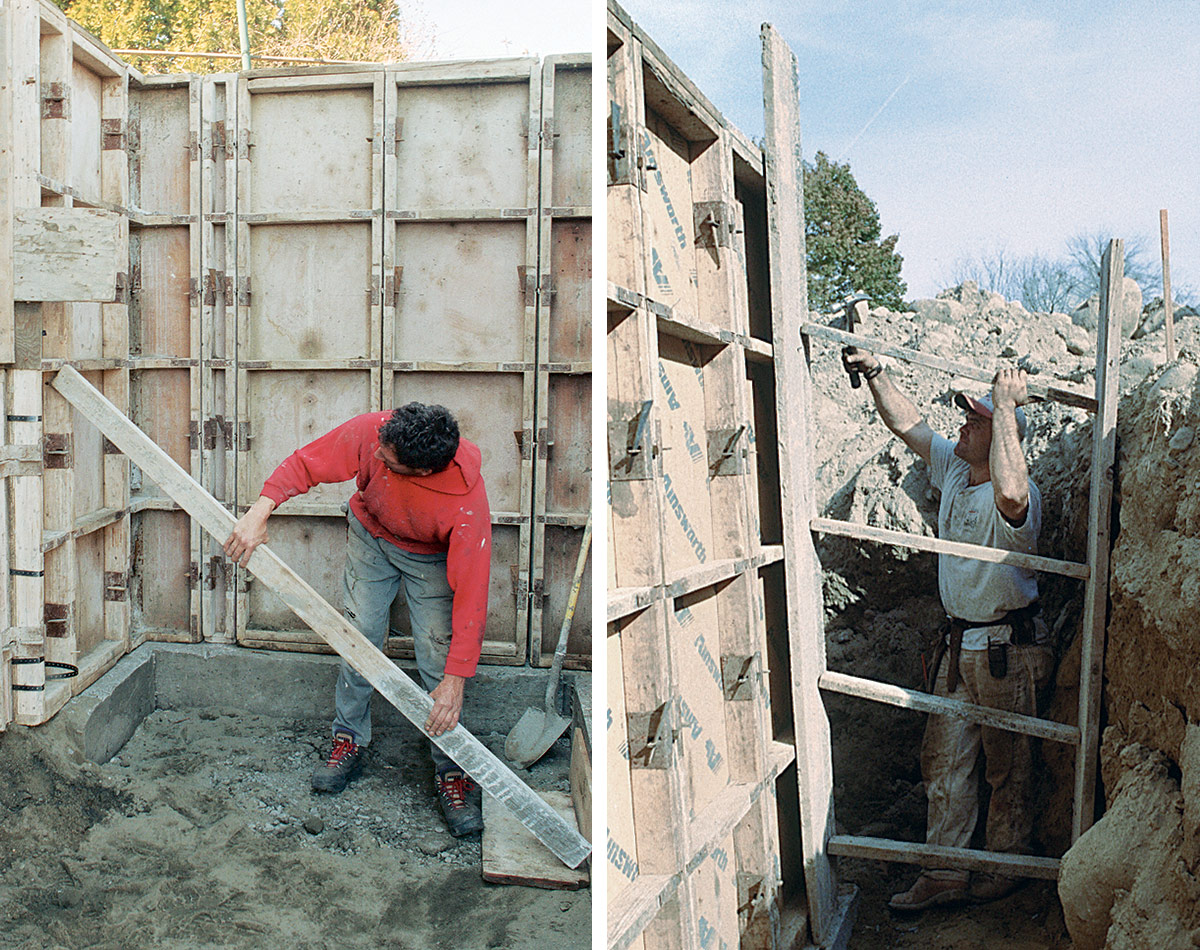
At the other end of the addition shown here, the new foundation returned to the old with a short wall. Without bracing, the pressure of the wet concrete could have pushed the wall away from the existing foundation. I had to brace the forms to keep them from kicking out.
For this brace, I first placed a tall 2×12 footing plank vertically against the bank of the excavation opposite the end of the wall and another against the form. Next, I cut pieces of 2x stock that fit tightly between the two 2x12s and nailed them into position every 2 ft. or 3 ft. I also cross-braced the small walls from inside the foundation, running the bracing back to the opposite footing.
Filling the forms
Unless directed otherwise, I use a 2500-lb. concrete mix, but I order a fairly stiff mix of concrete at a slump of 3 or 4. Slump is a scale of 1 to 12, with 1 being the stiffest, driest mix and 12 being the wettest. The stiff concrete mix plugs any small voids where the new foundation ties into the existing foundation.
I began the pour on this project at the corner where I began the layout. As the concrete fills the first forms, I gently poke at it with a 2×4 to help the concrete form to and bond with the existing foundation. A slow rate of pour and an extra pair of eyes help to prevent any mishaps at this juncture.
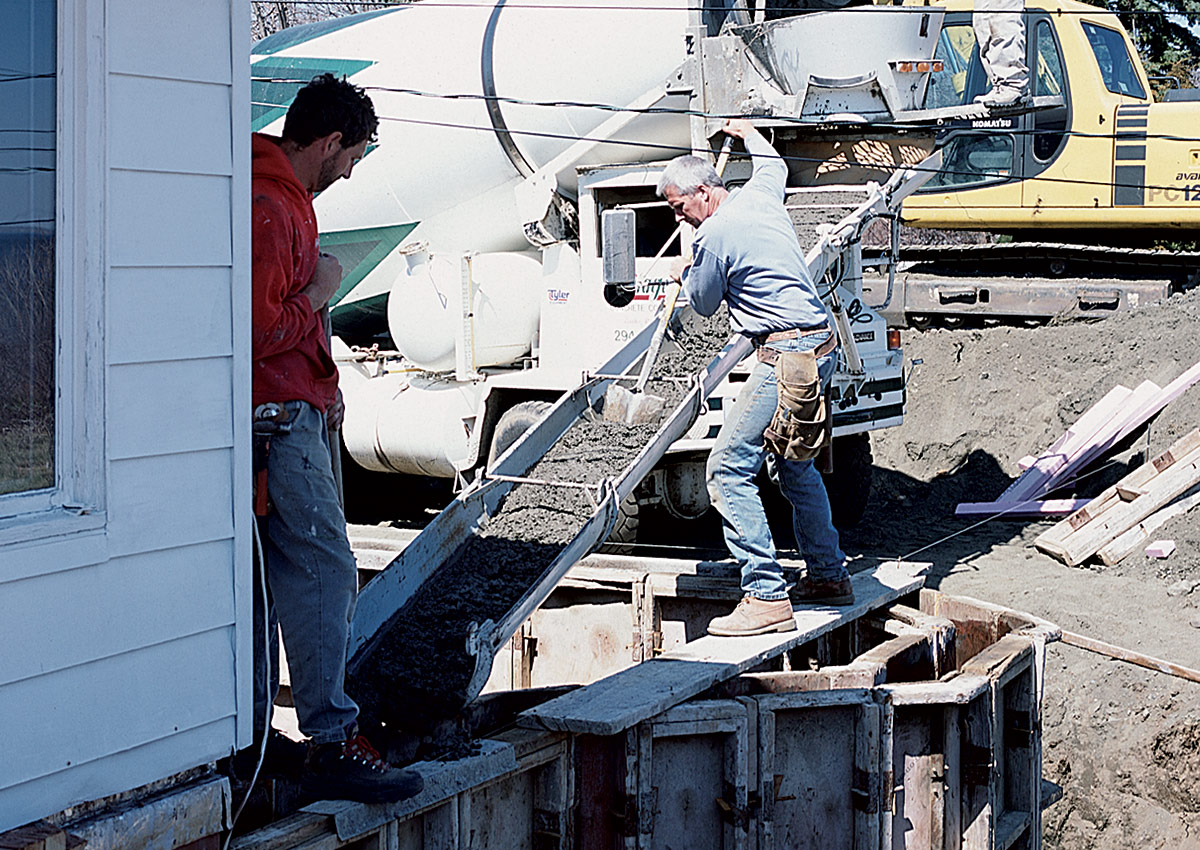
If access for the concrete trucks is good, I try to alternate between ends and fill the forms in smaller lifts. Depending on the strength of the existing foundation, I initially fill the forms about one-half full to three-quarters full before moving to the other wall that ties into the foundation and repeating the process. As a safety precaution, I then switch back and forth between the two ends, filling a little more each time. Alternating the pour this way gives the concrete a little time to begin to set up, which helps to reduce the initial pressure.
With this project, access to the foundation wasn’t great, and I needed a couple of loads of concrete to complete the pour. This fact changed my approach, and I just worked from one end to the other. After the first end was about two-thirds full, I added a small amount of water to the concrete, bringing it to about a 5 slump, to make it flow into the rest of the forms more easily. I always poke the looser concrete with a 2×4 to mix it with the stiffer concrete to eliminate cold joints, those distinct lines with small voids that can show up between the lifts. When I switched to a fresh truck near the other end, I again poured the stiffest mix into the forms where the addition foundation returned to the existing foundation. As with a regular foundation, I bring the concrete up to grade and float it flat and even with a 2×4 or a trowel. Then I place the anchor bolts.
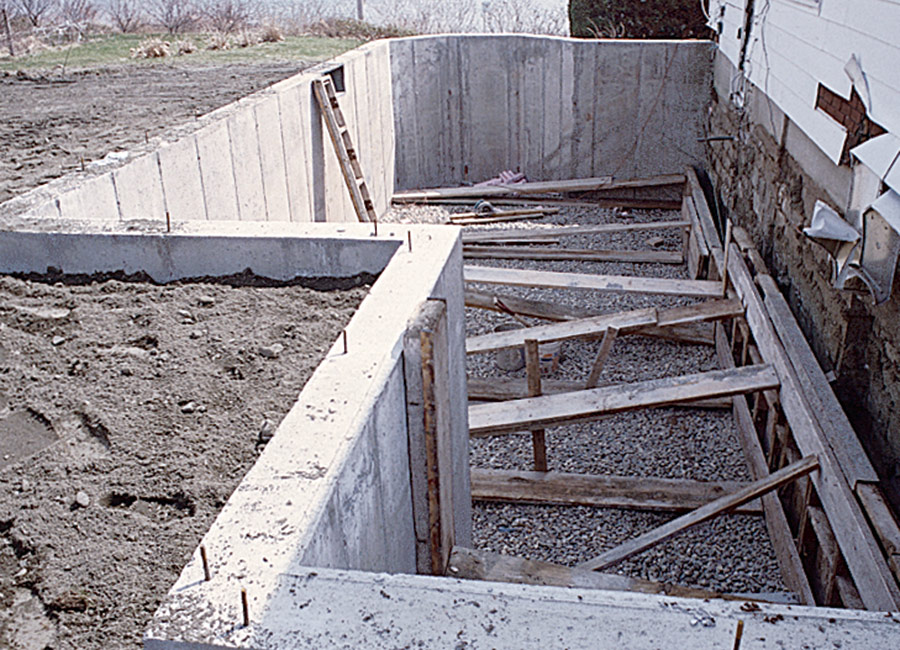
The floor of the excavation for this addition was quite a distance below the existing foundation, so after stripping the forms, I set up a single-face wall to shore up the excavation.
Shoring up excavated soil
A common problem with a full cellar-addition foundation is having to dig below the level of the existing foundation. The best way to deal with this problem is to excavate as closely as possible to the existing foundation without undermining it and then to pour a single-face concrete wall, which keeps the soil under the foundation intact and undisturbed.
After the addition walls are poured and stripped, I set up forms about 8 in. away from the part of the excavation that sticks out the farthest. The new wails provide something substantial to brace the single-face wall against.
Because concrete exerts a lot of force as it is being poured, I brace the wall every 2 ft. vertically and every 2 ft. to 3 ft. horizontally. I shoot the grade to extend 1 in. to 2 in. above the bottom of the existing foundation. The concrete mix should be stiff and should be poured slowly; it also should be poked with the shovel to prevent defects.
Fine Homebuilding contributing editor Rick Arnold is a builder and residential-construction consultant in North Kingstown, Rl. Photos by Roe A. Osborn, except where noted.
