
An Easy Approach to Coffered Ceilings
Careful layout, accurate framing, and preassembled parts simplify a traditional trim detail.
Synopsis: In building the coffered ceiling described in this article, carpenter Gary Striegler didn’t use box beams, a common approach to coffered ceilings, and he did as much work as possible on his worktable. Striegler provides a step-by-step account of how he built the ceiling, from measuring the space, to framing the beams, to attaching the panels, to installing beam sides as boxes and attaching the beam bottoms and molding.
I am often asked about coffered ceilings, and I’ll jump at any chance to build one, but they don’t work in just any space. The best rooms for coffered ceilings are close to square in dimension, at least within a couple feet of it. They aren’t open to adjacent spaces, which can make it tricky to terminate the ceiling details. And the ceilings must be on the taller side; a room with an 8-ft. ceiling is not usually the right place for this detail. In my experience, formal dining rooms and libraries are often good candidates for coffered ceilings. This one is in a study.
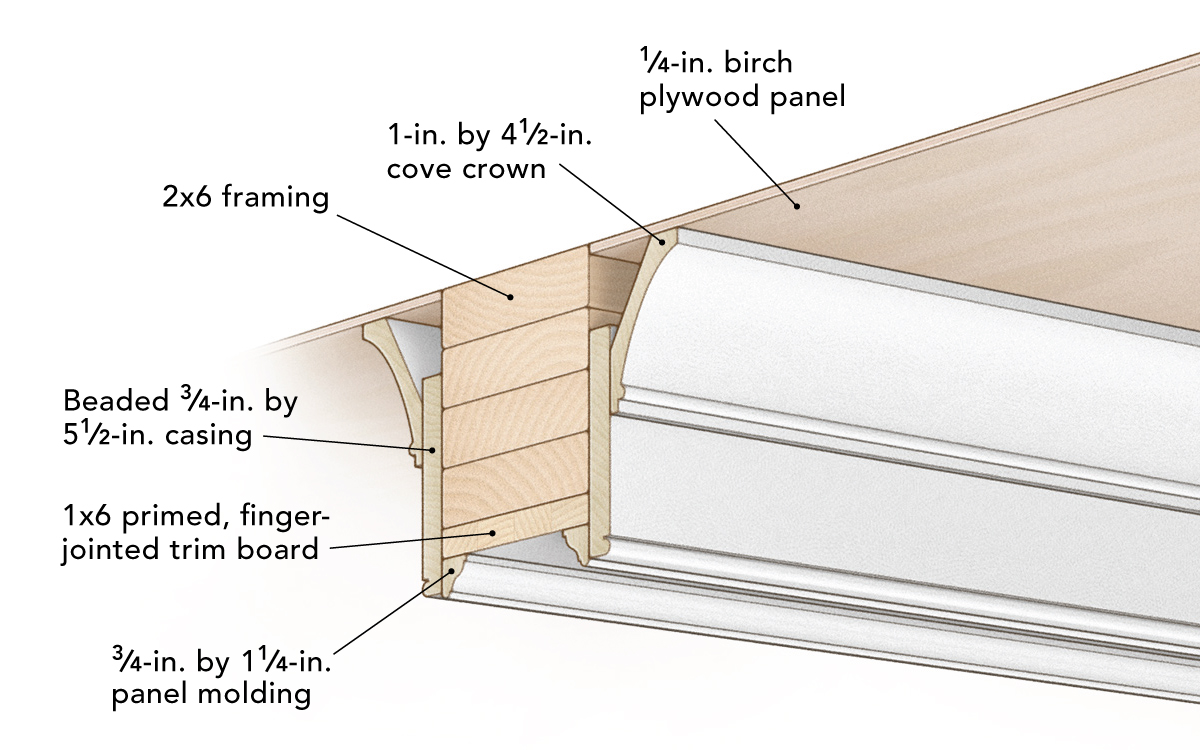
I have built coffered ceilings that were intensely ornate, with multiple layers of decorative moldings, but this client wanted something simpler. The beams have a beaded bottom edge, and the transition from the beam sides to the beam bottoms have panel molding. Each section has a tall but simple cove molding, and there is crown molding around the perimeter of the room. All the profiles are from Kuiken Brothers and can be found online.
I took a few novel approaches on this project. I didn’t use box beams, a common approach to coffered ceilings, and I did as much work as possible on my worktable. I assembled rectangles with the beaded stock and installed them to create the beam sides. I took the same approach with the cove molding. This process was faster, easier, and more accurate than installing these pieces overhead one at a time. I believe this approach could work just as well for other coffered ceilings with their unique trim details. But I’m getting ahead of myself. Unlike a coffered ceiling built with box beams, I first had to create a grid of backing on the ceiling with framing lumber.
Straight and flush framing is key
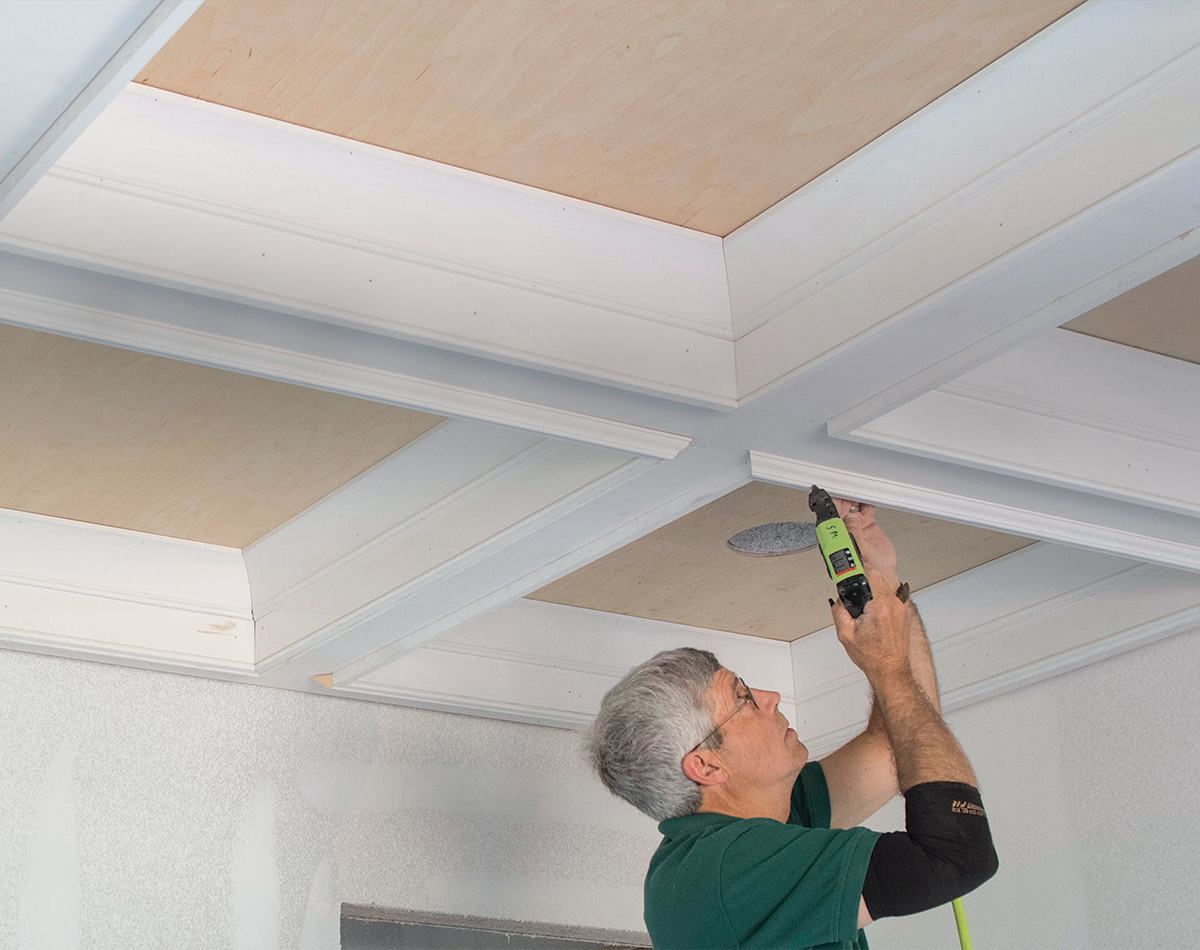
It’s not a hard-and-fast rule, but if my memory serves me well, the vast majority of coffered ceilings I’ve built over the years have had nine sections, like the one shown here. If the room is rectangular, the sections will be rectangular as well. The first step on this project was to lay out the sections and install the framing. When I know that I’ll be installing a coffered ceiling in a new home, I plan the lighting layout and the location of HVAC registers accordingly. In existing homes, you may need to relocate these things, or plan your beam locations around them.
Two important design aspects of a coffered ceiling are the width and depth of the beams. The beam depth will depend on the specific trim details you’re using, but as a general guideline it should be greater than the beam width. On this job, all the center beams were built around four layers of 2×6 framing, which is 5-1/2 in. wide. Around the perimeter, where the beams are intersected by the walls, the beams were built around 4-1/2-in. framing. Having roughly two-thirds of a beam at the wall creates pleasing proportions.
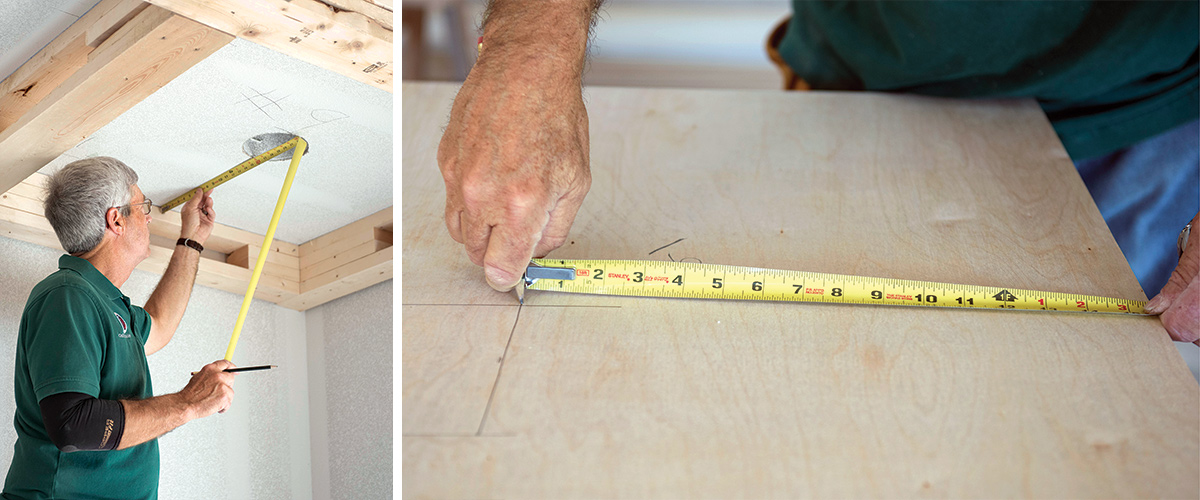
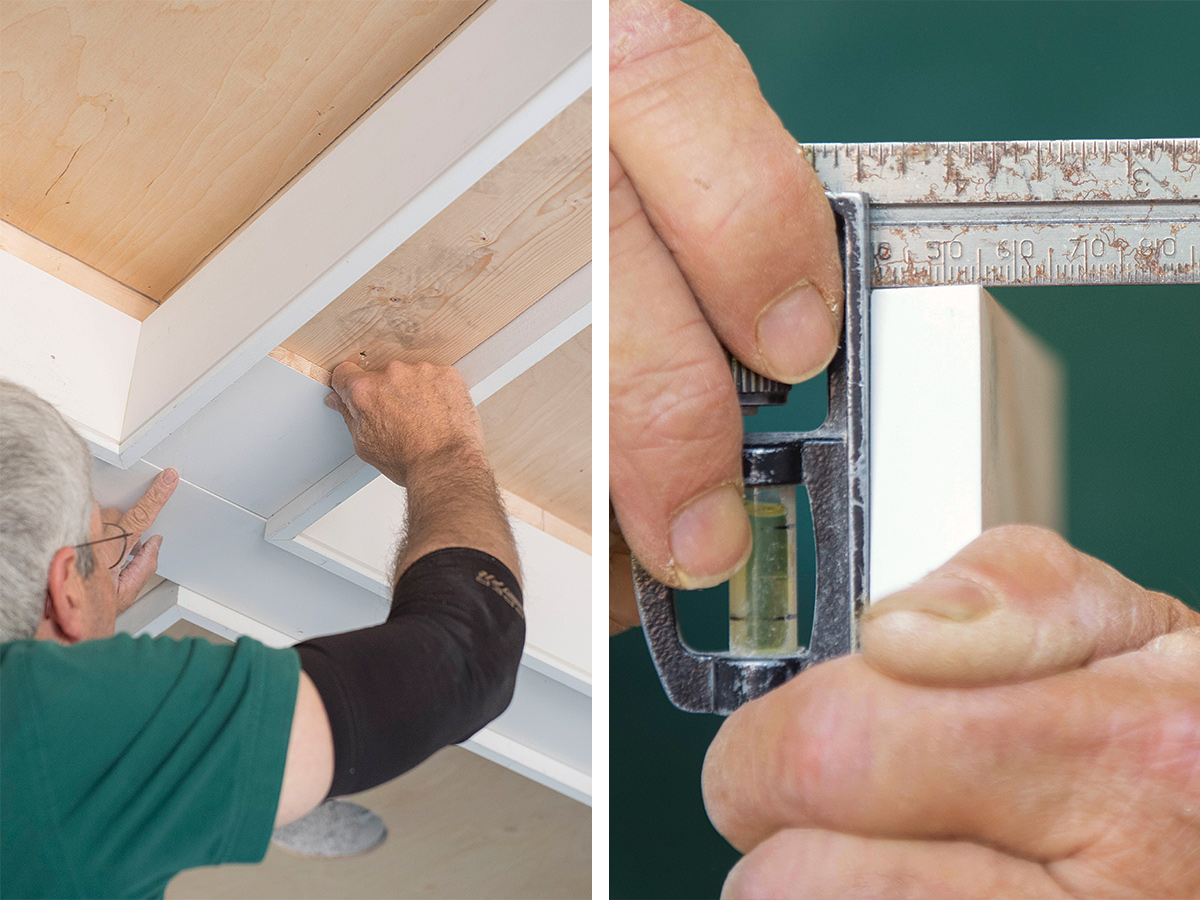
To locate the beam framing, I measured the ceiling along all four walls. Opposing walls usually measure within 1/4 in. of each other. I took the average of the two measurements, subtracted 20 in., which was the width of all four beams added together (two 5-1/2-in. beams plus two 4-1/2-in. beams), and divided by three to get the unfinished section dimensions. Another carpenter helped me carefully mark out the framing with a pencil and double-check the spacing before popping chalklines on the ceiling.
Be accurate when framing the beams
On this project, the ceiling is divided into nine equal sections. Because the perimeter beams are interrupted by the wall and only have trim on one side, they are slightly narrower than the full beams in the field. Specifically, the 2×6 framing used for full beams is ripped to 4-1/4 in. for the perimeter beams. That dimension includes a bit of space for wavy walls. In new construction it can sometimes be helpful to add blocking in the ceiling for fastening the beams, but by building up the framing as shown here, no blocking is needed. That makes this a good approach for adding a coffered ceiling to an existing house.
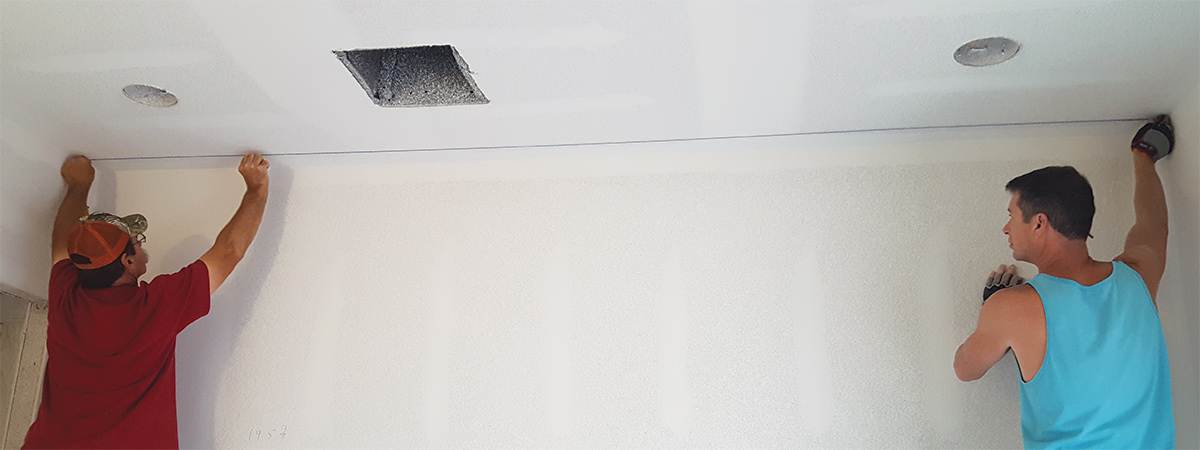
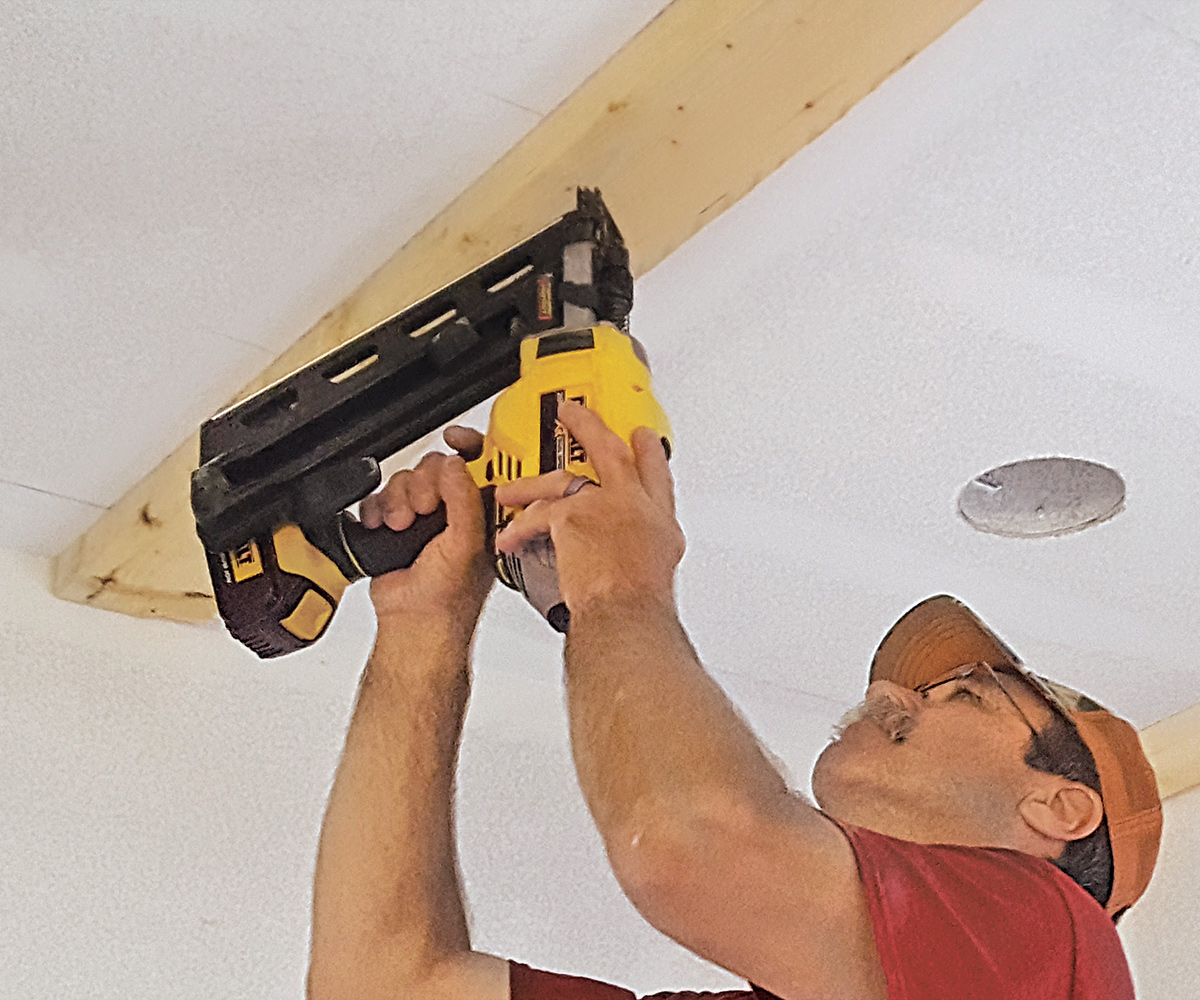
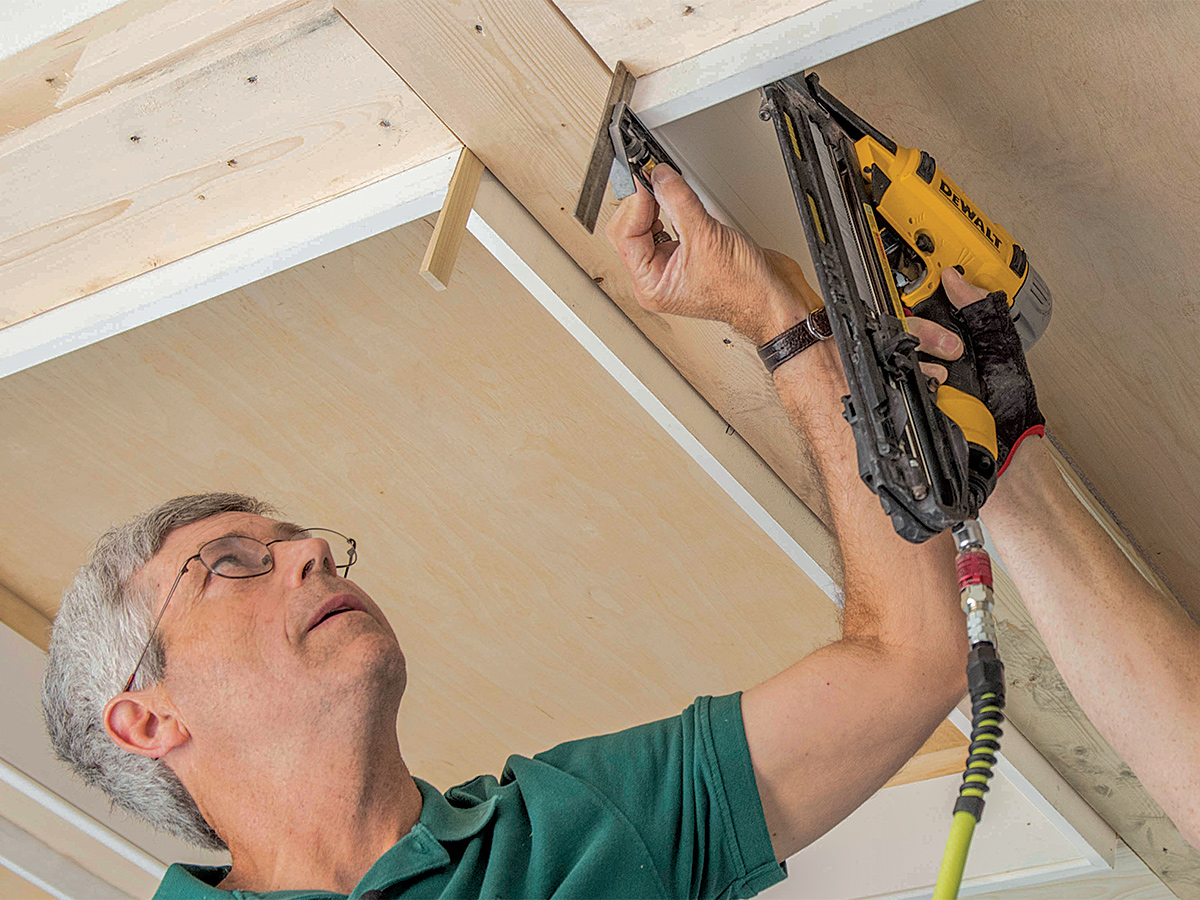
I don’t need any extra blocking installed in the ceiling with the approach I take to framing the beams. I start with the beams that run perpendicular to the ceiling joists, which anchor everything going forward. I make sure to order 2×6 lumber that is long enough to span the room. I always order a few extra boards and sort out the eight straightest for the first full-length sections I install. Although the outside beam framing here was laid out at 4-1/2 in., we ripped the 2×6 boards to 4-1/4 in. The 1/4-in. gap at the wall meant that we could align the inside edge of the board with the chalkline even if there were some irregularities in the drywall.
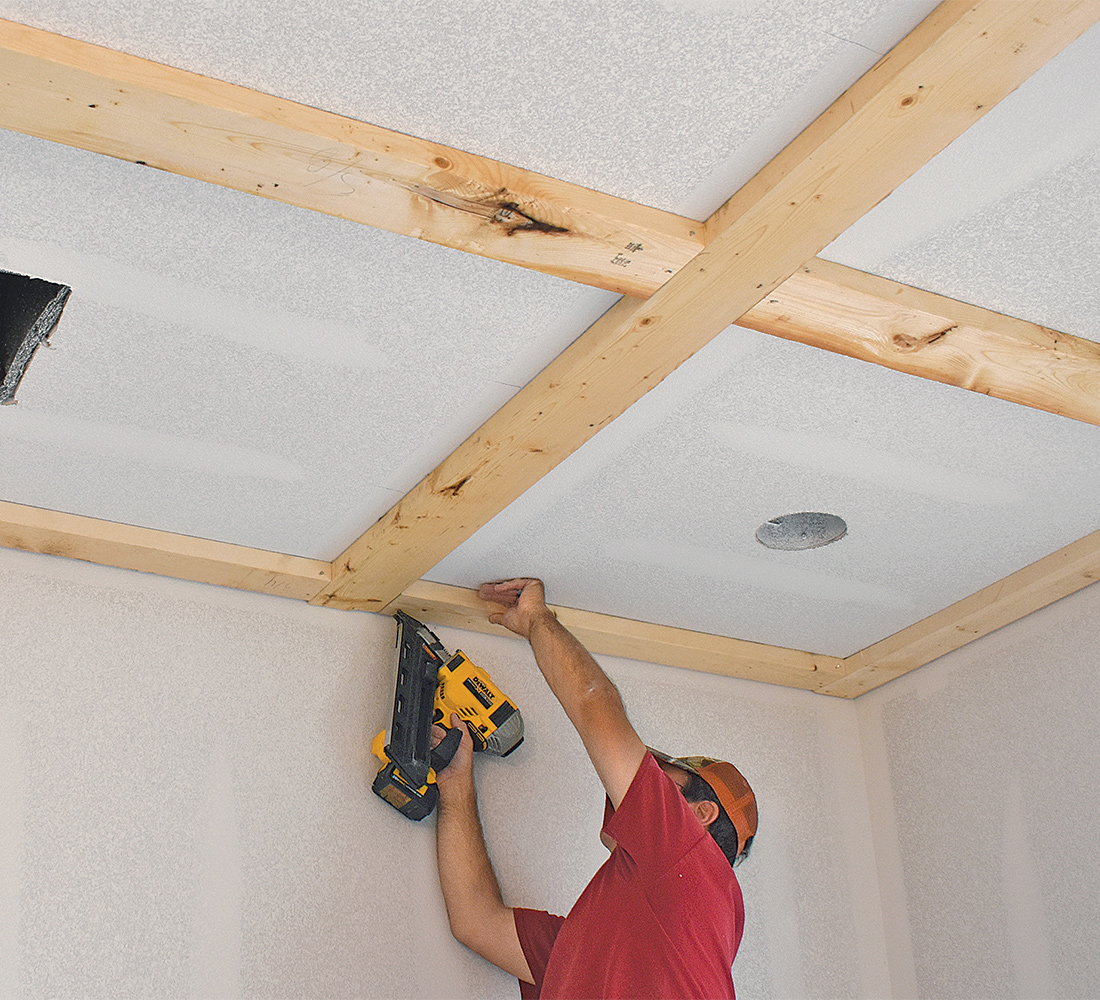
The first pieces of framing were nailed into each ceiling joist they crossed following the chalklines. That took half of my eight straightest boards. Next, I took some of the less-straight 2x6s and cut the cross members for the intersecting beams. Occasionally these will land below a ceiling joist, but most of the time they are just toenailed into the full-length boards to complete the first layer of framing. The next layer of framing locks the cross members into place more securely.
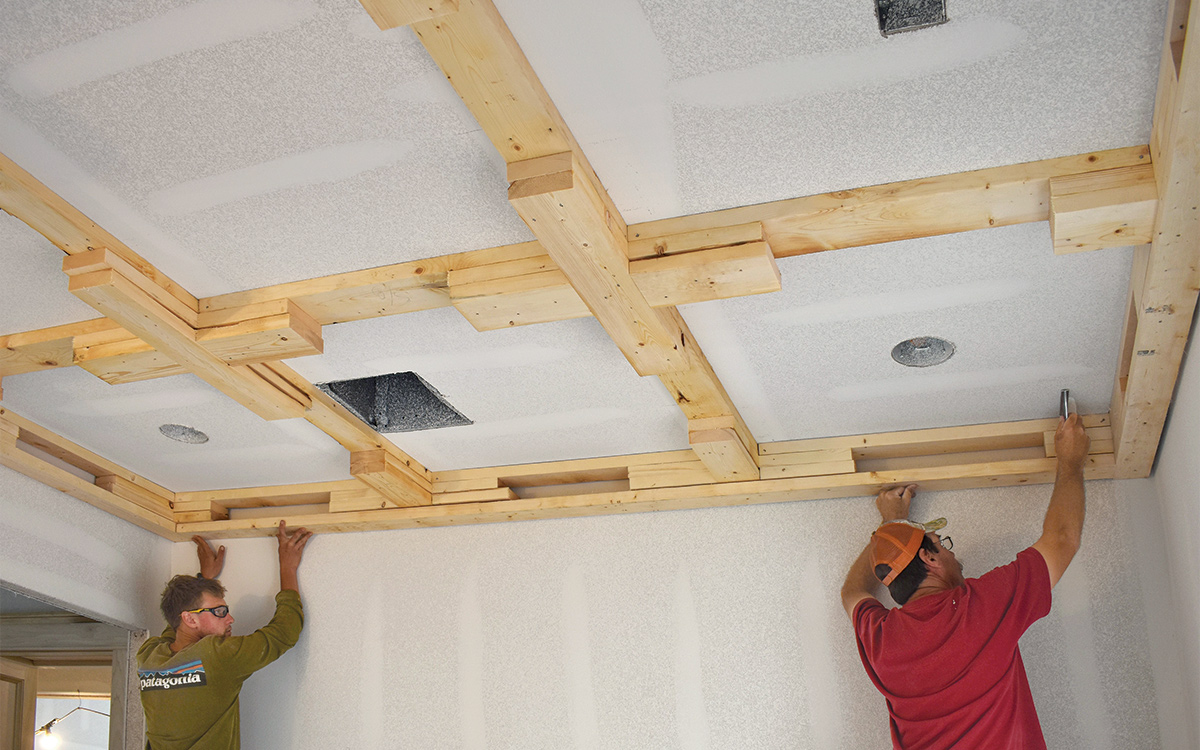
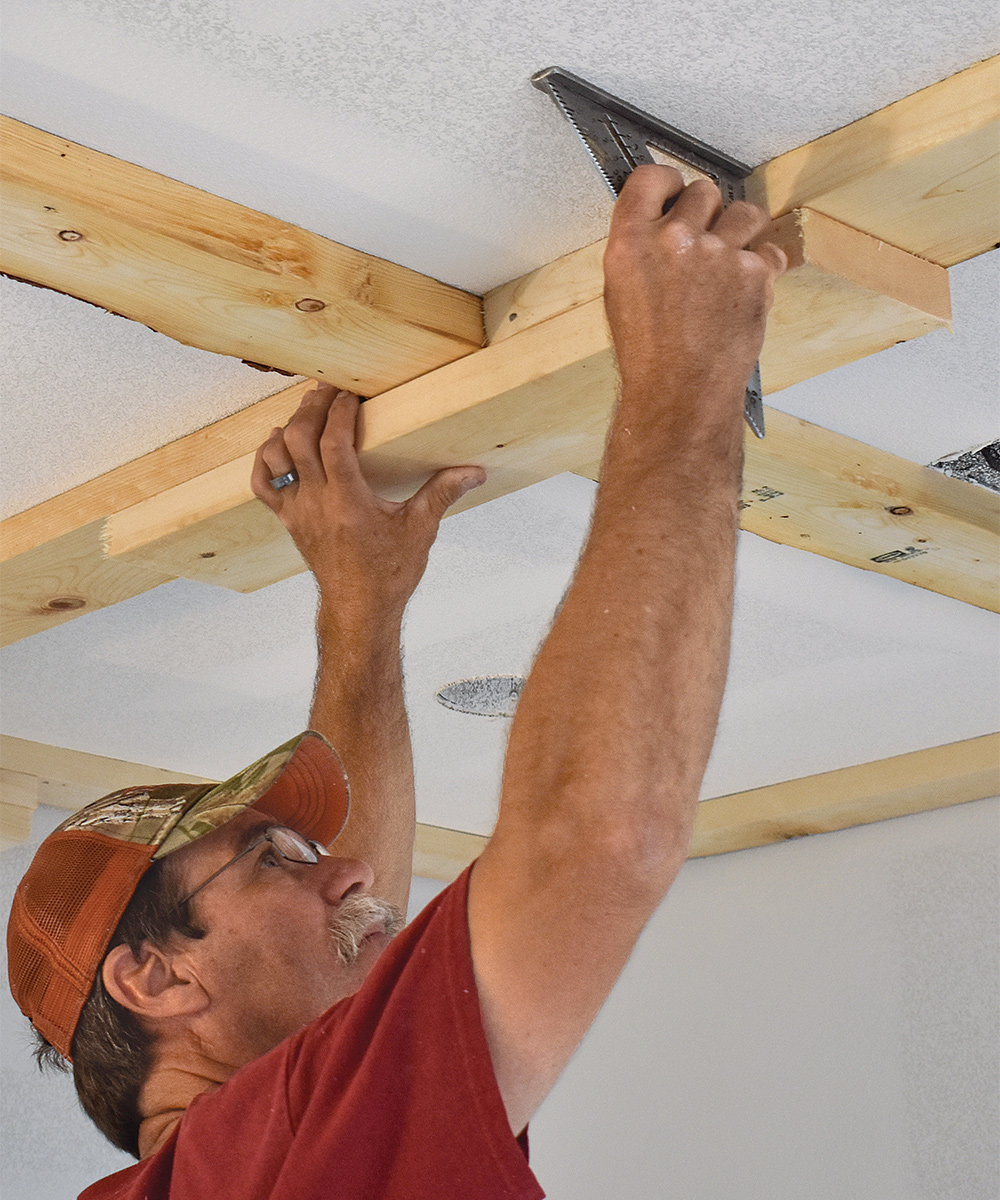
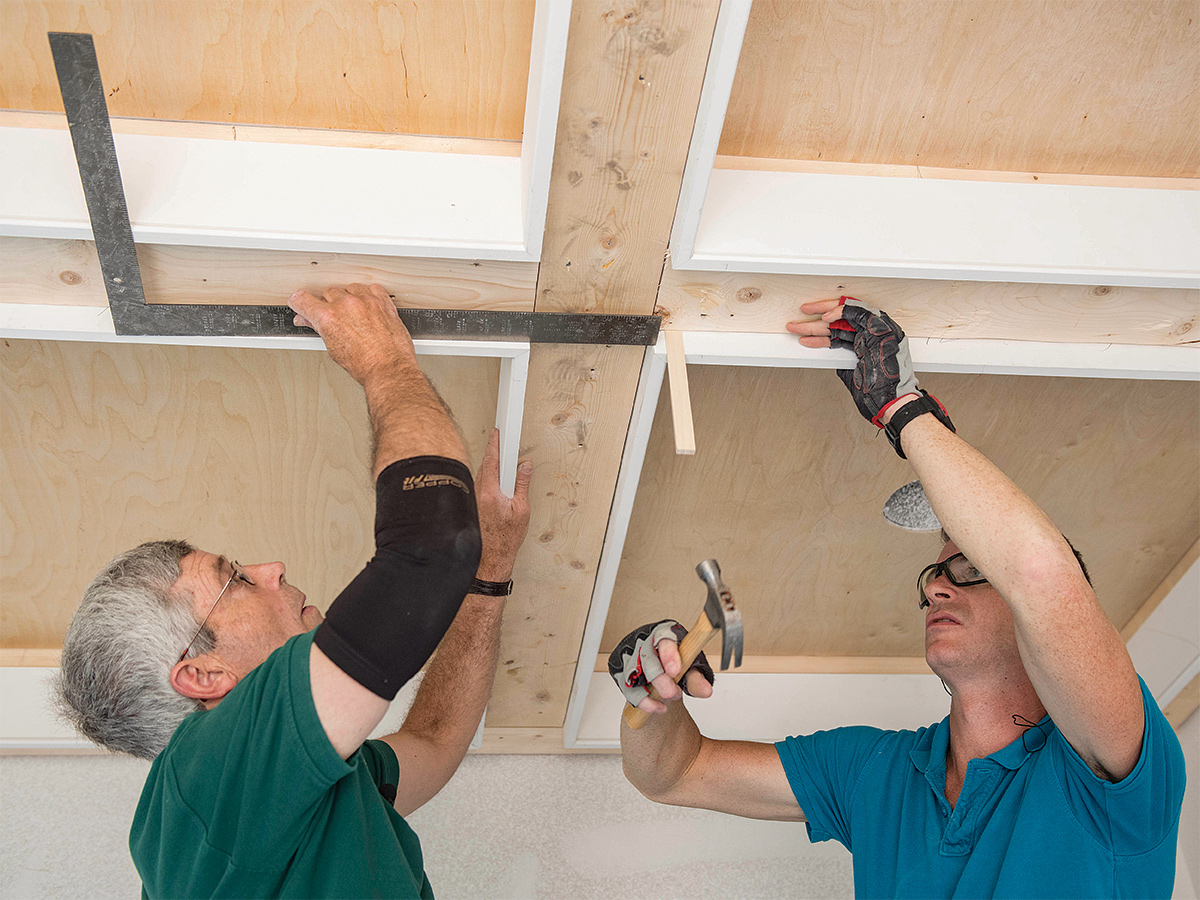
The next two layers of framing are shorter blocks. The first are cut about 32 in. long to span the beam intersections and support the toenailed joints. We use a rafter square continuously while nailing the blocks in place to keep the layers flush and square. It’s also important that framing is totally flat to the ceiling, so we use plenty of nails and an occasional screw if we find a place that needs to be pulled up.
After all the long blocks that cross the intersection are in place, pairs of shorter blocks are added to the other side of each intersection; again, we use a rafter square to keep the blocks lined up. For the last layer, I like to run the rest of the long, continuous pieces in the opposite direction of the long framing pieces used for the first layer. Keeping the framing flat and tight and accurately spaced takes work, but it makes a huge difference when it’s time to start cutting and installing trim.
Plywood panels are worthwhile
Stained coffered ceilings can be beautiful, particularly in rooms with lots of natural light, but most of the coffered ceilings we install are painted. If you have smooth drywall or can skim-coat over a textured ceiling, you don’t have to put plywood panels on the ceiling, but I always do. Installing a plywood panel against the ceiling hides drywall damage if you need to make any adjustments to the location of lighting. It also gives you a nailer for moldings. In my market, 1/4-in. birch plywood is usually the best option. It’s affordable and paints well. If we can’t get birch plywood, we’ll spend the money to get a decent-grade maple plywood, which also takes paint well.
Tack the ceiling panels in place
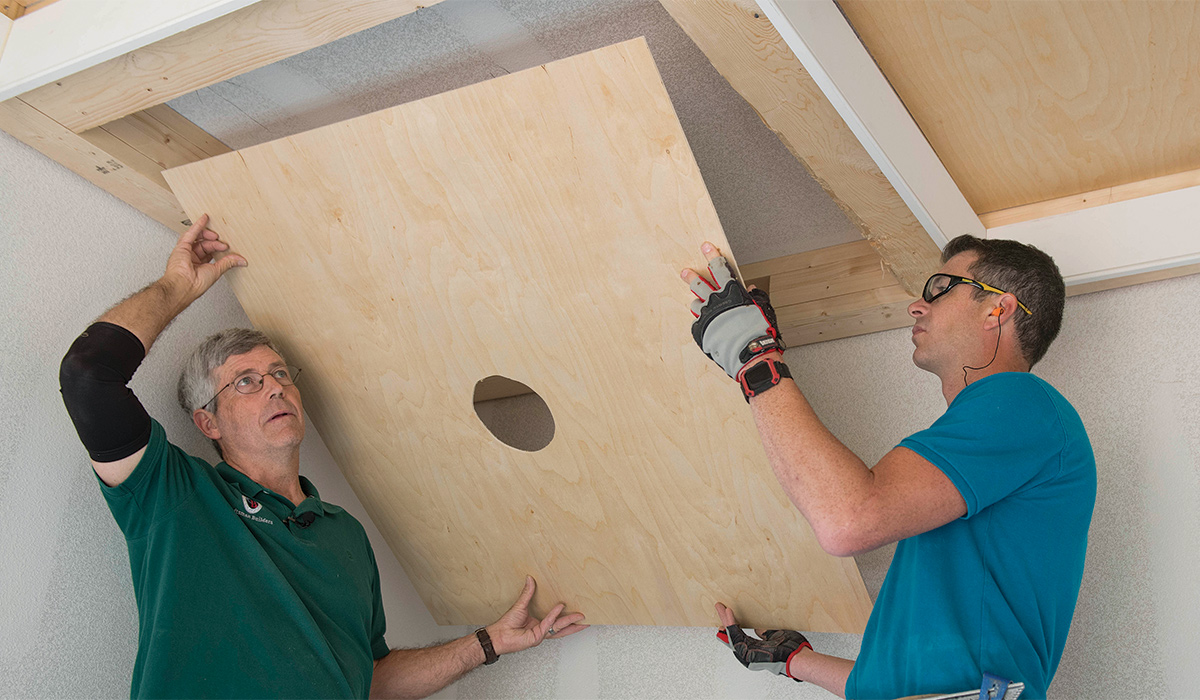
Plywood panels cover imperfections in the ceiling, create a smooth surface for paint, and offer a nailer for trim. If the layout and framing was done well, the panels will all be very close in size, if not exactly the same. Take care to locate lights and registers and cut the panels accurately. They can be glued and tacked in place and will later be supported by the cove molding added inside each section.

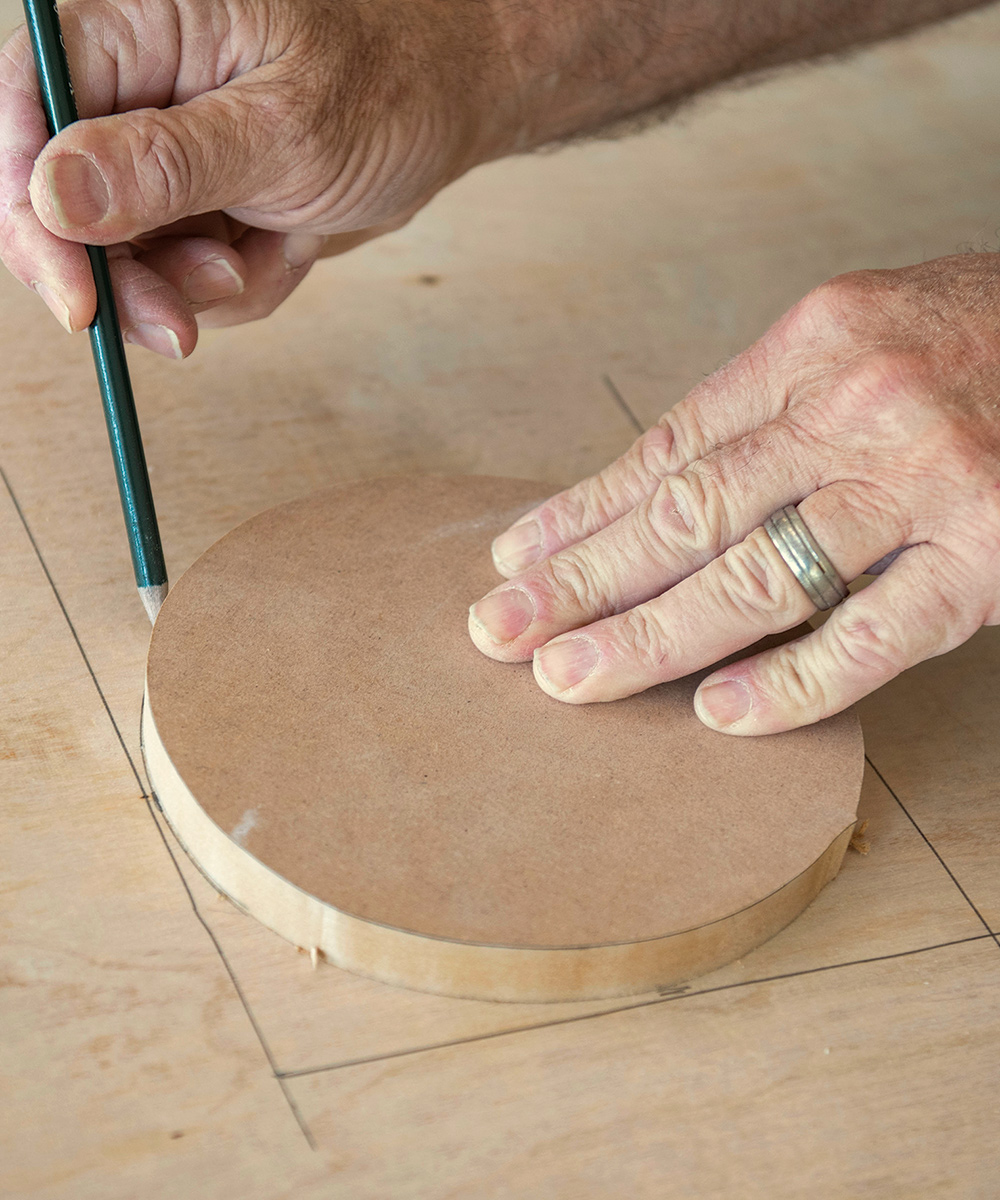


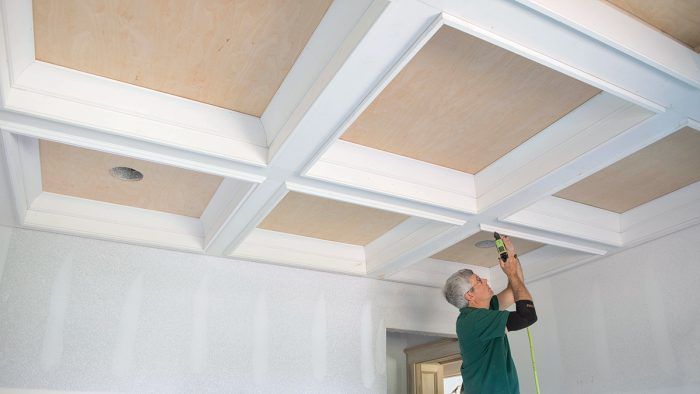
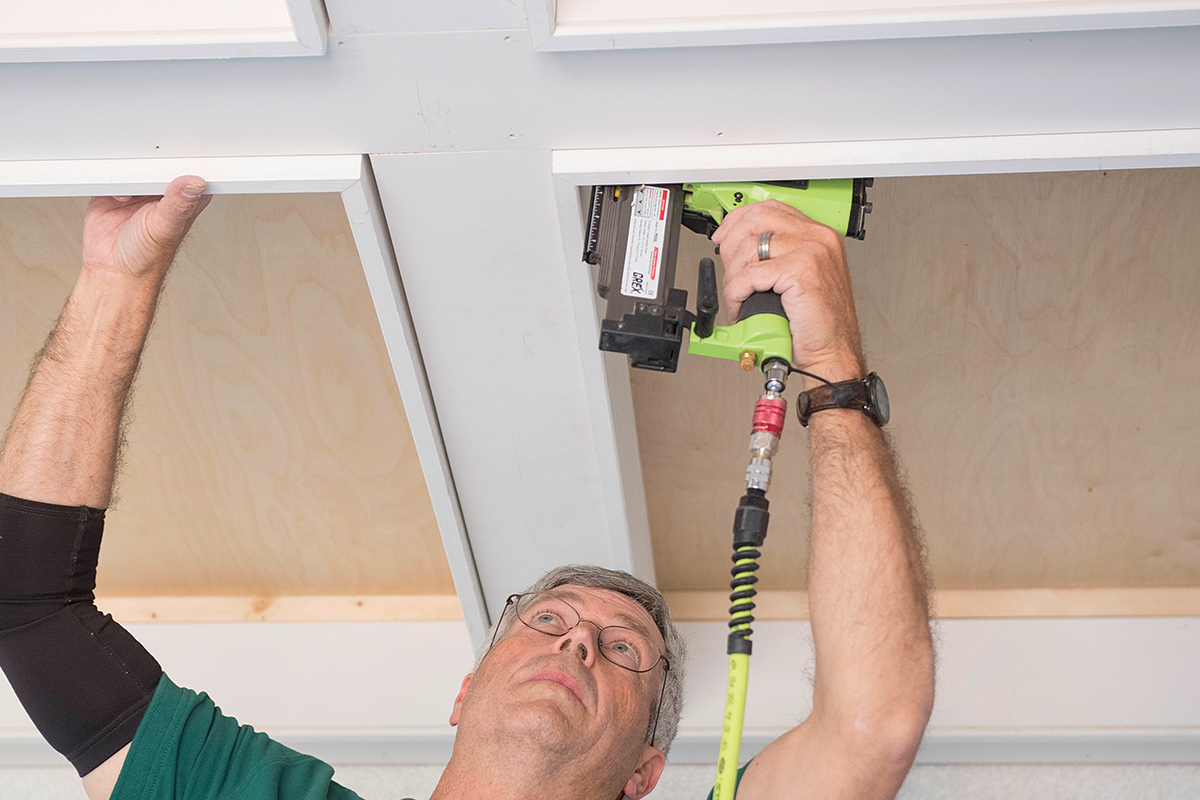
If I have laid out and installed the beams accurately, all the pieces of plywood will be the same size, which means I can cut them all at the same time. Still, I label each panel with a number and the corresponding section on the ceiling so that once I start modifying the panels for lights and registers, I will know where they go. Even though the lights in this project were installed to be in the center of the panels, for accuracy I like to check their location on the ceiling and measure from three sides of the panel to locate the holes. I then use a template to draw the appropriate-size circle for the light and cut the hole with a jigsaw. It might be a little more trouble, but it keeps me from buying extra plywood. Since the edges of most of these panels don’t land below a joist, we like to use glue and brads to stick them to the ceiling. Eventually the cove molding will keep them in place.
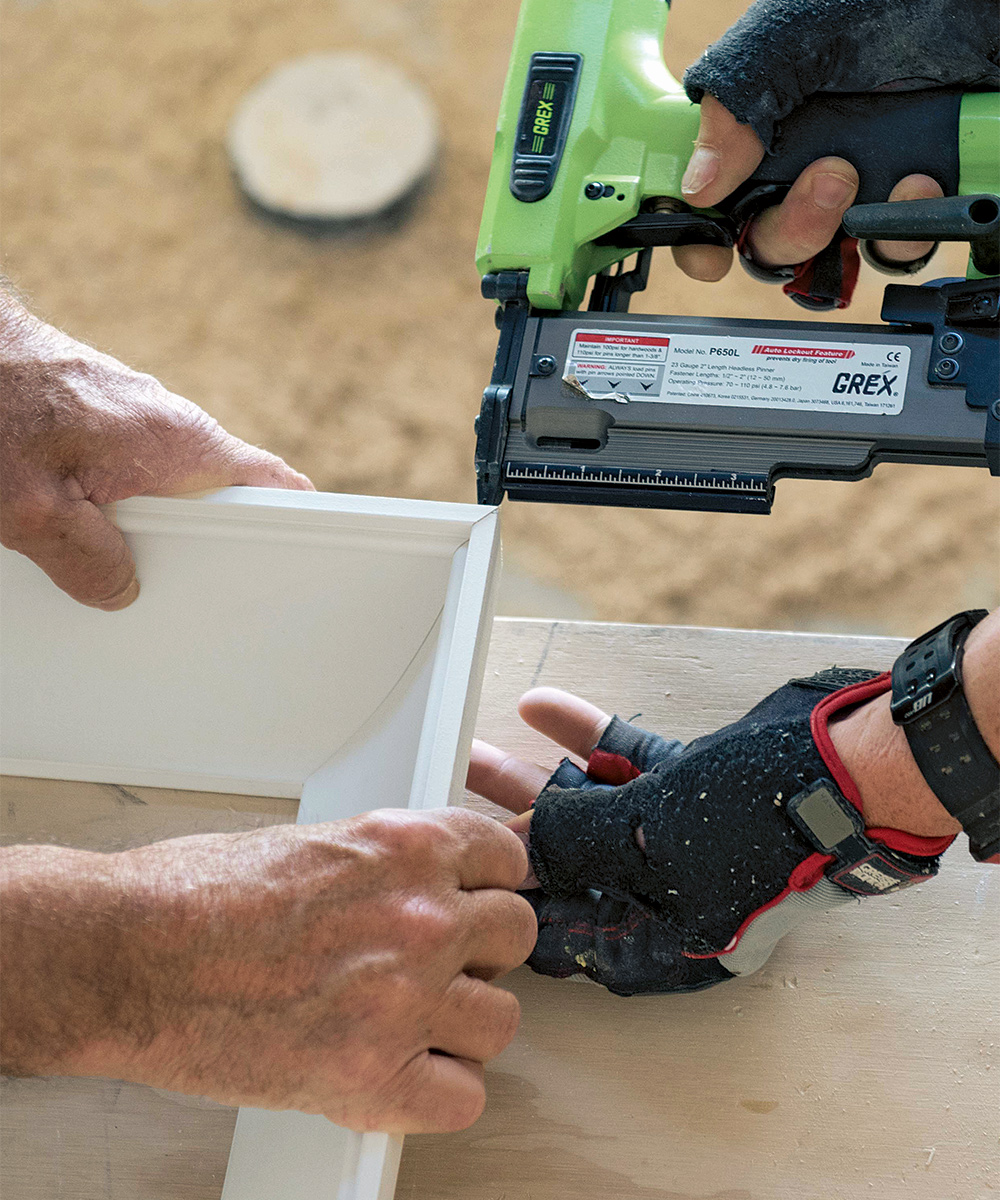
Beam sides can be installed as boxes
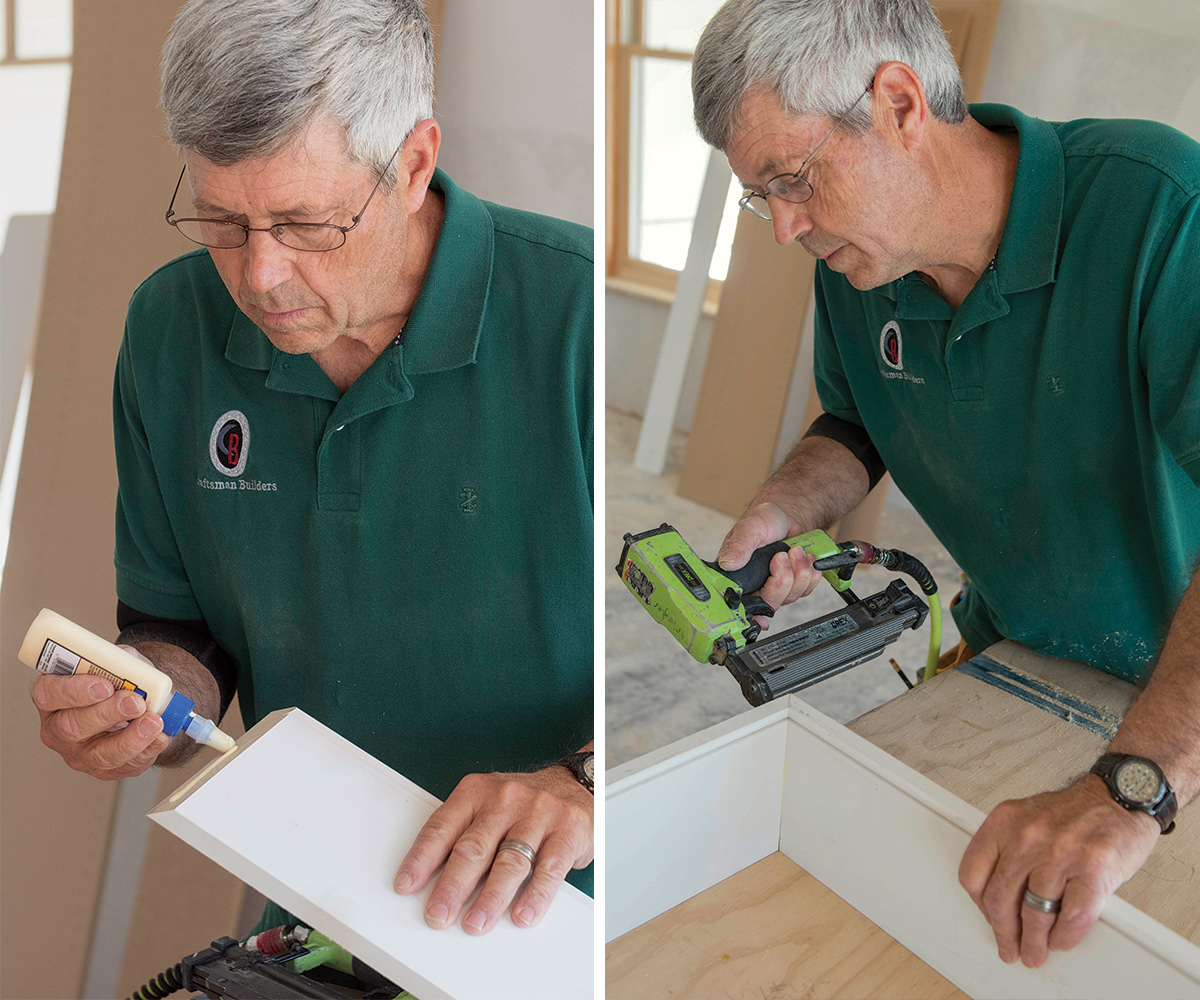
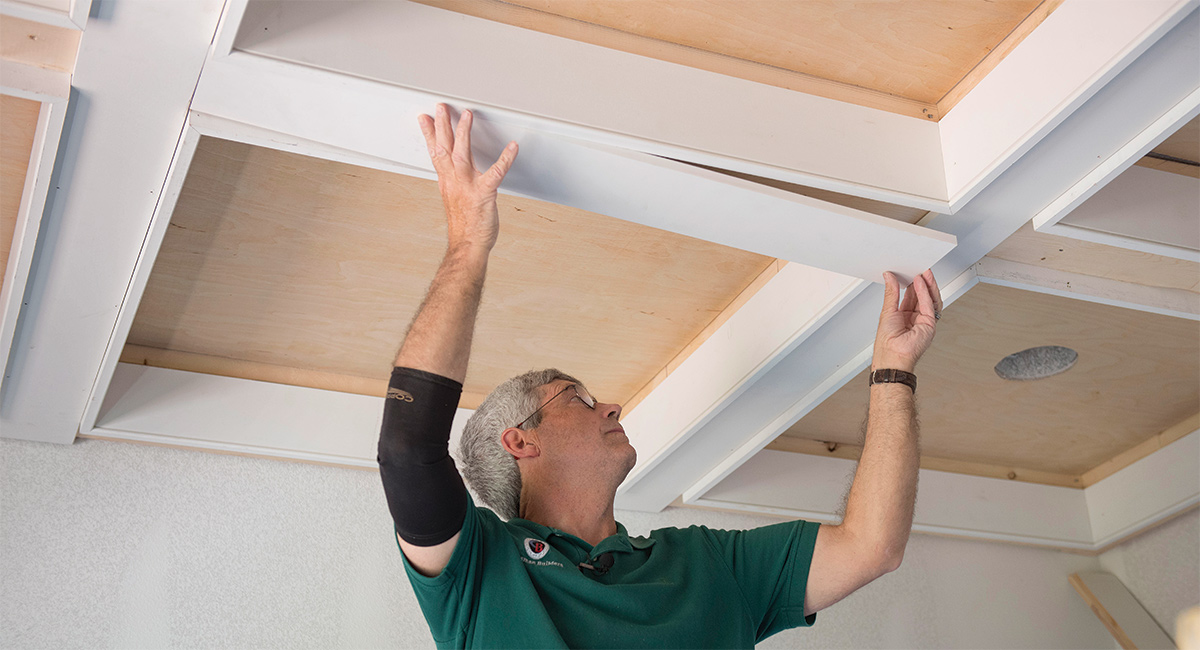
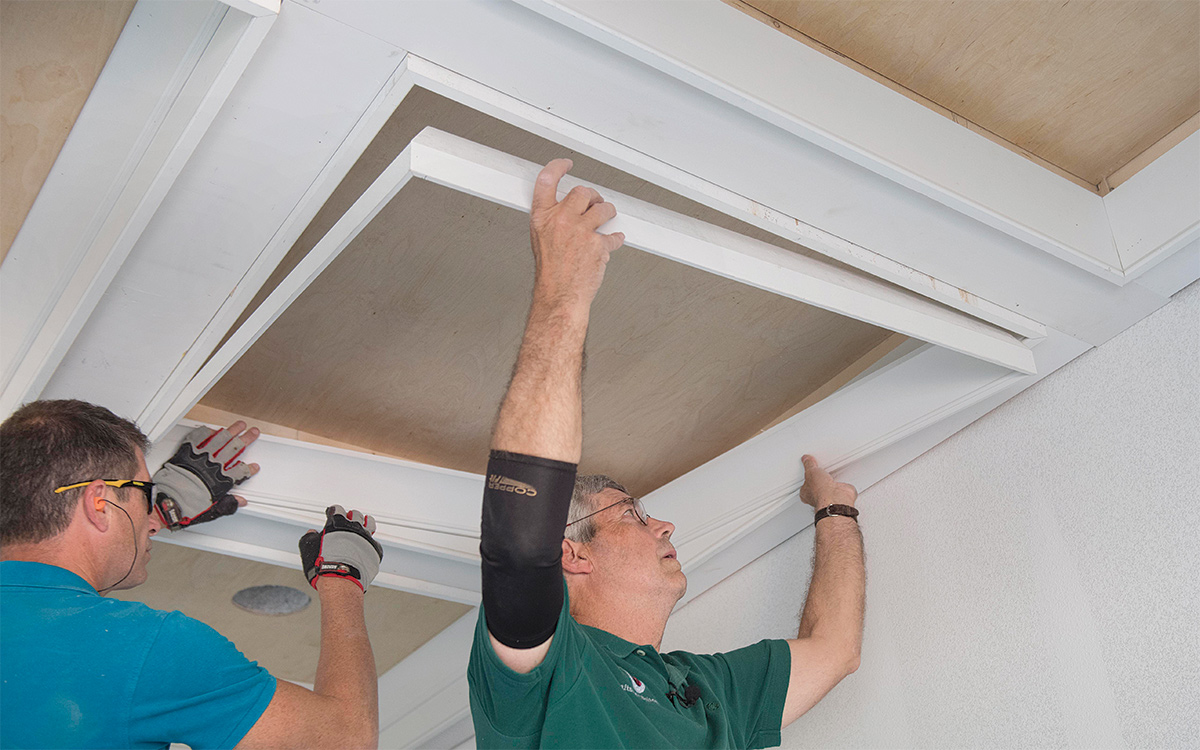
With the plywood panels installed, the fun starts. To trim the sides of the beams on this ceiling, I assembled four-sided boxes from the beaded material on my worktable and lifted them into place. I took accurate measurements of each rectangular section, working to the closest 1/32 in., then cut the pieces to allow 1/16 in. of shim space on each side. Because we took care with the layout and framing, a lot of the cuts were duplicates, which allowed me to use a stop on my miter-saw stand and cut most of the pieces quickly. This process is a lot like building a giant shadow box. By gluing and nailing the miter joints from the back side with headless pins, I get better, stronger joints much faster than I could by fitting four individual pieces into place one at a time.
Make boxes to finish the beam sides
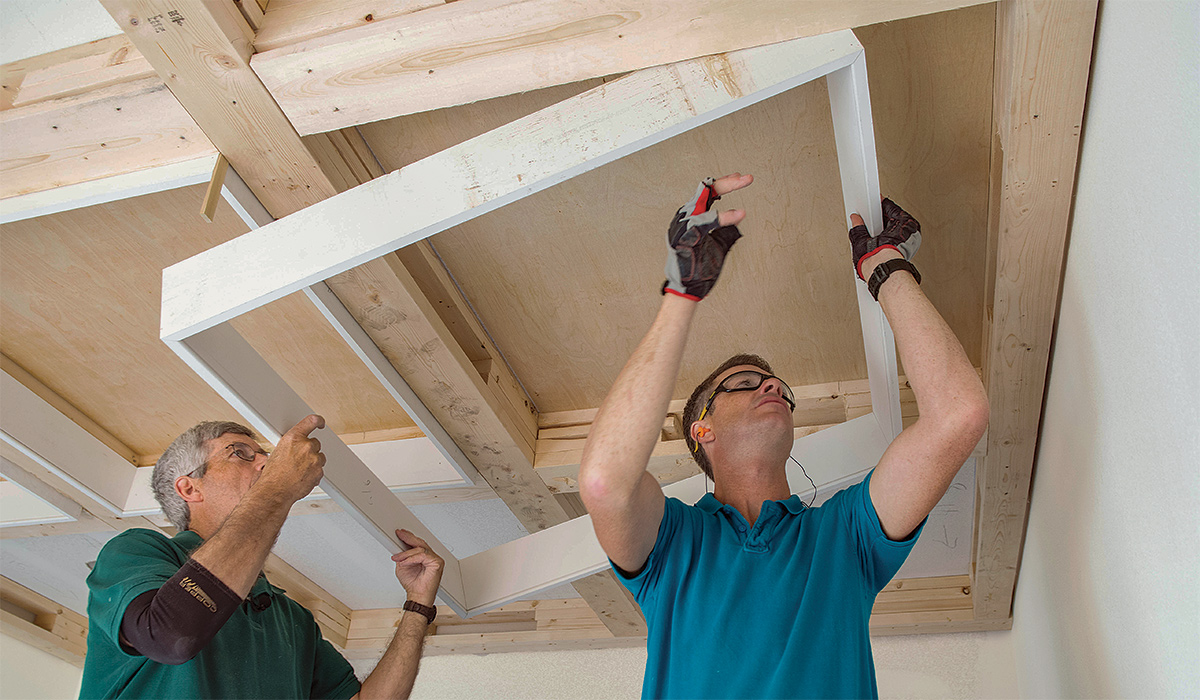
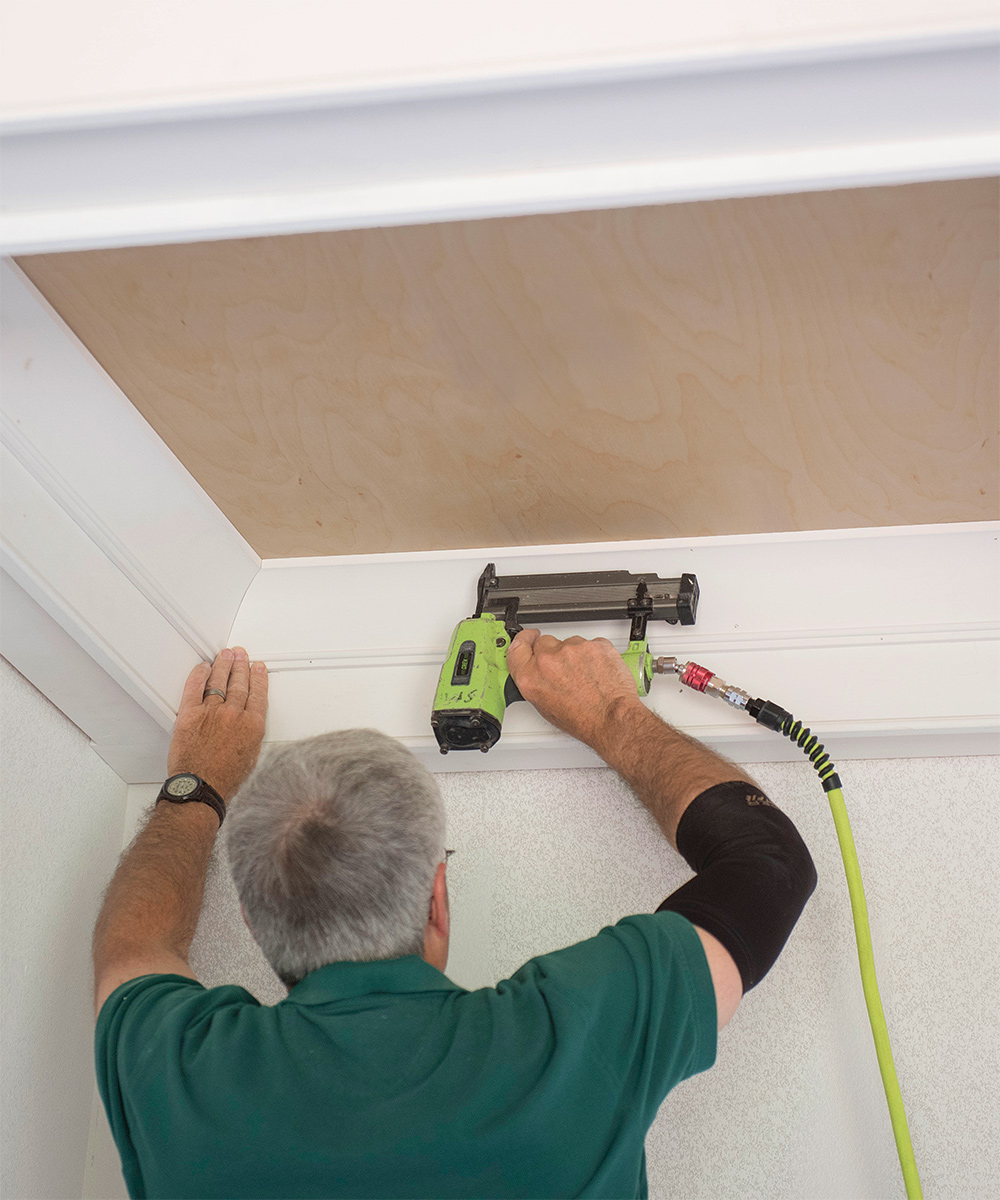
Coffered ceilings have the appearance of intersecting beams, but with this approach the beam sides are actually short pieces of beaded casing. Assembling the beam sides on a workbench and installing them as a box is less fussy and allows for glued and nailed miter joints. The key is to tack the boxes to the framing and make sure that they are aligned throughout the room, and square, before permanently nailing them in place.

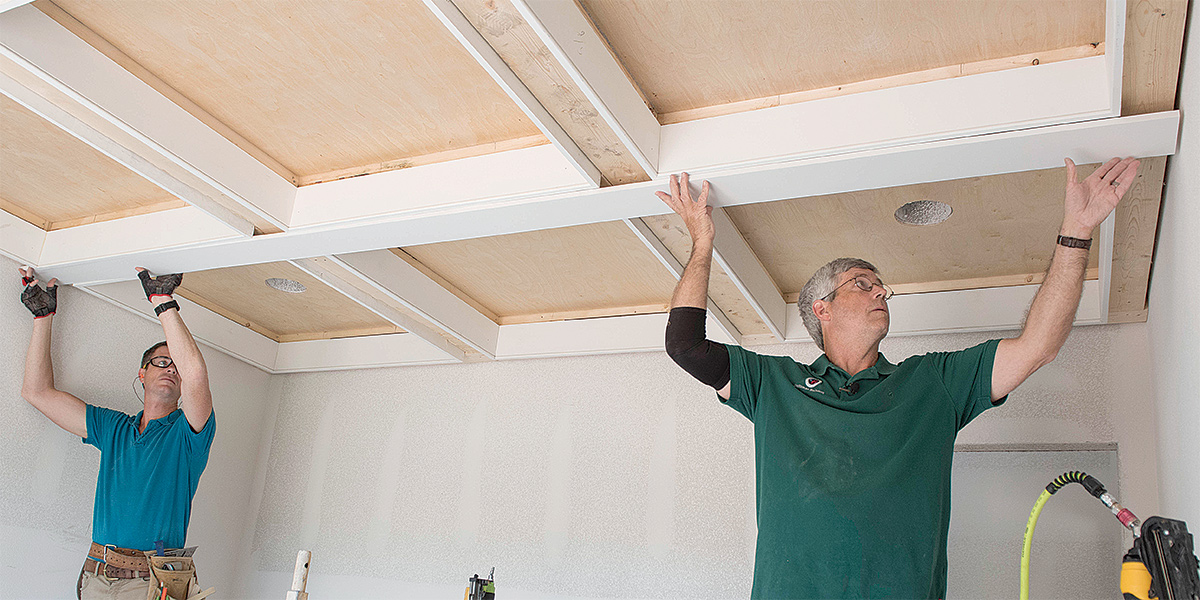
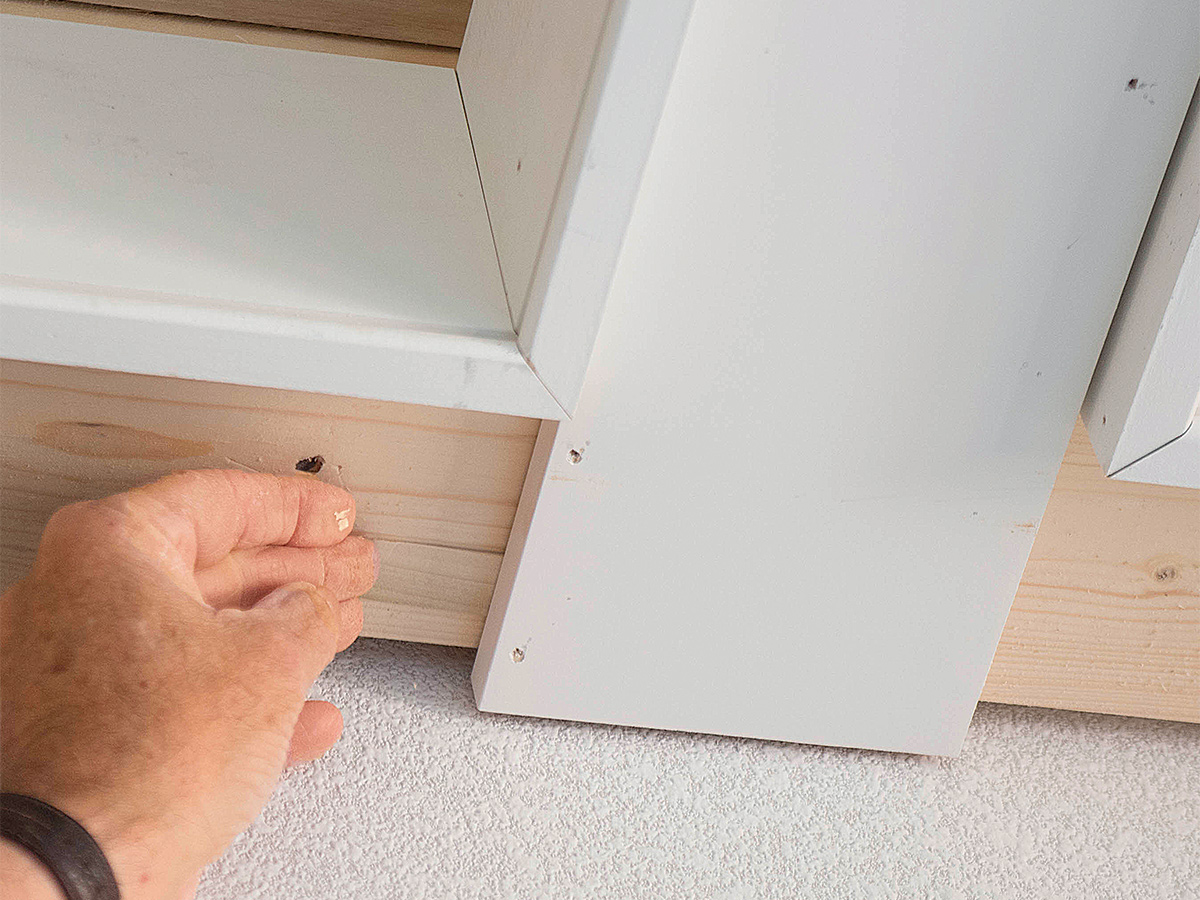
The boxes didn’t need to reach the ceiling; that space was to be covered by cove molding. But they did need to extend the right distance below the framing and to capture the beam bottoms and panel molding, so I used a small adjustable square as a gauge during installation. I started with a single finish nail in each corner. This minimal fastening meant I could still make adjustments, inserting shims where needed.
Once all nine boxes were in place, I made sure everything was aligned and square before adding more nails. I started by sighting down the boxes from the floor. Where I wasn’t sure how straight and square things were, I broke out a tape and framing square to double-check. I could also have pulled a stringline or set up a laser to do that. The process of aligning these boxes took an hour or so for two people. It was time well spent to make the next steps go smoothly. When we finished, we shimmed and nailed the middle of each box.
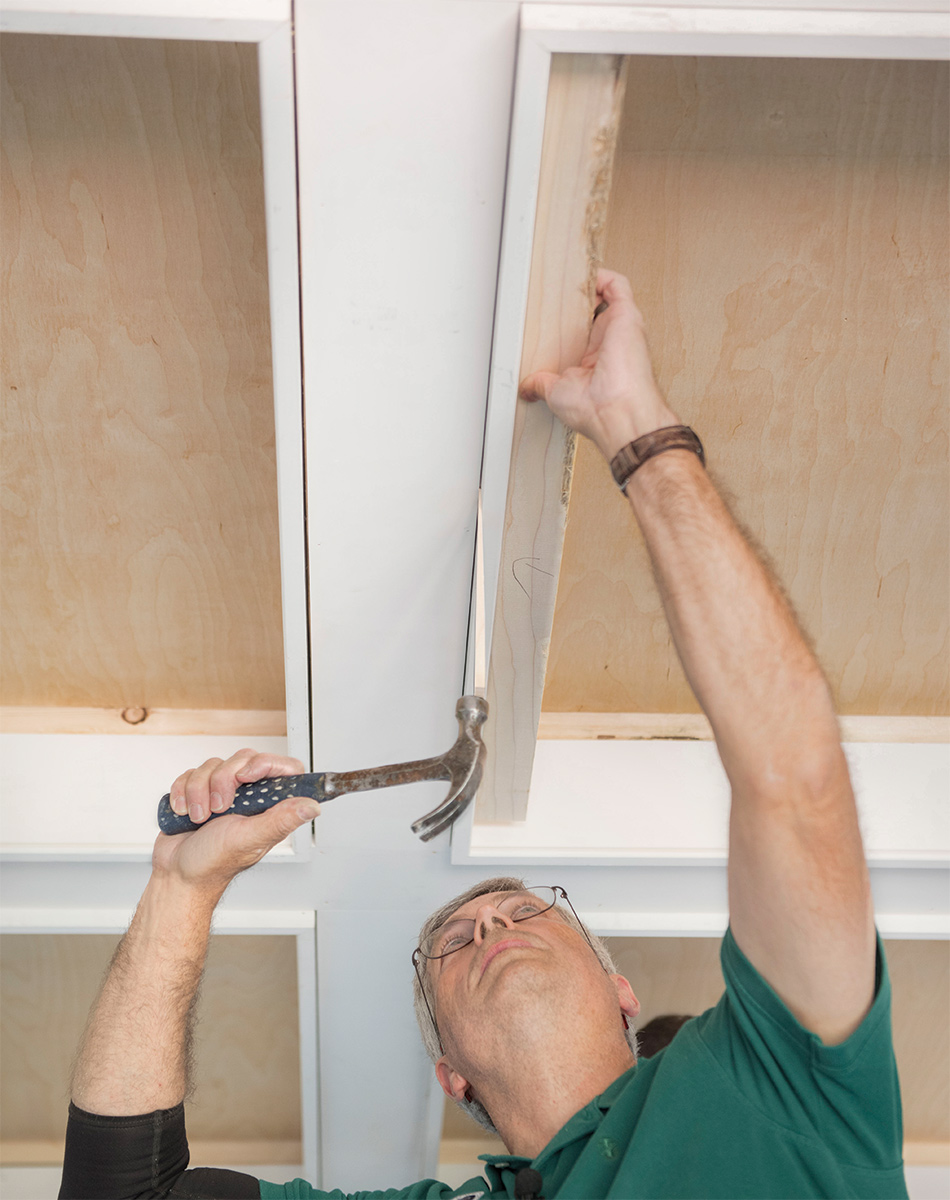
Beam bottoms must be dead flat
Installing the beam bottoms may seem like a simple part of the job compared to everything else, but this ceiling was going to be finished with an enamel, so any joint that wasn’t flat would stand out. I chose primed finger-jointed stock from Windsor One for the beam bottoms because it is reliably flat and straight. With this material, if the beam sides were not aligned perfectly, I would know it.
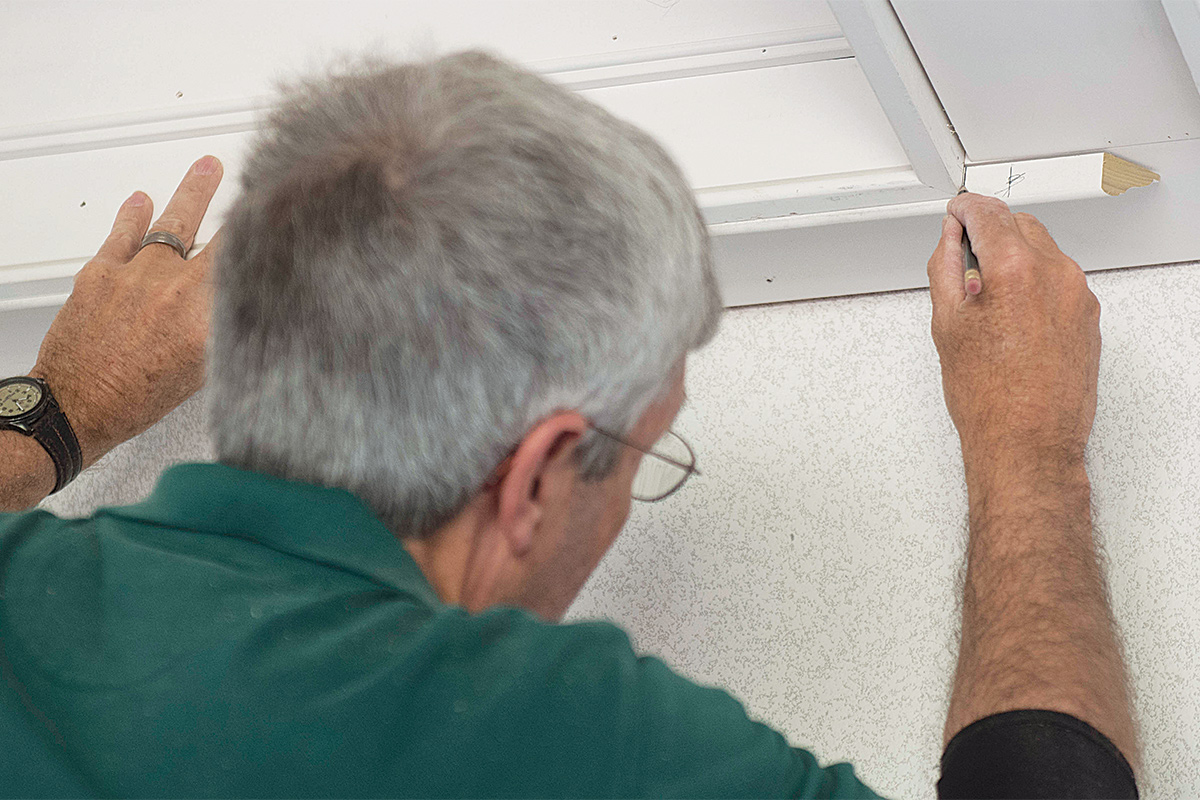
Be fussy with the beam bottoms
Out-of-plane butt joints will appear as obvious flaws in painted trimwork, so even though this is one of the simpler parts of the job, getting the beam bottoms to appear flat is important. Start by installing the long, continuous pieces perpendicular to the long runs of framing material. This means that the joints in the framing material are covered by full-length boards. When installing the shorter segments of the beam bottom, be fussy with the butt joints.
I wanted to avoid having a joint in the framing and in the beam bottom in the same location, so I ran the full-length pieces for the beam bottoms perpendicular to the long 2x6s used for the last framing layer. These bottom pieces needed to be pulled up tight to the framing, so we used plenty of nails to install them, especially close to the intersections.
When it came time to add the shorter, intersecting pieces of beam bottom, I checked the joint with a small test piece and cut both ends of each short beam bottom with a slight back bevel, which allowed me to wedge them into place for a very tight fit. When necessary, I added shims to keep the joints flat. In one spot I had to remove a strong 1/16 in. from the back side of the beam bottom to get a flush fit. After fine-tuning each joint, I added some extra nails through the beam sides and into the edge of the beam bottoms.
Moldings add character
So far I’ve just covered building beams, which are the foundation for all coffered ceilings, but moldings define the ceiling’s style and give it character. For this project, I chose a simple cove molding to trim inside each section. This cove molding can be assembled on a worktable and installed as rectangular units, just like the beam sides.
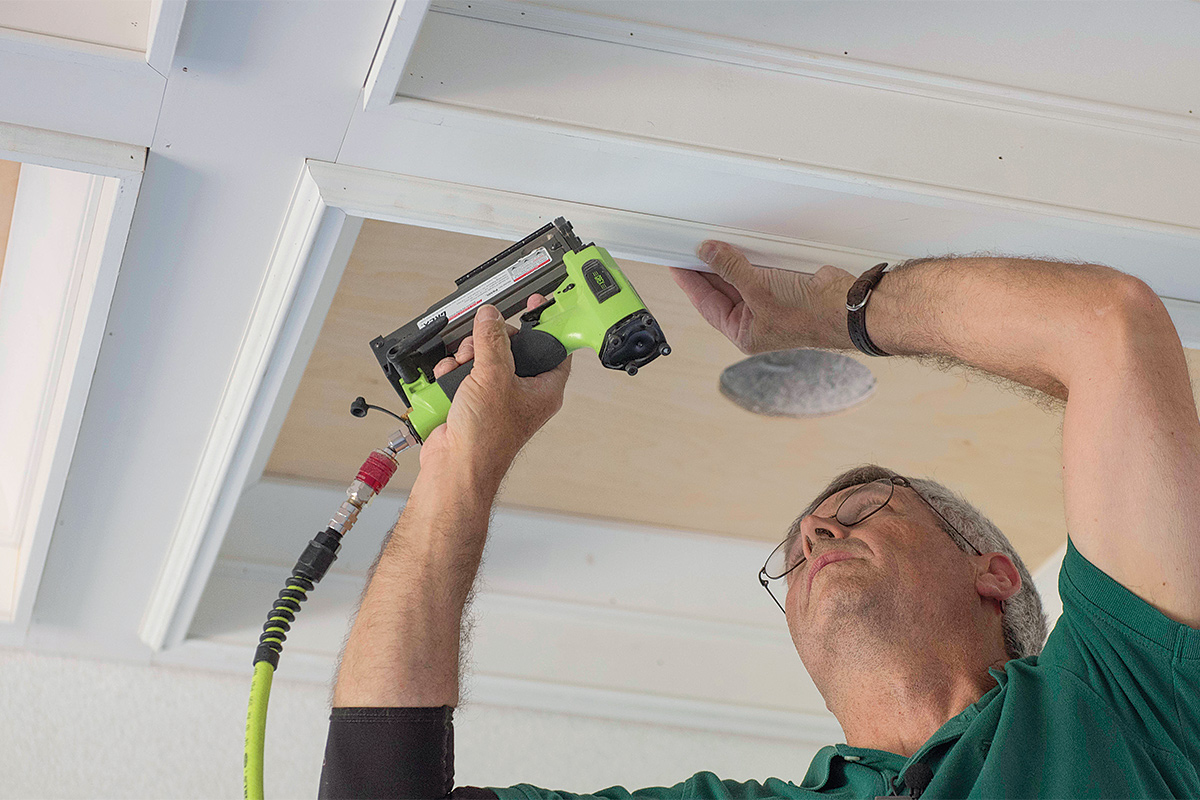
Preassemble the cove molding
For an easier installation, you can take a similar approach to the cove molding as for the beam sides by assembling units on a worktable. It’s a bit trickier to preassemble miter joints for cove molding, but it’s still easier to get a great joint this way than it is when installing the molding one piece at a time. Cut the molding lengths a hair shy and you’ll have an easier time lifting them into place.
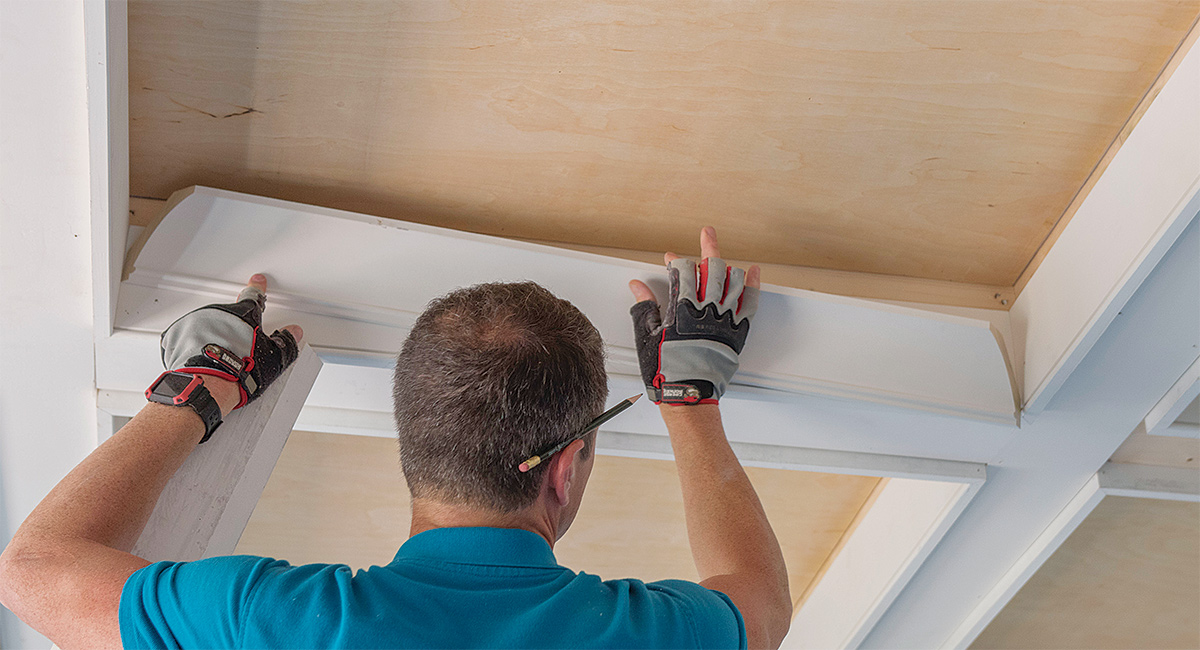
Nailing together a box made from cove molding is a little more challenging, but installing the units actually goes a little faster than the beam sides since there is no alignment to worry about. When measuring and cutting the cove molding, I aim to be just a bit shy on each length to make it easy to lift the boxes into place. If a box is a little tight, a few passes on the back edge of the cove molding with a block plane is usually all it takes to get it to slide into place.
Even though this is not an ornate coffered ceiling, I did install a 3/4-in. by 1-1/4-in. panel molding to transition from the beam boxes to the beam bottoms. All of the joints are outside corners, which offers two advantages: Outside corners highlight trim profiles nicely, and they allow for an installation sequence that ensures accuracy. I marked, cut, and installed the molding on opposite sides of the section first. That let me measure the next two pieces from long points. I cut those pieces slightly long so that I could test fit the joints and make minor adjustments for a tight fit. This process can be tedious, so it’s a great opportunity to step back a few times and admire your work. With the primed material you’ll have a pretty good idea what the finished ceiling will look like, and that will inspire you to give the final joints extra care.
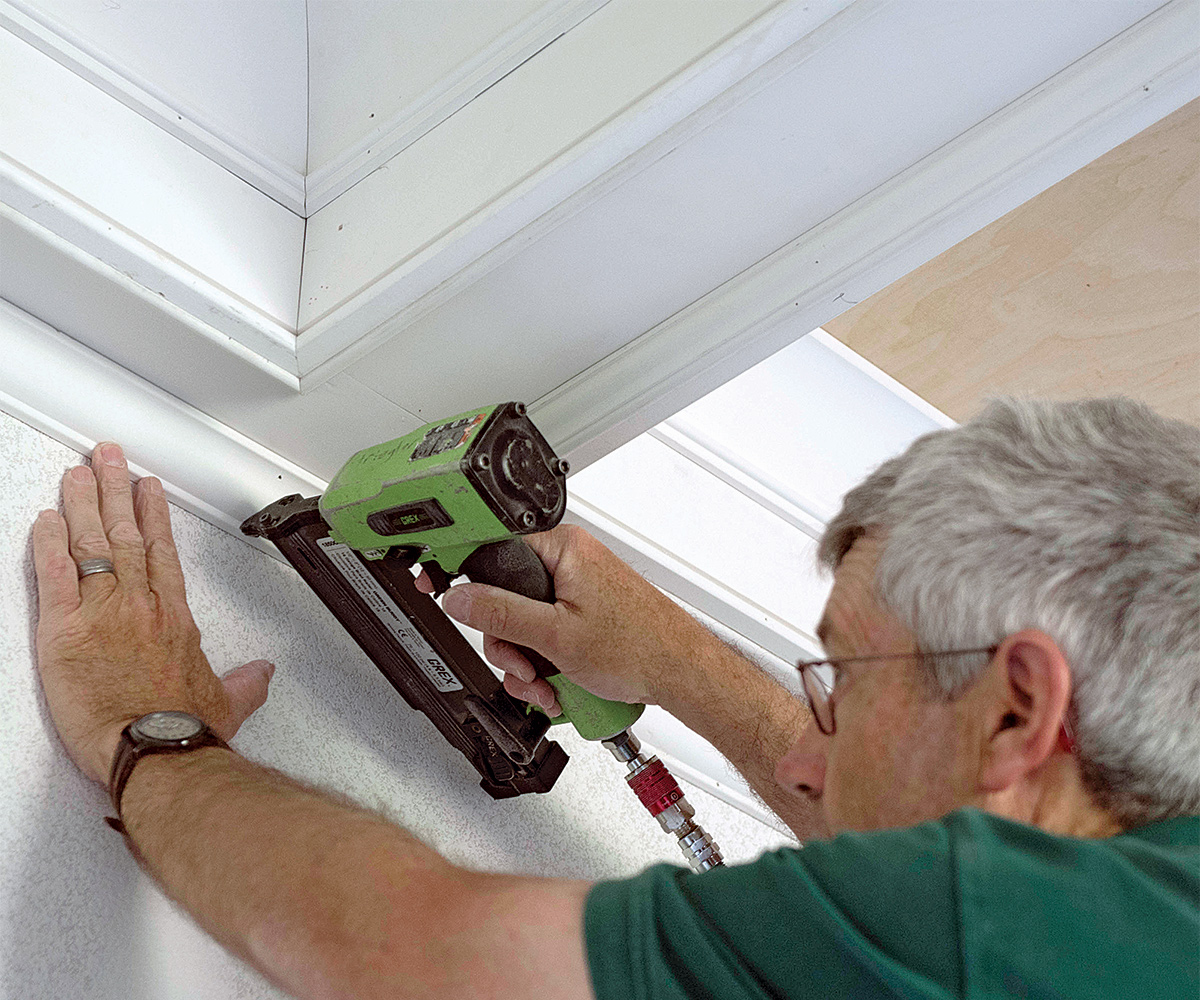
Finish with panel molding and crown
The final steps are to add panel molding to dress up the intersection of the beam sides and bottoms, and crown molding around the perimeter of the ceiling. The panel molding is the only trim on the ceiling with an outside corner, so it has a big impact. Measuring and marking opposing pieces of panel molding in place ensures accuracy and allows you to measure from the long points for the next pieces. The crown molding is installed last and is a typical crown installation.
Frequent Fine Homebuilding contributor Gary Striegler owns Craftsman Builders, a Fayetteville, Ark., company specializing in millwork and interior details. Photos by Bryan Striegler.
From Fine Homebuilding #319
RELATED STORIES

View Comments
Exploring an easy approach to coffered ceilings unveils a world of architectural elegance and simplicity. Just as this approach offers a seamless way to enhance your living space, collaborating with a skilled SEO consultant in Pakistan provides a straightforward path to optimizing your online presence.