FHB Logo Facebook LinkedIn Email Pinterest Twitter X Instagram Tiktok YouTube Plus Icon Close Icon Navigation Search Icon Navigation Search Icon Arrow Down Icon Video Guide Icon Article Guide Icon Modal Close Icon Guide Search Icon Skip to content
Subscribe
Log In
  • How-To
  • Design
  • Tools & Materials
  • Restoration
  • Videos
  • Blogs
  • Forum
  • Magazine
  • Members
  • FHB House
  • Podcast
Log In

Fine Homebuilding Project Guides

Finish & Trim Carpentry

Guide Home
  • Trim Design
  • Tools and Materials
  • Interior Trim Basics
  • Window and Door Casings
  • Baseboard and Crown Molding
  • Wainscot and Paneling
  • Mantels and Fireplace Surrounds
  • Coffered Ceilings
How-To

8 Basic Rules to Master Trim Carpentry

Excerpted from a contractor’s new-employee handbook, these fundamentals will improve the efficiency and quality of any finish carpenter’s work.

By Tucker Windover Issue 208

Synopsis: Trim carpenters put the finishing touches on a home’s interior, making sure that everything looks perfect. The best finish carpentry doesn’t happen accidentally. Veteran carpenter Tucker Windover presents his new crew members with a guidebook to mastering trim carpentry, and FHB presents these eight basic rules from Windover’s playbook. Windover’s rules include keeping the job site clean, being neat about nailing, thinking and seeing straight and parallel, improving surfaces before the finish goes on, making miters flush, knowing when to make precise cuts, using a reveal on standing trim, and knowing when it’s necessary to use a measuring tape.


I’m a busy contractor with a half-dozen trim carpenters working on two or three jobs on any given day. Needless to say, I’ve had a number of employees on my crew of carpenters over the years. To maintain quality and consistency, I’ve written up a list of work habits and procedures that I’ve organized in a three-ring binder. On their first day, every new carpenter receives a copy. It’s as much a list of results as a list of techniques. Each point sounds minor by itself, but added together, this list creates a foundation for efficient finish carpentry. Even veteran carpenters can let these simple guidelines slip away from them over time, and that can result in careless work. Finish carpentry is more than just tight miter joints. It’s a method of work defined by standards that can be easily replicated.

1) Keep the site clean

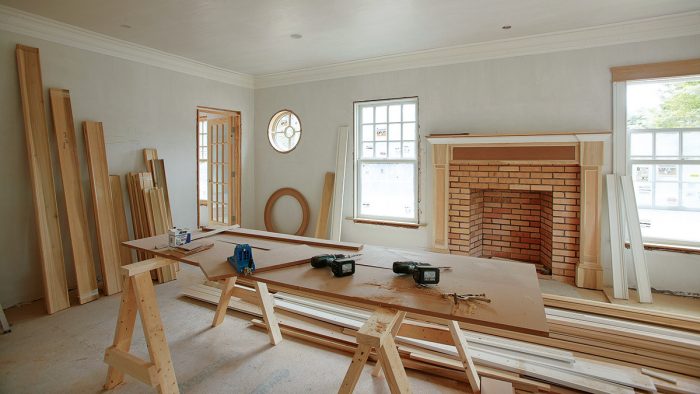
I knew a guy everyone called Yard Sale because he left tools all over the job site. He could never put his hands on the tools he needed. To set up an efficient site, keep tools organized, plan tasks for simple repetition, and lay out job-site materials so that they are easy to access and find.

neat working area

some material in each room rather than to have one big pile
It’s better to have some material in each room rather than to have one big pile. Start each project by unpacking the doors and setting them at the openings where they will be installed. This is the time to double-check that the doors swing correctly, that the doors don’t swing over a light switch, and that they open cleanly against walls. Stock enough window casing, door trim, and baseboard in each room to complete that room. This way, it’s much easier to account for missing material.


Corral stair parts
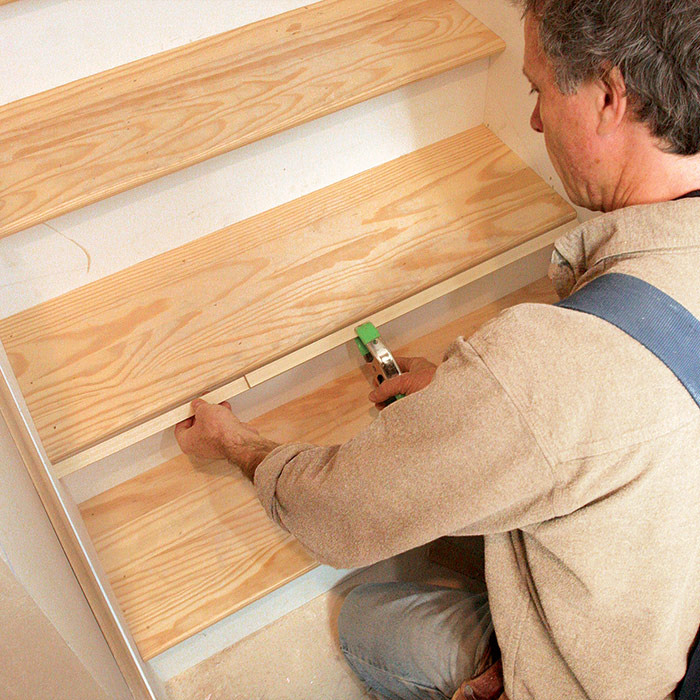
Corral stair parts at the stairs. These smaller pieces are easy to misplace, so put everything within easy reach of the stairs. The risers go in one pile, with treads nearby and newel posts next to the handrail fittings.


Don’t expect the painter to make your work look good


2) Be neat about nailing

One good work habit to develop is establishing a pattern to your nailing. On standing and running trim, place nails regularly in pairs every 16 in., or until the material is tight. This keeps the work neat and orderly. Avoid nails inside molding profiles; it’s hard for a painter to fill and sand these holes. Use 2-in. nails for baseboard because 2 1 ⁄ 2-in. nails will eventually hit a wire in a 2×4 wall. Use 18-ga. nails for wood-to-wood connections and 15-ga. nails for applying molding over drywall and for setting doors.

Establish a pattern to your nailing
Establish a pattern to your nailing. On standing and running trim, place nails regularly in pairs every 16 in., or until the material is tight.

Always use a nail set
Always use a nail set. In an average 2800-sq.-ft. house, there might be 5000 nails in the trimwork. The painters shouldn’t find one unset nail after the finish carpentry is complete.

3) Think and see straight and parallel


Installing most trim is the discipline of connecting two points with a straight line. At this stage in the building process, the work sometimes becomes more a game of appearances than of perfection. The trick is to make bows, bends, and out-of-plumb conditions appear straight and true.

bowed ceiling

Parallel trumps plumb installations, usually

Snap a line as a guide for the bottom edge of crown molding
Snap a line as a guide for the bottom edge of crown molding. If there are waves in the ceiling, at least the bottom edge will be true. Thin gaps at the ceiling can be caulked, and wider gaps can be reduced by flexing the crown to conform to the ceiling.

Converging lines will stand out to anyone with a good eye
After the carpenters are gone, no one inspects the house with a level. Converging lines, however, will stand out to anyone with a good eye. This is especially true where a door is set close to a wall, as in a hallway. If the wall is out of plumb and the door is hung plumb, the casing will show a taper against the wall. However, the aesthetics must be balanced with the door’s function, especially if a door is likely to be kept open. Hung out of plumb, a door may swing shut by itself. In that case, the door must be installed so that it operates properly.

4) Improve the surfaces before the finish goes on

It may not be noticeable now, but after semi-gloss paint hits the trim, any sawblade marks, tear out, or imperfections will stand out like a sore thumb. Carry a piece of 150-grit sandpaper in your tool belt. On wood that gets a clear finish, erase or lightly sand out pencil marks. Sand field joints so that they become flush. When you walk away from the work, the stock should be ready for paint or stain.

sand tearout erase pencil marks

denatured alcohol

TIP: A rag dipped in denatured alcohol can erase many pencil marks and doesn’t affect the surface of the wood.

5) Make miters flush

After door and window casings are painted, mating surfaces that aren’t flush will stand out. A miter should be tight and flush, but a thin gap in the miter can be filled with caulk and will disappear. Uneven surfaces will stand out and should be leveled. A shim placed under one side of the miter can help to line up the joint. Tack it in place, and trim the excess. A little sanding can blend discrepancies between the two sides.

A shim placed under one side of the miter can help to line up the joint A little sanding can blend discrepancies between the two sides


6) Know when to make precise cuts

Not every joint shows, so don’t waste valuable time on cuts that don’t matter.

open and tight corners
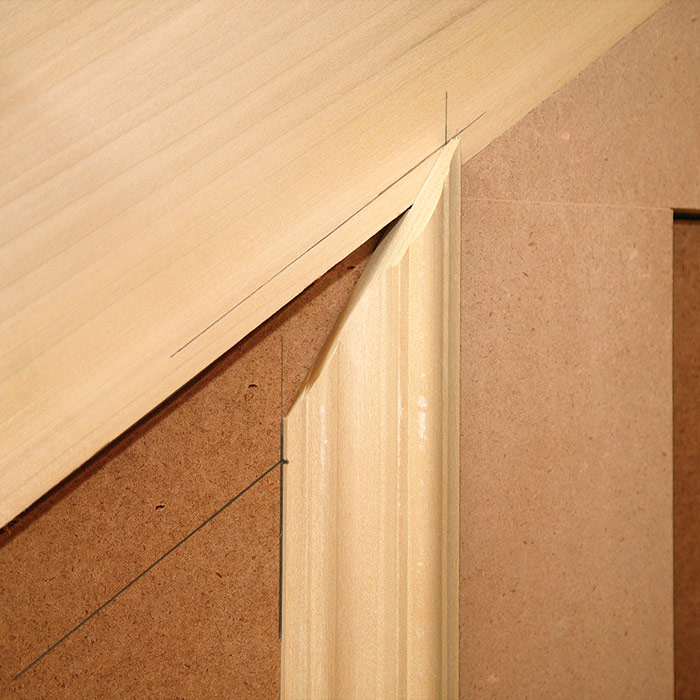
Use your time wisely. There are plenty of times when a miter or cope will be covered with a successive layer of trim, so only the visible part of the joint needs to be tight. Corners are almost never square, so miters cut at 45° (photo above left) will often show a gap. Instead, use a back-beveled miter that creates a tight outside joint; the gap (photo above right) will be hidden by the band molding. Likewise, shoe molding will cover gaps under a run of baseboard. When installing base or crown at an inside corner, the first piece can be cut a little short because the small gap will be covered by the cope of the next piece.


7) Always use a reveal on standing trim

Avoid a flush joint on layers of standing trim, such as applied window stool or door casings. Typically, any additional layer of trim on a door or window jamb should have a reveal, or it will leave a distracting seam. The size of the reveal depends on the proportions of the trim, but a 3⁄16-in. reveal is a good rule of thumb.
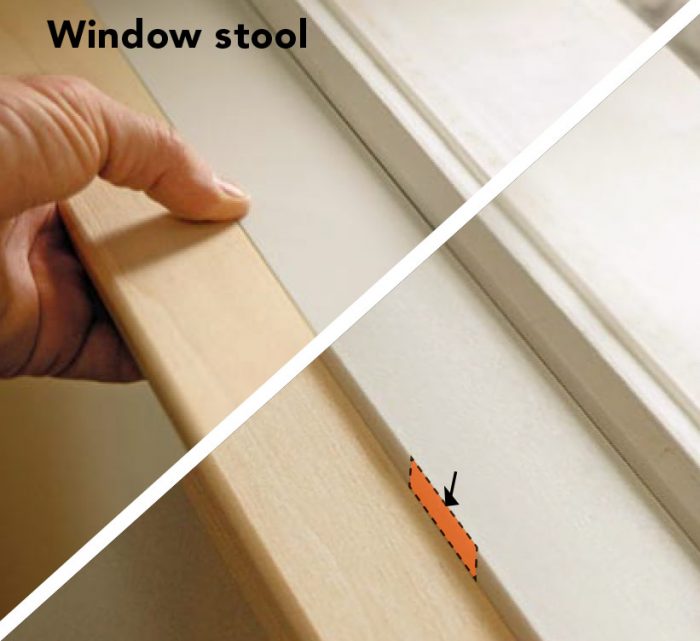
Window stool Window casing

TIP: Use a small combination square to mark a consistent reveal on standing trim.

Use a small combination square to mark a consistent reveal on standing trim

8) You don’t have to pull out your tape every time you mark and measure

Most trim measurements can be made faster and more accurately with a more appropriate technique. choose the most appropriate method for the task at hand.

story pole
For repeated measurements or a series of measurements taken from the same reference, use a story pole. They are typically made from scrap at hand and have the room to display measurements legibly.

pinch sticks
Pinch sticks.

Mark a piece of stock in place
Mark a piece of stock in place. After cutting one end to fit, locate the stock, and use a knife or sharp pencil to scribe the cutline.

Pinch sticks let you take an exact measurement
Pinch sticks let you take an exact measurement between surfaces and transfer it to the stock. The simplest version consists of identical rips of 3⁄4-in. stock that are extended and locked in position with a spring clamp. Bevel the outer stick ends for a more accurate read.

TIP:

measure any angle
1. To measure any angle, cut a scrap piece of the stock, hold it in place, and mark the outside and inside lines.

mark the lines
2. Next, place the stock on the opposite side, and mark the lines.

Transfer the crossed marks onto the scrap
3. Transfer the crossed marks onto the scrap, and use it to determine the angle of the cut.

If you can’t see the joint, don’t waste time on it


From Fine Homebuilding #208

Mastering carpentry spreadsheet

For more photos and details, click the View PDF button below:


Sign up for eletters today and get the latest how-to from Fine Homebuilding, plus special offers.

Signing you up...

This site is protected by reCAPTCHA and the Google Privacy Policy and Terms of Service apply.
See all newsletters
See all newsletters
View PDF
Previous: 10 Tips for Fast Trim Next: 10 Rules for Finish Carpentry

Guide

Finish & Trim Carpentry

Chapter

Interior Trim Basics

View Comments

  1. user-6801124 | Oct 04, 2017 08:04am | #1

    Great tips that many carpenters slack on. I'd like to see the whole handbook!

  2. user-6801124 | Sep 02, 2018 06:20pm | #2

    Tips that should be part of the solid foundation for a good finish carpenter. I also would like to see the whole handbook!

Log in or create an account to post a comment.

Sign up Log in

Become a member and get full access to FineHomebuilding.com

Finish & Trim Carpentry

Finish & Trim Carpentry

Trusted, comprehensive guidance from the pros for creating perfect trim details in any room of the house

View Project Guide

View All Project Guides »

Become a member and get unlimited site access, including the Finish & Trim Carpentry Project Guide.

Start Free Trial

Trim Design
  • Trim Style and Design
Tools and Materials
  • Tools
  • Materials
Interior Trim Basics
  • Tips and Tricks
  • Techniques
  • Using Jigs
Window and Door Casings
  • Windows
  • Doors
Baseboard and Crown Molding
  • Baseboard
  • Crown Molding
  • Specialty Crown Situations
Wainscot and Paneling
  • Beadboard Wainscot
  • Paneled Wainscot
  • Chair Rails
  • Wall Treatments
Mantels and Fireplace Surrounds
  • Design
  • Installing Mantels and Surrounds
Coffered Ceilings

Fine Home Building

Newsletter Sign-up

  • Fine Homebuilding

    Home building tips, offers, and expert advice in your inbox.

  • Green Building Advisor

    Building science and energy efficiency advice, plus special offers, in your inbox.

  • Old House Journal

    Repair, renovation, and restoration tips, plus special offers, in your inbox.

Signing you up...

This site is protected by reCAPTCHA and the Google Privacy Policy and Terms of Service apply.
See all newsletters

Follow

  • Fine Homebuilding

    Dig into cutting-edge approaches and decades of proven solutions with total access to our experts and tradespeople.

    Start Free Trial Now
    • Facebook
    • Instagram
    • X
    • LinkedIn
  • GBA Prime

    Get instant access to the latest developments in green building, research, and reports from the field.

    Start Free Trial Now
    • Facebook
    • YouTube
  • Old House Journal

    Learn how to restore, repair, update, and decorate your home.

    Subscribe Now
    • Facebook
    • Instagram
    • X

Membership & Magazine

  • Online Archive
  • Start Free Trial
  • Magazine Subscription
  • Magazine Renewal
  • Gift a Subscription
  • Customer Support
  • Privacy Preferences
  • About
  • Contact
  • Advertise
  • Careers
  • Terms of Use
  • Site Map
  • Do not sell or share my information
  • Privacy Policy
  • Accessibility
  • California Privacy Rights

© 2025 Active Interest Media. All rights reserved.

Fine Homebuilding receives a commission for items purchased through links on this site, including Amazon Associates and other affiliate advertising programs.

X
X
This is a dialog window which overlays the main content of the page. The modal window is a 'site map' of the most critical areas of the site. Pressing the Escape (ESC) button will close the modal and bring you back to where you were on the page.

Main Menu

  • How-To
  • Design
  • Tools & Materials
  • Video
  • Blogs
  • Forum
  • Project Guides
  • Reader Projects
  • Magazine
  • Members
  • FHB House

Podcasts

  • FHB Podcast
  • ProTalk

Webinars

  • Upcoming and On-Demand

Podcasts

  • FHB Podcast
  • ProTalk

Webinars

  • Upcoming and On-Demand

Popular Topics

  • Kitchens
  • Business
  • Bedrooms
  • Roofs
  • Architecture and Design
  • Green Building
  • Decks
  • Framing
  • Safety
  • Remodeling
  • Bathrooms
  • Windows
  • Tilework
  • Ceilings
  • HVAC

Magazine

  • Current Issue
  • Past Issues
  • Magazine Index
  • Subscribe
  • Online Archive
  • Author Guidelines

All Access

  • Member Home
  • Start Free Trial
  • Gift Membership

Online Learning

  • Courses
  • Project Guides
  • Reader Projects
  • Podcast

More

  • FHB Ambassadors
  • FHB House
  • Customer Support

Account

  • Log In
  • Join

Newsletter

Get home building tips, offers, and expert advice in your inbox

Signing you up...

This site is protected by reCAPTCHA and the Google Privacy Policy and Terms of Service apply.
See all newsletters
See all newsletters

Follow

  • X
  • YouTube
  • instagram
  • facebook
  • pinterest
  • Tiktok

Join All Access

Become a member and get instant access to thousands of videos, how-tos, tool reviews, and design features.

Start Your Free Trial

Subscribe

FHB Magazine

Start your subscription today and save up to 70%

Subscribe

We hope you’ve enjoyed your free articles. To keep reading, become a member today.

Get complete site access to expert advice, how-to videos, Code Check, and more, plus the print magazine.

Start your FREE trial

Already a member? Log in